INFO TO PEOPLE WHO WANT TO EDIT THIS WIKI POST: Before you do that, please read the Wiki Editing Rules in the “Other” Section.
Note: Some people will mention scope/channels. If you don’t know what that is, look here.
Tag Zone
-LxmasHaxTakis
The bug that makes the tag zone show during the game has been fixed -NavyCatZ
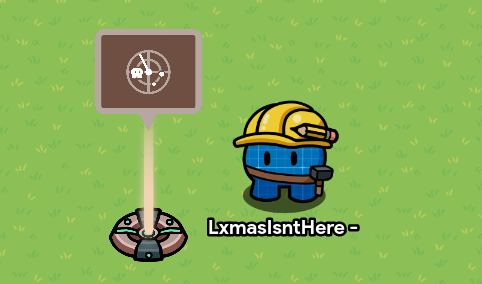
The tag zone device lets players tag each other! With it, ever wanted to make a Tagging game? The tag zone device is recommended for it! Now, let’s click it.
That’s a lot of memory, since tag zones take up 1,500 memory. (Remember, you can only place 6 tag zones!) Anyways, let’s click “All options”
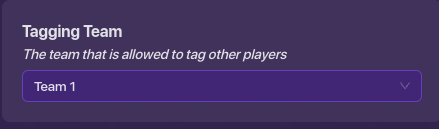
“Tagging team” means which team is going to tag.
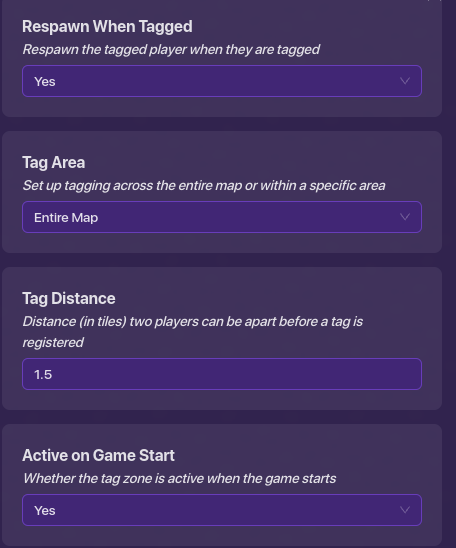
“Respawn When Tagged” Means if the tagger has tagged someone, should the tagged person respawn or not?
“Tag Area” Means like “Should the tagging team be allowed to tag the entire map or only tag on a zone?”
“Tag Distance” Means how close the player should be to get tagged.
“Active on Game Start” Means should the tag zone be active when the game starts.
(I have ignored channels because wires might be important)
Now, let’s see the options for the wires!
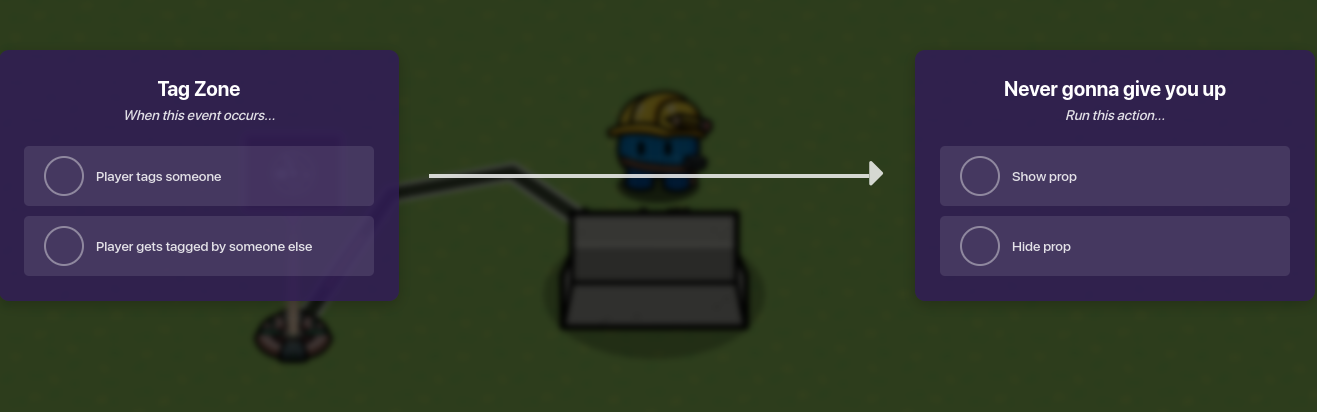
These are the options in the wires, and there are 2 of them when you wire it first.
“Player Tags Someone” Means if the tagger tags someone, an event can occur.
“Player gets tagged by someone else” Means if the player gets tagged by a tagger, an event can occur.
Now let’s see for the end of the wires!
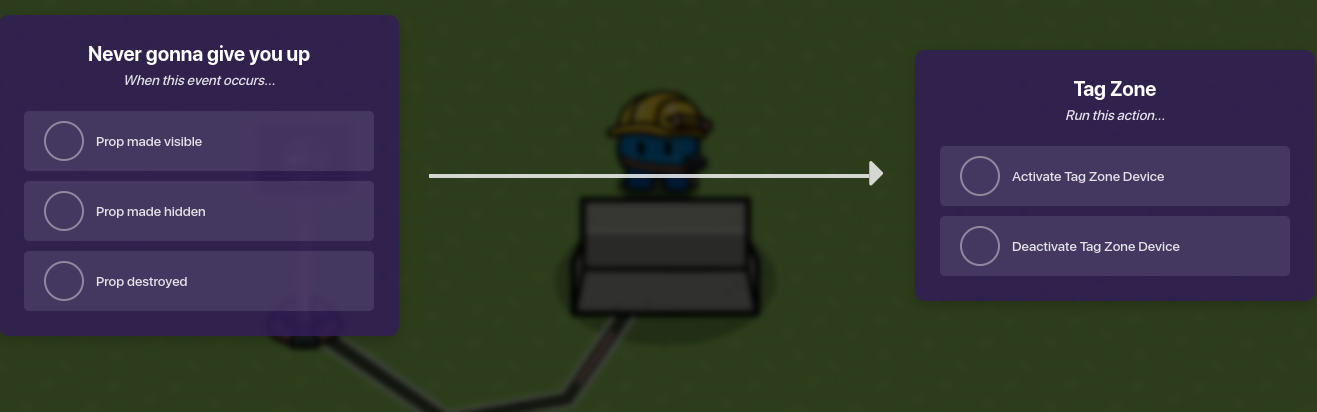
2 Options for the wires: “Activate Tag Zone Device” Or “Deactivate Tag Zone Device” - Let’s roll over with that.
“Activate Tag Zone Device” Means when an event occurs, you can activate the tag zone.
“Deactivate Tag Zone Device” Means when an event occurs, you can deactivate the tag zone.
Total wire options for the Tag Zone Device: 4.
Speed Modifier
Wingwave
The Speed Modifier is used to make a player’s running speed faster or slower mid-game, depending on what you set it to. It uses up 10 memory. Let’s go over its settings.
1. Speed: This will allow you to create the speed of the player. It allows you to have lots of different speeds. For example, the default speed is 1.00, double speed is 2.00, half speed is 0.50, etc.
2. Set Player to Configured Speed When Receiving On: This sets the channel that will change the speed of the player when a signal is sent to it.
Health Granter
Wingwave

The Health Granter is used to grant shield or health to a player mid-game. It uses up 20 memory. Let’s go over its settings.
1. Amount: This setting allows you to change how much health or shield is given to the player. You can add from a range of 1 to 200 at a time.
2. Grant Type: This setting changes whether it gives the player shield or health. You can also choose an option called “Health, then Shield.” When you select that, the player will gain health, and all leftovers will add for the Shield.
3. Grant Health When Receiving On: This sets the channel that will add the health/shield when a signal is sent to it.
Respawn
-ImPrettyCool
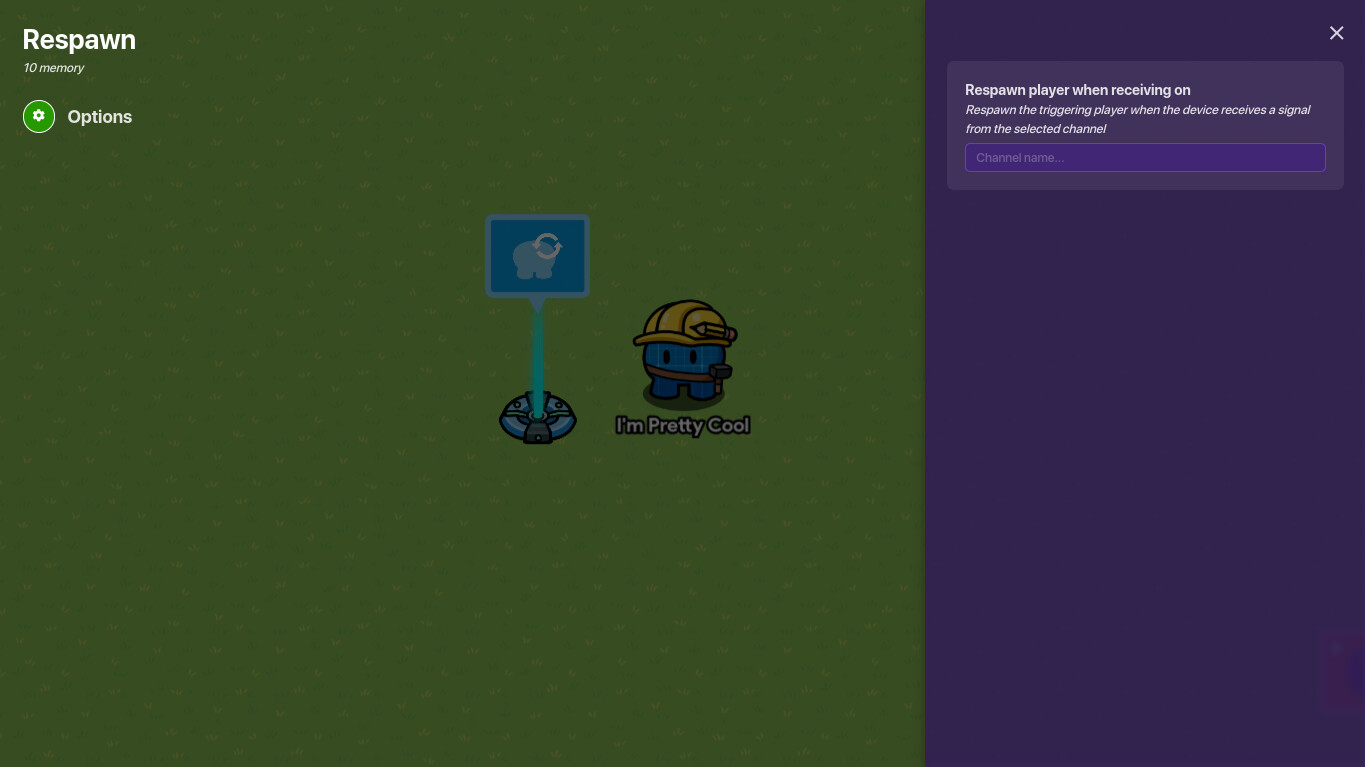
The Respawn device is used to force respawn a player.
This is a very simple and straightforward device, as it only has one setting:
Respawn player when receiving on - This is where you input the channel that would activate the respawn device; respawning the player. You don’t even need to fill this out if you use wires.
Item Spawner
-ImPrettyCool
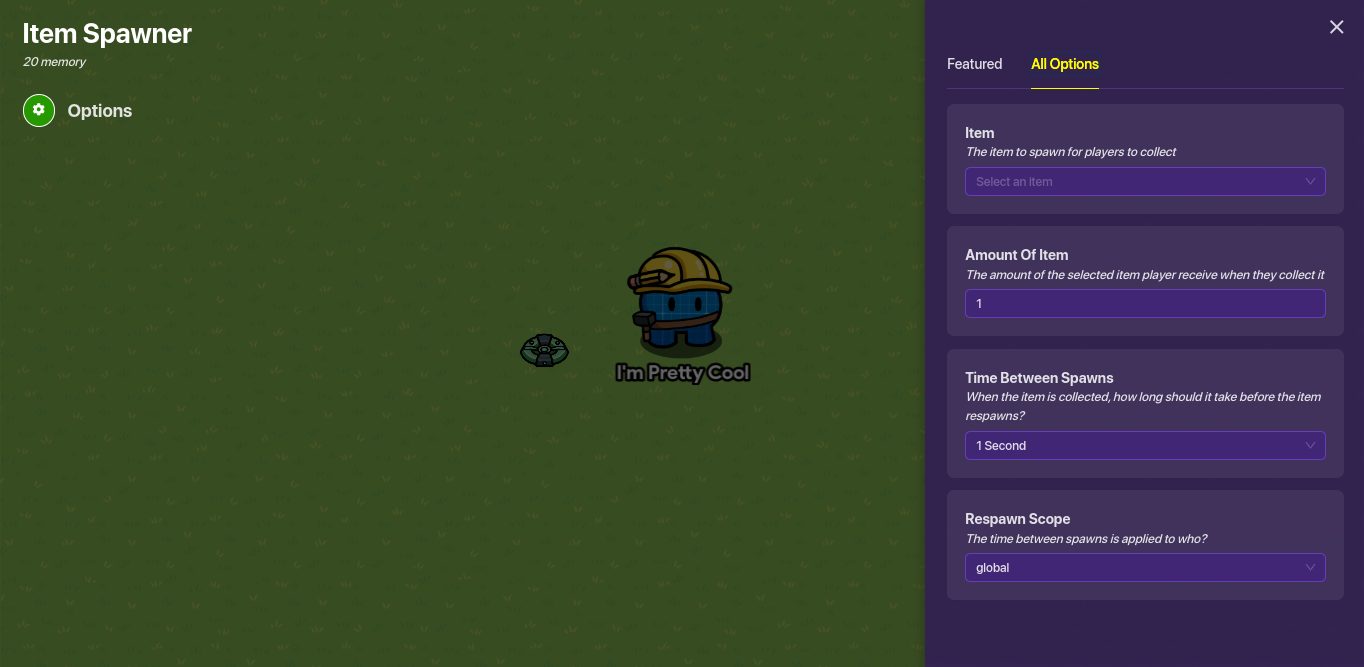
The Item Spawner repeatedly spawns an item that the player can collect.
Let’s take a look at the settings.
-
Item: This is where you choose which item the item spawner will spawn.
-
Amount of Item: This is where you control how much of the item the player will receive when collecting it.
-
Time Between Spawns: This is where you control how long the item spawner before spawning another item.
-
Respawn Scope: This is where you control who it affects if the item is collected.
Global = If one player picks it up, it is periodically gone for all players before it respawns.
Team = If one player picks it up, it is periodically gone for all the players on that same team before it respawns.
Player = If one player picks it up, it only affects that one player and the item is still available for all other players.
Laser Beam Manager
-NavyCatZ

The Laser Beam Manager is a new device that was added alongside the Gim redesigns. It can be used with a new setting that was added to laser beams, which allows the device to easily affect more than one of them at a time. It’s kind of like a laser relay.
1: Laser Group: This sets the laser beams this device will manage. For example, if you type “laser set 1” to in this setting, the lasers that have “Laser Group” set to “laser set 1” will be affected.
2: Activate Lasers when Receiving On: When this device gets a signal from the selected channel, it will activate the lasers that it can affect (refer to setting 1)
2: Deactivate Lasers when Receiving On: When this device gets a signal from the selected channel, it will deactivate the lasers that it can affect (refer to setting 1)
Zone
-NavyCatZ
The Zone is a device that can be used in a variety of ways. While its main use is detecting when players go in or out of it, it can also affect the conditions of the game within the zone.
1: Active on Game Start: This sets if the zone will be able to affect players at the start of the game, in other words be active.
2: When Player Enters Zone, Transmit On: When the player enters the borders of the zone, it will transmit on the selected channel.
3: When Player Leaves Zone, Transmit On: When the player leaves the borders of the zone, it will transmit on the selected channel.
4: Allow Gadget Fire: This sets if weapons are able to be fired in and/or within the zone.
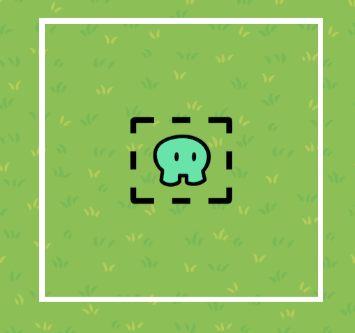
5: Visible in Game: This sets if players will be able to see the zone once the game is started. If set to “yes,” the zone will look like this:

6: Background Color: This sets the color of the zone.
7: Activate Zone when Receiving On: The zone will activate when receiving on the selected channel.
8: Deactivate Zone when Receiving On: The zone will deactivate when receiving on the selected channel.
9: Allow Gadget Drop: This sets if players are able to drop gadgets(weapons) inside the zone. Setting it to “Do Not Overide” will make the zone not affect the drop settings.
10: Allow Consumable Drop: This sets if players are able to drop consumables(Med Packs/Shield Cans) inside the zone. Setting it to “Do Not Overide” will make the zone not affect the drop settings.
11: Allow Resource Drop: This sets if players are able to drop resources(items you can see in the inventory) inside the zone. Setting it to “Do Not Overide” will make the zone not affect the drop settings.
12: Dropped Item Decay Enabled: This sets if items dropped in the zone will disappear after a certain period of time.
12a: Dropped Item Decay: This will show up if you set “Dropped Item Decay Enabled” to “yes.” It sets how many seconds a dropped item can stay in a zone until it disappears.
13:Zone Shape. This will allow you to change the shape of the zone from a rectangle to circle, or vice versa.
-WhoAmI
Other: Change Size: Pressing this allows you to change the size of the zone. You can change its size horizontally or vertically and rotate it.
Repeater
-NavyCatZ

The Repeater is a device that is used for repeatedly running a task or in other words a wire pulse every few seconds.
1: Start Repeater when Receiving On: When the selected channel receives a signal, the repeater will start running.
2: When Task Occurs, Transmit On: When the repeater runs a task, it will transmit on the selected channel.
3: Task Interval: This sets how often the task runs in seconds. It can be set from 0.5 to 600.
4: Stop Strategy: This sets when the repeater will stop running. Setting it to “period of time” makes it stop after the set amount of seconds. Setting it to “after number of repetitions” will make it stop after a set amount of times it runs. Setting it to “after receiving on channel” will make it not stop until it is told to via a wire or channel. Use this setting if you want the repeater to run indefinitely. It can be stopped with wires regardless of what this setting is set to.
4a: (May vary): This setting will vary depending on what you set "Stop Strategy’ to. It configures the setting that you set the previous setting to. (So if you set it to “after number of repetitions,” you will be able to set the amount of reeditions the repeater runs until it stops.)
5: Max Concurrent Tasks per Player: This sets how many tasks that same repeater can run at the same time per player. It’s like a bunch of mini repeaters within one that can stack every time the repeater is triggered again.
6: Trigger Task on Start: This sets if the Repeater will run the task right as it starts, or wait until the set amount of seconds it runs a task. For instance, a Repeater with this setting will increment a counter right as it activates while one without this will wait until the amount of seconds that “Task Interval” is set to.
Sentry
-NavyCatZ

Sentries are AI enemies that can be seen in One Way Out. They will shoot players or other sentries that are not on their team with a chosen weapon.
1: Gadget: This sets the weapon that the sentry will use.
2: Aim Accuracy: This sets how accurate the sentry will be when it shoots at a target. There are 6 levels of this.
3: Fire Rate: This sets how quickly the sentry will fire projectiles. There are 7 levels of this.
4: Sentry Health: This sets how much health the sentry has. It can be set from 1 to 100,000.
5: Sentry Shield: This sets how much shield the sentry has. It can be set from 0 to 100,000.
6: Use Adaptive Health: This sets if the sentry’s health and shield will increase depending on how many players are in the game.
6a: Adaptive Health Amount: This will only show if you set “Use Adaptive Health” to “Yes.” This sets how much extra health the sentry will gain per player. It can be set from 0 to 10,000.
6b: Adaptive Shield Amount: This will only show if you set “Use Adaptive Health” to “Yes.” This sets how much extra shield the sentry will gain per player. It can be set from 0 to 10,000.
7: Sentry Appearance: This sets what the sentry will look like. Here are the possible options:
(From left to right: Sentry Robot, Green Evil Plant, Pink Evil Plant)
8: Sentry Team: This sets the team that the sentry is be on. It will not attack those who are on its team.
9: Respawn Enabled: This sets if the sentry will respawn a set amount of time after being defeated.
9a: Respawn Duration: This setting will only show if you set “Respawn Enabled” to
“Yes.” This sets the amount to time in seconds the sentry will respawn after being defeated. It can be set from 0 to 600.
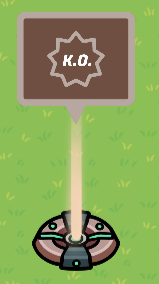
10: Sentry Name: This sets what the sentry is called and will be shown in the ko message when a player defeats it. The default name is “Sentry.”
11: Item Drop: This sets if the sentry will drop an item after being defeated.
11a: Dropped Item: This will only show if you set “Item Drop” to “Yes.” This sets what item the sentry will drop after being defeated.
11b: Dropped Item Amount: This will only show if you set “Item Drop” to “Yes.” This sets what amount of the item the sentry will drop upon being knocked out. It can be set from 1 to 999,999,999.
12: When Sentry Knocked Out, Transmit On: When the sentry gets knocked out, it will transmit on the selected channel.
13: Active On Game Start: This sets if the sentry will automatically be activated when the game starts.
14: Activate Sentry when Receiving On: The sentry will activate when receiving on the selected channel.
15: Deactivate Sentry when Receiving On: The sentry will deactivate when receiving on the selected channel.
Knockout Manager
-NavyCatZ
The knockout manager is a device that can be used to track and/or affect knockouts.
1: Knockout Target: This sets the type of knockouts that the KO Manager will listen for. It can either listen to player or sentry knockouts.
2: When Target Knocked Out, Transmit On: When the target is knocked out, the KO Manager will transmit on the selected channel.
3: Grant Item: This sets if an item will be granted after the target is knocked out.
3a: Item to Grant: This will only show if you set “Grant Item” to yes. This sets the item that will be granted.
3b: Item Amount: This will only show if you set “Grant Item” to yes. This sets how much of the item will be granted.
3c: Grant Strategy: This will only show if you set “Grant Item” to yes. This sets how the item is granted. You can either make it grant directly into the inventory of the player who ko’ed the other, make it drop at the position of the ko’ed player when they died, or drop at the position of the player when they ko’ed the other.
3d: Use Drop Chance: This will only show if you set “Grant Item” to yes. This sets of the item that is dropped will have a random chance of dropping.
3da: Drop Chance: This will only show if you set “Use Drop Chance” to yes. This sets the percentage of the item dropping when the target is defeated. It can be set from 1 to 99.
4: Active on Game Start: This sets if the KO Manager will automatically be active when the game starts.
5: Active Scope: This sets the scope of the KO Manager when it is activated/deactivated.
6: Activate when Receiving On: The KO Manager will activate when receiving on the selected channel.
7: Deactivate when Receiving On: The KO Manager will deactivate when receiving on the selected channel.
Popup
The popup device is used to open up a screen that can be used to display information, showcase options, and create an interactive screen.
Here are the settings:
-
Header Text: This is the text that is large and shown at the top of the popup, like a title.
-
Content Text: This is the smaller text that is used for the main information, like descriptions and explanations.
-
Open Popup When Receiving On: This is where you put the channel in which the popup will open when receiving on.
-
Icon Image: This is where you can put an icon image that will be shown above the header and content. The icons to choose from can be found here: Custom Images
-
Popup Style: This is where you can choose the style of your popup. There are two options: Modal, and banner. Modals take up the center of your screen, while banners are smaller and cover the bottom of your screen.
-
Call to Action Label: Call to Actions are buttons that can be clicked on in popups. There are a max of two call to action buttons per popup, and this is where you put the label to appear on your first call to action button. For no call to action button, leave this empty.
-
Call to Action Channel: This is where you put the channel that the call to action button will send on.
-
Secondary Call to Action Label: This is where you put the label to appear on your second call to action button.
-
Secondary Call to Action Channel: This is where you put the channel that your second call to action button will send on.
-
Content Scope: If you have the content of the popup change in blocks, this is where you choose who it will affect. Global (everyone), team (triggering player’s team), or player (just the triggering player).
-
Background Color: This is where you can change the background color of your popup.
-
Font: This is where you choose what font your popup will be displayed in.
-
Closable by Player: This is where you choose whether or not the player can close the popup once displayed.
-
Close Popup when Receiving on: This is where you put the channel in which the popup will close when receiving on.
-
When Popup Closed, Transmit on: This is where you put the channel that your popup will send on once closed.
Movement Meter
-NavyCatZ

The Movement Meter is a device mainly used for taking away items from a player every time they walk. Its most notable usages are the Energy mechanic in every game mode except Fishtopia.
1: Tracked Item: This sets the item that is drained when the player moves.
2: Item Drain per Tick: This sets how much of that item will be removed every tick.
3: Drain Interval: This sets how often a “tick” is made, in other words how often the item will be removed. It can be set to every 0.25, 0.5, or 1 second(s.)
4: When Player Runs out of Tracked Resource, Transmit On: This Movement Meter will send a signal to the selected channel when you no longer have any of the tracked item.
5: Player Speed when out of Tracked Item: This sets the speed of the player when they run out of the tracked item. It can be set from 0 to 4.
6: Use as Default: This sets if the movement meter will automatically be active when the game starts. It also seems to set the scope of the Movement Meter, meaning setting this to yes will make every player affected when one player deactivates the Movement Meter.
7: Active when Receiving On: When receiving on the selected channel, the Movement Meter will activate.
8: Deactivate when Receiving On: When receiving on the selected channel, the Movement Meter will deactivate.
Counter
By: @Jobozo1875
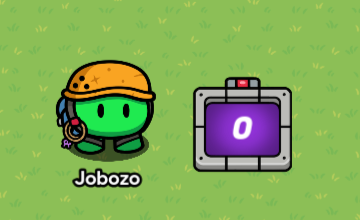
The counter is used for keeping track of how many times something has been done.
1. Starting Value - This is the value the counter starts at
2. Increment Counter when Receiving on - This will add +1 to the counter’s value when it receives a signal from the channel put in the blank
3. Decrement Counter when Receiving on - This will subtract -1 to the counter’s value when it receives a signal from the channel put in the blank
4. Visible in Game - When you switch this to on, it just means when the game starts, you aren’t able to see the counter
5. Count Scope - NOTE: If you don’t know what scope is, click here. What this means is whenever the counter is added, subtracted, or reset in any way, who can see that. A player, Everyone, Or a team
6. Reset Counter When Receiving On - This will reset the counter’s value to the starting value when it receives a signal from the channel put in the blank
7. Update Property - When turning this on, you can put a property to update in the blank. This must be a number property.
NOTE: These Properties are advanced and can be used with blocks
8. Use Target Value When turning this on, you can select a target number for it to reach. Also below it, whenever the target is reached, it will send a message on the channel you put in the blank
WIRES
Wire coming out of counter
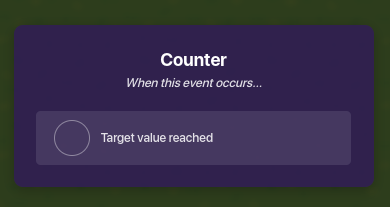
When selecting this, if you have a target value, when it is met, it will do the second thing you selected
Wire coming in to counter
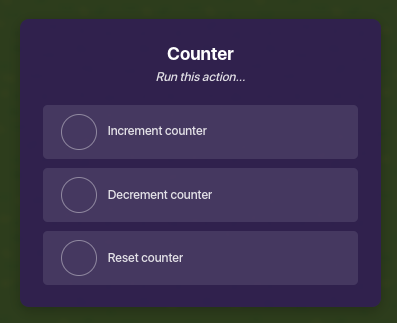
You have Three Options
- Increment Counter
- Decrement Counter
- Reset Counter
Increment Counter - Adds +1 to the counter’s value
Decrement Counter - Subtracts -1 to the counter’s value
Reset Counter - Resets the counter to the starting value
End of Game Widget
-NavyCatZ

The End of Game Widget device is used to display information at the end of the game. For instance, you might see it display the class stats at the end of a Fishtopia game.
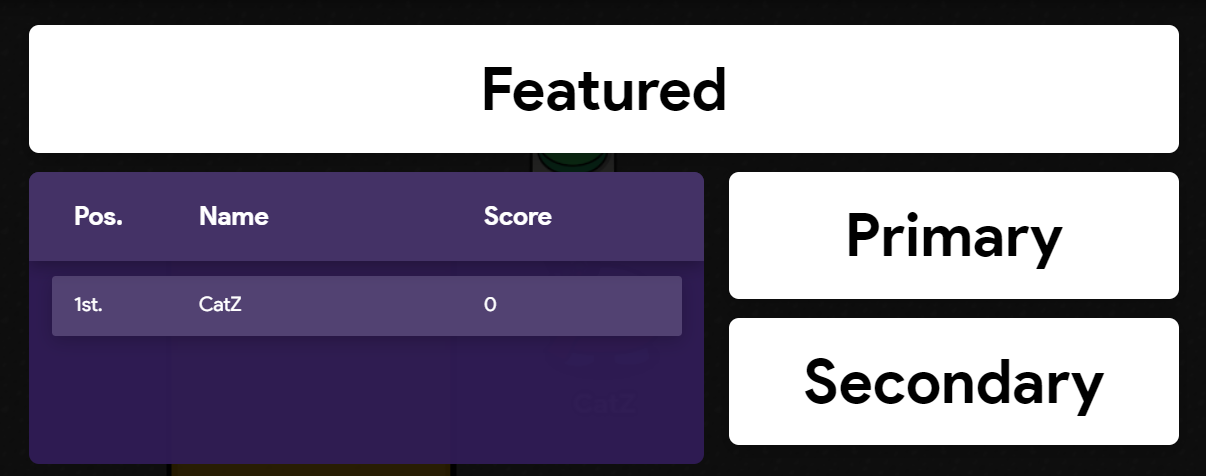
1: Widget Placement: This sets where the widget will be placed. You can set it to Featured, Primary, or Secondary. Refer to this image:
2: Widget Type: This sets the type of information that the widget shows. It can be set to Statistic or Game Time. Statistic will display a certain property and Game Time will display how much time has passed since the start of the game.
2a: Property: This will only show if you set “Widget Type” to “Statistic.” It sets the property that will be displayed.
3: Label: This sets the text that will be shown above whatever the Widget displays.
4: Show To: This sets who will be shown the Widget. It can be set to Everybody, Players, or Game Host.
5: Active on Game Start: This sets if the Widget will be shown at default.
6: Active Scope: This sets who will be affected when it is deactivated or activated by a player. It can affect exclusively themself, their team, or everyone.
7: Activate when Receiving On: When receiving on the selected channel, the Widget will be shown at the end of the game.
8: Dectivate when Receiving On: When receiving on the selected channel, the Widget will not be shown at the end of the game.
Relay
-NavyCatZ

The relay is a very useful device that manages who receives signals from devices. It is commonly used for games like among us in order to give the imposter certain actions.
1: Relay Audience: This sets who will receive the wire/channel signals the relay sends. There are 7 options-
All players- Every player in the game
All other players- Every player in the game except for the player(s) who caused the relay to trigger
All players on my team- All players on the team of the player(s) who caused the relay to trigger
Random player- A random player from the game
All players on specific team- Every player on the selected team
Random player on specific team- A random player from the selected team
Single player on each team- One player from each team. Additional testing is needed, but the player who joined the latest into the game within the team will be selected
1a: Team: This setting is only shown if "Relay “Audience” is set to “All players on specific team” or “random player on specific team.” It sets which team the signal will be sent to, then it will either send the signal to everyone on that team or just a random player depending on the setting.
2: Relay Channel: This sets the channel that the relay will send a signal to when triggered.
3: Relay when Receiving On: The relay will be triggered when it receives a signal from the selected channel.
Trigger
-NavyCatZ

The trigger is a very commonly used device. It is mainly used for blockcode but it also has other various uses. In addition to signals, it can also be triggered by being stepped on if its settings allow it.
1: When Triggered, Transmit On: When the trigger is triggered, it will send a signal through the selected channel.
2: Trigger when Receiving On: When receiving on the selected channel, the trigger will be triggered.
3: Trigger Delay: This sets the delay in seconds that the trigger will wait before sending signals when it is triggered. It can be set from 0-120.
4: Visible in Game: This sets if players will be able to see the trigger in the game, but it can still be triggered via stepping on it if its settings allow it.
5: Allowed Team: This sets the team that is able to trigger the trigger. If any other team triggers it, the trigger won’t send signals.
6: Max Triggers: This sets the maximum amount of times the trigger can be triggered. Even by deactivating and activating it this won’t reset. The text box doesn’t have to be filled (leaving it empty will result in it not having a limit) and it can be set from 1-100.
7: Max Trigger Scope: This sets who’s count total toward the max trigger amount will be affected when a player triggers it.
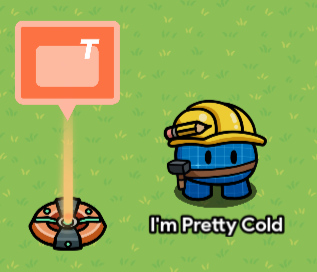
8: Active on Game Start: This sets if the trigger is activated on game start. While deactivated, the trigger cannot send signals. Shown in game, it looks like this while deactivated in comparison to an activated one
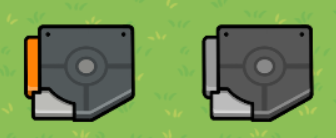
Left: Activated; Right: Deactivated
9: Activate when Receiving On: The trigger will activate when receiving on the selected channel.
10: Deactivate when Receiving On: The trigger will activate when receiving on the selected channel.
11: Active Scope: This sets who will be affected when the trigger is activated/deactivated.
12: Trigger by Player Collision: This sets if the trigger is able to be triggered when a player steps on it while it is active.
(Quick note from shdwy, the trigger can be triggered as many times as you are able to step on it, despite the animation seemingly invoking a cooldown.)
Property
-NavyCatZ

The property device is used for managing properties. The text that says “Property” on the physical device will be replaced with whatever property is inputted into it.
1: Property Name: This sets the name of the new or existing property the device will manage.
2: Property Type: This sets what type of property the property will be. Every property is set to a text property by default. These property types affect what values the property can have
Text- Any form of text (Letters, special characters, etc.) Although it can be set to numbers, you cannot change it using number blocks in blockcode. You would have to use a text block with a number instead.
Number- As the name suggests, any real number. Contrary to the Text Property, you can only change its value with number blocks, not text blocks. This is the only type of property that can be altered outside of block code and the property device.
True/False- Either True Or False. It can only be altered with the True/False block.
3: Default Value: This sets the value of the property at the start of the game. What it can be set to depends on what type of property it is.
4: Property Scope: This sets who the current property value will be applied to when it changes.
5: When Property Changes, Transmit On: When the property value changes, the device will send a signal through the selected channel.
6: Broadcast Value Change on Game Start: This sets if the property value will count as changed at the start of the game. Therefore, it will send a signal to the devices it’s supposed to transmit on when this occurs at the start of the game.
Waypoint
Since this guide goes through it very well, use this
On the Nature of a Waypoint: A Comprehensive Study On the Waypoint’s Biology and Its Place In the Community [WIP]
Inventory Item Manager
-NavyCatZ

The inventory item manager is a device used for, you guessed it, managing items. As of the time writing this, it still has a bug where some people don’t have the option to deactivate it with wires or channels.
1: Item: This sets the item that is managed by the device.
2: Use by Default: This sets if the inventory item manager is active for every player at the start of the game.
3: Activate when Receiving On: When receiving on the selected channel, the device will activate.
4: Set Maximum Amount: This sets if there is a maximum amount of the managed item a player can hold.
4a: Maximum Amount: This only shows if “Set Maximum Amount” is set to “Yes.” This sets the maximum amount of the managed item a player can hold.
5: Override Respawn Behavior: This sets if the map option for whether the item is kept or not when a player is respawned can be overridden for the managed item.
5a: Respawn Behavior: This only shows if “Override Respawn Behavior” is set to “Yes.” This sets whether the managed item will be kept or not in the player’s inventory when the player is respawned.
6: Show Item Alerts: This sets if item alerts like the image below will be shown when a player gains that item.

7: Clear Item from Inventory when Receiving On: When receiving on the selected channel, the device will remove all of the managed item from the player’s inventory.
8: Update Property: This sets whether a property will be updated based on the amount of the managed item.
8a: Property to Update:* This sets the property that will be updated when the amount of the managed item changes. The selected property has to be a number property.
[No One] is Editing.
Please put the bracket that says you’re editing and check the box so people know you are doing it.
Other
Wiki Editing Rules
Hey there! Seems like you’re new to wiki editing, and you want to also be here too. Before you do this, read these rules -
- Do not make this Wiki post violate TOS and the rules of the forum. We do not wanna get banned here, so as you.
- Do not edit other people’s tutorials on it/do not edit any other’s messages in User Assignments. If you do that, we’ll check the editing history and you will not be able to edit again if you do this. Do not also CHANGE THESE RULES.
- Only one person may edit at a time. Failure to follow this rule could result in lost work.
- Please try to be active in assignments! If not, someone else is able to take your device (with permission from people, of course).
Parts of TUGTED
Part 1: [ 📜 ] The Ultimate Guide To Every Device Part 1!
Part 2: (Currently Here)
Part 3: [📜] The Ultimate Guide To Every Device Part 3! [WIP]
Open Devices to Edit
The following devices are open to add:
- Counter(Taken by @Jobozo1875)
- Zone(Taken by @NavyCatZ)
- Relay (Taken By @LxmasHaxTakis)
- Trigger (Taken by @LxmasHaxTakis)
- Property (Taken by @getrithekd)
- Repeater(Taken by @NavyCatZ)
- Waypoint (Taken by @LxmasHaxTakis)
- Sentry(Taken by @NavyCatZ)
- Movement Meter(Taken by @NavyCatZ)
- Knockout Manager(Taken by @NavyCatZ)
- End of Game Widget(Taken by @NavyCatZ)
- Inventory Item Manager (Claimed by @WhoAmI)
If you add one of these devices, make sure to make it say (taken by (your username)) or delete it from this list.
Extra Resources
These are extra guides to learn more about device-specific ideas.
A complete guide on checkers
[📜] The Ultimate Guide on Psuedo-Things! [WIP]