NOTE - THIS IS A CLOSED VERSION OF TUGTED (the ultimate guide for every device). PLEASE GO TO PART 2 TO SEE MORE DEVICES. DO NOT EDIT THIS WIKI, EDIT PART 2 INSTEAD!
(you may have seen other removed, because they moved to part 2.)
Part 1 of the “TUG” Series.
Note: You may see some users mention transmissions, channels, etc. If you don’t know what that is, look at this guide.
Note: By opening the device interface and going to the upper left corner, you will find that you can rename the device by clicking on the name and renaming it. (WhoAmI/NavyCatZ)
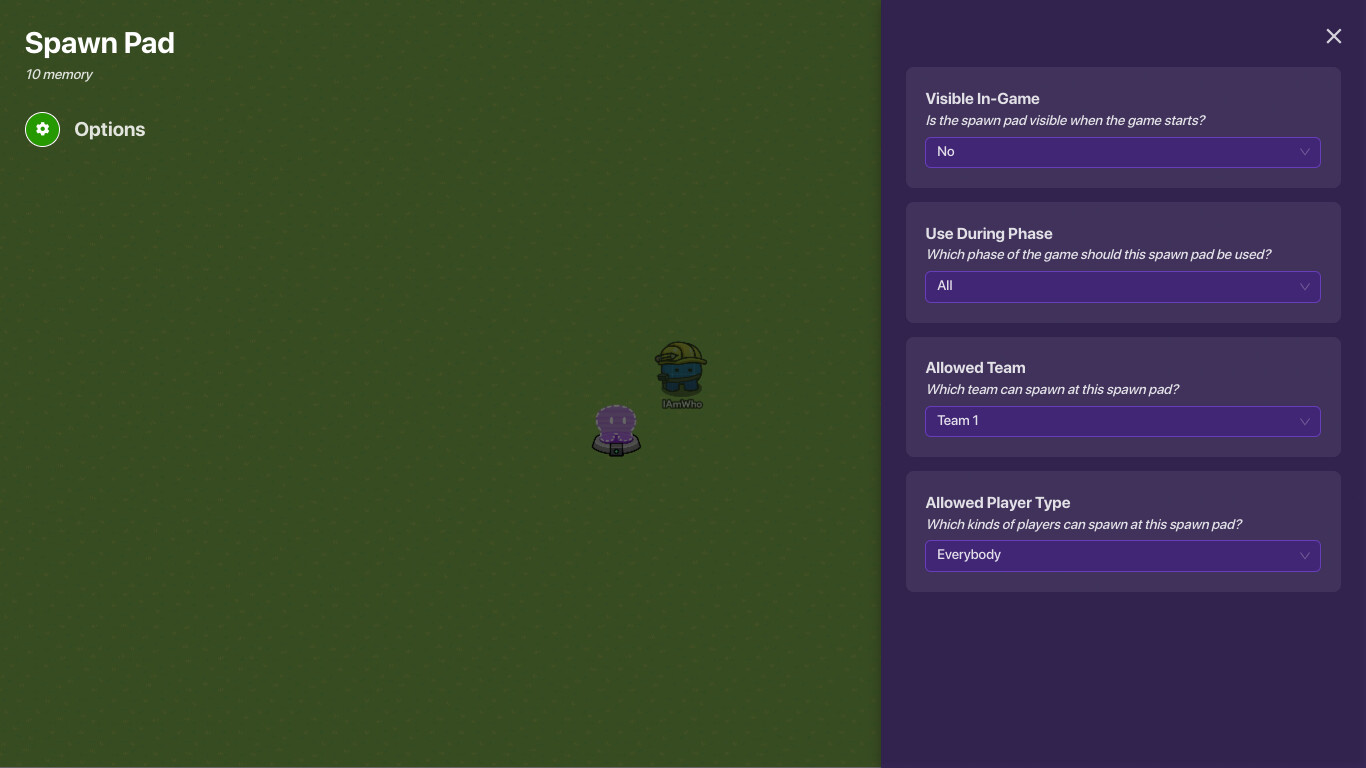
Spawn Pad
-WhoAmI
Spawn Pads are used to spawn certain players in at a certain location.
Let’s take a look at the settings:
1a. Visible In-Game: This setting is very simple - it’s just a yes/no input. If you have Visible In-Game off, you won’t be able to see it when you start the game. If you have Visible In-Game on, you will be able to see it in game. Easy, right?
1b. Use During Phase: This one is a bit more complicated. This shows if you want to use it during the lobby phase, the doing phase, or both. The Lobby Phase is where you are waiting for people to join; the doing phase is when the game actually starts.
1c. Allowed Team: This setting determines who is allowed to spawn there. If you are on team 1, you will spawn there, but if you are on team 2, you will not.
1d. Allowed Player Type: This setting is used to determine whether players or game hosts should be allowed to spawn at this device.
Lifecycle
Lifecycle
-By WhoAmI
The Lifecycle.
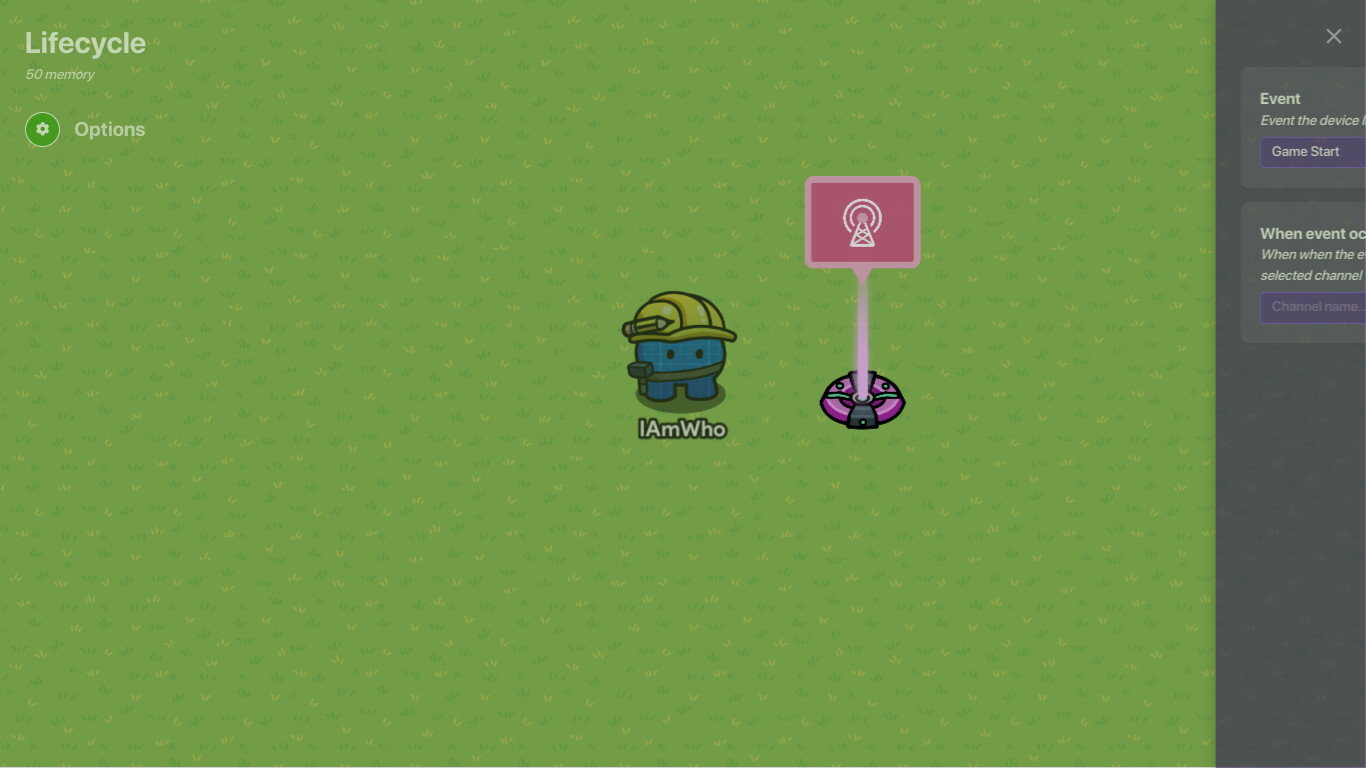
Enter the lifecycle. This device can be one of the most crucial parts to one of your gimkit games. What does it do, you might ask? Well, a lifecycle can track certain events in a game, and send a wire pulse accordingly. Let us take a look at the settings.
As you can see here, there are 4 settings for the lifecycle.
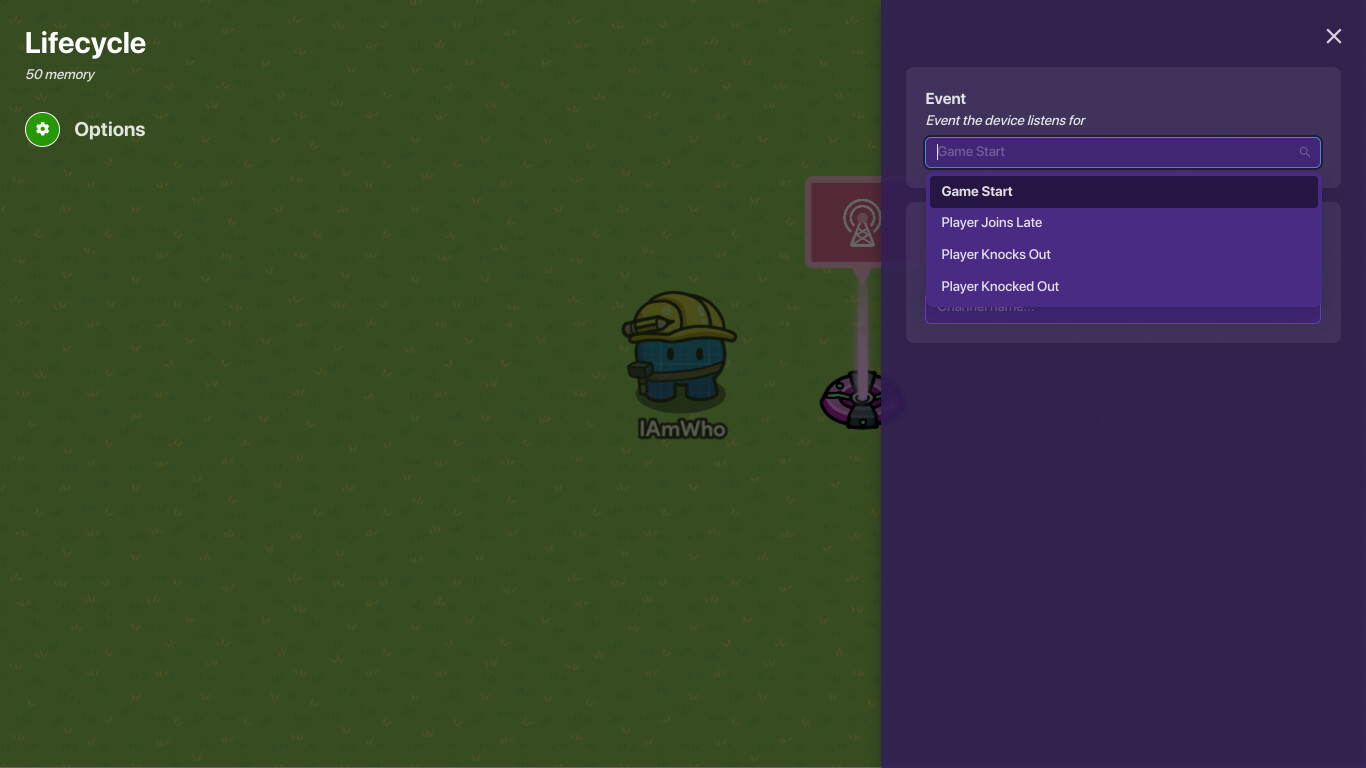
Game start, Player Joins Late, Player Knocks Out, and Player Knocked Out.
What can each of these do, you might ask? Read on.
Game Start: This aspect is quite self explanatory. When you officially start the game, the lifecycle triggers. This can only happen once per game. What can you do with this? You can run block code to give people roles, make an imposter system, open popups, modify people’s speed, and many other things.
Player Joins Late. Let’s say that after the lifecycle has run it’s course, assigned everyone their roles, and whatnot. Well, if a person joins after that, they won’t get any of those things! They might not get a role, a weapon, or anything like that! Player Joins Late can remedy that by making sure that even the late joining players can see the popups and things like that.
Player Knocks Out. Sure, this option can be replaced by a K.O manager, but this function is still pretty important! This option detects when a player knocks out someone and can run a wire pulse on the behalf of the player that knocked out the other player. You can use this to increment a property and thus a player’s final score at the end of the game. You can use it to give a player an item, unlock more options for them, and many other things!
Player Knocked Out. Okay. This is one of the most important functions of the lifecycle. It is the opposite of player knocks out, as where player knocks out detects the player that knocked a player out, player knocked out detects the player that was knocked out, whether it be by laser, sentry, or player. This function has countless uses, including switching a player to spectator in battle royale games, teleporting them to a cooldown room and then teleporting them back into the game, giving them an object when knocked out, and clearing an object when knocked out, allowing for cashback roles and stuff like that. You can also create Lifesteal and Vitality with this function.
And those are the 4 options for a lifecycle! Also, you can have the lifecycle transmit on a channel when an event happens instead of using wires.
Fun Facts:
You can only place up to 16 lifecycles per game. Reusing lifecycles can help cut back on that, instead of using a lifecycle for every contraption, use a single lifecycle for all aspects of one type!
When getting hit by two lasers at once, the lifecycle function player knocked out considers it at two seperate knockouts, so be careful!
You can create a player counter by hooking up a lifecycle to a relay, and the relay to a counter. Only problem is that it cannot detect players leaving the game, so you still have an issue there…
Questioner
-Zypheir
The Questioner is used to allow players to answer quiz questions and receive items.
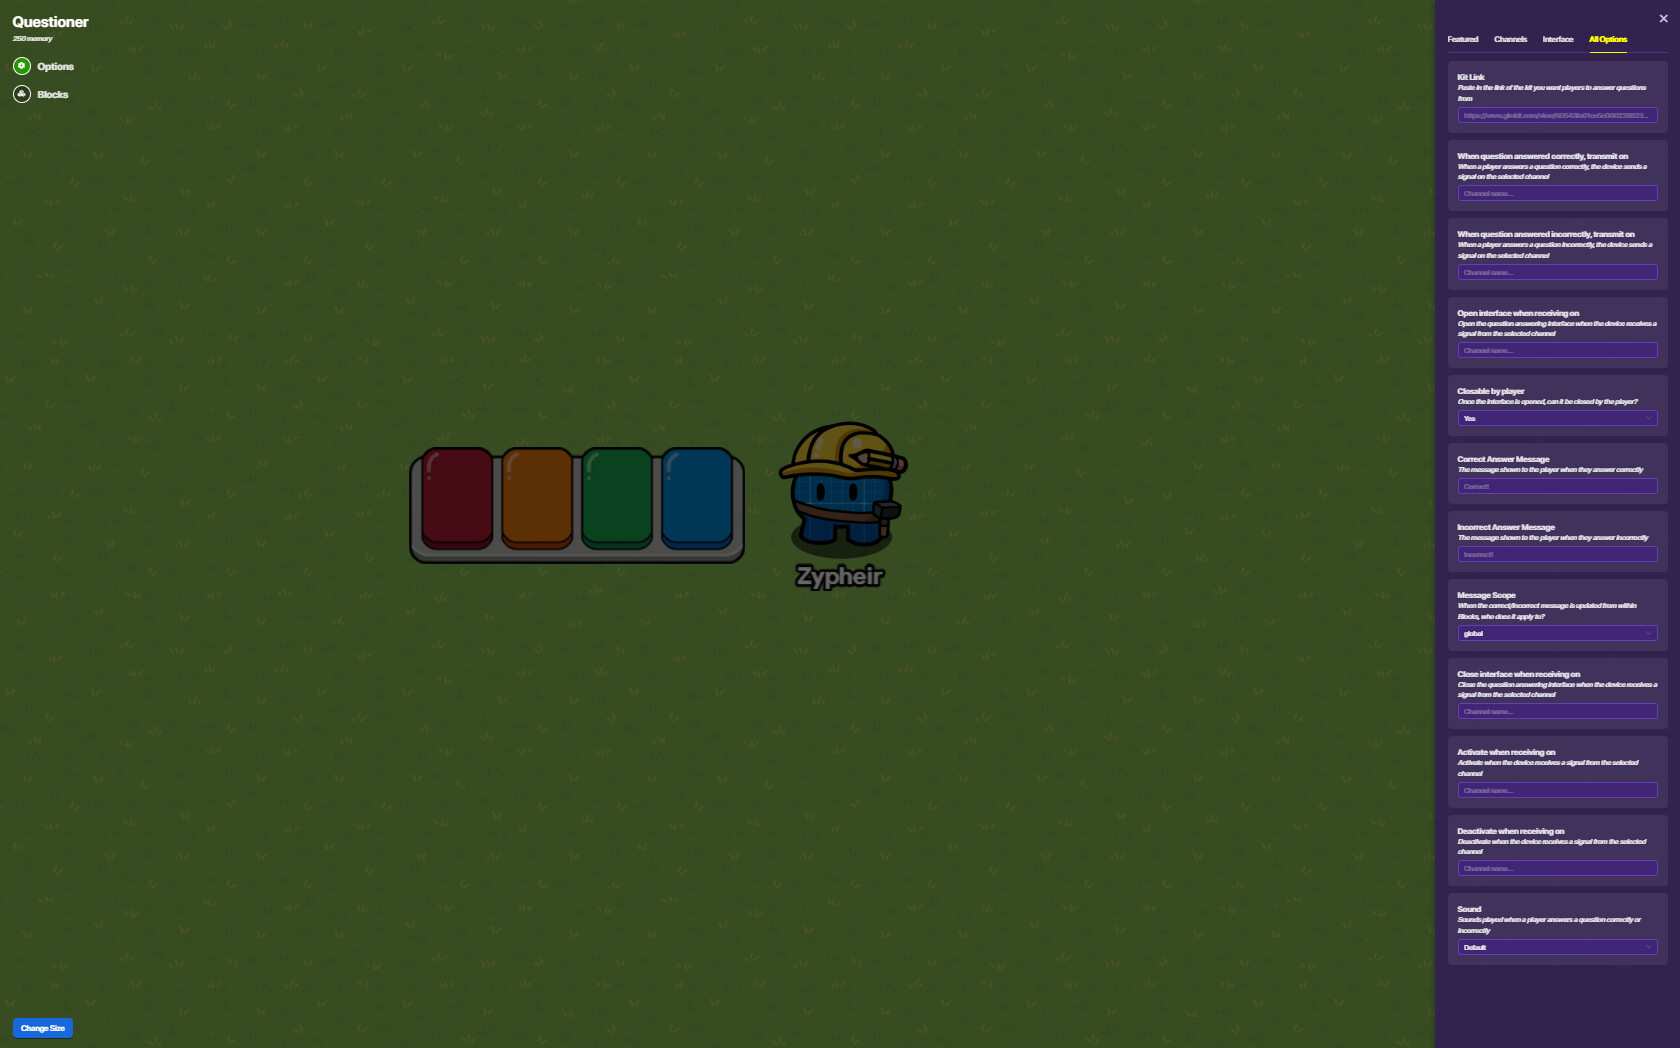
1a. Kit Link: The Kit Link is used to specify which Kit should be used with the Questioner. You can make your own Kit to use with the Questioner, and the questions from that Kit will be randomly shown when a player interacts with the Questioner.
1b. When question answered correctly, transmit on: This setting is used to send a message to the rest of the program when the player answers a question correctly. This is what allows the game to do other things (like grant the player an item) when a player answers a question correctly.
1c. When question answered incorrectly, transmit on: This is practically the same thing as answering a question correctly, but this time it’s for incorrect responses. Like the setting for correct responses, it allows the game to perform tasks when the player answers a question incorrectly.
1d. Open interface when receiving on: When the device receives a transmission from another source, it opens the display. You can change this setting to specify which transmission should be used to open the display.
1e. Closable by player: This setting is used to allow the map designer to choose whether or not they want players to be able to close the Questioner by themselves. Note that the player can still close the Questioner by sending the transmission that closes the interface (if one is assigned), but they won’t be able to close the display by clicking on the X at the top-right of the display.
1f. Correct Answer Message: This setting allows the map designer to write a message that will be shown to the player when they answer a question correctly.
1g. Incorrect Answer Message: This setting allows the map designer to write a message that will be shown to the player when they answer a question incorrectly.
1h. Message Scope: You can change the message(s) written above by using Blocks. These changes can be applied while the game is in progress, and are done by having the player trigger a Block script in some way. The Message Scope setting is used to specify whether you want that change to automatically apply to all players, only the players on the team of the triggering player, or only the triggering player.
1i. Close interface when receiving on: This setting allows a certain transmission to be used for closing the Questioner’s display.
1j. Activate when receiving on: This allows the Questioner to be activated (meaning that players are now able to interact with the device) when it receives a certain transmission.
1k. Deactivate when receiving on: This allows the Questioner to be deactivated (meaning that players are no longer able to interact with the device) when it receives a certain transmission.
1l. Sound: This setting determines which sound plays when a player answers a question.
Starting Inventory
-I’mPrettyCool
The Starting Inventory device is used to give players items at the start of a game.
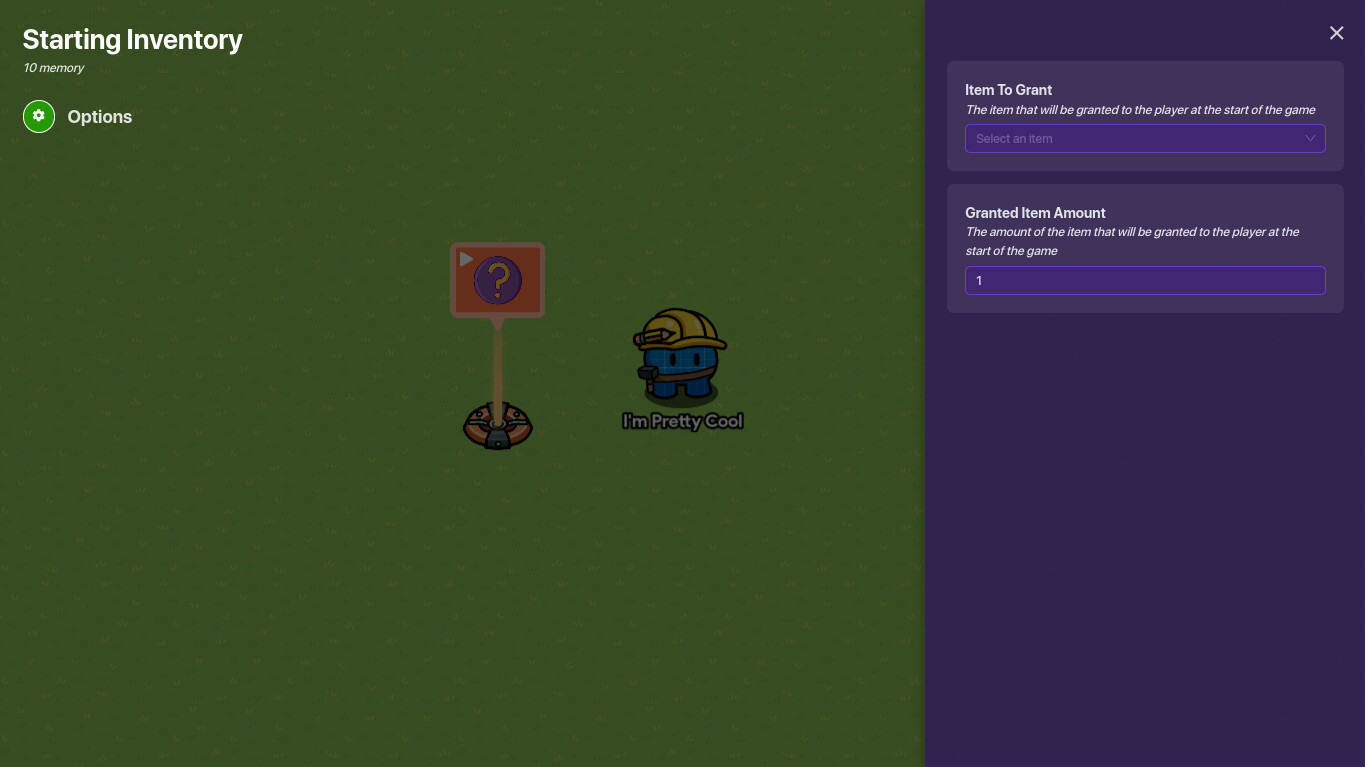
There are only two settings on this device, as it is very simple. Lets take a look.
1a. Item to Grant: This is where you choose what item to give players at the start of the game.
1a. Granted Item Amount: This is you enter the amount of that item you wish to be granted.
Game Overlay
-I’mPrettyCool
Game Overlays are used to display a certain thing on a player’s screen.
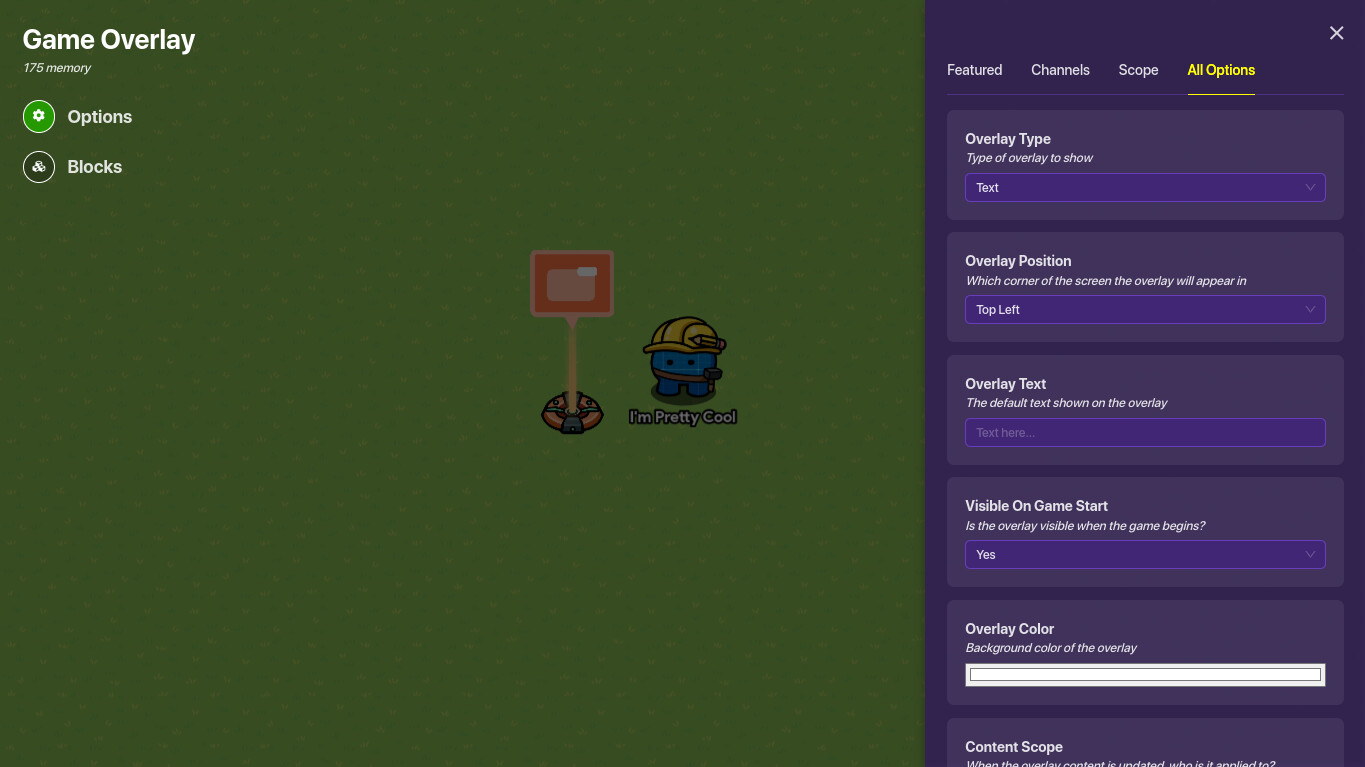
Let’s take a look at the settings:
A. Overlay Type: This is the most important setting: What you want your overlay to display. There is a choice between three options. Text, Button, or Tracked Item. Let’s look at each one.
Text: This displays, well exactly what it says, text. This can be used to show pieces of information, timers, and all sorts.
Button: This creates a button that when clicked on, sends on a channel. This can do all sorts of things, like open a question answering screen, open a popup, really anything that can be activated via a channel.
Tracked Item: This tracks the quantity of an item the player has. This is usually used for items a player is constantly earning or losing, that the player would want to be aware of.
B. Overlay Position: This is simply the position where the overlay is located. You can either place it in the Top Left, Top Right, Bottom Left, or Bottom Right. This means you can display a maximum of four overlays at one time. Where you place them is entirely in your preference, though tracked items would usually be placed somewhere in the top, and buttons would usually be placed somewhere on the bottom.
C.Content Scope: If the Overlay content changes in any part of the game, this is where you decide who it will affect. Global (if it changes for one player, it changes for all), player (if one player changes it, the Overlay will not change for anyone else), or team (if one player changes it, that player’s team will all be changed as well).
D.Visibility Scope: If the Overlay is shown/hidden in any part of the game, this is where you decide who it will affect. Global (if it is shown/hidden for one player, it is shown/hidden for all), player (if it is shown/hidden for one player, the Overlay will not be shown/hidden for anyone else), or team (if it is shown/hidden for one player, it will be shown/hidden for that player’s team as well).
E. Show Overlay When Receiving on: If the Overlay is hidden during any part of the game, this is where you put the channel that you want to make it show when receiving.
F. Hide Overlay When Receiving on: If the Overlay is shown and you want it to hide, this is where you put the channel that you want to hide when receiving on.
From now on, these settings vary from what you chose for the Overlay Type. So, I will be splitting them up, for each Overlay Type.
Text:
1a.Overlay Text: In this space you can type what you want to be shown for your text.
1b.Visible on Game Start: This is a simple Yes/No option. If you choose Yes, the Overlay will be shown from the start of the game. If you choose No, the Overlay will not be shown until it receives on either a wire or channel to do so.
1c.Overlay Color: This is where you can choose what color the background of your text Overlay will be.
Button:
2a.Overlay Text: In this space you can type what text you want to be shown in your button.
2b.When button clicked transmit on: This is where you put the channel that the button will transmit when being clicked.
2c.Visible on Game Start: This is a simple Yes/No option. If you choose Yes, the button will be shown from the start of the game. If you choose No, the button will not be shown until it receives on either a wire or channel to do so.
Tracked Item:
3a.Tracked Item: This is where you choose which item the overlay will be tracking.
3b.Show Tracked Item Maximum Amount: If you choose yes for this option, the maximum amount of the tracked item the player is allowed to hold will be displayed next to the current item amount (eg. 80/100)
3c.Overlay Color: This is where you can choose what color the background of your tracked item Overlay will be.
3d.Visible on Game Start: This is a simple Yes/No option. If you choose Yes, the Overlay will be shown from the start of the game. If you choose No, the Overlay will not be shown until it receives on either a wire or channel to do so.
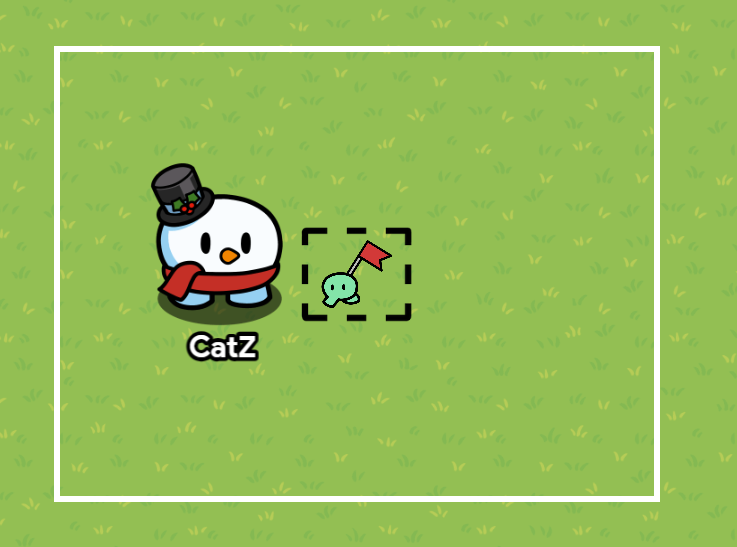
Flag
-NavyCatZ
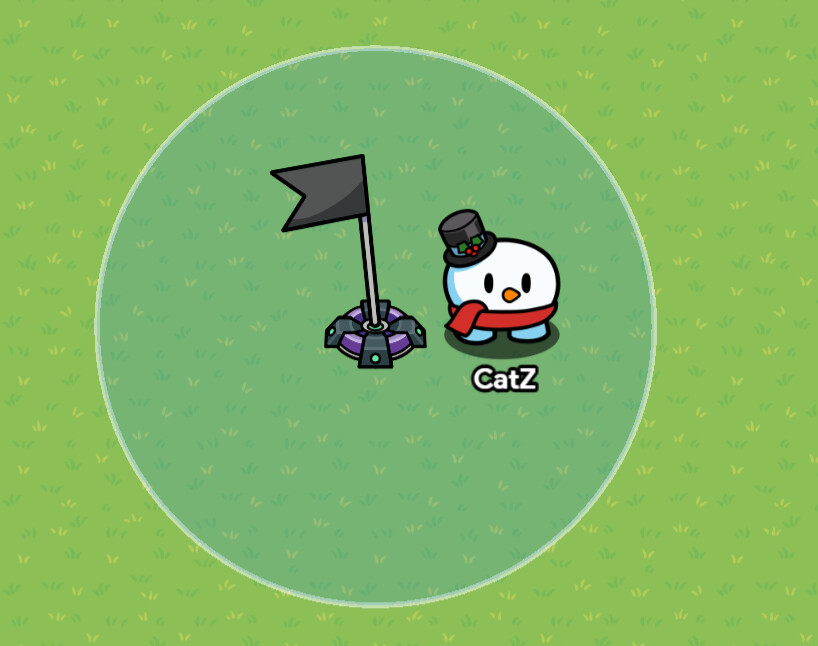
Flags are used in Capture-the-Flag games. A flag can be picked up by a team that doesn’t own it while it is in the base. A player will drop the flag when they are forced to respawn. The flag will drop at the location the player was knocked out and a player on the team that owns the flag can return it to the base. Let’s go over the settings.
1: Flag Color: This sets the color of the flag.
2: Protecting Team: This sets the team in charge of protecting the flag. That team will be unable to pick up the flag while it’s in the base, but they can return it back after a defeated player drops it.
3: Use Safe Zone: Setting this to “Yes” will prevent the protecting team from entering the circular zone around the flag. In-game, the zone will look red for the protecting team and blue for the other team(s.) If you set this setting to “No,” there won’t be a zone at all.
3a: Change Size: This button will appear at the bottom left when you open the editing menu. It will only appear if “Use Safe Zone” is set to “Yes.” When you click on it, you can alter the size of the safe zone.
3b: Hidden Zone Radius: This will only appear if “Use Safe Zone” is set to “Yes.” You can input a number to alter the size of the safe zone. The smallest number you can put is 150 and the largest one is 1000. I recommend you use the “Change Size” button to alter the radius instead of this setting as you can visually adjust it. However, this setting can be useful if you want to make the other flag the same exact size as another one yet you don’t want to copy and paste it.
4: Automatic Return to Base: This sets how many seconds you want the flag to wait for a player to send it back to base before it goes there automatically. The smallest number you can put is 1 and the largest one is 999.
5: Pick-Up Alert: Setting this to “Yes” will cause the protecting team to get a notification when their flag is picked up. It will say,
“Flag Picked Up
[Person who picked up the flag] picked up the [color of the flag] flag!”
6: When Flag Captured, Transmit On: This sets what channel will be signaled when the flag is captured.
7: Capture the Flag when Receiving On: When the flag is sent a signal from a certain channel, it will count as captured(it will be as if the flag was carried to the capture zone.)
8: When Flag Picked Up, Transmit On: This sets the channel that the flag will send a signal through when it is picked up (It doesn’t matter if the flag was picked up while it was in the base or not.)
9: When Flag Picked Up from Base, Transmit On: This sets the channel that the flag will send a signal through when a player picks the flag up while it is in the base.
10: When Flag Dropped, Transmit On: This sets the channel that the flag will send a signal through when the flag is dropped by a player.
11: Drop the Flag when Receiving On: When the flag receives a signal from a certain channel, the flag will forcefully be dropped if a player is currently carrying it.
12: When Flag Returned to Base, Transmit On: This sets the channel that the flag will send a signal through when the flag is returned to the base (It doesn’t matter if the flag was returned by a player or if it was returned automatically.)
13: When Flag Returned to Base Manually, Transmit On: This sets the channel hat the flag will send a signal through when it is returned to the base manually by a player.
14: Return Flag to Base when Receiving On: When the flag receives a signal from a certain channel, the flag will be returned to the base, even if it is being carried.
Buttons
-Mysz
Buttons run actions when they are interacted with. They are essential in almost every gimkit creative game. Let’s talk about their settings, and what they can do.
A. Button Message: In-game, this causes the button to display a button when you’re able to click it.
A1. When button pressed, transmit on: Here, you can write the channel the button transmits on when the button is pressed/interacted with.
A2. Visible In-Game: Choosing yes/no determines if you are able to see the button in-game.
A3. Interaction Duration: This is how long it takes to press the button. The options are “Instant”, “One Second”, “Three Seconds”, or “Five Seconds”.
B. Active on Game Start: Choosing yes/no determines if you are able to press the button when the game starts. This setting applies until the button is activated/deactivated.
B1. Activate button when receiving on: The button can be pressed when receiving a signal from an unspecified channel. This setting applies until the button is deactivated.
B2. Deactivate button when receiving on: The button cannot be pressed when receiving a signal from an unspecified channel. This setting applies until the button is activated.
B3. Active Scope: When the button is activated/deactivated, who does it apply to? You can choose if it applies to a player, a team, or everyone in the game.
Wire Info: The button can be wired to any “wireable” device. Any device that can transmit wires can wire something to a button.
When receiving a wire, the button will activate/deactivate.
The only option for wires coming out of the button is “When button pressed…”.
Those are all the options for a button!
Vending Machines
-Mysz
Vending Machine devices are a way to have the player exchange a certain item (such as cash) for another item (such as a yellow seed)! Let’s talk about their settings and wire options.
A. Purchase Action: When a player purchases an item from the vending machine, it can either grant an item or send a signal to a channel. It’s up to you to choose!
A1. Required Item: The item needed to purchase something from the vending machine.
A2. Required Item Amount: This value is how much of the required item you need to purchase something from the vending machine.
A3. Granted Item: This is the item you are granted from purchasing from the vending machine. The setting is only available if the Purchase Action is set to “Grant Item”.
A4. Granted Item Amount: This value is how much of the granted item you receive when purchasing from the vending machine.
A5. When item purchased, transmit on: This is what channel receives a signal when you purchase the item. Note how this option is always active, however, the Granted Item option is only active if the Purchase Action setting is set to “Grant Item”. This is because you could grant an item AND transmit on a channel in some cases.
A6. Visible In-Game: Choosing yes/no determines if you are able to see the body of the vending machine in the game.
B1. Item Name & Description: When you go up to the vending machine, this is what it shows. For example, let’s say the item name is “Cat”. When I go up to vending machine in the game, it will display a blue box at the bottom of the screen with the text, “Cat” as a heading, and then the Item Description as the body.
B2. Interaction Duration: How long it takes to purchase from the vending machine. This is similar to the Interaction Duration setting for a button and has the same dropdown menu as the setting for the button device.
B3. Match Item Rarity: Choosing yes/no determines if the color of the background of the vending machine is the same color as the rarity of the item. For example, let’s say I chose “yes” for the setting and the vending machine sold an epic zapper. The background of the vending machine would be purple.
B4. Exterior Color: The color of the outer part of the background of the vending machine.
B5. Interior Color: The color of the inner part of the background of the vending machine.
B6. Rays Color: The color of the rays that the vending machine produce.
More coming soon
Flag Capture Zone
-NavyCatZ
The Flag Capture Zone is a device used in Capture-the-Flag games. If you bring a flag to a capture zone of its corresponding color, the flag will be captured. Let’s go over its settings.
1: Flag Color: This sets the type of flag that can be captured in this zone. For instance, if you set this setting to black, black flags that are brought into its zone will be captured.
2: Active on Game Start: Setting this to “No” will make it so the device is deactivated when the game starts. While it’s deactivated, flags can’t be captured in that zone, and it will be invisible even if you set “Visible in Game” to “Yes.”
3: Visible in Game: Setting this to “Yes” will make the capture zone show up in-game as a slightly transparent box.
4: Background Color: This sets the color of the capture zone both in-game (if you set "Visible in Game to “Yes”) and in editing mode.
5: Change Size: This button can be found in the bottom left when you open the editing menu. You can use this to change the capture zone’s size.
6: When Flag Captured in the Zone, Transmit On: When a player captures a flag in that particular zone, it will send a signal through a certain channel.
7: Activate Zone when Receiving On: This sets the channel that activates the capture zone when a signal is sent through it.
8: Deactivate Zone when Receiving On: This sets the channel that deactivates the capture zone when a signal is sent through it.
Wire Repeater
- Anythinger

Wire Repeaters are arguably one of the simplest device in Gimkit Creative. This device has only two options to be configured.
“Delay”
Description:
When a pulse is receieved, how long (in seconds) to wait before relaying it
Usage:
When something is wired into the wire repeater, the delay set is how long the Wire Repeater will wait before sending to whatever is wired out of it.
Input Values:
Minimum Value: 0.0 seconds
Maximum Value: 60.0 seconds
Allowed Team
Description:
The wire’s pulse will be blocked if the message is not from a player on this team
Usage
Only pulses from a specific team (if configured) will be passed on, otherwise, it will be ignored.
Input Values
For Everyone: Any Team
For Specific Teams: Team 1-60
Wiring Options
Input
This is for wiring something into the repeater.
Output
This is for wiring something out of the repeater.
Ways to Utilize
The Wire Repeater is good if you want many wires to go in/out of a single prop/device, because you can simply connect it to the prop/device to easily increase its wire limit. You can also use it to make a timer. SImply get two wire repeaters, set whatever delay you want on ONE of them (1.0 for normal seconds), and wire the repeaters to each other. Now, whenever you want it to start, wire the event to the 0.0 delay repeater, and the delay repeater to whatever should happen every delay period.
Item Granters
-ClicClac & Beanine
Item granters give the player an item upon activation. Their simplicity is what makes them so powerful.
BASIC SETTINGS
A1: Item to grant: choose the item (any item in the game) to give to the player.
A2: Amount to grant: choose the amount of item to give to the player.
A3: Grant item when receiving on: the item granter will grant the item when receiving on the specified channel.
A4: Grant strategy: what the item granter will do if your inventory is full, and it needs to grant an item. There are three different options:
- A4a: Overflow: the item will go on the ground.
- A4b: Grant safe amount: the item granter, if the amount it will grant is too much, but a smaller amount will still fit, will grant that smaller amount.
- A4c: Don’t grant: the item granter will not grant the item.
BLOCKS
The item granter has three different ways to run blocks: on wire pulse (the block will run when it gets a pulse on a wire), when receiving on channel… (the block will run when the selected channel is transmitted on), and when item granted to player… (the block will run when an item has been granted to the player).
The item granter has two blocks that are unique to it:
- Grant player selected item: grants the player the selected item.
- Grant player selected item (custom amount) Amount grants the player the selected item, but you get to choose the amount.
Team Switcher
Wingwave
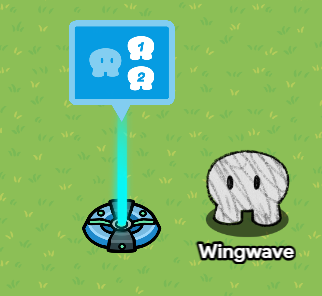
The team switcher is a device that can switch a player between teams mid-game. It uses 7 memory. Let’s go over its settings.
1.Switch Strategy: Setting this to “Random Team” will make the action switch the player to a randomly selected team. On the other hand, setting it to “Specific Team” will let you choose a specific team for the player to go to.You can choose from 60 teams, along with the Spectators.
2. Switch to configurated team when receiving on: This sets the channel that switches the player to the team when a signal is sent to it.
Teleporters
-NavyCatZ

Teleporters are devices that can be used to take players from point A to point B. If you want to know how to use them, check out this guide. Let’s dive into its settings.
1: Group: This is like a label for the teleporter.
2: Target Group: This is the teleporter that the teleporter will teleport to when it is triggered. So it you set it to “Point A,” you will teleport to the teleporter that has “Group” set to “Point A.”
3: When Teleported here, Transmit On: When a player is teleported to that teleporter, it will send a signal through a specific channel.
4: Teleport here when Receiving On: When the teleporter receives a signal from a specific channel, it will teleport the player that triggered that channel to its location.
5: Teleport to Target when Receiving On: When the teleporter receives a signal from a specific channel, it will teleport the player to the teleporter that “Target Group” is set to.
6: Visible In-Game: If this is set to no, the teleporter can’t be seen in-game and players can’t walk into its location to teleport to the target group.
Camera View
-NavyCatZ
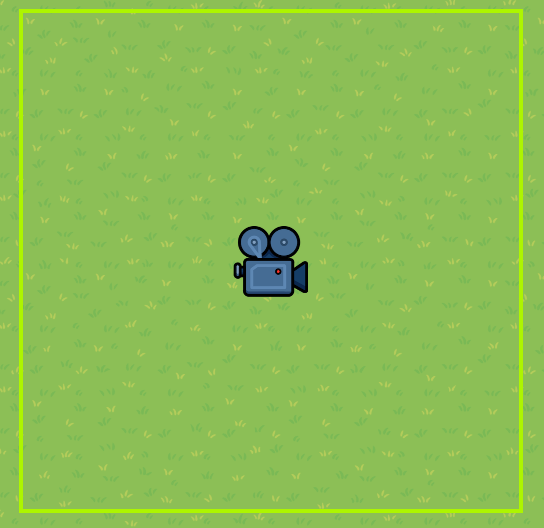
The camera view device is a useful device that limits what players can see. When a player is within its zone, they cannot see anything that’s outside the green border. Its only setting is the change size button.
Without It:
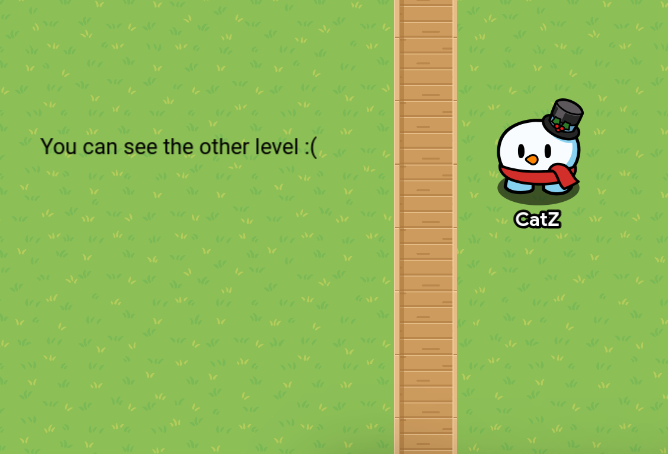
With it:
Checker
-NavyCatZ
A checker device is basically an inequality(greater/less equation). It compares the item amount, property, or score to a number and sends a signal depending on whether the equation is true or false. It can be useful for a key system that doesn’t take away your key. Let’s dive into its settings.
1: Check when Receiving On: When the checker receives a signal from a certain channel, it will perform its checks.
2: When Check Passes, Transmit On: This sets the channel that the checker will send a signal through when all of the checks are true.
3: When Check Fails, Transmit On: This sets the channel that the checker will send a signal through when at least one check is false.
4: Number of Checks: This sets the amount of individual checks the checker runs. So if you needed it to check if a player has a keycard and a seed, the checker would need two checks that check an item each. There can be up to 5 checks.
5: Check Type: This sets the variable that the checker checks for. It can either be an item amount, property, or score.
5a: Item/Property: The setting varies depending on what you put in “Check Type.” It will not be visible if you set that to “Score Amount.” This setting sets the type of item/property the checker will check.
6: Comparison: This sets how you will compare the thing you are checking to whatever you set in “Value.” You can check if it is greater than, less than, or equal to the value.
7: Value: This sets the variable that will be compared to the item amount/property.
End Game
-ImPrettyCool
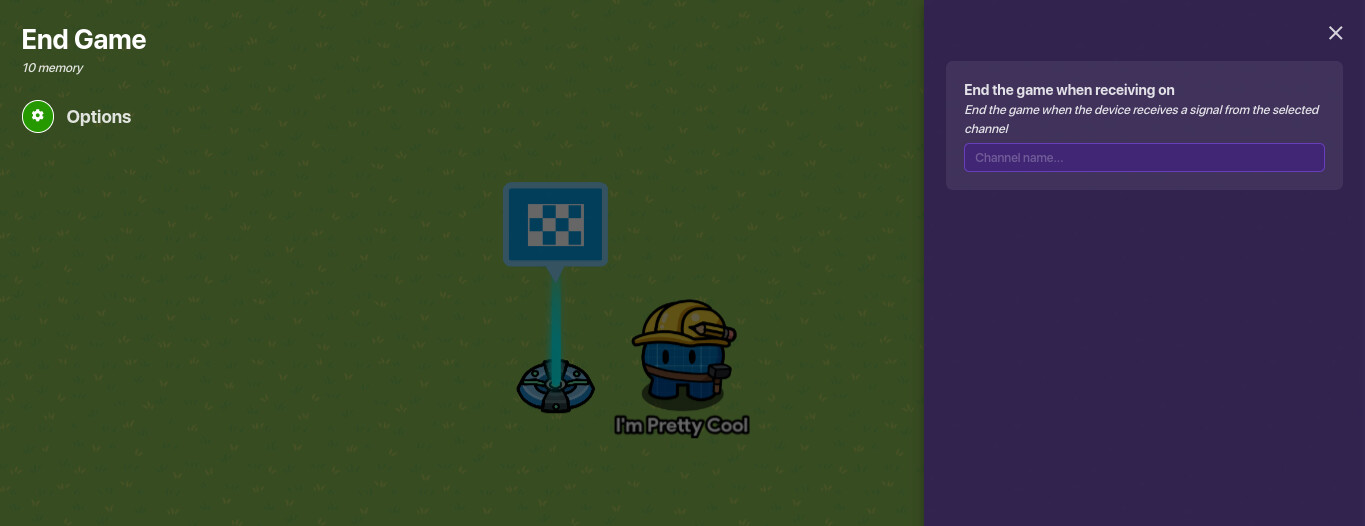
The End Game device, arguably the most simple yet most important part of any game. Without this device,
the game would never end, leaving players in an endless game play, dragging on for the rest of eternity…
This device has one setting:
End the Game When Receiving on. This is where you put the channel that will end the game. You can also end the game by connecting wires to the end game device. And there you go! As simple as that.