The Ultimate Guide to Gimkit Creative and Forums
All codes are inactive
Intro: When I first started Gimkit Creative (GKC), I took the tutorial. Which wasn’t helpful. At all. No offense to Josh or Jeffo, but there is so much more to creating a game than just knocking out a sentry to end the game ![]() . They never explained vending machines, blockcode, or any of the other devices. After that I found Forums. If you didn’t know forums makes you write in HTML format, which has so many cool features to format posts such as
. They never explained vending machines, blockcode, or any of the other devices. After that I found Forums. If you didn’t know forums makes you write in HTML format, which has so many cool features to format posts such as <big> to make text big and `TEXT HERE` to make look like blocky-ish for scripting code. I also talk about what makes a good post, what flagging is, and how to gain Trust Levels.
Gimkit Creative
This section is formatted in a specific way to teach you the way a teacher would. Each section has 3 parts: Information[1], Tutorial[2], and the DIY[3]. (Note: This will all be completed in Top-Down, as unless you have the Season Pass, you will not have Platformer)
Chapter 1: Creating a Map
Part 1: Creating a New Map
When you first open Gimkit click on the Creative tab in the Top Right corner

Once here, click on the green button Create New Map . If it doesn’t let you make a map, you probably have all your Map Slots filled. As a basic user, you can have 3 maps. If you purchase the Season Pass, you can make up to 25!
Here you can name your map, and then choose Top-Down or Platformer.
The last thing to do is name your map
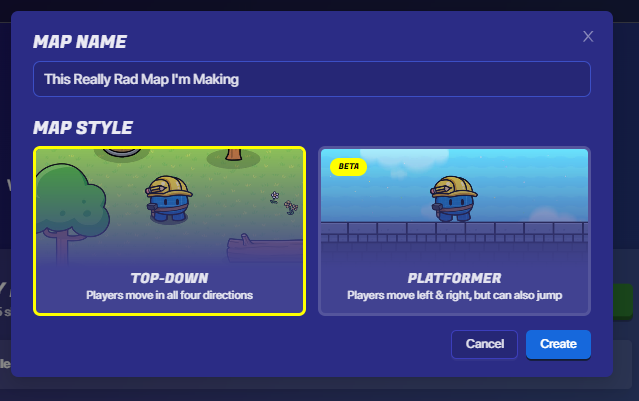
As I said before, unless you have the Season Pass, you will not have Platformer
After choosing which you would like, you will load into a brand-new world full of GRASS! It’s up to you to create a magical world.
Part 2: The UI
When your first load in, you might be overwhelmed by the amount of buttons on your screen. Don’t be here I am going to be breaking down each button bit by bit!
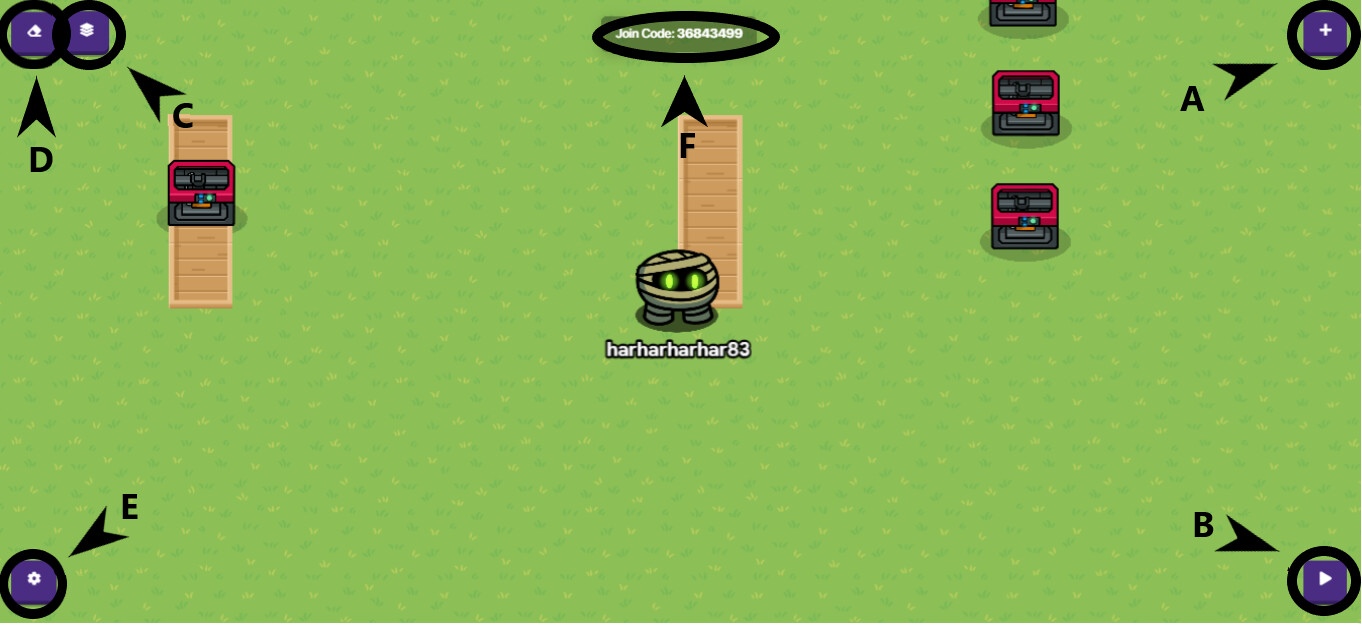
a. Add
When you click on this you it will bring up a menu that displays four options:
- Terrain - Terrian is the walling and flooring of your map.
- Props - Props are items that enhance the look of your map, but do not allow interactions.
- Devices - Devices actually make your map work, these use the coding to allow interactions.
- Wires - Wires allow devices to interact with each and run specific functions.
I will describe Terrian and Props now, later in the “Beginner Coding Chapter” I will describe Devices and Wires.
a1. Terrian
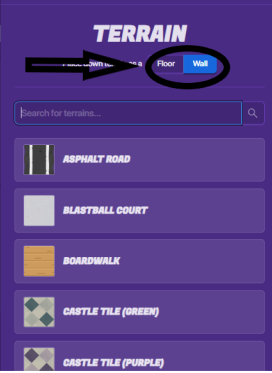
Terrain is the basic structure of your map. We can’t have it all grass can we?
There are 55+ terrain for you to choose from here! When you click on terrain, you first can choose Wall or Floor.
- Wall has collision, meaning players cannot move through walls
- Flooring does not have collision and appears under the player.
When you are placing terrain, a settings bar comes up that looks like this:
This is what I call the “Command Bar”. Let’s go over what we see here.
- Type - This shows the type of terrain you are adding.
- Memory - This shows how much memory the terrain is adding per tile.
- Layers - This is perhaps the most overlooked setting in GKC Maps nowadays! Which is unfortunate because you can create all sorts of cool effects with layers. Just remember, terrain will be place on top of each other in the number of the layers (A terrain on Layer 3 will be on top of a terrain on Layer 1)
- Brush Size - You can use this to place multiple tiles of terrain at once (up to 4)
- Terrain Type - Here you can also change between walls and floor terrains
Here are some hotkeys to help you while placing Terrian.
Click + Drag - Use to place a lot of terrian, quickly.
1 , 2, 3 , 4 - Changes the brush size to the respective number.
Shift - Use to switch between terrain types
Space - Is the Command Bar getting in your way? Use this to hide it.
a2. Props
Terrain can’t do it all! We need props to help add some spice to your map! Mysz made this very awesome guide to categorize all the props. They put a lot of effort into it! [![]() ] The Ultimate Guide to Props/Terrains and Their Categories.
] The Ultimate Guide to Props/Terrains and Their Categories.
There are over 200 props I believe (correct me if I’m wrong) so I will not be going over all of them. Since you don’t want to scroll through all the props just use the search bar to quickly find any prop!
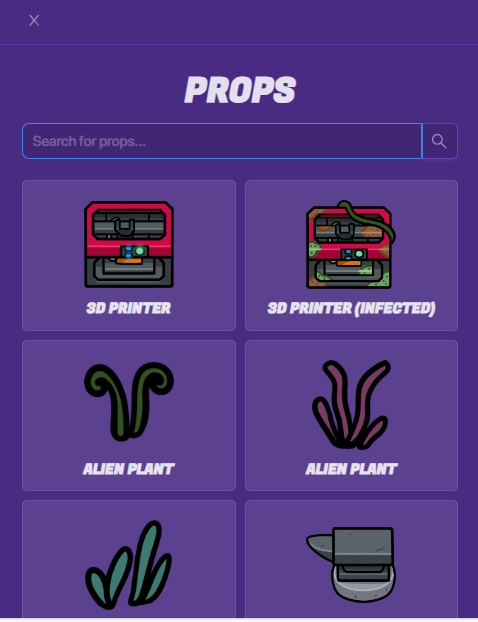
After finding the prop you want, click it and place it on your map.
Here are some basic settings that most props have:
-
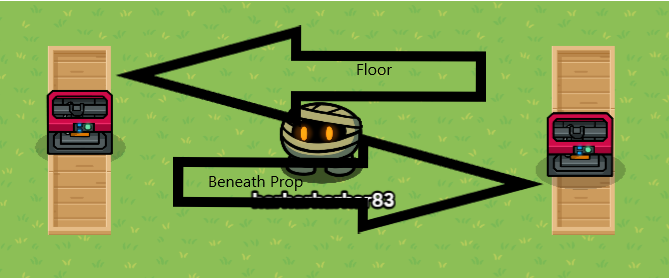
Shadow Placement - The two options here are on the
FloororBeneath Prop. Usually you should useBeneath Propbecause if you place a prop on the wall:
-
Tint - Here you can choose a color to tint your prop. The light the color, the light the tint. Here is a gradient scale for tinting props:

-
Alpha - How translucent a prop is. 1.00 is fully visible and 0.15 (the smallest amount possible) is very faint. Here is another scale:
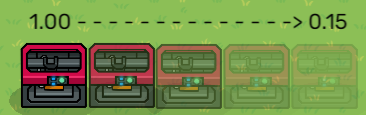
-
Prop Damage - Turning prop damage on allows players to deal damage to the prop. If the prop takes damage greater than or equal to the max damage, the prop is destroyed forever. As the prop gets closer to “De-ath”[4], it becomes more translucent.
-
Prop Health - The max damage the prop can take
-
Adaptive Health - For every player in game, the max damage increases by this number.
That wraps up the Add section of this guide.
b. Start Game
This is really self-explanatory. It starts the game.
c. Layers
Similar to the layers on terrain, however this is for devices and props. The higher the item is on the list, the higher it is in the air. The game splits the Layers into three sections:
- Above - Sits above the players
- Primary - Is Above or Below players, depending on the position
- Below - Sits under the players
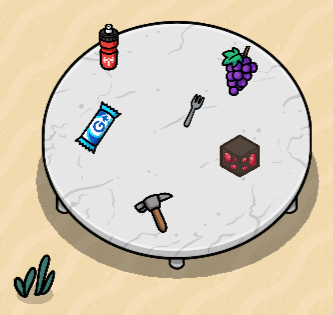
Using layers you can make other props sit on other props, to make the illusion of items sitting on a table:
or making text on top of a marble sign:
d. Eraser
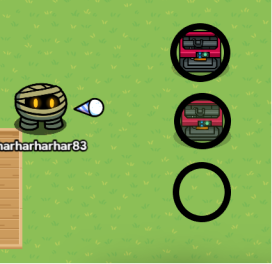
The eraser can be used to used to delete props, terrain, devices, and wires. While hovering over an item, it displays this:
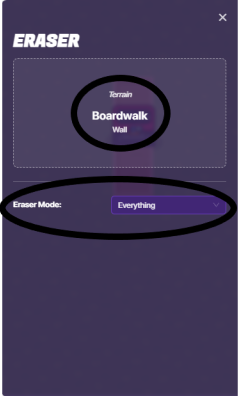
The first circle shows:
- Type - Is it a prop, a terrain, a device, or a wire?
- Subtype - Name of prop, device, terrain, or wire?
- Terrain Type - If it is terrain; is it a wall or a floor.
The second circle shows:
The Eraser Mode allows you to choose what you want to eraser. You can choose from:
- Everything - You can delete everything with the eraser.
- Terrain - You can delete terrain with the eraser. This mode also reveals a couple more settings you can choose from:
- Layers - Choose the terrain layer you wish to eraser. Top Layer is the layer at the top
 . All layers will delete all the terrain in the spot you clicked.
 - Size - Choose the size of the Terrain eraser. Spans from 1, 2, or 3.
- Layers - Choose the terrain layer you wish to eraser. Top Layer is the layer at the top
- Props & Devices - You can delete props and devices with the eraser.
- Wires - You can delete wires with the eraser.
Here are some eraser hotkeys to use:
- E to go to the most recent terrain you used
e. Settings
There are 6 different options available after clicking on Settings:
- Map Options - Use this section to adjust teams, game duration, scoring, winner, and more.
- Editing Options - Use this section to adjust editor settings that allow you traverse the map easier and more
- Publish - Publish your map to Discovery to be played by Gimkitters all over the world
- Showcase & Save - Creates a link to share your map or save your map
- Permissions - Change permissions while people are collaborating
- Documentation and Help - Here are some links to get help building your map
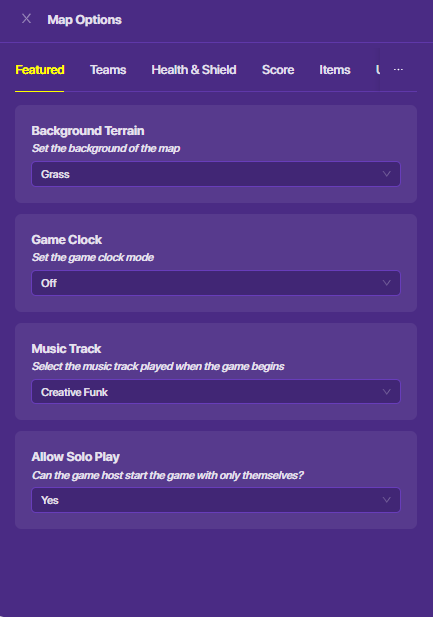
e1. Map Options:
I will not go full in depth of these because there are A LOT. If you have any that you don’t know just comment them down below and I will describe them.
e2. Editing Options
These settings can allow you to traverse the map easier while editing.
- Camera Zoom - Allows you to zoom out to see more of the map.
- Player Collision -
Onmeans that walls and props stop you from moving.Offmeans that you can run through walls and props. - Player Speed - Adjust the speed to get around the map quicker.
- Grid Snap - It allows you to place items neater, as it aligns them with a grid. However, this can get annoying quickly
- Show Grid - Allows you to toggle the grid on and off.
- Zone Device Display - Adjust what zone devices (Tag Zone, Zone, Camera View, etc.) look like when they are placed.
- Memory Bar - Tells you how much memory you have used at the top of your screen
e3. Publish
Note: (All these restrictions can be bypassed using a Season Pass)
In order to publish a game to be playable on a discovery you must pass the following requirements:
- 50+ Career Level (meaning you have gained 50 levels in all your time playing Gimkit)
- 1,000 Gimbuck (you must pay to publish)
Make sure to put the name and description in!
Examples
Examples of good names:
- Gimkour!!!
- Gim Dungeon
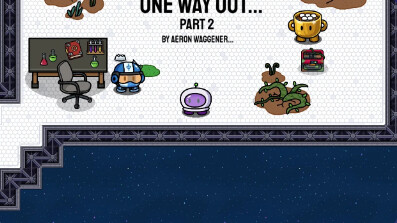
- One Way Out Part 2
Examples of bad names:
- Fortnite (This is copyright)
- The 5000 Million Plays Game (Clickbait)
- Game (Not descriptive)
Examples of good descriptions:
- Gim Dungeon is a dungeon crawler with 20+ rooms, tons of different mechanics, and two unique bosses! NEW UPDATE (1/19/2024): Added several new resources that can be used to craft powerful items!
- Credits- (Emo_Hayte, REST IN GAME) The goal: Escape the corrupted corporation that is Vortex. Why: The Boss of Vortex wants to use your powers to conquer the Gimkit Multiverse. Single Player. Update Patch 3 HAS BEEN RELEASED!!! 27,102 VIEWS AND RISING!!!
Examples of bad descriptions:
- Play-my-game (Not descriptive)
- If you win you will get 1,000 Gim Buck (Clickbait)
The next thing you need is a thumbnail. Thumbnails are often the first thing you see when searching for a game to play on Discovery. You need a good thumbnail that is eye-catching and not clickbait.
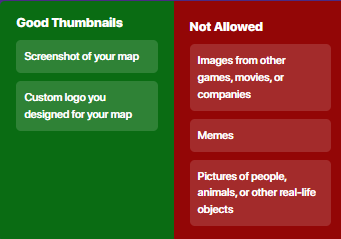
Examples

The next thing is Education Rating. Just for Fun maps will have no questioners. If your map even has one questioner in it, it is Educational rating.
Lastly, make sure your game follows the Community Guidelines.
Now click publish! If your map doesn’t publish for some reason, check out this guide.
e4. Showcase & Save
The showcase link is a link to your game that can be shared with friends before you publish the game. There are some restriction though:
- It only lasts for 7 days
- They cannot use their own kits for and Educational game
Saving the game. The game will automatically save every few seconds but, I always save the game before I leave the game, just in case.
e5. Permissions
You can deny/allow people these permissions while they are in your game in editing mode so they can help build
- Adding - Allows players to add terrain, devices, props, and wires.
- Removing - Allows players to delete things from the map.
- Editing - Allows players to edit the settings of devices, wires, and props
- Blocks - Allows players to edit, create, and remove blocks.
e6. Documentation and Help
There are two links here that will help you get help building your maps.
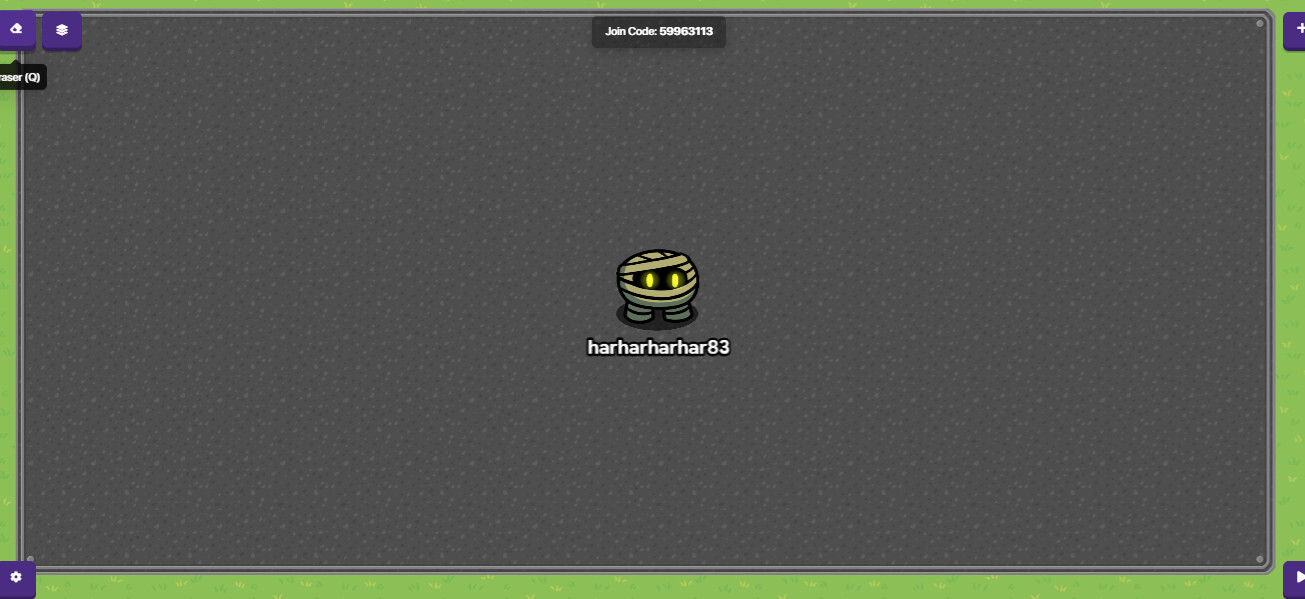
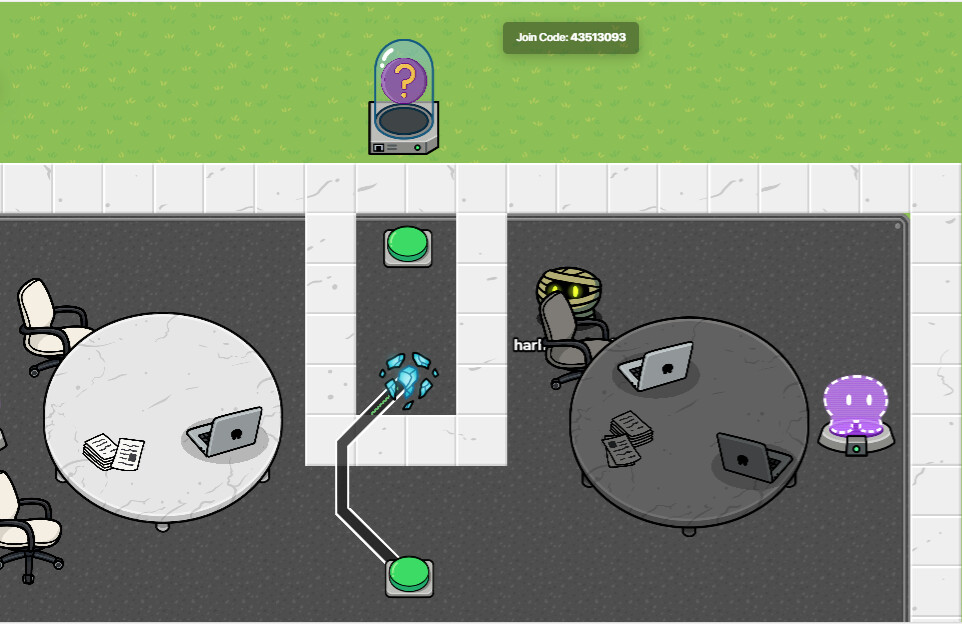
f. Jo-in[5] Code
That number at the top is the jo-in[6] code to allow people to jo-in[7] your game. If you click the jo-in[8] code, it takes you out of edit mode and gives you the basic Gimkit Lobby Screen:

To return to edit mode simply click Edit map
That finishes up this part! I hope that wasn’t too much. If it was wait a little until reading some more.
Tutorial
In this tutorial you will learn to:
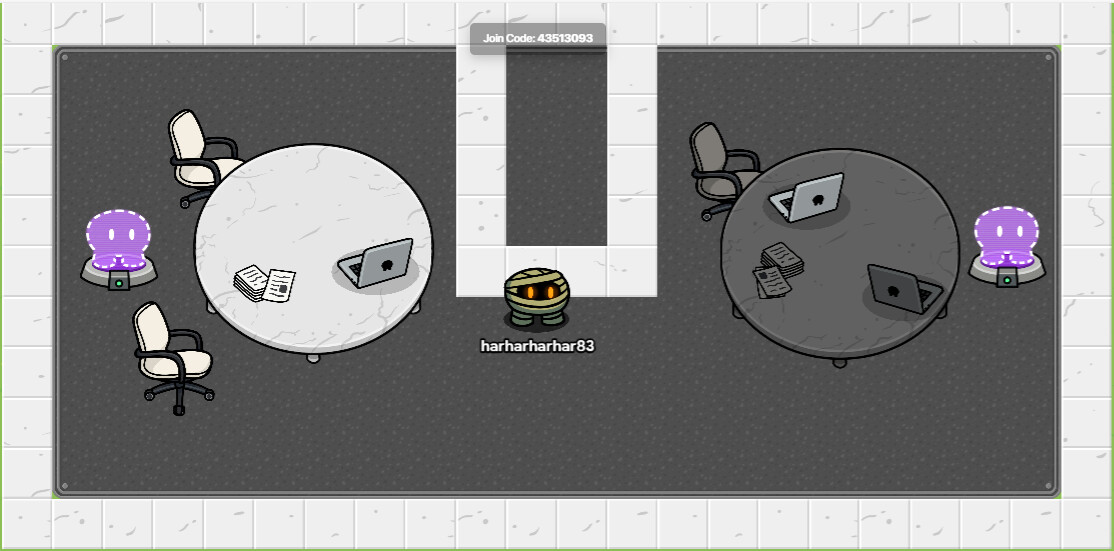
- Design a room like this:
- Set the Players to spawn on two different teams
- Create the score
Knockoutsbased onKnockouts
Step 1: Identifying and Placing Terrain
First, lets identify the terrain and place it down. Look through the terrain list. It is Dark Scraps . Did you get it right? Finally lets place down some of that terrain:
Step 2: Identifying and Placing Props
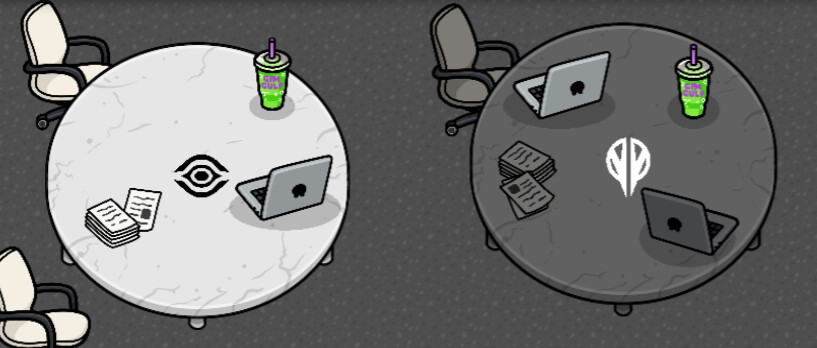
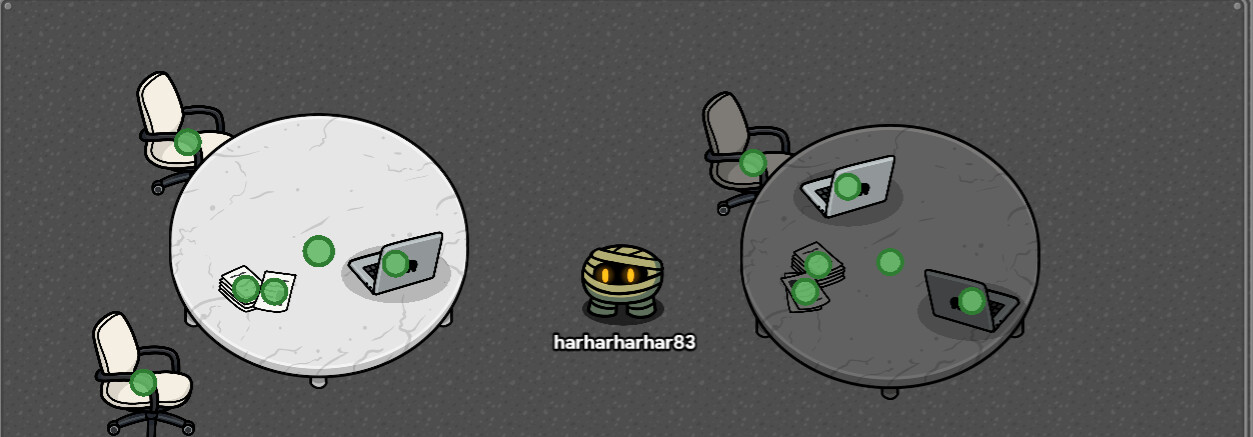
As with the terrain, lets first identify which props are used in the is image.
- 2x Table
- 4x Papers
- 3x Laptop
- 3x Office Chairs
The team images on the tables aren’t accessible to be put into a map and GimGulp is not a prop at the time. Now let’s place these props:
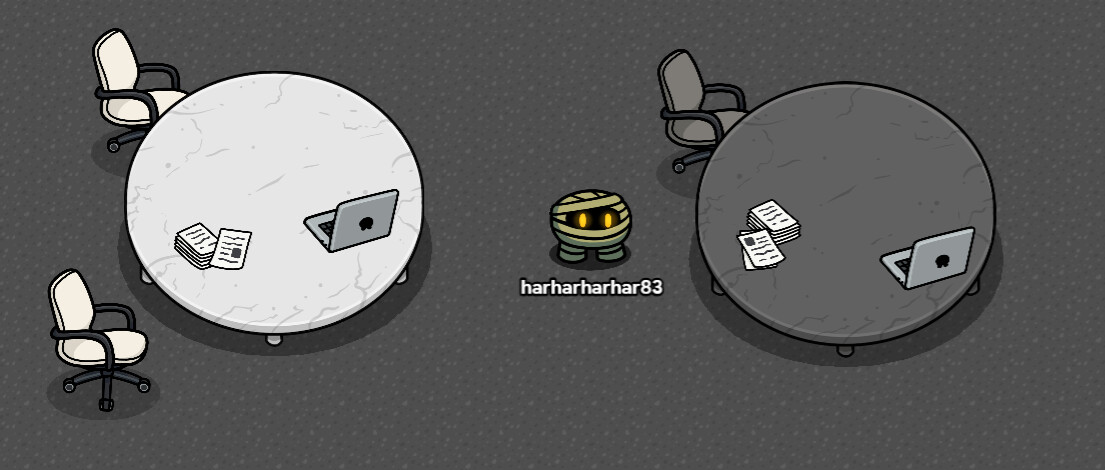
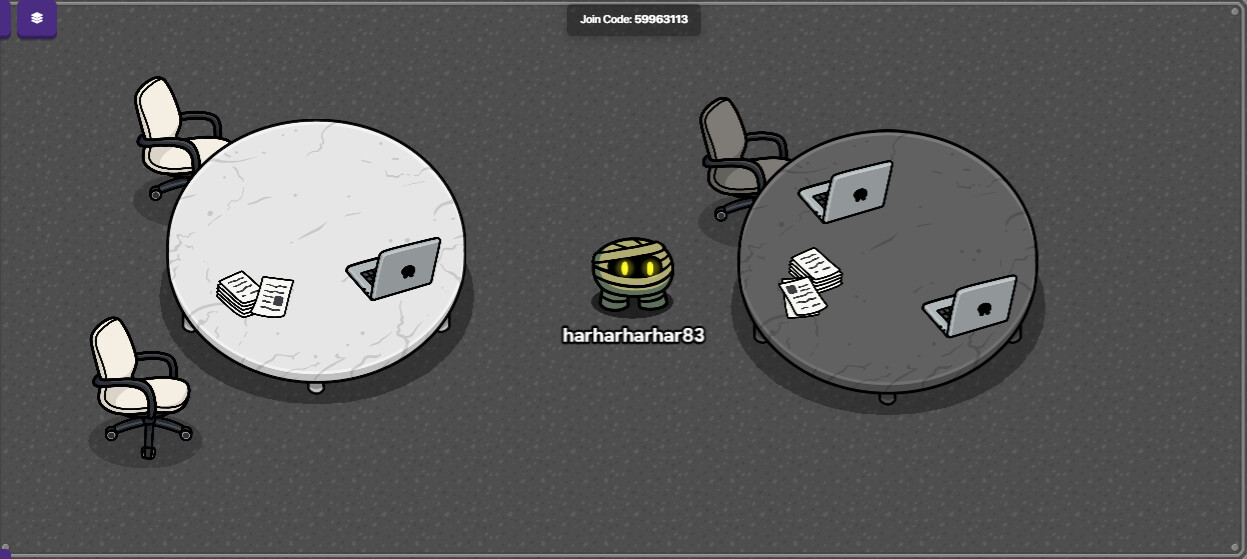
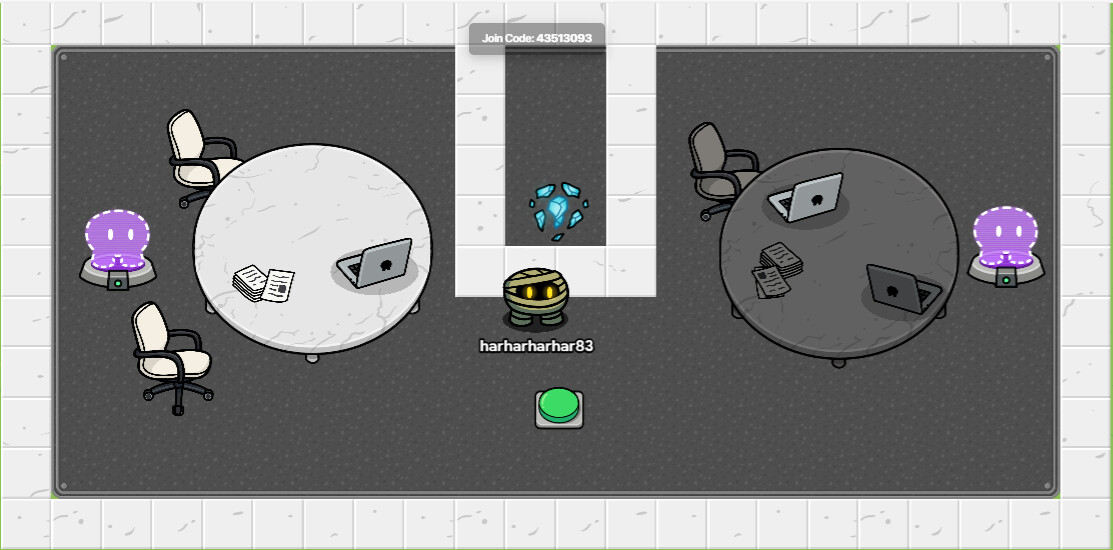
Let’s play some spot the difference! Can you spot all four things wrong with this picture?
- The Vortex Papers are the wrong color
- One Vortex Laptop is missing
- The visible Vortex Laptop is the wrong color and facing the wrong way
- All the shadows are messed up
How can we fix this? With Layers and Prop Settings!
Step 3: Adjusting Layers and Prop Settings
First let’s adjust the layers. Hover your mouse over the different items in the Layer list until the props that are under the table are outlined in red.
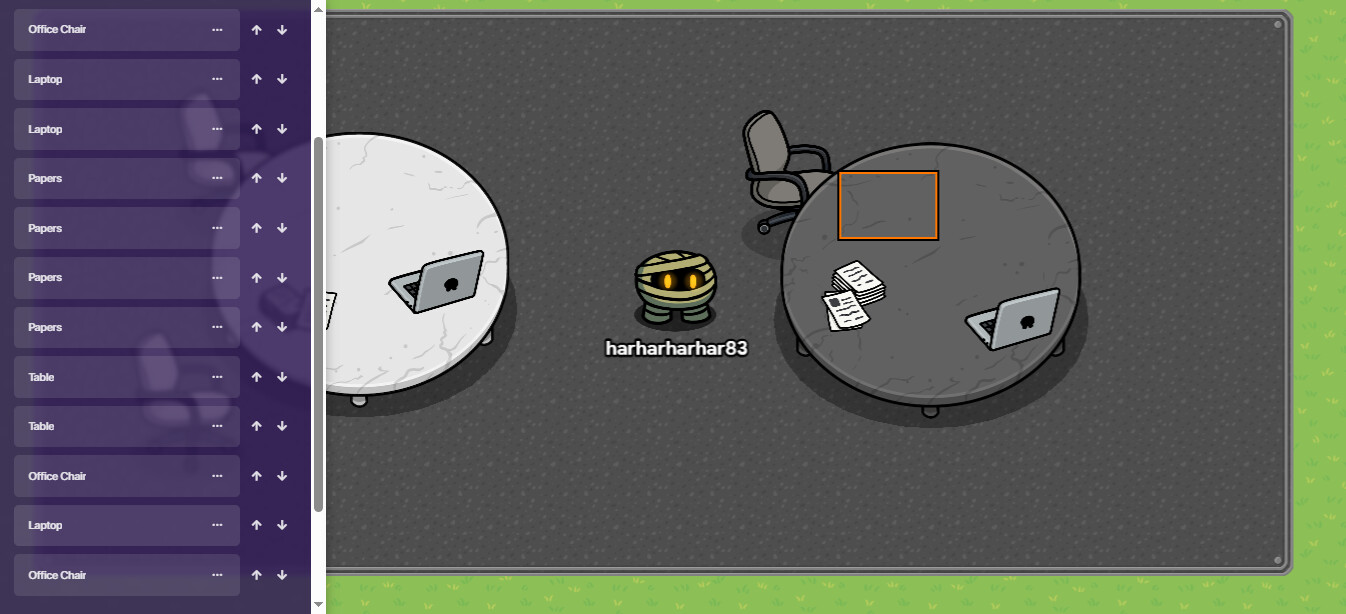
Then click the up arrow on the left-hand side until the prop is visible.
Now let us fix the shadows. In the OP[9], the tables and chairs had no shadows and the items on the table had shadows.
For the chairs and tables set “Shadows Enabled” to
Off.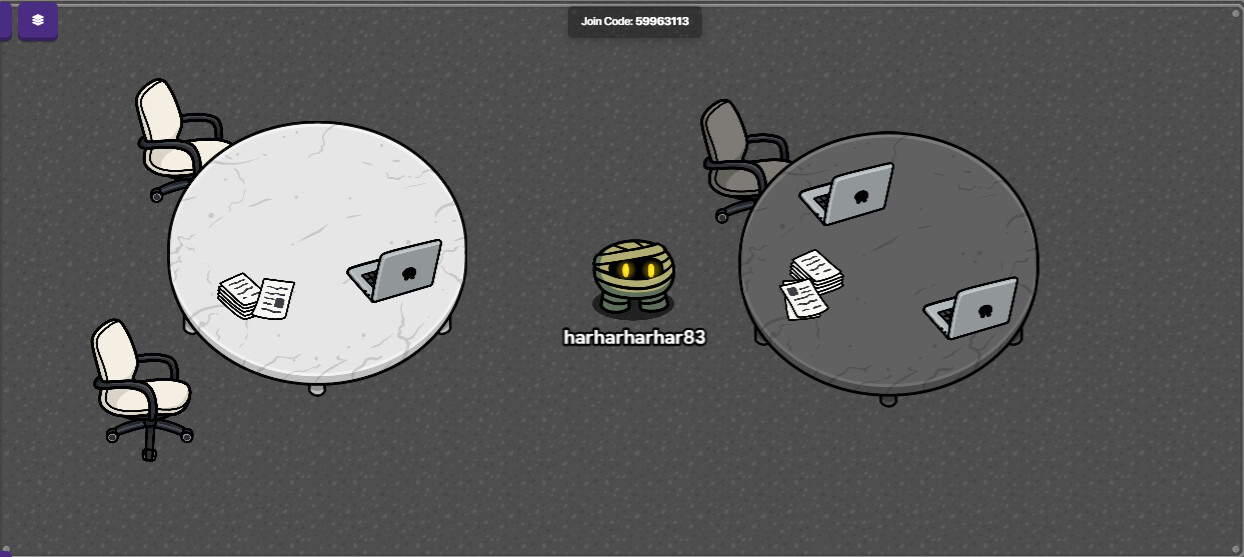
For all the Laptops on the table, set “Shadow Placement” to
Beneath Prop.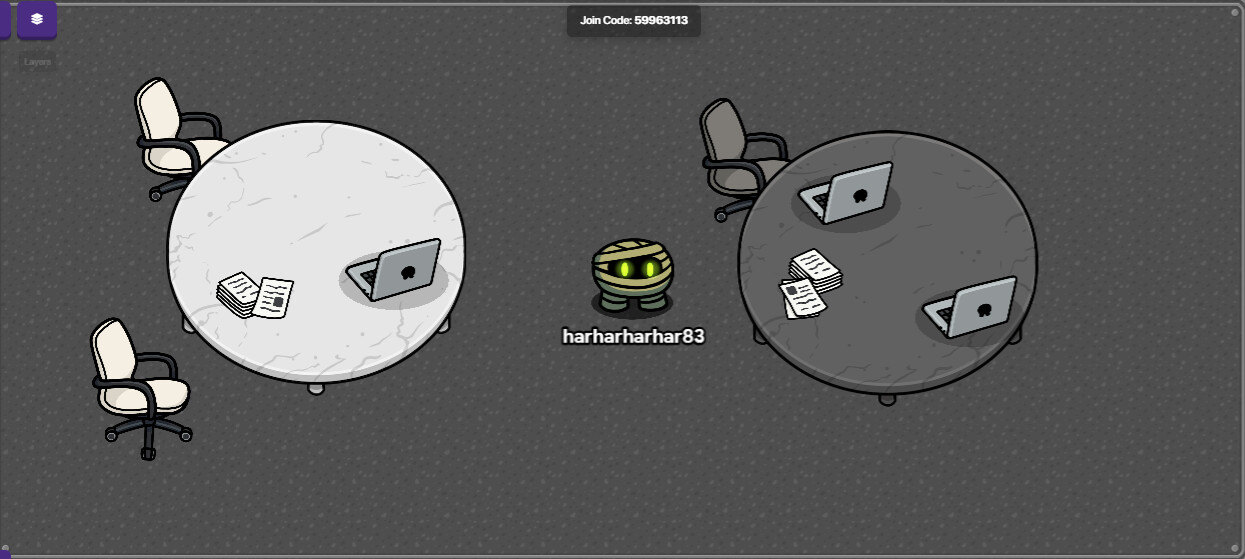
For the Vortex Papers, adjust the tint of the Vortex Papers to
R 112 G 112 B 112. Lastly, the Laptop. Set “Flip” to Yes and have the tint adjusted to the same RGB code listed before. Here is the final product: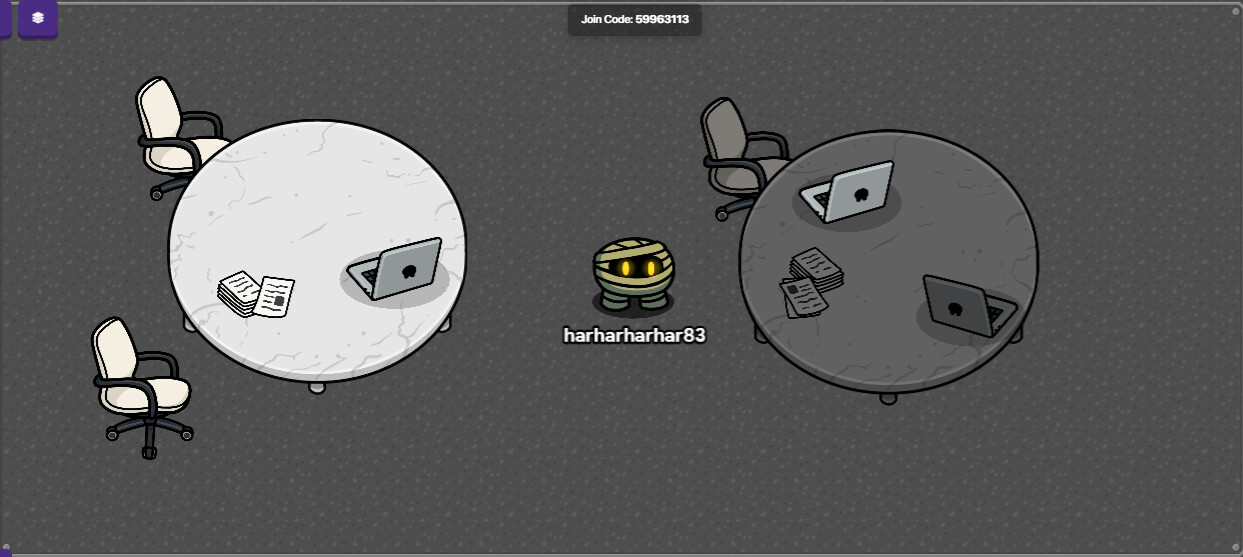
Step 4: Setting Up Teams
Go into Map Options and set the “Teams” to… Why don’t you try and guess! Specific Team Amount . Since we want two teams, set “Number of Team” to 2.
Step 5: Score
The last step!!! Go into Map Options. What do you think score type will be? Knockouts . Lastly, name the score Knockouts.
That is the end of the tutorial! Try the DIY now, I think your ready!
DIY
- Create a room designed like this:
- Have it be a Free For All game
- The scoring should be based on
Knockoutsand be named `Players “Snowballed”
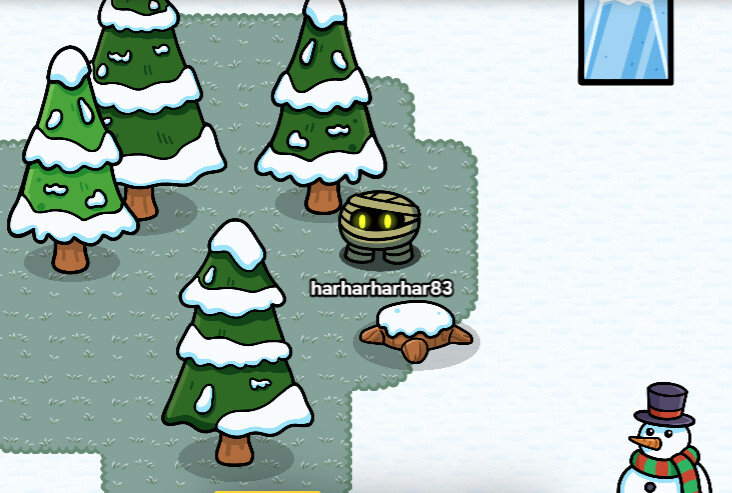
Here you will try and recreate this on your own! If you get stuck you can reread through the guide or use a hint!
Hints
Hint 1: The two terrains are Snowy Grass and Snow
Hint 2: The props are Snowman, 5x Snowy Trees, Stump (Snowy), and Ice Barrier (Vertical).
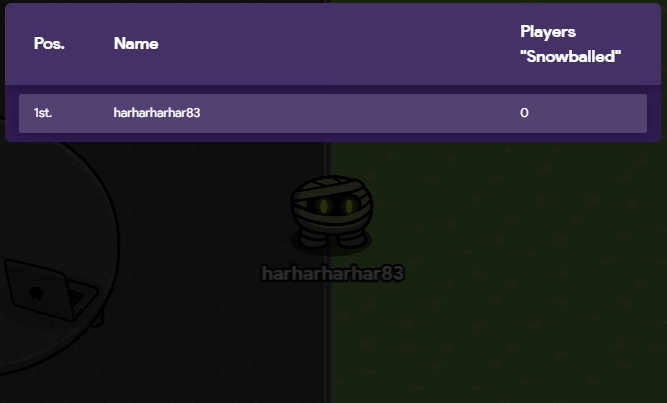
Hint 3:
At the end, the leaderboard should look like this:
Well, get ready to jump headfirst into the coding of GKC with the next chapter!
Chapter 2: Beginner Coding
Part 1: Devices
I am NOT going to explain into every device. If you want a breakdown on that look at TUGTED[10], a 3 part guide made by the whole community which does a deep explanation into every device. However just know that devices is divided into 4 subcategories:
- Starting Devices - Devices you may need for every map
- Inventory Devices - Devices to manage what items and resources players have
- Interaction Devices - Devices to create rich interactions with the player
- New Devices - Devices that were just added to Gimkit Creative
I would suggest familiarizing yourself with the Starting Devices and Interaction Devices before moving on.
Part 2: Wires
First off, never ever ever admit to liking wires in a post. People in the GKC community really hate wires.
With that cleared up, lets discuss wires!
To add a wire you can either click “Add” and then “Wires” or you can use the hotkey Z . After doing this a “Command Bar” pops up at the bottom announcing to you that you are adding a wire. Across your devices and props, little green dots will appear:
Hoving over it changes it to a blue box surrounding the device.
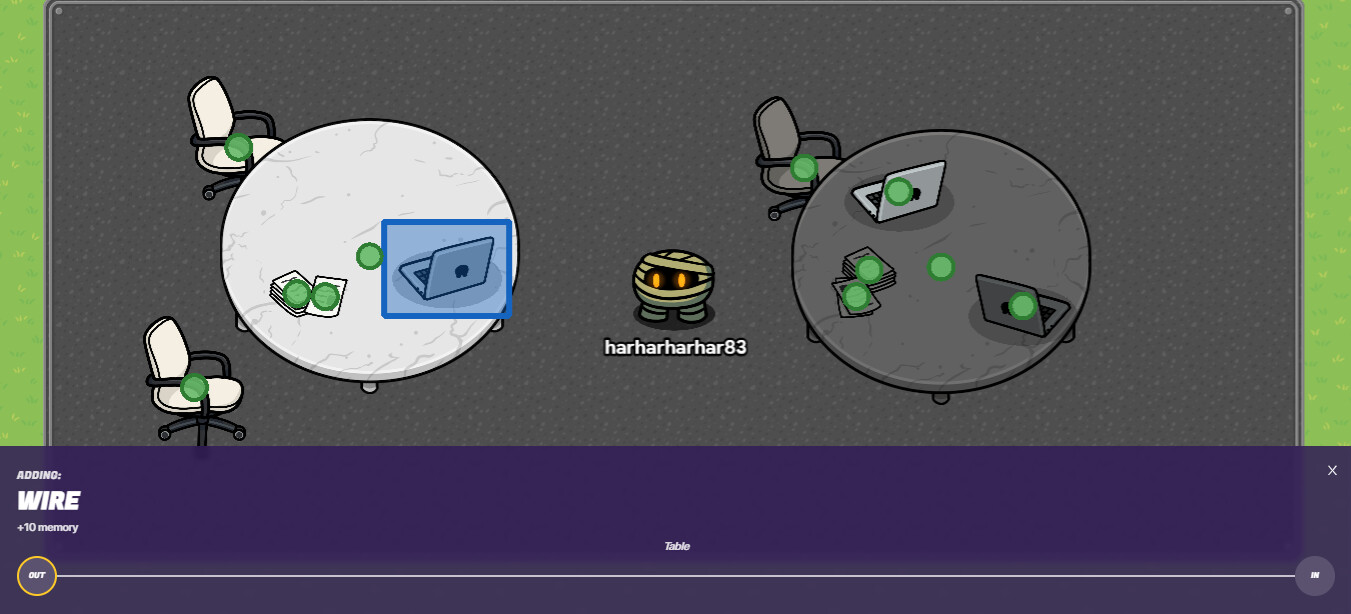
Clicking on it creates a wire
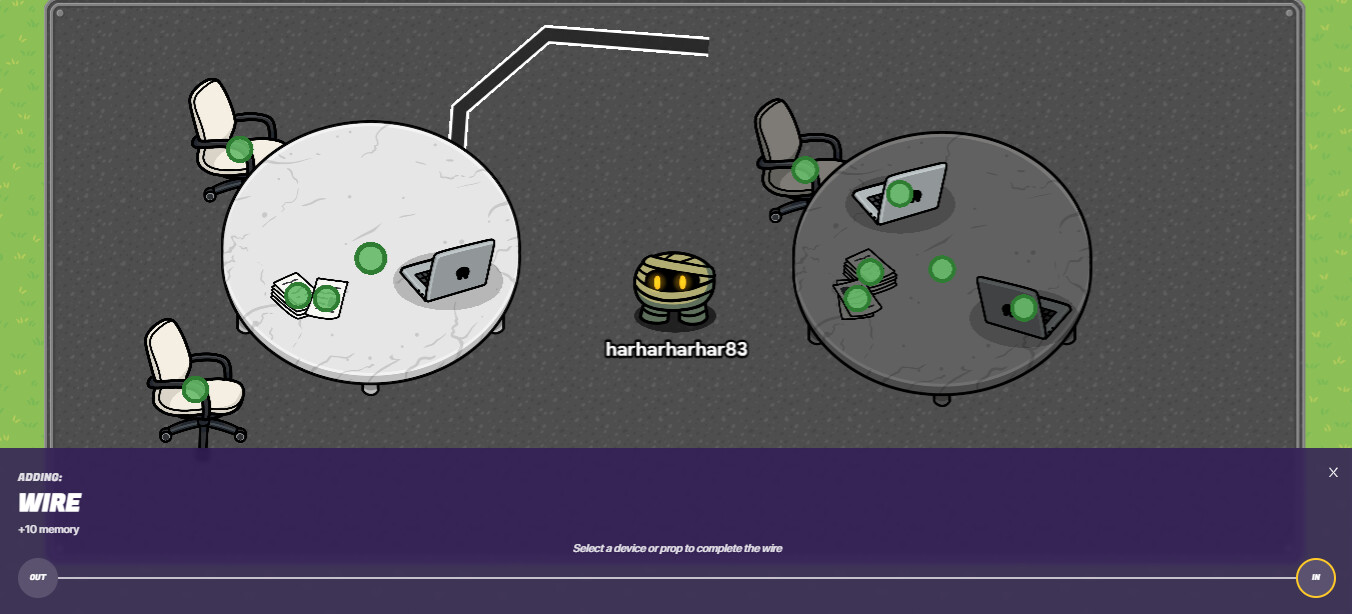
After selecting one a UI is brought up and you are asked to choose and input type and an output type:

You may be asking what is the difference between input and output?
- Input - When this device/prop does this; transmit on the wire
- Output - When this device/prop receives on the wires; do this
Extra Wire Stuff:
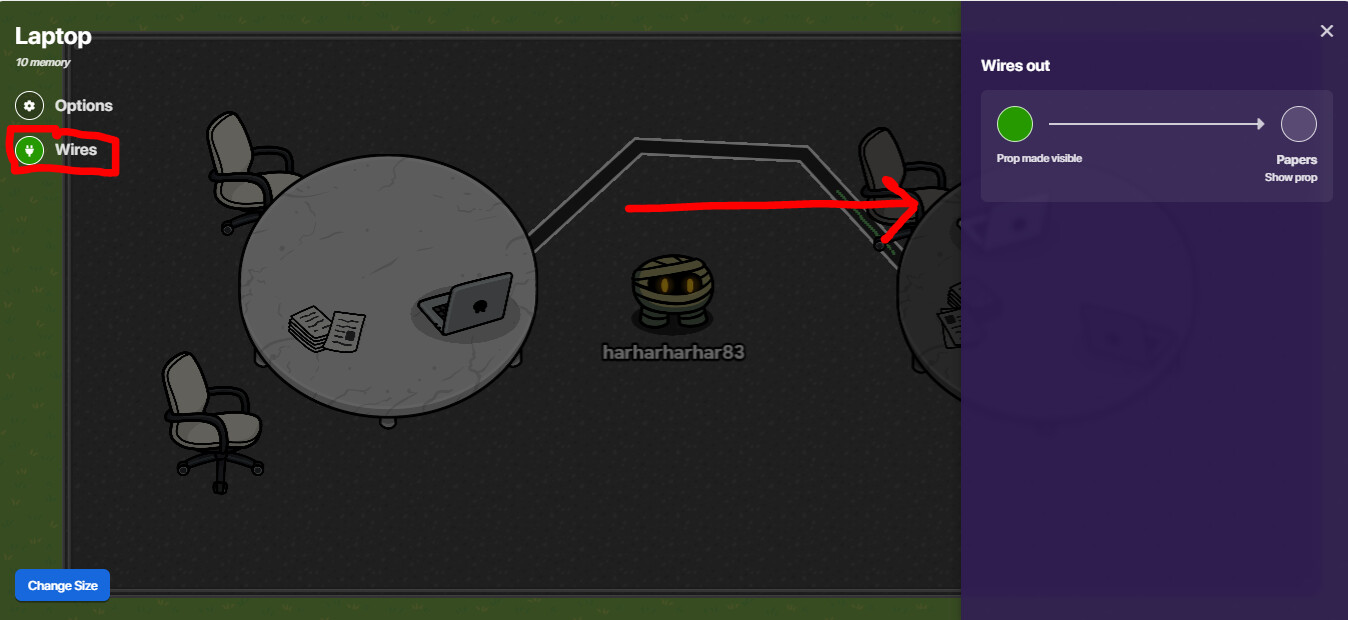
- When you click on a device/prop you will see a section called “Wires” on the left-hand side. Here you can view all wires going into/out of that device/prop
- When a device/prop’s output and input are both successfully put in the wire sends a green bar through it.
- When a device/prop’s output and input are incorrectly put in the wire sends a red bar through it.
- There is a max of 6 wires per device/prop
Thats all here! Get ready for the tutorial.
Tutorial
In this tutorial we will be coding:
- Spawn areas for the player
- A button wire system that deactivates a teleports them.
- A button wire system that grants and item
- A button wire system that ends the game
- Set up a 2 team system
- A score based on
Bananasand namedFruit Owned.
Step 1: Create the Map
Create a map for this game to take place in. I am going to use the map from last tutorial. Make sure to add some props for effect and walls so THEY CAN NEVER ESCAPE. Also, add an extra room that’s walled off.

Step 2: Spawning In
Create two spawn pads, one on each side of the room. Go into settings and set “Allowed Team” to 1 for the spawn pad on the left side and set “Allowed Team” to 2 for the spawn pad on the right side. ![]() What does this do?
What does this do?
Step 3: Teleporting
Place a teleporter in the walled off room and place the button outside, right across from it.
Now wire the Button → Teleporter. Try and fill in the UI yourself and then check your work:

Step 4: Granter
Now place a button in the room and add an item granter.
Try to wire them together yourself and then check your work:

The last thing we should do here is set the “Item to Grant” to a Banana!
Step 6: Avenger’s End Game
Get the End Game device and wire the second button to it.
Step 7: Teams
Go into Map Options and set the “Teams” to Specific Team Amount. Since we want two teams, set “Number of Team” to ![]() Can you guess: 2.
Can you guess: 2.
Step 8: Scoring
Can you fill in the blanks?
Since we want the score to be an item set the “Score Type” to Amount of Specific Item. Make this “Item” a banana. Finally “Name” it Fruit Owned.
That wraps up the tutorial! Have fun with the DIY!
DIY
For this DIY you will:
- Have all players start with a weapon
- Knockout a sentry to get 50 cash
- Knockout a sentry to end the game
- Create a 2 team system
- Have a
Itemscore, namedCash. (Do you think you can find out what the item is?)
Here you will try and recreate this on your own! If you get stuck, you can reread through the guide or use a hint!
Hints
Hint 1: The Starting Inventory device gives players an item on game start
Hint 2: When the Sentry is knocked out → [OUTPUT]
Hint 3: The Score Item should be “Cash”.
Well, that’s all for Chapter 1. Next chapter we will be introducing the concepts of scope and channels.
Other Good Guides
The ULTIMATE Gimkit Creative Beginner Handbook!
The ULTIMATE Gimkit Creative Advanced Handbook!
Outro: I wanted to post this on Gimkit’s birthday! Ran out of room to add stuff… I guess this will have to be a multi-part guide! See you next time!
Pretty self-explanatory ↩︎
Using the information you learned, I teach you how to create something ↩︎
After you complete the tutorial, I give you a rubric and you try and create it yourself ↩︎
Ignore the - ↩︎
Ignore the - ↩︎
Ignore the - ↩︎
Ignore the - ↩︎
Ignore the - ↩︎
Original Picture ↩︎
The Ultimate Guide to Every Device ↩︎