This is the Advanced Handbook for Gimkit Creative. If you want to learn how Gimkit Creative works for Beginners, please redirect to this page.
Welcome Back!
Previously, @Argo77 had guided you through the Beginner’s Handbook for the basics. Now, I’ll follow through with the Advanced Handbook. This handbook can really come in handy for experienced and/or advanced users. Anyway, I will go through the advanced stuff that may be difficult for some users. Let’s get started right now!
Section 1 of 4 - Creating a New Map
Sign up or login to your Gimkit account at gimkit.com. Then click on “Creative”, and you’ll be directed to the Build page. Click on the Create New Map button, if you have any slots remaining, and this will pop up:
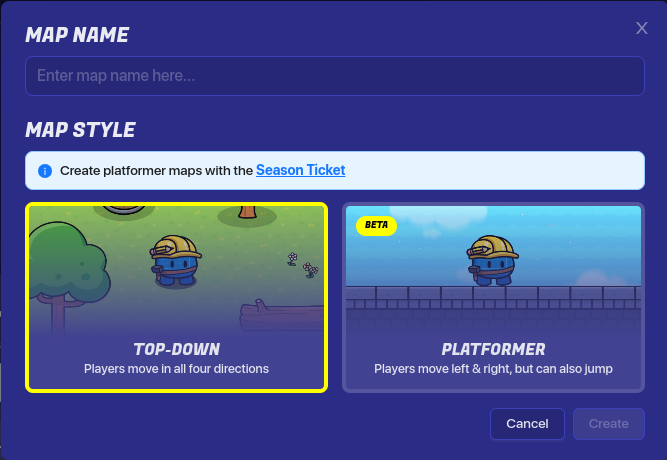
You can name your map anything you want. You have 2 map style options: Top-Down and Platformer. For this handbook, we will choose Top-Down. To learn about platforming, please check out this guide by @Cellofive and @ABCDalt23: Click Here for Platforming.
Section 2 of 4 - Scope:
WARNING:
This section assumes you have an understanding of how Devices work.
You may encounter one of the trickiest concepts to understand in Gimkit Creative.
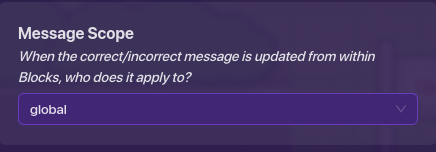
Before diving into Scope, the first thing to understand is Device Slate. Scope allows you to decide who these changes show up for when the Device Slate changes. Setting the slope will give you 3 options:
- Global = The Updated Device Slate will apply to everyone on the map.
- Team = The Updated Device Slate will apply to everybody on the triggering player’s team.
- Player = The Updated Device Slate will apply to only the triggering player.
Counters are an example of using Scopes. Learn more here.
Section 3 of 4 - Blocks
Blocks are used for those who are coders or who like to code in their maps and games. It may look difficult to some people, but I’ll guide you through it. Most devices allow you an option to use blocks but you don’t have to but if you want to make an advanced map or game, this is recommended. You can use Blocks for anything.
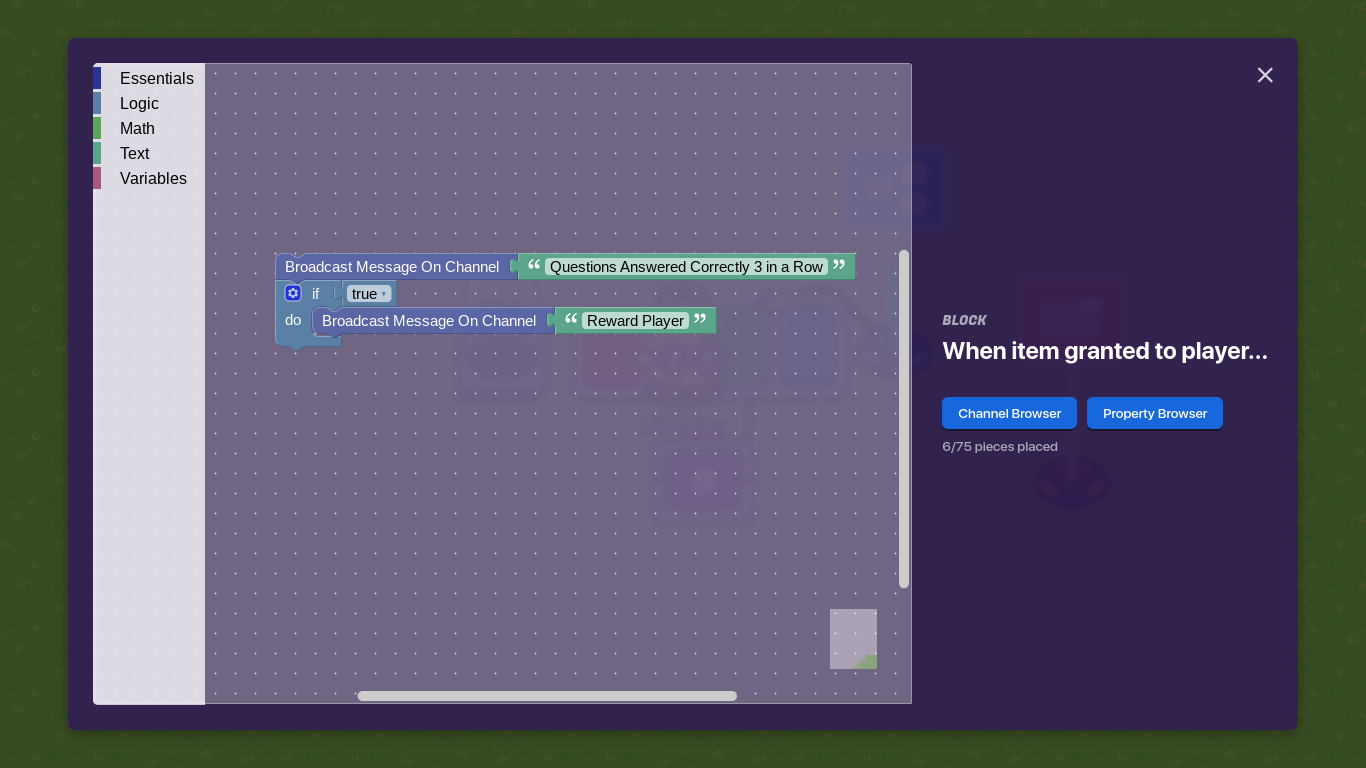
For example, I’ll use an Item Granter and a Questioner along with the Counter, Team Switcher set as Spectator, and Game Overlay set as Tracked Item (Cash) to involve a player to get rewarded if answered a certain number a questions correctly in a row:
Example 1 of 2 - Item Granter:
- You would click on the Item Granter (Left), click on Blocks, I will choose When item granted to player…, and it will open the Blocks interface. It is empty for now, so I’ll start dragging some Blocks and set it like this:
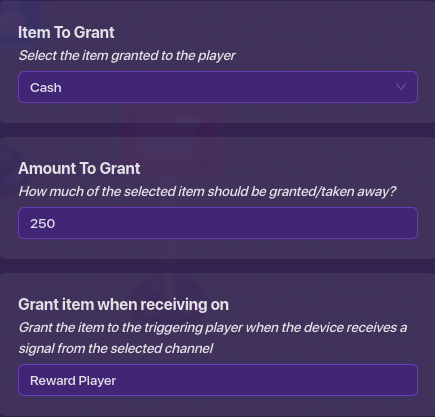
I will also set the Item Granter Settings like this:
Example 2 of 2 - Questioner:
You would click on the Questioner (Right) and click on Blocks:
When Question Answered Correctly…
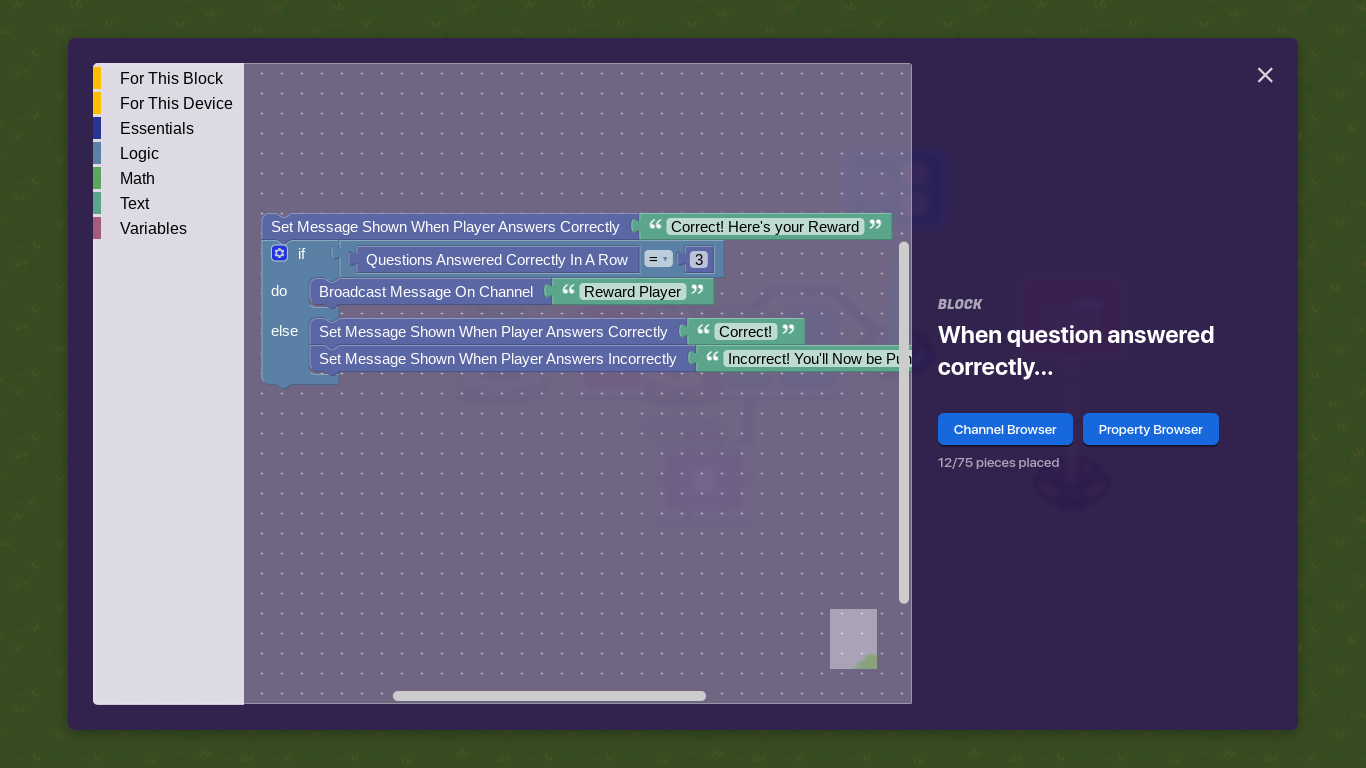
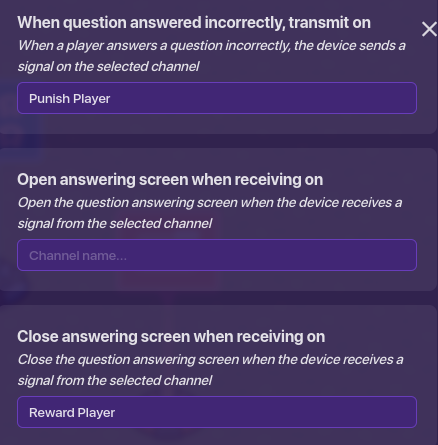
When Question Answered Incorrectly…
I would adjust these settings:
When a player answers 3 questions in a row correctly, they would be rewarded with cash. When a player answers a question incorrectly, they would be downgraded to a Spectator.
This is just a Sample Way to Use Blocks.
Section 4 of 4 - Channels
The last thing I want to show you before I wrap up this handbook is to show you about Channels. These allow devices to communicate with each other and are also a wireless version of wires.
Channels are basically one giant group chat with all the devices on your map. They can all send messages in the chat and & run actions when others send messages in the chat.
Devices that use Events/Actions that you might use wires for, you can also use channels. You can create as many channels you want and the best part about it, they cost No Memory. Unlike channels, Wires cost 10 Memory. When you create a channel, you can name it anything you want. I would recommend naming it by a specific event or action.
Pro(s) and Cons when using Channels:
PRO(S):
- Channels cost 0 Memory.
- You can create as many channels you want.
- You can duplicate mechanics without having to rewire them later.
- Long Distance without Wires running through your map.
CONS:
- Harder to know which devices connect to the channel which wastes time. You’ll have to go back and forth to know.
For more information about channels, click here for info.
Conclusion
That’s it. That’s all the end of the Advanced Handbook. if you want me to improve and revised this handbook, please let me know in the poll and the replies below.
- Yes, This Handbook needs improvement and revision.
- No, This Handbook is fine. It doesn’t need improvement and revision.
- Not sure
Thanks for reading and have a nice day/night and remember, Let’s Get Creative,
@AlvinFun.
Acknowledgements
Thank you…
- @AlvinFun for the Advanced Handbook.
- Gimkit Staff for some information from the Documentation.
- @Argo77 for the Beginner Handbook.
- @Cellofive and @ABCDalt23 for the Platformer Guide.
- @recalledMemories for adding this handbook in his version of the Beginner Guide.
- Everyone for reading this handbook.
Rate this Handbook
- 1
- 2
- 3
- 4
- 5