2.0 link:
This guide aims to show small yet cool art ideas that are worth sharing but don’t have a dedicated guide.
- Yes (once your done remove your vote.)
- no

Campfire
Just place two logs and a text box with a fire emoji to create a campfire.

Design by The_7th_Dragon
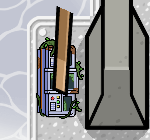
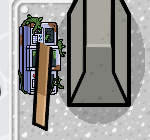
Security Camera
The Keycard terminal can be used for more than just a terminal. For instance, if you rotate and shrink it, you can create a security camera.
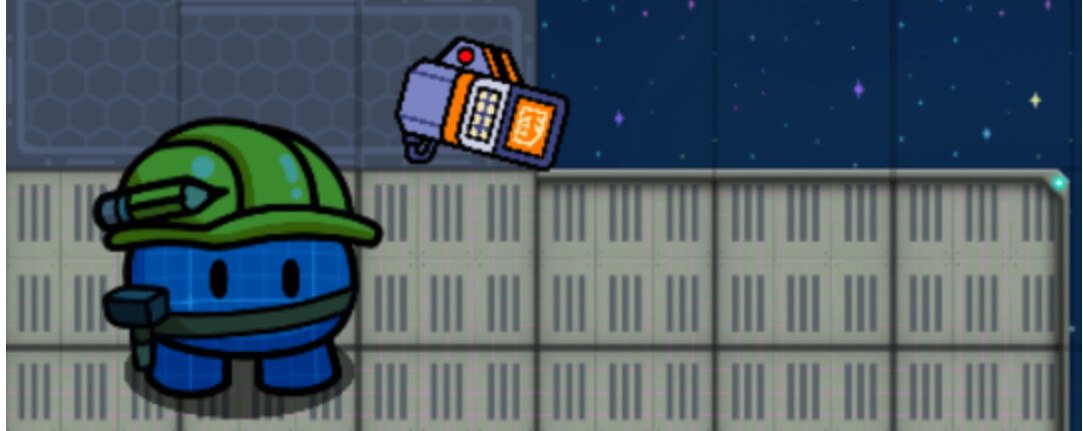
Design by WhereIsMyHat.
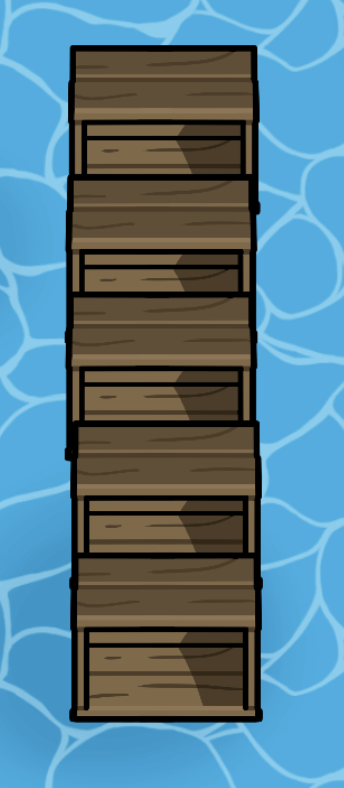
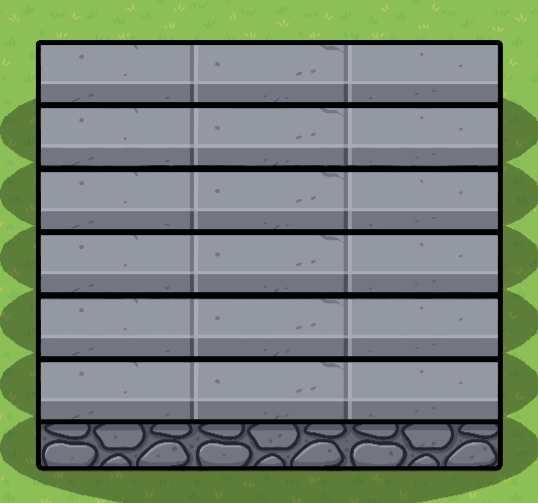
Stairs
If you are to rotate a bookshelf onto its side, you will find that you can create stairs.
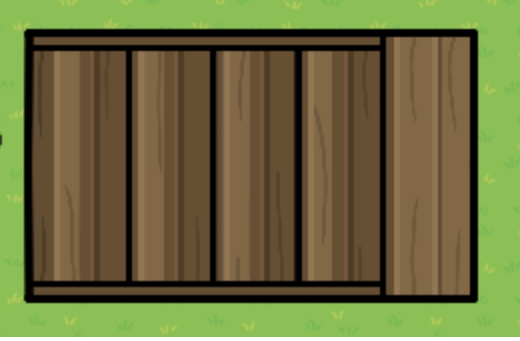
Design by M1dnight
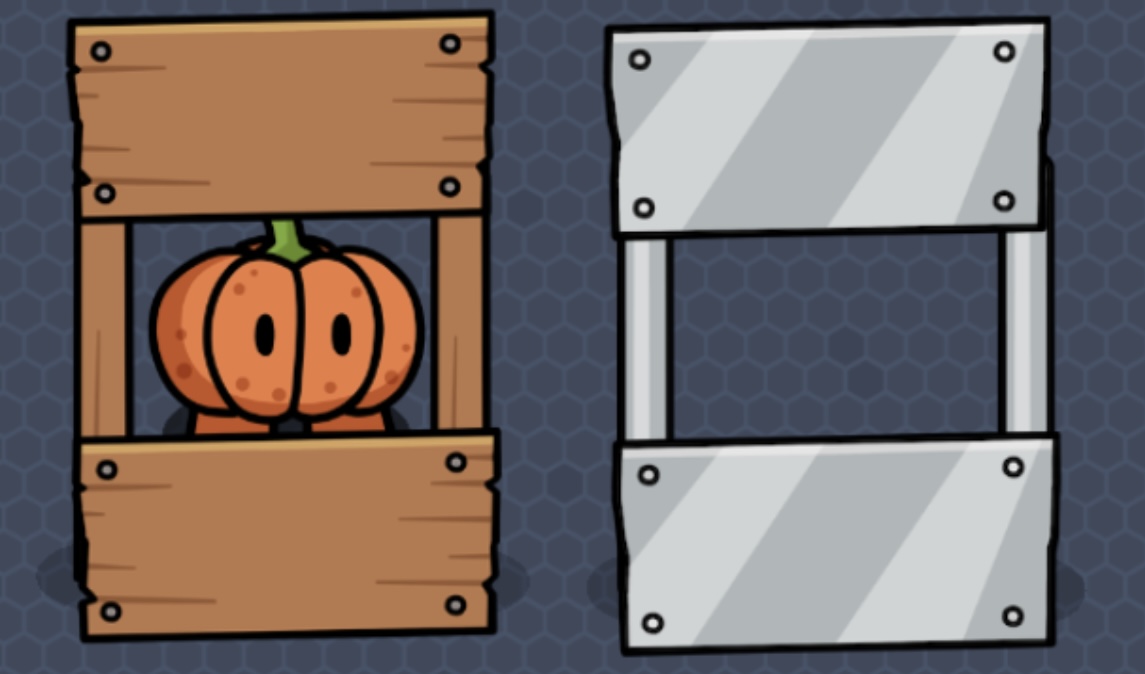
You can also use upside down fruit boxes.
Design by shdwy
You may use stone barriers that were added in the 100+ props update like this:
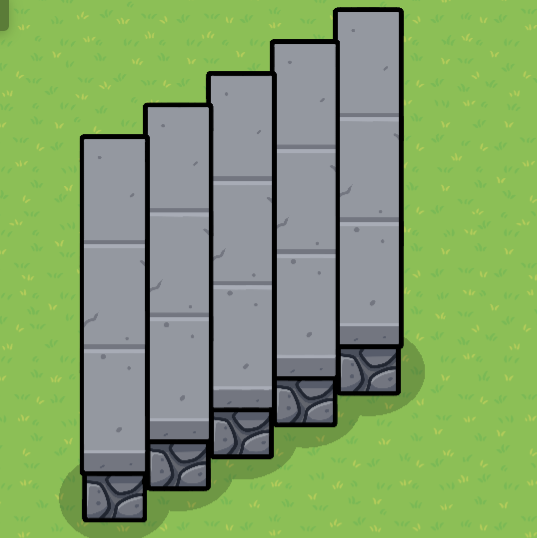
Just remove the shadows and it look perfect.
Design by Ele_Ral
Tent
Using sign and pole props, you can make a tent for Gims to hide in. Make sure to include barriers to make sure that Gims can’t go outside the tent!
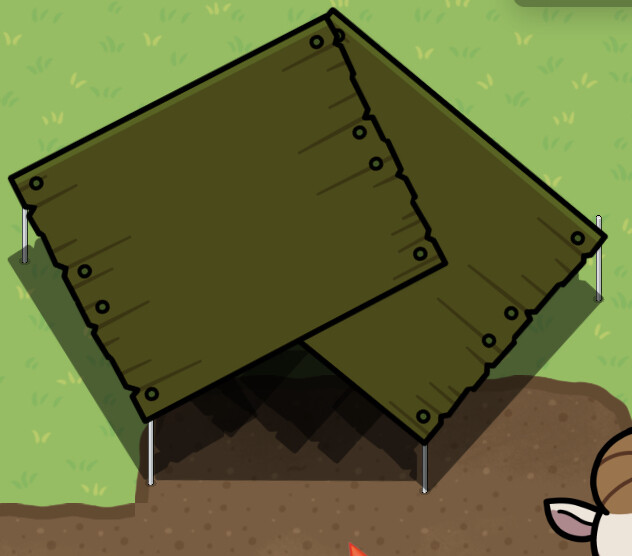
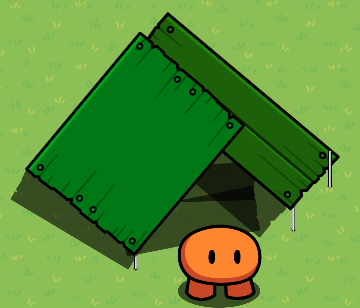
Design by @raeB
A Stove
Using a pot, a pile of fish, and a space container, you can create a stove.

Design by I_Like_Props
Among Us characters
Using barriers of different shades and shapes you can create an among us character.
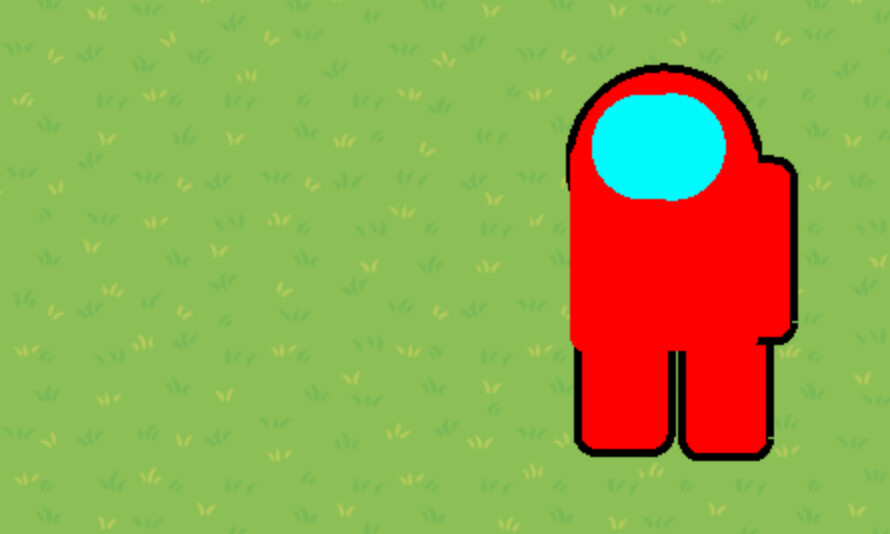
Design by WhereIsMyHat
Lever
By shrinking a command table and putting a blackboard leg on top of it you can create a lever. You can even add an animation.
Design by Telephone_Man
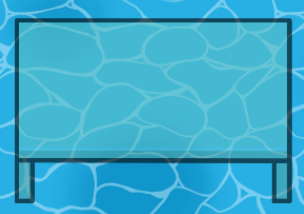
Bed
Using a table and a barrier, you can create a bed. (This was made before the update)

Design by WhereIsMyHat
Food On A Plate
Place text down and type a food emoji. Then, place down a plate and put the food on top of it.
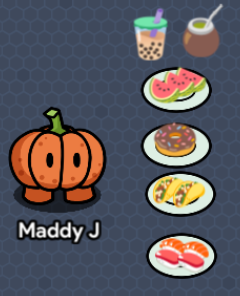
Design by I_Like_Props
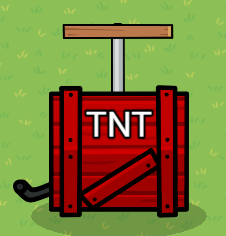
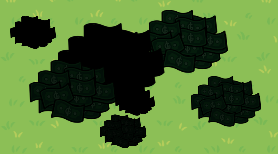
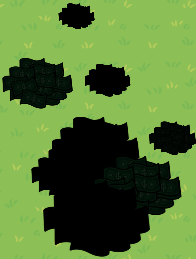
A Mushroom Cloud
Want to make your very own Nuclear Bomb whoops, i mean Mushroom Cloud in Gimkit Creative?
Using Gumball Machines, Dirt, and some Bushes, you can make your very own Nuclear Bomb Mushroom Cloud in Gimkit Creative!
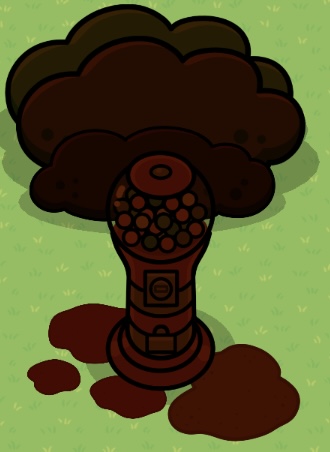
Design by Haiasi
Extra: You can use Wire Repeaters or Triggers to show and hide the props to make it look more uh, uh
Cute Farm/Garden
How to make a simple cute farm/garden:
Place down some dry grass terrain on level one then place down some dirt on level two in rows. Then add small plant props like small groundbreaking plants and flowers.
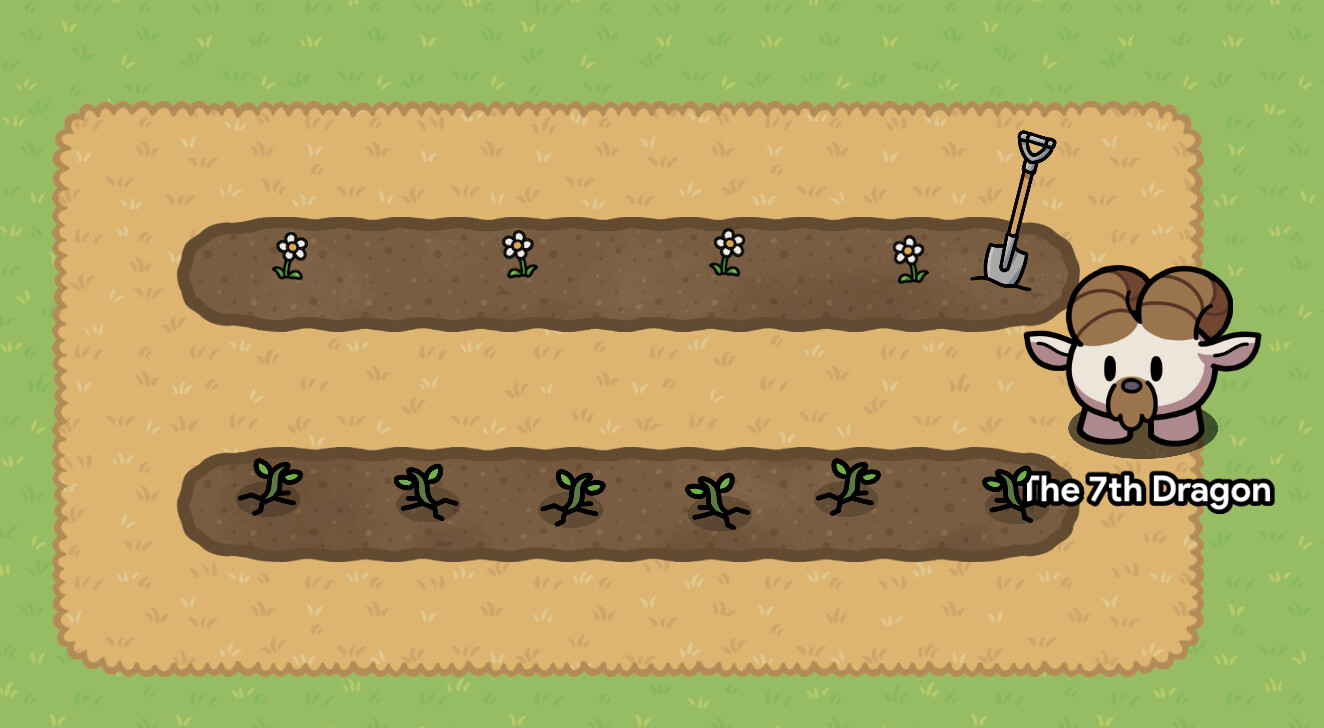
Design by the_7th_dragon
Pseudo-Pseudo-Zones! (art)
Pseudo-Pseudo-Zones
Did you run out of Lasers?
Do you want to make Pseudo-Pseudo-Zones?
Do you want to use less memory?
Don’t worry!
I got you!
Presenting:
Drumroll ![]() !
!
The Pseudo-Pseudo-Zone! (Actually Lasers)
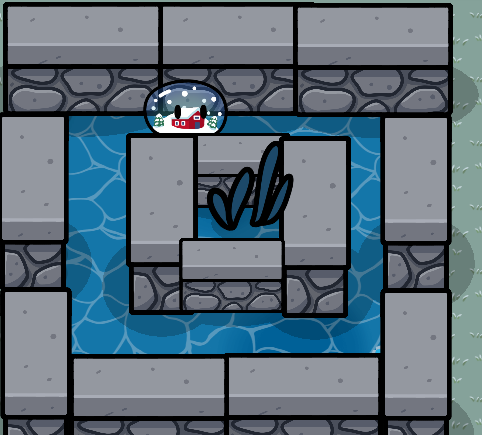
First, place two candles on opposite sides of each other.
Next, place a Metal Pole in between them.
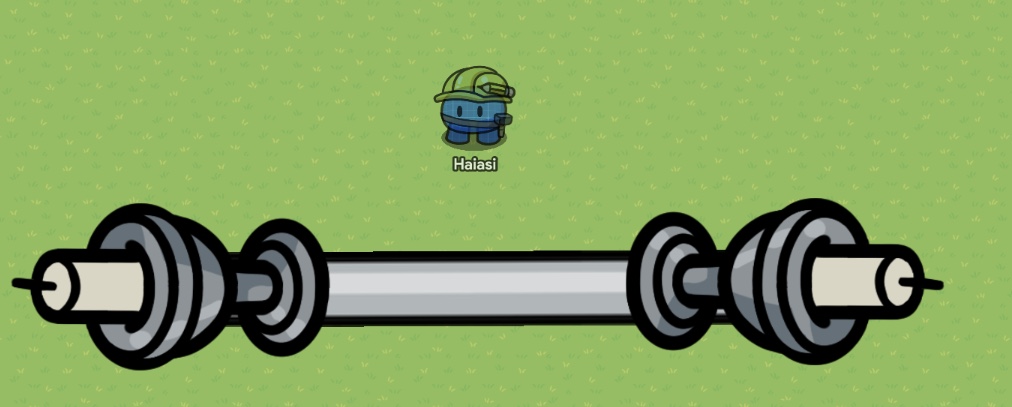
Lastly, place Alien Plants on the Candles.
Final Product:
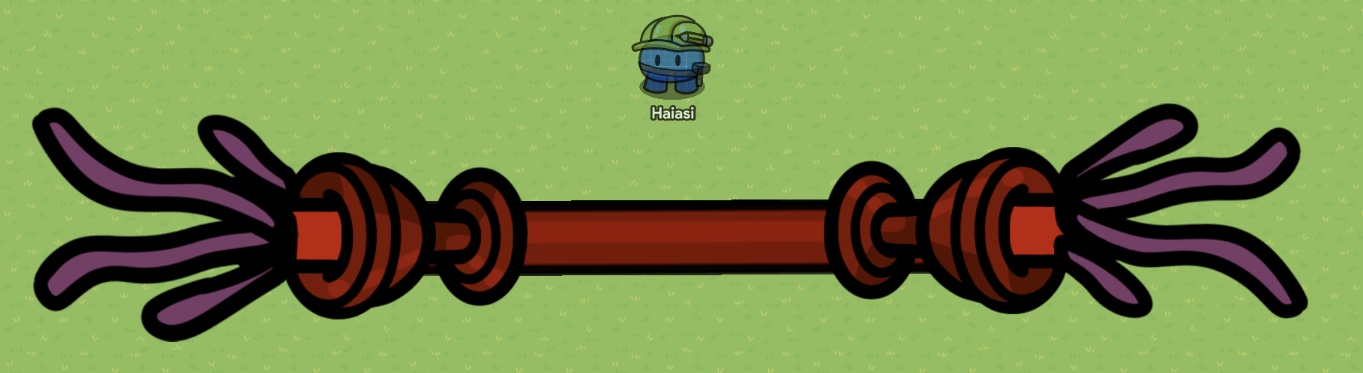
Design by haiasi
Extra: You can add triggers on the Laser Beam to make it kinda like getrithekd’s Pseudo-Zones Guide.
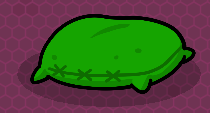
Frog
Dye a sand pile (in the menu it is a sand pile, but it really is a sandbag) green
Design by coffee
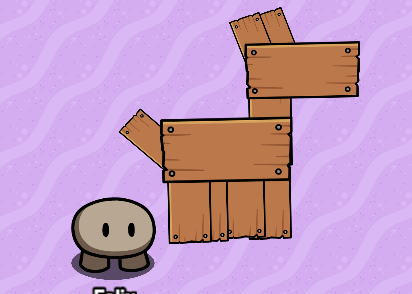
Stick Man
This is how to make a fun little stick man!
Materials needed:
Wooden shield
Text
5 metal poles
First get a wooden shield and a text, make the text look like a smiley face and then get the 5 metal poles and then make it into a body, ex. pic below:
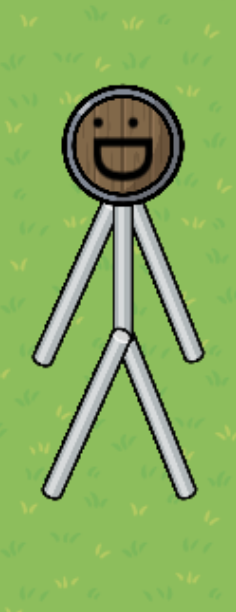
Design by Aubec7
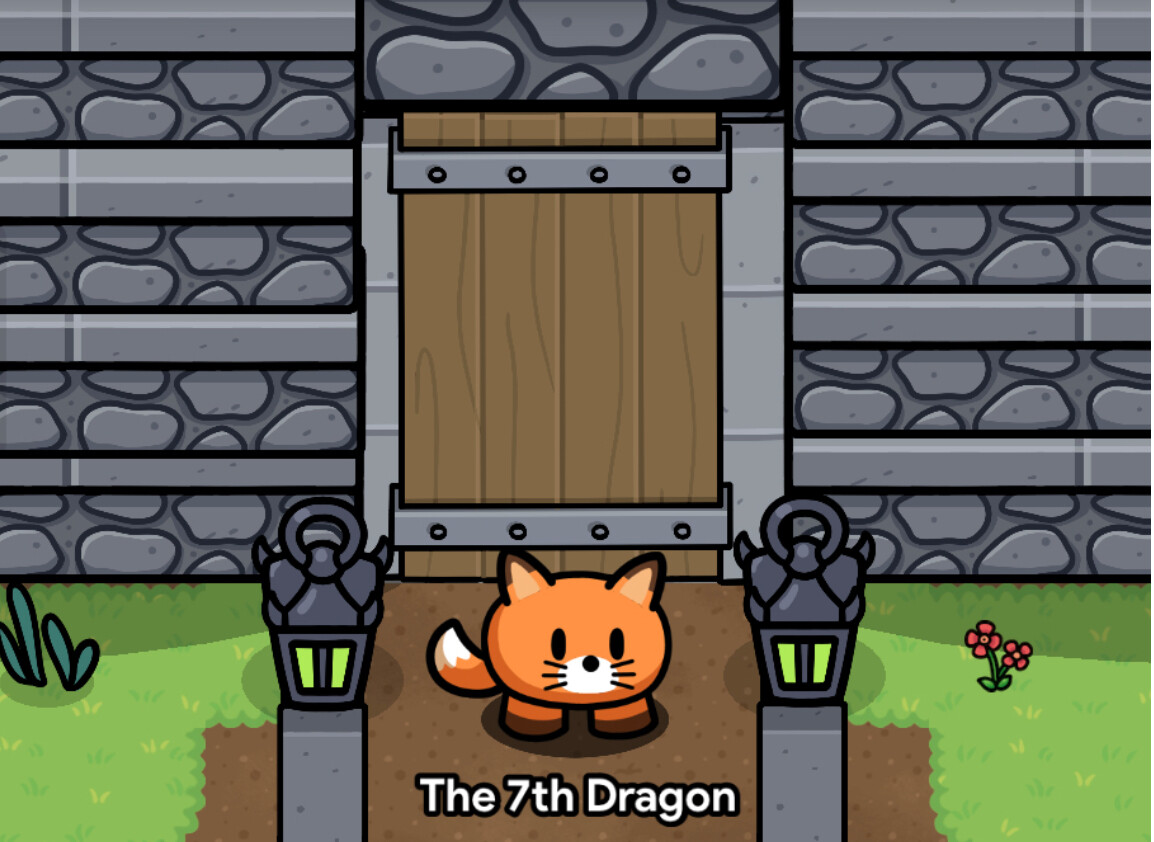
Door
First, rotate a blackboard (wide) so that it stands tall. Then add a rotated blackboard leg like this.
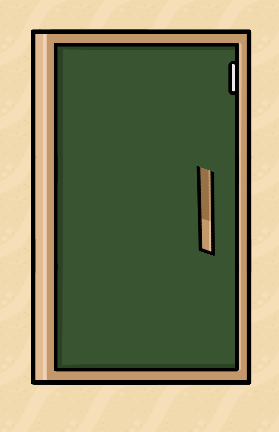
You can shrink it if you want
Design by BCannops
Truck
Add two mashers (enlarged) and 4 tinted barriers like so. You might have to change the layering
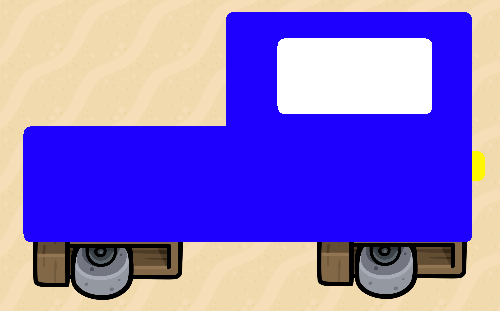
Design by BCannops
Stone gate / portal gate
step1: place two columns like this (any color works)
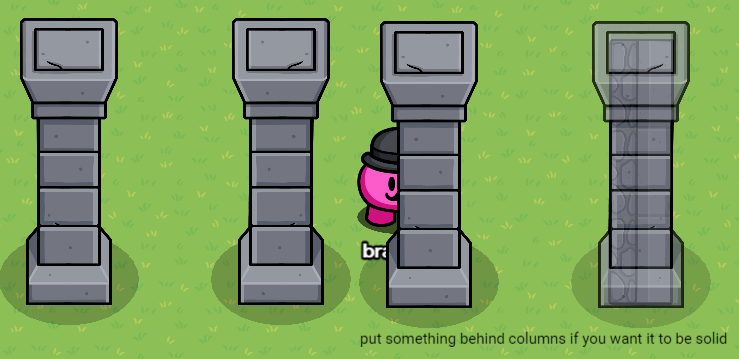
step2: get two stone barriers make them smaller and flip one
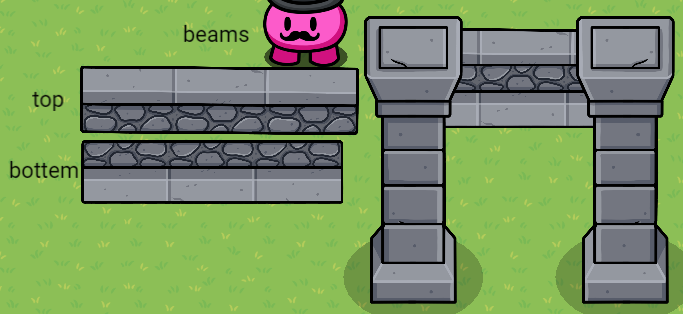
step3: use terrain of choice
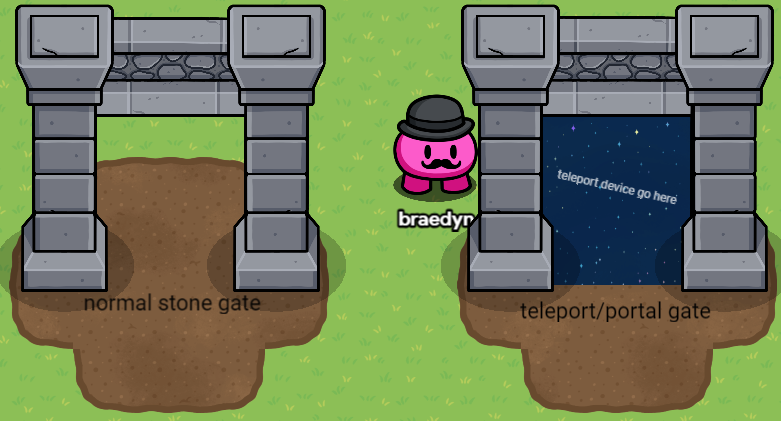
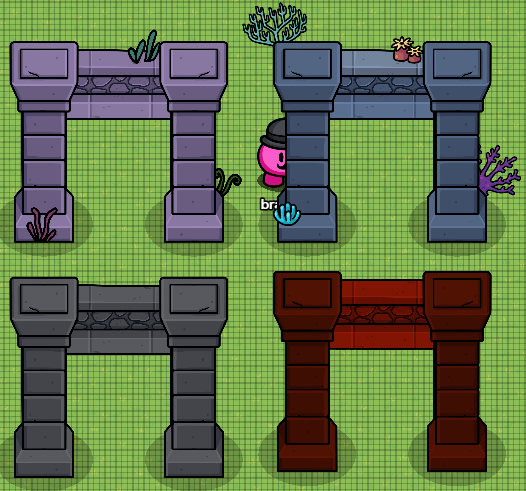
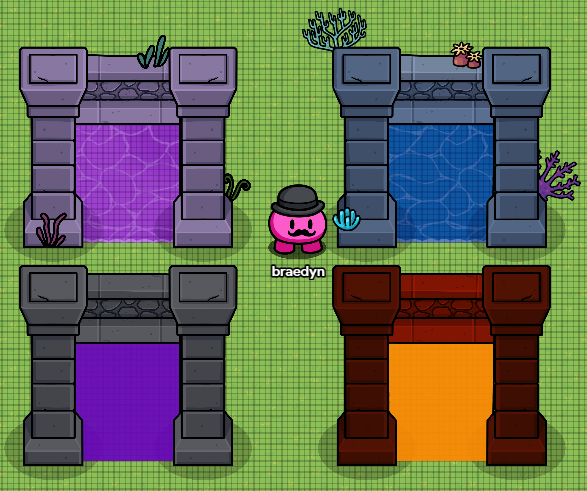
step4(optional):customize to your liking
design by Crazy_Rae
Carpet/Grass
I forgot where I saw this but it also makes good grass…
Place down a heck of a lot of alien plants or grass or yada yada yada whatever you want
Design by I_Like_Props
Bunk Bed
Put two beds on top of each other and then connect them with wooden poles.
Make a ladder using wooden poles, too.
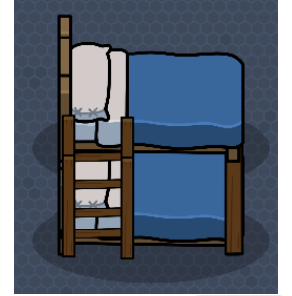
Design by I_Like_Props (With credit to _i_looked_down for the inspiration)
Spaghetti Ritual
Using some text, you can create a spaghetti ritual.
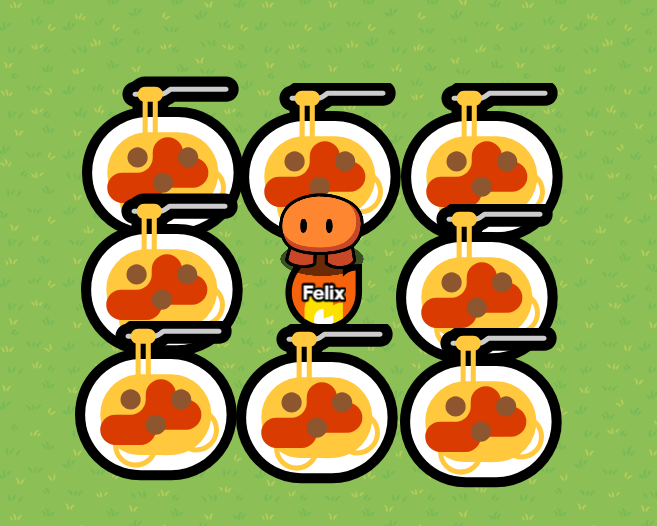
Design by vqnillaxx
(i shouldn’t have done this i’m sorry)
Cartography room!
so here is how to create a cartography room! (note some signs are gonna be tinted with 150:75:0 and we are gonna use a barrier with 0.4 transparency to tint this and so on and so forth here is the screen shot! also use an emoji to do the compass
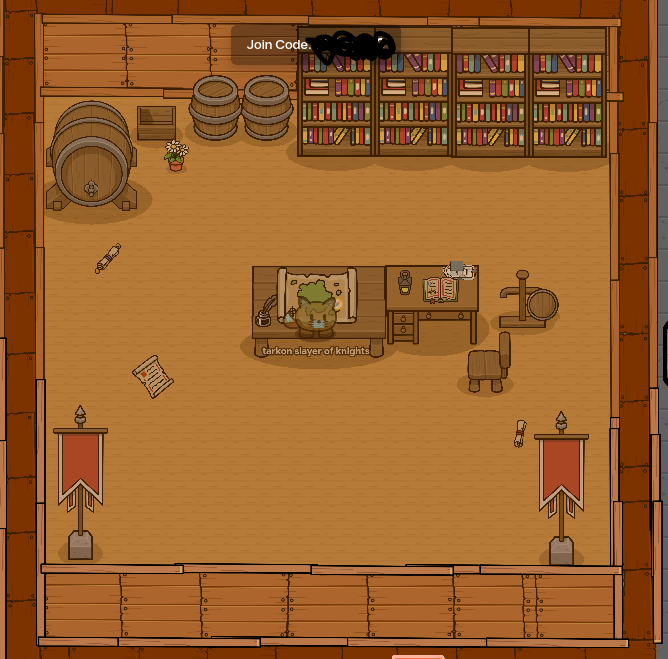
Design by blackfox45666
puddle(s) of "ketchup" / "Kool-ail"
all you need is some of the dirt props and tint the red… ![]()
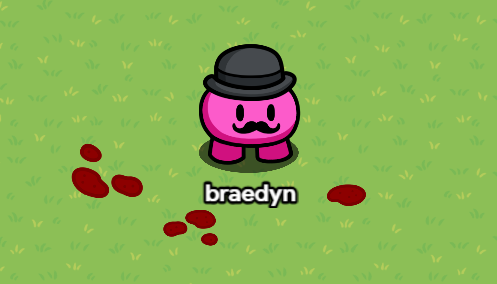
its definitely NOT blood… ok…![]()
![]() its not mine ethier…
its not mine ethier…
design by Crazy_Rae
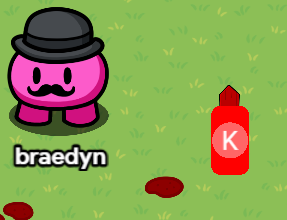
the ketchup ritual
you will need text, lasers, barriers, and the ketchup bottle
I think I may of been influenced to make some type of ritual from another persons ritual cough Spaghetti Ritual cough
design by Crazy_Rae
Rick Astley
Using dark marble, dark and light scraps, and barriers, you can create your very own Rick Astley!
Design by WhereIsMyHat
Draped Towels
Using some blackboard legs and some barriers, we can make some draped towels!
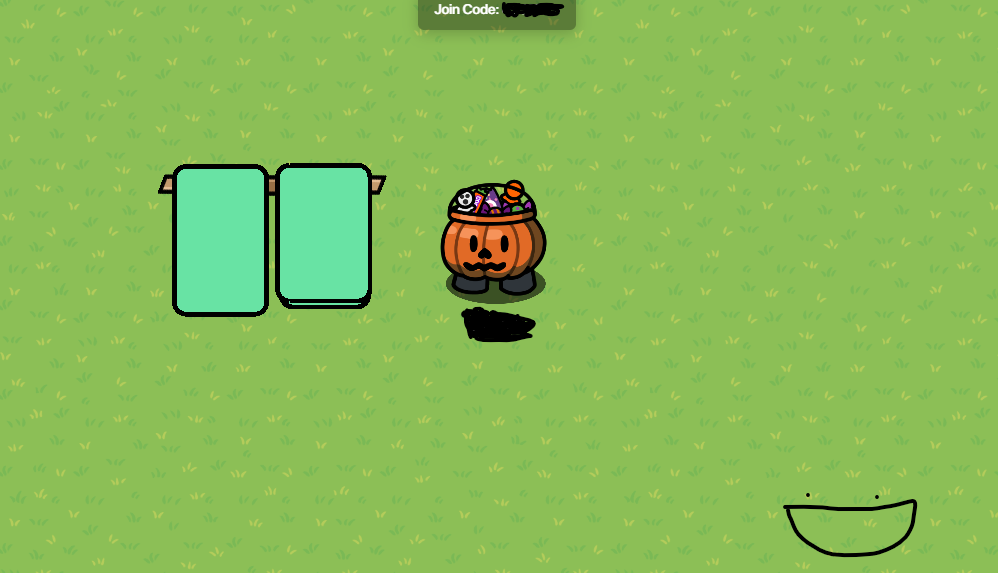
Design by vqnillaxx
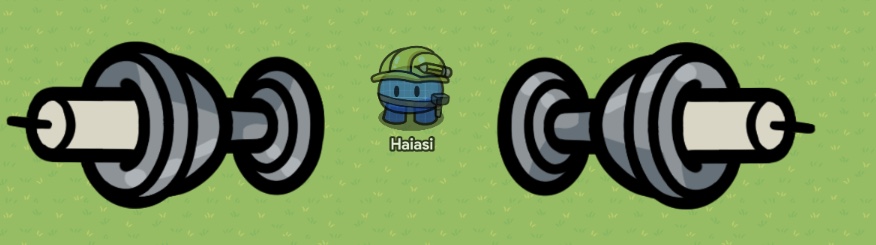
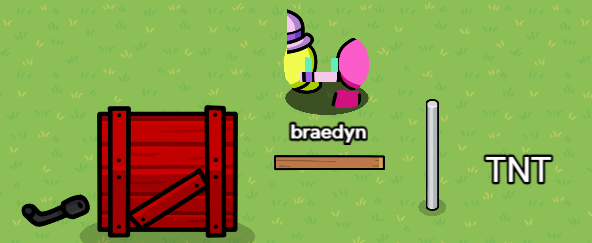
Jet Engine
You need a Large Barrel, big text with fire emoji🔥, and a 2x3 of terrain, it doesn’t have to be 2x3. Metal works the best.
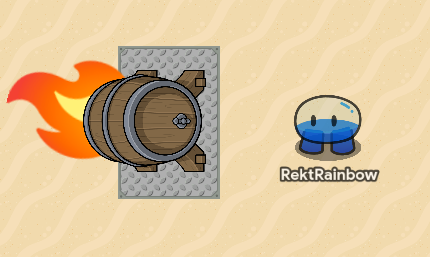
Design by RektRainbow
Laser Cannon
You need a Large Barrel, Laser, and 2x3 of any terrain, it doesn’t have to be 2x3. Metal works well best. After you’re finished. Go to the laser, click “All Options” and scroll to the very bottom.
For the “Show End Point” option. You want it to be “No”.
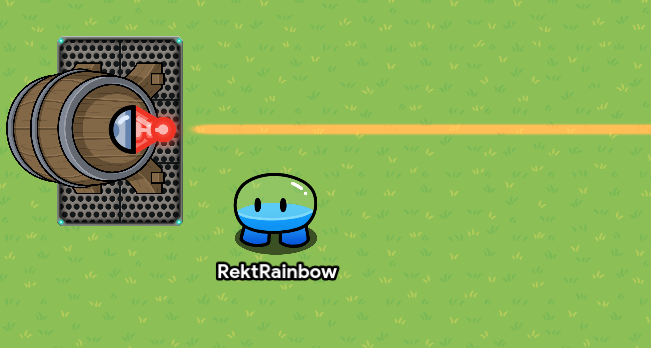
Design by RektRainbow
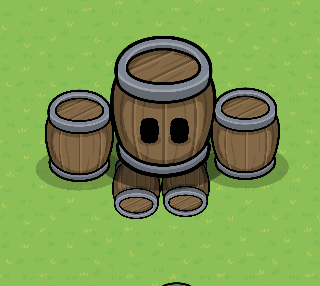
Robot boss
- put a barrel down
- flip two barrels upside down make them the bottom layer and put them under the first barrel
3.make 2 more smaller barrels as hands
4.make 2 small black barrels as eyes and your done!
Design by Edwards.
Samurais
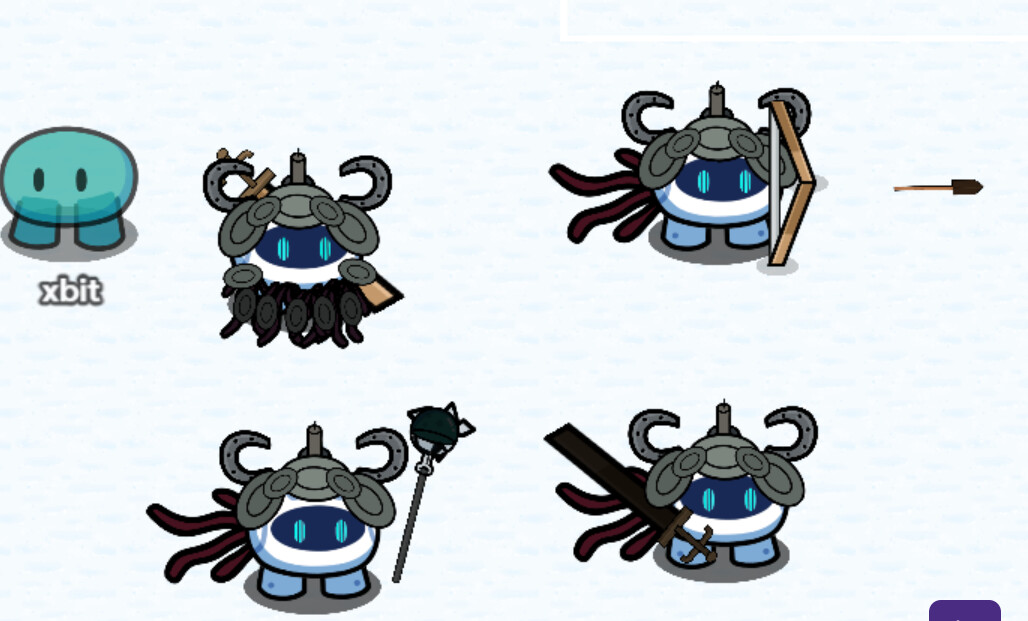
Designed by: xbit
- You can use the blackboard legs as good katana sheaths and a minimized empty armor rack for the handle. The candle on top for the helmet too.
- The cape is just made by a rotated and slightly tinted alient plant prop. The mace is actually a darkened blue chemical bottle on a small tinted metal pole. And for the spikes, it is the broken glass with max dark tint. It is two of them but one is rotated so they don’t overlap.
Kurzgesagt Birds/Ducks
Design By Haiasi
Using Plant Canisters, Barriers, Loaves of Bread, you can create a Kurzgesagt Duck!
(WIP, will add more)
The Knight
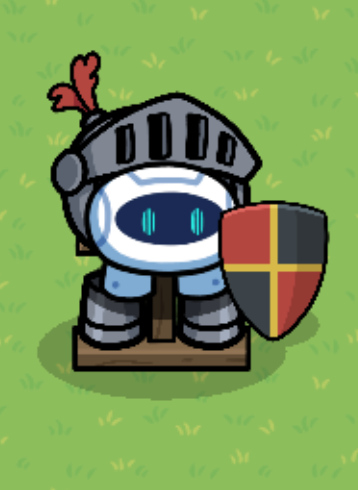
for this, you need to place a sentry and then place an armor stand below the sentry, OPTIONAL: you can give the sentry a shield if you want!
Designed by Aubec7
Leaking Barrel
Using a tinted moss and space trash you can make a leaking barrel

Design by the_7th_dragon
Vines
With a few groundbreaking plants and other space related props, we got vines!
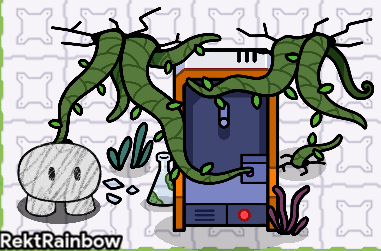
Design by RektRainbow
Vault Door
Okay, You will need Barriers(Device) And Metal Poles for this. Use a Dark Gray Barrier(Square) on the back, circle barriers for the front, and metal poles for a wheel.
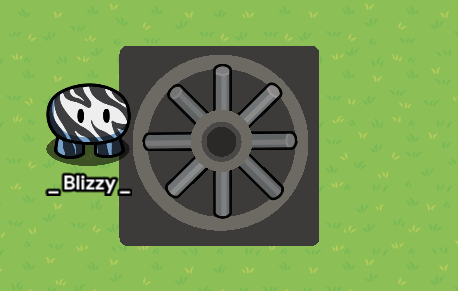
Designed by Blizzy
explosive barrel/toxic barrel
- gat a barrel and tint it red (greenish-yellow for toxic barrel)
- get some text and put an emoji (the emojis below work best)
I find the text size of 50 works well - put the text with emojis over the barrel
make sure you check the layering (make sure text is above barrel)
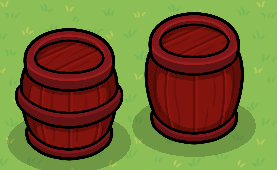
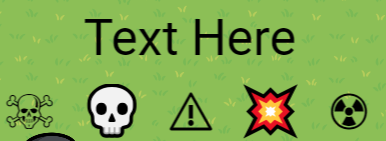
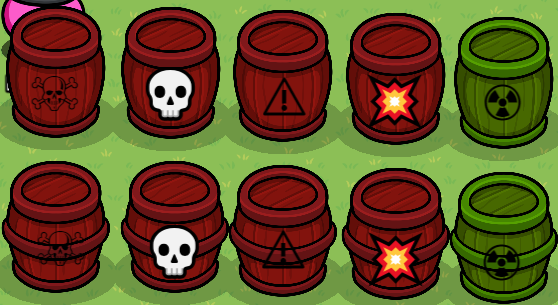
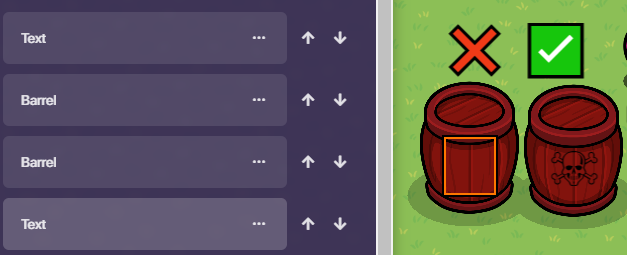
design by Crazy_Rae
Ash/Smoke
- Get a “Cash Stack” and tint it black or dark grey.
- Copy it multiple times, each cash stack being a different size and shade of grey tint.
The 2 Results:
3/Tip. Combine the first smoke/ash with a car to look like smoke! Combine the second one with the furnace prop to look like a chimney!

Design by clef
Fruit Stands
Use a market stand for selling! ![]() Once placed, put down a fruit box of whatever fruit you want (I used apples)
Once placed, put down a fruit box of whatever fruit you want (I used apples) ![]() right next to the fruit stand. Next, use a bowl or platter
right next to the fruit stand. Next, use a bowl or platter ![]() , and a spoon or fork if you want. Layer them on top of the market stand. Then, you can use a sentry or yourself to stand behind the market stand for sale! Add a sign and put it at the top of the stand, and put the name of your stand! Done! Here’s the finished project!
, and a spoon or fork if you want. Layer them on top of the market stand. Then, you can use a sentry or yourself to stand behind the market stand for sale! Add a sign and put it at the top of the stand, and put the name of your stand! Done! Here’s the finished project!

Thanks for reading!
Design by California love
Christmas tree
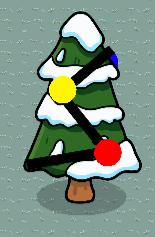
Make 3 small circular barriers. Change their colors and put it on a tree. Get some black poles and put them in between to make it look like it’s connected. Mess with the layers until it looks to your liking!
Created by EGGacha
Old Styled Canoe
With haystacks, firewood, a cutting board, and a wooden pole. We got the canoe of the 1500’s! (Close enough)
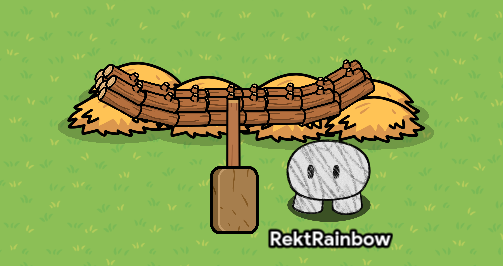
Design by RektRainbow
Mech Suit
Using A LOT of space beds and gate terminals, you can make a mech suit.
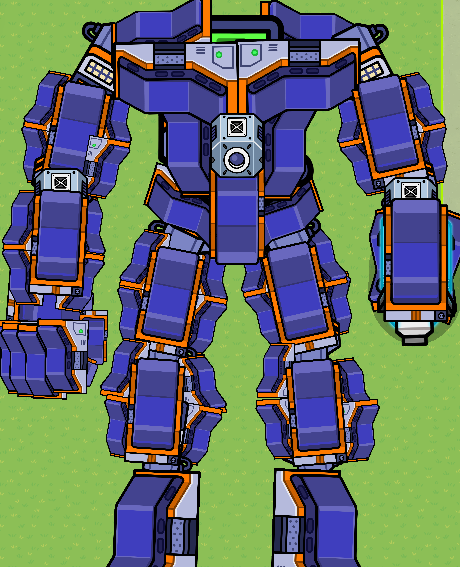
Design by cheesebox
Stick man & Flower
With a fork and circular shield you can make a flower! With poles rotated you can make a stick man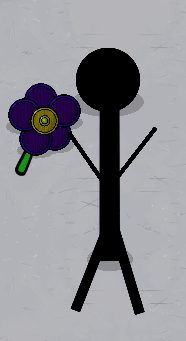
Design by tspentakota
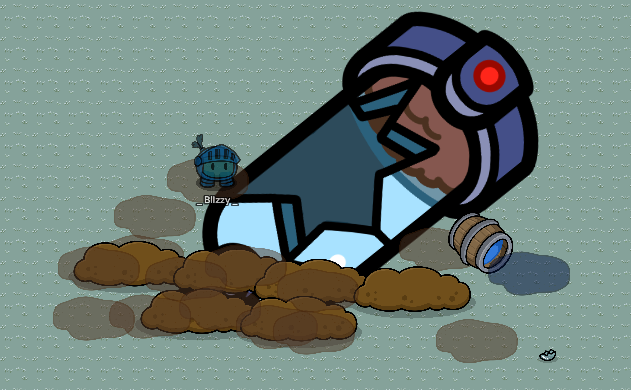
SUBMARINE
Get a bunch of random props and barriers, tint them blue or stuff and make:
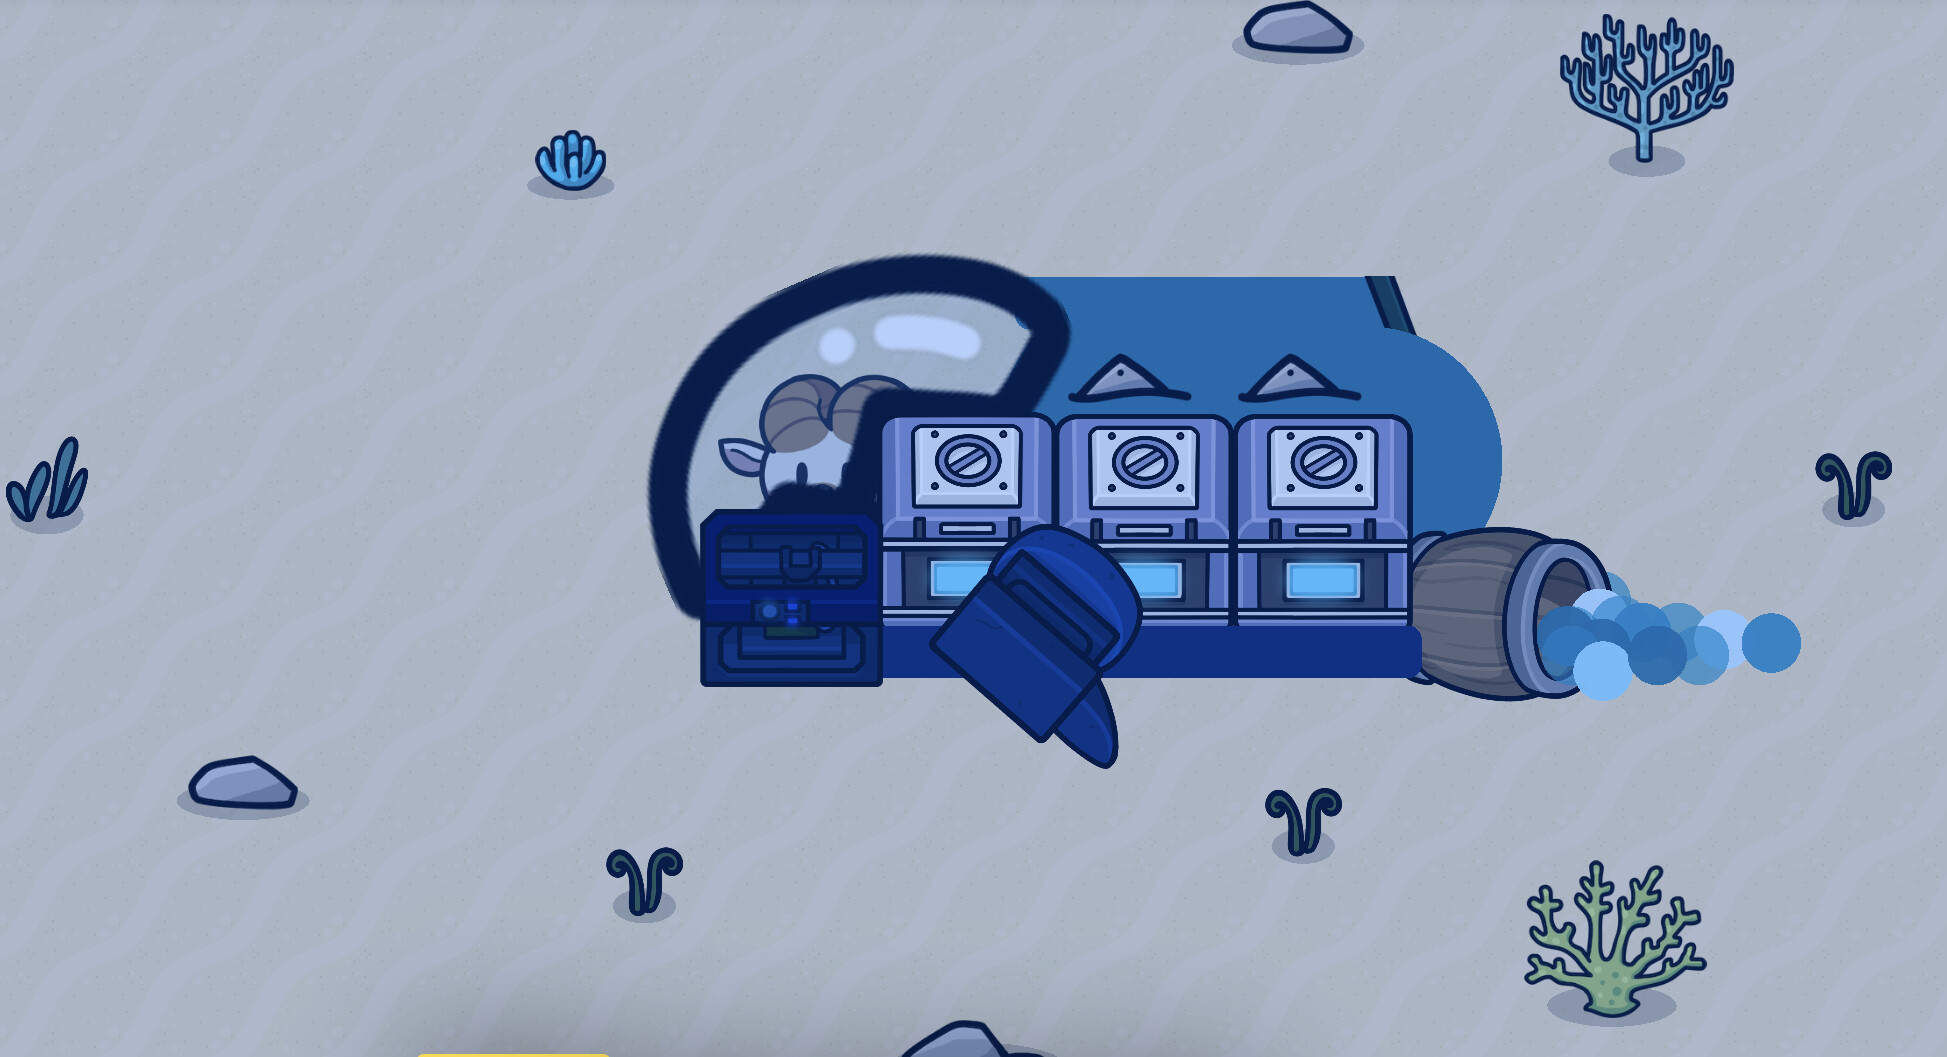
don’t forget to use broken glass for the windshield.
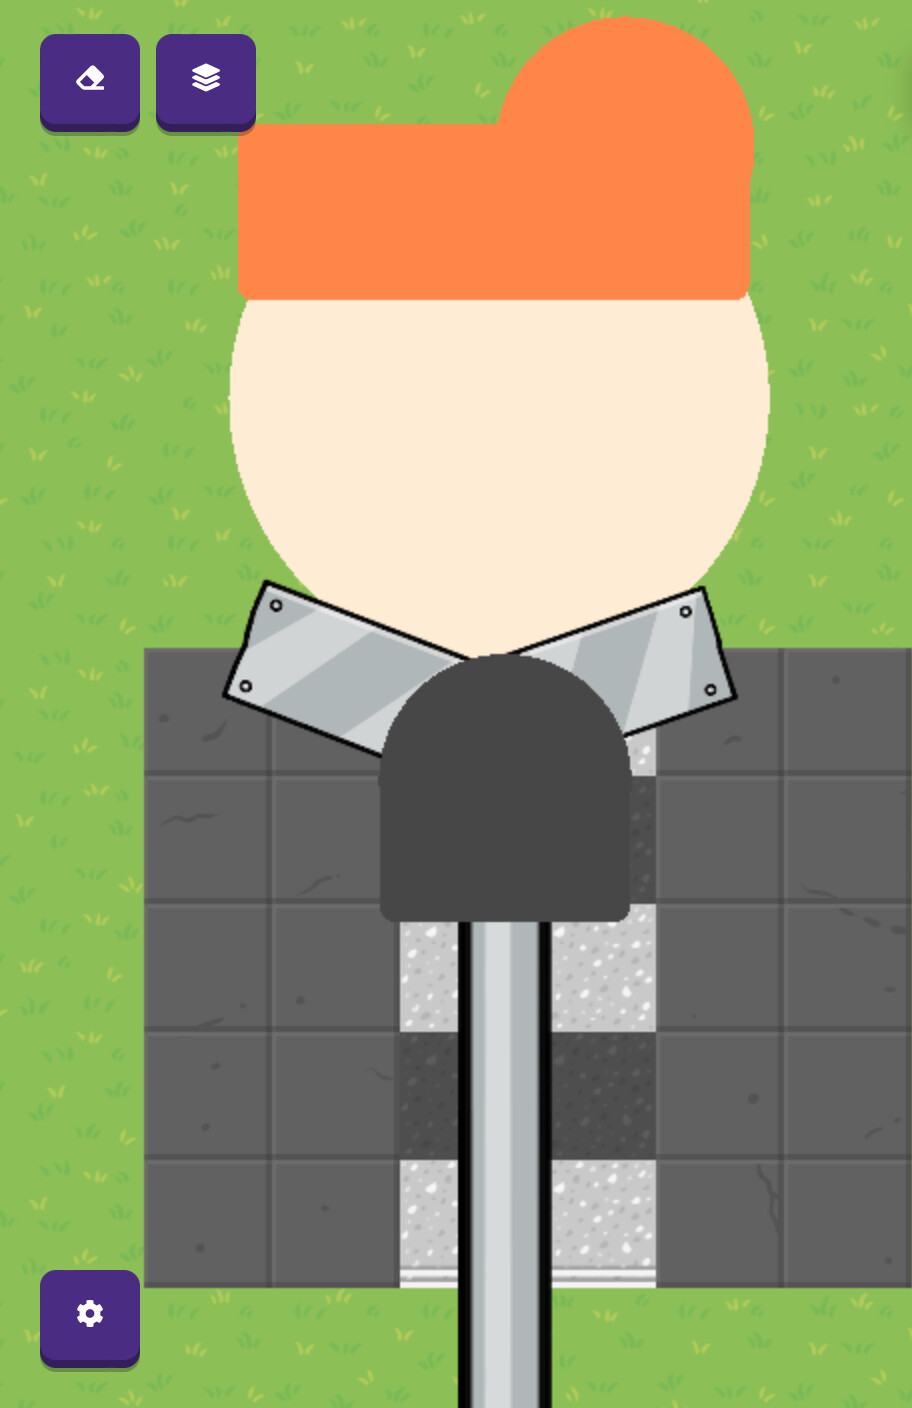
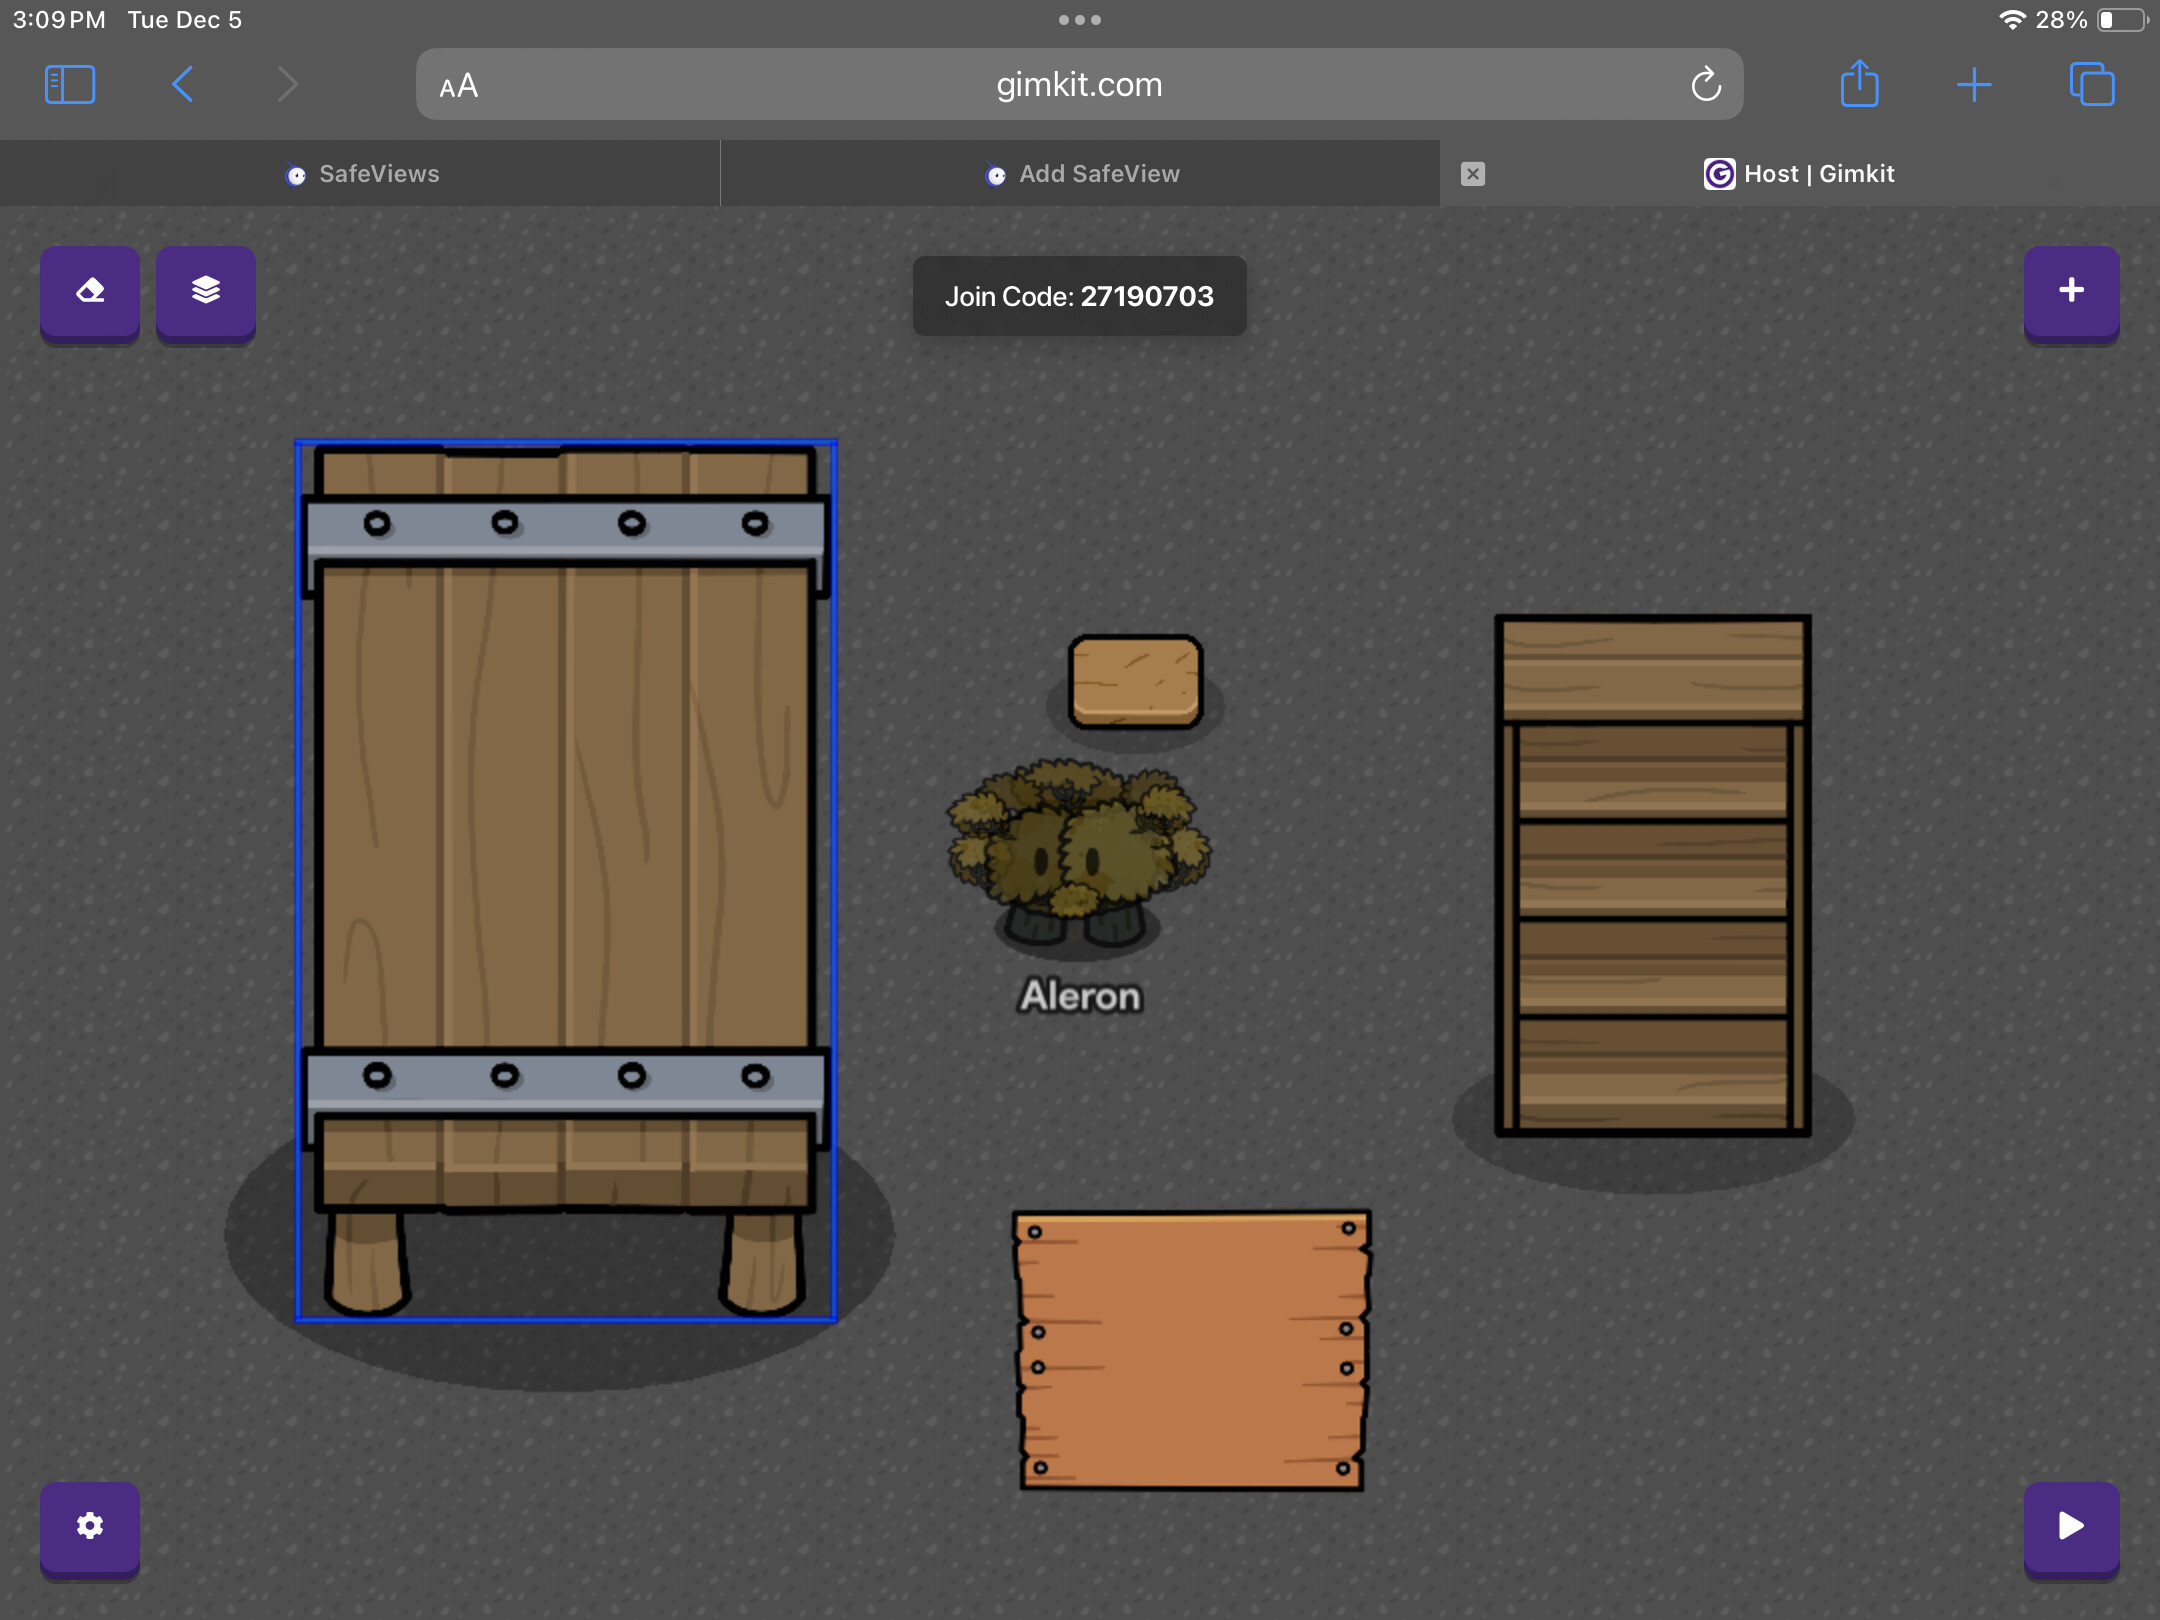
John
Heya! In this Guide I’ll show YOU, yes You! on how to make a John!
The First step to making a john is the materials, These will be put in the summary below!
Materials
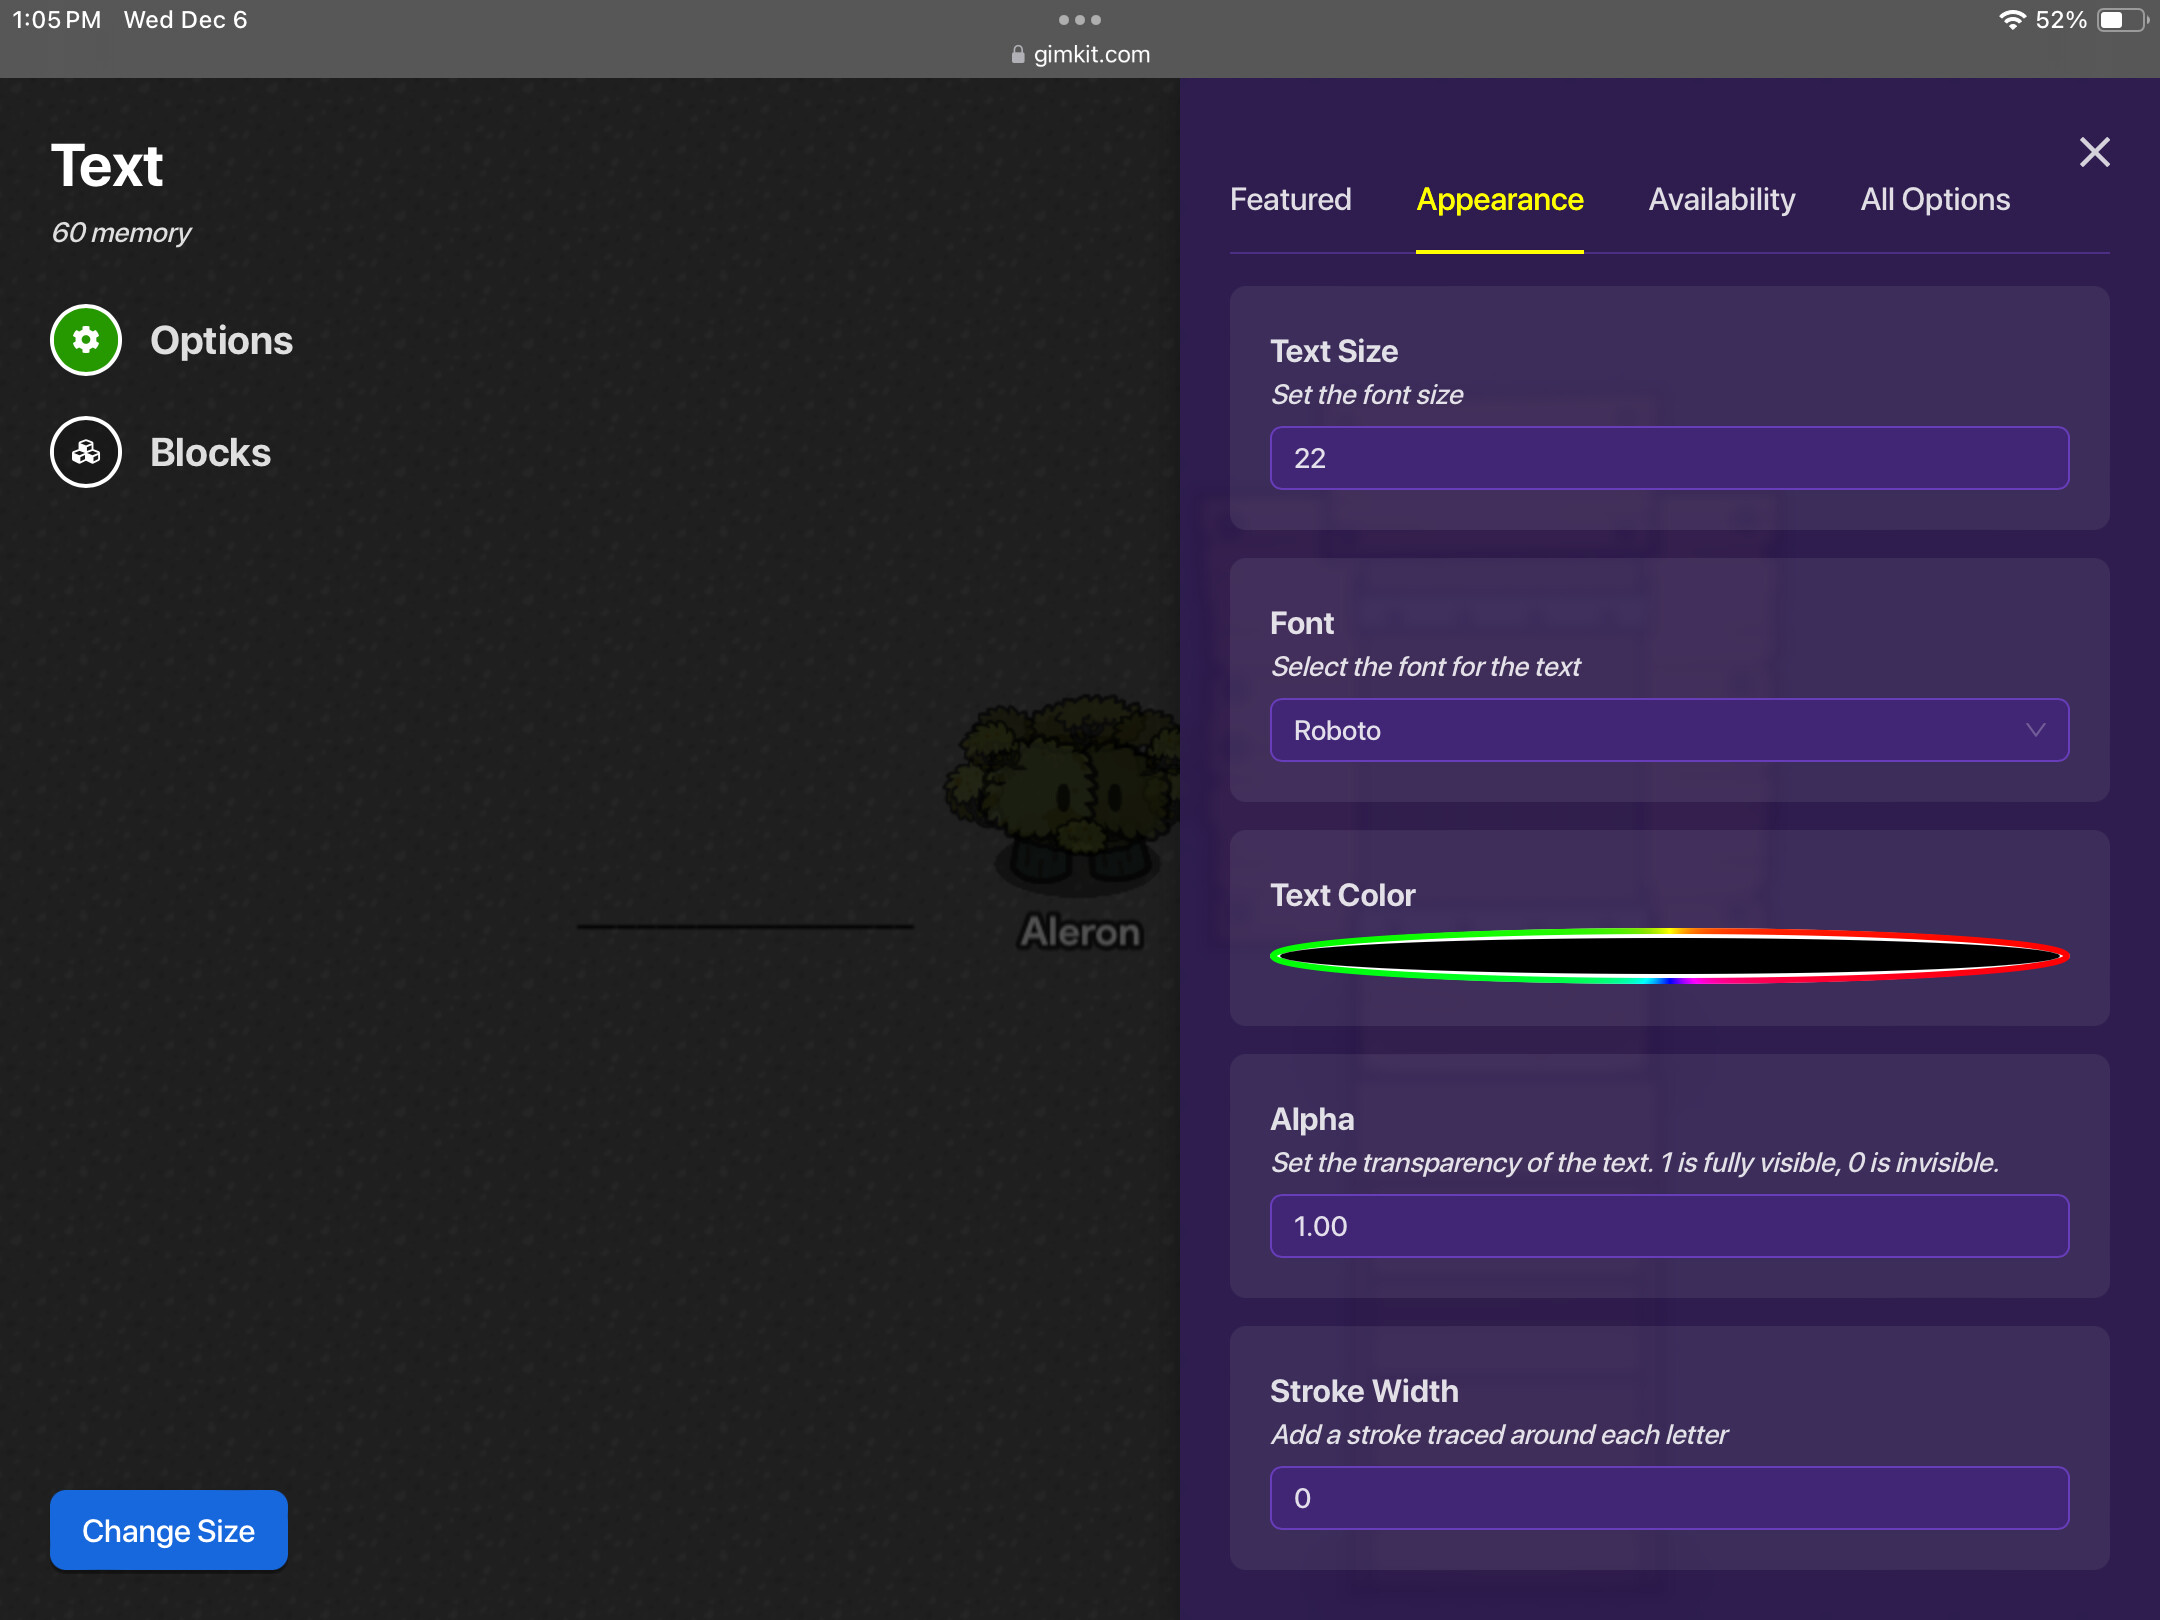
Once you have everything you’ll need to make John a face, Which is where the text comes in!
You’ll want to color the text to white, so that you can see his face!
Then, Position all the materials together; like so!
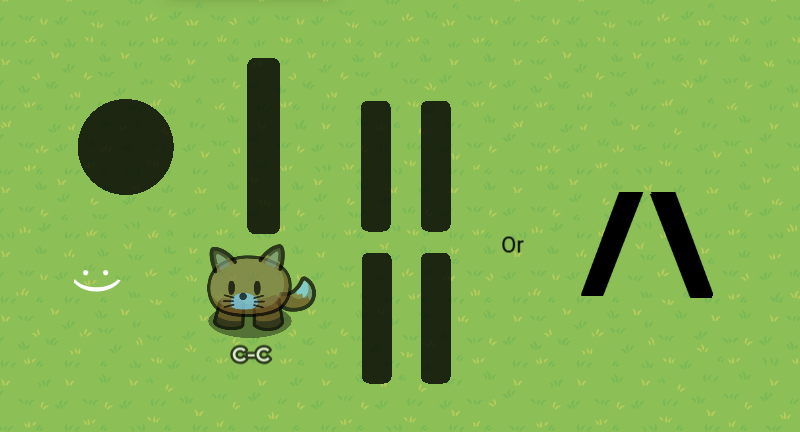
Once positioned in a way you feel comfortable, it’s now time to assemble a John!
Take the round barrier and take the longest rectangle barrier and put them together, that’ll form a
neck & Torso!

Then once you’ve assembled the torso, You’ll need to take the 4 smaller rectangles (Or blackboard legs colored pitch black-) to make the arms & legs!
You can position them in any position you want; but for this i’ll be putting it in a standard stick man position.
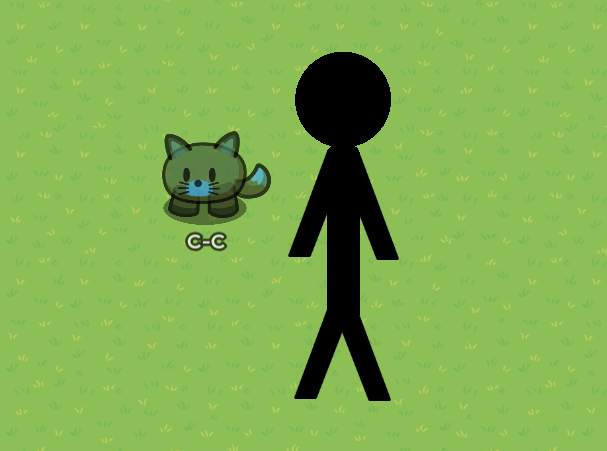
I used the 4 blackboard legs for his limbs. Now for the most important part of John, his face! You can make his face to whatever your desires are. (Nothing inappropriate you scandals!)
Side note: The Text needs to be one layer or higher above the head barrier.
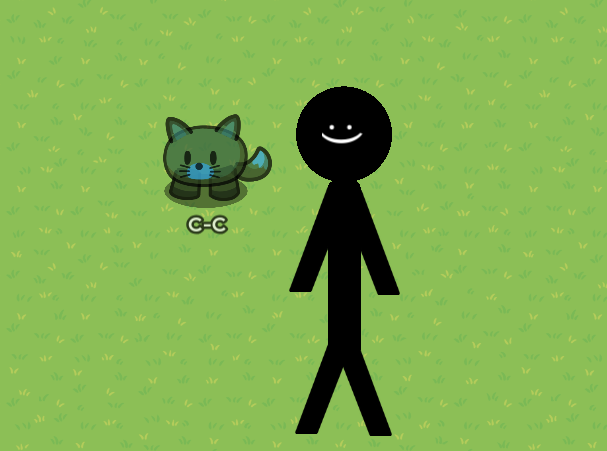
Look at his small little face! Now, you could stop at this part; but im going to go a bit farther and give John some clothes! John’s clothes can be made out of anything as long as it fits him!
For the clothes, I’ve given john some armor! Dont tell John but his armor is literally just stone walls- I’ve also given him some hair and a goatee, (all of which are made out of alien plants-)
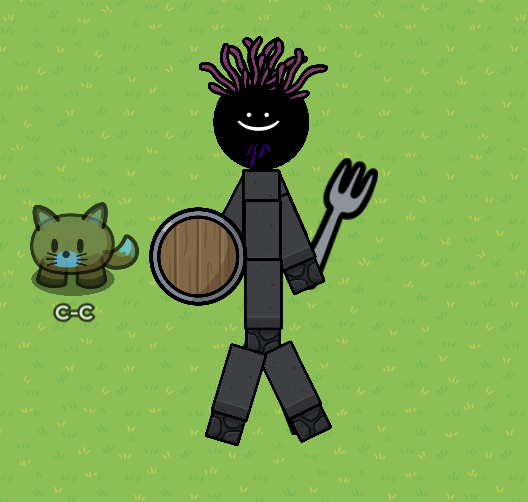
And that’s it! You’ve successfully created a John!
Designed by C-C
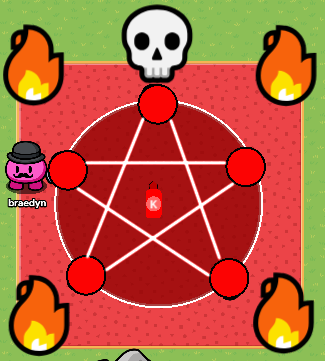
Summoning Circle
Reach into the dark depths of the underworld and discover an accursed creature said to be capable of destroying WORLDS.
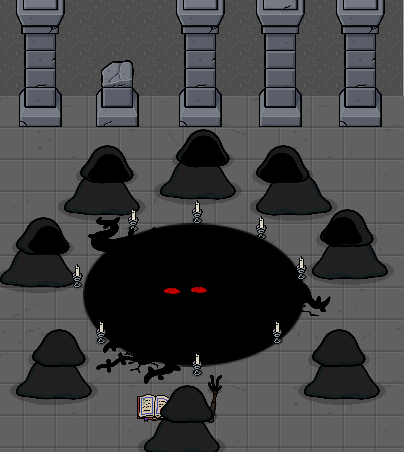
Uses snow piles, candles, ground breaking plants, a codex, a roller, an alien plant, a ceramic plate, bread, and some stone columns.
Designed by cheesebox
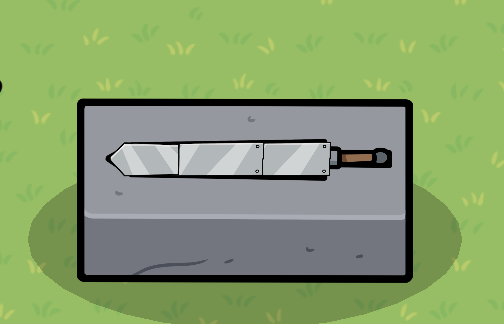
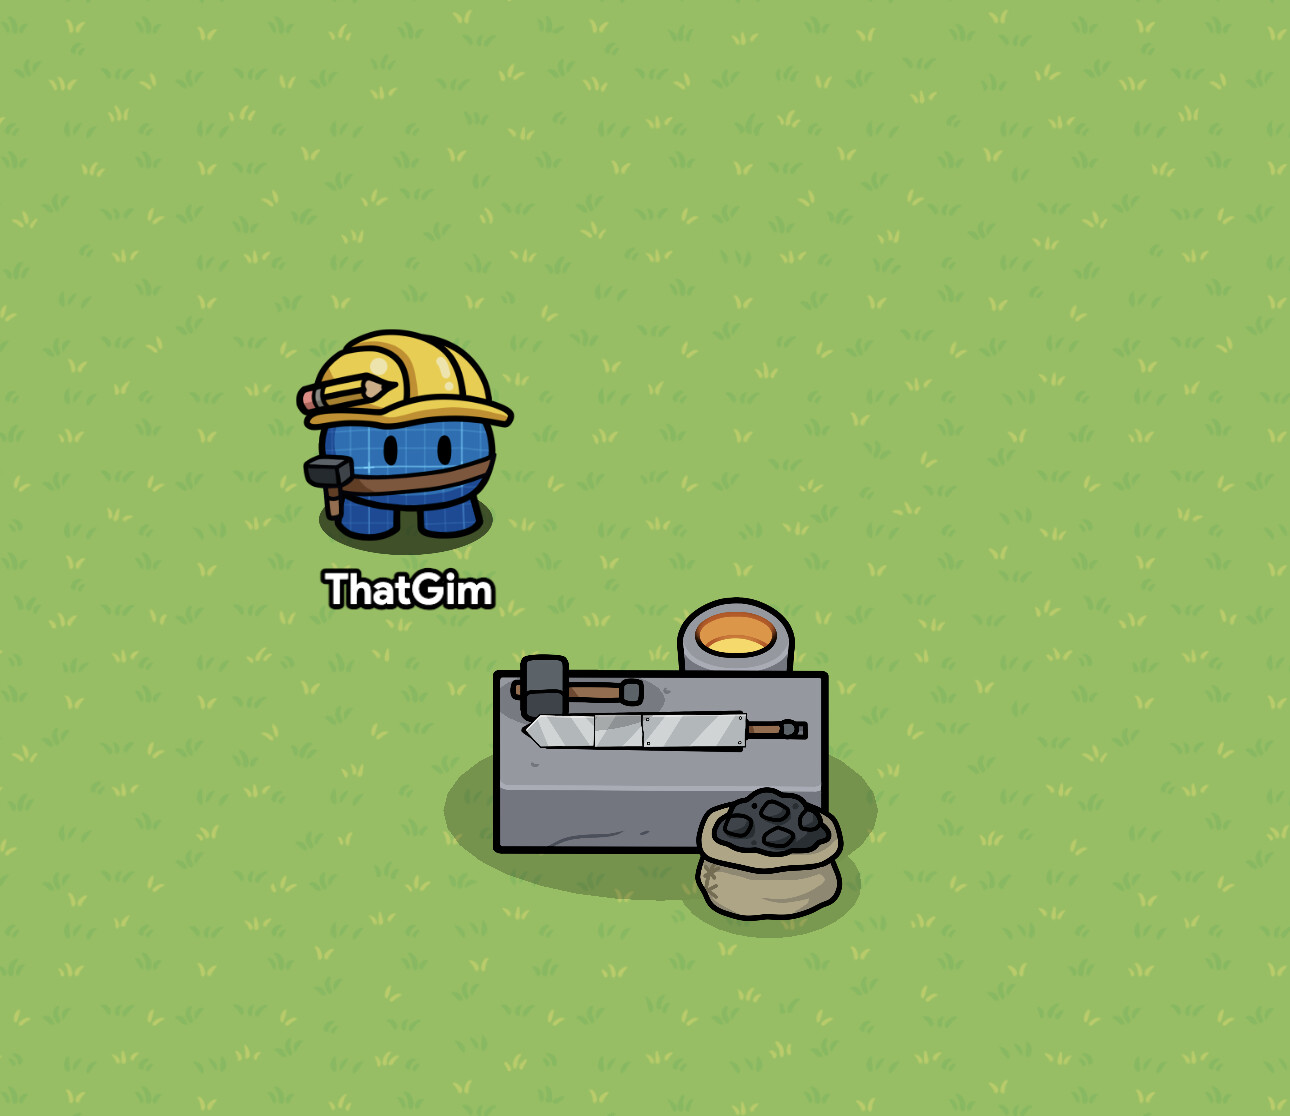
Sword in the sword stone
- ThatGim
So first you want to have to have a total of three metal signs and a roller that looks like this
Then you want to set them all in the sword stone like this
But make sure the metal sign layer is above the sword stone and same thing with the roller, but make sure the roller is also under the metal signs!
(add your own little touches to make it look better here’s mine)

LED Lights
Tint a wooden pole black

Place a laser on the pole (you can change the color). It should look like this:

And you’re done!
Designed by x.mochi
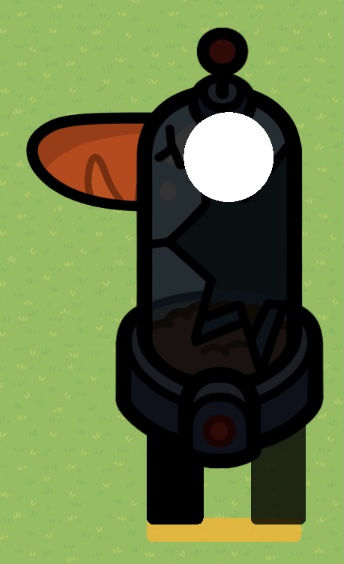
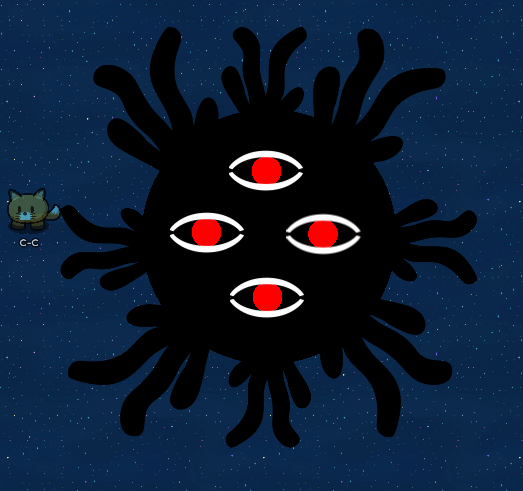
Joe
In this guide I’ll show you how to make another one of these guys! I might even make an entire art guide for them all >:)
Joe is fairly simple to make, unlike john, Joe doesn’t have body parts; but one big ol’ head!
Here’s a list of all the materials you’ll need for Joe!
Materials
Once you’ve gotten the materials; it should look like this so far.

Now its time for Joe himself! First thing you want to do is take the 4 alien plants, and place them in different directions on the big barrier! Like so:
Now it’s time for the eyes! The eyes are a little complicated but not too bad… You’ll want to take the Text and type in “()” for both of them, then rotate them until they’re on their side. (Snap rotation helps!) Like so:
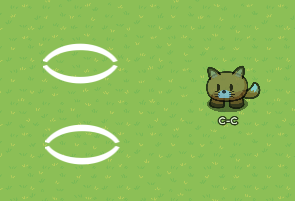
Once you’ve got the text setup, add the two other barriers, and place them inside the “()” Text! Make sure to layer the text above the barriers so the barriers look like they’re in the text!
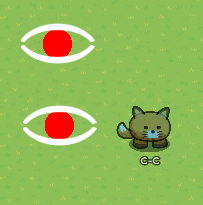
Then, Once you’ve done that; You can add the eyes to the head barrier! (Make sure the text and little barriers are layered above the head barrier!
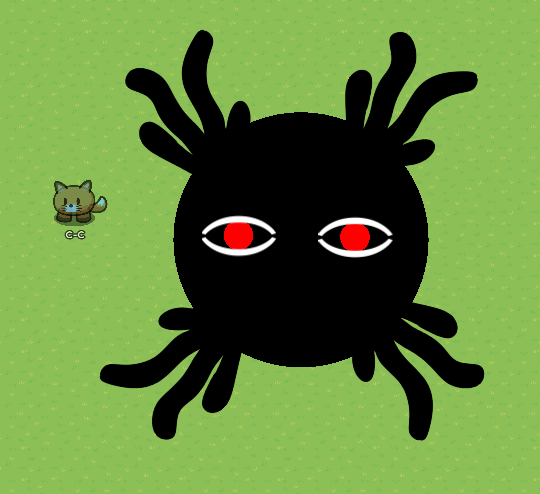
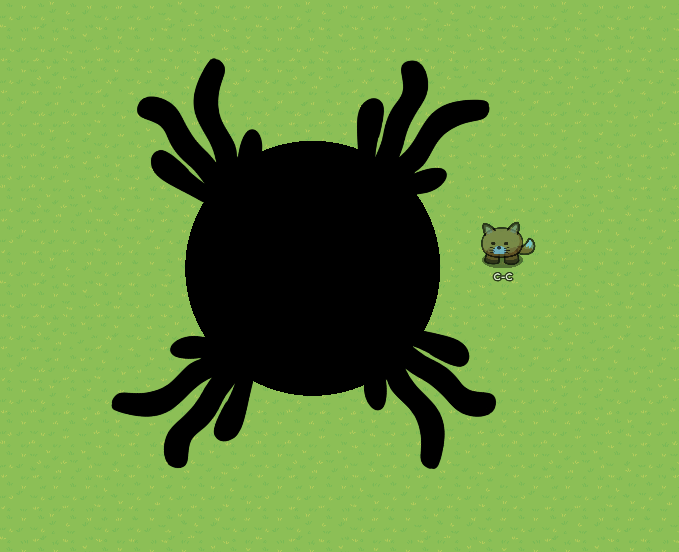
And there you have it! You have successfully made Joe!
As a little bonus, you could add some more designs to make him more scary! You could add a bit more alien plants inbetween the 4 to give him a bit more intensity… You could also add a space background to make him look like an alien!
If you want, you could also add some extra eyes! To give him a horror kind of vibe…
And That’s it for the bonus! Hope you enjoyed this extra little secret!
Olden Doorway
Hey, I’m MAD_Dragon_3.0, and I’m going to show you how to make an olden Doorway.
Materials:
(you will need a small sign later, I forgot to add it, but you will see it.)
To start, make the big sign bigger to fit the table. Then take the cutting board and put it under the table. Add the bookshelf part-way under and give both the shelf and board no collision.
Here’s what it should look like.

If you’d like, add text to make a line.
Thank you!
By MAD_Dragon_3.0
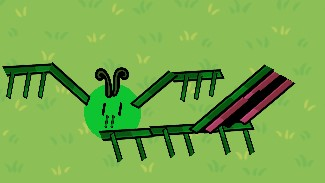
Fred the praying mantis
So you want to make a fred?
Step 1 To make the body take 2 tinted green blackboard legs and lay them sideways in a row
Step 2 To make the legs take 3 small green blackboard legs and place them upright on the body then place 3 more in-between and layer them under the body
Step 3 To make the head place 1 small green barrier and place 2 tiny black blackboard legs spaced apart for the eyes and for the mouth just copy and place closer together add an alien plant for the antenna
Step 4 To make the claws place 1 green blackboard leg and rotate it slightly then add a straight green blackboard leg on the tip of the claw stump then add 2-3 vertical = | green blackboard legs on the claw and repeat steps for the other side
Finished product
The finished product should look like this
i go more in-depth on the guide on my profile
This guide was made by Quimblo
Toko
Heya! In this little grimoire here i’ll be showing YOU on how to make a Toko!
It’s fairly simple…Lets start with the materials!
Materials
For the materials you’ll need…
- A living sacrifice
- 2 Large Blackboard legs
- A wide blackboard
- 3 Red Barriers
- 5 Large Alien Plants
Once you have all the materials Toko should look like this!

Looks pretty big doesn’t he? You can shrink him and grow him to whatever size you want though!
The next part is to build the head!
The Head
You should’ve gone for the head…
Anyways! Take the two blackboard legs and place them on top of the wide blackboard. (Make sure the blackboard is flipped sideways) Once you’ve done that take the 3 red barriers and layer them above the blackboard to make eyes! If done correct it should look like this!
Once you’ve done that, your done with the head!
And now onto the final part! (probably the most simple part anyway) The Torso- (or whatever you want to call it…).
Torso
Now onto the torso!
If you can even call it a torso…
Take the 5 alien plants and connect them to the head, so that the alien plants look like tentacles!
If done correct it should look like this!

Isn’t he so cute!!
And that’s it! You’ve made a Toko!
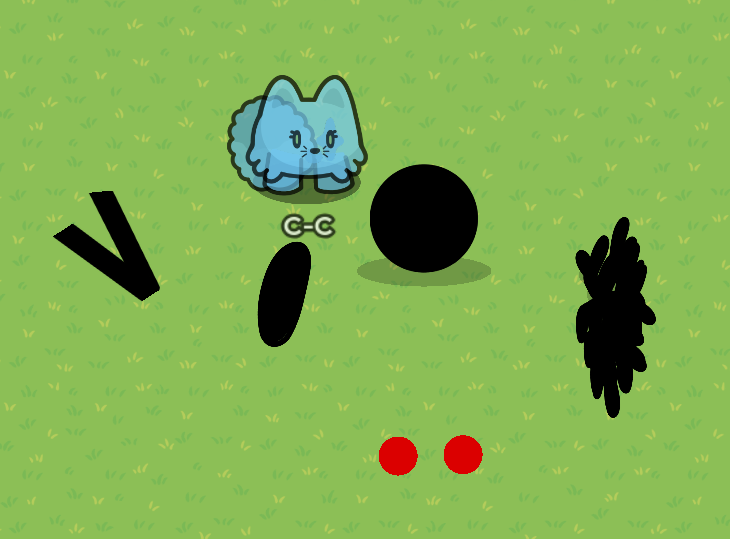
Zack (With a silent C!)
In this summary I’ll show you how to make A Zack! (Wow that sounded weird…) The first few things you’ll need are the materials! The building blocks towards Zack!
Materials
- 1 Circle Barrier
- 3 rectangle Barriers
- A LOT of alien plants
- 4 Blackboard legs
- Curly Alien Plant
Once you have the materials, It should look like this!
That’s it for the materials!
Once you have all the materials…It’s time to start building Zack!
The Body
For the body, all you have to do is make it like a cat! the round barrier being the head and the 3 other barriers as a body! Take the blackboard legs and make them into ears. If done correct it should look like so…
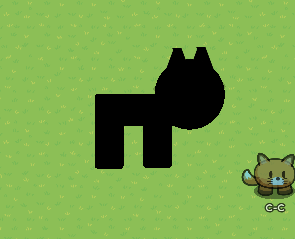
And that’s it for the body!
And Now onto the final part of Zack… The hardest part…THE TAIL!
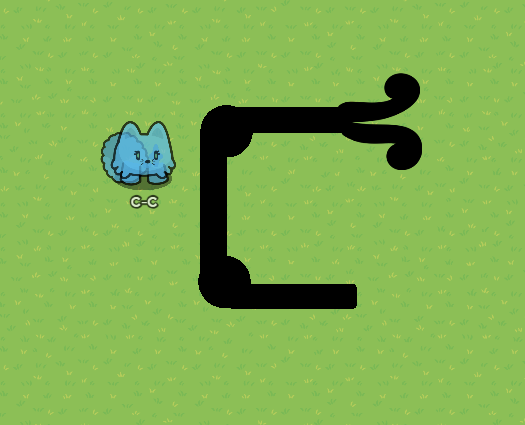
The Tail
For the tail itself, you’ll need two more round barriers and 3 More rectangle barriers…You’ll also need a BOAT TON of alien plants! to make it kinda creepy but…soft…at the same time.
You’ll want to make the tail like so:
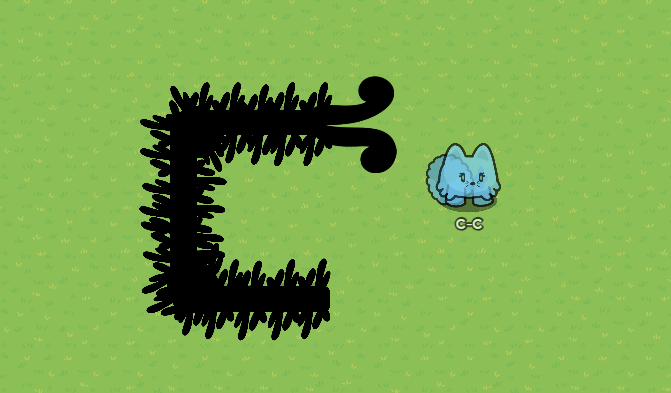
Once you have that down, its time to add the BOAT TON OF ALIEN PLANTS!!!
Keep them in the same direction as barriers and it should come out like this!
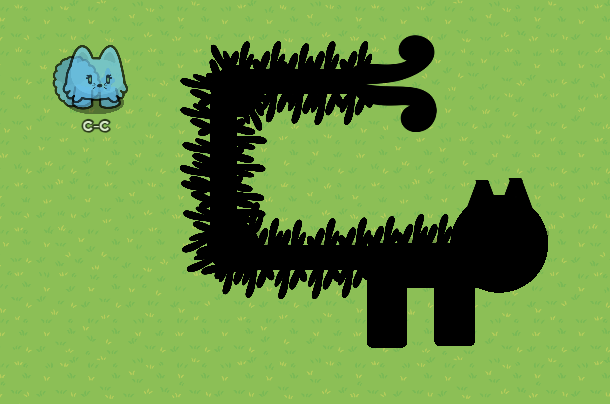
Once you have that down, just add it to the body and you’ll have the final product!
Once you’ve completed the tail just connect it to the end of the body and BOOM! you’ve got yourself a Zack!
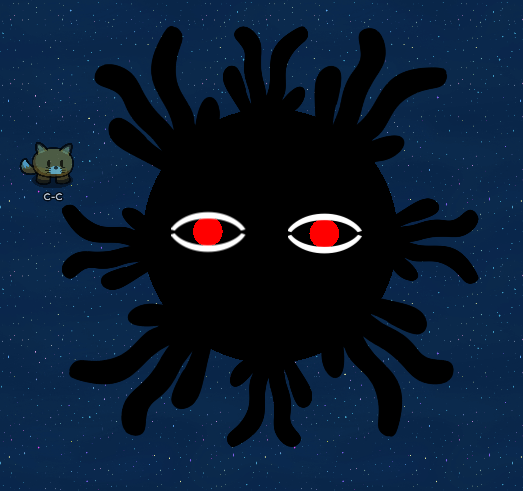
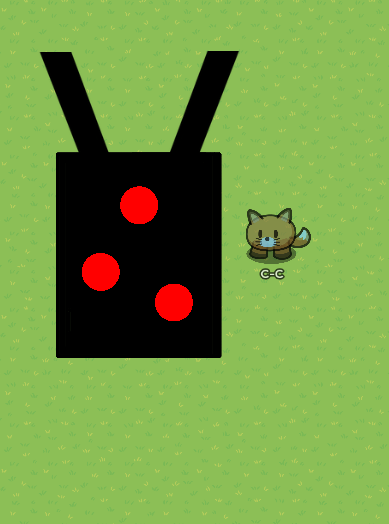
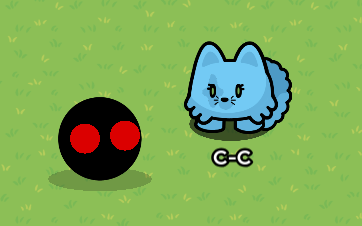
Naki
In this summary i’ll show you how to make a Naki!
Naki is VERY Shy…So i’ll only be able to show you her around a corner…If I can even find her that is! Oh…There she is!
Anyways…Here’s the materials you’ll need for Naki!
Materials
- 1x Basketball
- A lot of alien plants
- 1x Bread
- 2x Red Barriers
- 2x Blackboard Legs
Once you’ve got the materials For Naki, You’ll want to organize them out like so:
Now that you’ve done that the next step is to make the head!
The Head
The First step to making the head is taking the Black Circle Barrier and put the two red barriers one layer above it. So that you have the illusion of eyes! It should look like this afterwords
Then you have to add the hair! It should go behind the barrier head and move over to the side like this:
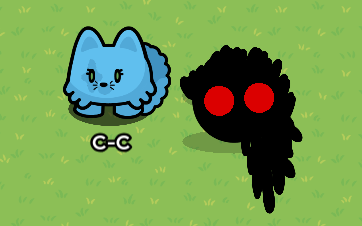
And that’s it! you’re done with the head.
Once you’ve done the head, place it behind a wall or something like that and it should appear as if she’s peaking around the corner!
The body is literally just bread so I dont think I need to summarize on that…But anyway! Once you’ve done that Just take the blackboard legs and layer so that one is above the other and put it behind the wall! The final product should look like this if done correct:
And that’s it! you’re done with Naki!
This one was significantly shorter because i’m making this at 11:30 at night and i’m insanely tired so…i’m glad its done.
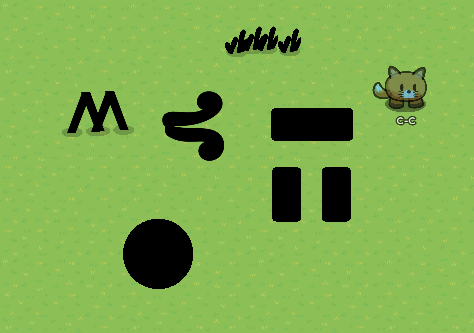
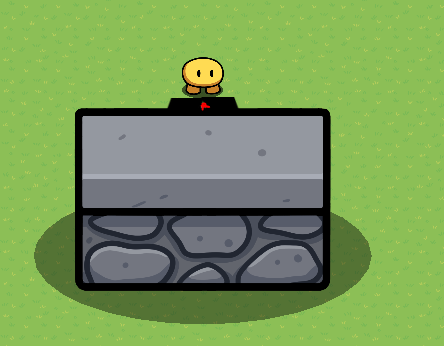
Sami
So you want a creature named sami?
materials : 17 black blackboard legs 1 wall thing 3 barriers (circle also black) and 1 text device + a metric gallon of layering
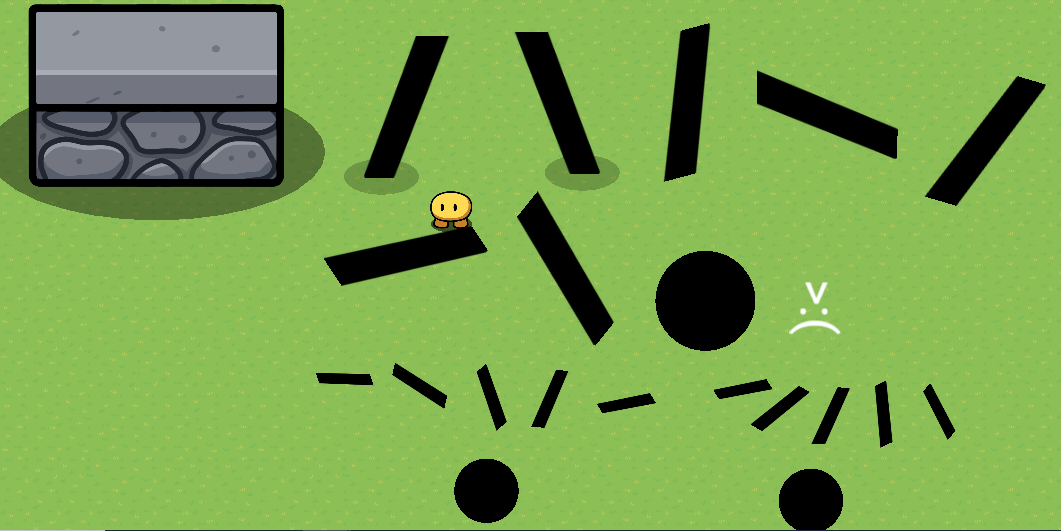
Step 1 (legs/wall) so take 2 blackboard legs and place them in an upside down v
then take your wall and make sure the legs poke up out a little. (legs need to be layered under wall)
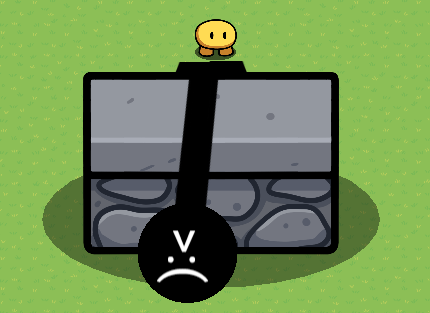
Step 2 (body/head) take 1 blackboard leg and layer it over the wall and make it look like he’s bending over it. Then take a black circle barrier and make it look like a head. also add a text box with a >:( and rotate it to look like a face
Step 3 (arm/hands) take 1 blackboard leg and make it horizontal then take 1 more and angle it towards the ground but not straight repeat for other side. for the hands take a smaller circle barrier and place it on the stump then take your desired amount of fingers (i chose 5) and make the hand repeat for other side.
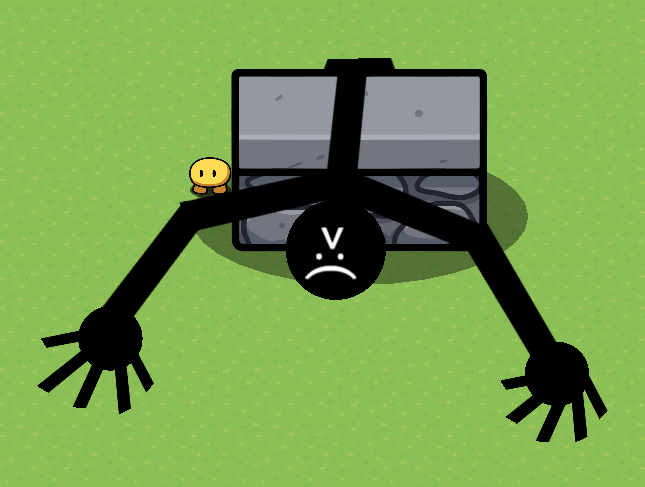
Finished results, Mine looked like this
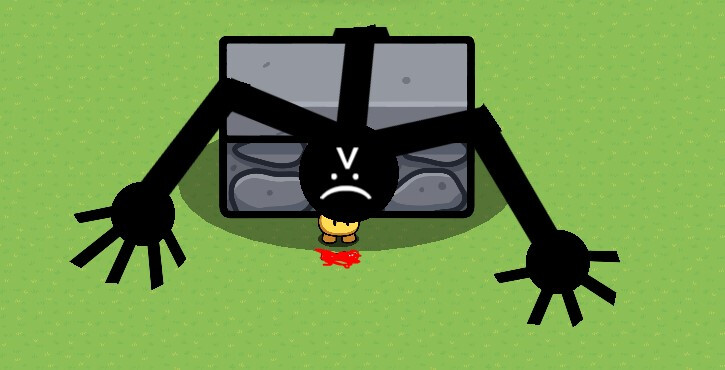
(This has nothing in common with the colossal titan from AOT.)
Made by quimblo. Thanks to C-C for the idea of this “creature”
Forum Related Section
Wiki Editing Rules (READ BEFORE EDITING, MUCH DIFFERENT THAN NORMAL RULES)
Please don’t make any edits that violate the TOS or FAQ, remember, anyone can see who edits a wiki and what part they edit.
Please be responsible.
Everyone, please don’t edit when it is being edited.
You can politely ask in the replies.
Please don’t change the name when it has one, and remove it when you are done.
If you aren’t in the credits, please ask and say what you are doing before editing. This helps keep the document clean.
Don’t use the @ sign, because there are a lot of usernames here. Don’t add guides, we want this to be clean.
When you are adding something, make sure to add how to make it, an image of it, and who the design was made by.
Ex) Using a pot, you can rotate and shrink it to create a tiny upside-down pot.
(Insert Image here)
Design by (Insert creator here)
Contributors
If you added stuff to this post, please put your name below:
WhereIsMyHat
The_7th_Dragon
Telephone_Man
I_Like_Props
Haiasi
Grey_Stone
Aubec7
BCannops
Crazy_Rae
BreathTaking
Ele_Ral
BendyTheInkDemon
blackfox45666
vqnillaxx
RektRainbow
Edwards
Xbit
Aubec7
Blizzy
clef
EGGacha
cheesebox
California_Love
tspentakota
C-C
ThatGim
x.mochi
Quimblo
Idea Credits
This is where the ideas for the props came from:
WolfTechnolgy
WhereIsMyHat
The_7th_Dragon
M1dnight
raeB
I_Like_Props
Telephone_Man
Haiasi
Aubec7
BCannops
Crazy_Rae
Techno
blackfox45666
RektRainbow
Edwards
Xbit
Aubec7
Blizzy
Clef
Cheesebox
C-C
tspentakota