Continued from
- Yes
- No
Props section:
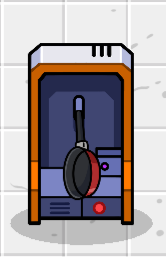
Airdrop
To make an airdrop you need anything crate-like 2 black blackboard legs for strings and a parachute
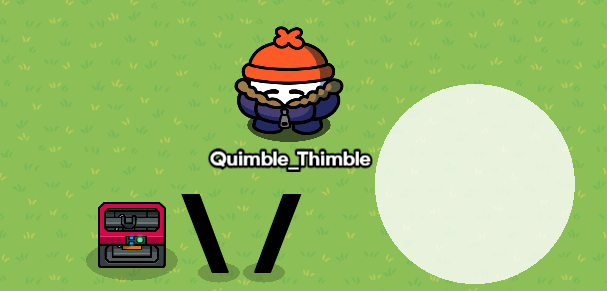
(don’t I look happy with my materials?)
Step 1 crate
Add your crate object (mine is 3d printer)
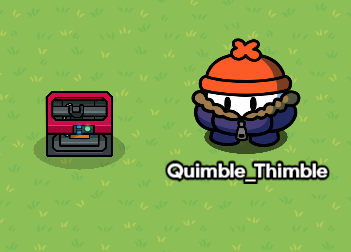
(don’t I look happy with my materials?)
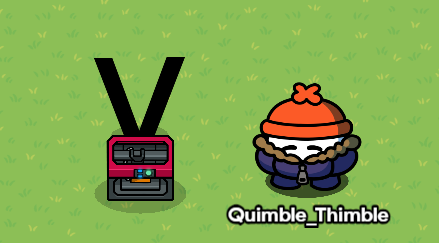
Step 2 strings
Take your blackboard leg strings and place them in a V shape
Step 3 Parachute
Take your parachute and place it on the strings like this
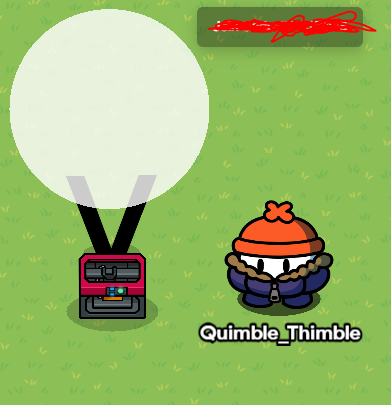
And that’s my finished product!
Design by Quimblo
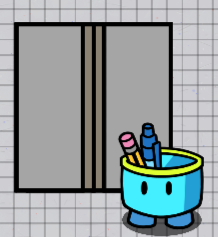
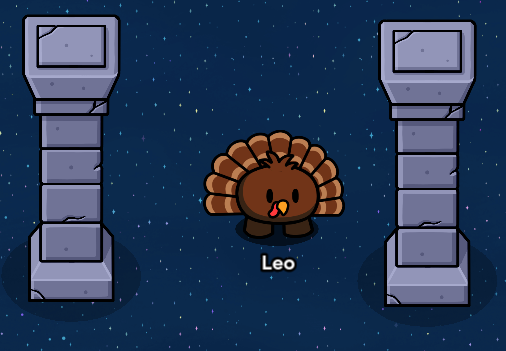
Sci-Fi table/crate thing
So you want to make a sci-fi table/crate thing?
You’re gonna need 5 lasers and a white square barrier transparency 0.4? (not sure)
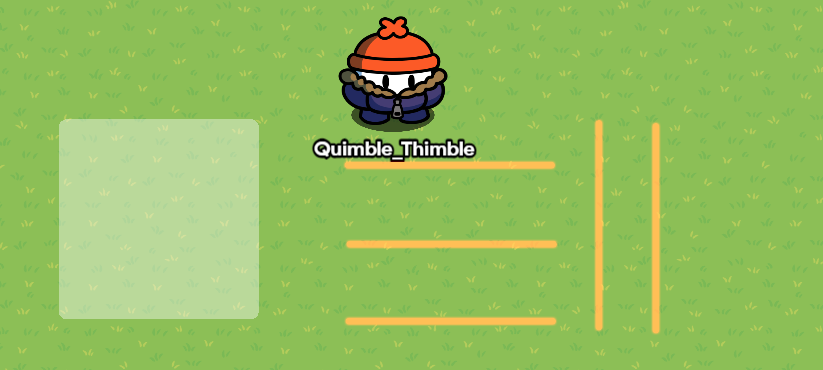
Step 1 barrier/ horizontal lasers
First place your square barrier then place your lasers like this
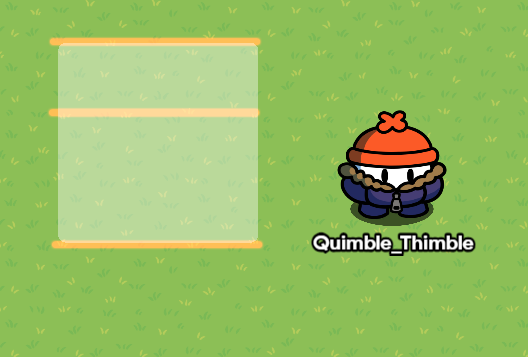
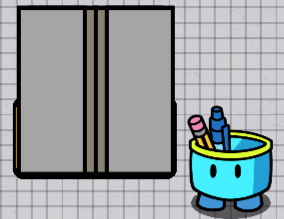
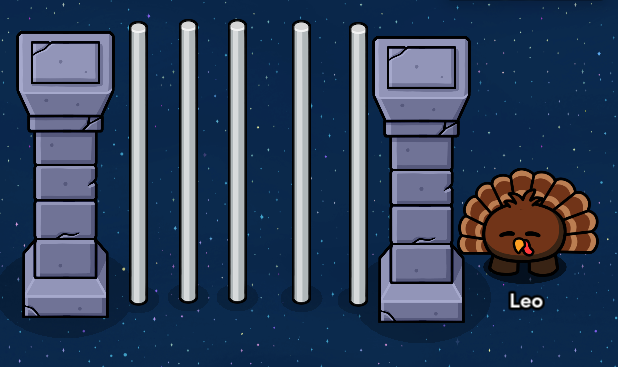
Step 2
Then place the vertical laser like this
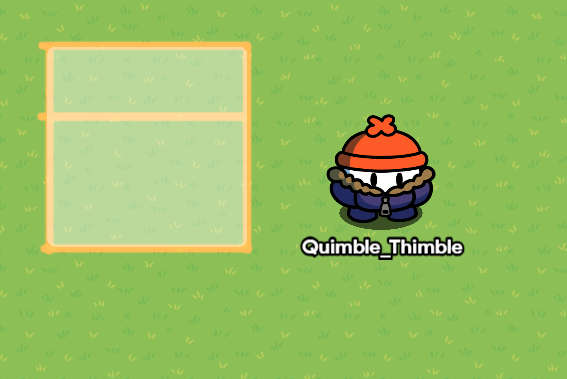
(lasers may or may not be substituted by red metal poles)
Design by _i_looked_down
Shell/Sea Boss
Made by Gimkiter28
This is how you can create this Shell/Sea Boss looking person using props!
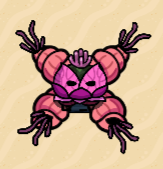
First, you need to get all your materials of course! Get all these props.
- A Sentry (Evil Pink Plant)
- 4 Shells (Pink)
- 4 Alien Plants (Pink/Purple One)
- 1 Coral (Small Pink)
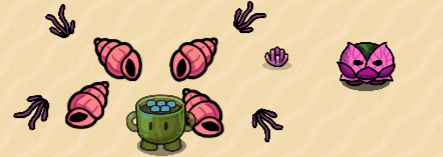
You don’t need the Golden hot coco Gim ofc.
Next, you want to make sure that the shells are layered below the sentry. This prevents the shells from being in front of the sentry. Attach each shell to each corner of the sentry. You probably have to rotate some of the shells to angle them in place. Also, don’t forget to flip two of the shells for the other side of the sentry.
Then, add the plants(hands) to the ends of each of the shells. Rotate the plants for each corner so they fit in. Again, flip two plants when you get to the other side of the shells.
Final Step, you need to place the coral prop on top of the sentry’s head to act as a crown or any type of headwear. Make sure this is ABOVE the sentry, and not behind it.
And you are pretty much done! Feel free to add any other special touches you want.
Idea: You can also add some lasers at the tip of the hands, make the hands hold a laser(like a lightsaber), or have the hands fire a laser. Thanks to @Haiasi for the laser idea.
Iron man briefcase
items you need : (▃ ⬤put these in the text item) then a metal briefcase tint the items down below

change the sizes a bit to be like the picture and rotate the rectangles to make an X make sure the bottom rectangles are smaller to fit in the briefcase than get the yellow circle
and place it in the middle than get the blue one (make sure its smaller) and put it on top of the yellow circle
it should look like this
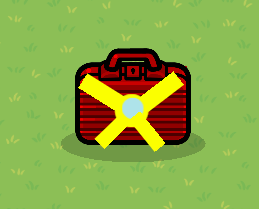
made by mapleOil
Laser Blaster
A working laser blaster for all of your laser blaster needs.
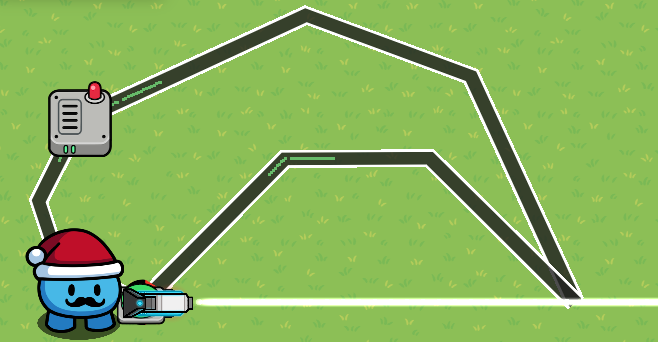
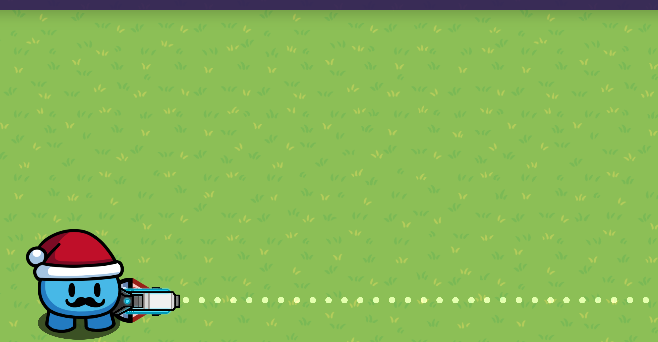
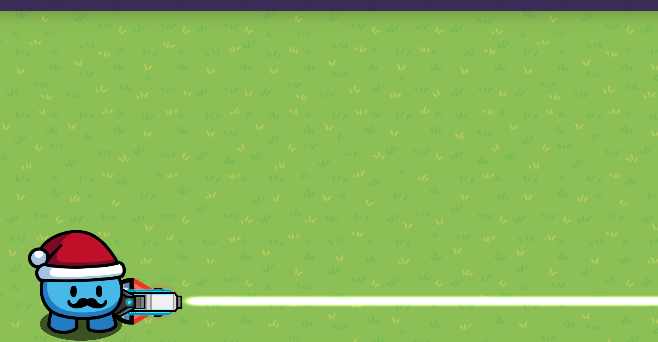
Original Design By Soccer_King
Olympian Torch
Need a way to light a path, or the entrance to a temple? A few Olympian Torches are a way to add some regal lighting to your map!
Simply Use a metal cup, a yellow barrier with 0.4 Alpha, and a text device with the fire emoji!
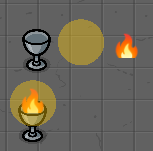
Original Design by cheesebox
Airdrop 2.0
(Inspired by Quimblo’s Design)
Using a Large Snow Pile, 4 Blackboard Legs and a Wooden Crate (Or a storage container, depending on the look you want), you can make an airdrop. You can also make a frame for it when its on the ground using a small snow pile instead.
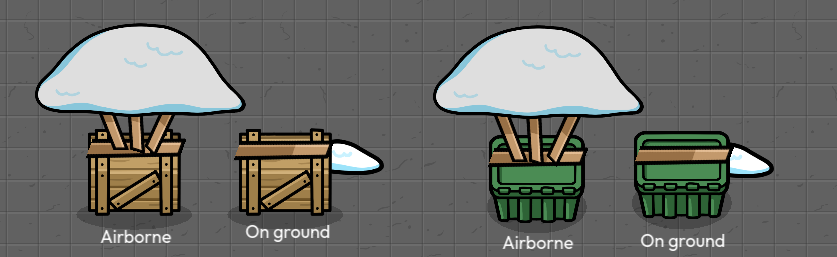
I only made this because I liked Quimblo’s idea for an airdrop, but thought there was room for improvement.
original design by cheesebox
Tape Despenser
![]()
Add the masher and you are done! a tape Despenser
Design by caternaught
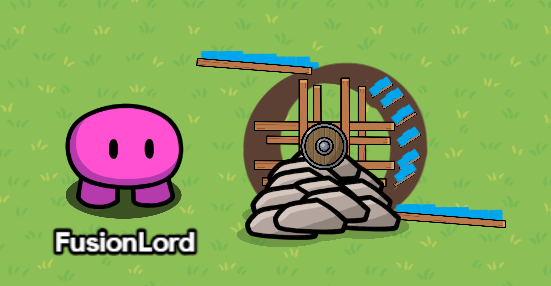
Watermill
Lots of text
x1 circular shield
x11 rocks
x10 wooden poles
Use these emojis ( 〇 and ![]() ) and refer to this picture
) and refer to this picture
Stairs
Materials: Ad Bases x amount of stairs
First Turn-off collision
Then click the “Change Size” button in the bottom left corner
Then rotate it 180° and place them in a column and it should look like this:

Doors
Just, wow, (screams in happiness)
Materials: 2 Ad Bases (Start with 1), and 1 barrier
[EVERYTHING SHOULD HAVE COLLISION]
Rotate 1 Ad Base 90° (doesn’t matter which direction)
and copy that Base and rotate it to face the other door
Then place a barrier and give it these settings:

Then place it behind the “Doors”
If you don’t use the barrier this will happen:


Space gate
Step one:
Step two:
Step 3 add emojis:

Then, you have your amazing space gate!
Made by: @leo_flowers
DTM from Lobotomy Corp.
You can make Don’t Touch Me from Lobotomy Corporation with an orange space container as the body, barriers for the decals, and a piece of text (클릭).
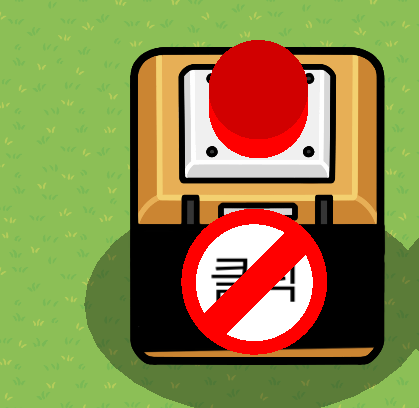
Made by Unavailible.
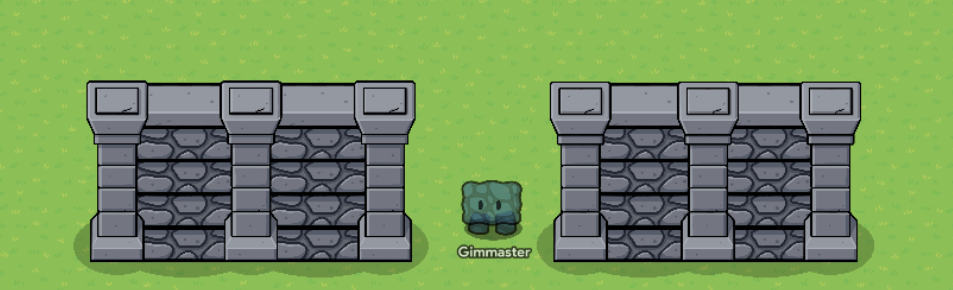
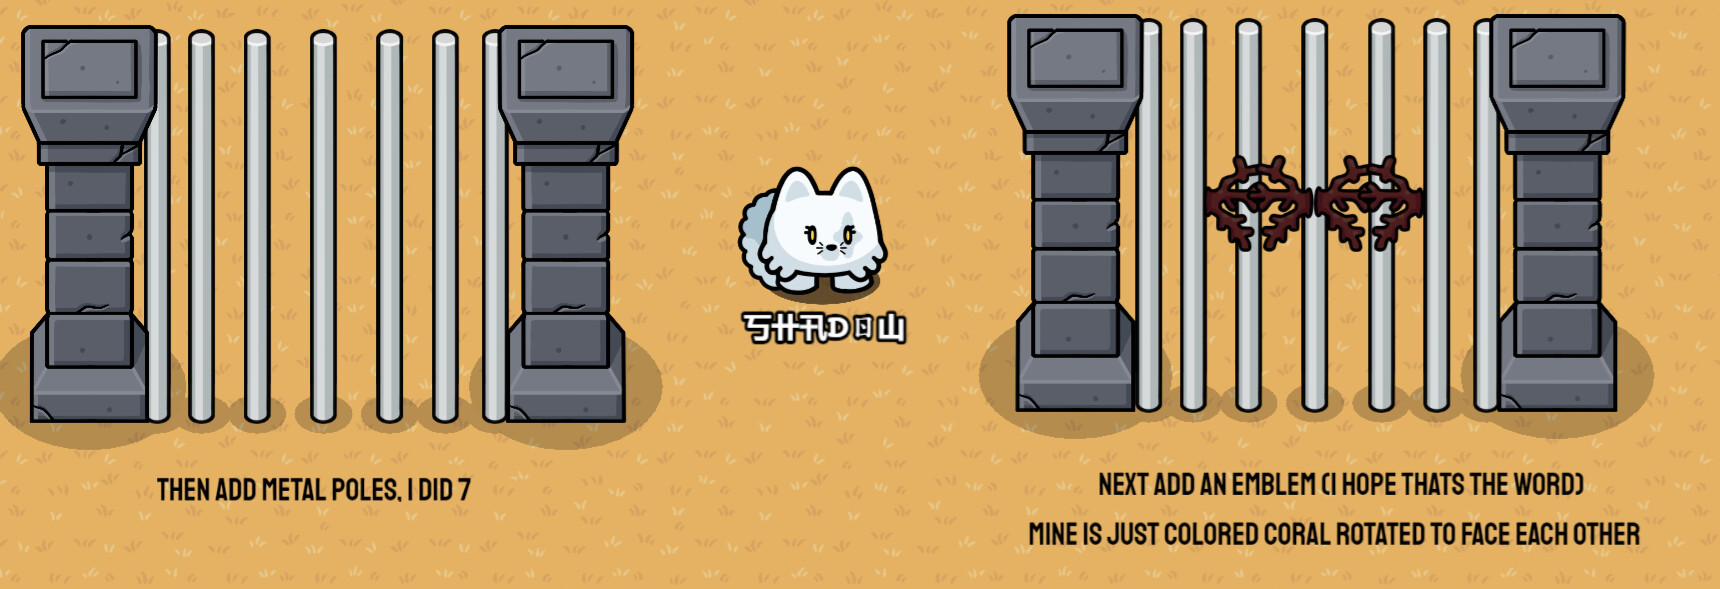
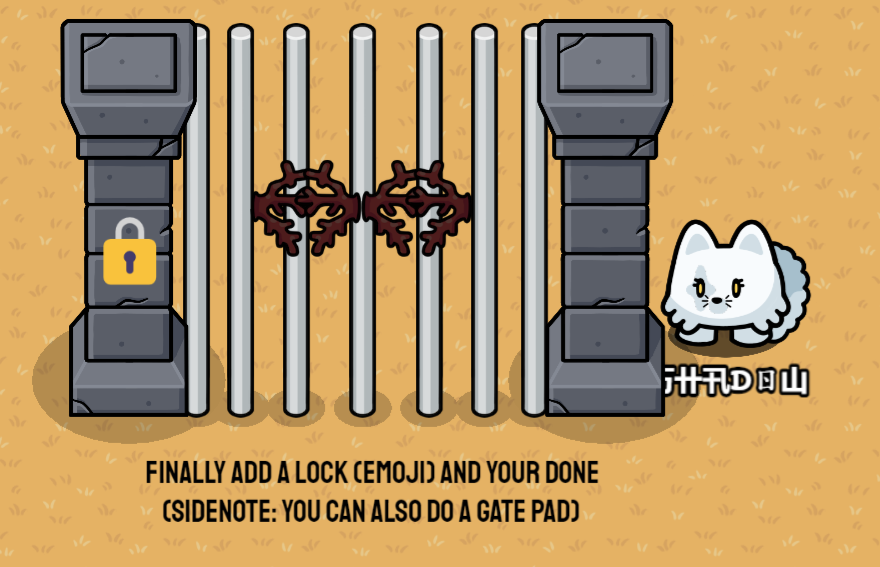
Dungeon Gate

Get some metal poles, tint them dark grey and place them down like so.
by: the 7th dragon
you could also edit it so that when you press a button, it opens (hides) and closes (shows) the gate….
have a good day!!
Easter Basket with Eggs

An Easter Basket made with an empty fruit basket and 5 eggs made with barrels that were colored. Click here to learn more
Made By: AlvinFun
Railroad Crossing Signal
Deactivated Signal:

Activated Signal:
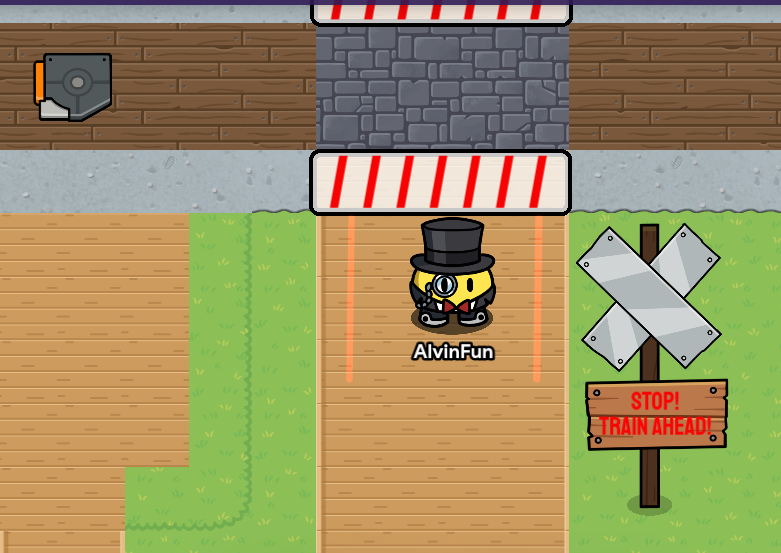
This is a railroad crossing signal that I made for anyone who wants to make a railroad or train game. I used 2 barriers and 2 red texts as the crossing gates, 4 lasers for the crossing lights, 2 triggers for when the train presses it, it activates or deactivates the crossing, 1 wooden pole for the sign pole, 1 wooden sign and 2 text boxes (1 red and 1 green) for the bottom sign, and 2 metal signs for the crossbuck.
Made By: AlvinFun
Aquarium
So, here is an image of my Aquarium prop:

If you would like to make it entirely, I made a guide on it here: How to make an Aquarium in Gimkit Creative (difficulty 0/10 ⬜)
Made by GimGulp1
House Light
Here is what we’ll be making:
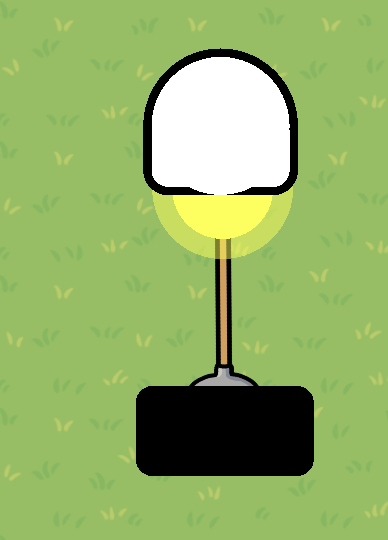
First, get a black barrier. Turn the border off, and set the alpha to 1.

Now the pole. For this part, I used a rotated pitchfork. Move the pitchfork over the black barrier to where only the curve of the metal is peaking out. Then put the barrier in front of the pitchfork in the layers tab.

Now the light. Get a light yellow barrier with no border and full alpha and a circular shape. Make it fairly small and put it over the tip of the pitchfork.
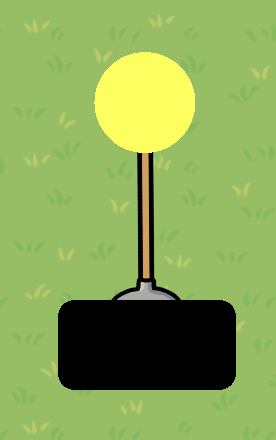
Make it glow: copy the light and place it right back on top of the original light. Make it a bit bigger. Now set the alpha to 0.5!
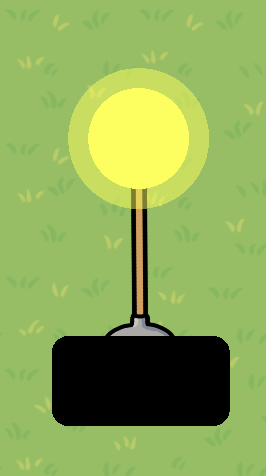
Now for the light cover. This is where it gets complicated! Make a white barrier a bit wider than the bulb with no border and an alpha of 1.
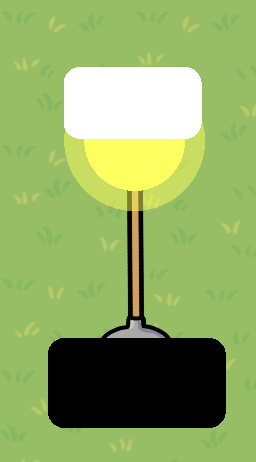
Now to give it a curve. Copy the white barrier and place it down. Make it a circle. Change the size so the edges of the circle touch the edges of the rectangle. Move the circle up so the bottom of the circle touches the bottom of the rectangle. Edit the size to your liking.

Oh, you thought we were done??? Lets add a cool border to our cover. Copy the white barriers and place them down. Give them a border. Move the bordered barriers behind the original barriers. It will take some time to do this, but I think it’s worth it for this final result:
Thanks for reading this section!
Fulcrum-19 made this post.
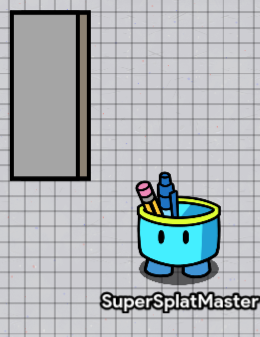
An Oversized tape measure.
You will need:
x1 circle black barrier x1 square grey barrier x1 yellow circle barrier
Make a large circle black barrier, then make a slightly smaller yellow circle and put the yellow inside the black circle. then put a small grey barrier at the corner of the circle. Then put text that says “tape measure” as shown:

By: gimpenetrable
Working Ladder
🪜 Appearance
First, get 2 metal poles
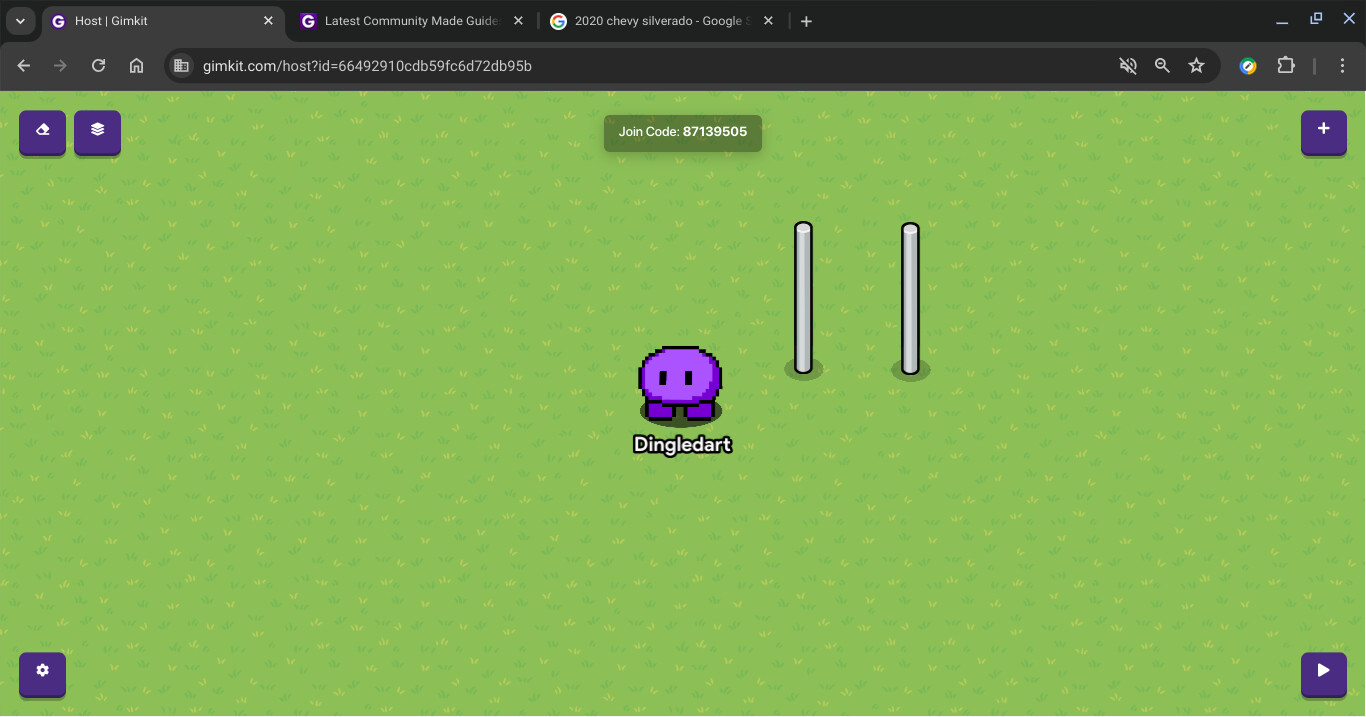
Then, place smaller sideways poles under and in between the first two poles
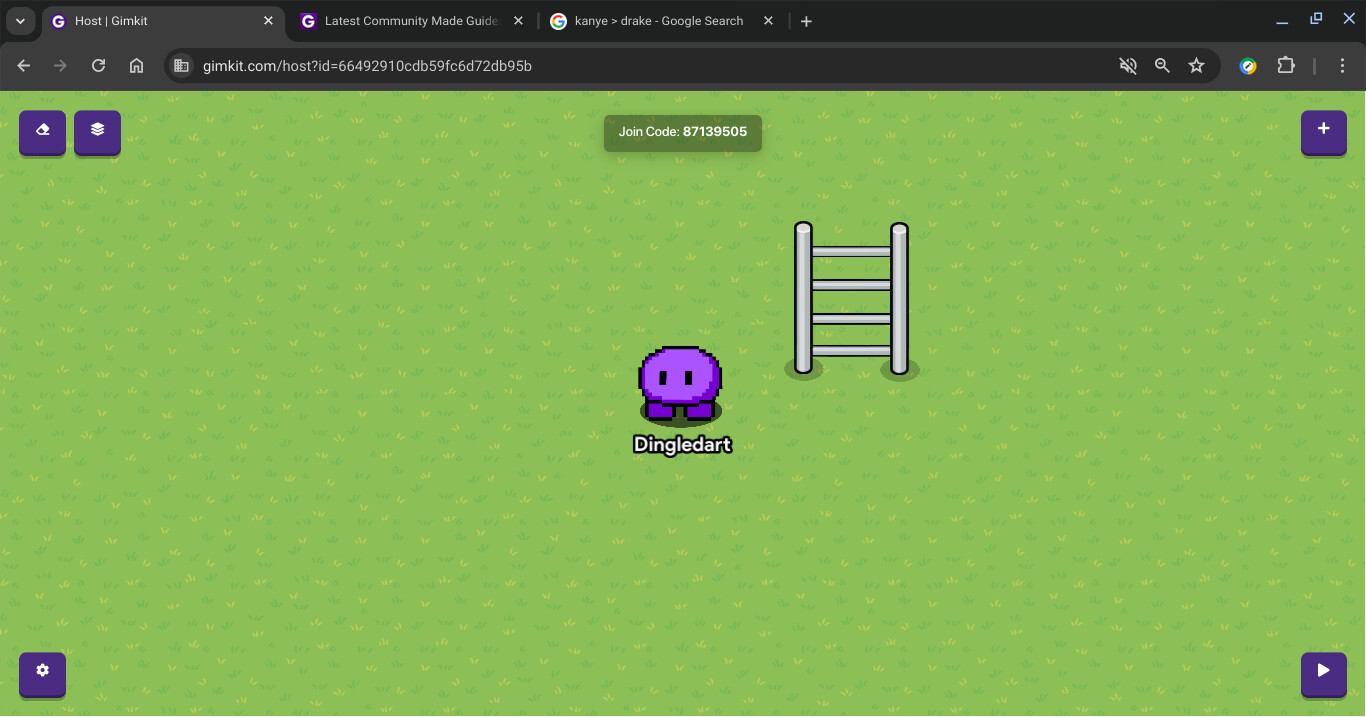
Finally, place a metal sign under the ladder and back sure its on the bottom layer
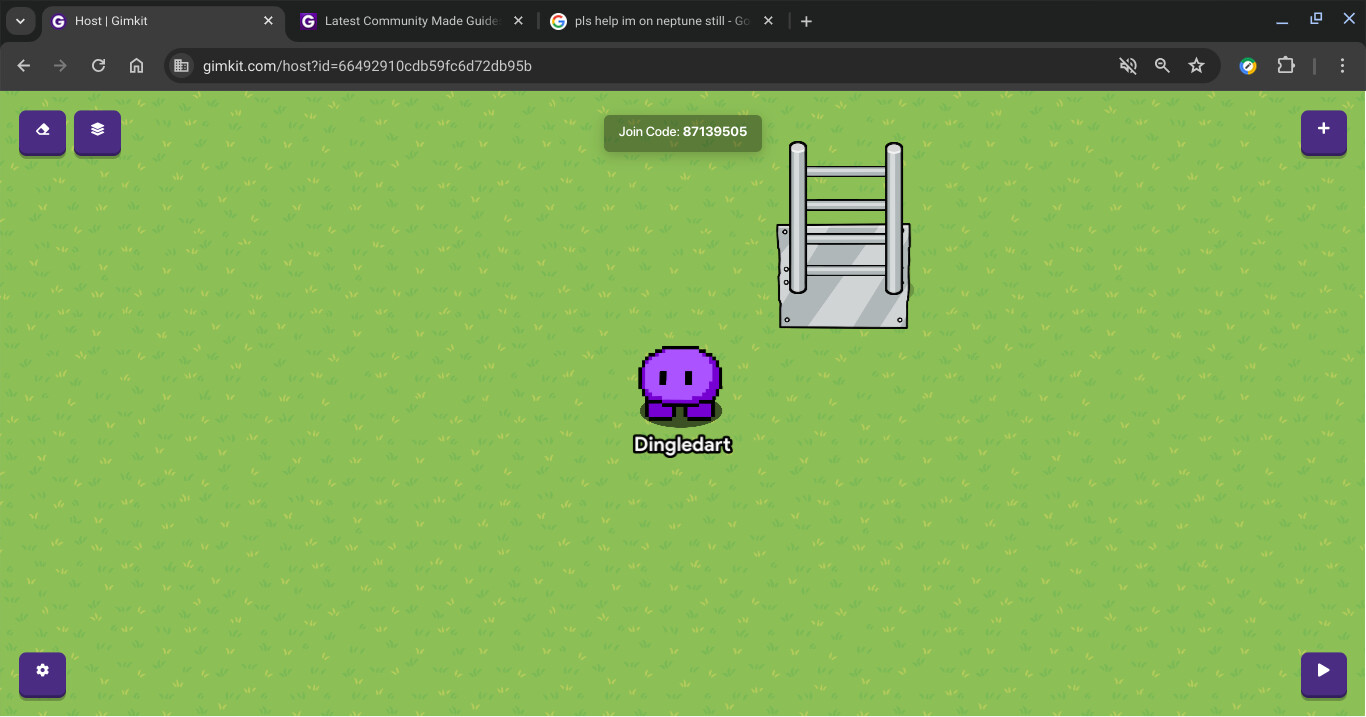
That is the ladder but there are still some issues with it.
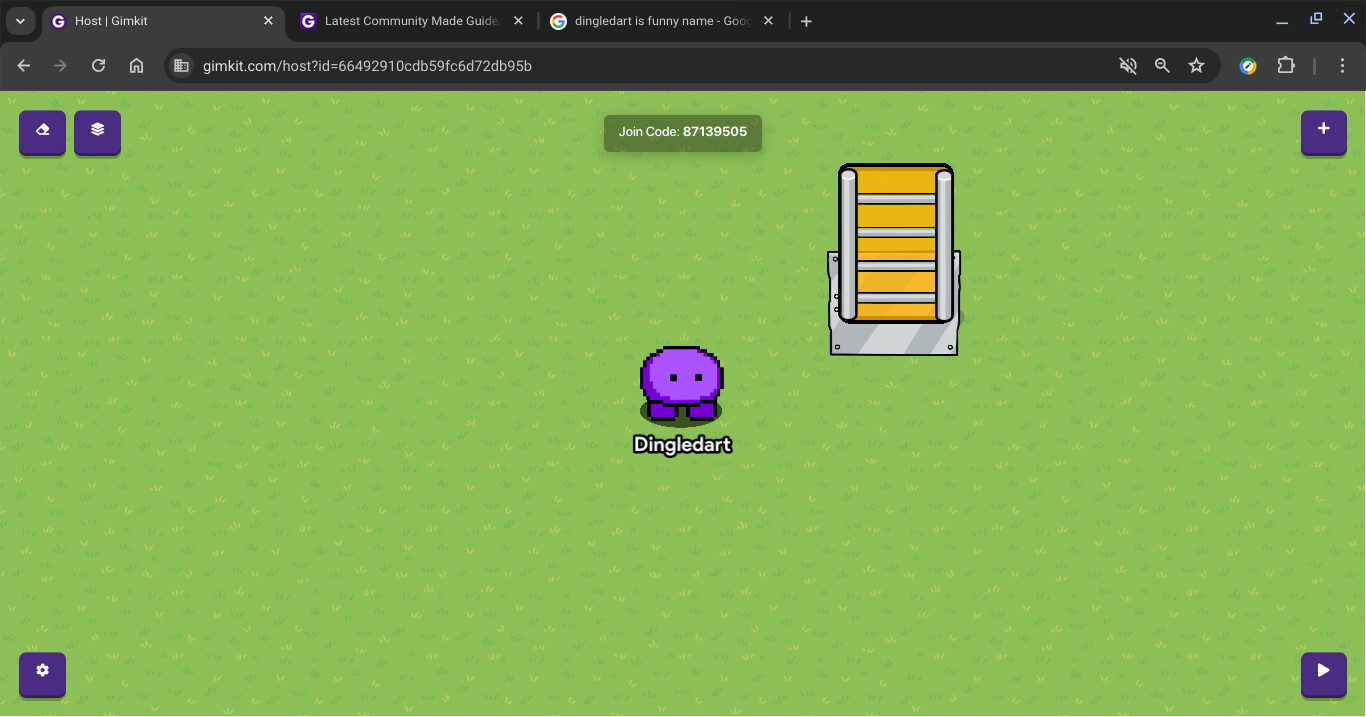
⚙️ Mechanics
Right now you can just walk through the ladder so put an invisible barrier on it like this
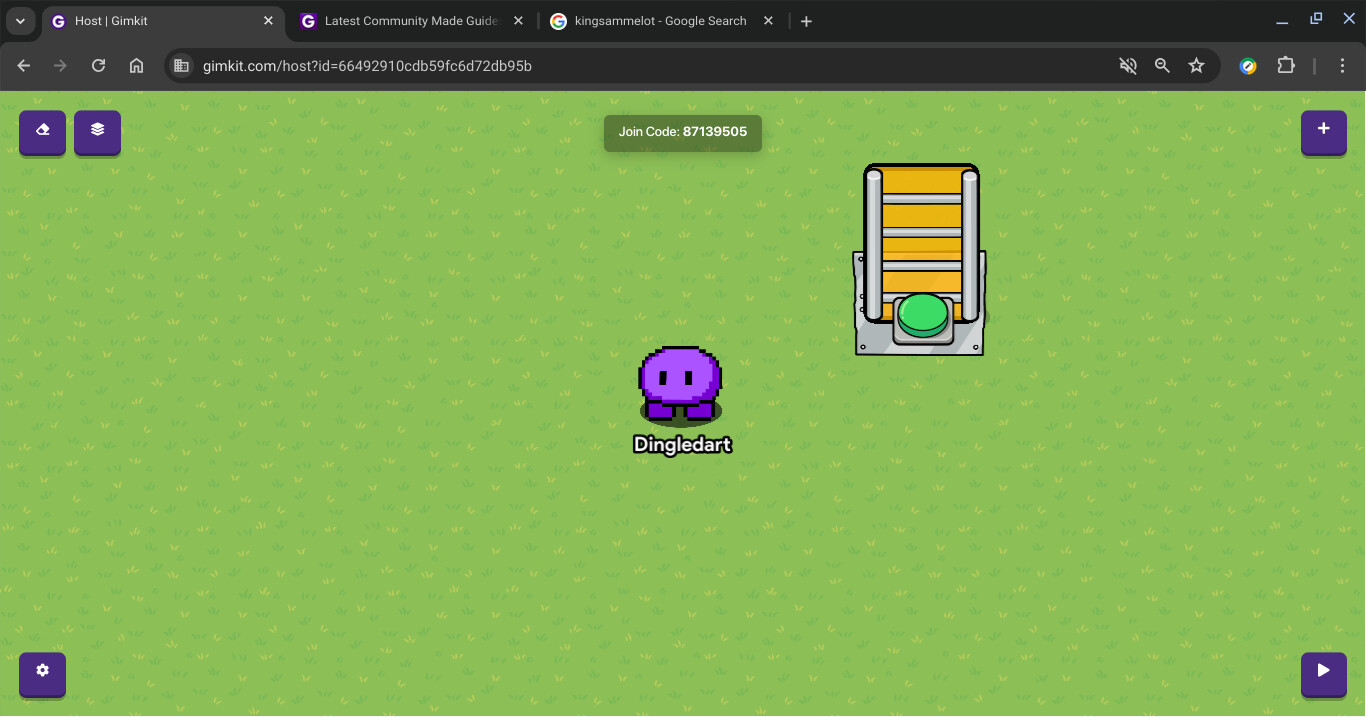
Next, put an invisible button on the ladder. This will be used to climb up/down (go to extras for down) the ladder to get teleported to a new area
Set up a wire to teleport the player when the button is clicked
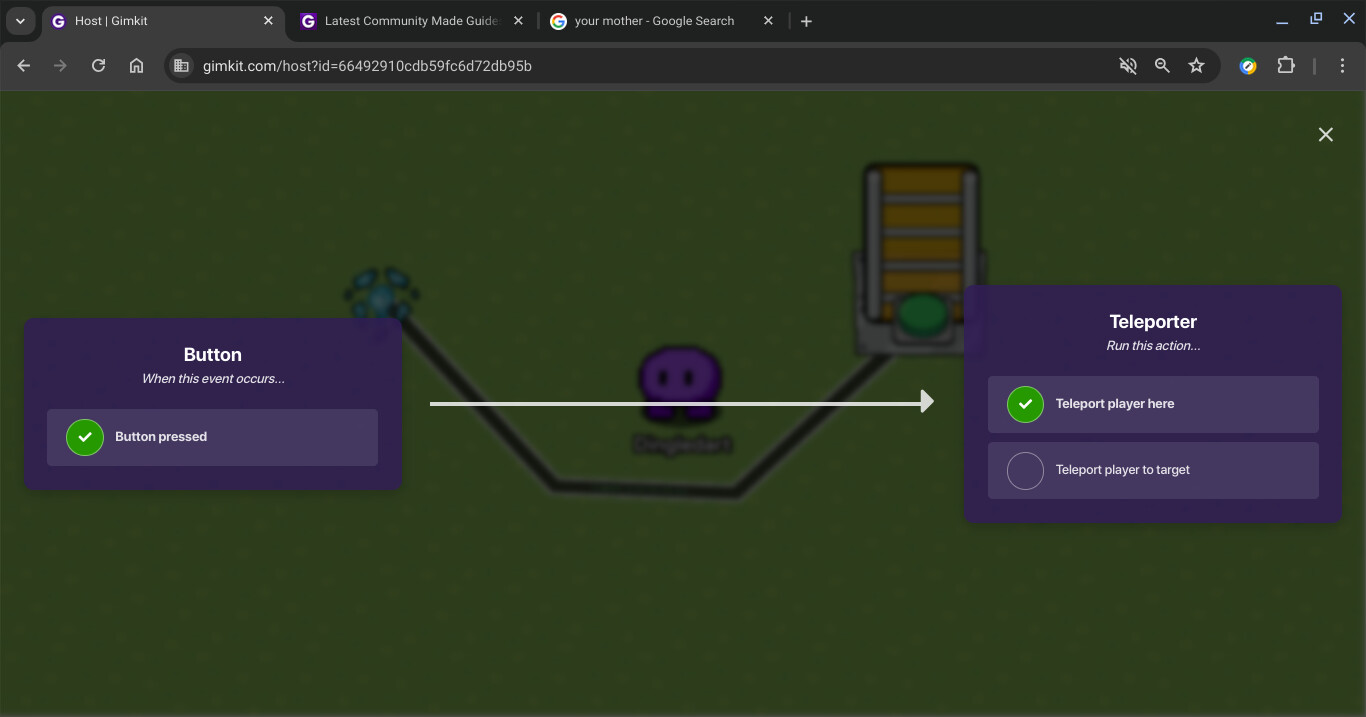
And your done! You have made a working ladder in gimkit!
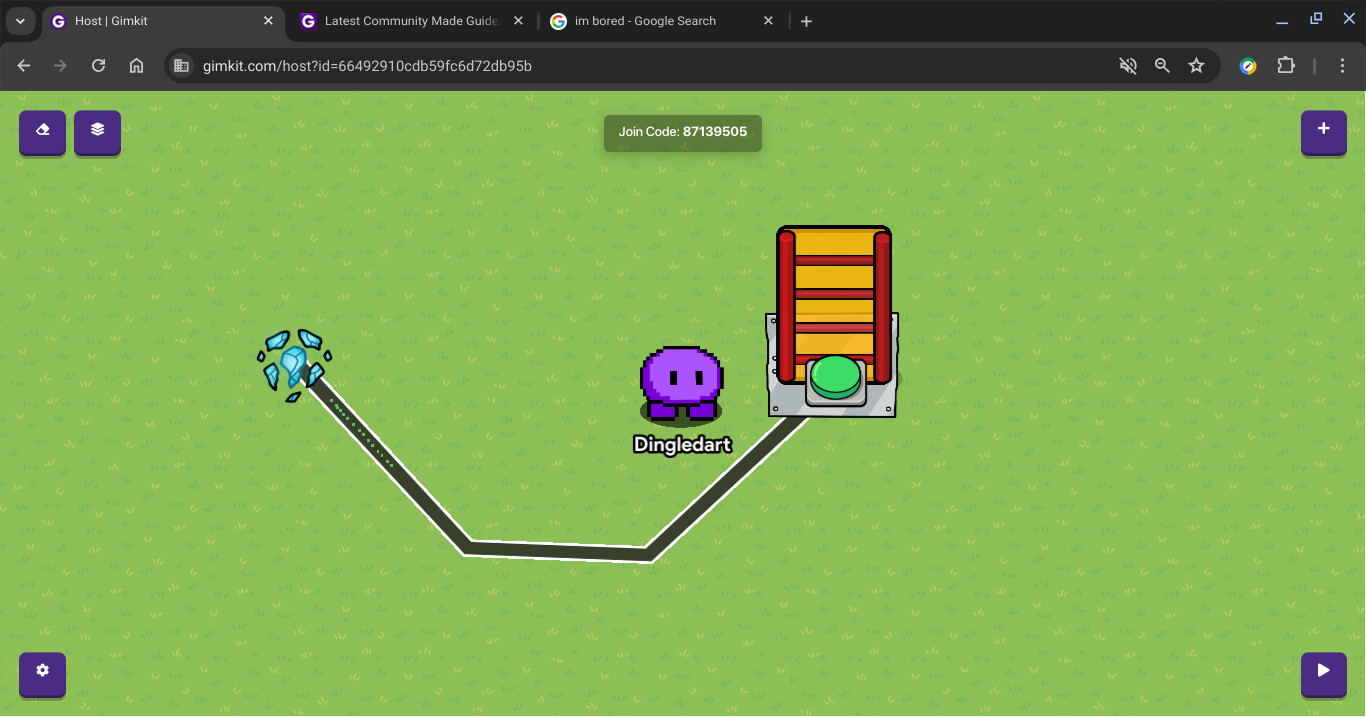
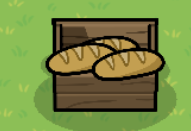
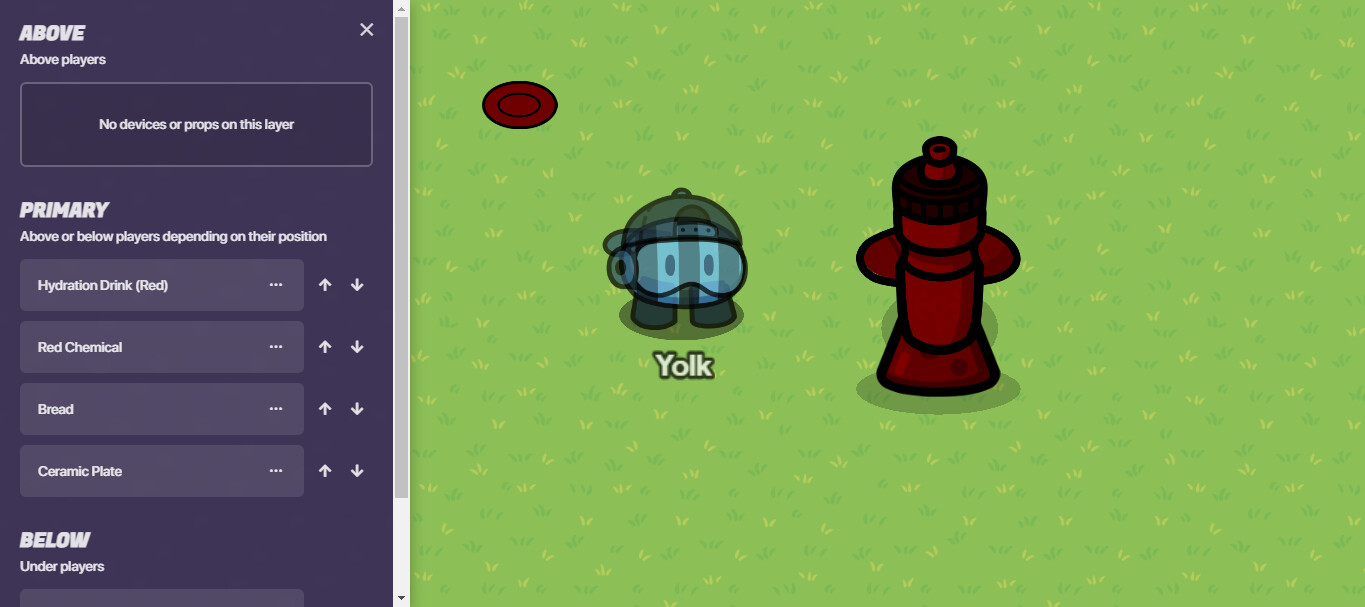
Fire Hydrant
Needed props: 1 Ceramic plate, 1 Bread, 1 Hydration Drink (Red), and 1 Red chemical, all tinted 128:0:0
First, move the hydration drink onto the red chemical and use layering to show it on top of the chemical.

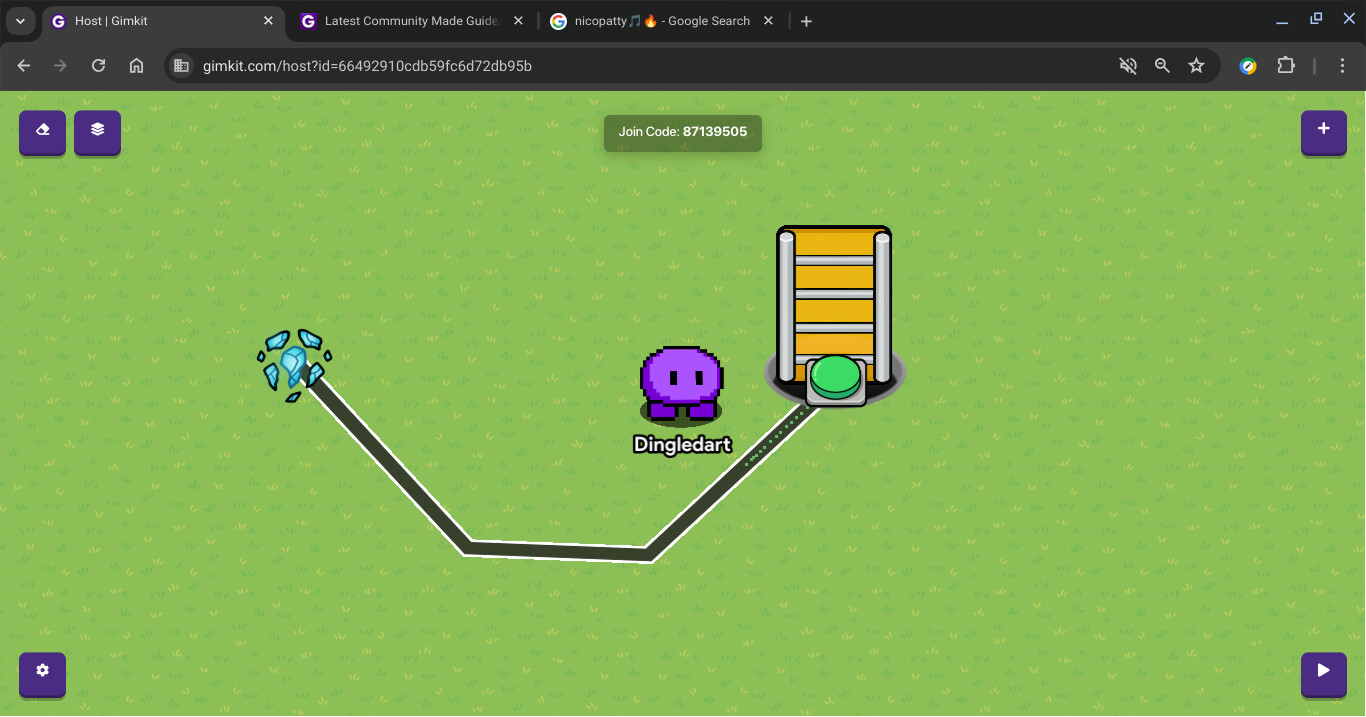
After that, move the bread to the narrow part of the hydration drink and use layering to show it under the bottle of the hydration drink.
Finally, move the ceramic plate onto the center of the bread, and layer it so that the plate is on top of the hydration drink.
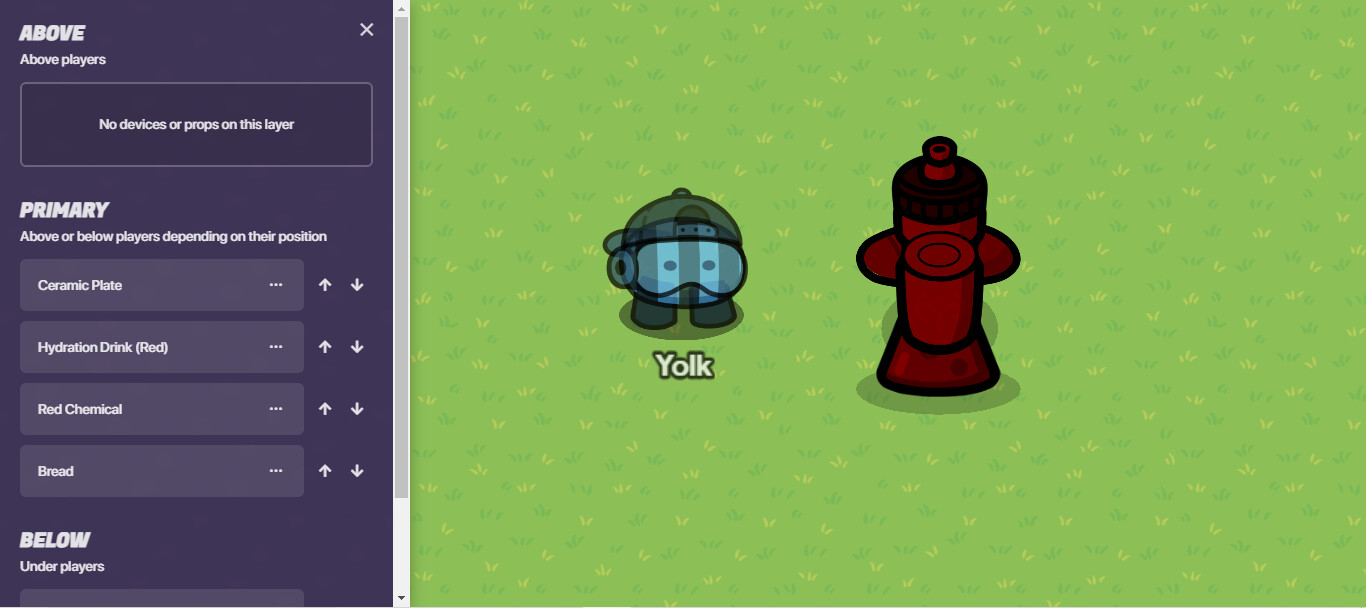
And there you have it, your very own fire hydrant for any urban projects you work on.
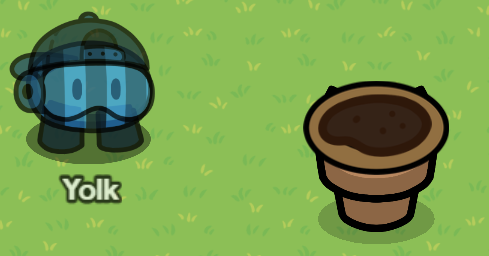
Bonsai Tree
Needed props: 1 Ceramic plate (Tint 167:118:73), 1 Evil potted plant (No tint), 1 Dirt (Tint 96:92:92), 2 groundbreaking plants (Tint 143:90:0), and a LOT of leaf props (Tinted to your preference)
First, place the ceramic plate on top of the evil potted plant so that the plant growing in the pot is covered.

Next, place the dirt on top of the plate and use layering to make in show on top of it.
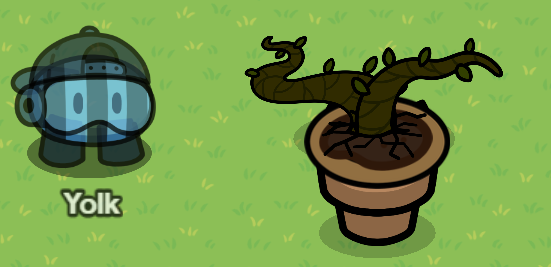
After that, align the groundbreaking plants in the dirt so that it looks as if they come from one stem, and layer them so they show on top of the dirt. Any combination of groundbreaking plants can be used to create your personalized tree, but I recommend the two shown in the picture below.
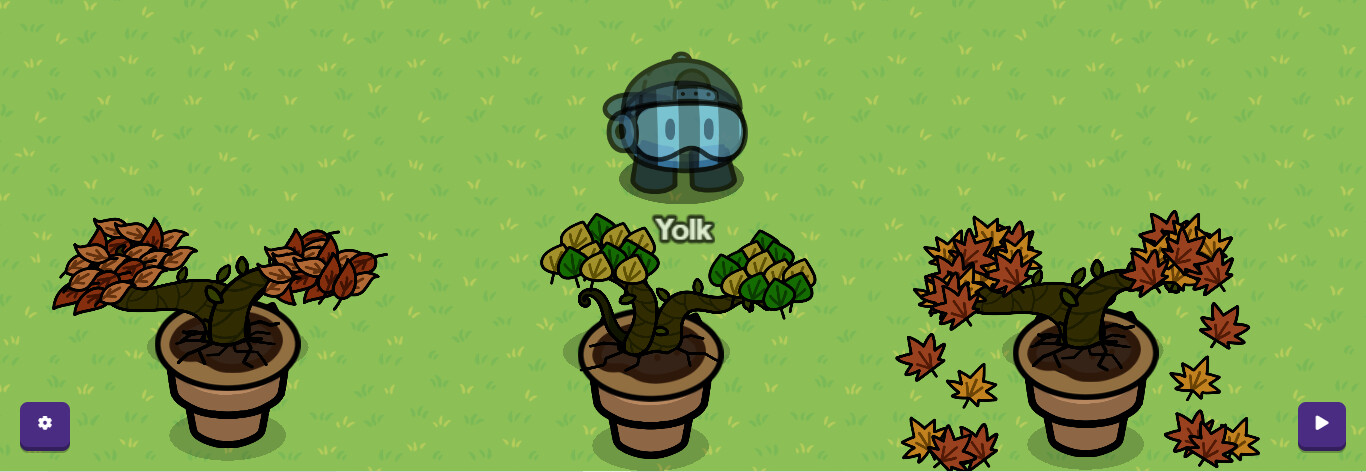
Finally, copy multiple leaf props to cover the tops of the groundbreaking plants. You can use any design of leaf and any color tint to make a tree that fits the image of its surroundings, or one that really pops. A few of my designs are shown below.
How to make a Corn Merchant
Alright. The final product:

This design is simple enough, I’m going to explain it with words.
Step 1: Put a bench and resize it to be slightly bigger than normal.
Step 2: Add 2 wooden poles sticking out of the bench. Tint the poles to make the color more like the bench.
Step 3: Put a sign and resize it to be as long as the bench from before. (Then tint it)
Step 4: Put a text device that says “Fresh Corn” (font and color your choice) on the sign
Step 5: Add item images of corn and tilt them, then put them on the bench.
(Optional) Step 6: Add a sentry, then make the sentry Seed Sid, and move the sentry to behind the bench
Step 7: Take a crafting table, set the appearence to farming plot, and add the corn prop on it.
Step 8: Repeat step 7 besides it
Step 9: Add a fence directly in front of what you made in Step 7 and 8
Made by NPC_da_CPU

Forum-Related section:
Wiki Editing Rules
Wiki Editing Rules
Please don’t make any of the edits violate the TOS or FAQ, remember, anyone can see who edits a wiki and what part they edit.
Please be responsible.
Everyone, please don’t edit when it is being edited.
You can politely ask in the replies.
Please don’t change the name when it has one, and remove it when you are done.
If you aren’t in the credits, please ask and say what you are doing before editing. This helps keep the document clean.
Don’t make references using @ since you can only do that 10 times in a post.
Credits
This is where the designs came from:
chub
_i_looked_down
Quimblo
Gimkiter28
MapleOil
Soccer_King
Caternaught
ShadowDragon44
Yolk
Contributors
If you added something to the guide, put your name here.
chub
Quimblo
Gimkiter28
Soccer_King
cheesebox
Caternaught
FusionLord
ShadowDragon44
EGGacha
Leo_Flowers
Gimmaster
AlvinFun
GimGulp1
Fulcrum-19
Gimpenetrable
Yolk
NPC_da_CPU