First of all, let me clarify. This is NOT how to save a map for future editing. This is a guide on how to make a system so that players can import a save file and get their progress back.
Now that we’ve gotten that out of the way, we can get on with the real stuff:
To start out, there are a few concepts we’ll need to understand, so this will be split into chapters.
Getting what you want to save
You can’t have a save game without data to actually save. For this example, we’ll be using a game called “RPG.” This game is very simple. All you have to do is reach the disco floor.
(Each trigger will send off a signal to the barrier to disappear. You should use channels because wires a̶r̶e̶ t̶e̶r̶r̶i̶b̶l̶e are less flexible and cannot accomplish anywhere near as much.)
Unfortunately, the player is very lazy. They do not want to finish the entire game all in one sitting, they want to come back to it later! We can help them, because we’re good game developers.
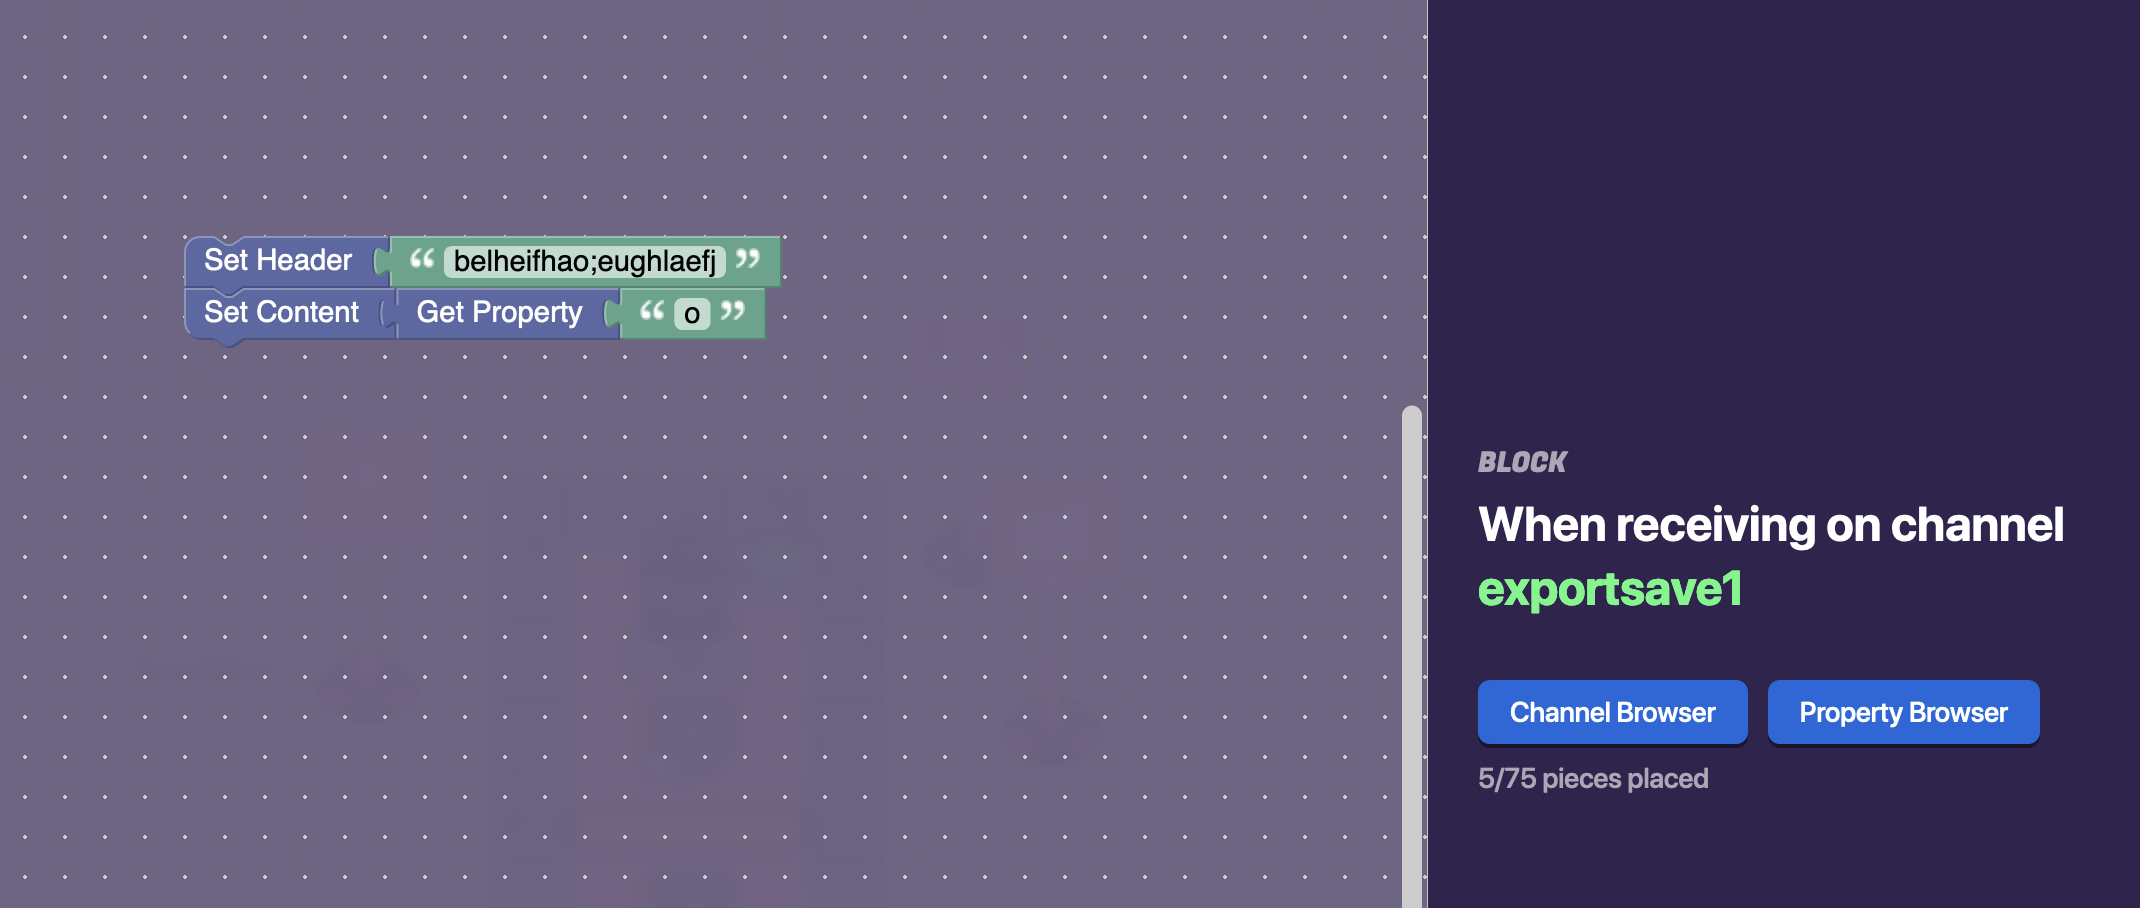
How do we store this, though? Well, let’s take a look at what we’re doing. All that’s happening is that we’re sending a signal on a channel, lets say channel “e.” This channel goes to the barrier, but it can also go to literally any other device we want at any time! So we want it to go to something that can store our data. The best way to do this (as far as I know, please give me better ideas if you have them) is through properties. So we’ll create property ‘o.’
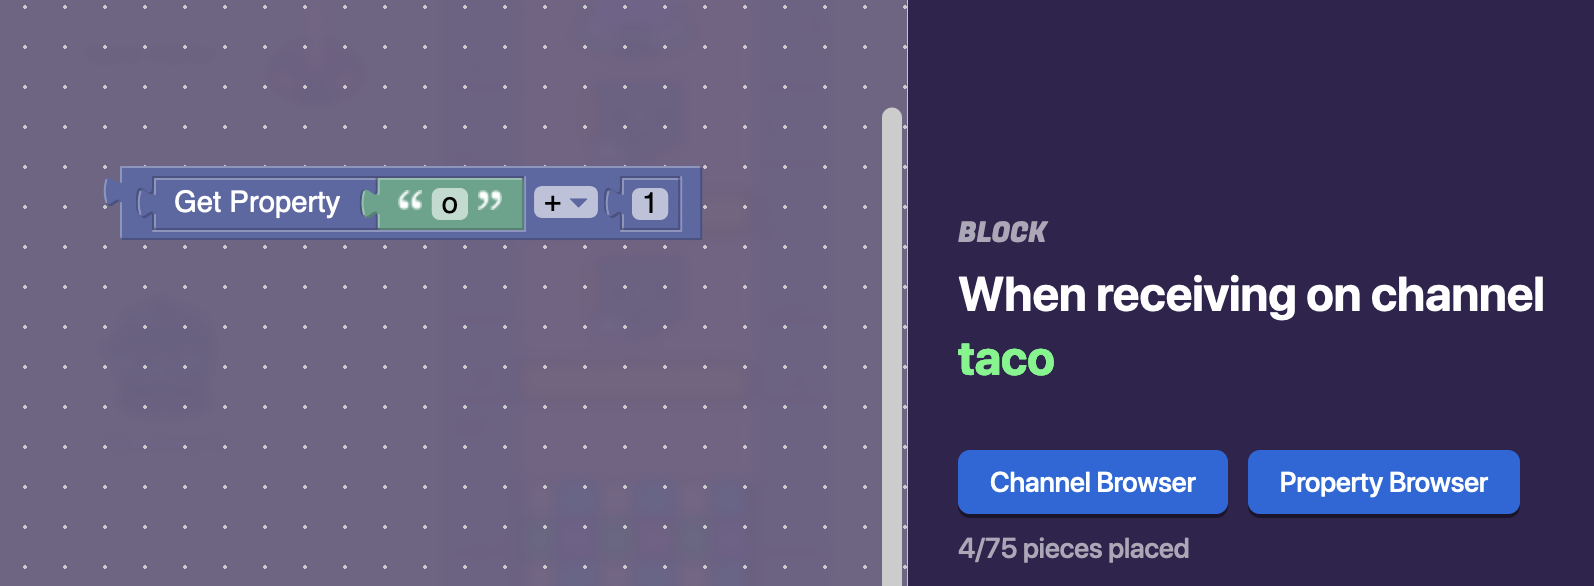
Property ‘o’ is a number that starts at 0. Unfortunately, properties can’t edit themselves, so we’ll have to have another device that can change ‘o’ and make it actually useful. We can use really anything with block code, but we’ll use text for this.
In the text, we create a block code by pressing 'When receiving on channel ‘taco’" (‘taco’ is the channel that the first trigger will trigger.) In this code area, we will put down the following blocks:
Here’s how this concept works. When one thing (progress on a quest, or a certain number of barriers removed) is edited, it must be stored somehow. The best way I’ve thought of doing this that doesn’t require complex operations is through digit numbers. Each digit is a new area to store one of ten possible states (0-9). You can have thirteen digits total – 11 whole numbers and 2 decimals – so that’s 10^13 possible options already with just one property! (If this concept isn’t clear enough, pls let me know)
Now we need to figure out how to show it to the player.
Exporting data
Alright, so you’ve got your data. Now for probably the easiest segment.
This is pretty simple, you just need to display your data to the player. We’ll use a popup with block code. First, you need a button or trigger that the player can press when they need to export their save.
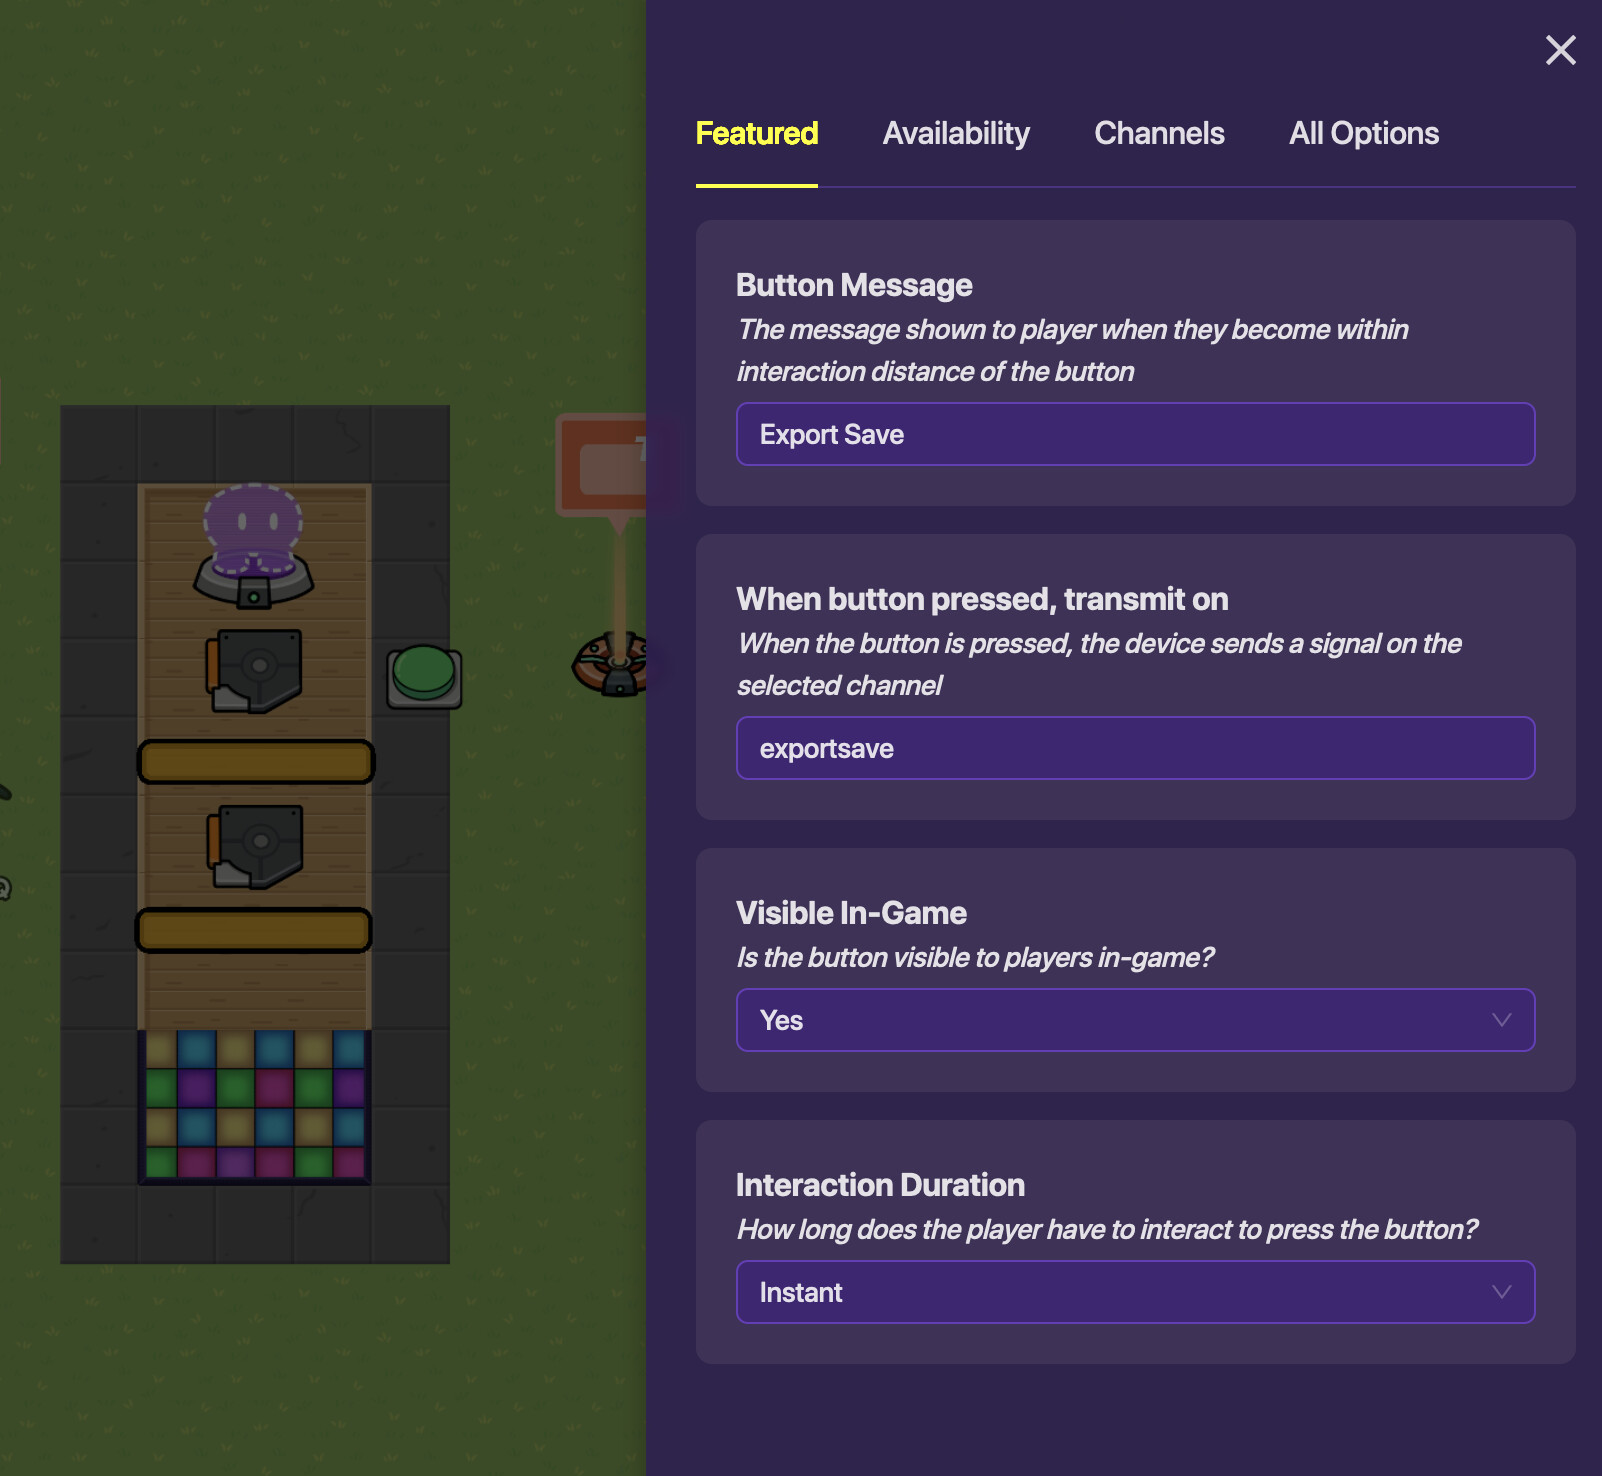
(IMPORTANT: It is possible to make it so only the triggering player gets the data, by getting player username and adding that in. I didn’t do that here, but it is possible)
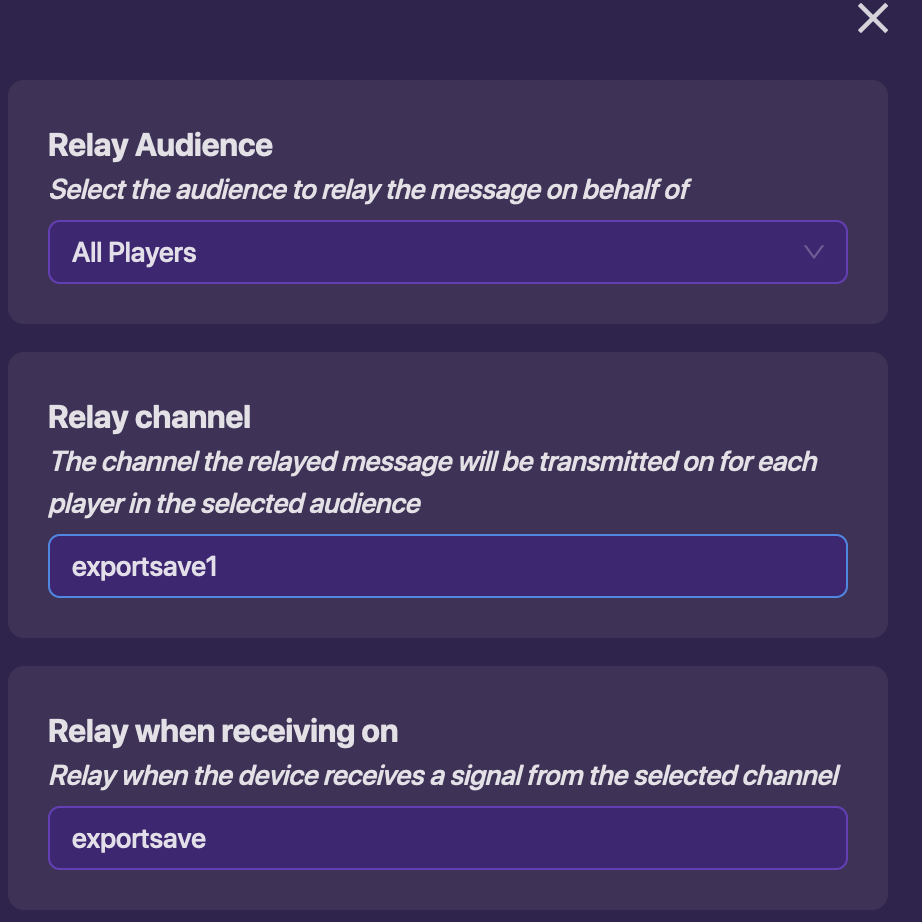
Now we relay it, here we’ll do all players since I have no idea how to relay it to only the button presser right now. So you set up a relay like this:
Now we make the popup with this code, so that it just displays the save to the player. You can format this however you want, as long as it does actually contain the save.
Bam! All done.
Importing data
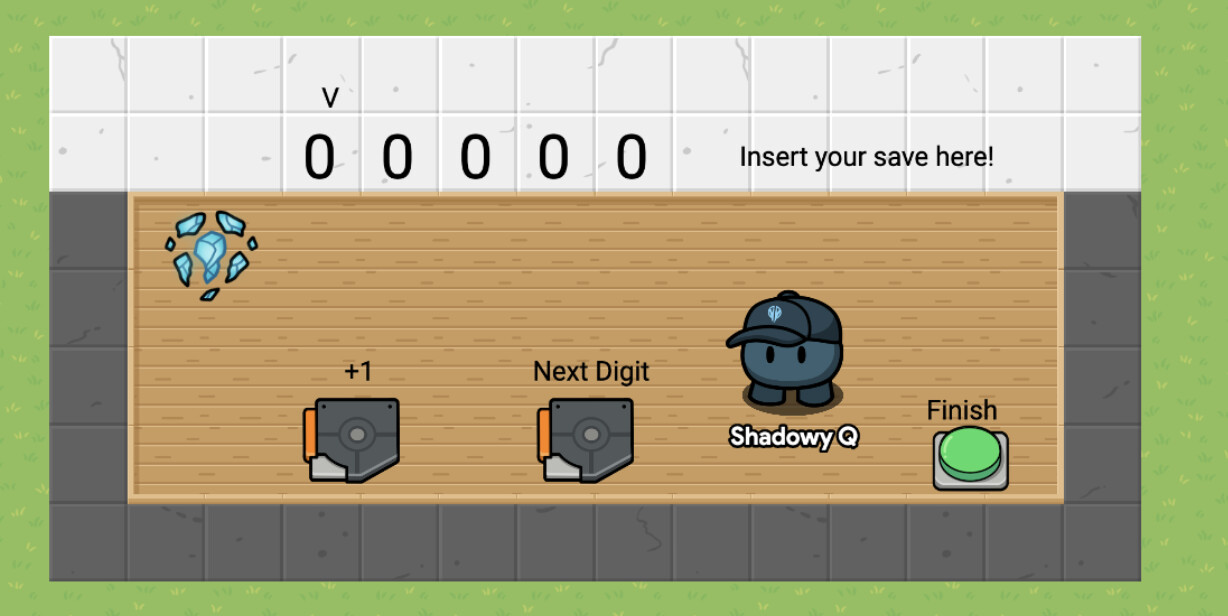
Here’s where it starts getting tricky. As of the creation date of this post, there is no way to do text input through a keyboard. The best option is to use scaling tickers, which are incredibly annoying, but that’s all we have.
There’s not much space in my area, so I’m adding a button that teleports you to a new area. You don’t need to do this if you have the room.
Then you gotta make a multi-digit counter. For the sake of space and getting this thing done in a reasonable amount of time, I’m not going to include the instructions here, but you want something that looks a bit like this: (length may vary based on how long your actual save string is gonna be)
If I find a link on how to make this or I create a guide, I’ll put it here.
Implementing your save state
Now for the fun part! You’ve saved your data, exported it, and imported it. Now you gotta do something with it.
The counter used in the import step should add these digits to a property (this uses property ‘o’ once again). You can do this with anything with block code, simply by changing the property by a certain value whenever the counter is changed. What about reading it, though? To do that, you’re gonna have to do some math.
The data is stored digit by digit, so we’ll have to extract a single digit from our big property. To do that, we’ll need some block code. I’m going to use the text box “Finish” in my counter example to do it. (IMPORTANT: This depends on the number of digits in your save string. For now, we just have one digit, but we’re going to pretend that we have two.) Here’s some code on how to do this:
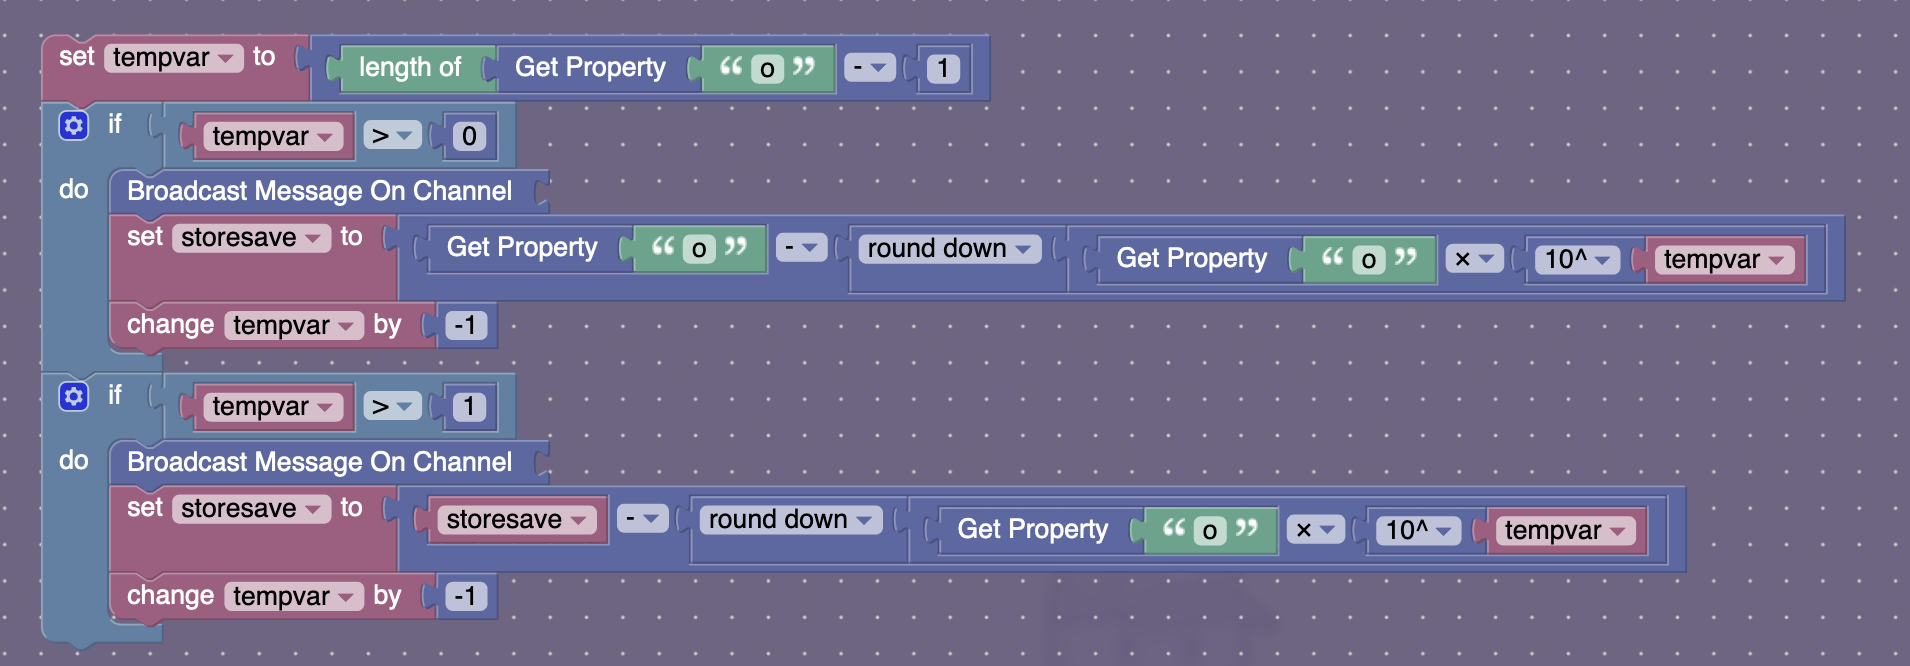
That may look like a lot, but let me explain.
Tempvar (ignore the name) is a variable that checks the length of the property, so that it can locate each individual digit. The code basically multiplies the property by 10^tempvar then rounds it down, so you get the very top digit.
Once you have that big digit, you can either use that to determine channel sent to, or send to a channel a certain number of times (gimkit please add for loops) and use that as your output. This requires user input, this is not code you can just copy and paste in.
From there, it subtracts that digit from the property and lowers tempvar by one, so we move on to the next digit and repeat. You need as many if statements as you have digits in the save code.
I’m absolutely sure that code doesn’t work too well right now, so PLEASE let me know of any suggestions you have. Other than that, congrats, you just learned how to make a save game. Even if the specifics don’t work, you have the general concept.
Thank you for reading my guide. Sorry if it’s a bit complicated, I tried my best to simplify it, but its literally just hard to understand. Even I still can’t wrap my mind around it fully.
If you have any suggestions on how to improve this, you can reply to this post and let me know. Any and all feedback is appreciated. Thank you so much for reading, and have a nice day!