How to Make Animation | Difficulty: 
Introduction
I’ve seen some posts regarding animation, and so I decided to go through the pain to make a meh car look like it’s driving.
Disclaimer
The reason this guide is ![]() is because of the repetitive work. If anyone finds a better way to do this, please tell me! I would want to know how to make this more effective. I’m making this guide because I didn’t see any others about this, and if you already knew this, then, well, nice job
is because of the repetitive work. If anyone finds a better way to do this, please tell me! I would want to know how to make this more effective. I’m making this guide because I didn’t see any others about this, and if you already knew this, then, well, nice job ![]() !
!
Table of Contents
Original Design
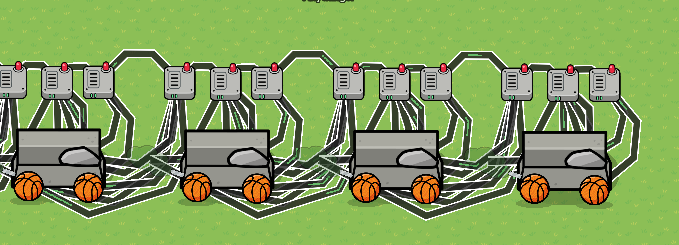
For my original design, I used wire repeaters, and a LOT of wires, to make groups of props (which come together to create a car in my case) appear and disappear. The way this works is when the game starts (Lifecycle), it sends a pulse to a wire repeater. Since my object had more props than the maximum amount of wires allowed on a single device, I used multiple wire repeaters. (Note: you will need enough wires for the double number of props because one set will appear and the other will disappear.) The first set of props should be visible on game start, but the rest of the sets deactivated. Each set of wire repeaters should hide the old set and show the next set. Only the first wire repeater of each set had a delay (which for me was 0.5 seconds). I just made my design and copied it over and over again.
Upgraded Design
For the second design, I used channels and blocks instead. When the game starts (Lifecycle), it starts a repeater that runs however long you want your delay to be (mine was 0.5, again).
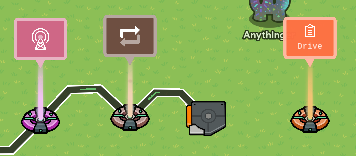
The repeater runs the trigger again and again, which simultaneously deactivates and activates sets of props using blocks. (Default value for Drive was zero)

To pair this up with the sets, every individual prop shows and hides in a specific order:
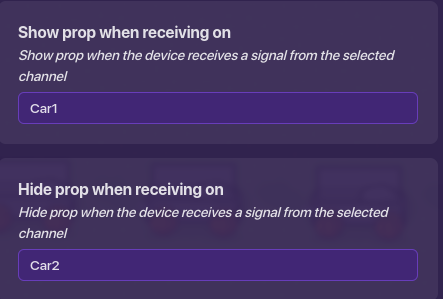
followed by
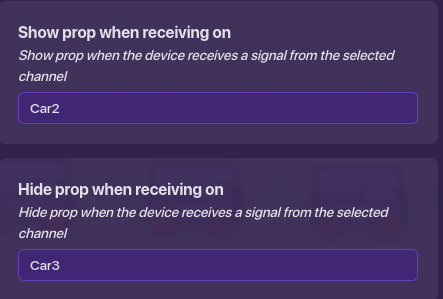
…until we reach the end:
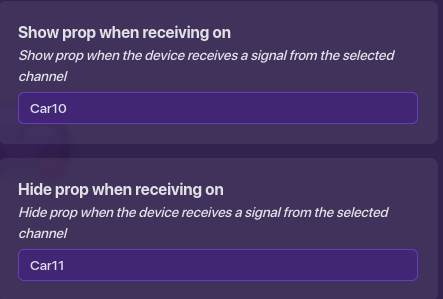
Overall, it looks much cleaner. The benefit is that you can instantly change the whole setup’s delay because it all depends on one repeater. Also, it’s much faster to debug.
Optional Looping
If you want your animation to cycle, you can make it loop like this: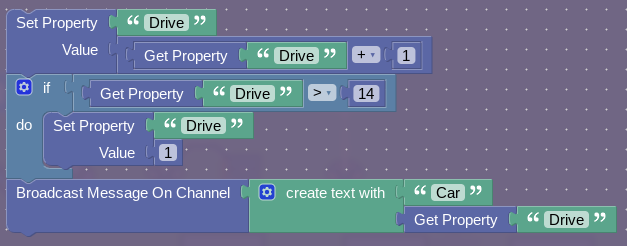
I used fourteen as the maximum because I had thirteen cars. You can change that number to whatever fits your needs.
Potential Uses
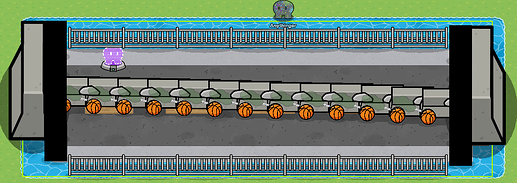
This system can be used in many different Gimkit Creative games, and for this guide, I made just one of the many ways this can be implemented. I made a bridge with tunnels on both sides surrounded by water. I used the looping system to make this:
If you want to see what this looks like in-game, you can see it here:
Conclusion
Turns out, animation is possible in Gimkit Creative! With some effort, you can improve your games, tenfold!
If you liked this guide, feel free to ![]() it and let me know how you implemented it in your games! Thanks for reading
it and let me know how you implemented it in your games! Thanks for reading ![]() !
!
0 voters


