 Please read the Wiki Editing Rules at the bottom before editing.
Intro:
Many people have been asking for FNAF map ideas so I thought, why not make The Ultimate Guide To FNAF?
Note: This guide uses wires, channels , scope , and blocks .
(If you don’t know what they mean, click the highlighted-blue link, it’ll take you to some guides.)
Guide Warnings
Difficulty/Lag Warning:
This guide uses lots of properties, triggers and blockcode.
It also uses lots of memory which can result in lag.
DON’T PUBLISH IN DISCOVERY
Fnaf is copyrighted and your map will be taken down.
The Basics:
Closing/Opening Doors
Closing/Opening Doors
[ Difficulty ![]() or 3/10 ]
or 3/10 ]
Related Post:
Power System, like FNaF1 (🟩) - #20 by Haiasi
Place two Game Overlays.
Set their placement to be in the Top Left and Top Right of the screen.
Name them “Close Left Door” and “Close Right Door.”
Make sure both of them are active on game start and have the scope of player.
Now, place two other Game Overlays named “Close Left Door” and “Close Right Door.”
Make them the same settings as the previous overlays but make them inactive on game start.
Now, wire the “Close Left Door and Right Door” overlays to show some props in the Left and Right gaps of your office.
(Close Left Door) Button Pressed > (Left Door Prop) > Show Prop
(Close Right Door) Button Pressed > (Right Door Prop) Show Prop
Now, wire the “Close Left Door” Overlay to the “Open Left Door” Overlay and vice versa.
Use Wire Repeaters to Hide the Overlay pressed.
(also repeat for the right door overlay)
(Close Left Door) Button Pressed > (Wire Repeater) Repeat Wire Pulse
(Wire Repeater) Wire Pulse Repeated > (Close Left Door) Hide Overlay
(Close Left Door) Button Pressed > (Open Left Door) Show Overlay
DoorLights
DoorLights:
[ Difficulty ![]() or 2/10-3/10 ]
or 2/10-3/10 ]
Place four Game Overlays. (the settings are the same from the door overlays)
If you don’t get it, the “Turn On Left Light” and “Turn On Right Light” overlay are active on game start while the “Turn Off Left Light” and “Turn Off Right Light” Overlays are inactive on game start.
Wire the “Turn On Left Light” to a Wire Repeater which hides itself and to the “Turn Off Left Light” Overlay.
(Turn On Left Light) Button Pressed > (Wire Repeater) Repeat Wire Pulse
(Wire Repeater) Wire Pulse Repeated > (Turn On Left Light) Hide Overlay
(Turn On Left Light) Button Pressed > (Turn Off Left Light) Show Overlay
Do this for the Right Light and Vice Versa.
Place a barrier next to the Left and Right Doors
Make the opacity 1.00.
Place another barrier but make it a bit lighter.
Wire the “Turn On Left and Right Light” Overlay to start a Repeater that shows and hides both of the barriers.
Button Pressed > Start Repeater
Repeater Runs Task > Activate/Deactivate Barrier/s
Now, wire the “Turn Off Left and Right” Overlay to stop the Repeater.
Button Pressed > Stop Repeater
Cameras
Cameras:
[ Difficulty ![]() or 2/10 ]
or 2/10 ]
Place 11 Buttons and Triggers in your office.
Make the Button Interaction instant and make the Trigger have a Delay of 0.5 seconds.
(To make the Camera Opening Delay)
Place them in this pattern:
Connect the Trigger to a Teleporter which teleports you to the cam that corresponds with the Button Name.
Place another Button in that cam called “Return to Office.”
Connect the Button to a Teleporter which teleports you back to the office.
Draining Power
Draining Power:
[ Difficulty ![]() or 3/10 ]
or 3/10 ]
In FNAF, when you close the doors, turn on the lights or open the cameras, you lose power.
You only have a specific amount of power each night and if you lose all of them, you die.
Note: This Guide assumes you already have your Door Mechanics, Light Mechanics and Camera Mechanics.
Place a Counter, Repeater and a Property
Connect your “Close Left Door and Close Right Door” Overlay to a Repeater.
(Close Left Door) Button Pressed > (Repeater) Start Repeater
(Close Right Door) Button Pressed > (Repeater) Start Repeater
Get your Counter.
Make the scope player and make it link to a Property
Connect both repeaters to the counter decrementing it (as the more nights pass you can make the repeater faster because it can only decrement the counter by one)
Now, get your “Open Left and Right Door” Overlays.
Connect both of them to stop the Repeater.
This is to ensure that when the door is opened, the power won’t go down.
(Open Left Door) Button Pressed > (Repeater) Stop Repeater
(Open Right Door) Button Pressed > (Repeater) Stop Repeater
Repeat this for the lights.
Power Outage
Timer
Every night in FNAF, the Animatronic AI gets bigger causing them to be more agressive.
Look at the movement opportunities dropdown for an explanation.
We’ll create a timer.
Place a Lifecycle, Repeater, Counter (starting value is 534) and a Property (starting value is 534)
Connect a Lifecycle to the Repeater (every 1.00 seconds).
Event Occurs > Start Repeater
Now, get your counter.
Make sure it is linked to the property called “NightNumber.”
Repeater Runs Task > Decrement Counter
This makes it easier to manage the Animatronic AI agression.
Animatronic AI Levels/Movement Opportunities
Animatronic AI Levels Explanation:
Animatronic AI Levels Explanation:
Here’s a guide explaining fnaf and the Animatronic AI Levels.
(Skip to 10:10 of the video for the AI level explanation if you don’t wanna sit there for 22 minutes)
Freddy AI
Bonnie AI
Place a Lifecycle and a Repeater.
Connect the Lifecycle to the Repeater.
(Lifecycle) Event Occurs > (Repeater) Start Repeater
Now, connect the Repeater to a Trigger.
(Repeater) Repeater Runs Task —> (Trigger) Trigger
Now, put this in the blockcode.
(I think you could shorten it using concatenation)
if Get Property “BonnieAI” = 1
do Set “BonnieAI” to random integer from 0 to 20

if “BonnieAI” < Get Property “BonnieAI”
do Broadcast Message On Channel “bonniemovementopportunity”
Now, go to the props you used for bonnie.
Set all of them except the one on Show Stage to show on “bonniemovementopportunity.”
Now, wire all the props together to hide themselves when one is made visible.
This will make sure that bonnie won’t be in multiple locations at the same time.
(Prop) Prop Made Visible —> (Prop) Hide Prop
Repeat them until the Property “BonnieAI” is 20.
I don’t know if using concatenation will shorten the code and save memory so feel free to tell me if you could!
(All the Animatronic AI Level Blockcode takes up 40% memory so if you could do it with concatenation, tell me in the replies ![]() .
.
You’re done!
Chica AI
Now, Chica’s AI is a bit more complicated.
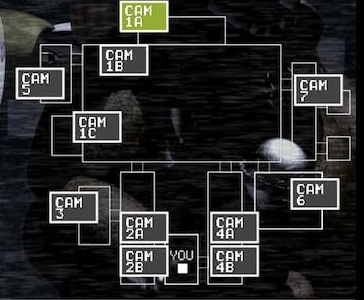
Chica can’t randomly teleport to rooms and can only move in adjacent rooms forward or backward in the right side of the map.
(In this pattern)
Chica needs five movement opportunities (assuming all of them are forward) to get to your office.
(The “YOU” icon in the image above)
So, let’s create a new property called “ChicaLocation.”
Make sure it is a number.
Each camera location corresponds to a Number Value of the property.
For example, “1” would be the first camera, show stage.
“2” would be Cam 7 and so on and so forth.
Now, for the AI Movement Opportunity, simply copy the blockcode from Bonnie’s AI but add this in:
if Get Property “ChicaAI” = 1
do Set “ChicaAI” to random integer from 0 to 20

if “ChicaAI” < Get Property “ChicaAI”
do (currently existing code, leave the do part blank)

else if “ChicaLocation” = 1
        do Broadcast Message On Channel “Cam7”

else if “ChicaLocation” = 2
        do Broadcast Message On Channel “Cam4A”

else if “ChicaLocation” = 3
        do Broadcast Message On Channel “Cam4B”

else if “ChicaLocation” = 4
        do Broadcast Message On Channel “inoffice”
Now, go to the props you used for chica.
Set all of them except the one on Show Stage to show on “chicamovementopportunity.”
Now, wire all the props together to hide themselves when one is made visible.
This will make sure that bonnie won’t be in multiple locations at the same time.
(Prop) Prop Made Visible —> (Prop) Hide Prop
Foxy AI
So, foxy’s gimmick is that he just stays in Pirate Cove.
You might say, “How does he move?”
Good question.
Foxy has 5 stages.
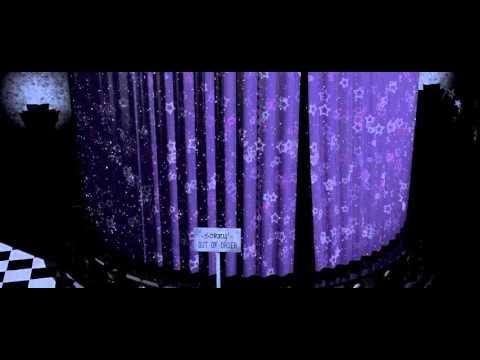
Stage 1 - Not Peeking In the Pirate Cove curtain
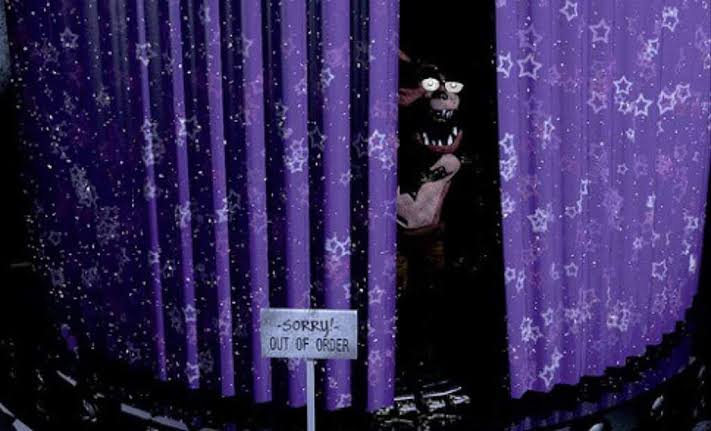
Stage 2 - Face Peeking In the Pirate Cove curtain
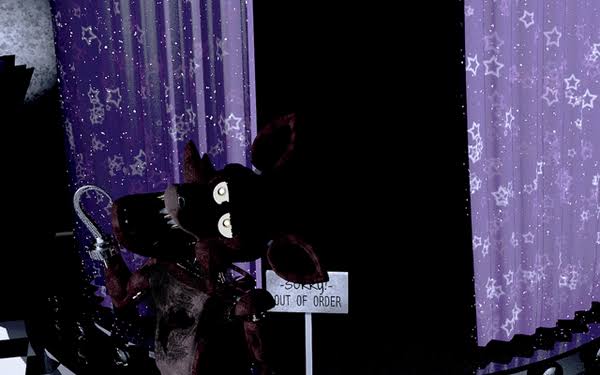
Stage 3 - Whole body is Peeking out of The Pirate Cove Curtain
Stage 4 - Out of Pirate Cove running to your office and will jumpscare you in ~20 seconds but his run can be triggered by looking at Cam 4A.
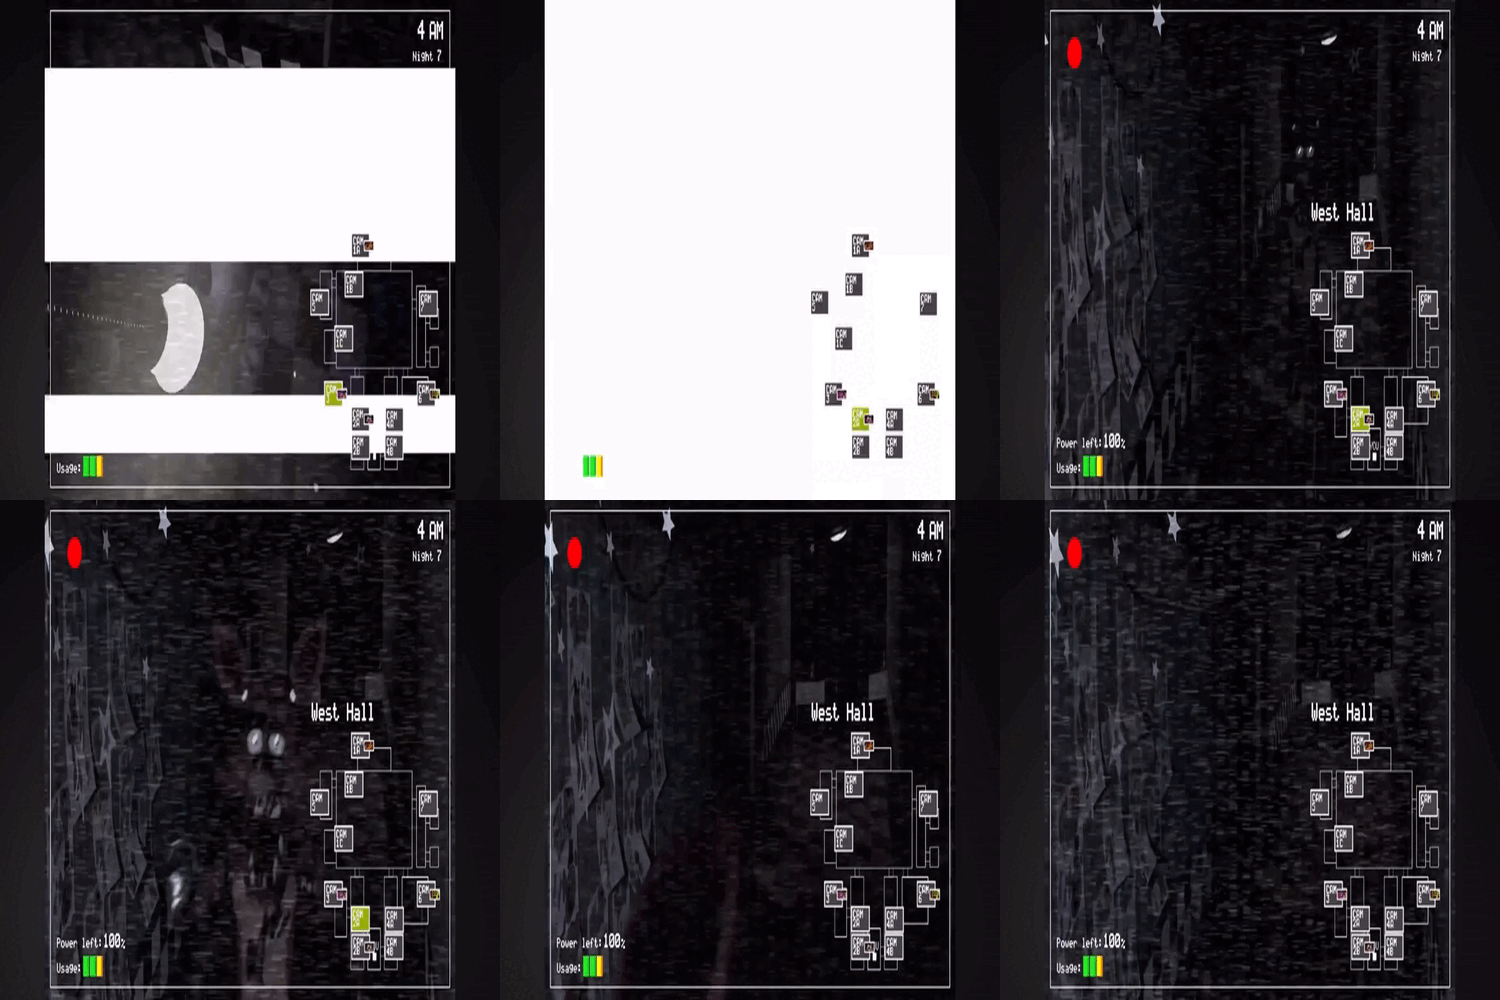
Stage 5 - In your office jumpscaring you
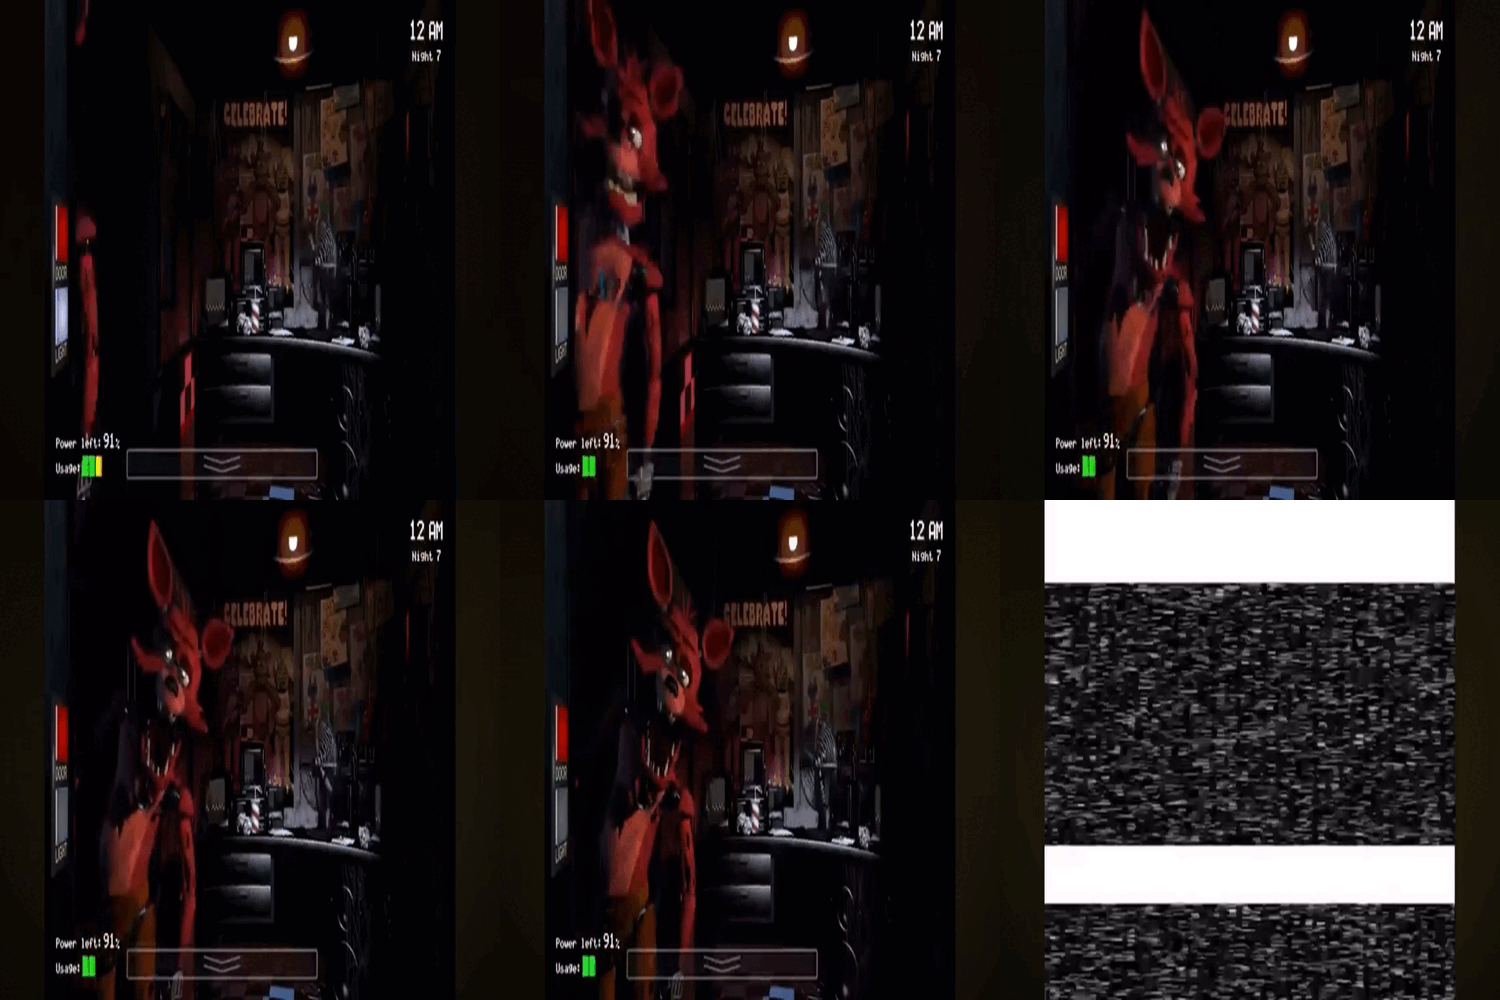
Every single successful movement opportunity, he advances one stage (except for stage 4, that don’t use movement opportunities, they move as time passes ignoring whether they pass or fail their movement opportunities.
However, when you open the cameras (it doesn’t matter what camera you look at) he gets stalled for a random amount of time causing him to fail all his movement opportunities regardless if he passes.
You can wire the camera buttons to a trigger randomizer which deactivates the repeater that causes foxy to advance through his stages for a random amount of time.
(Whatever button you are using) Button Pressed --> (Trigger) Trigger
Blockcode:
Set [FoxyStall] to Random Integer from # to #

if [FoxyStall] = 5
do Broadcast Message On Channel "FoxyStalled5Sec"

else if [FoxyStall] = 6
         do Broadcast Message On Channel "FoxyStalled6Sec"
Add more to your liking, just repeat more else if dos.
Go to your Repeater and make the Stop When Receiving On channel to “FoxyStalled.”
Now for the channels, get your trigger/s (the one without blockcode)
Make the delay the one you put in the blockcode and make the Trigger When Receiving On setting to correspond with it’s delay and blockcode.
Now, wire the Trigger/s to the Repeater to start it again to make Foxy move again after he has been stalled.
(Trigger) Triggered --> (Repeater) Start Repeater
For his movement opportunities, just copy it from the other animatronics and make them show and hide the props you used for him to simulate him advancing in stages.
if Get Property “FoxyAI” = 1
do Set “FoxyAI” to random integer from 0 to 20

if “[FoxyAI]" < Get Property “FoxyAI"
do Broadcast Message On Channel “foxymovementopportunity”
Golden Freddy AI
Golden Freddy isn’t really an active animatronic.
You can find him by having a 1/100,000 chance of seeing the Golden Freddy poster in the West Hall Corner.
Then, he will appear in the office and jumpscare you.
You can also get him by inputting “1987” in the Custom Night mode.
(By setting freddy’s AI to 1, Bonnie’s to 9, Chica’s to 8 and foxy’s to 7.)
WAS THAT THE BITE OF 87??
To avoid the jumpscare (you can only do it from getting the rare poster)
you have to reopen the cameras and he will go away.
Other:
Jumpscares: (Pixel-Art)
Freddy Jumpscare
First, copy and paste these emojis into textboxes and make sure to align them. (I know they look weird but it should look normal in one)
Textbox 1:
![]()
![]()
![]()
![]()
![]()
![]()
![]()
![]()
![]()
![]()
![]()
![]()
![]()
![]()
![]()
![]()
![]()
![]()
![]()
![]()
![]()
![]()
![]()
![]()
![]()
![]()
![]()
![]()
![]()
![]()
![]()
![]()
![]()
![]()
![]()
![]()
![]()
![]()
![]()
![]()
![]()
![]()
![]()
![]()
![]()
![]()
![]()
![]()
![]()
![]()
![]()
![]()
![]()
![]()
![]()
![]()
![]()
![]()
![]()
![]()
![]()
![]()
![]()
![]()
![]()
![]()
![]()
![]()
![]()
![]()
![]()
![]()
![]()
![]()
![]()
![]()
![]()
![]()
![]()
![]()
![]()
![]()
![]()
![]()
![]()
![]() 🏾🏾🏾:black_large_square:
🏾🏾🏾:black_large_square:![]()
![]()
![]()
![]()
![]()
![]()
![]()
![]()
![]()
![]() 🏾🏾🏾:black_large_square:
🏾🏾🏾:black_large_square:![]()
![]() 🏾🏿🏿🏿🏾:black_large_square:
🏾🏿🏿🏿🏾:black_large_square:![]()
![]()
![]()
![]()
![]()
![]()
![]()
![]() 🏾🏿🏿🏿🏾:black_large_square:
🏾🏿🏿🏿🏾:black_large_square:
![]() 🏾🏿🏿🏿🏾:black_large_square:🏾🏾🏾🏾🏾🏾🏾:black_large_square:🏾🏿🏿🏿🏾:black_large_square:
🏾🏿🏿🏿🏾:black_large_square:🏾🏾🏾🏾🏾🏾🏾:black_large_square:🏾🏿🏿🏿🏾:black_large_square:
![]() 🏾🏿🏿🏿:black_large_square:🏾🏾🏾🏾🏾🏾🏾🏾🏾:black_large_square:🏿🏿🏿🏾:black_large_square:
🏾🏿🏿🏿:black_large_square:🏾🏾🏾🏾🏾🏾🏾🏾🏾:black_large_square:🏿🏿🏿🏾:black_large_square:
![]()
![]() 🏾🏾:black_large_square:🏾:black_large_square:
🏾🏾:black_large_square:🏾:black_large_square:![]()
![]()
![]() 🏾:black_large_square:
🏾:black_large_square:![]()
![]()
![]() 🏾:black_large_square:🏾🏾:black_large_square:
🏾:black_large_square:🏾🏾:black_large_square:![]()
![]()
Textbox 2:
![]()
![]()
![]()
![]()
![]() 🏾🏾🏾🏾🏾🏾🏾🏾🏾🏾🏾:black_large_square:
🏾🏾🏾🏾🏾🏾🏾🏾🏾🏾🏾:black_large_square:![]()
![]()
![]()
![]()
![]()
![]()
![]()
![]()
![]() 🏾🏾:black_large_square:
🏾🏾:black_large_square:![]() 🏾🏾🏾:black_large_square:
🏾🏾🏾:black_large_square:![]() 🏾🏾:black_large_square:
🏾🏾:black_large_square:![]()
![]()
![]()
![]()
![]()
![]()
![]()
![]() 🏾🏾:black_large_square:
🏾🏾:black_large_square:![]()
![]()
![]() 🏾:black_large_square:
🏾:black_large_square:![]()
![]()
![]() 🏾🏾:black_large_square:
🏾🏾:black_large_square:![]()
![]()
![]()
![]()
![]()
![]() 🏾🏾🏾:black_large_square:
🏾🏾🏾:black_large_square:![]()
![]()
![]() 🏾:black_large_square:
🏾:black_large_square:![]()
![]()
![]() 🏾🏾🏾:black_large_square:
🏾🏾🏾:black_large_square:![]()
![]()
![]()
![]()
![]() 🏾🏾🏾:black_large_square:
🏾🏾🏾:black_large_square:![]()
![]()
![]()
![]()
![]()
![]()
![]()
![]() 🏾🏾🏾:black_large_square:
🏾🏾🏾:black_large_square:![]()
![]()
![]()
![]()
![]() 🏾🏾:black_large_square:🏽🏽🏽:black_large_square:
🏾🏾:black_large_square:🏽🏽🏽:black_large_square:![]()
![]() 🏽🏽🏽:black_large_square:🏾🏾:black_large_square:
🏽🏽🏽:black_large_square:🏾🏾:black_large_square:![]()
![]()
![]()
![]()
![]()
![]() 🏾:black_large_square:🏽🏽🏽🏽:black_large_square:🏽🏽🏽🏽:black_large_square:🏾:black_large_square:
🏾:black_large_square:🏽🏽🏽🏽:black_large_square:🏽🏽🏽🏽:black_large_square:🏾:black_large_square:![]()
![]()
![]()
![]()
![]()
![]()
![]()
![]()
![]() 🏽🏽🏽🏽:black_large_square:🏽🏽🏽🏽:black_large_square:
🏽🏽🏽🏽:black_large_square:🏽🏽🏽🏽:black_large_square:![]()
![]()
![]()
![]()
![]()
Textbox 3:
![]()
![]()
![]()
![]()
![]()
![]()
![]()
![]()
![]()
![]()
![]()
![]()
![]()
![]()
![]()
![]()
![]()
![]()
![]()
![]()
![]()
![]()
![]()
![]()
![]()
![]()
![]() 🏾:black_large_square:
🏾:black_large_square:![]()
![]()
![]()
![]()
![]()
![]() 🏾:black_large_square:
🏾:black_large_square:![]()
![]()
![]()
![]()
![]()
![]()
![]()
![]()
![]()
![]()
![]() 🏾🏾:white_large_square:
🏾🏾:white_large_square:![]()
![]()
![]()
![]() 🏾🏾:black_large_square:
🏾🏾:black_large_square:![]()
![]()
![]()
![]()
![]()
![]()
![]()
![]()
![]()
![]()
![]()
![]() 🏾🏾🏾🏾🏾🏾🏾:black_large_square:
🏾🏾🏾🏾🏾🏾🏾:black_large_square:![]()
![]()
![]()
![]()
![]()
![]()
![]()
![]()
![]()
![]()
![]()
![]()
![]()
![]()
![]()
![]()
![]()
![]()
![]()
![]()
![]()
![]()
![]()
![]()
![]()
![]()
![]()
Bonnie Jumpscare
Paste these emojis into a textbox.
Textbox 1:
![]()
![]()
![]()
![]()
![]()
![]()
![]()
![]()
![]()
![]()
![]()
![]()
![]()
![]()
![]()
![]()
![]()
![]()
![]()
![]()
![]()
![]()
![]()
![]()
![]()
![]()
![]()
![]()
![]()
![]()
![]()
![]()
![]()
![]()
![]()
![]()
![]()
![]()
![]()
![]()
![]()
![]()
![]()
![]()
![]()
![]()
![]()
![]()
![]()
![]()
![]()
![]()
![]()
![]()
![]()
![]()
![]()
![]()
![]()
![]()
![]()
![]()
![]()
![]()
![]()
![]()
![]()
![]()
![]()
![]()
![]()
![]()
![]()
![]()
![]()
![]()
![]()
![]()
![]()
![]()
![]()
![]()
![]()
![]()
![]()
![]()
![]()
![]()
![]()
![]()
![]()
![]()
![]()
![]()
![]()
![]()
![]()
![]()
![]()
![]()
![]()
![]()
![]()
![]()
![]()
![]()
![]()
![]()
![]()
![]()
![]()
![]()
![]()
![]()
![]()
![]()
![]()
![]()
![]()
![]()
![]()
![]()
![]()
![]()
![]()
![]()
![]()
![]()
![]()
![]()
![]()
![]()
![]()
![]()
![]()
![]()
![]()
![]()
![]()
![]()
![]()
![]()
![]()
![]()
![]()
![]()
![]()
![]()
![]()
![]()
![]()
![]()
![]()
![]()
![]()
![]()
![]()
![]()
![]()
![]()
![]()
![]()
![]()
![]()
![]()
![]() �
�
Textbox 2:
![]()
![]()
![]()
![]()
![]()
![]()
![]()
![]()
![]()
![]()
![]()
![]()
![]()
![]()
![]()
![]()
![]()
![]()
![]()
![]()
![]()
![]()
![]()
![]()
![]()
![]()
![]()
![]()
![]()
![]()
![]()
![]()
![]()
![]()
![]()
![]()
![]()
![]()
![]()
![]()
![]()
![]()
![]()
![]()
![]()
![]()
![]()
![]()
![]()
![]()
![]()
![]()
![]()
![]()
![]()
![]()
![]()
![]()
![]()
![]()
![]()
![]()
![]()
![]()
![]()
![]()
![]()
![]()
![]()
![]()
![]()
![]()
![]()
![]()
![]()
![]()
![]()
![]()
![]()
![]()
![]()
![]()
![]()
![]()
![]()
![]()
![]()
![]()
![]()
![]()
![]()
![]()
![]()
![]()
![]()
![]()
![]()
![]()
![]()
![]()
![]()
![]()
![]()
![]()
![]()
![]()
![]()
![]()
![]()
![]()
![]()
![]()
![]()
![]()
![]()
![]()
![]()
![]()
![]()
![]()
![]()
![]()
![]()
![]()
![]()
![]()
![]()
![]()
![]()
![]()
![]()
![]()
![]()
![]()
![]()
![]()
![]()
![]()
![]()
![]()
![]()
![]()
![]()
![]()
![]()
![]()
![]()
![]()
![]()
![]()
![]()
![]()
![]()
![]()
![]()
![]()
![]()
![]()
![]()
![]()
![]()
![]()
![]()
![]()
![]()
![]()
![]()
![]()
![]()
Textbox 3:
![]()
![]()
![]()
![]()
![]()
![]()
![]()
![]()
![]()
![]()
![]()
![]()
![]()
![]()
![]()
![]()
![]()
![]()
![]()
![]()
![]()
![]()
![]()
![]()
![]()
![]()
![]()
![]()
![]()
![]()
![]()
![]()
![]()
![]()
![]()
![]()
![]()
![]()
![]()
![]()
![]()
![]()
![]()
![]()
![]()
![]()
![]()
![]()
![]()
![]()
![]()
![]()
![]()
![]()
![]()
![]()
![]()
![]()
![]()
![]()
![]()
![]()
![]()
![]()
![]()
![]()
![]()
![]()
![]()
![]()
![]()
![]()
![]()
![]()
![]()
![]()
![]()
![]()
![]()
![]()
![]()
![]()
![]()
![]()
![]()
![]()
![]()
![]()
![]()
![]()
![]()
![]()
![]()
![]()
![]()
![]()
![]()
![]()
![]()
![]()
![]()
![]()
![]()
![]()
![]()
![]()
![]()
![]()
![]()
![]()
![]()
![]()
![]()
![]()
![]()
![]()
![]()
![]()
![]()
![]()
![]()
![]()
![]()
![]()
![]()
![]()
![]()
![]()
![]()
![]()
![]()
![]()
![]()
![]()
![]()
![]()
![]()
![]()
![]()
![]()
![]()
![]()
![]()
![]()
![]()
![]()
![]()
![]()
![]()
![]()
![]()
![]()
![]()
![]()
![]()
![]()
![]()
![]()
![]()
![]()
![]()
![]()
![]()
![]()
![]()
![]()
![]()
Chica Jumpscare
Paste these emojis into a textbox.
Textbox 1:
![]()
![]()
![]()
![]()
![]()
![]()
![]()
![]()
![]()
![]()
![]()
![]()
![]()
![]()
![]()
![]()
![]()
![]()
![]()
![]()
![]()
![]()
![]()
![]()
![]()
![]()
![]()
![]()
![]()
![]()
![]()
![]()
![]()
![]()
![]()
![]()
![]()
![]()
![]()
![]()
![]()
![]()
![]()
![]()
![]()
![]()
![]()
![]()
![]()
![]()
![]()
![]()
![]()
![]()
![]()
![]()
![]()
![]()
![]()
![]()
![]()
![]()
![]()
![]()
![]()
![]()
![]()
![]()
![]()
![]()
![]()
![]()
![]()
![]()
![]()
![]()
![]()
![]()
![]()
![]()
![]()
![]()
![]()
![]()
![]()
![]()
![]()
![]()
![]()
![]()
![]()
![]()
![]()
![]()
![]()
![]()
![]()
![]()
![]()
![]()
![]()
![]()
![]()
![]()
![]()
![]()
![]()
![]()
![]()
![]()
![]()
![]()
![]()
![]()
![]()
![]()
![]()
![]()
![]()
![]()
![]()
![]()
![]()
![]()
![]()
![]()
![]()
![]()
![]()
![]()
![]()
![]()
![]()
![]()
![]()
![]()
![]()
![]()
![]()
![]()
![]()
![]()
![]()
![]()
![]()
![]()
![]()
![]()
![]()
![]()
![]()
![]()
![]()
![]()
![]()
![]()
![]()
![]()
![]()
![]()
![]()
![]()
![]()
![]()
![]()
![]()
![]()
![]()
![]()
![]()
![]()
![]()
![]()
![]()
![]()
![]()
![]()
![]()
![]()
![]()
![]()
![]()
![]()
![]()
![]()
![]()
![]()
![]()
![]()
Textbox 2:
![]()
![]()
![]()
![]()
![]()
![]()
![]()
![]()
![]()
![]()
![]()
![]()
![]()
![]()
![]()
![]()
![]()
![]()
![]()
![]()
![]()
![]()
![]()
![]()
![]()
![]()
![]()
![]()
![]()
![]()
![]()
![]()
![]()
![]()
![]()
![]()
![]()
![]()
![]()
![]()
![]()
![]()
![]()
![]()
![]()
![]()
![]()
![]()
![]()
![]()
![]()
![]()
![]()
![]()
![]()
![]()
![]()
![]()
![]()
![]()
![]()
![]()
![]()
![]()
![]()
![]()
![]()
![]()
![]()
![]()
![]()
![]()
![]()
![]()
![]()
![]()
![]()
![]()
![]()
![]()
![]()
![]()
![]()
![]()
![]()
![]()
![]()
![]()
![]()
![]()
![]()
![]()
![]()
![]()
![]()
![]()
![]()
![]()
![]()
![]()
![]()
![]()
![]()
![]()
![]()
![]()
![]()
![]()
![]()
![]()
![]()
![]()
![]()
![]()
![]()
![]()
![]()
![]()
![]()
![]()
![]()
![]()
![]()
![]()
![]()
![]()
![]()
![]()
![]()
![]()
![]()
![]()
![]()
![]()
![]()
![]()
![]()
![]()
![]()
![]()
![]()
![]()
![]()
![]()
![]()
![]()
![]()
![]()
![]()
![]()
![]()
![]()
![]()
![]()
![]()
![]()
![]()
![]()
![]()
![]()
![]()
![]()
![]()
![]()
![]()
![]()
![]()
![]()
![]()
![]()
Foxy Jumpscare
Textbox 1:
![]()
![]()
![]()
![]()
![]()
![]()
![]()
![]()
![]()
![]()
![]()
![]()
![]()
![]()
![]()
![]()
![]()
![]()
![]()
![]()
![]()
![]()
![]()
![]()
![]()
![]()
![]()
![]()
![]()
![]()
![]()
![]()
![]()
![]()
![]()
![]()
![]()
![]()
![]()
![]()
![]()
![]()
![]()
![]()
![]()
![]()
![]()
![]()
![]()
![]()
![]()
![]()
![]()
![]()
![]()
![]()
![]()
![]()
![]()
![]()
![]()
![]()
![]()
![]()
![]()
![]()
![]()
![]()
![]()
![]()
![]()
![]()
![]()
![]()
![]()
![]()
![]()
![]()
![]()
![]()
![]()
![]()
![]()
![]()
![]()
![]()
![]()
![]()
![]()
![]()
![]()
![]()
![]()
![]()
![]()
![]()
![]()
![]()
![]()
![]()
![]()
![]()
![]()
![]()
![]()
![]()
![]()
![]()
![]()
![]()
![]()
![]()
![]()
![]()
![]()
![]()
![]()
![]()
![]()
![]()
![]()
![]()
![]()
![]()
![]()
![]()
![]()
![]()
![]()
![]()
![]()
![]()
![]()
![]()
![]()
![]()
![]()
![]()
![]()
![]()
![]()
![]()
![]()
![]()
![]()
![]()
![]()
![]()
![]()
![]()
![]()
![]()
![]()
![]()
![]()
![]()
![]()
![]()
![]()
![]()
![]()
![]()
![]()
![]()
![]()
![]()
![]()
![]()
![]()
![]()
![]()
![]()
![]()
![]()
![]()
![]()
![]()
![]()
![]()
![]()
![]()
![]()
Textbox 2:
![]()
![]()
![]()
![]()
![]()
![]()
![]()
![]()
![]()
![]()
![]()
![]()
![]()
![]()
![]()
![]()
![]()
![]()
![]()
![]()
![]()
![]()
![]()
![]()
![]()
![]()
![]()
![]()
![]()
![]()
![]()
![]()
![]()
![]()
![]()
![]()
![]()
![]()
![]()
![]()
![]()
![]()
![]()
![]()
![]()
![]()
![]()
![]()
![]()
![]()
![]()
![]()
![]()
![]()
![]()
![]()
![]()
![]()
![]()
![]()
![]()
![]()
![]()
![]()
![]()
![]()
![]()
![]()
![]()
![]()
![]()
![]()
![]()
![]()
![]()
![]()
![]()
![]()
![]()
![]()
![]()
![]()
![]()
![]()
![]()
![]()
![]()
![]()
![]()
![]()
![]()
![]()
![]()
![]()
![]()
![]()
![]()
![]()
![]()
![]()
![]()
![]()
![]()
![]()
![]()
![]()
![]()
![]()
![]()
![]()
![]()
![]()
![]()
![]()
![]()
![]()
![]()
![]()
![]()
![]()
![]()
![]()
![]()
![]()
![]()
![]()
![]()
![]()
![]()
![]()
![]()
![]()
![]()
![]()
![]()
![]()
![]()
![]()
![]()
![]()
![]()
![]()
![]()
![]()
![]()
![]()
![]()
![]()
![]()
![]()
![]()
![]()
![]()
![]()
![]()
![]()
![]()
![]()
![]()
![]()
![]()
![]()
![]()
![]()
![]()
![]()
![]()
![]()
![]()
![]()
![]()
![]()
![]()
![]()
![]()
![]()
![]()
![]()
![]()
![]()
![]()
![]()
![]()
![]()
![]()
![]()
![]()
![]()
![]()
![]()
![]()
![]()
![]()
![]()
![]()
![]()
![]() �
�
Textbox 3:
![]()
![]()
![]()
![]()
![]()
![]()
![]()
![]()
![]()
![]()
![]()
![]()
![]()
![]()
![]()
![]()
![]()
![]()
![]()
![]()
![]()
![]()
![]()
![]()
![]()
![]()
![]()
![]()
![]()
![]()
![]()
![]()
![]()
![]()
![]()
![]()
![]()
![]()
![]()
![]()
![]()
![]()
![]()
![]()
![]()
![]()
![]()
![]()
![]()
![]()
![]()
![]()
![]()
![]()
![]() 🏽:white_large_square:🏽:black_large_square:
🏽:white_large_square:🏽:black_large_square:![]()
![]()
![]()
![]()
![]()
![]()
![]()
![]()
![]()
![]()
![]()
![]()
![]()
![]()
![]()
![]()
![]()
![]()
![]()
![]()
![]()
![]()
![]() 🏽🏽:black_large_square:
🏽🏽:black_large_square:![]()
![]()
![]()
![]()
![]()
![]()
![]()
![]()
![]()
![]()
![]()
![]()
![]()
![]()
![]()
![]()
![]()
![]()
![]()
![]()
![]()
![]()
![]()
![]()
![]()
![]()
![]()
![]()
![]()
![]()
![]()
![]()
![]()
![]()
![]()
![]()
![]()
![]()
![]()
![]()
![]()
![]()
![]()
![]()
![]()
![]()
![]()
![]()
![]()
![]()
![]()
![]()
![]()
![]()
![]()
![]()
![]()
![]()
![]()
![]()
![]()
![]()
![]()
![]()
![]()
![]()
![]()
![]()
![]()
![]()
![]()
![]()
![]()
![]()
![]()
![]()
![]()
![]()
![]()
![]()
![]()
![]()
![]()
![]()
![]()
![]()
![]()
![]()
![]()
![]()
![]()
![]()
![]()
![]()
![]()
![]()
![]()
![]()
![]()
![]()
![]()
![]()
Textbox 4:
![]()
![]()
![]()
![]()
![]()
![]()
![]()
![]()
![]()
![]()
![]()
![]()
![]()
![]()
![]()
![]()
![]()
![]()
![]()
![]()
![]()
![]()
![]()
![]()
![]()
![]()
![]()
![]()
![]()
![]()
![]()
![]()
![]()
![]()
![]()
![]()
![]()
![]()
![]()
![]()
![]()
![]()
![]()
![]()
![]()
![]()
![]()
![]()
![]()
![]()
![]()
![]()
![]()
![]()
![]()
![]()
![]()
![]()
![]()
![]()
![]()
![]()
![]()
![]()
![]()
![]()
![]()
![]()
![]()
![]()
![]()
![]()
![]()
![]()
![]()
![]()
![]()
![]()
![]()
![]()
![]()
![]()
![]()
![]()
![]()
![]()
![]()
![]()
![]()
![]()
![]()
![]()
![]()
![]()
![]()
![]()
![]()
![]()
![]()
![]()
![]()
![]()
![]()
![]()
![]()
![]()
![]()
![]()
![]()
![]()
![]()
![]()
![]()
![]()
![]()
![]()
![]()
![]()
![]()
![]()
![]()
![]()
![]()
![]()
![]()
![]()
![]()
![]()
![]()
![]()
![]()
![]()
![]()
![]()
![]()
![]()
![]()
![]()
![]()
![]()
![]()
![]()
![]()
![]()
![]()
![]()
![]()
![]()
![]()
![]()
![]()
![]()
![]()
![]()
![]()
![]()
Golden Freddy Jumpscare
Textbox 1:
![]()
![]()
![]()
![]()
![]()
![]()
![]()
![]()
![]()
![]()
![]()
![]()
![]()
![]()
![]()
![]()
![]()
![]()
![]()
![]()
![]()
![]()
![]()
![]()
![]()
![]()
![]()
![]()
![]()
![]()
![]()
![]()
![]()
![]()
![]()
![]()
![]()
![]()
![]()
![]()
![]()
![]()
![]()
![]()
![]()
![]()
![]()
![]()
![]()
![]()
![]()
![]()
![]()
![]()
![]()
![]()
![]()
![]()
![]()
![]()
![]()
![]()
![]()
![]()
![]()
![]()
![]()
![]()
![]()
![]()
![]()
![]()
![]()
![]()
![]()
![]()
![]()
![]()
![]()
![]()
![]()
![]()
![]()
![]()
![]()
![]()
![]()
![]()
![]()
![]()
![]()
![]()
![]()
![]()
![]()
![]()
![]()
![]()
![]()
![]()
![]()
![]()
![]()
![]()
![]()
![]()
![]() 🏽🏽🏽:yellow_square:
🏽🏽🏽:yellow_square:![]()
![]()
![]()
![]()
![]()
![]()
![]()
![]()
![]()
![]() 🏽🏽🏽:yellow_square:
🏽🏽🏽:yellow_square:![]()
![]()
![]() 🏽🏽🏽:yellow_square:
🏽🏽🏽:yellow_square:![]()
![]()
![]()
![]()
![]()
![]()
![]()
![]()
![]()
![]() 🏽🏽🏽:yellow_square:
🏽🏽🏽:yellow_square:![]()
![]()
![]() 🏽🏽🏽:black_large_square:
🏽🏽🏽:black_large_square:![]()
![]()
![]()
![]()
![]()
![]()
![]()
![]()
![]()
![]() 🏽🏽🏽:yellow_square:
🏽🏽🏽:yellow_square:![]()
![]()
![]()
![]()
![]()
![]()
![]()
![]()
![]()
![]()
![]()
![]()
![]()
![]()
![]()
![]()
![]()
![]()
![]()
![]()
![]()
![]()
![]()
Textbox 2:
![]()
![]()
![]()
![]()
![]()
![]()
![]()
![]()
![]()
![]()
![]()
![]()
![]()
![]()
![]()
![]()
![]()
![]()
![]()
![]()
![]()
![]()
![]()
![]()
![]()
![]()
![]()
![]()
![]()
![]()
![]()
![]()
![]()
![]()
![]()
![]()
![]()
![]()
![]()
![]()
![]()
![]()
![]()
![]()
![]()
![]()
![]()
![]()
![]()
![]()
![]()
![]()
![]()
![]()
![]()
![]()
![]()
![]()
![]()
![]()
![]()
![]()
![]()
![]()
![]()
![]()
![]()
![]()
![]()
![]()
![]()
![]()
![]()
![]()
![]()
![]()
![]()
![]()
![]()
![]()
![]()
![]()
![]()
![]()
![]()
![]()
![]()
![]()
![]()
![]()
![]()
![]()
![]()
![]()
![]()
![]()
![]()
![]()
![]()
![]()
![]()
![]()
![]()
![]()
![]()
![]()
![]()
![]()
![]()
![]()
![]()
![]()
![]()
![]()
![]()
![]()
![]()
![]()
![]()
![]()
![]()
![]()
![]()
![]()
![]()
![]()
![]()
![]()
![]()
![]()
![]()
![]()
![]()
![]()
![]()
![]()
![]()
![]()
![]()
![]()
![]()
![]()
![]()
![]()
![]()
![]()
![]()
![]()
![]()
![]()
![]()
![]()
![]()
![]()
![]()
![]()
![]()
![]()
![]()
![]()
![]()
![]()
![]()
![]()
![]()
![]()
![]()
![]()
Textbox 3:
![]()
![]()
![]()
![]()
![]()
![]()
![]()
![]()
![]()
![]()
![]()
![]()
![]()
![]()
![]()
![]()
![]()
![]()
![]()
![]()
![]()
![]()
![]()
![]()
![]()
![]()
![]()
![]()
![]()
![]()
![]()
![]()
![]()
![]()
![]()
![]()
![]()
![]()
![]()
![]()
![]()
![]()
![]()
![]()
![]()
![]()
![]()
![]()
![]()
![]()
![]()
![]()
![]()
![]()
![]()
![]()
![]()
![]()
![]()
![]()
![]()
![]()
![]()
![]()
![]()
![]()
![]()
![]()
![]()
![]()
![]()
![]()
![]()
![]()
![]()
![]()
![]()
![]()
![]()
![]()
![]()
![]()
![]()
![]()
![]()
![]()
![]()
![]()
![]()
![]()
![]()
![]()
![]()
![]()
![]()
![]()
![]()
![]()
![]()
![]()
![]()
![]()
![]()
![]()
![]()
Forum-Related Section:
Is someone Editing?
[@No-One is editing]
When checked, somebody is editing this post. Use the pencil menu to check who is editing. Please do not push the checkmark while someone is editing or it will cause edit conflict (happens when a user edits a wiki while you are editing and your changes cannot be saved)
Wiki Editing Rules
Please don’t make any of the edits violate the TOS or FAQ, remember, anyone can see who edits a wiki and what part they edit.
Please be responsible.
Everyone, please don’t edit when it is being edited.
You can politely ask in the replies.
Please don’t change the name when it has one, and remove it when you are done
