Good morning everyone! Today, I will be showing you how to make GimLand: a thrilling game that involves NO snakes, ladders, or candy, but all of the counting! This is a step up from TTT, and requires HEAVY use of blocks, causing it to have a high rating. We’re in the big leauges now. Let’s get building!
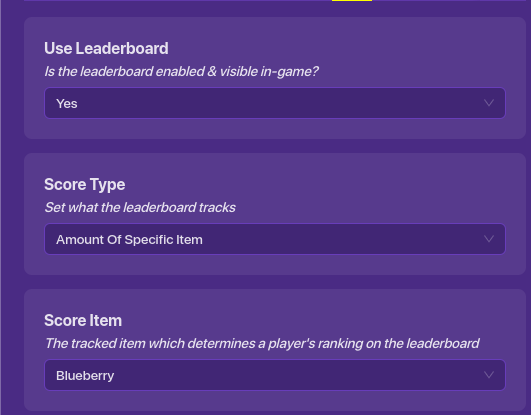
PART 0: MAP SETTINGS
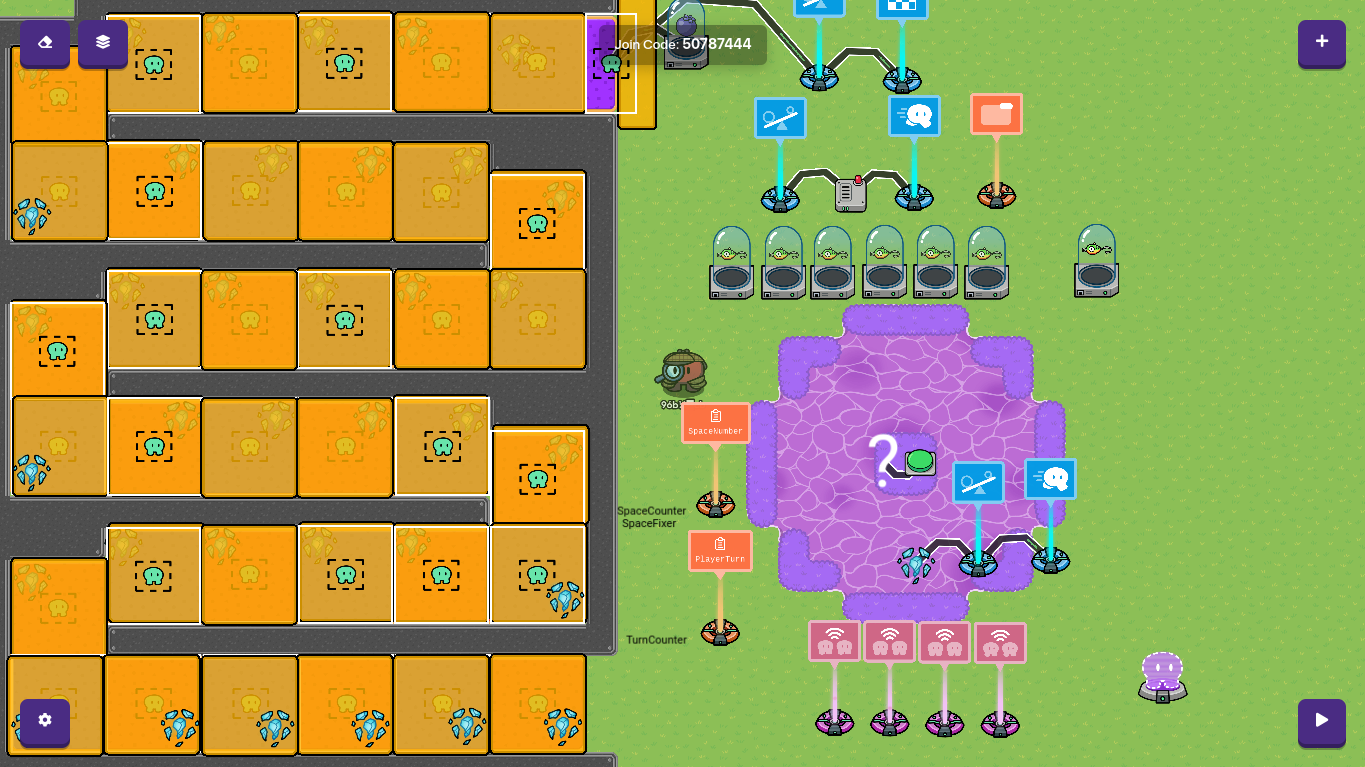
PART 1: MAKING THE BOARD
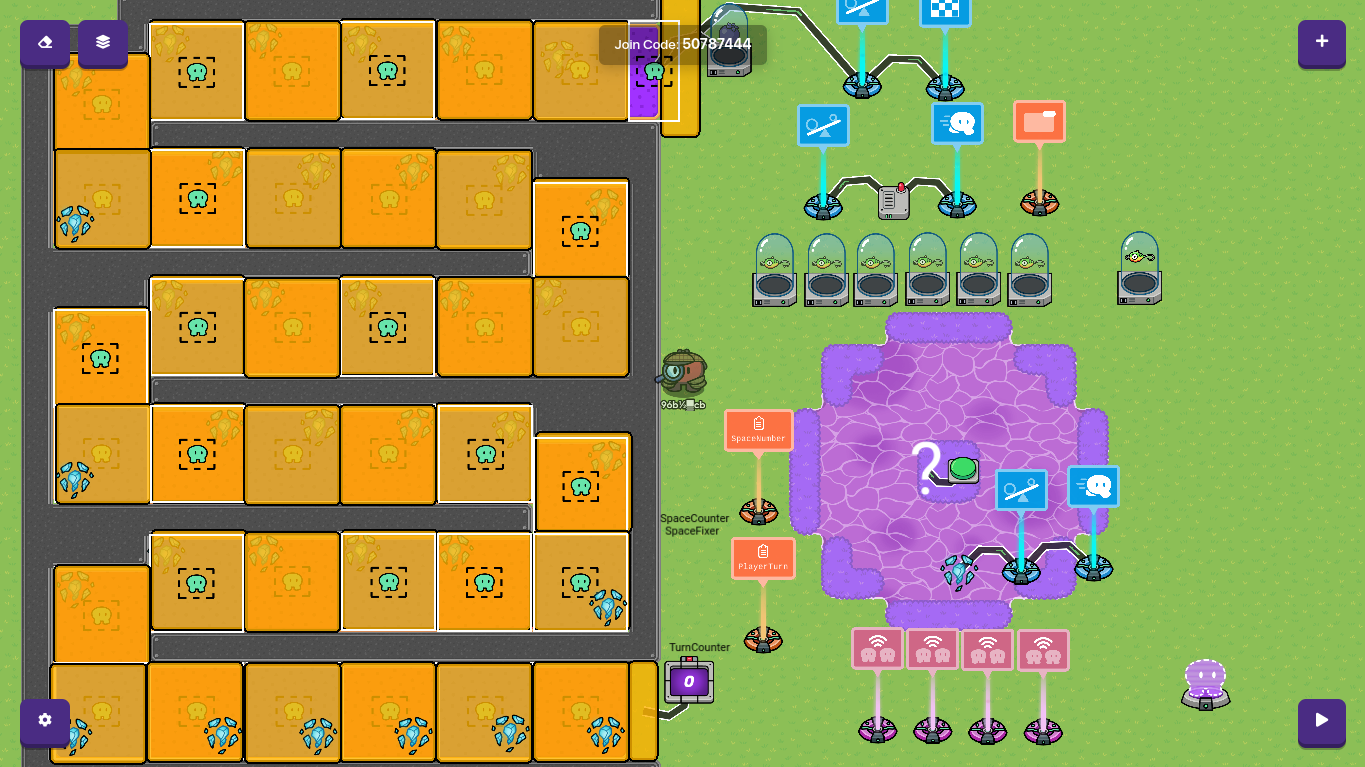
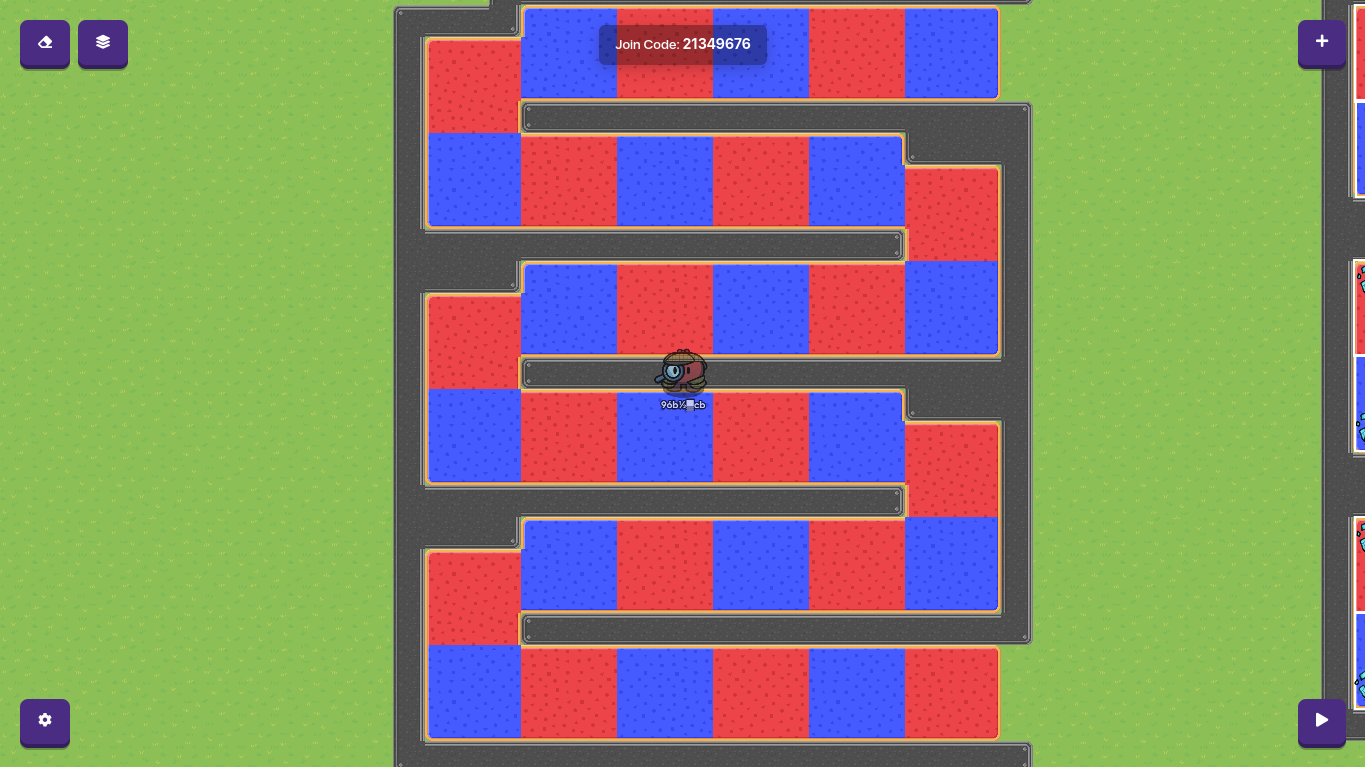
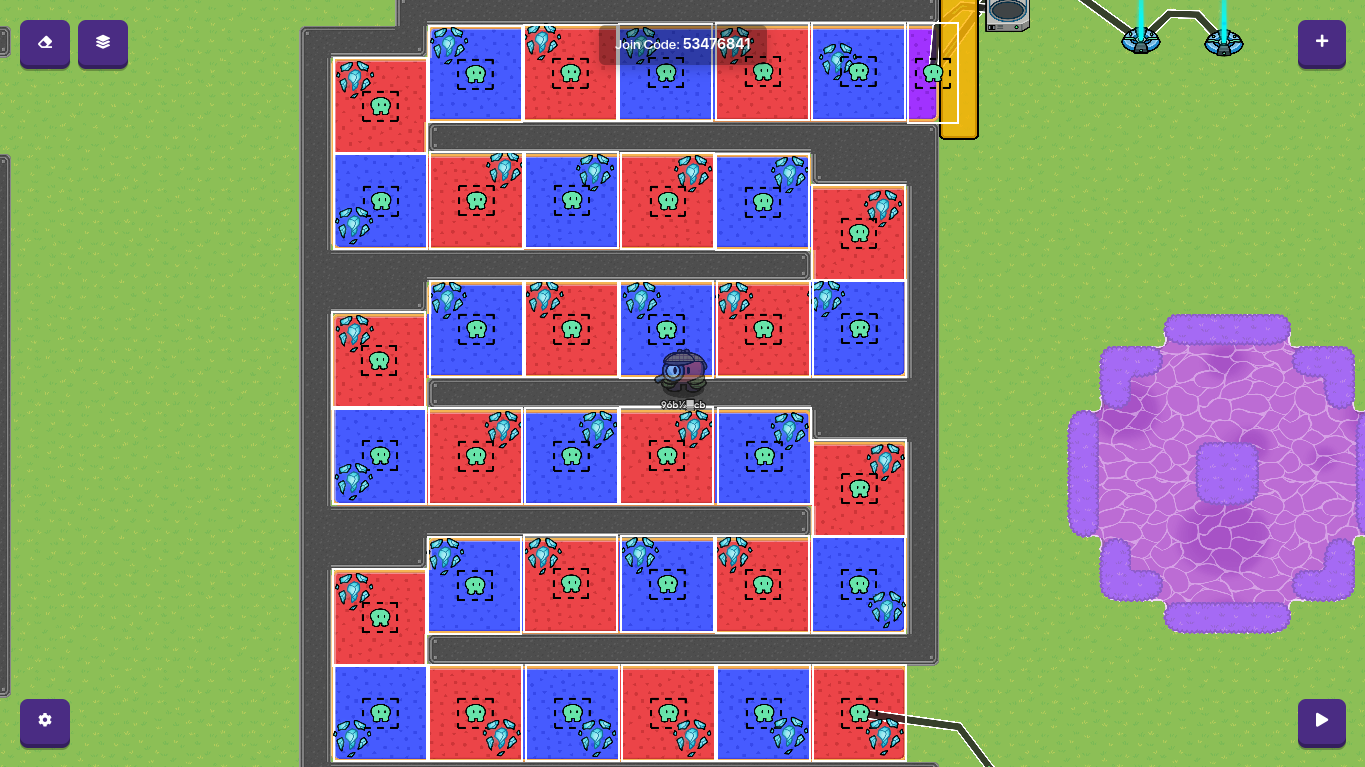
Step 1: Place down 36 squares of alternating color, making sure to leave walls between everywhere somebody could skip a space and break the game.
(The only reason I’m not showing the finished version is becasue its a lot.)
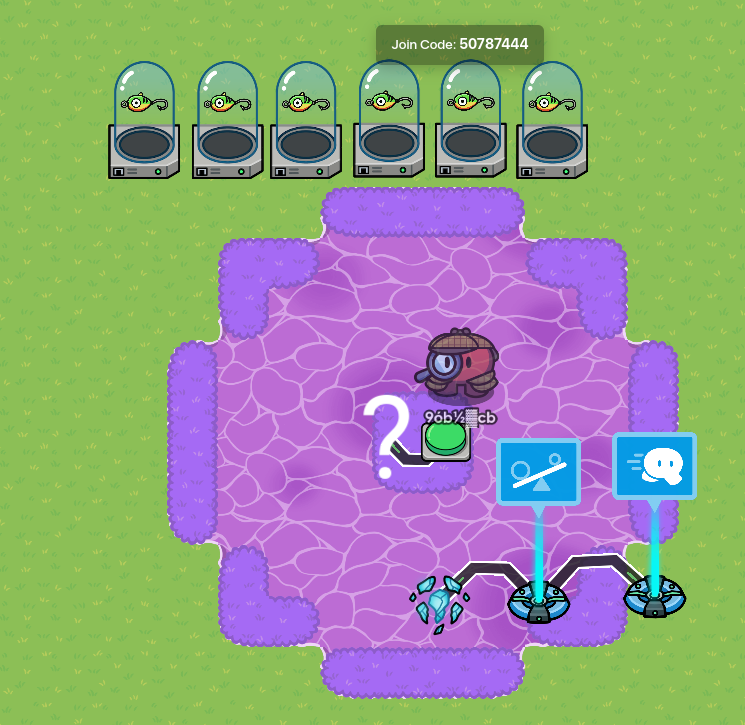
Step 2: Make a circle somewhere on your map, preferably near your board.
PART 2: FINISHING THE BOARD
Step 0: Add three purple spaces at the top of the map.
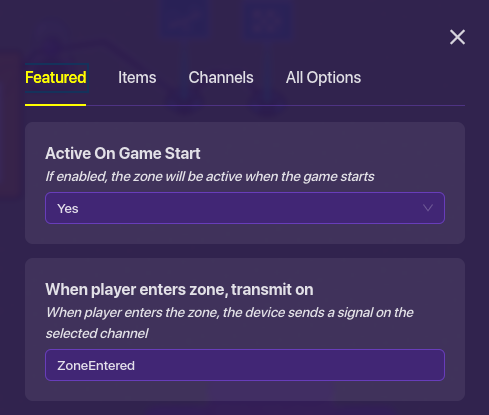
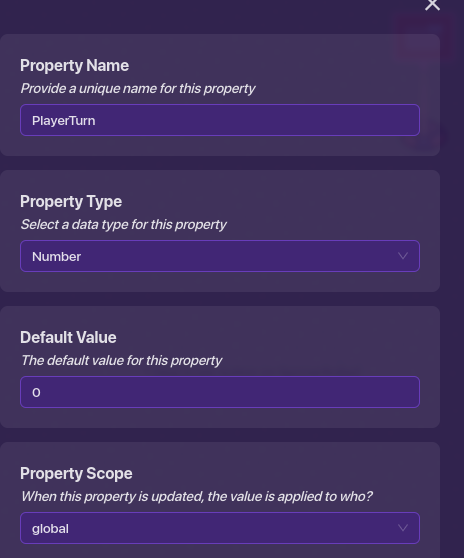
Step 1: Place down a zone, change it to the same size as a space, and configure it with these settings.
Step 2: Copy it 35 times, and place one in every space.
Step 3: Place a teleporter in square 1, and configure it as so.
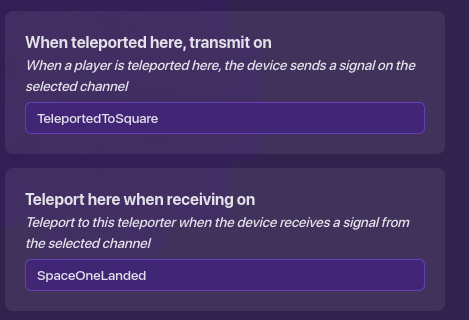

Copy it 35 times, and change the “Teleported here when receiving on” to Space#Landed, with # being the space it is on.
(Don’t mind the stuff at the top and bottom…
Yet.)
PART 3: MAKING THE SPINNER
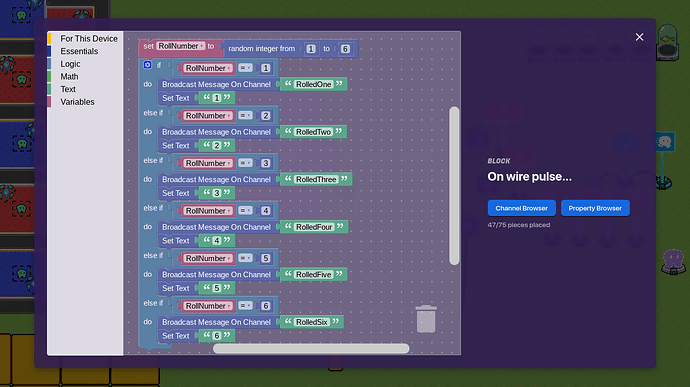
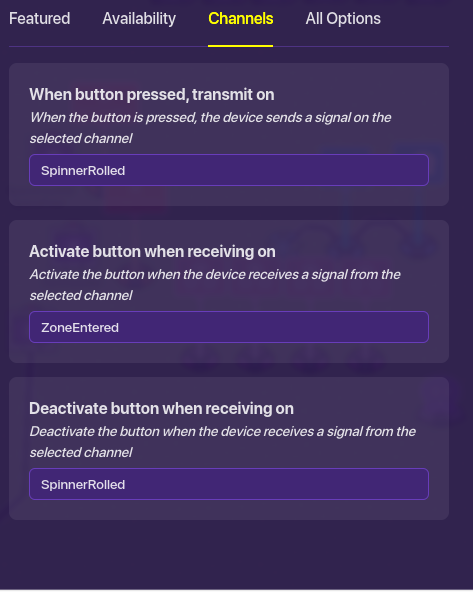
Step 1: Place down the standard button-text-run-wire-pulse-block-when-pressed in the center of the spinner circle.
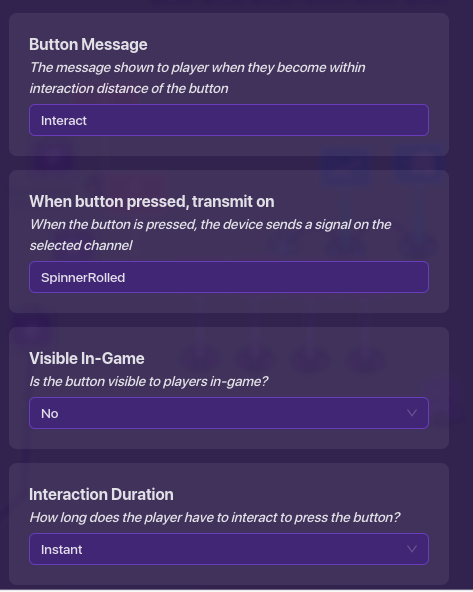
Step 2: Configure the button like so:
Step 3: Go into the text, and add this in a wire pulse block:
Step 4: Add six item granters, and configure them like so:

The sixth granter

The fifth

Fourth

3rd
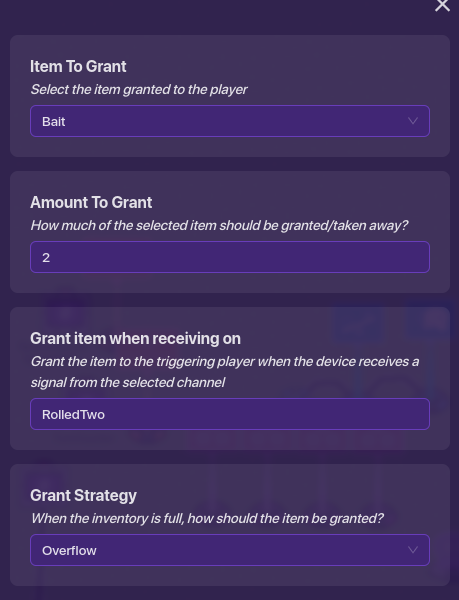
2nd

1st
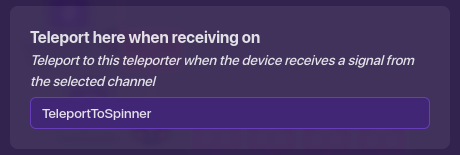
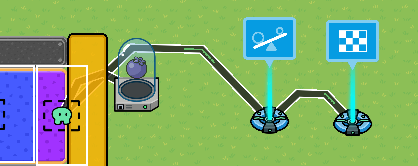
Step 5: Place a teleporter, turn off in-game visibility, and configure it like so:
Wire the teleporter to a checker, so when the player is teleported here, a check is run.
Step 6: Configure the checker like so:

Step 7: Wire the checker to a speed modifier, so when the check passes, the player is set to the configured speed.
Step 8: Set the speed modifier to 1.
PART 4: MAKING THE SOFTWARE
Step 1: Place down four relays, and configure them like so:
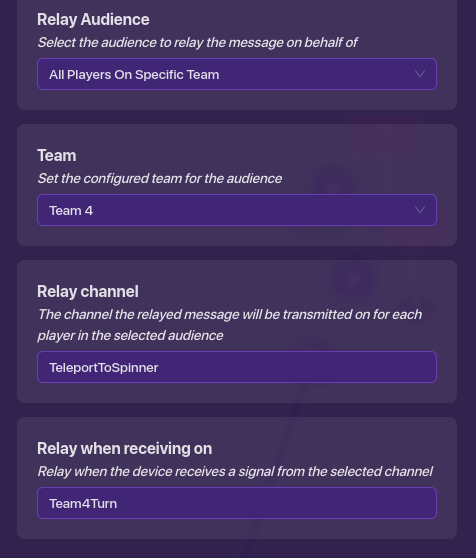
The 4th one

3rd

2nd

1st
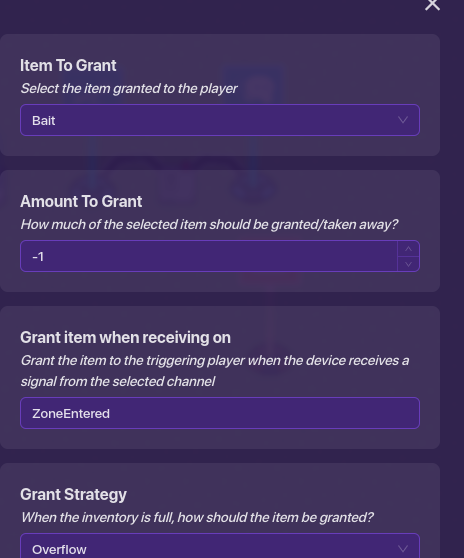
Step 2: Place an item granter, and configure it like so:
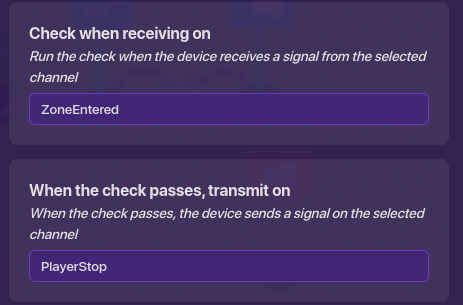
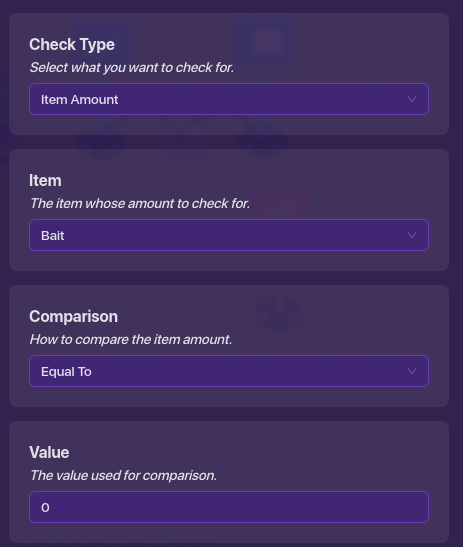
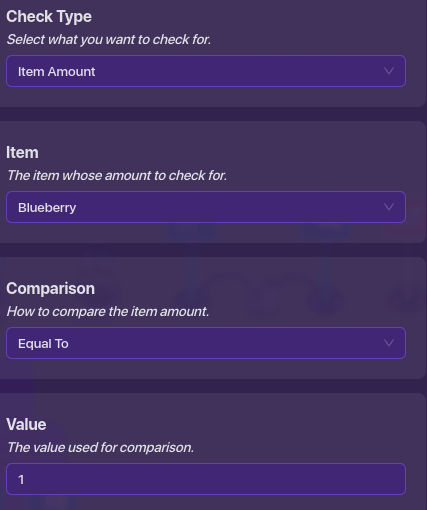
Step 3: Place a checker, and configure it like so:
Step 4: Place a wire repeater, and connect it so if the check passes. repeat the pulse.
Step 5: Place down a speed modifier, and wire it to the wire repeater, so when the check passes, set the player to the configured speed.
Step 6: Set the configured speed to 0.
Step 7: Put down a game overlay, and configure it like so:

Step 8: Place down a property, and configure it like so:
Your software should look like this now:
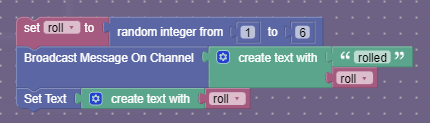
Step 9: Place down a piece of text, name it TurnCounter, go into its blocks, and configure it like so:

The channel the block needs to activate on

The code itself
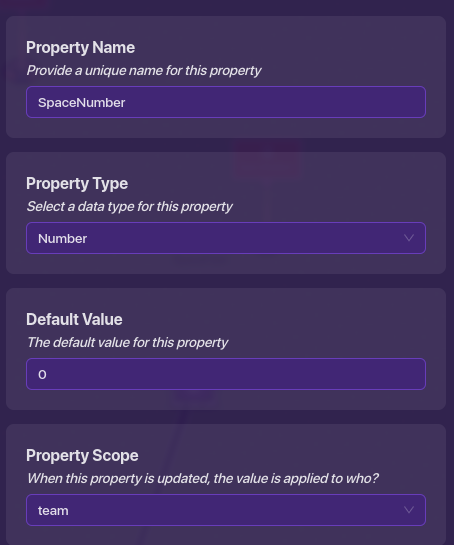
Step 10: Place down a second property, and configure it like so:
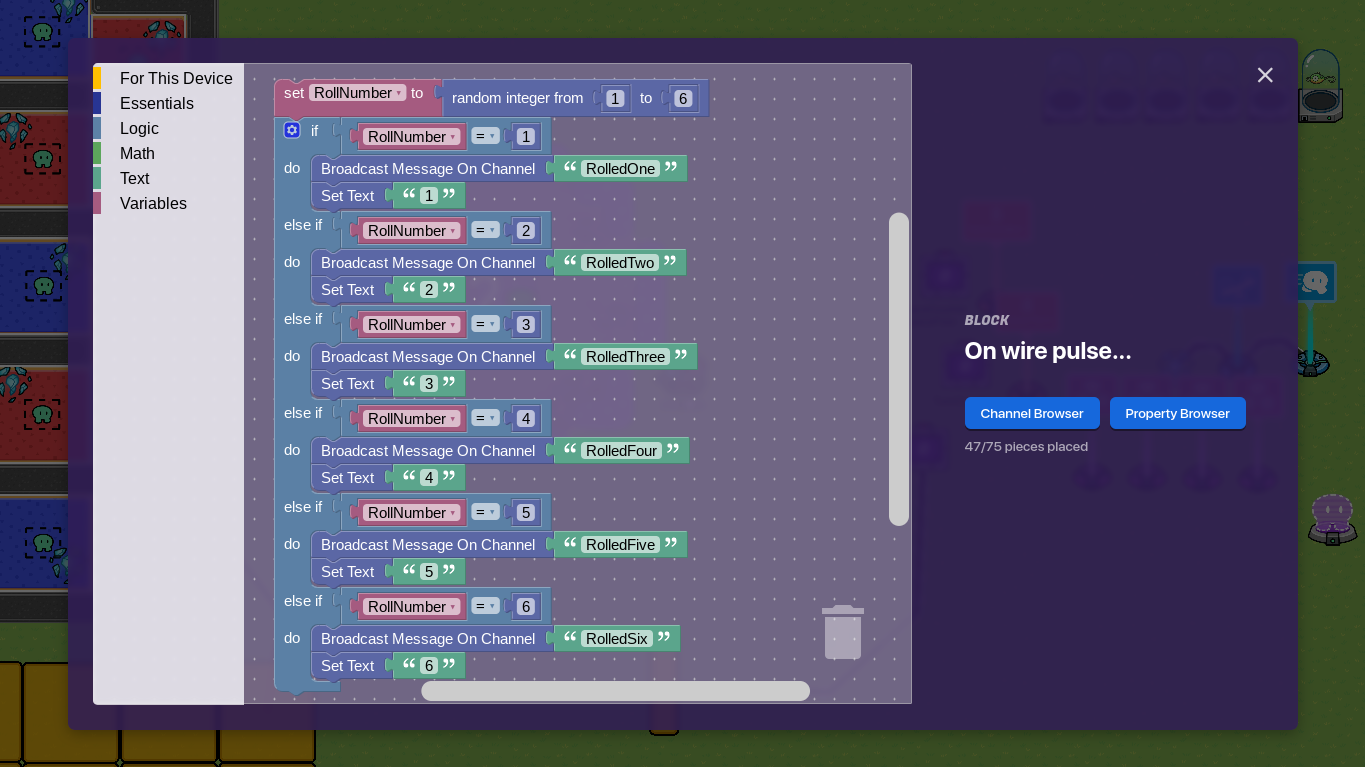
Step 11: Place down a piece of text, name it SpaceCounter, and configure it like so (this will take a while):
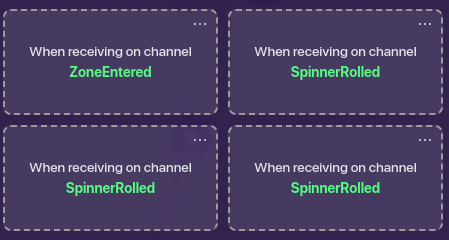 The SpinnerRolled on the top is #1, the bottom left is #2, and the bottom right is #3.
In the ZoneEntered block:

In SpinnerRolled#1:
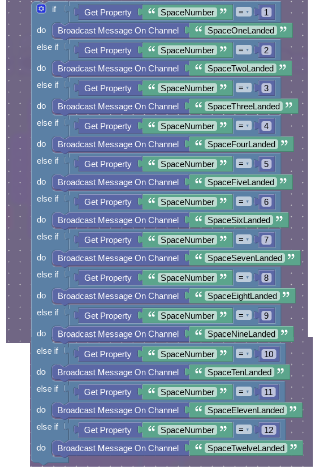
In SpinnerRolled #2:
Add 12 to every number on the above code, written out or number format.
In SpinnerRolled #3:
Add 24 to every number on the above code, written out or number format.
Step 12: Place down a piece of text, name it SpaceFixer, and configure it like so:


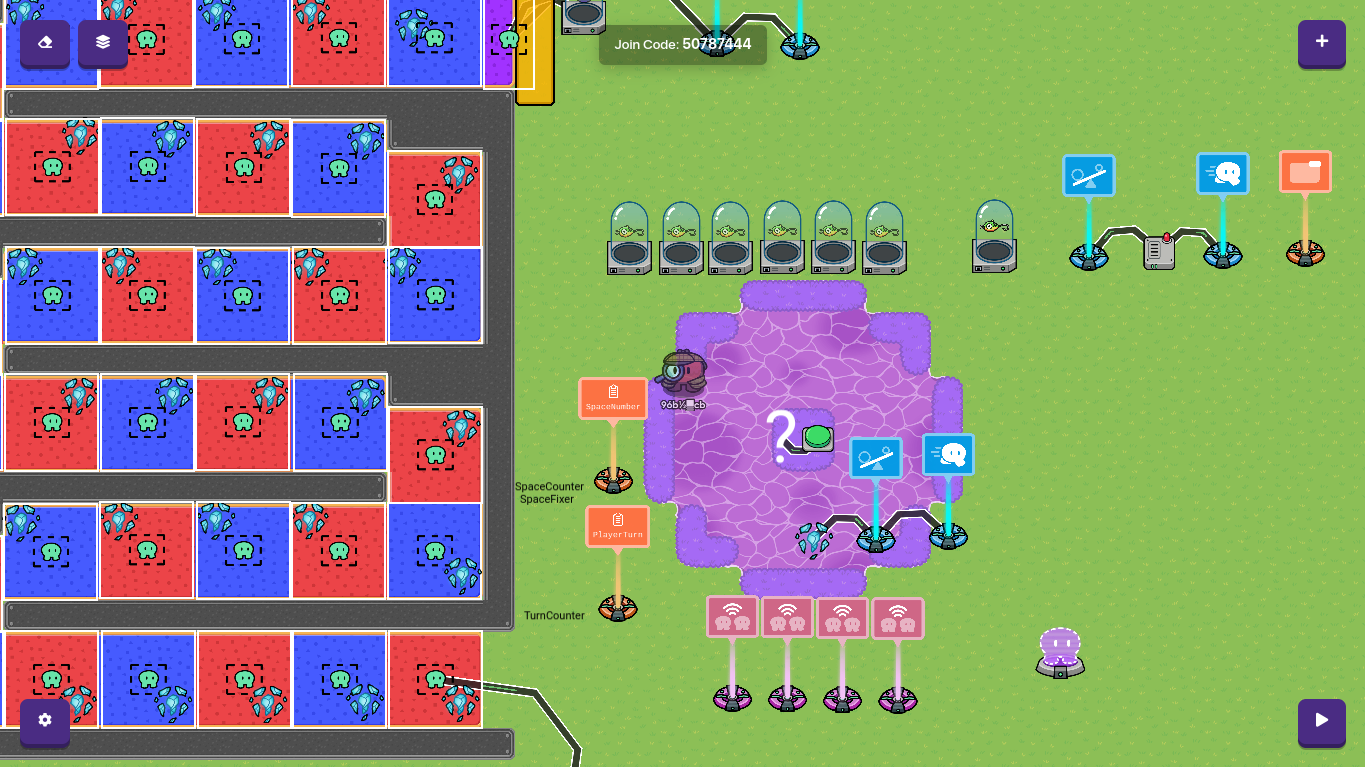
Your build should look like this:
PART 5: ACTUALLY FINISHING THE BOARD
You see that little barrier and stuff near the top of the map that I told you not to worry about? Worry about it now.
Step 1: Place a zone in the purple area, making sure to not have it touch the blue square before it.
Step 2: Place a barrier.
Step 3: Place an item granter, and configure it as so:

STEP 4: WIRE THE ZONE TO THE ITEM GRANTER, SO WHEN THE ZONE IS ENTERED, THE ITEM IS GRANTED. AWO IS IN PLAY HERE, SO THIS WIRE MUST BE FIRST.
Step 5: Place a checker, and configure it as so:
Step 6: Wire the zone to the checker, so when the zone is entered, the check is run. ***THIS MUST BE DONE AFTER WIRING THE ZONE TO THE ITEM GRANTER FOR AWO TO WORK
Step 7: Place an Endgame, and wire it to the checker, so when the checker check passes, the game ends.
Step 8: Place a barrier, and configure it like so:


Step 9: Copy it 35 times.
Step 10: Wire each one to an individual zone (besides the gameend one), so when that zone is left, the barrier is activated.
Step 11: Place down a counter, and configure it like so:
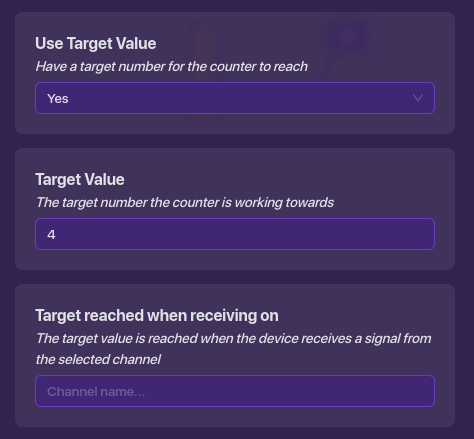
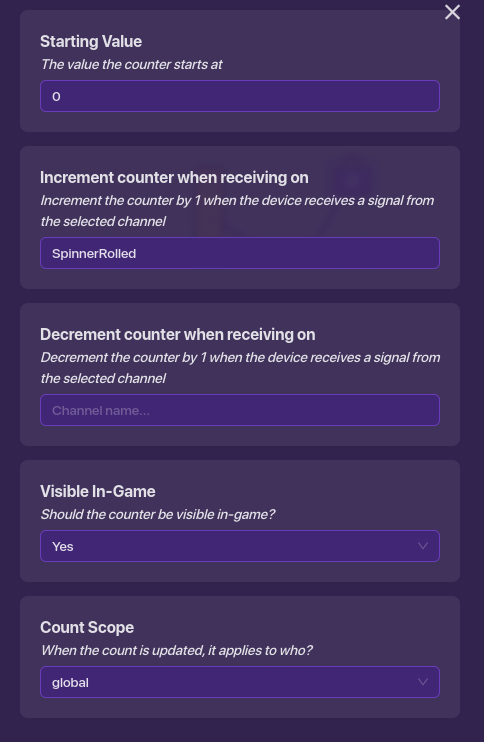
Step 12: Place a barrier over the entrance, and wire it to the counter, so when the counter reaches its target value, the barrier is disabled.
And that’s it! This was suggested to me by @WhoAmI, so go pay him a visit. This took forever, but I finished it before my birthday, so HOORAY!
What should this guide be rated?
- 1/5 (
 )
) - 2/5 (
 )
) - 3/5 (
 )
) - 4/5 (
 )
) - 5/5 (
 )
) - 6/5 (
 )
)
0 voters
Anyway, happy building!
-ClicClac