Welcome to another Baldi’s Basics guide! This series of guides will be teaching you how to make a Baldi’s Basics game in Gimkit Creative. ![]() Since this guide continues off another guide, if you haven’t read the previous ones, that is recommended. Previous guides are below!
Since this guide continues off another guide, if you haven’t read the previous ones, that is recommended. Previous guides are below!
![]() Before starting, I’d like to give credit to @Haiasi because later on in this post I will link to a guide his solution
Before starting, I’d like to give credit to @Haiasi because later on in this post I will link to a guide his solution ![]() on the topic.
on the topic.
Other Guides!
![]() OTHER GUIDES
OTHER GUIDES
Baldi’s Basics Guides— How to Make A Classroom [Difficulty: ![]() ]
]
Baldi’s Basics Guides- Classroom & Notebooks (PART 2)– [Difficulty: ![]() ]
]
Without further ado, let’s get started on this amazing guide! (Baldi’s not here to witness this, so don’t worry!) This guide will be teaching you how to make hallways and doors for your classrooms! ![]() Using just a couple of props and terrain, we can jazz up our school! We can even make it functional!
Using just a couple of props and terrain, we can jazz up our school! We can even make it functional!
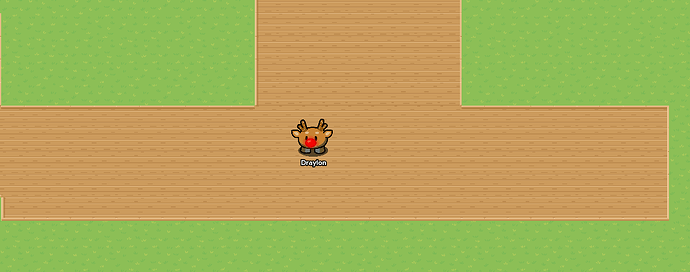
Let’s start by making some hallways. Using the same terrain as your classroom, (or something different if you choose!) let’s make halls. You can do that by laying out terrain at least 3x4 in length and width. (It would be too TIGHT for Baldi to chase you, or vice versa!) Have them go different directions, instead of everything going in one direction! That’d be even scarier than ever! It should look something like THIS:
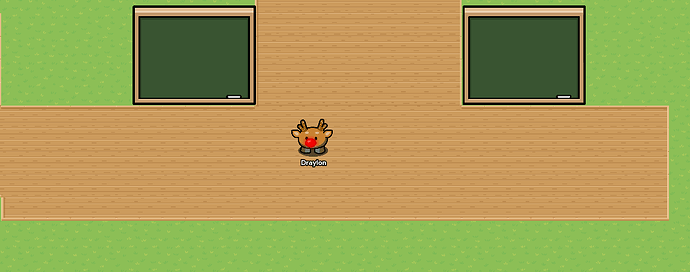
It looks kinda empty, huh? Well, let’s add something that’s in EVERY hallway: billboards and posters! Let’s just make billboards! Just search up BLACKBOARD in the props, and place it at the edge of the hallway intersection, on both sides.
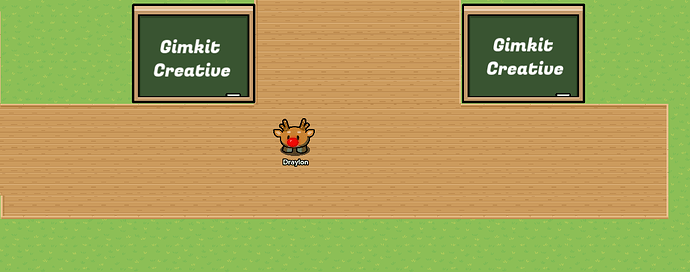
Using text, write whatever you want that could go on the billboard, and make sure the text is white (or whatever color players will be able to see) and layer it ON TOP off the blackboards. There are guides to layering, so make sure you look at those if you don’t know how to do it.
What else do you need to make this school look not boring? LOCKERS! Yes, we need lockers, and we need to IMPROVISE! Since we don’t have lockers in GKC, let’s use the next best thing: SAFES! They look just like lockers, and they can be available in different colors: grey
You can make these lockers functional with some simple wiring and easy block code. First, place down a button that isn’t visible in game, in front of a locker of your choice. Next, add some terrain behind the locker and add a teleporter. Wire the button to the teleporter: Button pressed
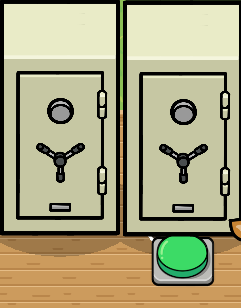
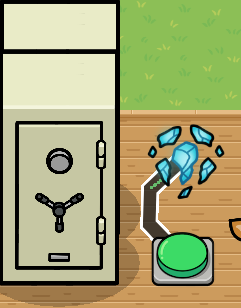
If you only want it so that players can only hide for a specific amount of time, you can use this guide: How do you make a counter increase every second?
Now for the doors, just have a barrier and a button that has a good hitbox on the barrier. Using a WIRE
Additional Tricks/Tips
![]() Continuing from the previous guide, you can make it so that when the barrier is unlocked, (or button pressed) it activates the Questioneer. And if you’re an advanced creator, make it so that when the button is pressed, it runs a check to see if the player is on a certain team, and when the check fails, it opens a popup that says, “Baldi isn’t allowed to open the door.”
Continuing from the previous guide, you can make it so that when the barrier is unlocked, (or button pressed) it activates the Questioneer. And if you’re an advanced creator, make it so that when the button is pressed, it runs a check to see if the player is on a certain team, and when the check fails, it opens a popup that says, “Baldi isn’t allowed to open the door.”
You can do that using this guide: How to open doors with items (Difficulty: 2/10 ![]() )
)
![]() And that’s all for this guide! Hopefully, you have created your own classroom and schoolhouse! The game is going to be released soon, and I look forward to seeing Gimkit Creators making their own! Go and collect some notebooks (knowledge) before Baldi beats you to it! *He’s extremely slow, but don’t tell him I said that!
And that’s all for this guide! Hopefully, you have created your own classroom and schoolhouse! The game is going to be released soon, and I look forward to seeing Gimkit Creators making their own! Go and collect some notebooks (knowledge) before Baldi beats you to it! *He’s extremely slow, but don’t tell him I said that! ![]() More Baldi’s Basics guides are coming soon, too!
More Baldi’s Basics guides are coming soon, too! ![]()
Happy Gimkitting! ![]()
California_Love
