Hi, yes, i’ve seen many guides to making thumbnails
(but decided to make a guide for *when in the process of making a thumbnail, not where to make one) -Intro has what I use for when making my thumbnails
also I tried making a webpage for this, and failed ( It was blocked or had an error page for many)
so here are my Tips n’ Tricks to when making a thumbnail!
-
Disclaimer-
please use this guide to help you make GKC-related thumbnails,
or for outside of here, anything! -
I wanted this guide to further help people who are confused on thumbnails, where
I make them, and a full walkthrough of their mechanics.
(welcome to art class buddy)
Introduction
Hello, hello and welcome!
I will be showing YOU my tips and tricks for when making thumbnails!
( I will be adding multiple GIFs to walk you through some specific things!)
What applications do I use?
- Kleki.com
and I hope this has helped you in any way!
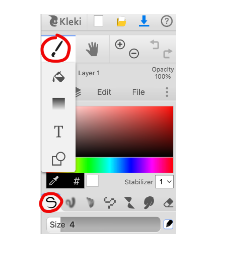
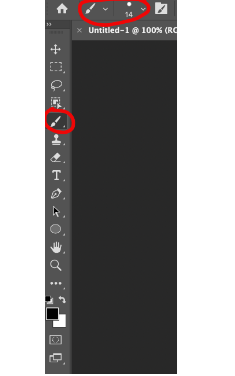
Paint Tool
Ah, the PAINT tool, one of the best tools to use for a masterpiece!
here’s what it looks like:
Kleki:
Photoshop:
How and what do I use the paint tool for?
1st of all, why ask that question?
I dunno but It’s there!
alrighty! The paint tool can have many uses, it's up to you and your creativity!
Just tap/click and drag in a normal or abnormal way to draw!
It could be used to draw, make something more noticeable, fill something in, and more!
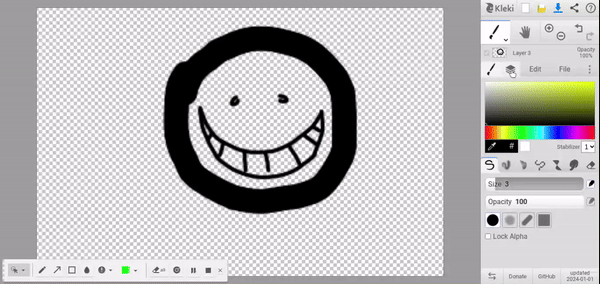
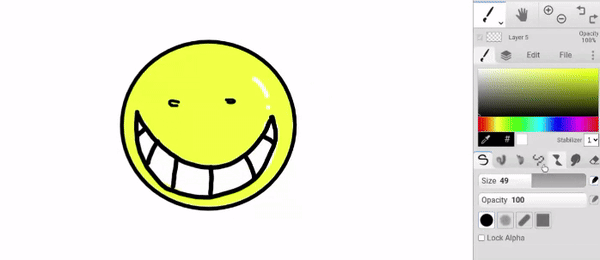
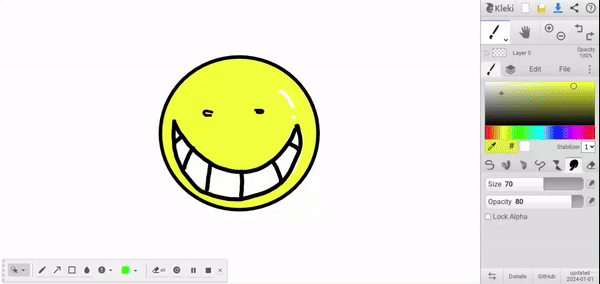
here is something simple that shows you how koro-sensei’s head is drawn:
You can draw anything with the paintbrush tool! (use it WISELY, no sus stuff)
~honestly I don’t think there can be much said about the paintbrush tool Kat
~bruh, I KNOW THAT, I’m trying to sound smart!
okay, moving onto LAYERS.
Layers
Ah, Layers ,layers, and LAYERS!
what are layers you might ask?
Layers are like stacked, transparent sheets of “glass” on which you can paint images. You can see through the transparent areas of a layer to the layers below. You can work on each layer independently, experimenting to create the effect you want. Each layer remains independent until you combine (merge) the layers.
~Did you just google that Kat?
~ uhhh, what’s google again?
~you DID, didn’t you…
~ hahahah, no most definitely not!
welp, forget that!
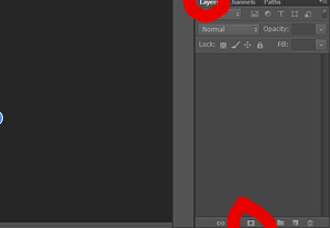
what does the LAYERS Icon look like?
Kleki:
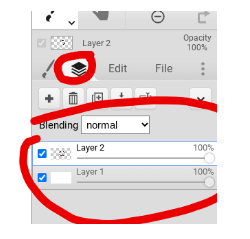
Photoshop: (the bottom circle is to ADD a new layer!)
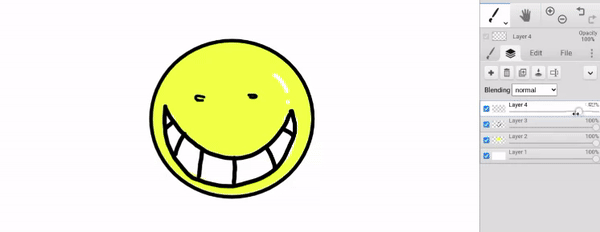
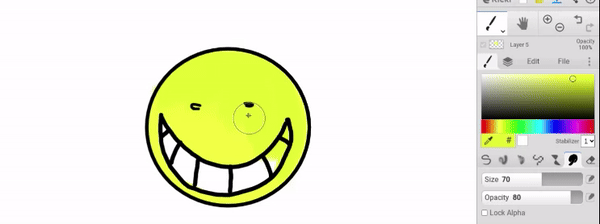
Layers can be used many ways, for instance, when I don’t wanna color on the SAME LAYER, all you have to do is make a layer BELOW YOUR OUTLINE, and color like this:
You can also use layers to do some shading!
like this:
Okay, now here is: How to shade using LAYERS!
- go to layers and turn the opacity down
- pick a color to draw over
- make sure it’s the TOP layer
- done.
got that?
okay then, onto Color!
A lil' everything about color
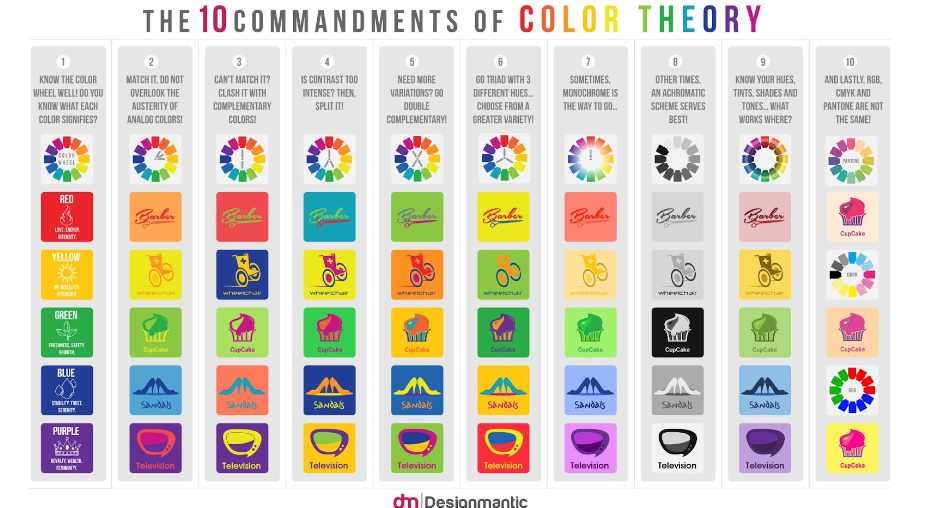
Alright, colors are an IMPORTANT aspect of your art! They make a masterpiece all wonderful and flashy as it is!
There are warm colors and your cools, analogous colors, complementary colors, and so much more!
for now, I’ll be putting the basics and suggesting a few things about color! (basically color theory!)
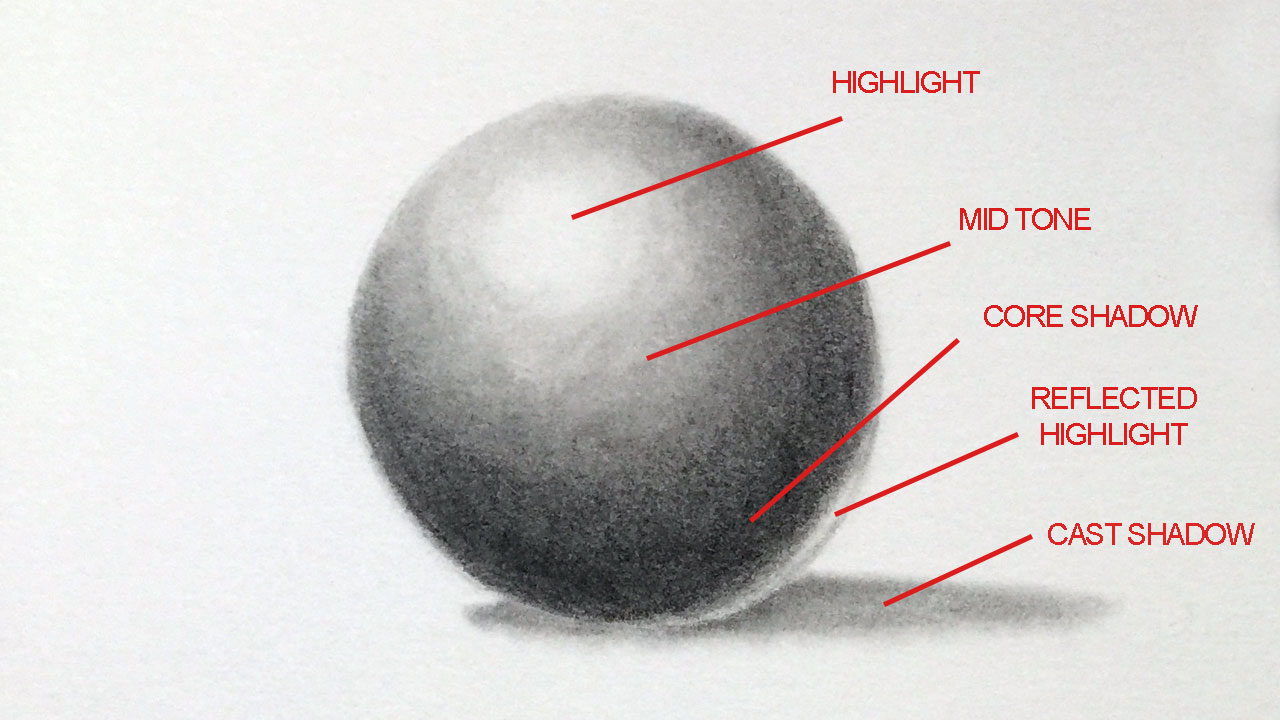
If you don’t know what to do with a color scheme or something about color and contrast, look at this image and think of these terms!
a lil' more to shading
Ah, at last, SHADING!
Remember in the LAYERS section, you could use a layer to color?
welp, now you can use it to shade also! I will be giving shading techniques!
~Show them your scratch, Kat
~Not funny
Okay. Onto shading techniques!
shading techniques come in a ton of variations! You can use those variations to your liking and give your art some SPICE!
here are some:
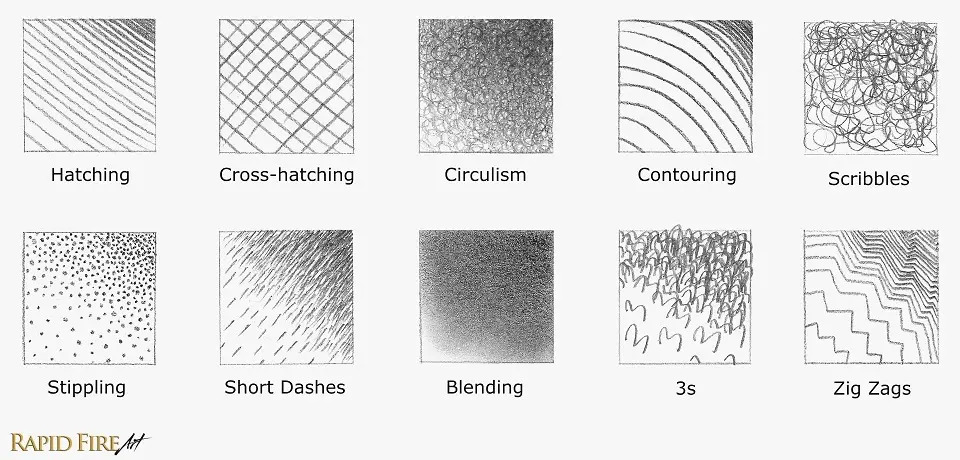
Now, There is a shading theory, a way you can shade knowing where to put “light” at:
[details=“other “hidden gems” i guess…?”]
Okay. The DROPPER and SMEAR tools.
They’re very simple.
~Kat’s simple. She’s simply short!
~No. just no. and idiotically inaccurate. I’m one inch below your height!
The dropper is used to GRAB color from a spot, and use it!
The smear tool is to RUB colors/ blend them together!
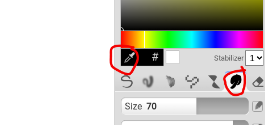
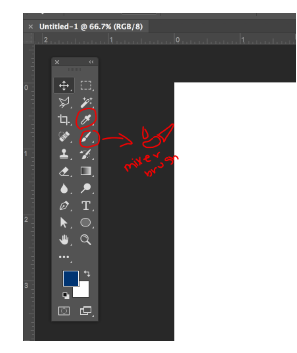
ALRIGHT! What do the DROPPER and SMEAR tools look like?
Kleki:
Photoshop: the smear tool (also KNOWN AS MIXER BRUSH click the little arrow by the paintbrush, you’ll find more painting options, it should be there!)
Using the DROPPER TOOL:
Using the SMEAR TOOL:
~Kat, you don’t even use smear, why include it?
~I forgot
[/details]
Adding small, but powerful details!
Adding small details! it’s another way to spice your art up!
you can include:
- easter eggs, like this one frame in an animation:
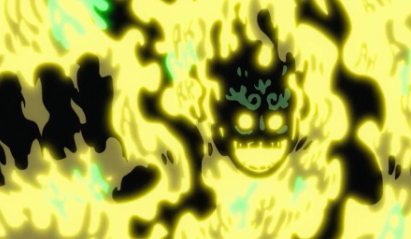
- did you notice it? welp, there are a bunch oh "AH"s like someone screaming!
VERY COOL!
welp, nothing much to say about this topic though.
~yeah, we know
NEXT!
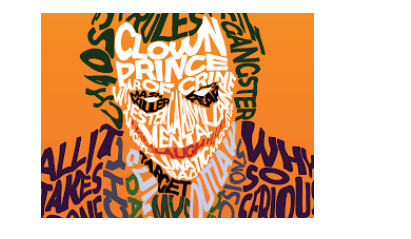
Text and fonts! (Typography!)
Ahhh, Texts, Fonts, and C0lor!
a great aspect to include in your graphic designs!
it looks l like a [T]
here’s a definition:
Typography is the art of arranging letters and text in a way that makes the copy legible, clear, and visually appealing to the reader. It involves font style, appearance, and structure, which aims to elicit certain emotions and convey specific messages.
and here’s your example:
here is how you can add simple typography:
Well, well, well! read it all?
Because you made it to the end!!
~Good job, but are you going to add more things anytime soon, Kat?
~Thanks, although I may add more when I feel something related to this is necessary
I hope y’all had a great time learning!
KAT OUT!
(phew! That took a LONG TIME! Anyway, how do you think this guide was?
give feedback in the comments if needed!)
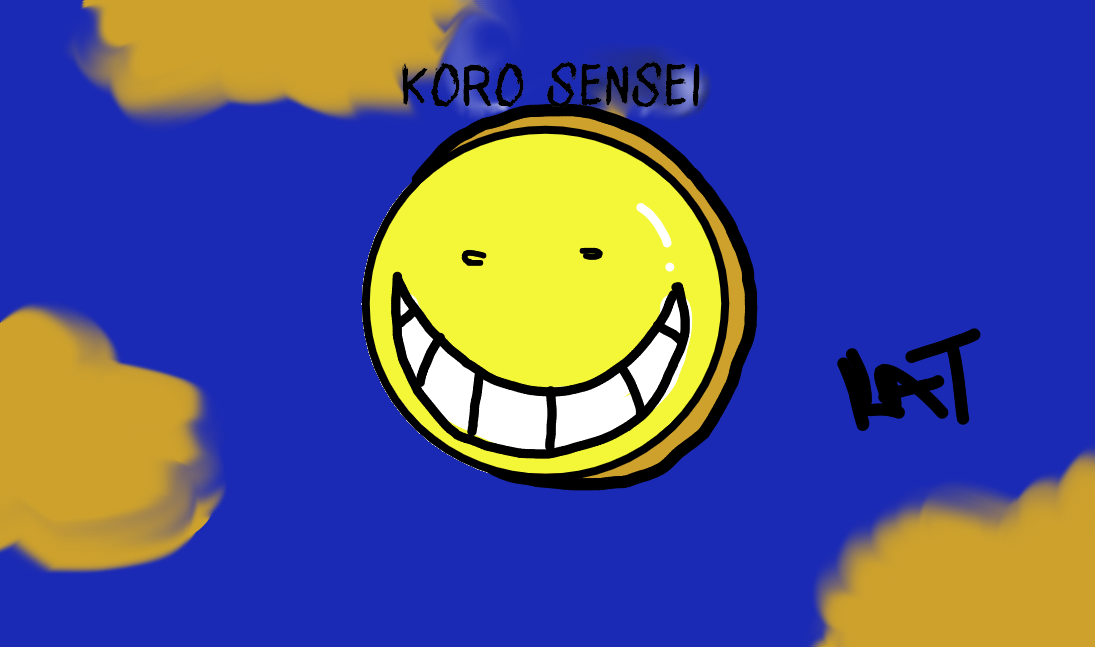
anyways, I finished koro with using some aspects I explained:
- Useful, but I don’t think it was needed!
- Great! It may help many others that need it!
- trash. I just don’t like it.