NOTICE: Updated
Now that I am a normal gimkit forums user, I replaced all my text depictions with actual screenshots.
Introduction
Have you ever wanted to have, for example, a voting system to choose the next map or choose a play for something? In my case, it will be for my recreation of fleeing the facility on gimkit. There is a pretty cool way of doing this in gimkit creative and it may use some things may not have even known were possible!
Memory Usage Notice
This voting system may take up a bit of memory because it uses trigger block and block coding to work, but it will be worth it.
Get started
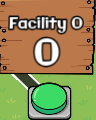
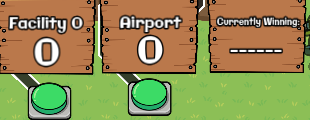
To get started, you can place down 2 text boxes and 1 button. I will also use a sign for style.
please build them in a structure like the following:
I will also be including a currently winning sign for debug purposes to make sure it has the right number.
All my voting options and the winning sign look like this:
Adding functionality
To add functionality, begin by placing counters like this above every voting option make sure to hide them!!!
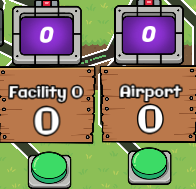
Make sure to wire up the buttons to the counters and make them increment their value when the button is pressed.
Next, we will create 3+ new properties,
- property 1: highestName
- stores the name of the winning vote
- property 2: highestValue
- number property that holds how many votes the winning vote has.
- property 3-4: voting option name
- this will be the property that holds the number of votes for each option. in my example, I will need 2 properties.
now wire up the properties to pulse the wire when the property changes
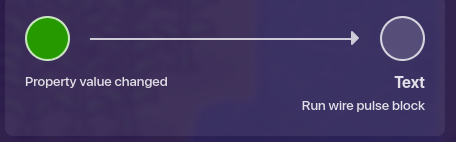
make sure these properties are wired so that when their value changes, send a wire pulse to the text boxes that show the number of votes, then add this code on the wire pulse to the text boxes (I will detail how to do this later)

REPLACE highestValue with the corresponding property value name
Now that you have all these properties, make sure to make it so that both the counters for each option set their value to their matching property.
Block Code
What is block code (for those who don’t know)
Block code is a scratch-like block coding system built to allow coding in gimkit. I was pleased with this addition because it gave gimkit the functionality it needed for proper game development.
How to write block code
Some devices, such as the trigger have a tab on the left side that is labeled “blocks”
Please click this tab, it will bring you to a UI where you can write code that runs when the requirement is met.
Writing our block code
We will first create a new trigger with block code that runs on wire pulse. We will then hook up or properties for each vote to the trigger and make it trigger when the property changes.
Now we begin scripting, insert this code into the trigger:
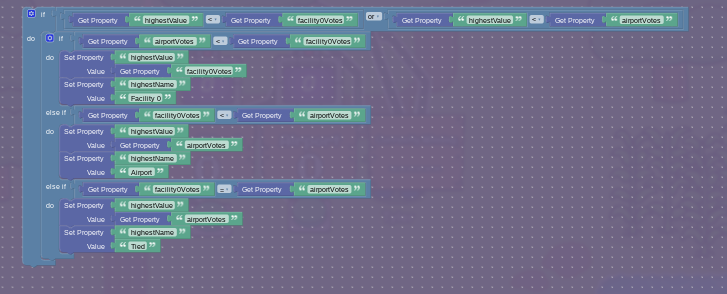
REMEMBER this will be different for everyone based on their vote options, so change this code to match
Conclusion
In this post you learned,
- how to block code
- how to use triggers
- how to use properties
Thank you for reading this guide, I spent an hour writing this lol
[EDIT] Thanks! I was not expecting to get many interactions but rather downvote bombed like on stack overflow. I really love the engine and the community behind it