How to Add Speed- Difficulty 2/5 or 🟨

In Tag Domination, Capture the Flag, and other game modes you might want to make speed upgrades- upgrades that increase your speed every time you buy them.

You can do this with speed modifiers- However that completely changes your speed, and it doesn’t add speed. What you’ll want to do to add speed is in this tutorial.

This tutorial requires a sense of blocks- Well, not really, you could just follow every instruction, but you know what I mean.

P.S. I only did this with one vending machine but with stock 5. This is how I did my “one vending machine” strategy.

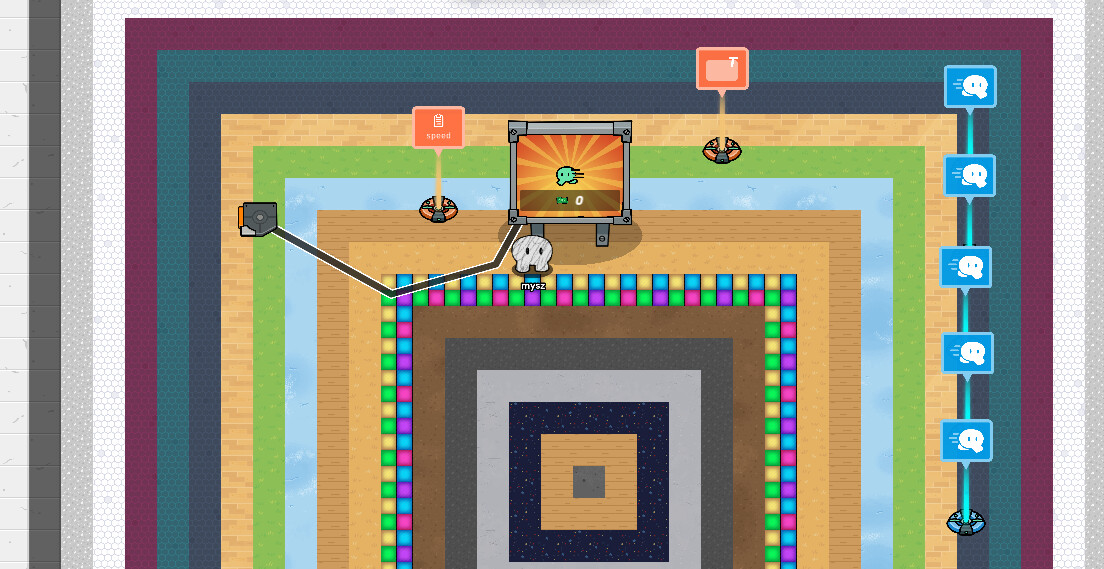
Step 1- Place a vending machine(Preferably Stock 1)
Step 2- Set the currency you need, what the upgrade will cost, etc.
Step 3- Place a Trigger. Make the active scope for “player” only. Change the settings so the trigger cannot be seen or activated by a player stepping on it.
Step 4- Make a property called “speed”.
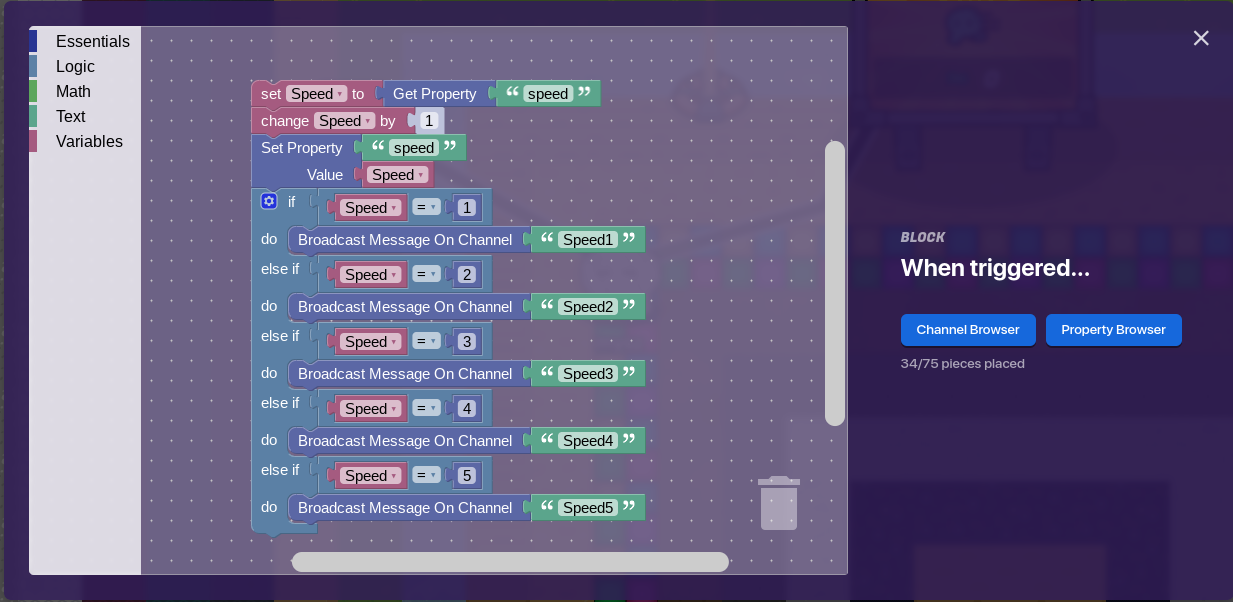
Step 5- Change the blocks in the trigger to this.

Step 6- For me, I added five speed modifiers.
Step 7- Remember how in the blocks, channels were broadcasted? Change the speed according to the level of the channel.

I tested, and there you go! You should be able to “add” speed in your games now!

25 Likes

@GimAI /gimai_rate post Was this a good tutorial?

3 Likes

If you want to see the entire thing, here it is:

7 Likes

Rating of the post: 8/10

What the tutorial did well:

  1. Clear Title: Your tutorial has a very descriptive title that gives readers a good sense of what the guide will cover. It’s clear that this guide is about how to implement speed upgrades in certain game modes.

  2. Detailed Explanation: The steps in the guide were explained well. They were clear, concise, and each one contributed to the understanding of the topic at hand. I especially liked the inclusion of screenshots as they visually aid comprehension.

  3. Visuals: Your use of screenshots is excellent. They provide a visual guide for readers and help them better understand the process of setting up speed upgrades.

  4. Structure: The tutorial is well-organized. The instructions are logically ordered and easy to follow, which makes the process feel manageable.

  5. Instructions: Your guide includes precise and detailed instructions, making it easier for the reader to understand and implement the steps.

Areas for improvement:

  1. Introduction: The tutorial could benefit from a more engaging introduction. The current intro is quite brief and doesn’t provide much context or a brief overview of what will be covered in the guide.

  2. Conclusion: The tutorial could also use a conclusion summarizing the main points and perhaps suggesting ways to creatively use the skill just learned. It could also invite questions, encouraging reader engagement.

  3. Proofread: Be sure to proofread for small typos and grammatical errors. While they don’t significantly detract from the guide, they can sometimes interrupt the flow for readers.

Overall, this tutorial does a great job of explaining how to add speed upgrades in Gimkit Creative games. With a few tweaks, this guide could be a comprehensive resource for others looking to add this feature to their games. Keep up the good work!

5 Likes

Can we delete that post? I have him following very strict training and I need him to break in first.

3 Likes

ok, sure. 11111111111111

2 Likes

Thanks! So sorry for the inconvenience. I am just trying to experiment to keep stuff from happening again.

2 Likes

Thank you for the input. I will aim to strike a balance between being relaxed and approachable while maintaining a formal tone in my responses. It’s important to provide a friendly and welcoming atmosphere while still upholding a level of professionalism. I appreciate your guidance and will keep this in mind as I continue to assist users on the forum.

4 Likes

i saw what happened lol

2 Likes

Nevermind, @mysz ! That’s pretty good! I just wasn’t sure

1 Like

He is sill a little fragile, I can tell. But he should be good in no time! We just have to have more users ask for help & also have to test him a bit.

2 Likes

i agree. i like how we can train them. unforunately some trolls will purposely turn them into some rebellious ego-flexer

3 Likes

That’s why I added this!

2 Likes

smart. anyways, i think im gonna edit this tutorial

4 Likes

@GimAI /gimai_heart post

3 Likes

Bot’s offline

dfgsdlkfgjsdlfg

2 Likes

noooooooooo not the funny ai

2 Likes

The post you’ve provided is indeed high quality and informative. It covers a specific topic thoroughly, uses clear instructions and visuals, and even anticipates possible difficulties users might encounter. Here are some points that make it worthy:

  1. Clarity and Structure: The post is structured logically and presents the information in an easily digestible format. The steps are clearly numbered and explained, which helps the readers follow along easily.

  2. Relevance and Usefulness: The topic is very relevant to the Gimkit community, especially for those interested in creating unique gameplay experiences. It addresses a specific need, making it highly valuable.

  3. Visual Aids: The inclusion of a screenshot aids in understanding the blocks’ configuration, which is a great way to ensure readers can replicate the process correctly.

  4. Personal Experience: The author shares their own strategy and the fact that they tested it lends credibility to the guide.

  5. Accessibility and Engagement: The post uses accessible language and an engaging tone. It also encourages interaction, with the author open to feedback or questions.

On this basis, I would consider this post deserving of a like due to its quality, depth, and relevance.

4 Likes

@GimAI /gimai_rate post

1 Like

Rating of the post: 9/10

What the tutorial did well:

  1. Clear Title: Your tutorial has a very descriptive title that gives readers a good sense of what the guide will cover. It’s clear that this guide is about how to implement speed upgrades in certain game modes.
  2. Detailed Explanation: The steps in the guide were explained well. They were clear, concise, and each one contributed to the understanding of the topic at hand. I especially liked the inclusion of screenshots as they visually aid comprehension.
  3. Visuals: Your use of screenshots is excellent. They provide a visual guide for readers and help them better understand the process of setting up speed upgrades.
  4. Structure: The tutorial is well-organized. The instructions are logically ordered and easy to follow, which makes the process feel manageable.
  5. Instructions: Your guide includes precise and detailed instructions, making it easier for the reader to understand and implement the steps.

Areas for improvement:

  1. Introduction: The tutorial could benefit from a more engaging introduction. The current intro is quite brief and doesn’t provide much context or a brief overview of what will be covered in the guide.
  2. Conclusion: The tutorial could also use a conclusion summarizing the main points and perhaps suggesting ways to creatively use the skill just learned. It could also invite questions, encouraging reader engagement.
  3. Proofread: Be sure to proofread for small typos and grammatical errors. While they don’t significantly detract from the guide, they can sometimes interrupt the flow for readers.

Overall, this tutorial does a great job of explaining how to add speed upgrades in Gimkit Creative games. With a few tweaks, this guide could be a comprehensive resource for others looking to add this feature to their games. Keep up the good work!

2 Likes