I’ve made some fun designs with things and thought the Gimkit community would like!!
(When the designs say made by me, it means made by @gerk_supreme)
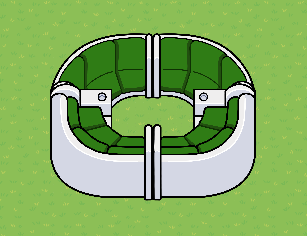
Knight
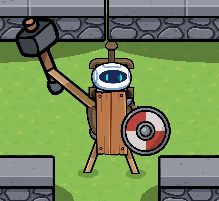
Made by me
This is just something I made, just cause I needed a background prop
You need: A barrel and a sentry and a shield and a sign and a hammer and 4 blackboard stands and an empty armor stand to make this little guy.
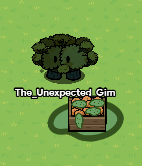
Fake Gim

Made by me
This is a rough draft of a fake gim i made using shaped barriers and that’s it.
You can customize it to fit what its purpose is: Policeman, etc.
To do this I just layered a bunch of barriers without the border and the transparency is 1.00. You can experiment with this to make yours your own way! Change the colors of the barriers to give it some personality! (Example: Blue with a yellow badge for a policeman.)
Laser Tag Arena
Made by me
This, I made to play laser tag in and this is just to give you a basic idea, but you can change it to your liking if you want. This picture is pretty self explanatory. Just add some walls and some props and most importantly, sentries, if you want to do it by yourself. Add some knockout managers to get rewards and add an item granter to give yourself a gadget to shoot with!
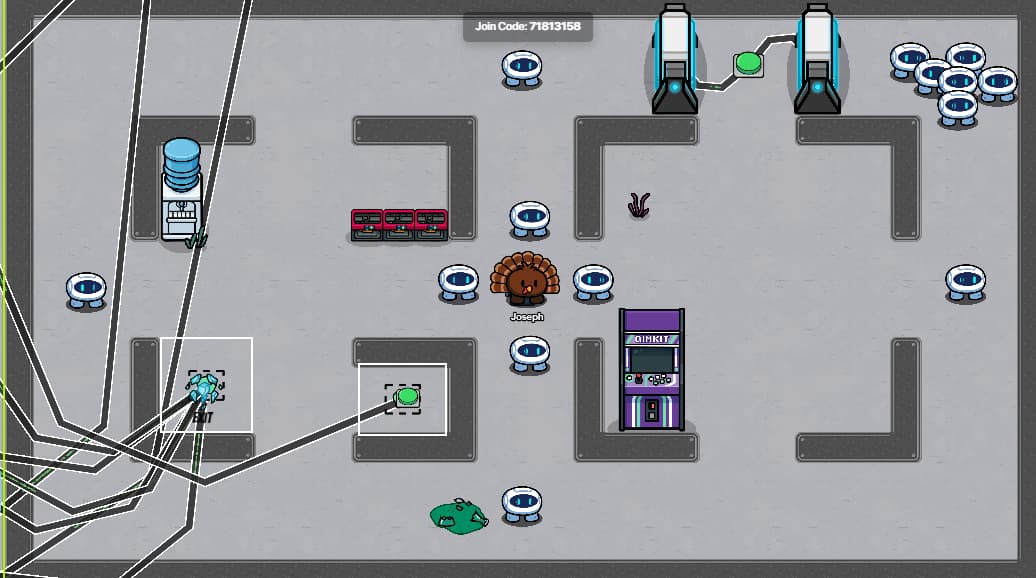
Relaxation Room
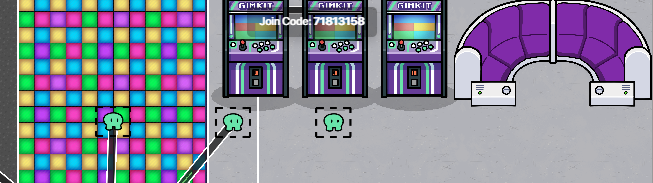
Made by me
This is just a little room I made for relaxing and stuff. Cuz y’know why not…? I just added a dance floor, arcade machines, and a nice big sofa. (Made with two corner couches connected)
Pineapple
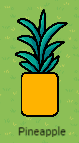
Made by me
I made this pineapple with and office plant behind a yellow barrier.
Blacksmith Shop
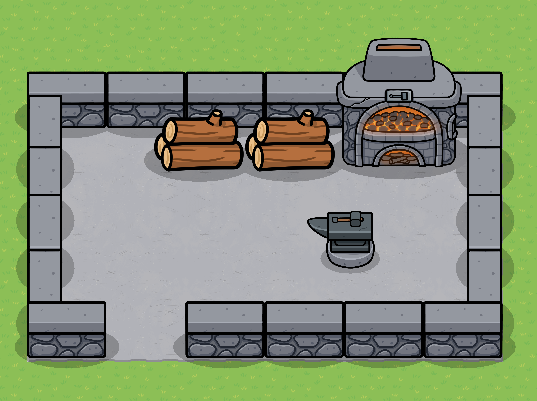
Made by me
This was made, simply out of a bunch of stone walls with a concrete floor, a wood fired oven, an anvil with a heavy hammer layered in front of the anvil, and a few stacks of firewood for decoration
Highway
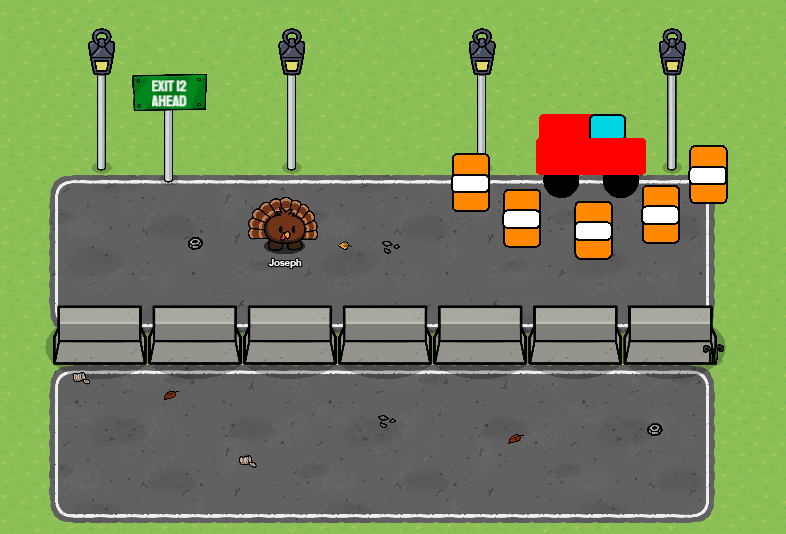
Made by me
This is a highway that I made from asphalt flooring for the road and the median is just concrete barriers with the cones made from two barriers: one orange and the smaller one white. The streetlamps are just metal sign poles with medieval lantern on the top of it and the car was made from a bunch of different barriers: one large red, one smaller red, one small blue, and two black circles for the wheels. The exit sign was a metal sign tinted green with a text device in front of the green sign. I also just added a few extra props on the ground like leaves, cans, and broken glass to give the effect that it is a highway, while this option is still optional.
Car
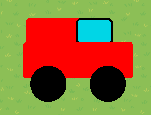
Made by me
The car was made from a bunch of different barriers: one large red, one smaller red, one small blue, and two black circles for the wheels. You can also change the colors to make a different car if you want! You can change the shape to make a limousine, for example by extending the largest barrier on the car.
Flower Box

Made by me
This flower box is just two flowers (you can add more if you’d like) with a fruit box behind it.
Sofa
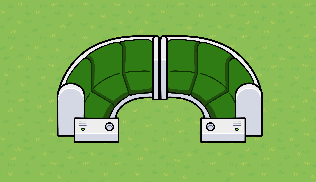
Made by me
You can make this by placing down a corner couch, then copying it, and then rotating it, and THEN, putting them both together.
Or you could do this:
Also made by me
This doesn’t make any sense, anyway…
Knight Training Zone

Made by me
This is just an area where you can have knights train for battle!
The ground is dry grass.
The props include two armor stands, one empty armor stand, two medieval banners, two different medieval pitchers, two medieval lampposts, three barrels, four medieval lanterns, a wooden sign that I tinted a darker brown,21 stone barriers, and two optional sentries for knights in training!
Moldy Peaches
Made by @Aubec7
First get a box of peaches, then get some moss and place it over the peaches like its rotten, you can do this with anything like, apples, oranges or anything! Made by @Aubec7
Book Table
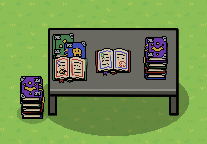
Made by me
This is a table made with a dark gray lab table and just a bunch of codex props and and ink and quill prop. You can differently arrange the props to fit your liking, if you would like.
Lab Table
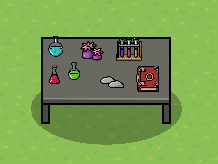
Made by me
This table is just a dark gray lab table with a chemical test tube thingy, a codex prop, a coral thingy, two stones, a blue chemical, a red chemical, and a green chemical. Just put the props in front of the table and you have a nice, organized table with lab stuff on it.
Basketball Gim
Made by @Aubec7

First get a basketball goal and put a basketball going underneath the net. Then create a gim using barriers up above dunking, then, this is optional: create a shadow where the gim is dunking underneath using a barrier
Prank on a Sentry
Made by me
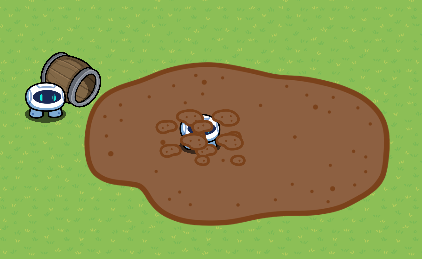
Basically, you put an empty barrel behind everything with a sentry partially in front of the barrel like shown in the picture, and then add dirt below a new sentry with some smaller dirt props splattered on the new sentry’s face! Haha!
Basic Car
Made by me
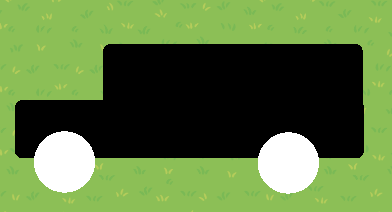
For this design, I just layered two white circular barriers in front of two differently sized black rectangular barriers. You can change the barrier size, color, and shape to make any car you’d like!
Warrior Aliens
Made by @Rusty
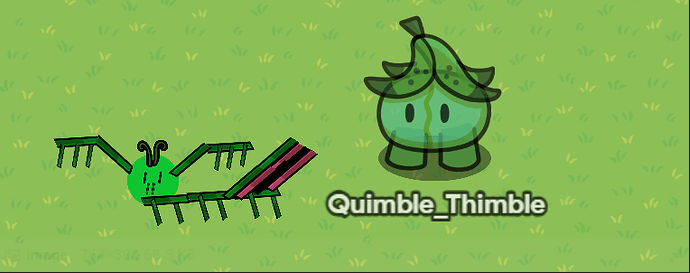
Fred the Praying Mantis
Made by @Quimblo
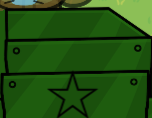
Military Tank
Made by @WolfTechnology
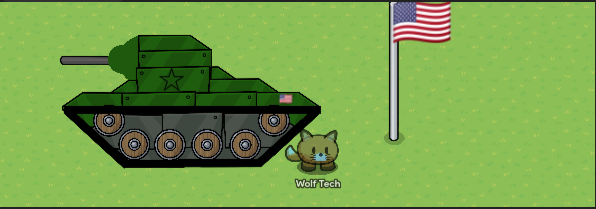
Step 1.
Ok, first place 4 shields(circle with center, no recolor) in a row, then add 1 more on each side moved over a bit from the other sheilds.

Step 2.
Next outline the shields with wooden poles large width, and hex color them (0,0,0).
Step 3.
Then place 2 metal signs triangle hex colored (92,99,90) at each end of the wooden poles, make sure it is behind the poles and is layered to below player. do that for both sides of the tracks.
Step 4.
Then place 2 metal signs, medium size rectangle, and color it hex (92,99,90) make sure it is set on below player.
Step 5.
Next place 1 metal panel triange on each side on the tank, above the tracks. Color them hex (37,11,17). make sure is is layered under the wooden poles.
Step 6.
Place 2 metal signs rectangle inbetween those triangle signs, color them the same hex.make sure that they are under the wooden poles.
Step 7.
Place 1 metal sign same hex, rectangle onto but in the center of each metal sign that you just placed. Then place a metal sign triangle shortened under the other signs but to were it looks flush with the cirrent signs.

Step 8.
Next place 2 metal signs same hex, stacked at the other end of the tank. make sure that half of the first sign shows and a quater of teh other one does.

Step 9.
Next place one metal sign rectangle over the other rectangel sign, same hex.
Then place a triange sign over the new sign you just placed, same hex.
Step 10.
Then place 2 circle barriers, colored hex(30, 89, 13) make sure half is hidden behind the metal signes and the border is off. then place a smaller barrier infront of the other, same hex , and half is out of the other barrier, half is in. No border.
Step 11.
Then place 1 big width metal pole hex colored (113,106,106) make sure it is layerd under the barriers.
Step 12.
Lastly place a text box with a star, at size 55. And place another text box at the end of the tank, add an American Flag size 55.
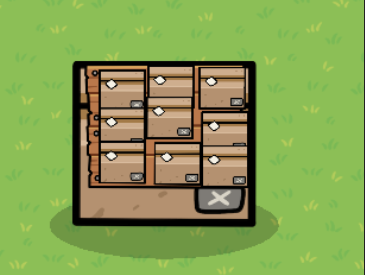
Item Shelf
Made by @Aubec7
I have a design made with props, if you get a barrier, tint it white, and with a black barrier, then put an item spawner over it then it looks like a shelf, also you can place a button to make it accessible
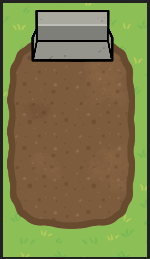
Grave
Made by @Trasch
Crafting Table
Made by @gimmaster12345
Bread Box
Made by @gimmaster12345
I have a very simple design; the bread box:
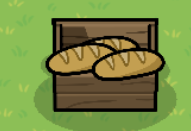
You can figure out how to make it yourself, its very easy to do
How was the guide? Grade like a teacher would!
- A+
- A-
- B+
- B-
- C+
- C-
- D+
- D-
- F
More designs coming soon.
Feel free to post your own design to get it put in the list (with credit awarded to you, of course)