so, one of the most suggested guides was the “doors and power gauge” so that will be my 1rst guide!
so the first things first, in this guide, you will need:
1 counter (devices)
1 lifecycle (devices)
1 end game (devices)
2 verticle barriers (props)
2 wire repeaters (devices)
2 triggers (devices
4 game overlays (devices)
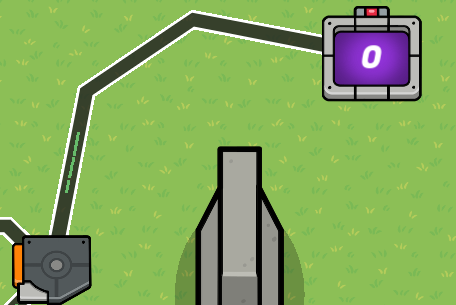
step 1: place the doors
this step is pretty simple, all you have to do is place the 2 verticle barriers like this:
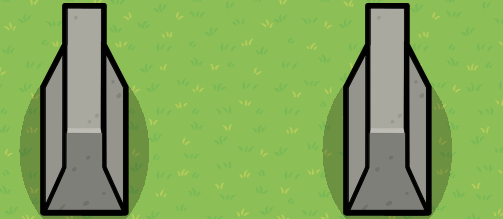
then you can tint them any color you like! (I suggest that you use a dark gray to match the doors in the game) but for this guide, I won’t be tinting them.
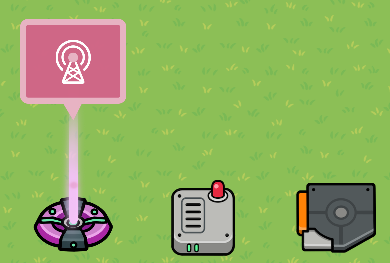
step 2: set up the life cycle
for this step, all you have to do is make the lifecycle wait for the game to start then use one of the wire repeaters and triggers and place them next to the lifecycle. like this:
step 3: wire the lifecycle to the wire repeater and the trigger
so first you will need to place a wire going from the lifecycle to the wire repeater.
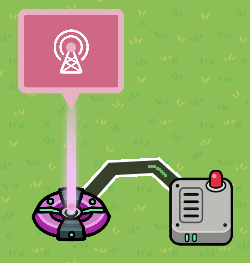
now make the wire connection to be event occurs, repeat the wire pulse, and set the delay to whatever you want! (I used 15 seconds as an example)


now connect the wire repeater to the trigger, then the trigger to the wire repeater. now make the wire from the wire repeater in these settings: when the wire receives a pulse, trigger.
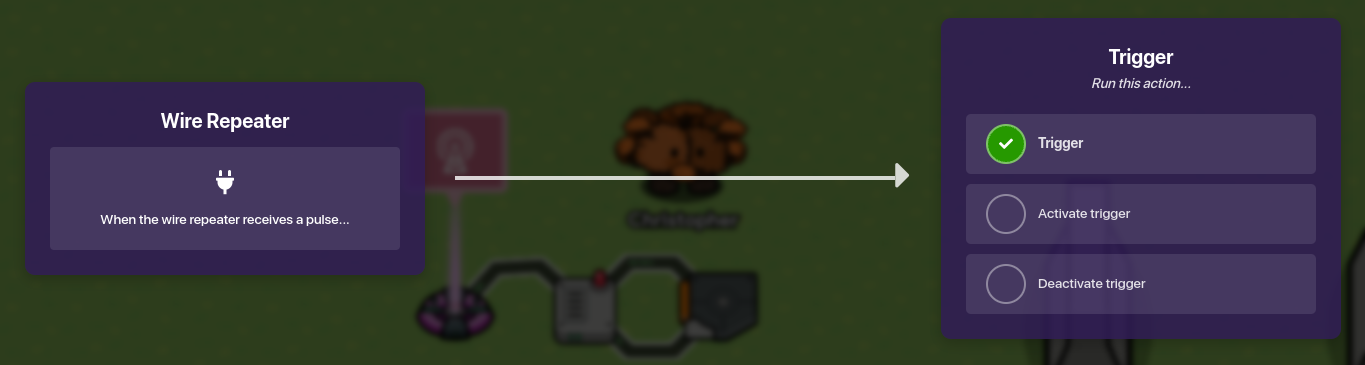
now for the wire from the trigger, make the wire settings: triggered, repeat the wire pulse.

step 4: wire the trigger to the counter
first, you need to place down a counter, then wire the trigger to the counter.
now make the settings: triggered, decrement counter.
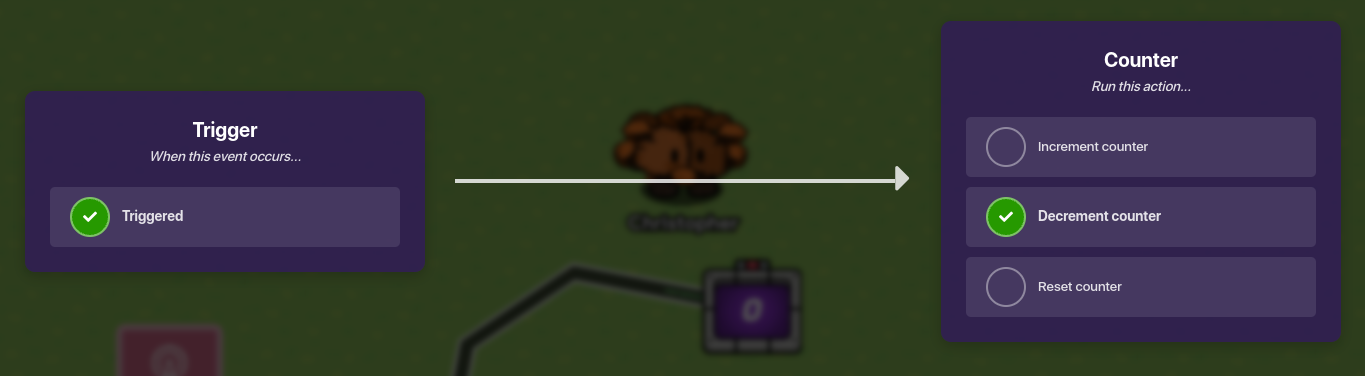
now set the starting value to 100, and set the target value to 0.


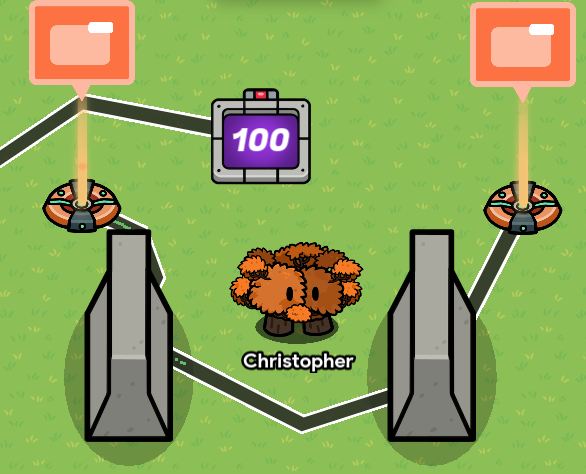
step 5: make the button system (left side)
place down 2 of the 4 game overlay devices, set them to buttons, and (for organization) place them on either side of the mechanism. now wire them to the left barrier.
now make the overlay that you want to close the door, have these wire settings: button pressed, show prop. now to open the door you just need to change show prop to hide prop.


step 5 (part 2): make the button system (right side)
place down the other 2 game overlay devices, and connect them to the right barrier, now do the same settings for opening and closing the doors with the wires as on the left side.
step 6: connect the buttons to the power gauge
copy the repeater and the trigger interconnect the copies the same as the originals, and connect the trigger to the counter with the same settings. connect the door closing overlays to the repeater and make the wire settings: button pressed, repeat the wire pulse.

now, to stop the door power usage, you need to connect the open doors to the trigger and set both of them to these settings: button pressed, deactivate the trigger.

step 7: finishing things off
so, this is the hardest part to get working, but I’ll try to make it simple, first click on the left door overlay devices and name them, then make the closed door visible on game start, and the open door is not visible on game start. now make it so that when you press the button it transmits a signal, now make that signal the signal that hides it, and shows the other overlay. now do this for the other overlay devices.
and you’re done! …for now.