The maker of this topic would like to say that the words “my”, “I”, or “me” refer to @jjnitzan, NOT @vqnillaxx.
Hi everyone who sees this… sorry to be a bit sudden about this, but I’m going to be developing a more efficient system for Chess (I’ve done a bit more learning about programming in general; Java yay), and it will hopefully be simple enough to build. I’ll make another guide with the complete thing once done.
This will be updated once I stop being lazy and rebuild the block code guide since that had some massive changes.
To be clear, no codes shown within this Wiki work, and this Wiki is only to be edited by jjnitzan unless given explicit permission.
This is a work in progress, but is currently at the highest level of gimkit mechanics in my opinion, so it’s a good post to learn from.
The Board Itself
Source: Making a Chess Board by @NightEnd
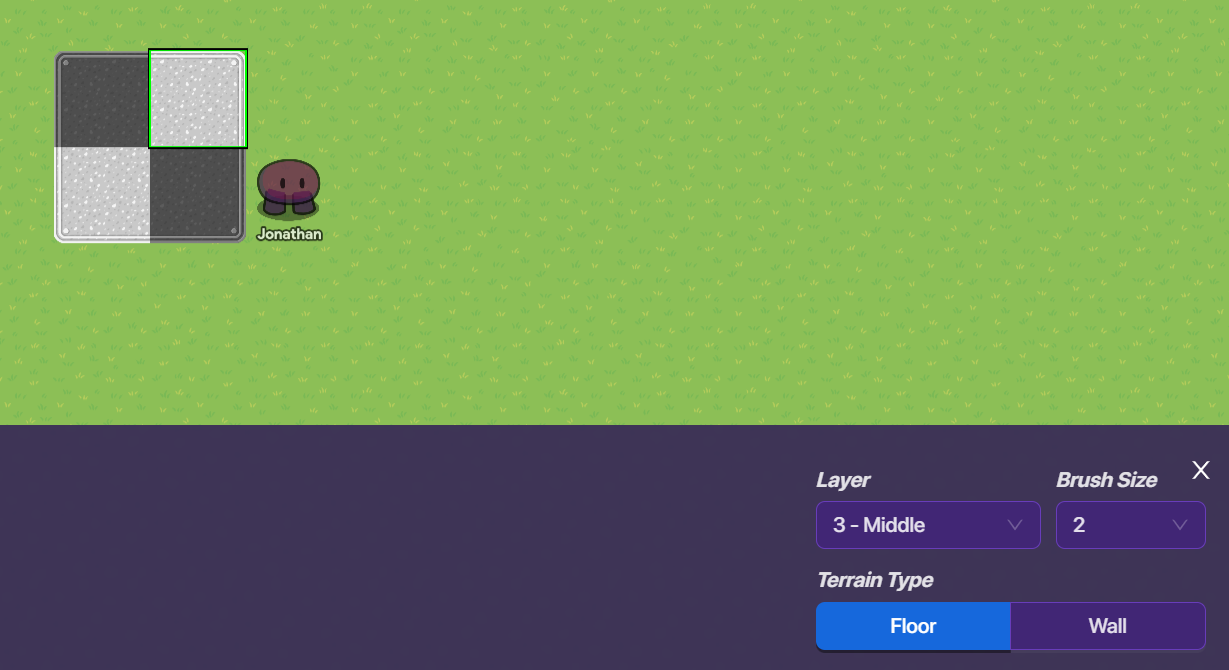
- First start of by making a 8 by 8 grid of light and dark colored tiles (2x2 floors) in a checkered pattern. The top left and bottom right tiles should be light, bottom left and top right dark.
- Next create a text object and set the text size to 112, and the font to Rubik. Set the text to; A B C D E F G H, and make sure it’s on global.
- Create another text object and set the text size to 112, and the font to Rubik.
Text;
8
7
6
5
4
3
2
1
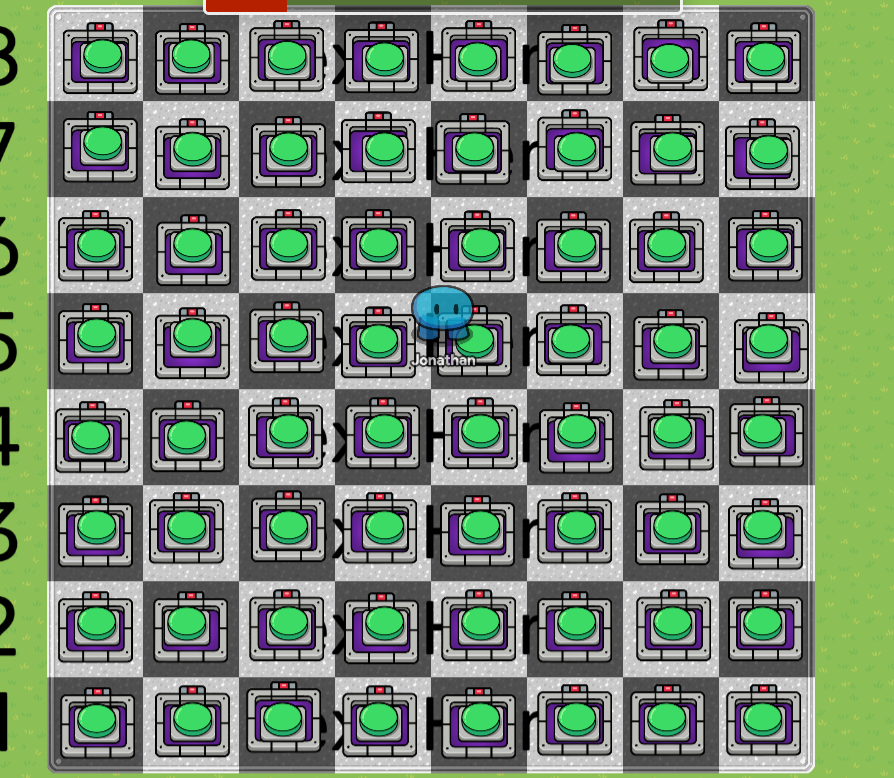
Picture of A-H and 1-9 (They should be centered with the tiles).


Dynamic Text
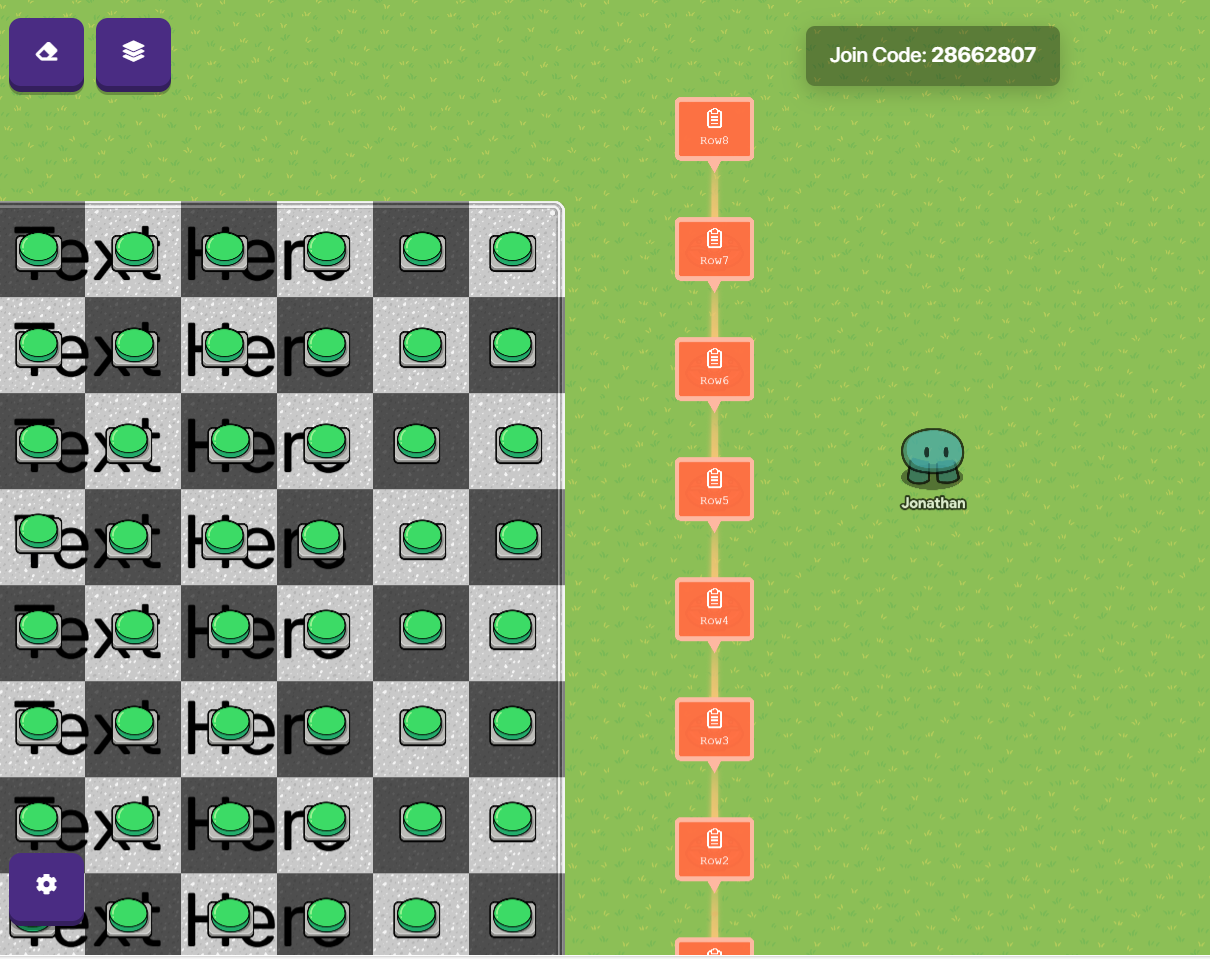
Sadly, due to the inability to create newlines with block code, we need 8 text object instead of 1 here.
- Create a text object and center it along the bottom row of your board.
- Set the text size to 102 and the font to Rubik
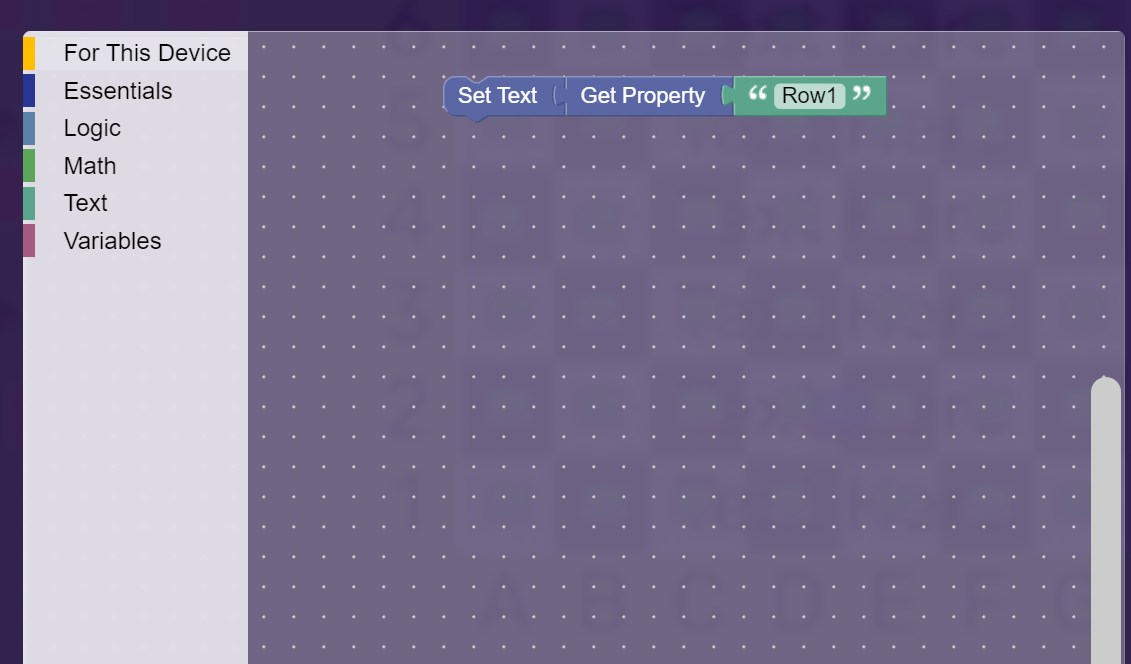
- Add the block; When receiving on channel UpdateText.
- Add the following code to the block.
- Copy and paste the text object into each row. Make sure to go to the block code of each object and change the row number depending on the row the text is in.

Checkable Inputs (Part 1)
Warning: This part is EXTREMELY annoying to do, mainly due to needing to copy and paste so many buttons and counters.
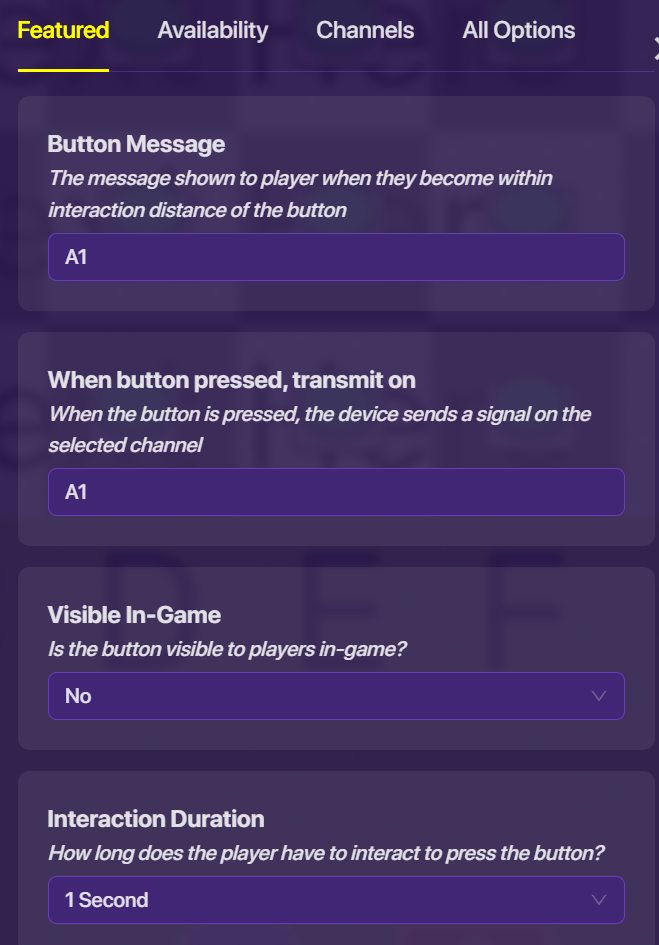
- Create a button. Change the button to be invisible to players and set the activation scope to players. Also make the button take no time to press.

- Set the button message and the transmit channel onto the square it’s on (A1, B1, etc.)
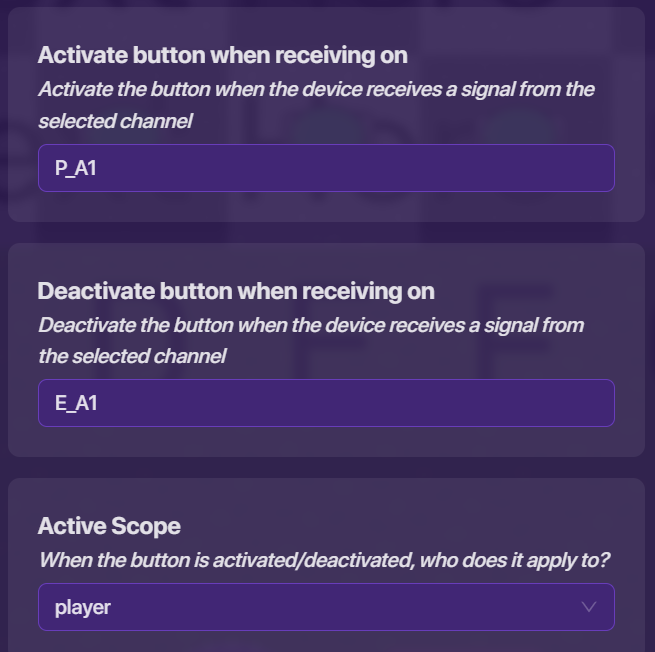
- Set the activation and deactivation to P_[Square] (Activation), E_[Square] (Deactivation)
- Copy and paste the button onto each of the 64 squares, and change the settings for each based on the square it’s on (same rules as above)
Counter setup:
Place a counter on each square with the following rules.
- The starting value is 10/20/30/40/50/60/70/80 (Based on what coord A-H) + 0/1/2/3/4/5/6/7 (Based on coord 1-8). So each starting value looks like; A1 = 10, A2 = 11, B1 = 20, B2 = 21, etc.
- The counter should NOT be visible in game, and have a scope of global.
- The counter should update the property CurrentSelected, and not have a target.
- For each counter, it should reset when it receives on the corresponding square (Counter on A1 resets when it recieves A1 for example)
There needs to be a counter on each square with the settings changed based on the corresponding square.
At this point
Congratulations, you have finished the first 5% or less of this guide/wiki! It only gets more complicated from here, but it’ll be worth it in the end ![]() (hopefully).
(hopefully).
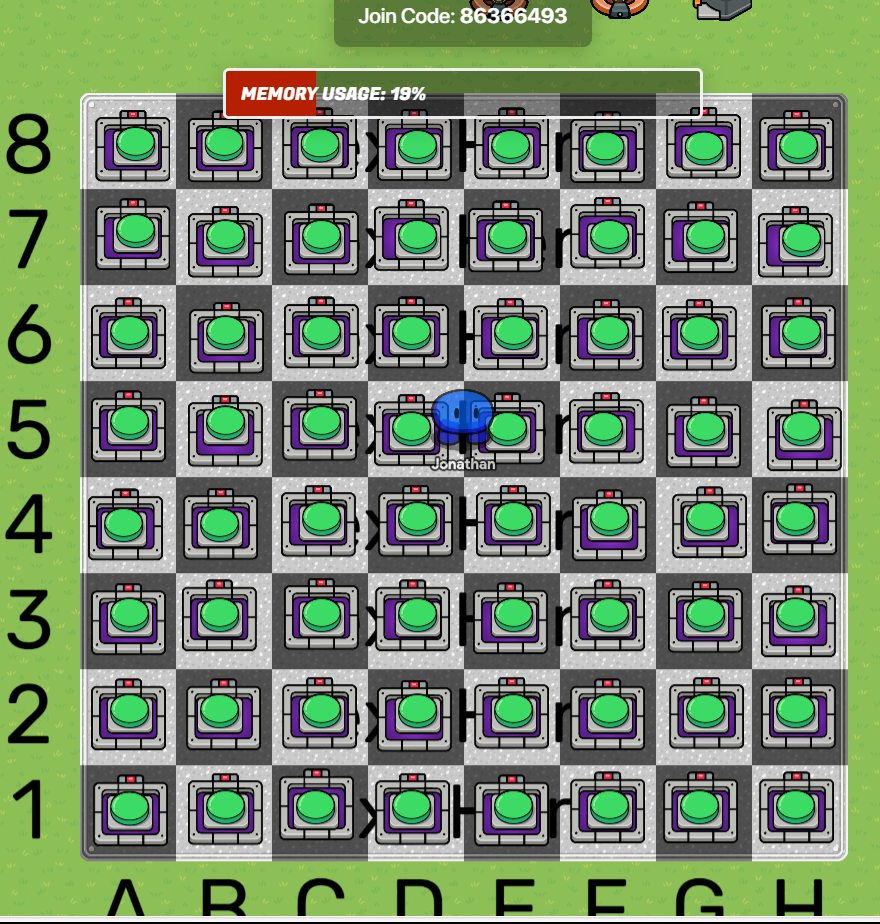
Anyway, this is what your board should look like:
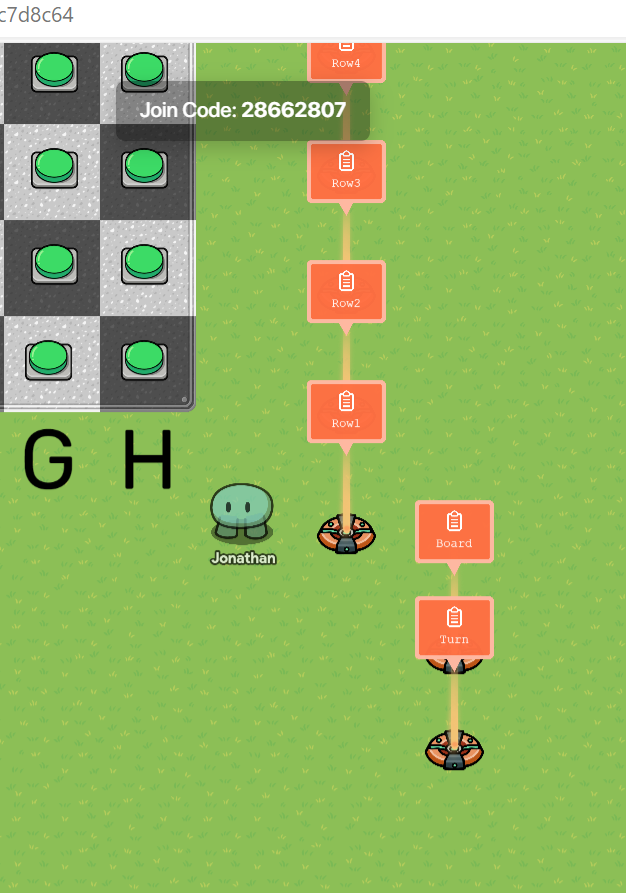
Properties
Each of the following properties should be global unless specifically stated otherwise, and should have a default of blank unless stated otherwise in the form of [Property Name] (Default Value).
- Text Properties
- Row1
- Row2
- Row3
- Row4
- Row5
- Row6
- Row7
- Row8
- Board
- Rw (♖)
- Nw (♘)
- Bw (♗)
- Kw (♔)
- Qw (♕)
- Pw (♙)
- Rb (♜)
- Nb (♞)
- Bb (♝)
- Kb (♚)
- Qb (♛)
- Pb (![]() )
)
- Ee
- Spacer
- PieceTo
- OverlayPieceSelected (None)
- PieceTaken
- PieceLetterOn
- PieceLetterTo
- Number Properties
- UpdateBoardCounter
- Turn
- ButtonLoop
- CurrentSelected (-1) (Broadcasts on PieceSelected when value changes)
- BoardPieceTo
- BoardPieceOn
- MoveCheckRecursion (0)

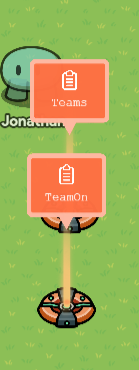
Teams
You now have a choice to make. Do you want this to be one player, or two?
- Note that I’ll merge these 2 eventually into the player choosing, but I’d recommend 2 player for now, since the AI will take me the longest.
-
Set up 2 number properties with a default of 0
- Teams (Global)
- TeamOn (Local)
-
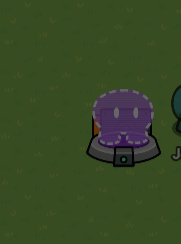
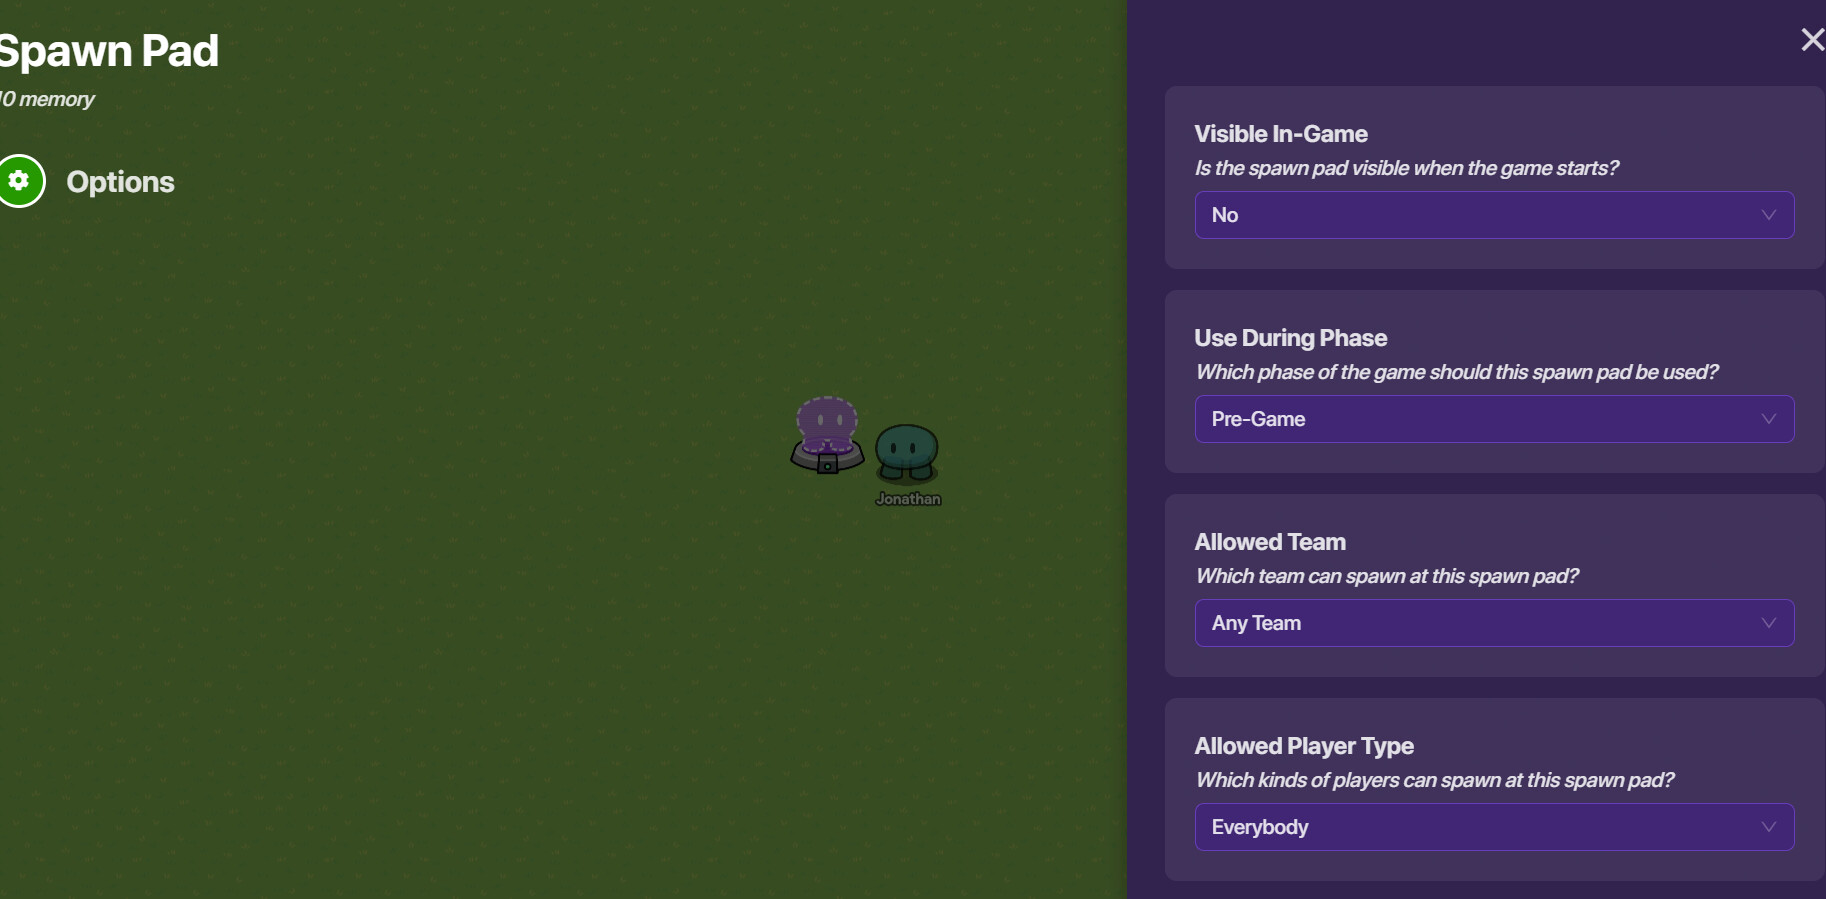
If you want, you can have a pregame spawner (which would be wherever your lobby would be. This is optional.)
-
Add a spawn pad that you spawn on when you start the game, and place a trigger wherever you’d like.
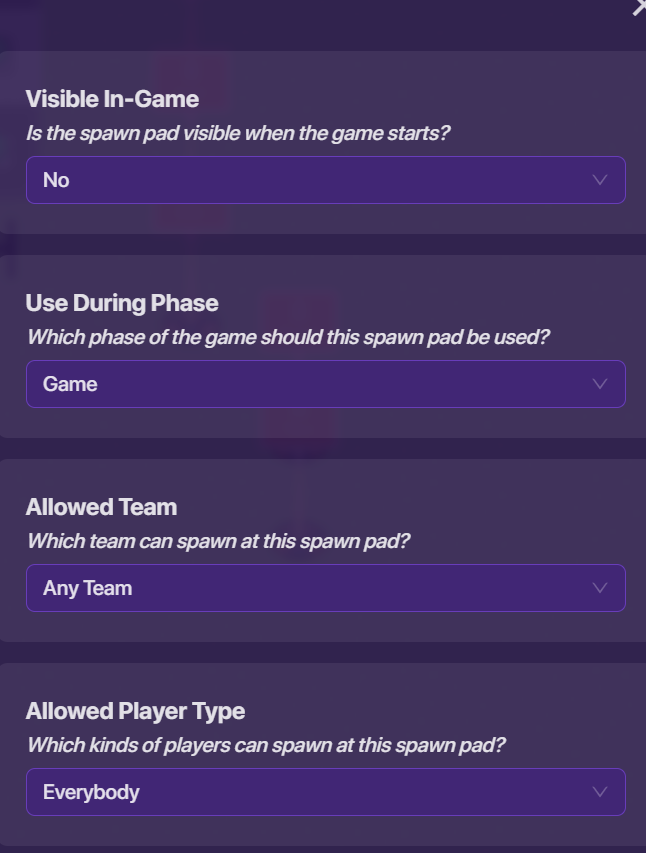
- The trigger is hidden and will be activated when it receives on GameStart:
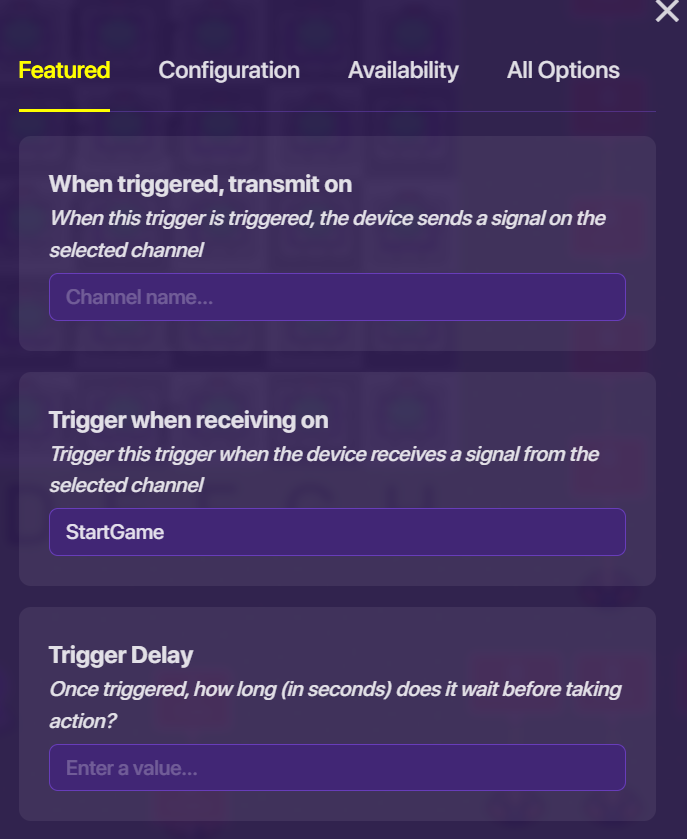
- Create a when triggered block for the trigger and do the following shown:
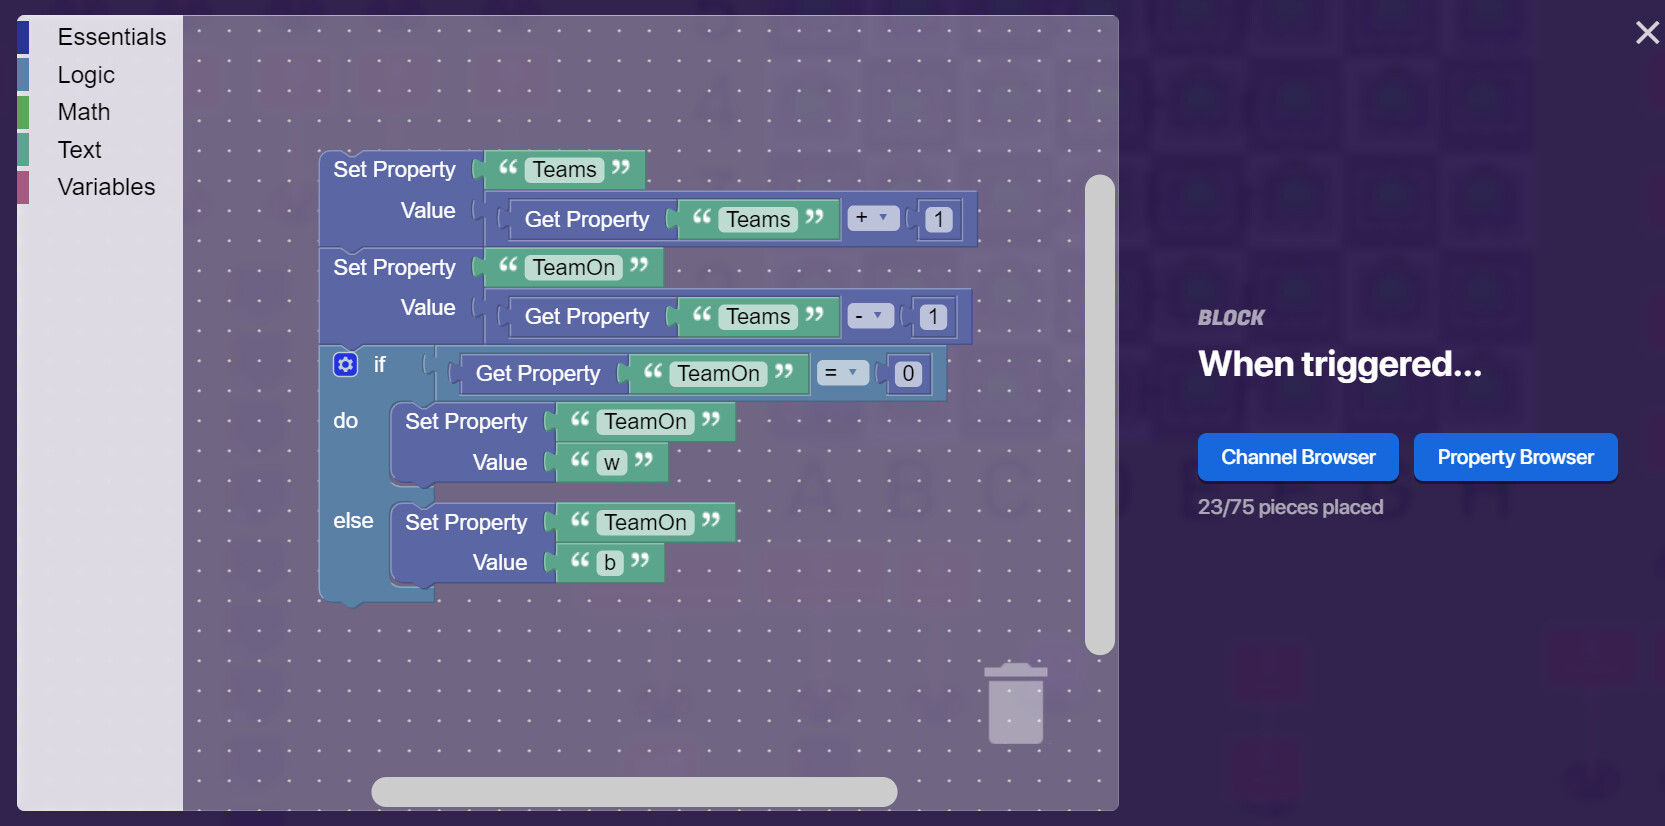
This utilizes (sort-of) psuedo-teams, and we all know if it’s complex or uses quantum mechanics for gimkit, it’s going to be great ![]() ! Best of all, this uses both!
! Best of all, this uses both!
Anyway, back to the guide.
Updating the Board Dynamically
Here is where this starts to get complicated. If you had trouble with the previous steps, then reach out to me or @Blackhole927 (who’s also really good at this), and either one of us can help (though it’s @Blackhole927’s choice if they want to help).
Anyway, I’ll explain better in this section due to this being difficult (at least it will once this wiki/guide is finished, not necessarily now).
We created the global number property called UpdateBoardCounter if you remember. The purpose of this property is to loop through updating the board, setting a trackable limit and counter in recursion.
-
Add a lifecycle. Set it so it broadcasts the channel StartGame when the game begins.
-
Create a trigger and make it invisible in game.
-
Set it so it triggers when receiving the channel StartGame.
-
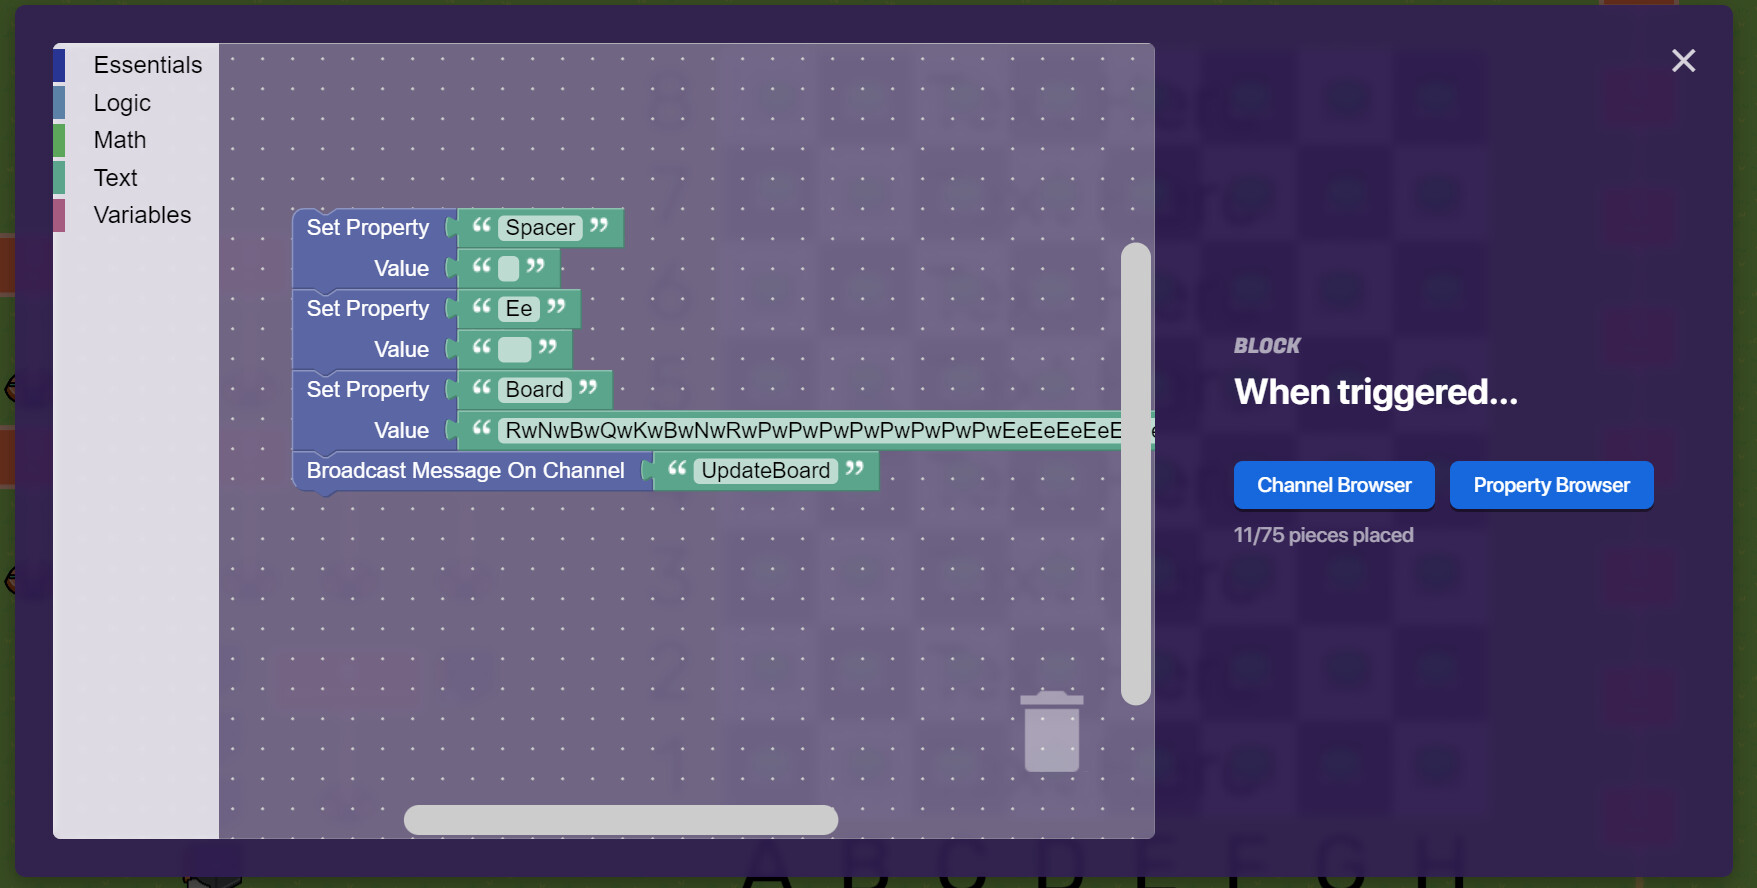
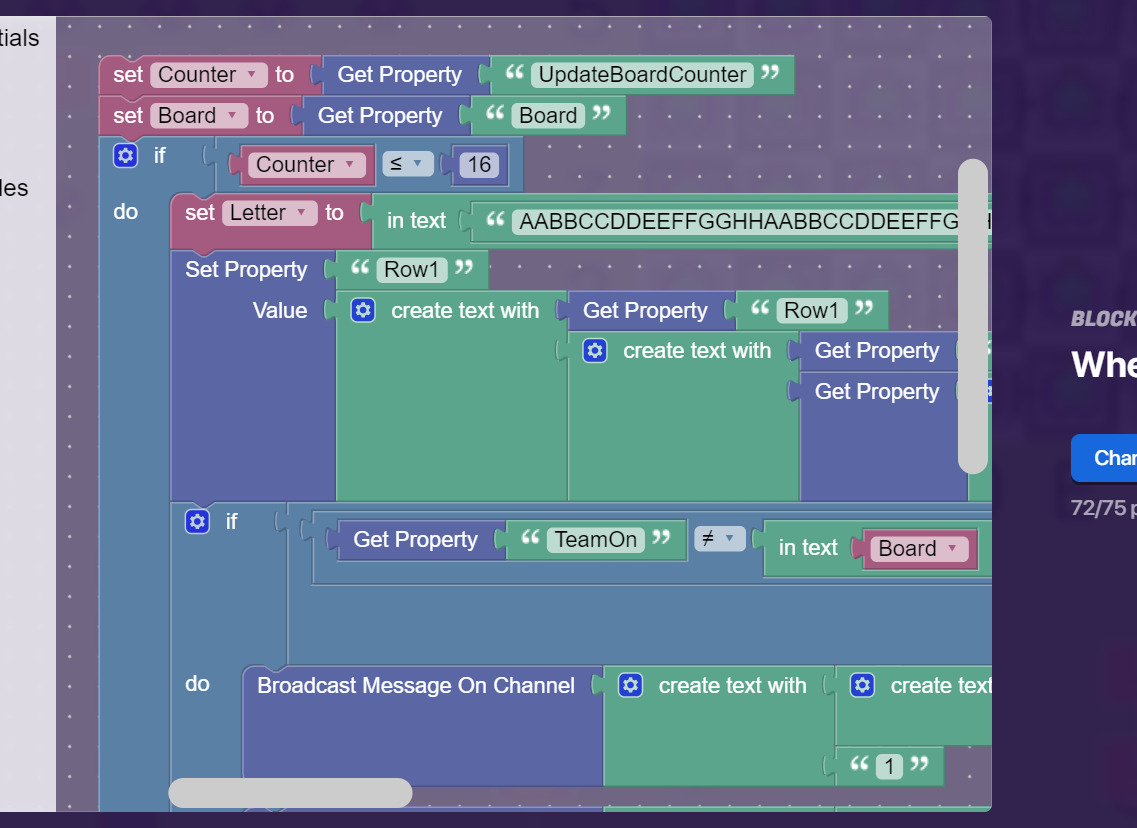
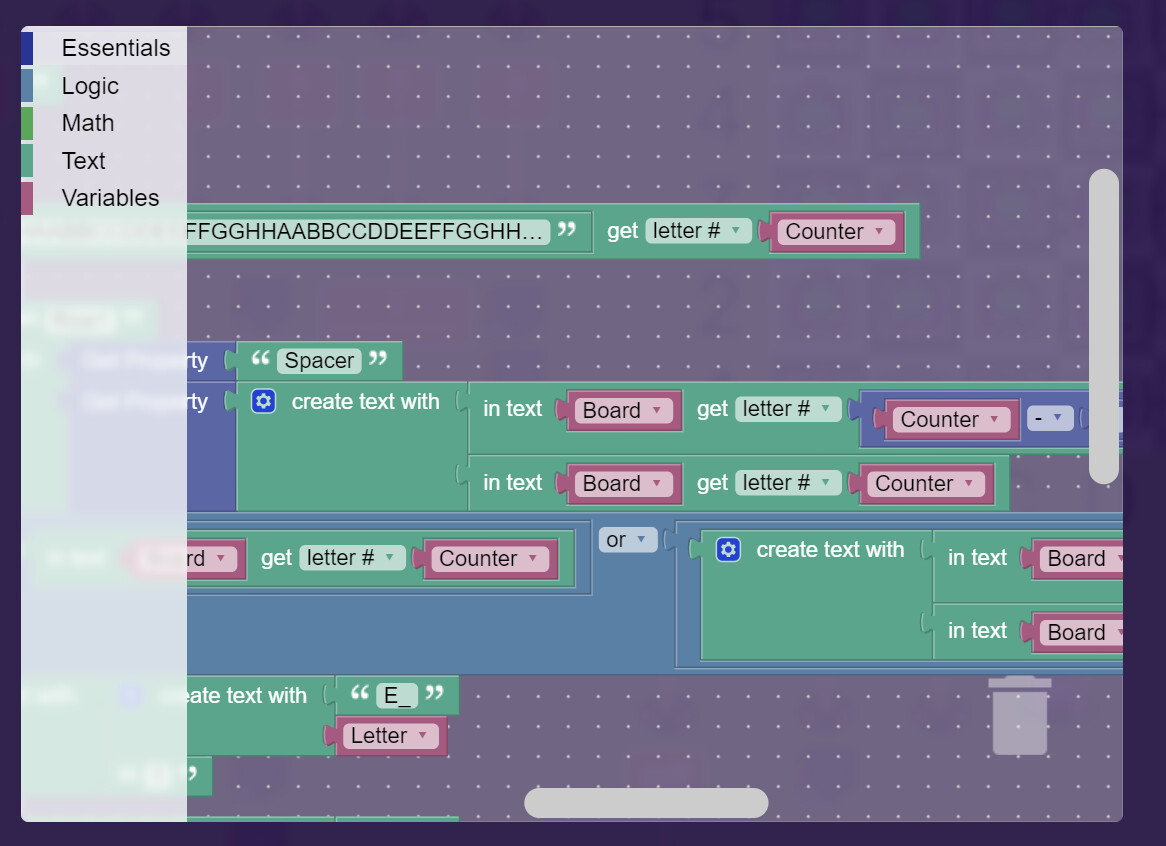
Add a when triggered block with the following block code.
The block code should be the following for this trigger:
Spacer=1 space
Ee=3 spaces
Board=RwNwBwQwKwBwNwRwPwPwPwPwPwPwPwPwEeEeEeEeEeEeEeEeEeEeEeEeEeEeEeEeEeEeEeEeEeEeEeEeEeEeEeEeEeEeEeEePbPbPbPbPbPbPbPbRbNbBbQbKbBbNbRb
- Create another trigger. Set the trigger to trigger when it receives on channel UpdateBoard
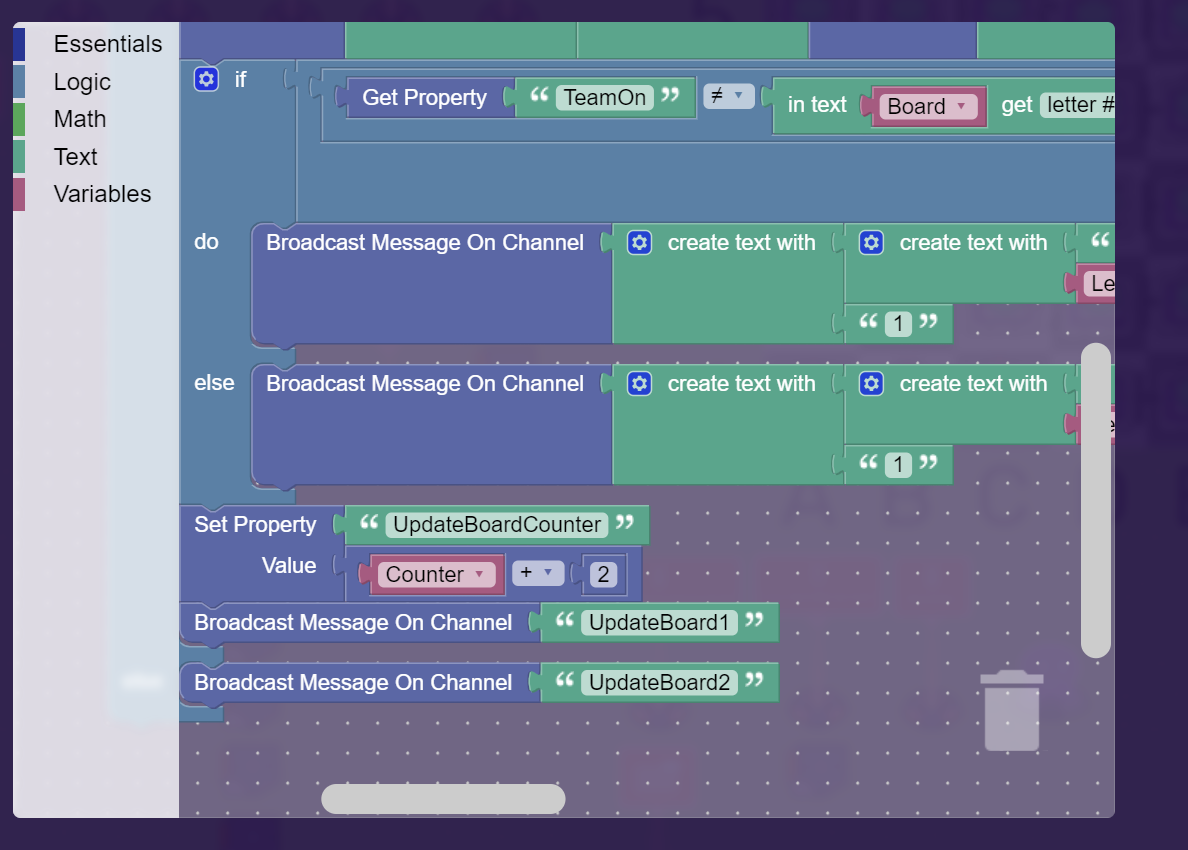
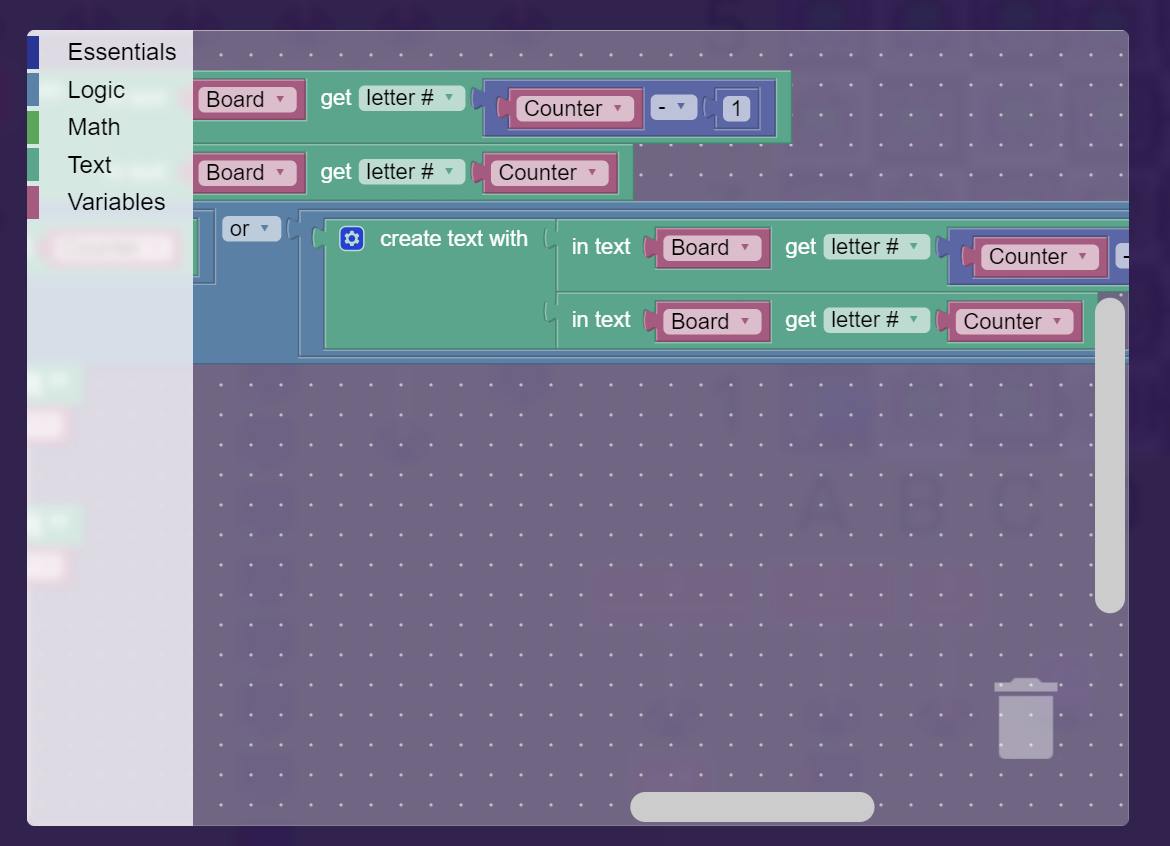
- Add a when triggered block and put the following code inside.
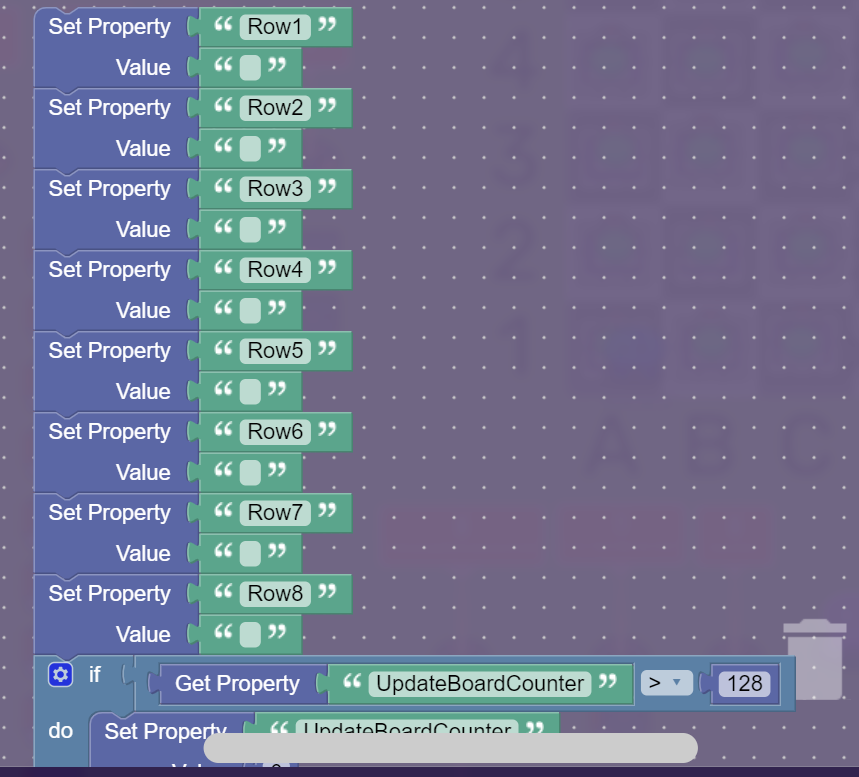
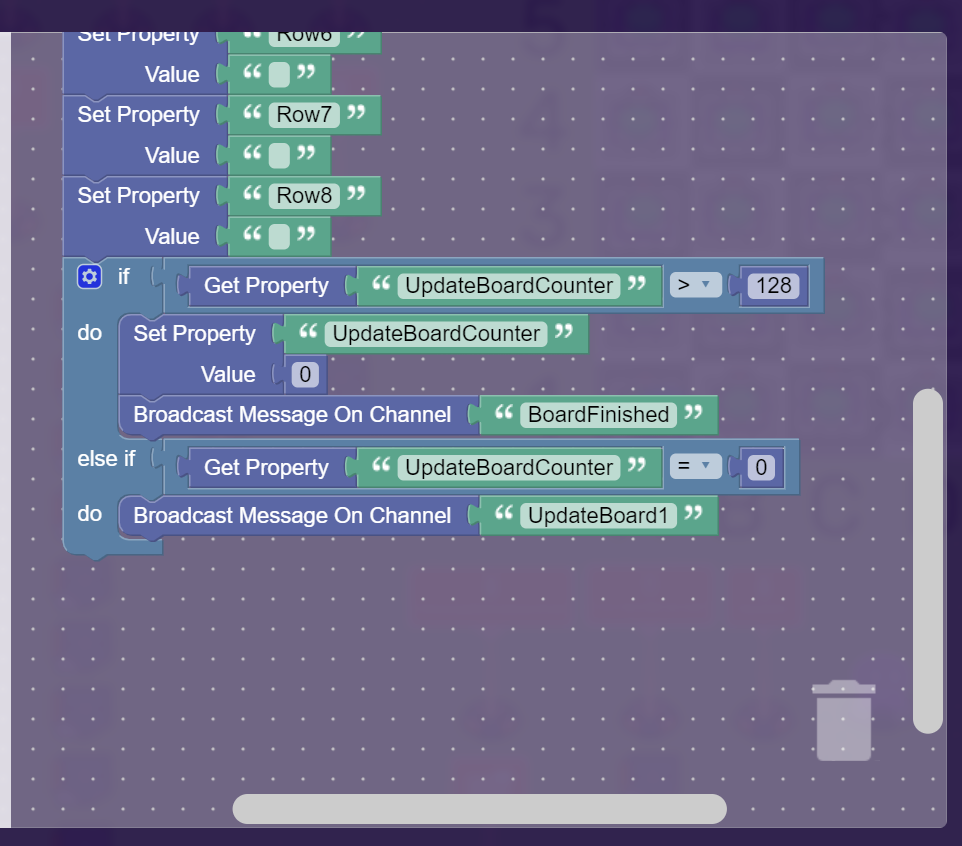
- Create another trigger that triggers when it receives on UpdateBoard1. Give it a when triggered block and put the following block-code in.
The long text shown is: AABBCCDDEEFFGGHHAABBCCDDEEFFGGHHAABBCCDDEEFFGGHHAABBCCDDEEFFGGHHAABBCCDDEEFFGGHHAABBCCDDEEFFGGHHAABBCCDDEEFFGGHHAABBCCDDEEFFGGHH
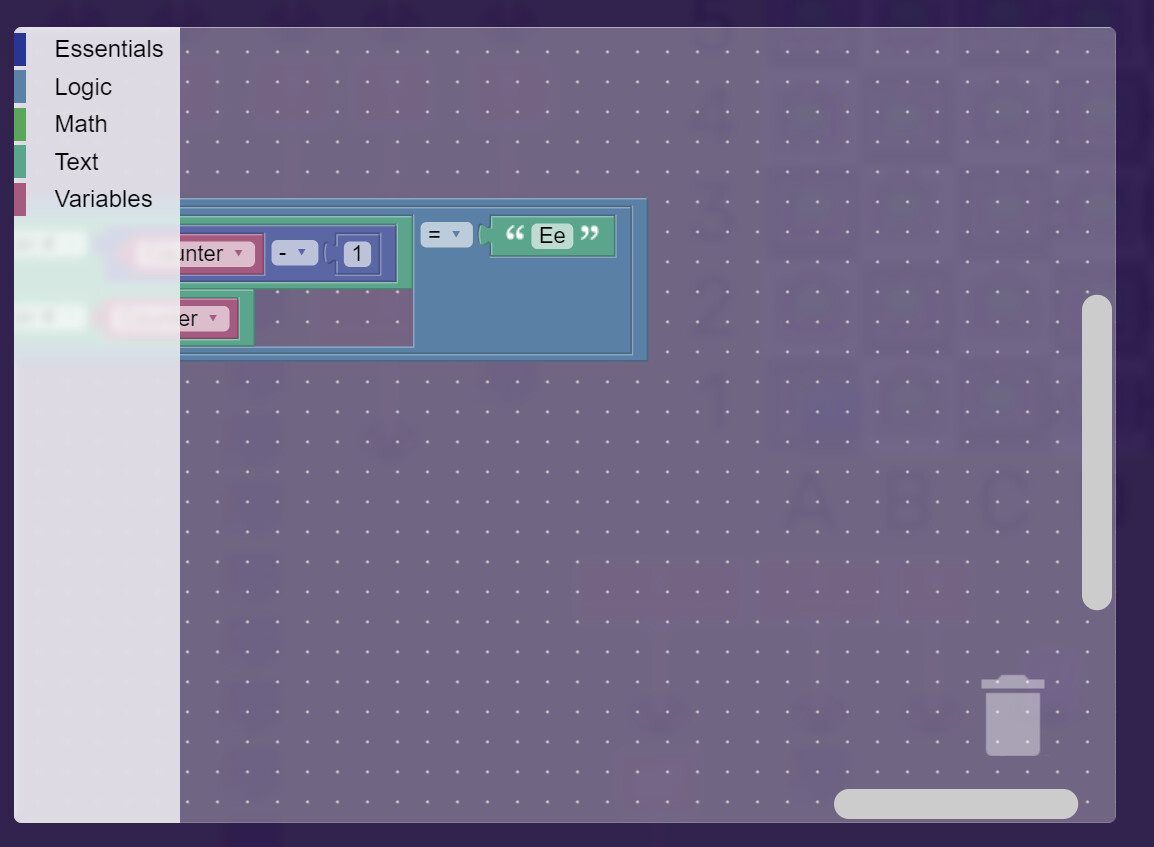
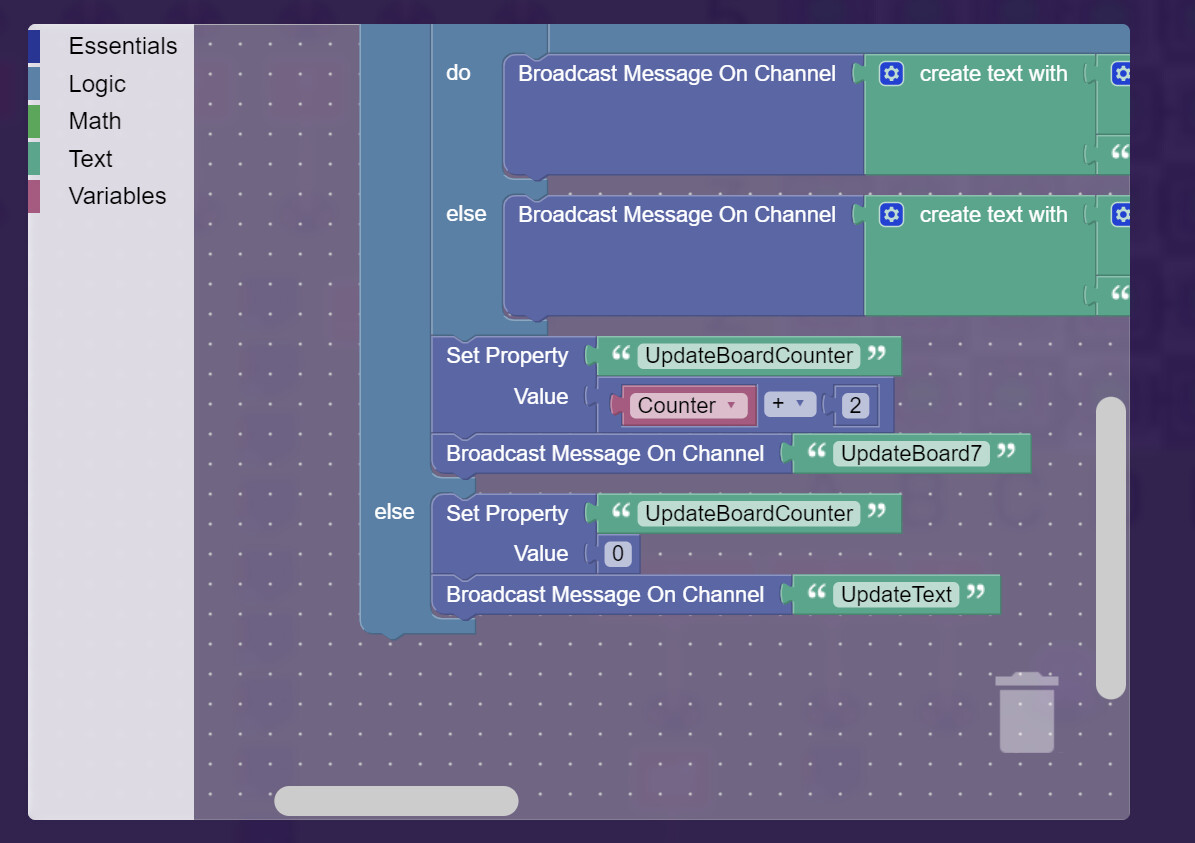
- Copy and paste the trigger 8 times, changing the following:
- The greater than or equals to by 16 more each time.
- It triggers when it receives on UpdateBoard 1-8 (UpdateBoard1, UpdateBoard2, etc.)
- Replace all Row property’s to the respective row number (Row1, Row2, etc.)
- Change the 1 under broadcast on channel to the row number (1, 2, 3, etc.)
- Change the UpdateBoard1 to UpdateBoard2 (Previous + 1) and UpdateBoard2 to UpdateBoard3 (Also previous + 1).
Now you have to change the 8th trigger!
The end of it should look like this:
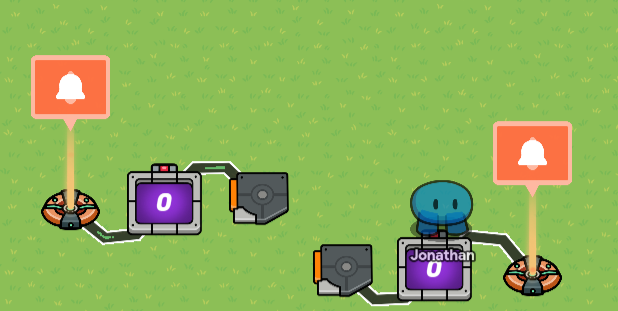
What you have
Congrats! You now have a dynamic changeable board. You may have to mess around to get the text to line up perfectly in the center (I recommend the snap edit option), but you’ve actually done quite a bit.
Player Input Part 2
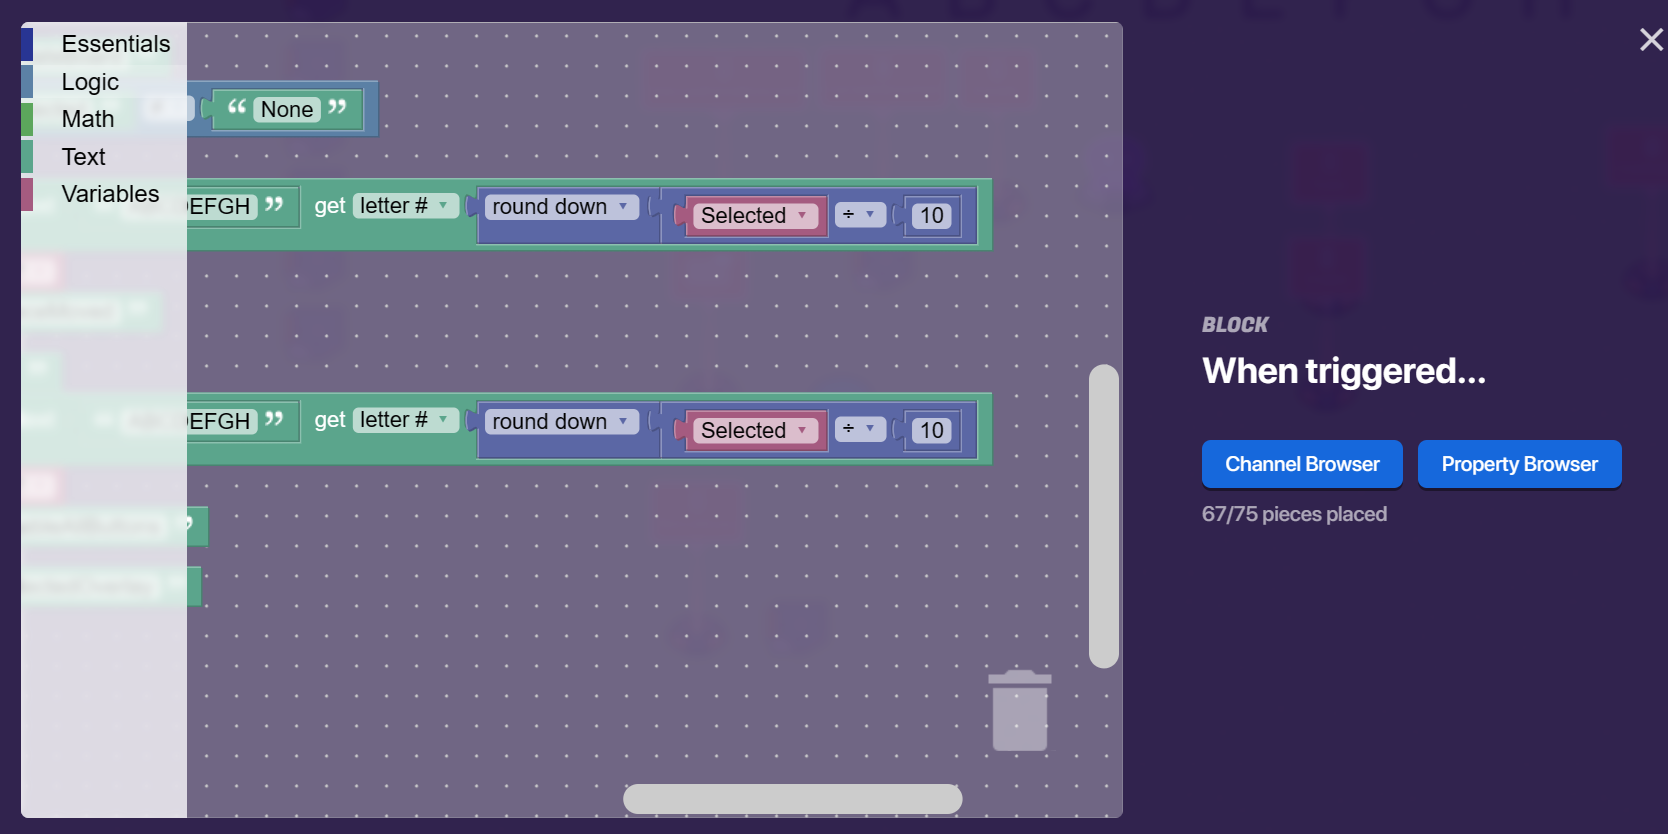
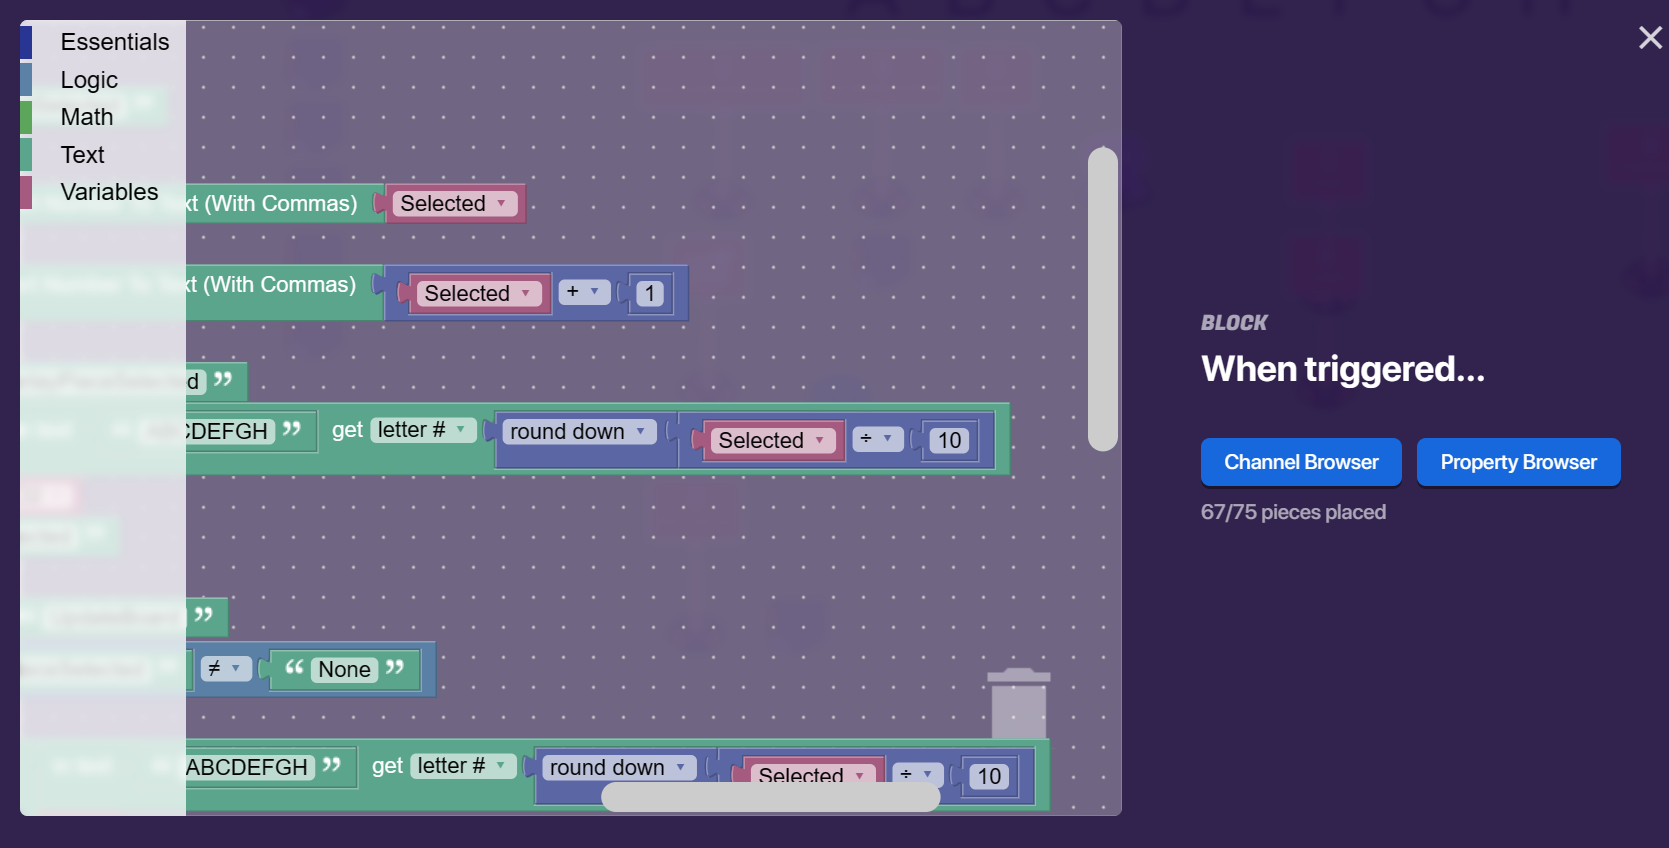
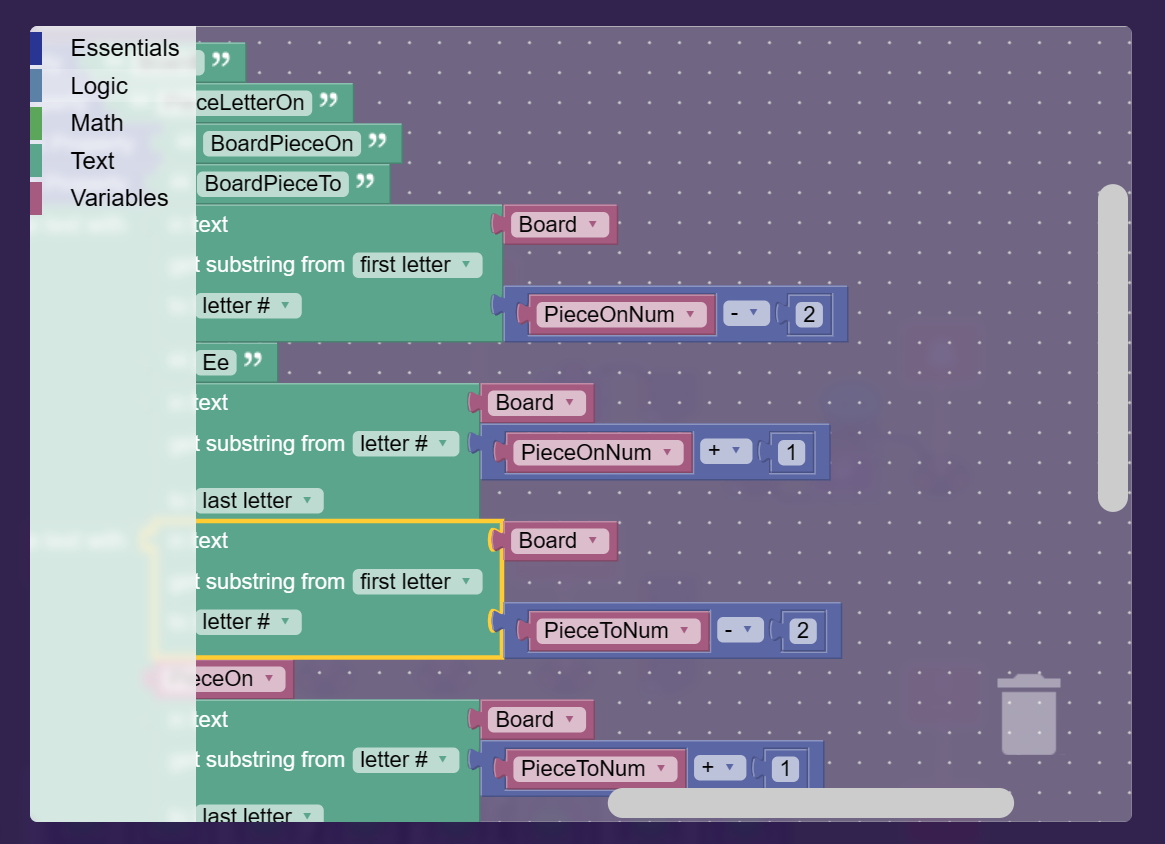
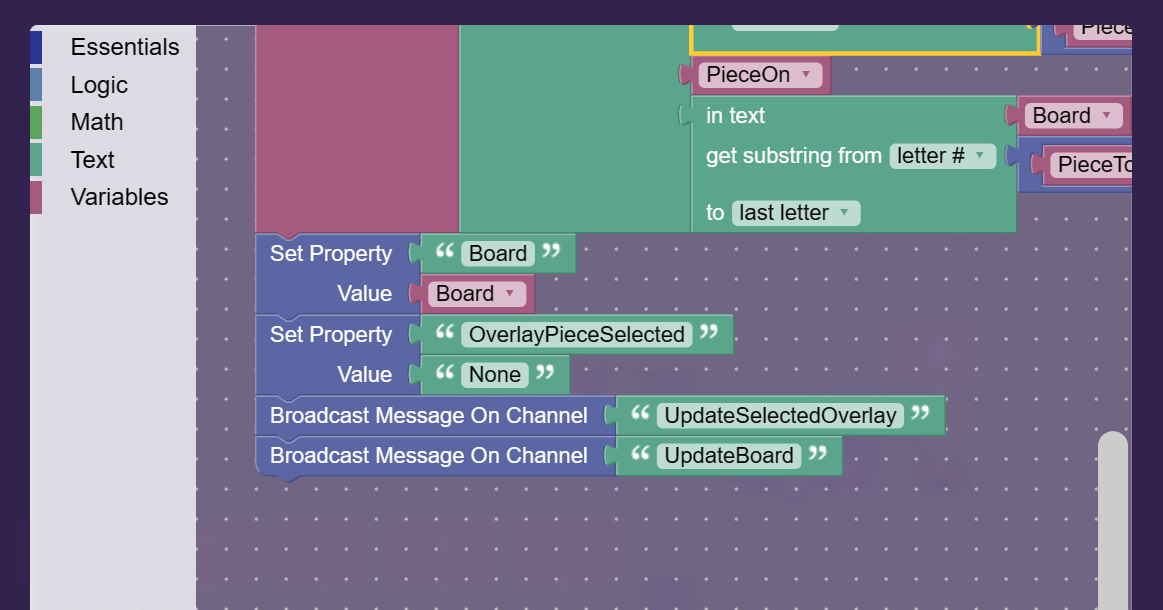
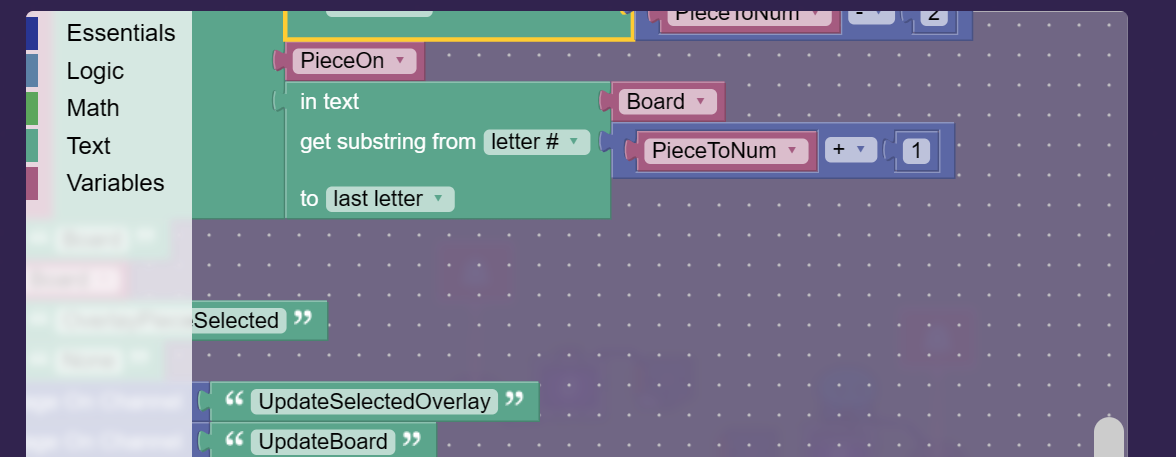
To begin, you need to make a new trigger. This trigger should trigger on the channel PieceSelected, and have the following block-code.


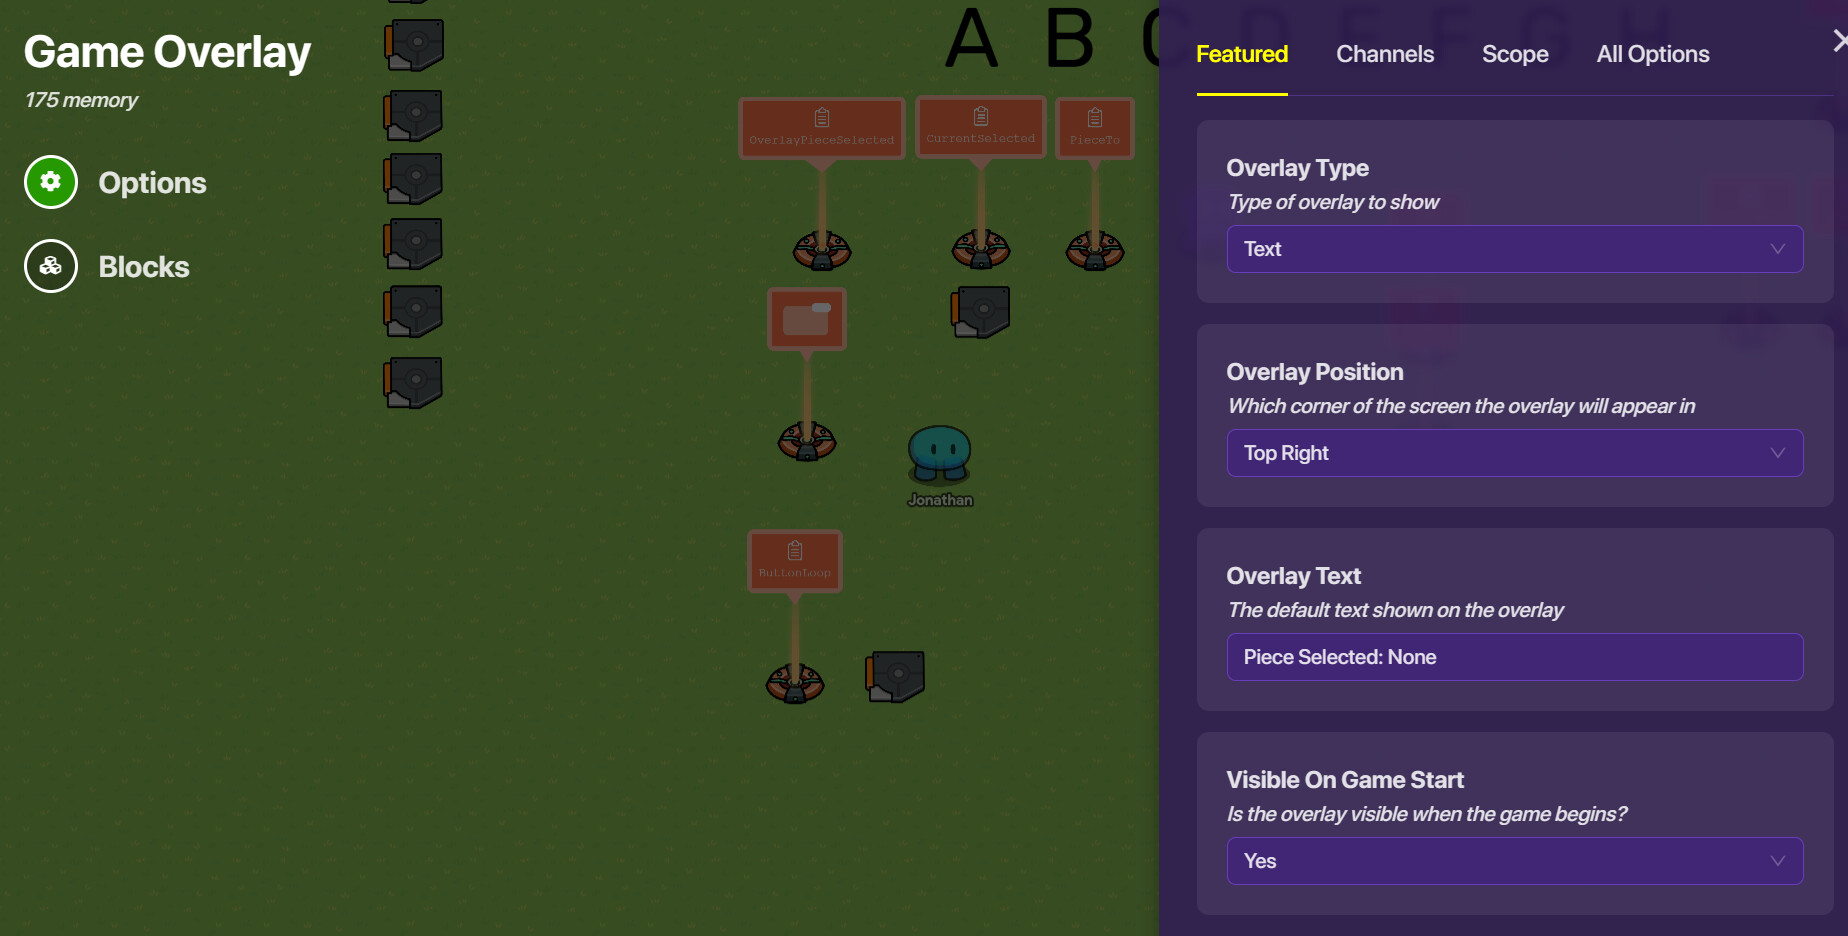
Now make an overlay with the following settings:
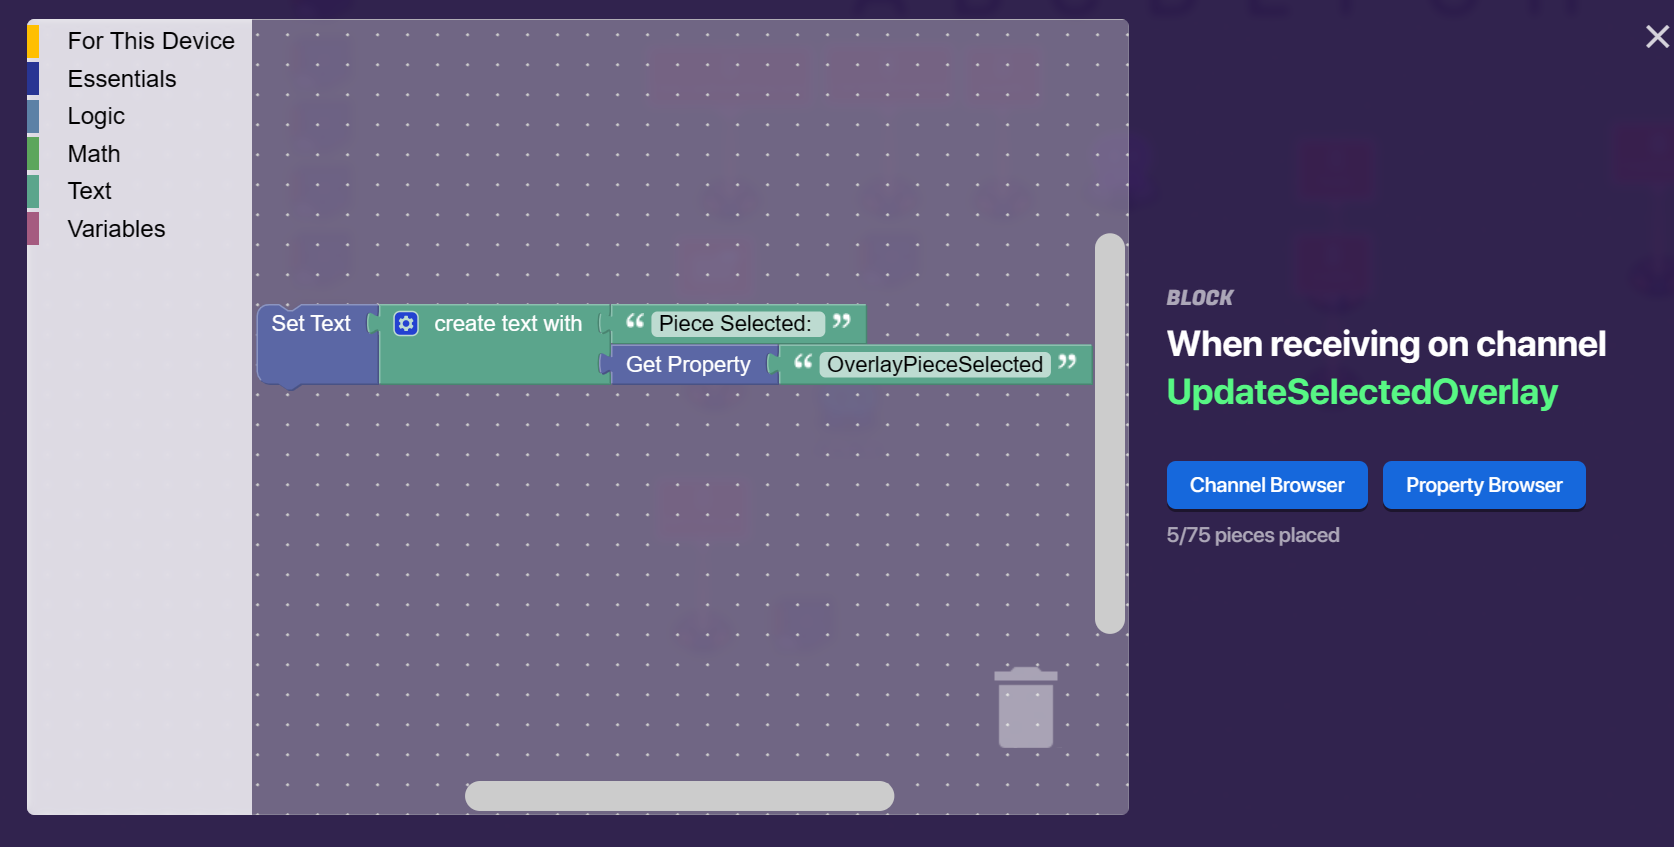
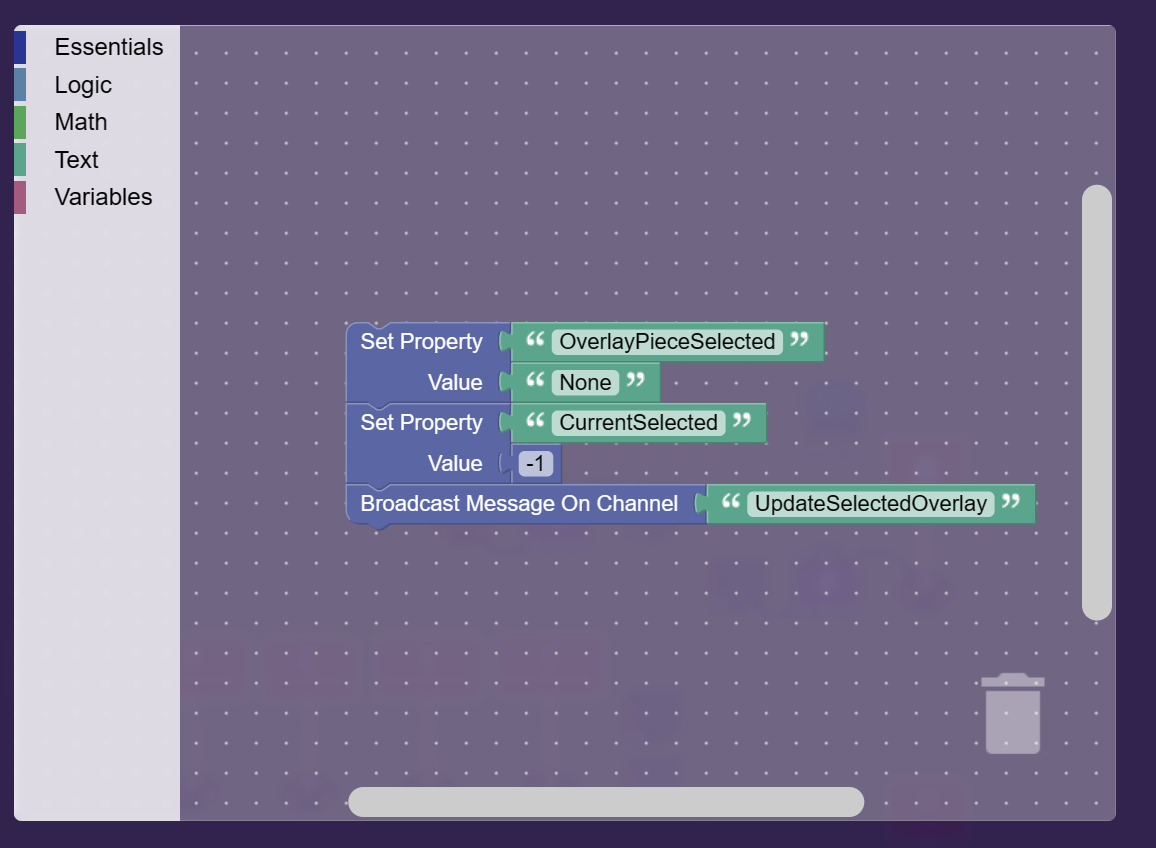
Make a when recieving on channel UpdateSelectedOverlay block for it.
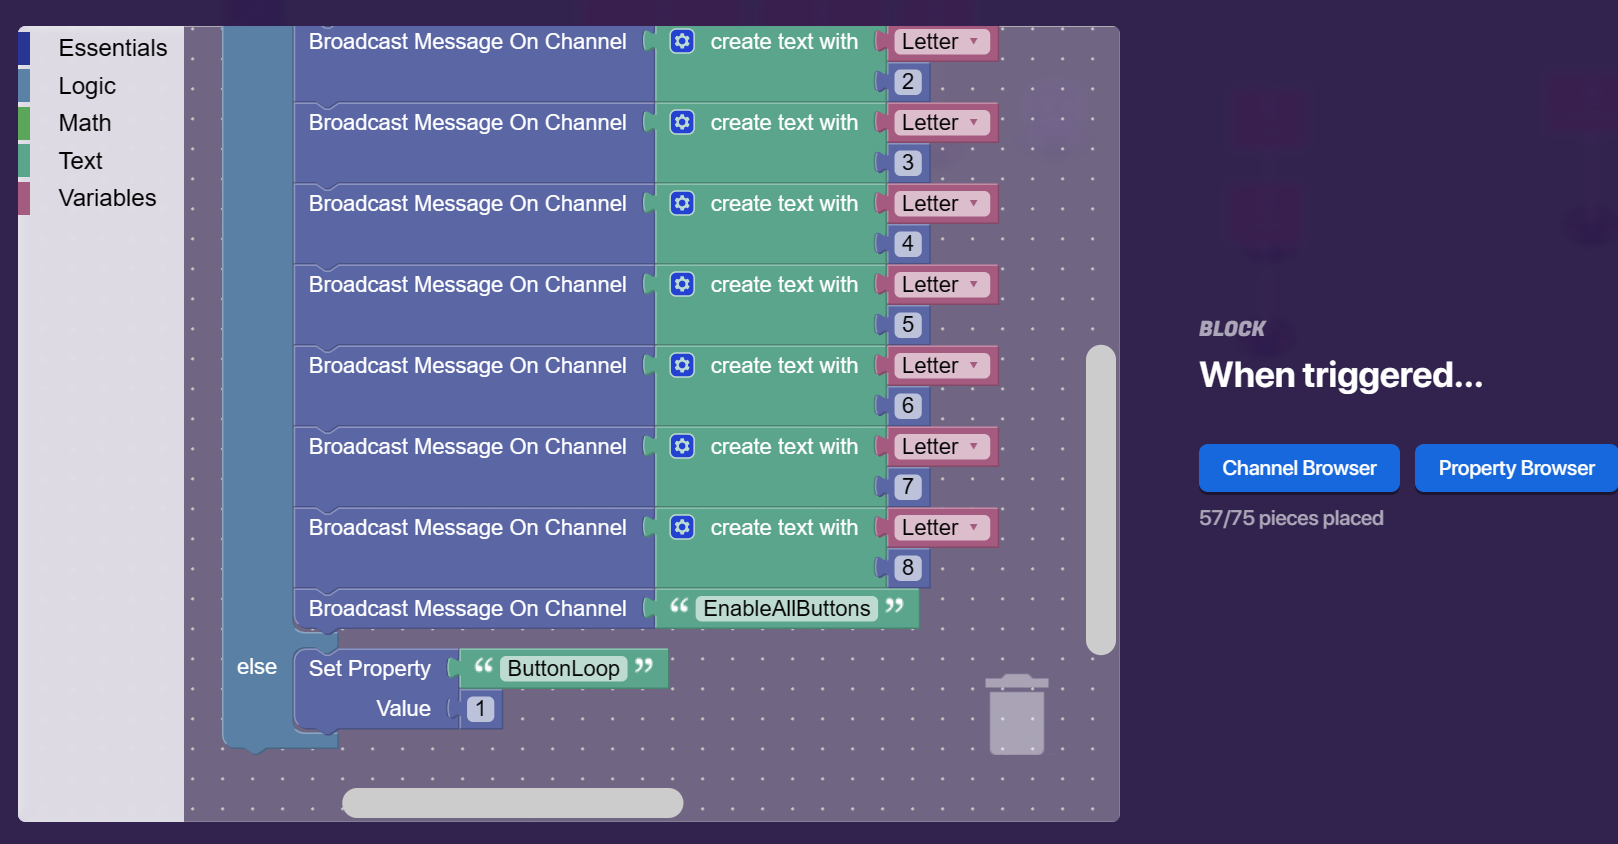
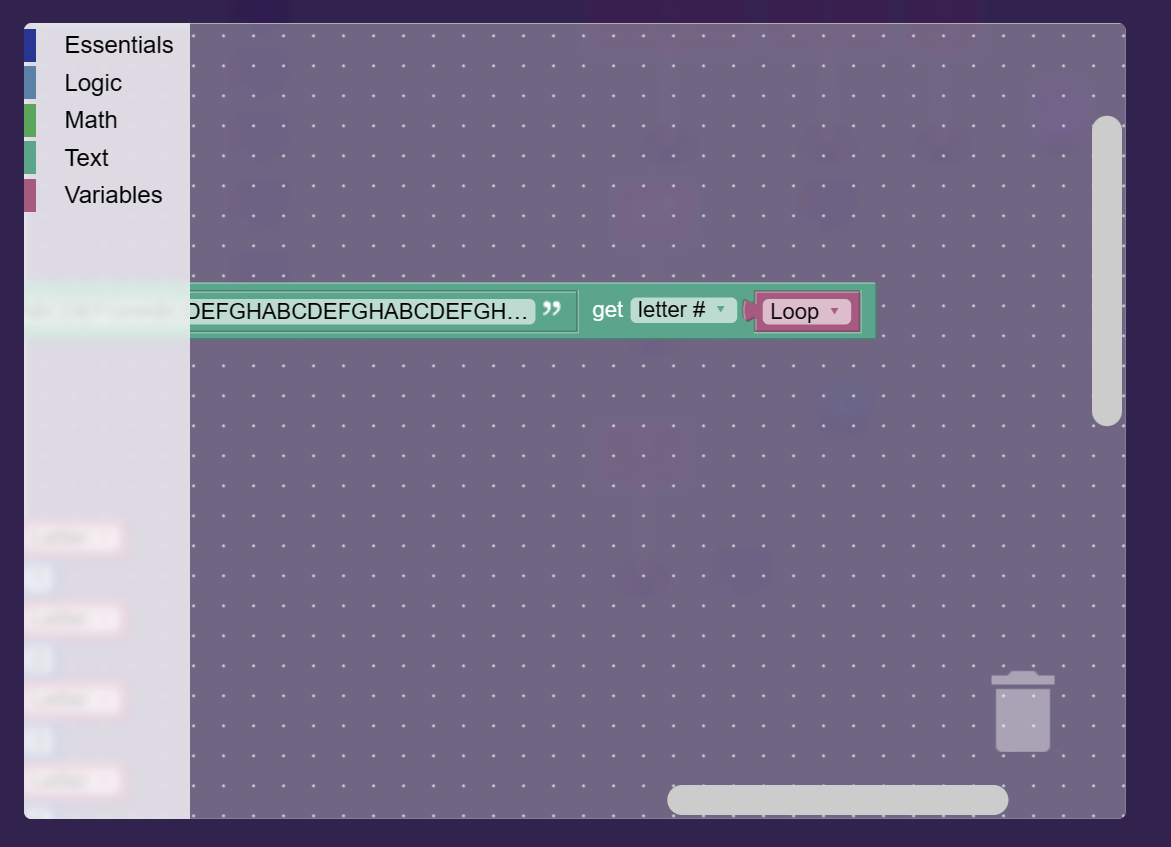
Create another trigger that triggers when it recieves on EnableAllButtons.
Add a when triggered block to it.
The very long string is: ABCDEFGHABCDEFGHABCDEFGHABCDEFGHABCDEFGHABCDEFGHABCDEFGHABCDEFGH

Basic Move Algorithm
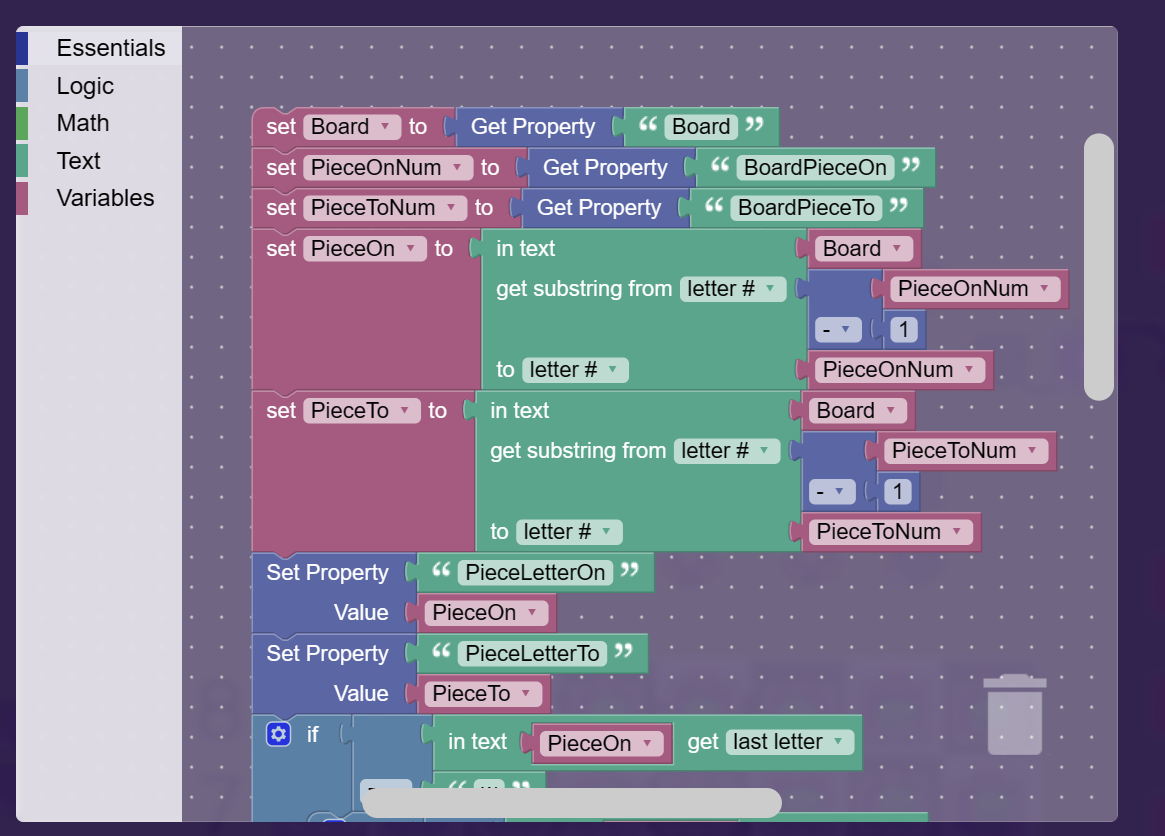
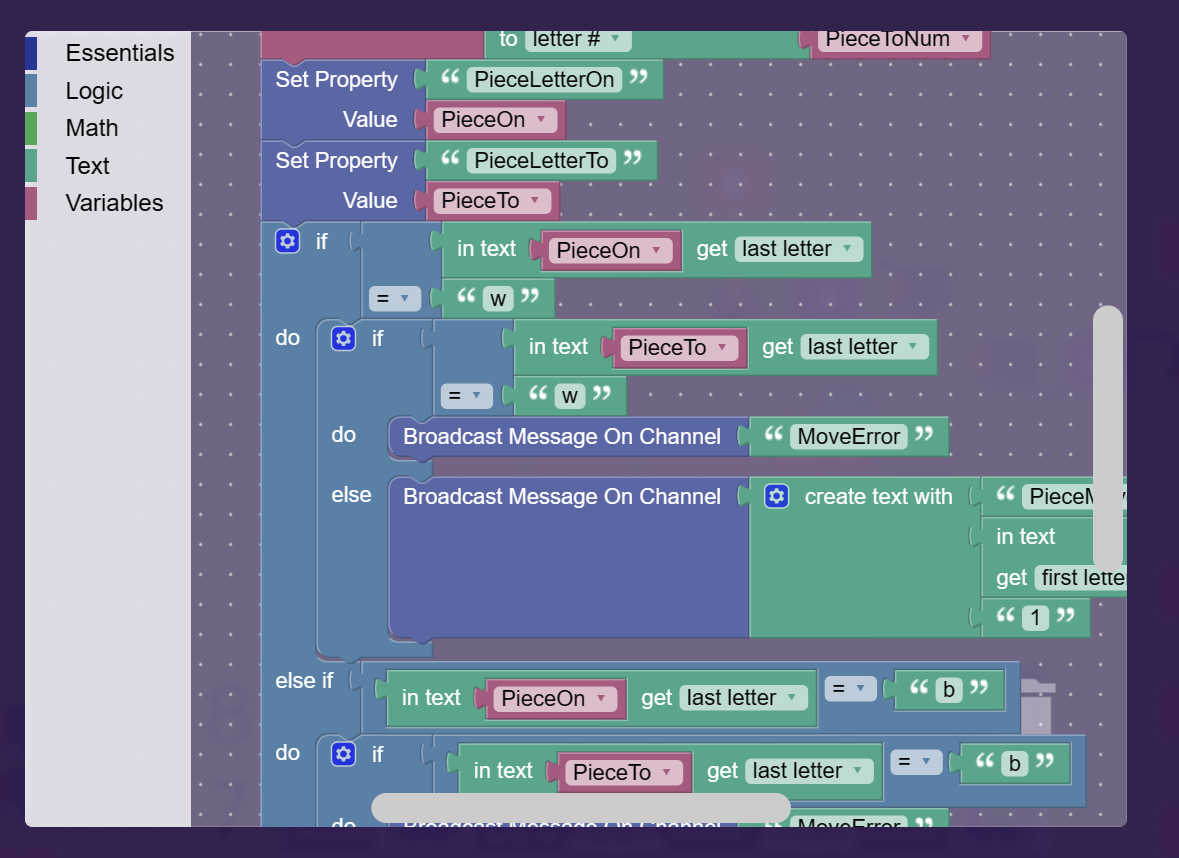
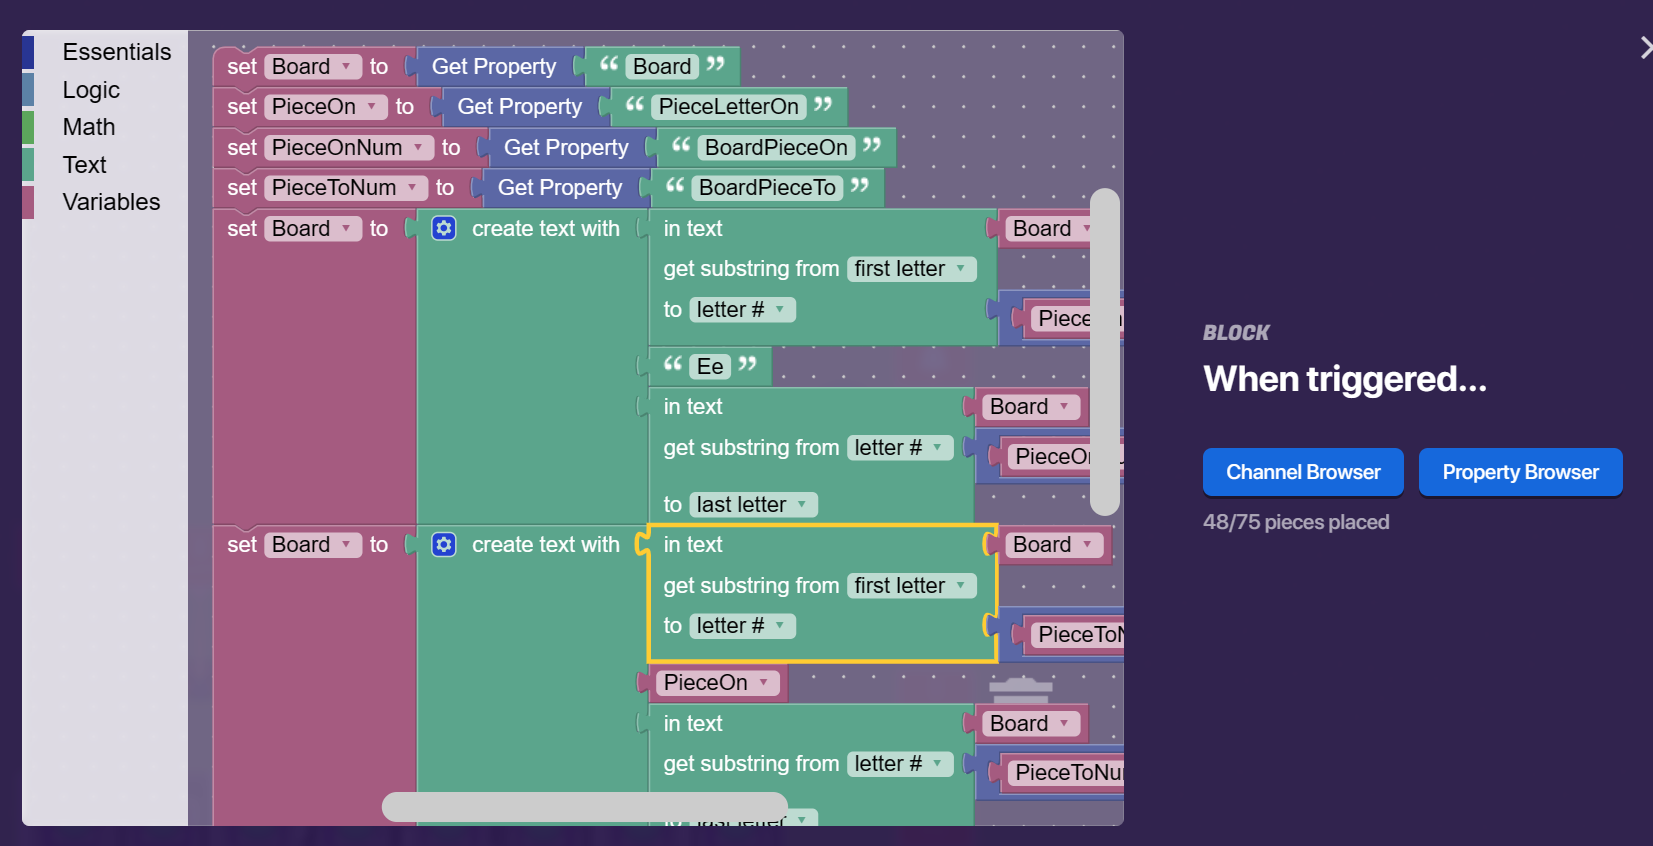
Create a new trigger that triggers when it receives on PieceMoved. Add a when triggered block.
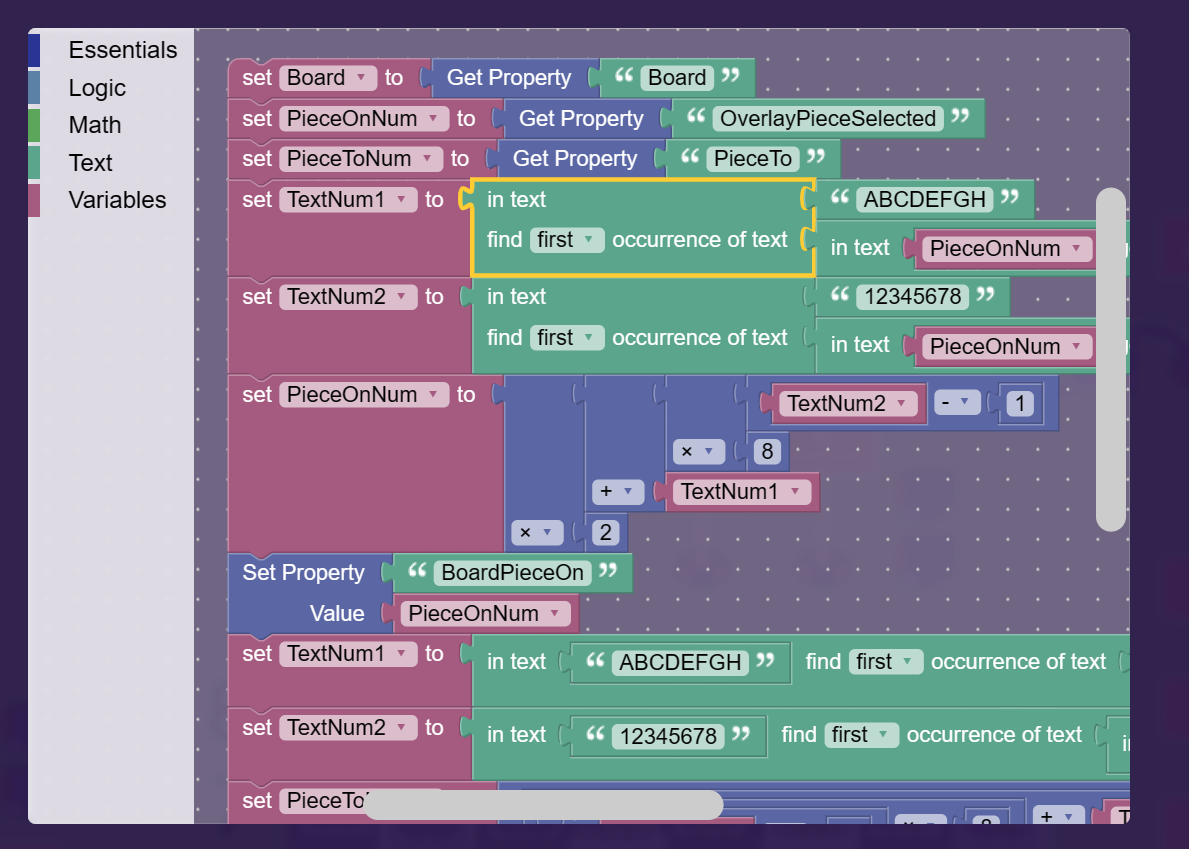
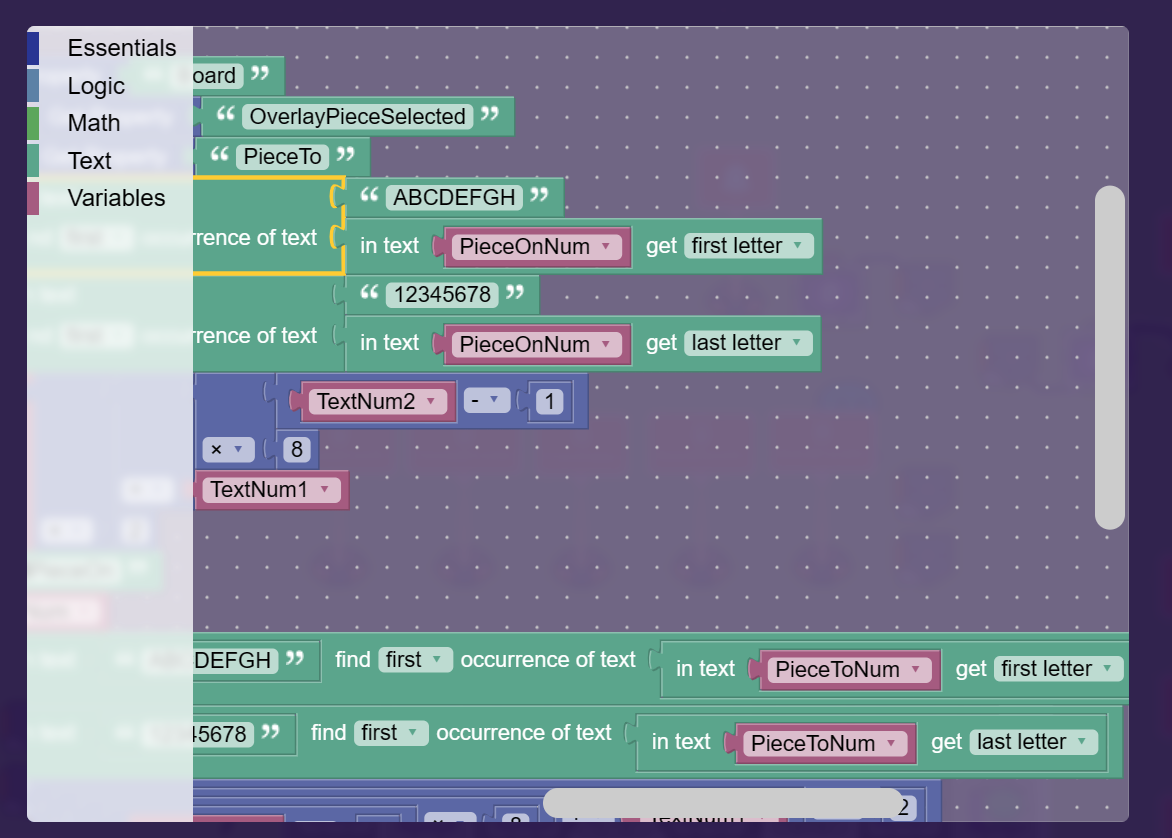
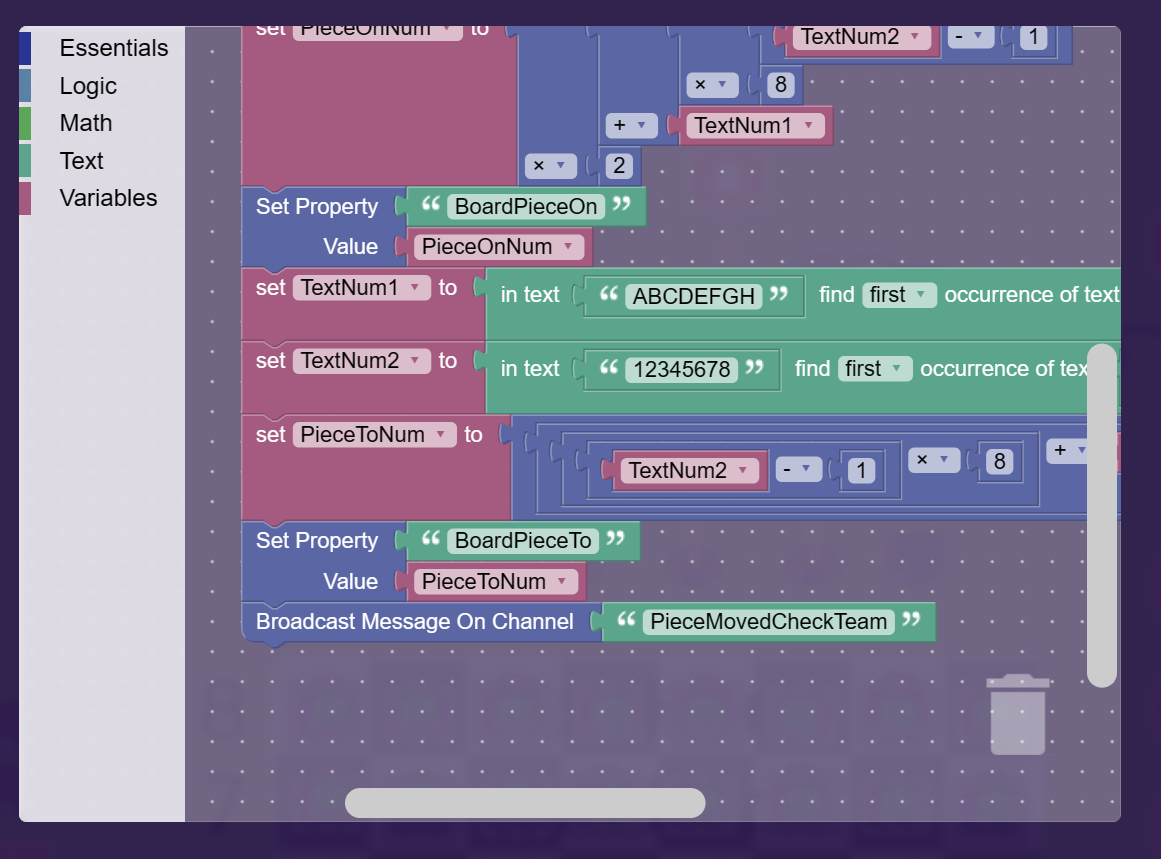
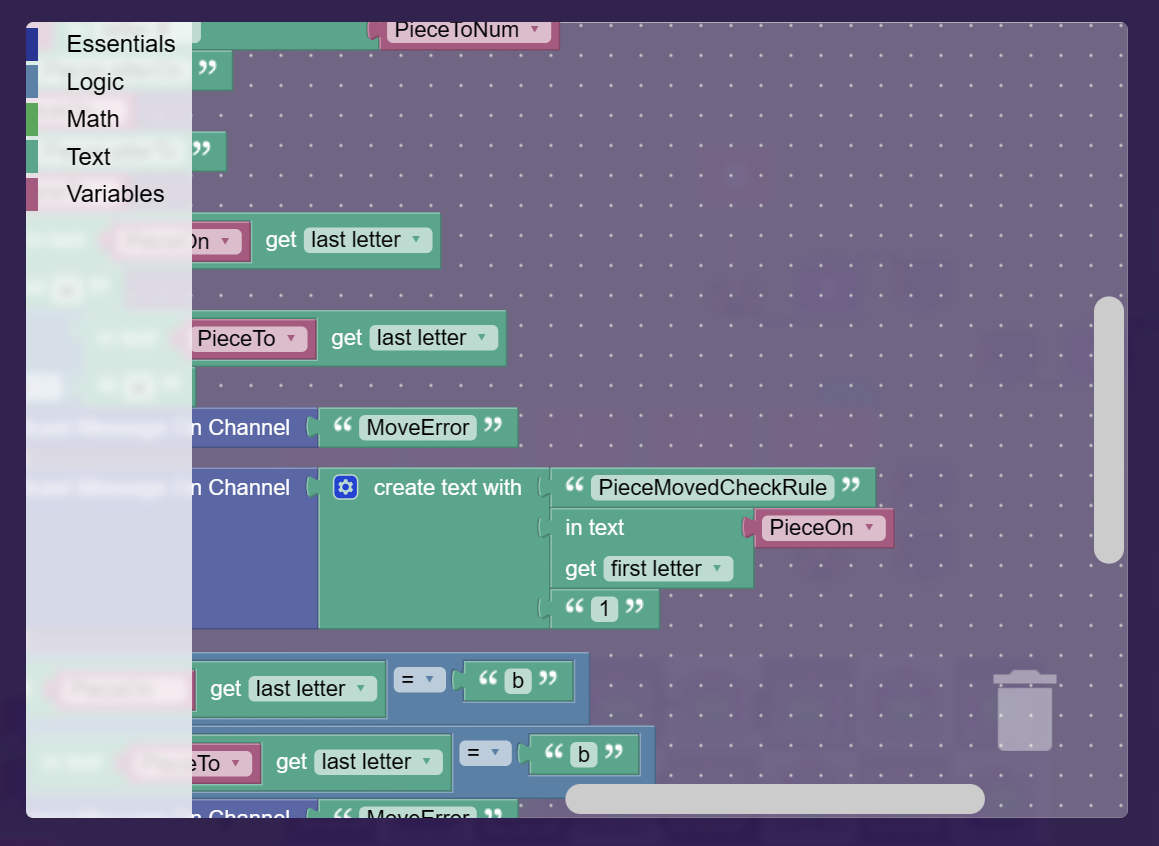
Create a new trigger that runs on PieceMovedCheckTeam. Add a when triggered block.
Feedback via notifications
This is just basic feedback/reset for moves.
Make a setup that looks like this:
The wires always go from the counter to the trigger and notification, and triggers the trigger/sends the notification when the counter reaches the target value.
Both triggers have a target value of 1.
The counter on the left increments when it receives on MoveValid, and the one on the right when it recieves on MoveError.
MoveValid counter:
- When target reached, broadcast on ResetCounterValid
- Reset Counter when recieving on ResetCounterValid
MoveError counter:
- When target reached, broadcast on ResetCounterError
- Reset Counter when recieving on ResetCounterError
Notifcation (left side):
- Title: Piece Moved
If you go to all options, change the duration to 2 seconds and the type to a success.
Notifcation (right side):
- Title: Invalid Move
If you go to all options, change the duration to 2 seconds and the type to a error.
Trigger (left side):
- Make a when triggered block for it. It should have the following block code.
Trigger (right side):
- Make a when triggered block for it. It should have the following block code.
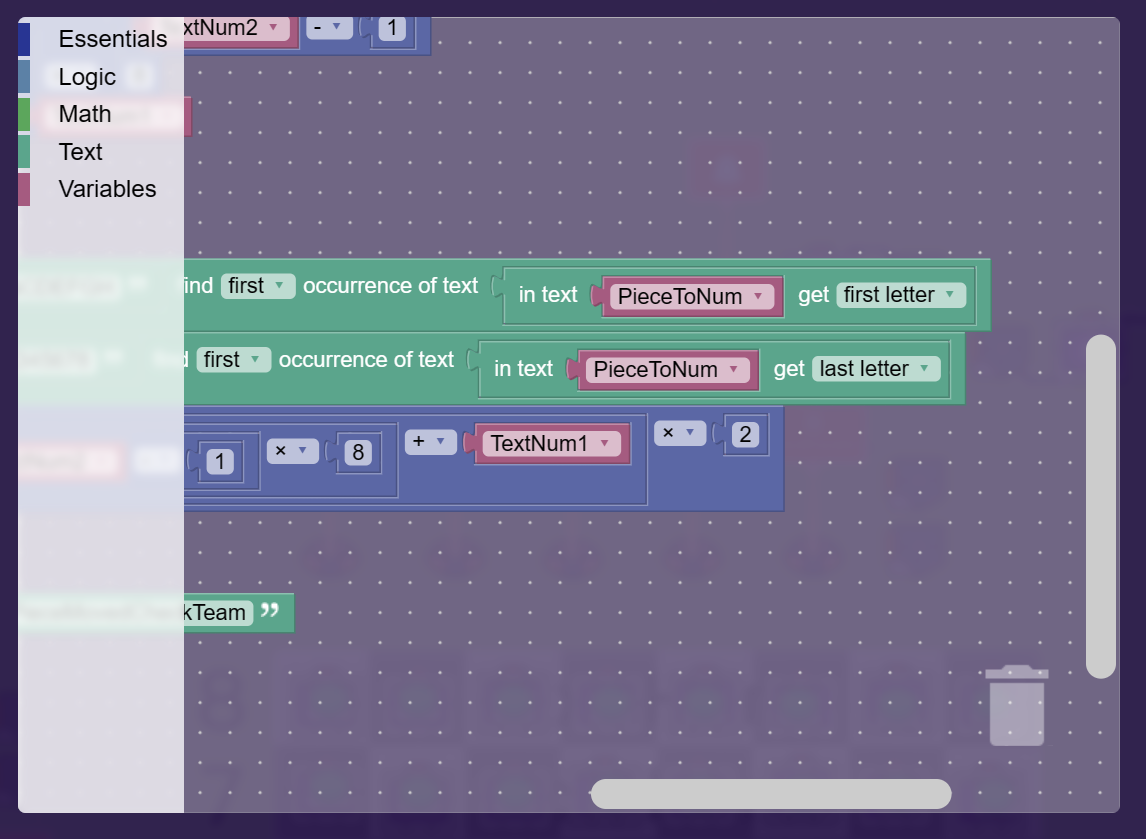
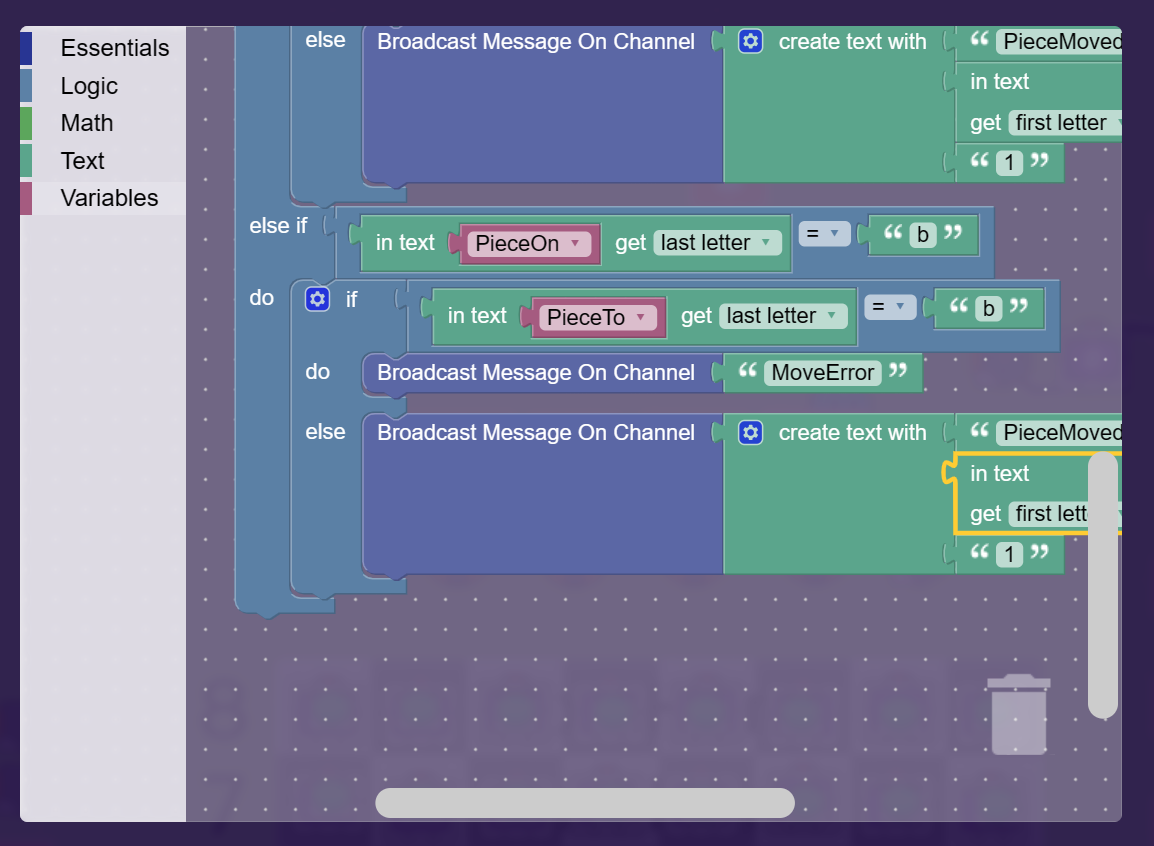
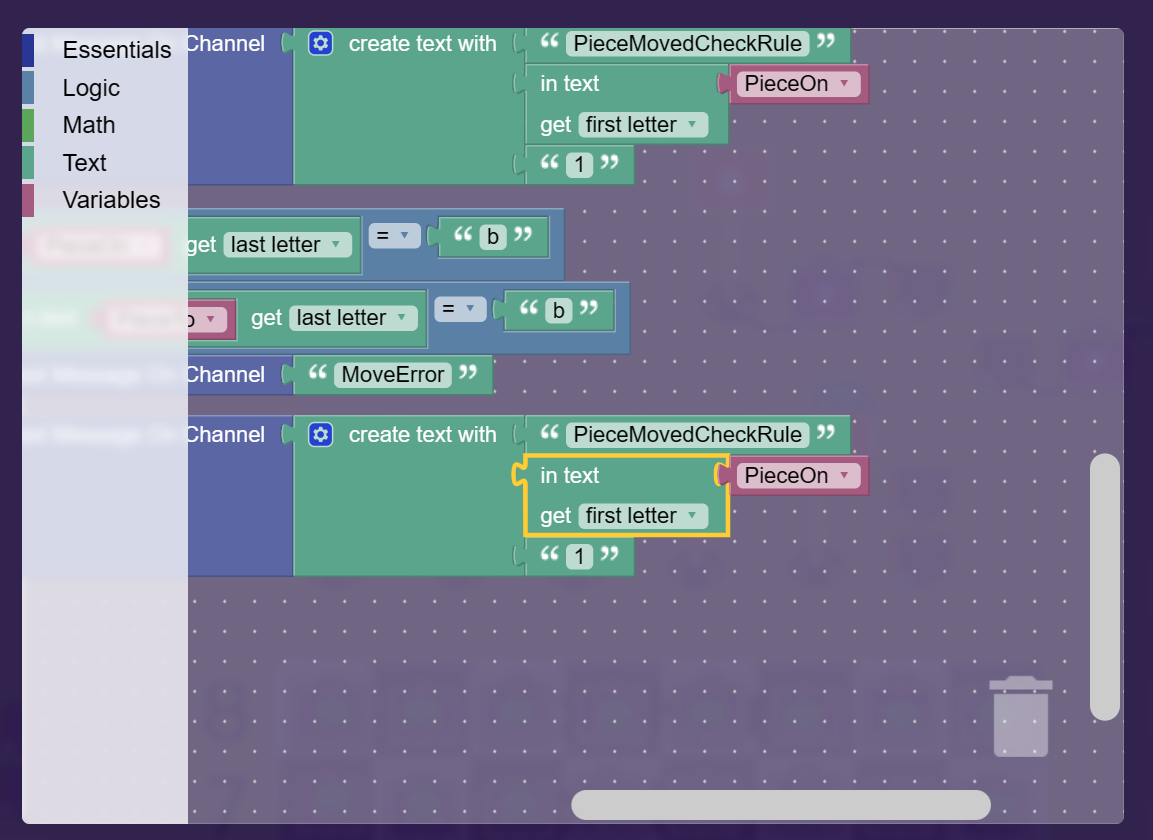
Pawn Movement Algorithm
Create a new trigger that triggers on PieceMovedCheckP1. Add a block to it.
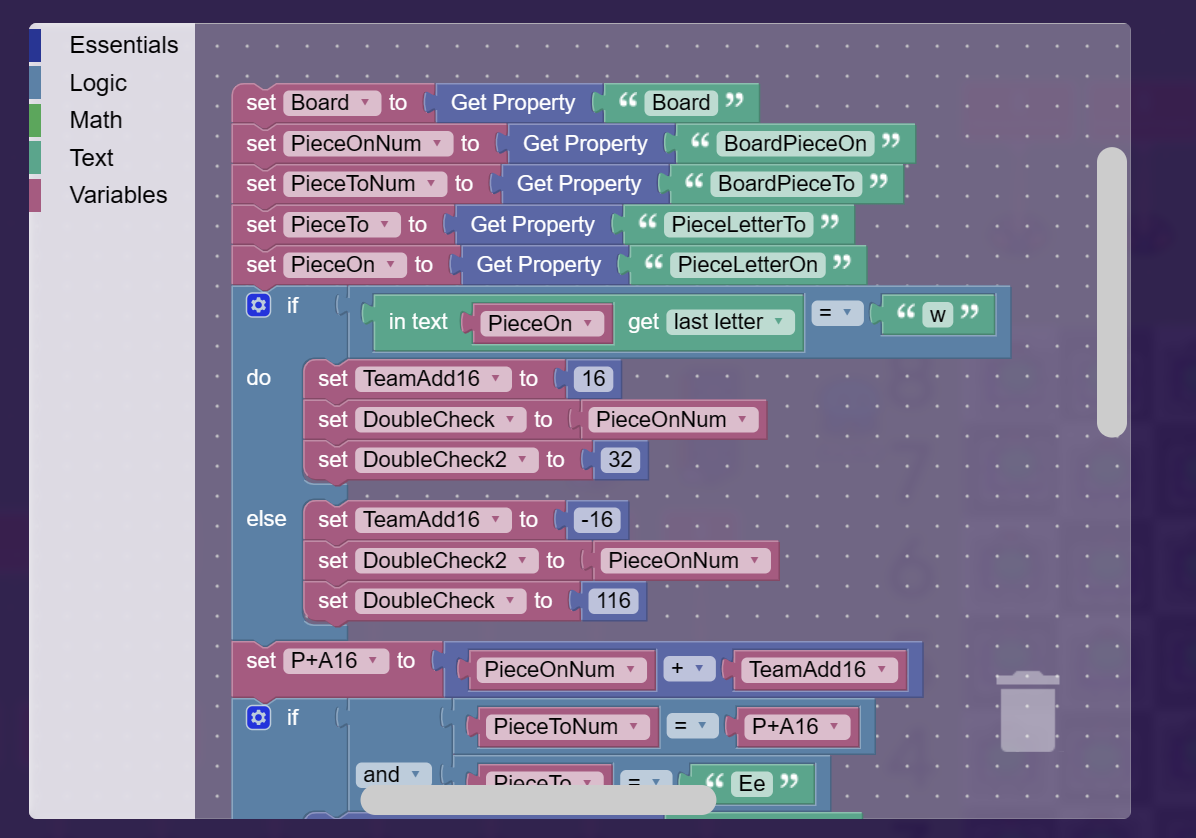
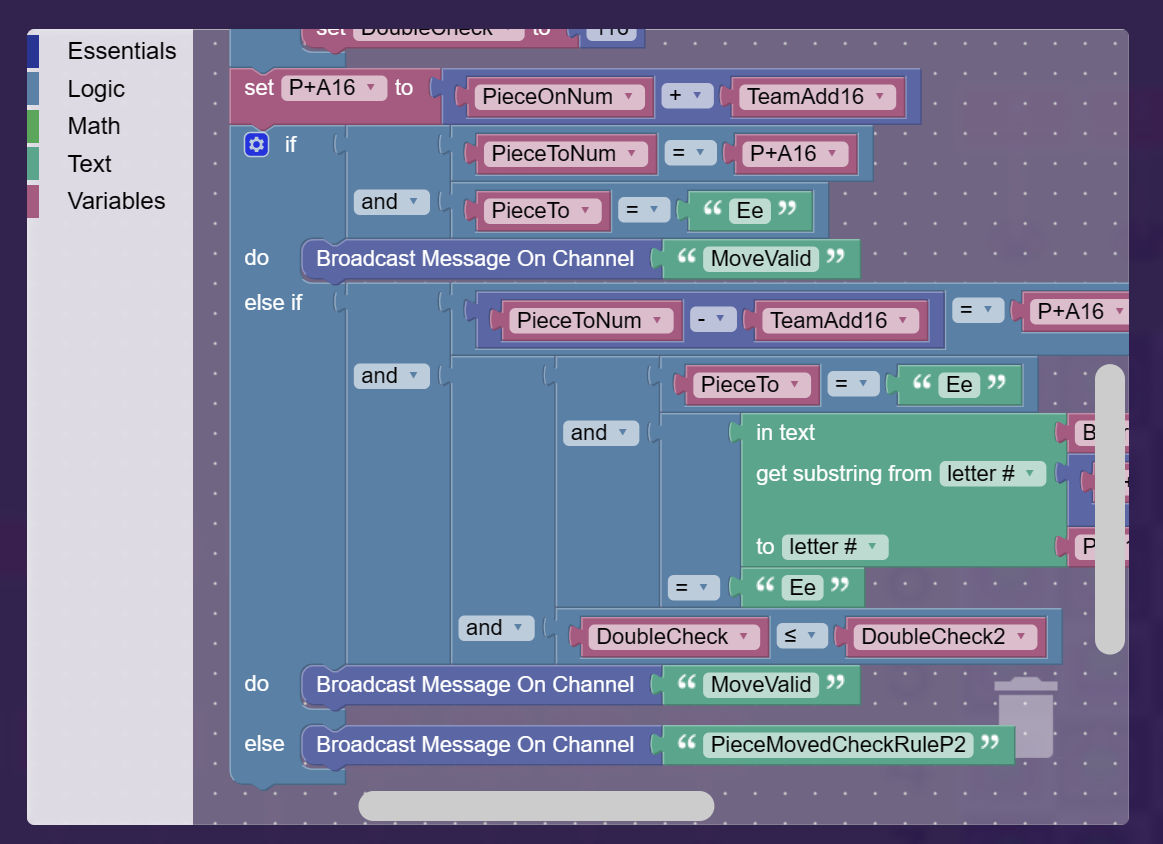
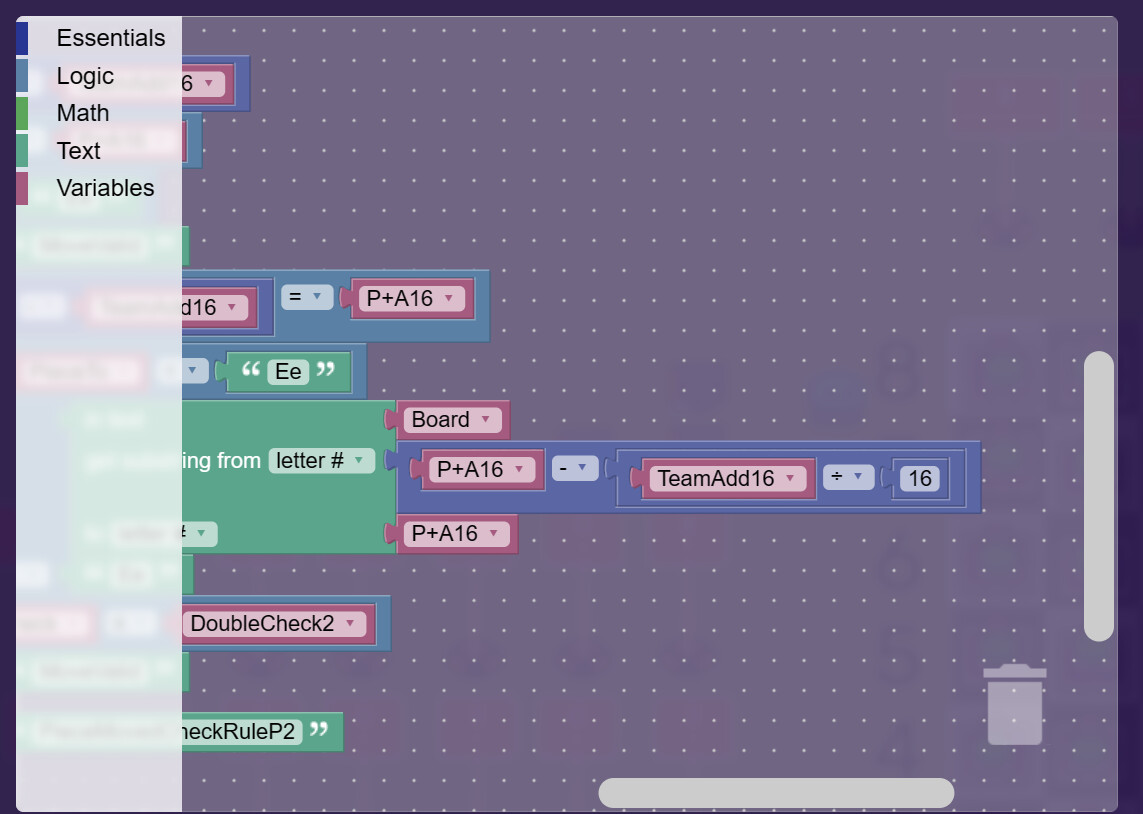
Create a new trigger that triggers on PieceMovedCheckP2. Add a block to it.


Note that you can only move pawns right now successfully, due to the lack of rules for other pieces!
If you want to mess with the board, go to the StartGame trigger block-code and mess around with the string that the board gets set to.
Upcoming Sections:
-
Detecting Check (unknown timeline)
-
Detecting Checkmate (unknown timeline)
-
Creating the AI (probably a long time)
Current memory usage is 14%, will go to 21% (mostly block code) once updated.
Credit to @NightEnd for saving me some time in deciding on the board design.
Credit to @Blackhole927 for the emojis (who @NightEnd got them from).
I just want to say, always feel free to reach out to me for help!
Also, since this is a Wiki @vqnillaxx made for me (Thanks by the way @vqnillaxx).
Anyway, that’s all I have to say in this little guide/wiki of mine for now. If you have some cool idea that will work for this, reach out in the comments! This also took WAY too long to make.
Toodles! ![]()
![]() -- @jjnitzan –
-- @jjnitzan – ![]()