Ever wanted to create actual kitchen furniture instead of having to deal with a greasy kitchen table? You read the title, so I’m not going to bore you to death with an intro.
Stovetop (Difficulty: 1.5/10)
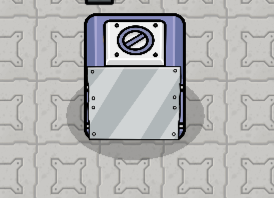
- Place down a space container and a metal sign. The metal sign must be the largest one to cover up the front of the space container.
- Oh yeah, and you should place down a pan prop.
- In case it hasn’t already done it for you, layer the pan on top of the space container.
- Adjust the size of the metal sign to cover up the front of the space container.
- Place the metal sign on the front of the container.
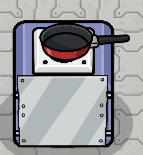
- Place the pan on top of the now-“stovetop.”
Stove & Oven (Difficulty: 1/10)
Repeat the stove guide, but with a space container turned on and NO metal sign. Just put the pan on, and you have a basic stove and oven! Here’s what it should look like:
To out something IN the oven, raise the transparency of the space container.
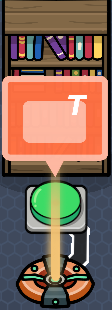
Cookbook Shelf (Difficulty: 1/10)
- Place down a bookshelf, button, and popup. Remember to place the button in front of the bookshelf.
- Make sure the button is not visible in-game. Then, wire it to the popup.
- Put “Cookbooks” as the popup title.
This is an example, but not in the kitchen:
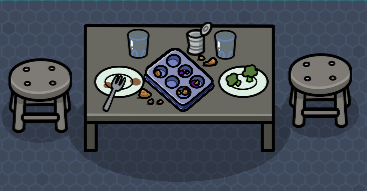
Dining Table (Difficulty: 0.5/10)
Either you can use the greasy, disgusting, and cracked kitchen table, but for space’s sake, you can use a lab table or one of those gray or white tables. Add plates, utensils, cups, and cans for a better effect of a dining table! Here is an example from my map:
Dishwasher (Difficulty: 1/10)
Place down a gray space container, preferably turned on. Place down some dishes near it for the “dishwasher” effect. You can also try to place some dishes inside of the hole. It’s hard and not going to be very visible, but it’s possible.
Refrigerator (Difficulty: 4.5/10)
- Place down an empty spacesuit cabinet and a button. Remember, the button has to be invisible in-game!
- Now, create a “room” using a floor (preferably light metallic), and place a metal shelf. Make sure you adjust the size so it’s small enough to fit behind the spacesuit cabinet.
- If the size adjustment hasn’t already layered the metal shelf beneath the cabinet, then layer the spacesuit cabinet in front of the shelf.
- Wire the button to the spacesuit cabinet. It should say button pressed>hide prop.
- Make another button, deactivate it on game start, and wire it to the cabinet. This time, it should say button pressed>show prop.
- Remember to move the spacesuit cabinet to add what you want in the metal shelf. Make sure the things you put there are layered on top of the shelf! Now, put the cabinet back on top of it because otherwise, it would just be a shelf.
- And back to the buttons, one should say it closes the refrigerator, and the other one should close it. Wire the first button to the latter and it should say button pressed>activate button.
- Wire the “close fridge” button to the opening one and do the same wire settings as the aforementioned one.
[Optional]: You can make it “locked” by visiting my “How to ‘Unlock’ Something” guide and repeating it there.
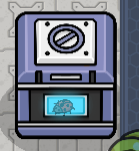
You’re done now! That was more complicated than the other ones, so in case you’re confused, it should look like this (covered):
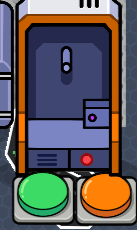
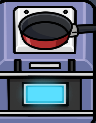
Uncovered for a better view:
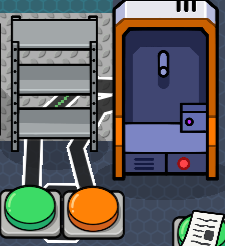
(the paper and button in the corner aren’t a part of this part of the guide)
Final Touches
If you’ve been following along, you probably have a pretty good kitchen, along with your own touches! Now, it’s time for final touches. Here are some ideas you could do:
- Readable recipes scattered around the kitchen bring it to the next level. If you don’t know how to make it, there are some guides about how to make those readable documents from One Way Out. You just need a button below the prop (paper, laptop, computer, etc) and wire it to a popup.
- Decorations, such as the plant in a pot, office plant, etc., are good. If you want to make a dining table near it and have the space to, then do it! Props help make your map actually interesting, and placing a lot of them brings it to another level.
The first tip’s picture:

A picture of my kitchen:
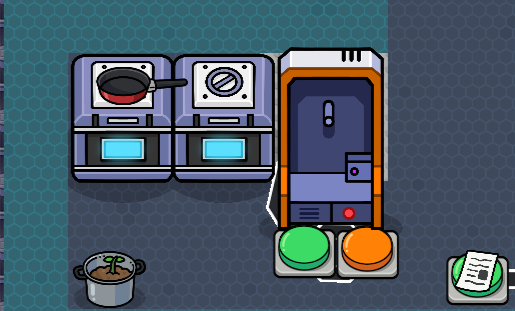
As you can see, it’s not really entertaining. And that is why you add props. However, there is a readable recipe in the corner so it’s a little more interesting.
And now, you’re done! Congrats on building a kitchen!