As of right now (May 28, 2023) there is currently no built in way to make lists in gimkit creative. However, if we get creative, we can make our own lists.
The Idea:
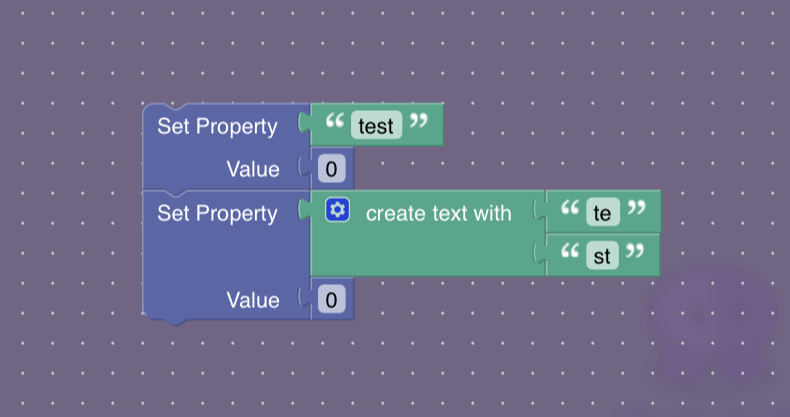
You’ll notice when you place a get property block, the property name is just a text object. We can use this to our advantage, with the create text block. By creating multiple properties, each named item.0, item.1, item.2, we can make some text with the create text block that matches the property name of the item we’re trying to grab. If you’re confused by this, don’t worry, below is a step by step guide!Example: Both of the set property blocks below set the same property, “test”
List storage and indexing
So lists are ordered, they have a first item, a second item, a third item, and so on. Our list will have three items. The position of an item in a list is called the “index” of the item. To store our list, we’ll place down three number properties, named like shown in the image below: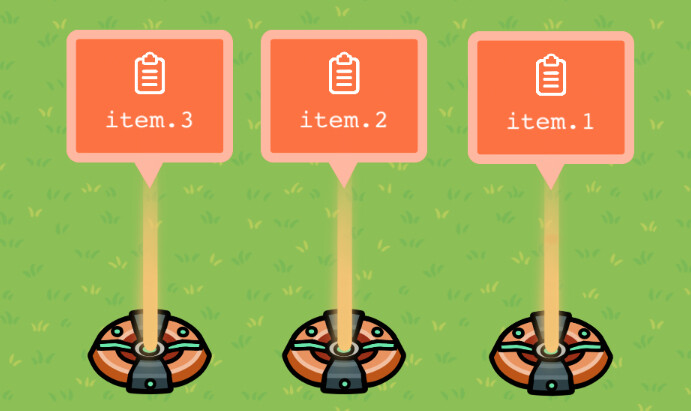
Now, place down a trigger. This is where we will write the code that accesses items from the list. Make a new “When Triggered” coding block, and go to the variables tab on the left and make a new variable named index. Set index to 2. Then get a set property block, and instead of choosing an existing property, drag out a create text block. In the create text block at the top, add “item.”, and at the bottom, convertNumberToText(index). It should look like this:
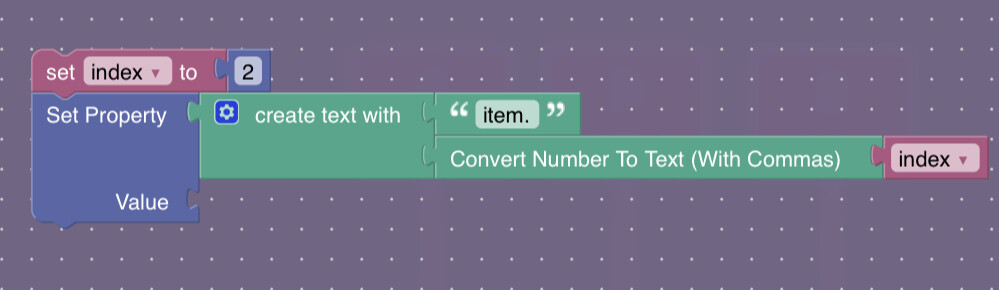
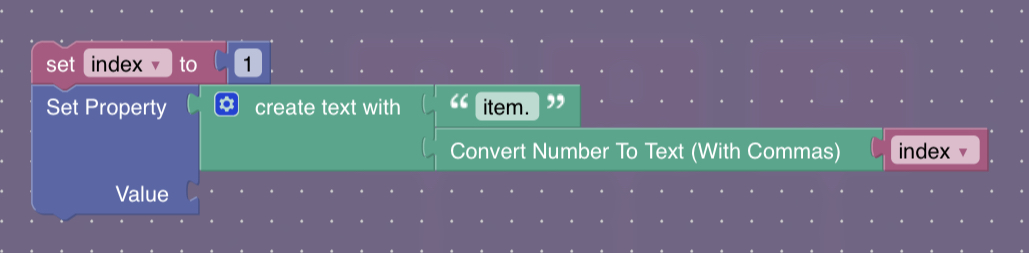
We just set the second item in the list! Notice how the create text object is joining together “item.” and “2”? This makes item.2, which is the second item in our list. If we set index to 1, now the create text object is joining together “item.” and “1”, making item.1, the first item in the list!
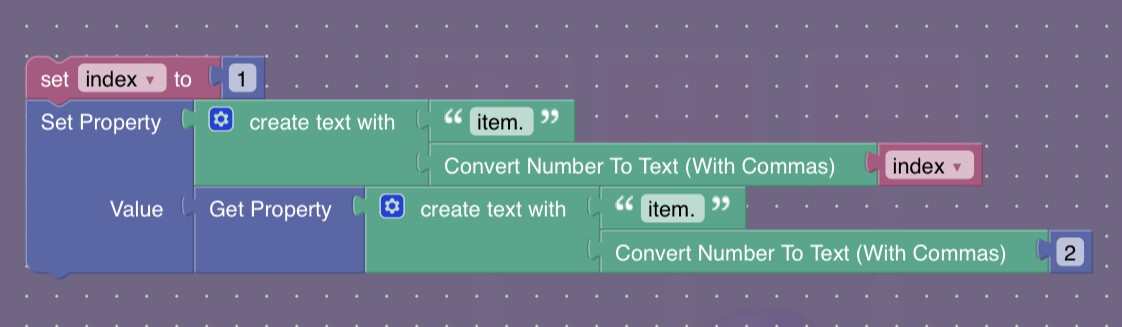
Now, let’s set the first item of the list to the second. If you want to try and figure this out on your own, you can pause here and do that. If you don’t though, here is the solution: Set the first item of the list like we did above, to get_property(create_text(“item.”, 2))
Conclusion
So that’s how you make a list in gimkit creative! In this tutorial, we learned how to get and set items in a list, along with how to set one up. If you saw any error in this tutorial, leave a comment and I will fix it as soon as possible. I hope you learned something from this! If you liked this tutorial, leave a like, it would be greatly appreciated!Thanks for reading!
- Blackhole927