So you might be having deja vu. Don’t worry, I do too. Here is the original guide:
This guide will show you how to get multiple overlays in the rotation, using a different mechanism.
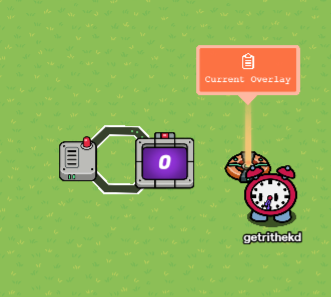
This will use the set text block in the overlay blocks to “change” the overlay. To store which overlay that it is showing, we’ll use a counter with a target. So lets make the counter! Have a player scoped number property named “Current Overlay”, with a default of 0. Now, make a player-scoped counter that edits that property. Make the target however many different overlays you need. Wire the counter to a wire repeater. It should be on target reached. Wire the wire repeater back to the counter. This should reset the counter.

Now, we have the rotation system almost done, but there’s a very easy part we can knock out before finishing the rotation: the changing. Make a repeater (can be a wire repeater clock). Use the delay you need. Make the repeater increment the counter. The repeater should be set to stop on a channel. For that, enter nothing into the channel spot.
Now, we can finish the overlay! Make the property broadcast on “Update Overlay” when its changed. Now, we’ll make a list of the messages. Make properties for each message. Make the first message’s name be “Message0”, and keep on going. The nth message’s number in the name should be n-1. After this, go into the blocks for the overlay, make it set the text to “Message” + [get property] (Current Overlay).
So now, the display is all right. We just need the function of the button to do it. So, to do this, make the overlay broadcast to a trigger when its pressed. In the triggers blocks, it should broadcast on “Do Function” + [get property] (Current Overlay). These functions should trigger the system you need.