This is a tutorial about how to make a building, house (or anything really) 2 or more levels!
STEPS:
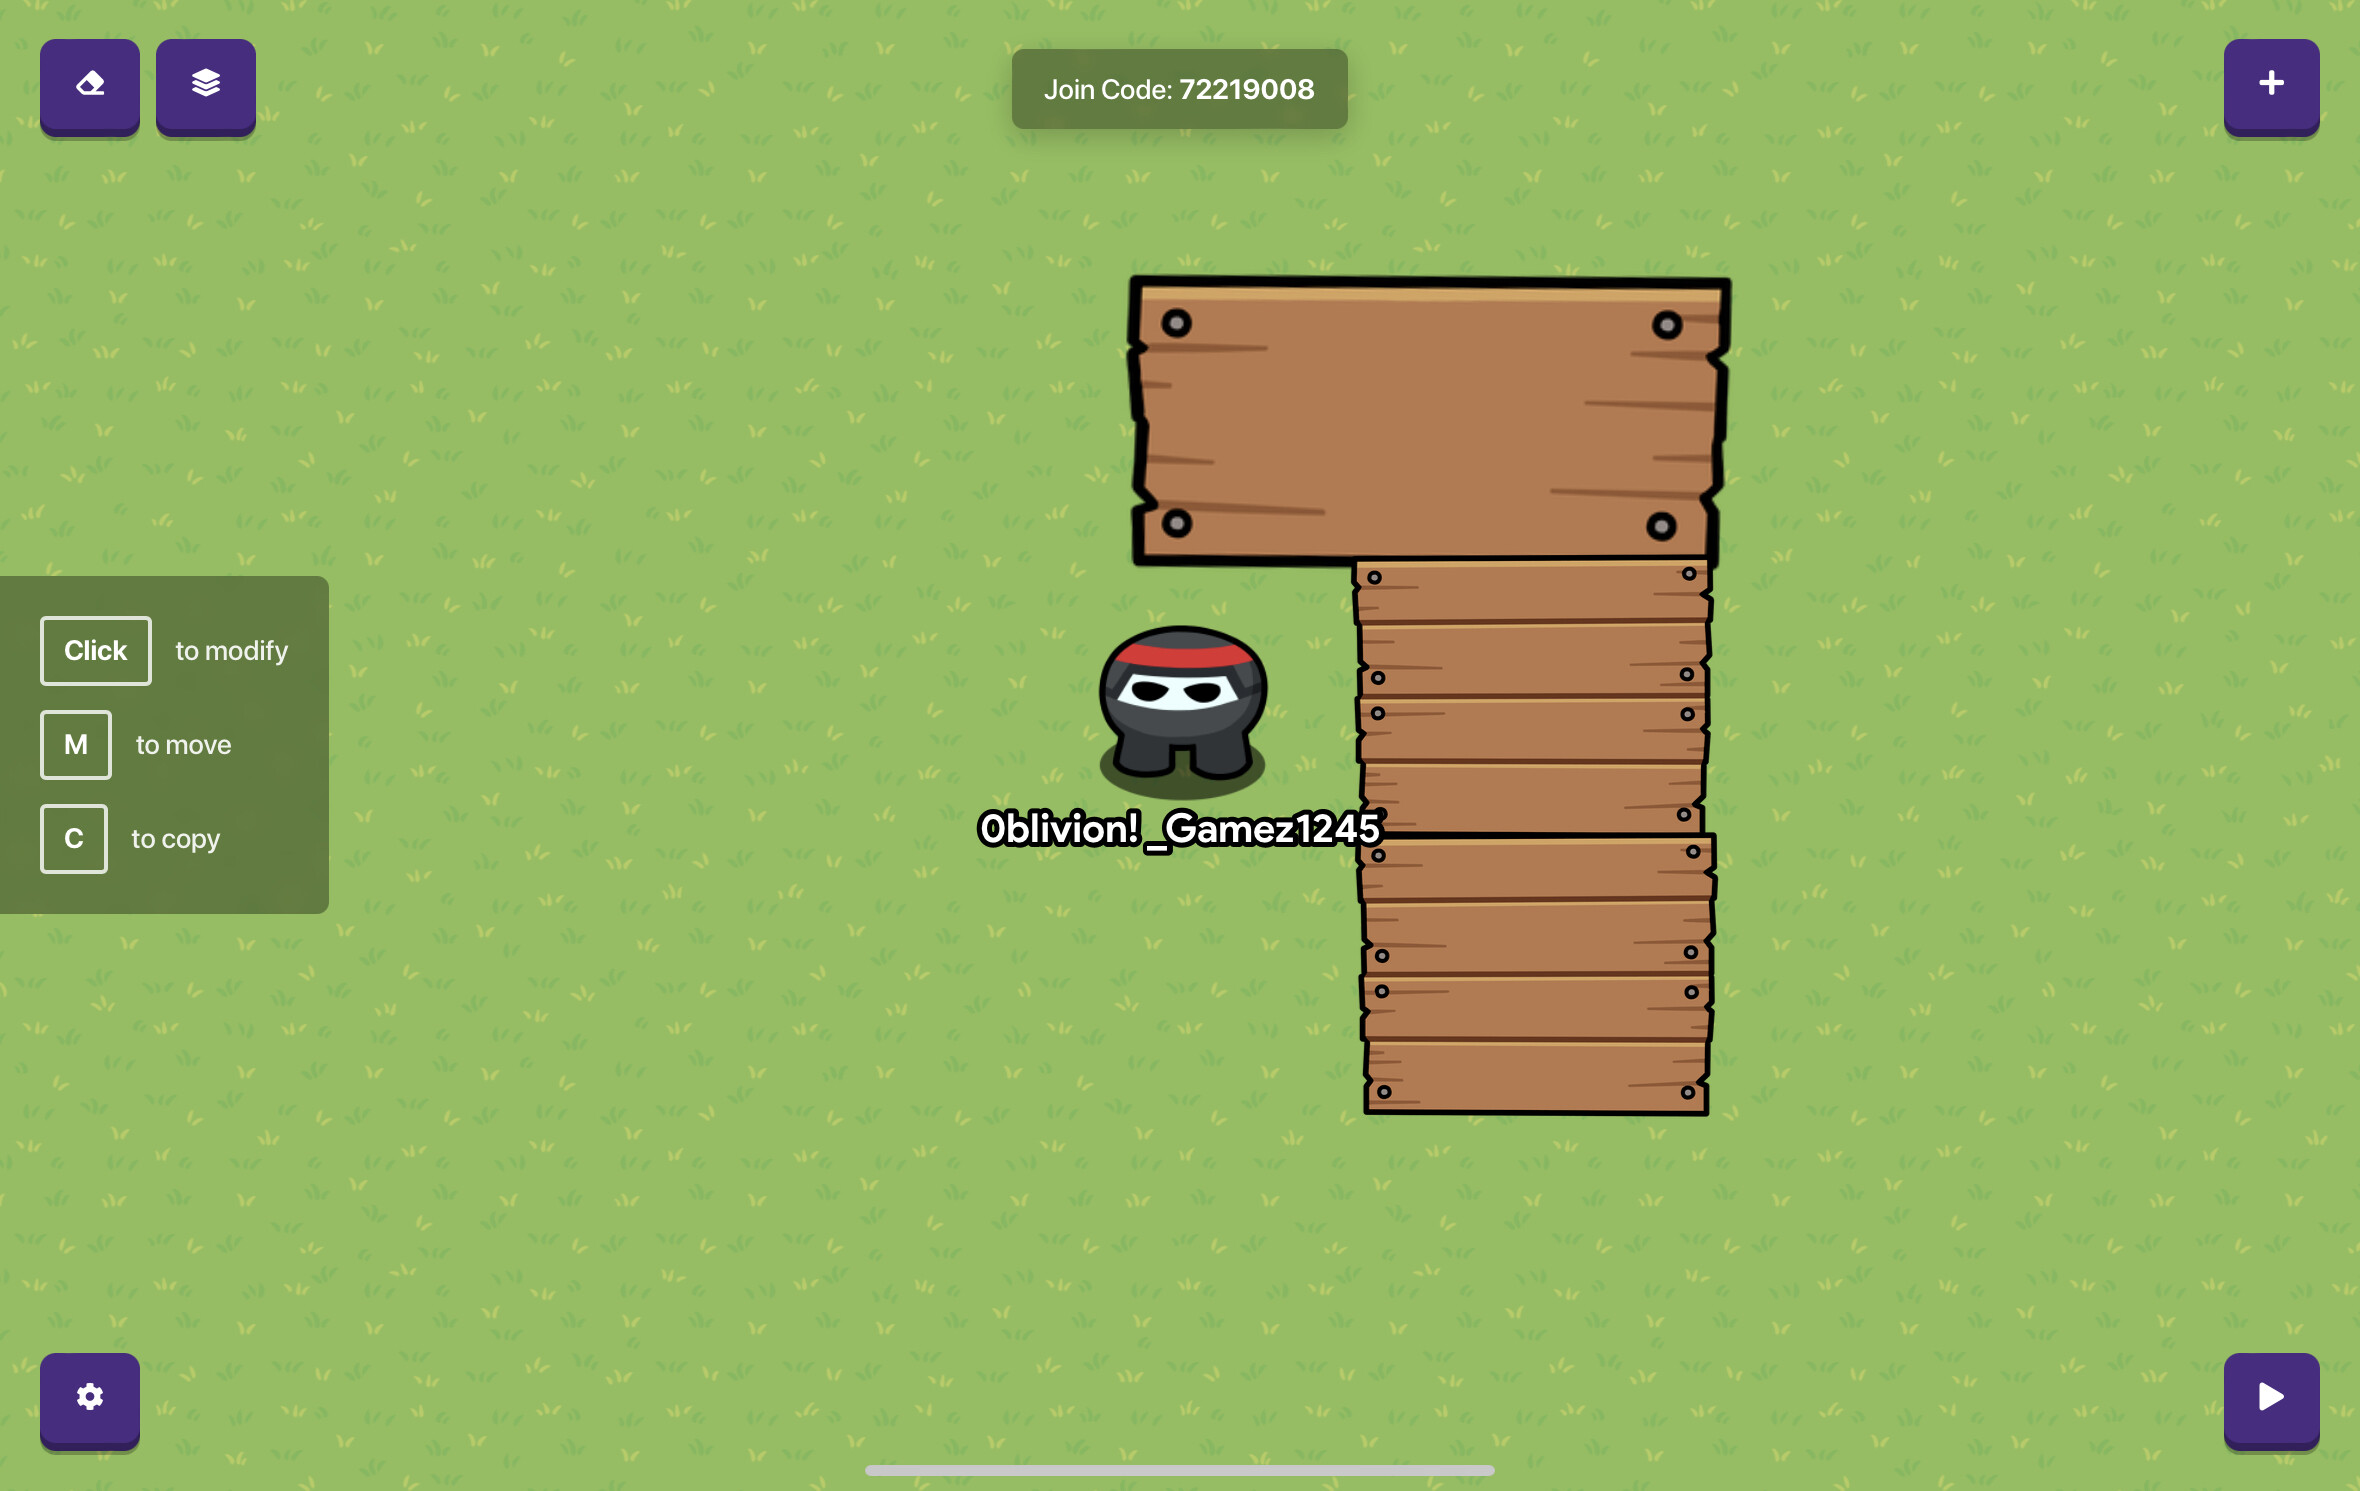
1.
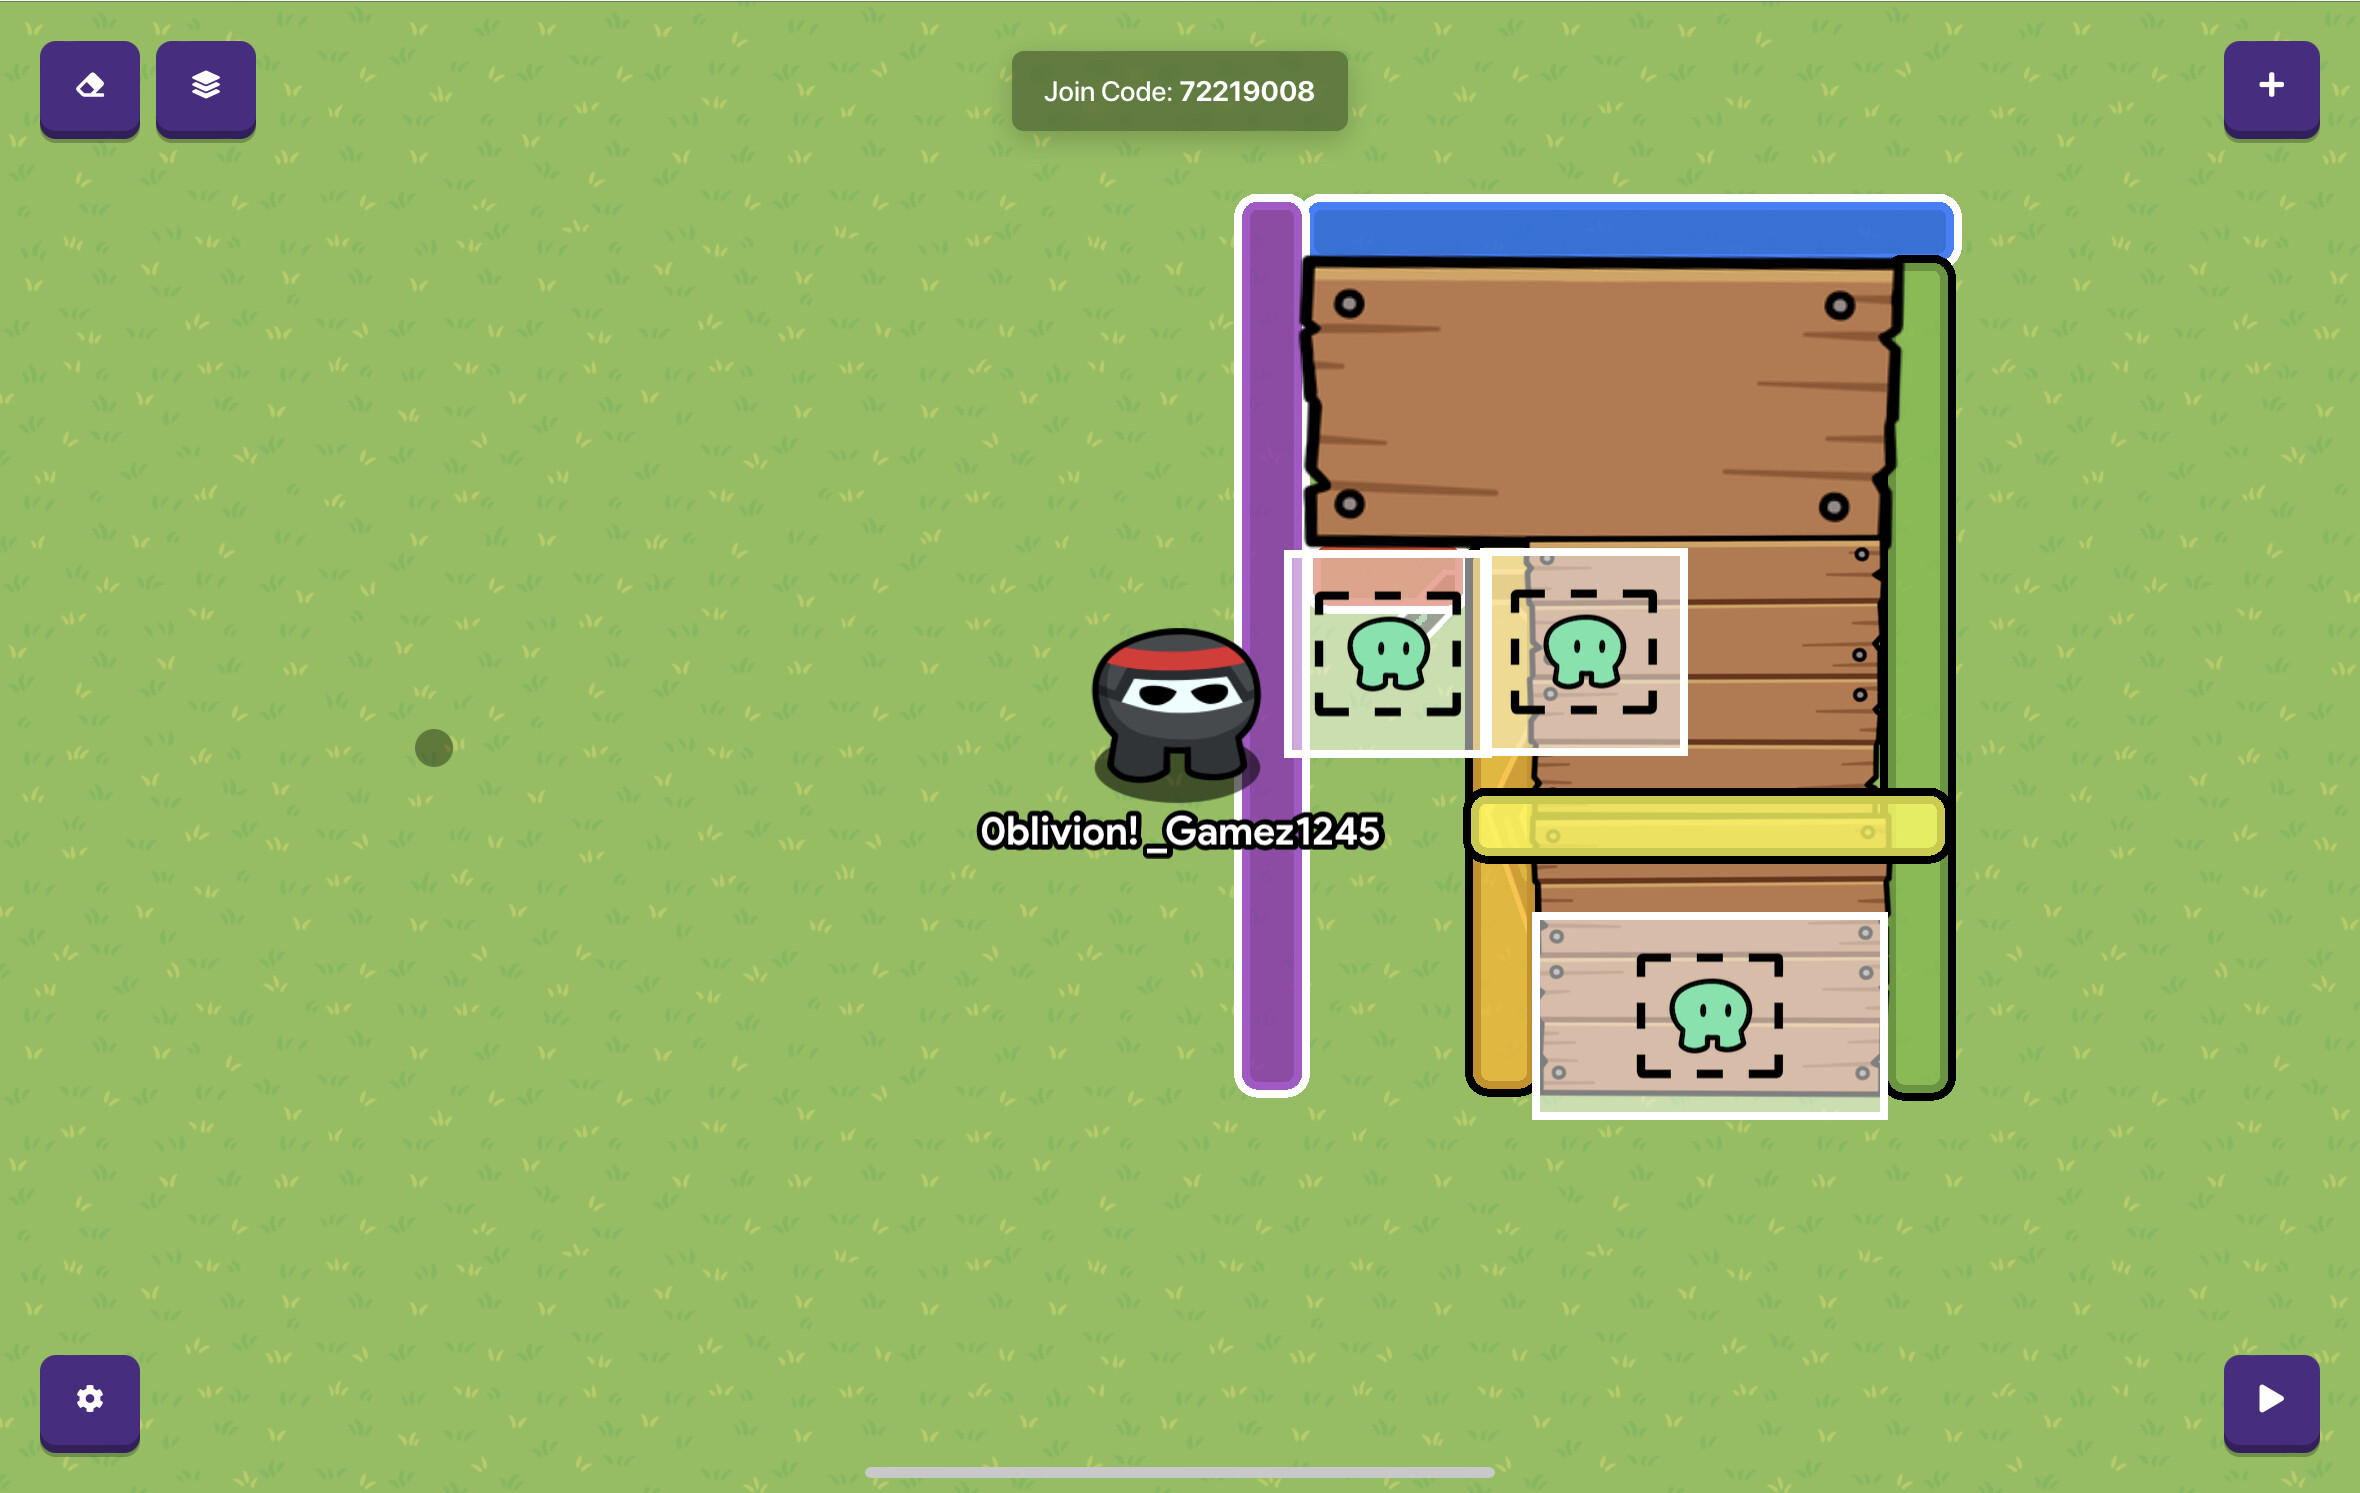
Add a few sign to represent stairs, these are mine.
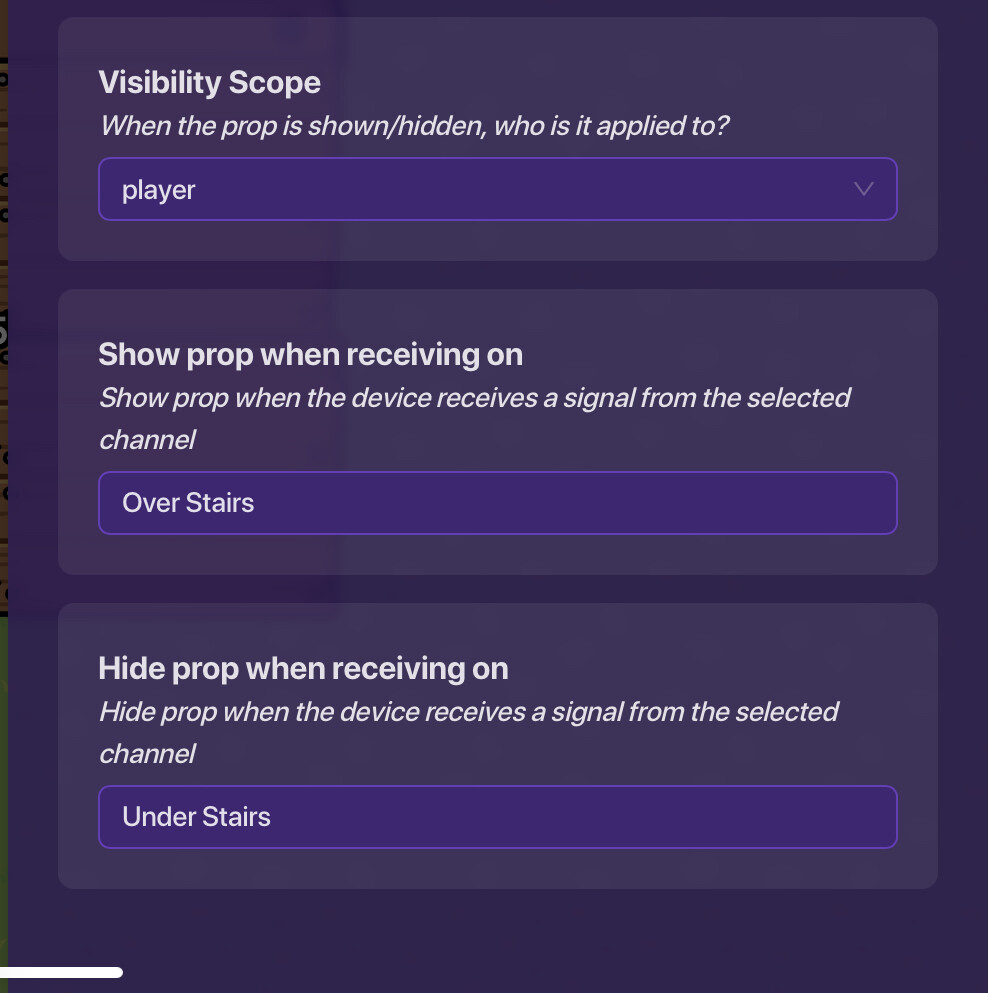
2.
Set the layering of all the signs to Below, and the visibility scope to player. Hide the all the signs when they receive Under Stairs, and show the signs when they receive Over Stairs.
3.
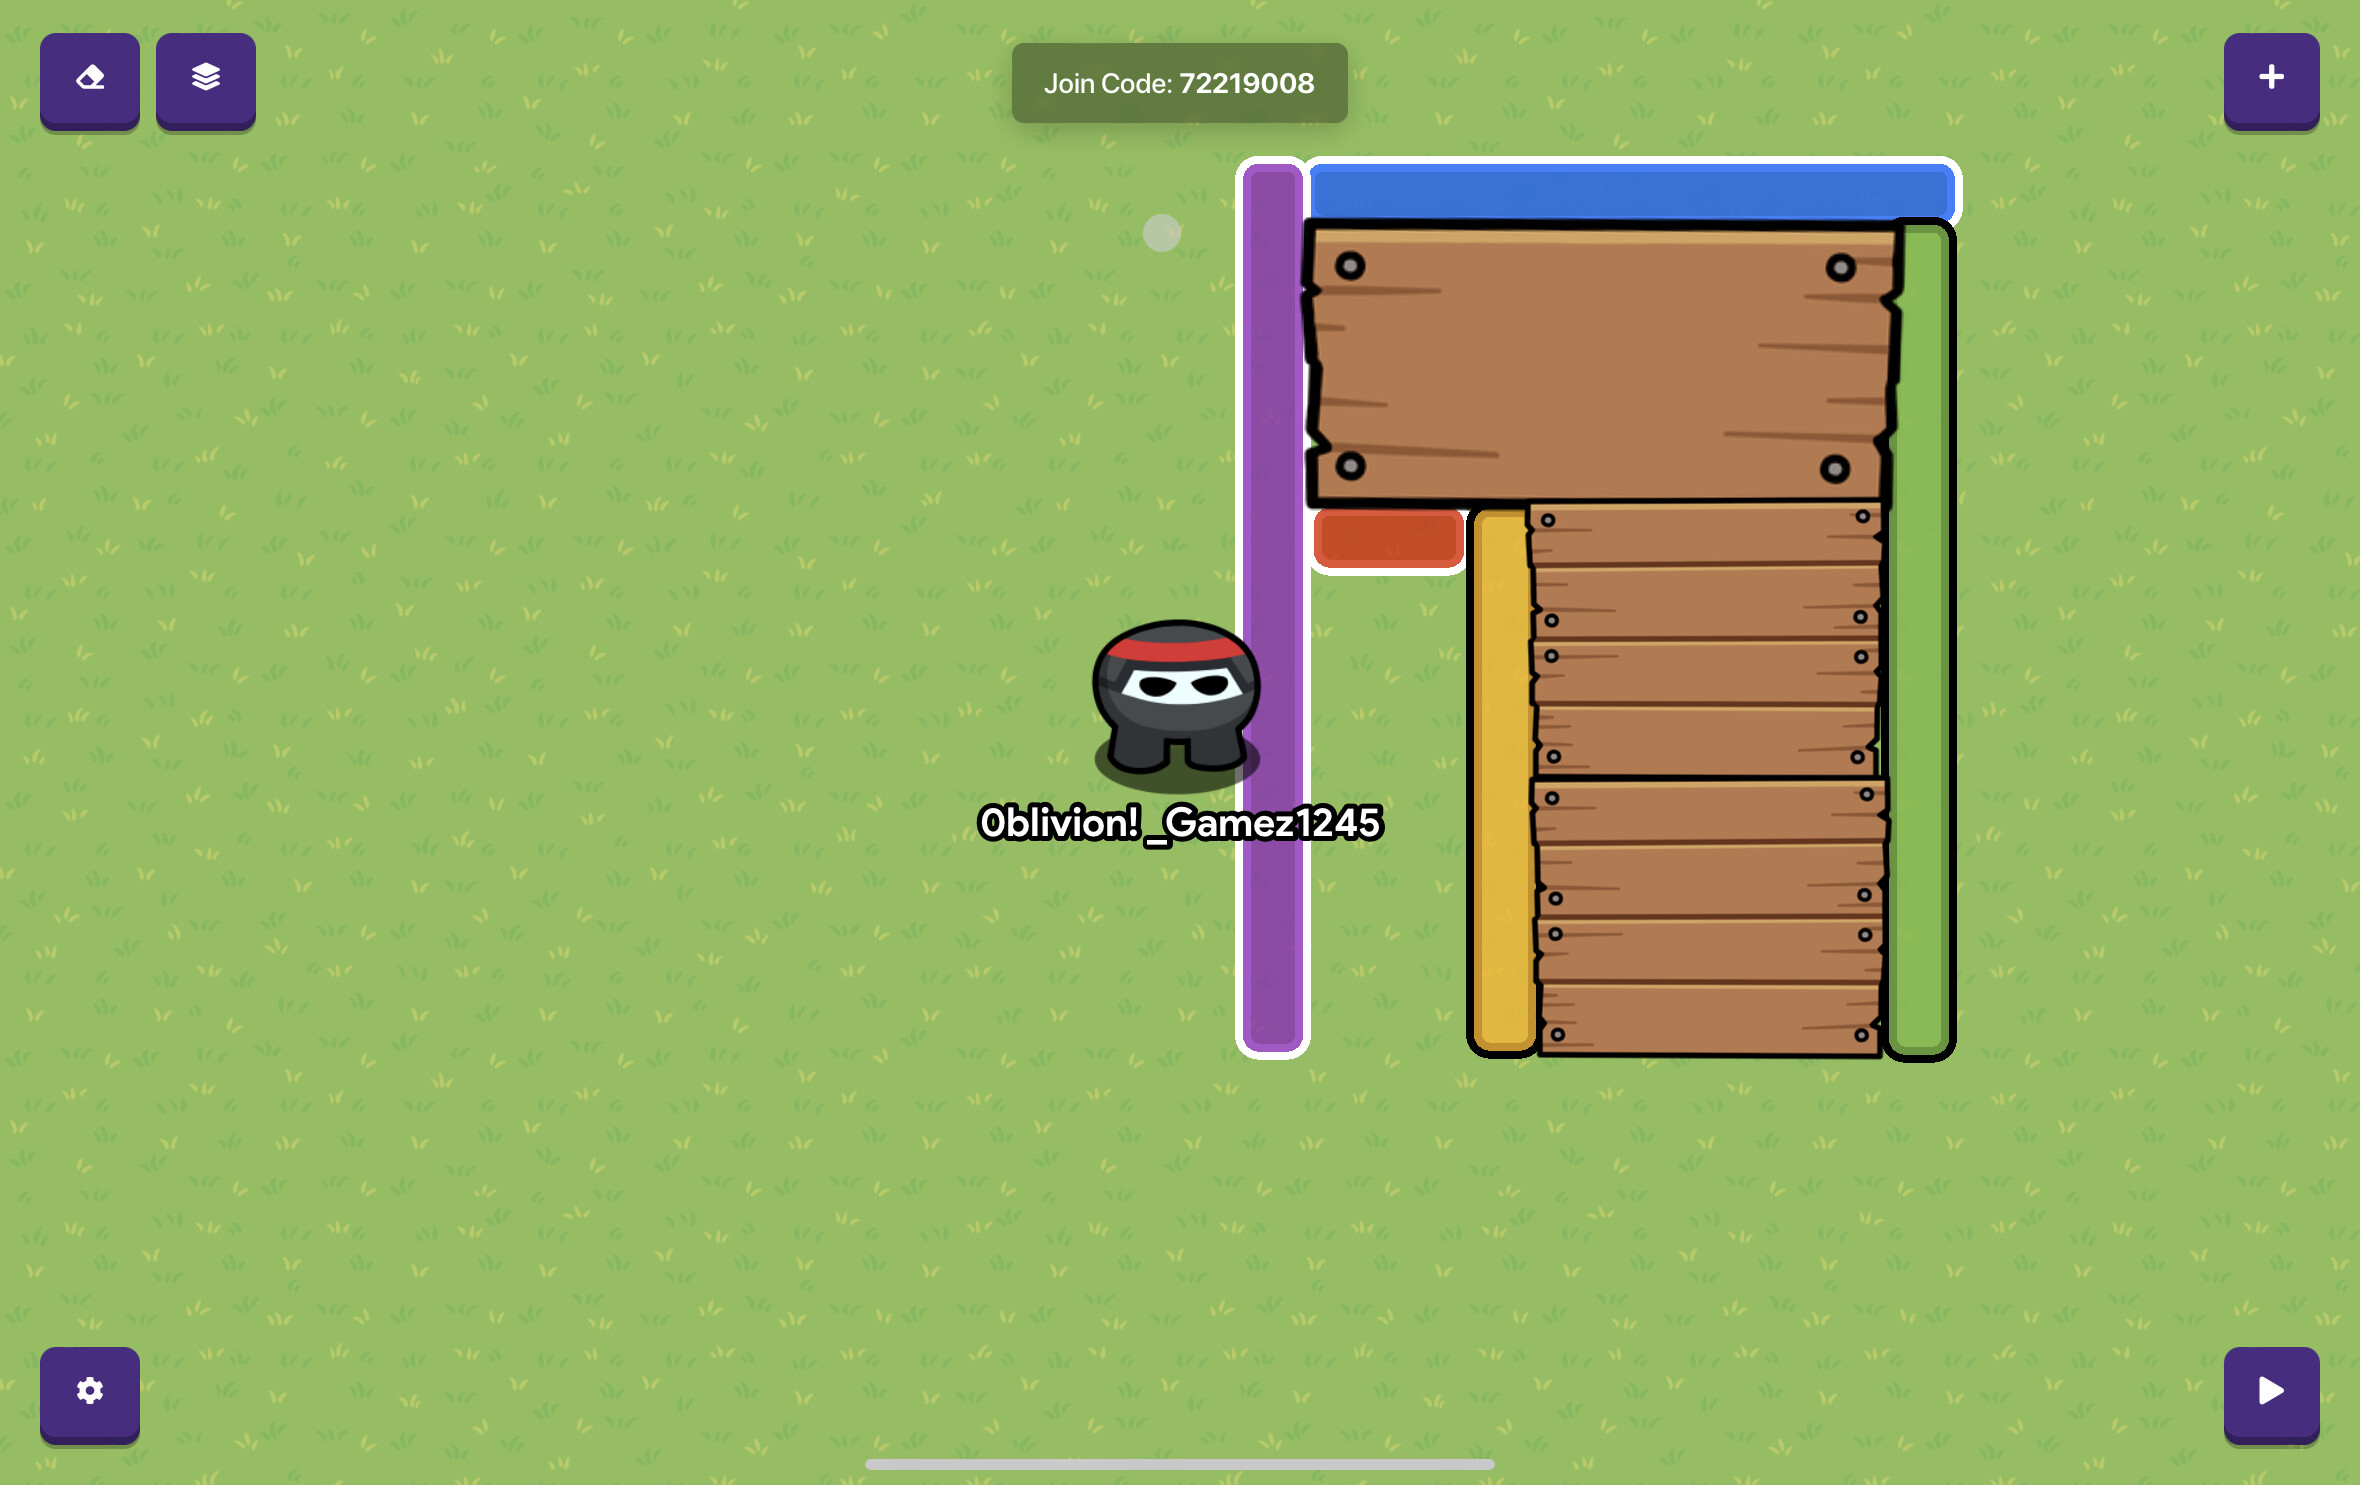
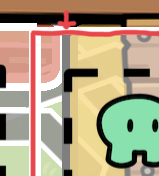
Add 5 barriers around your stairs like so. Set visible in game to no for each one.
4.
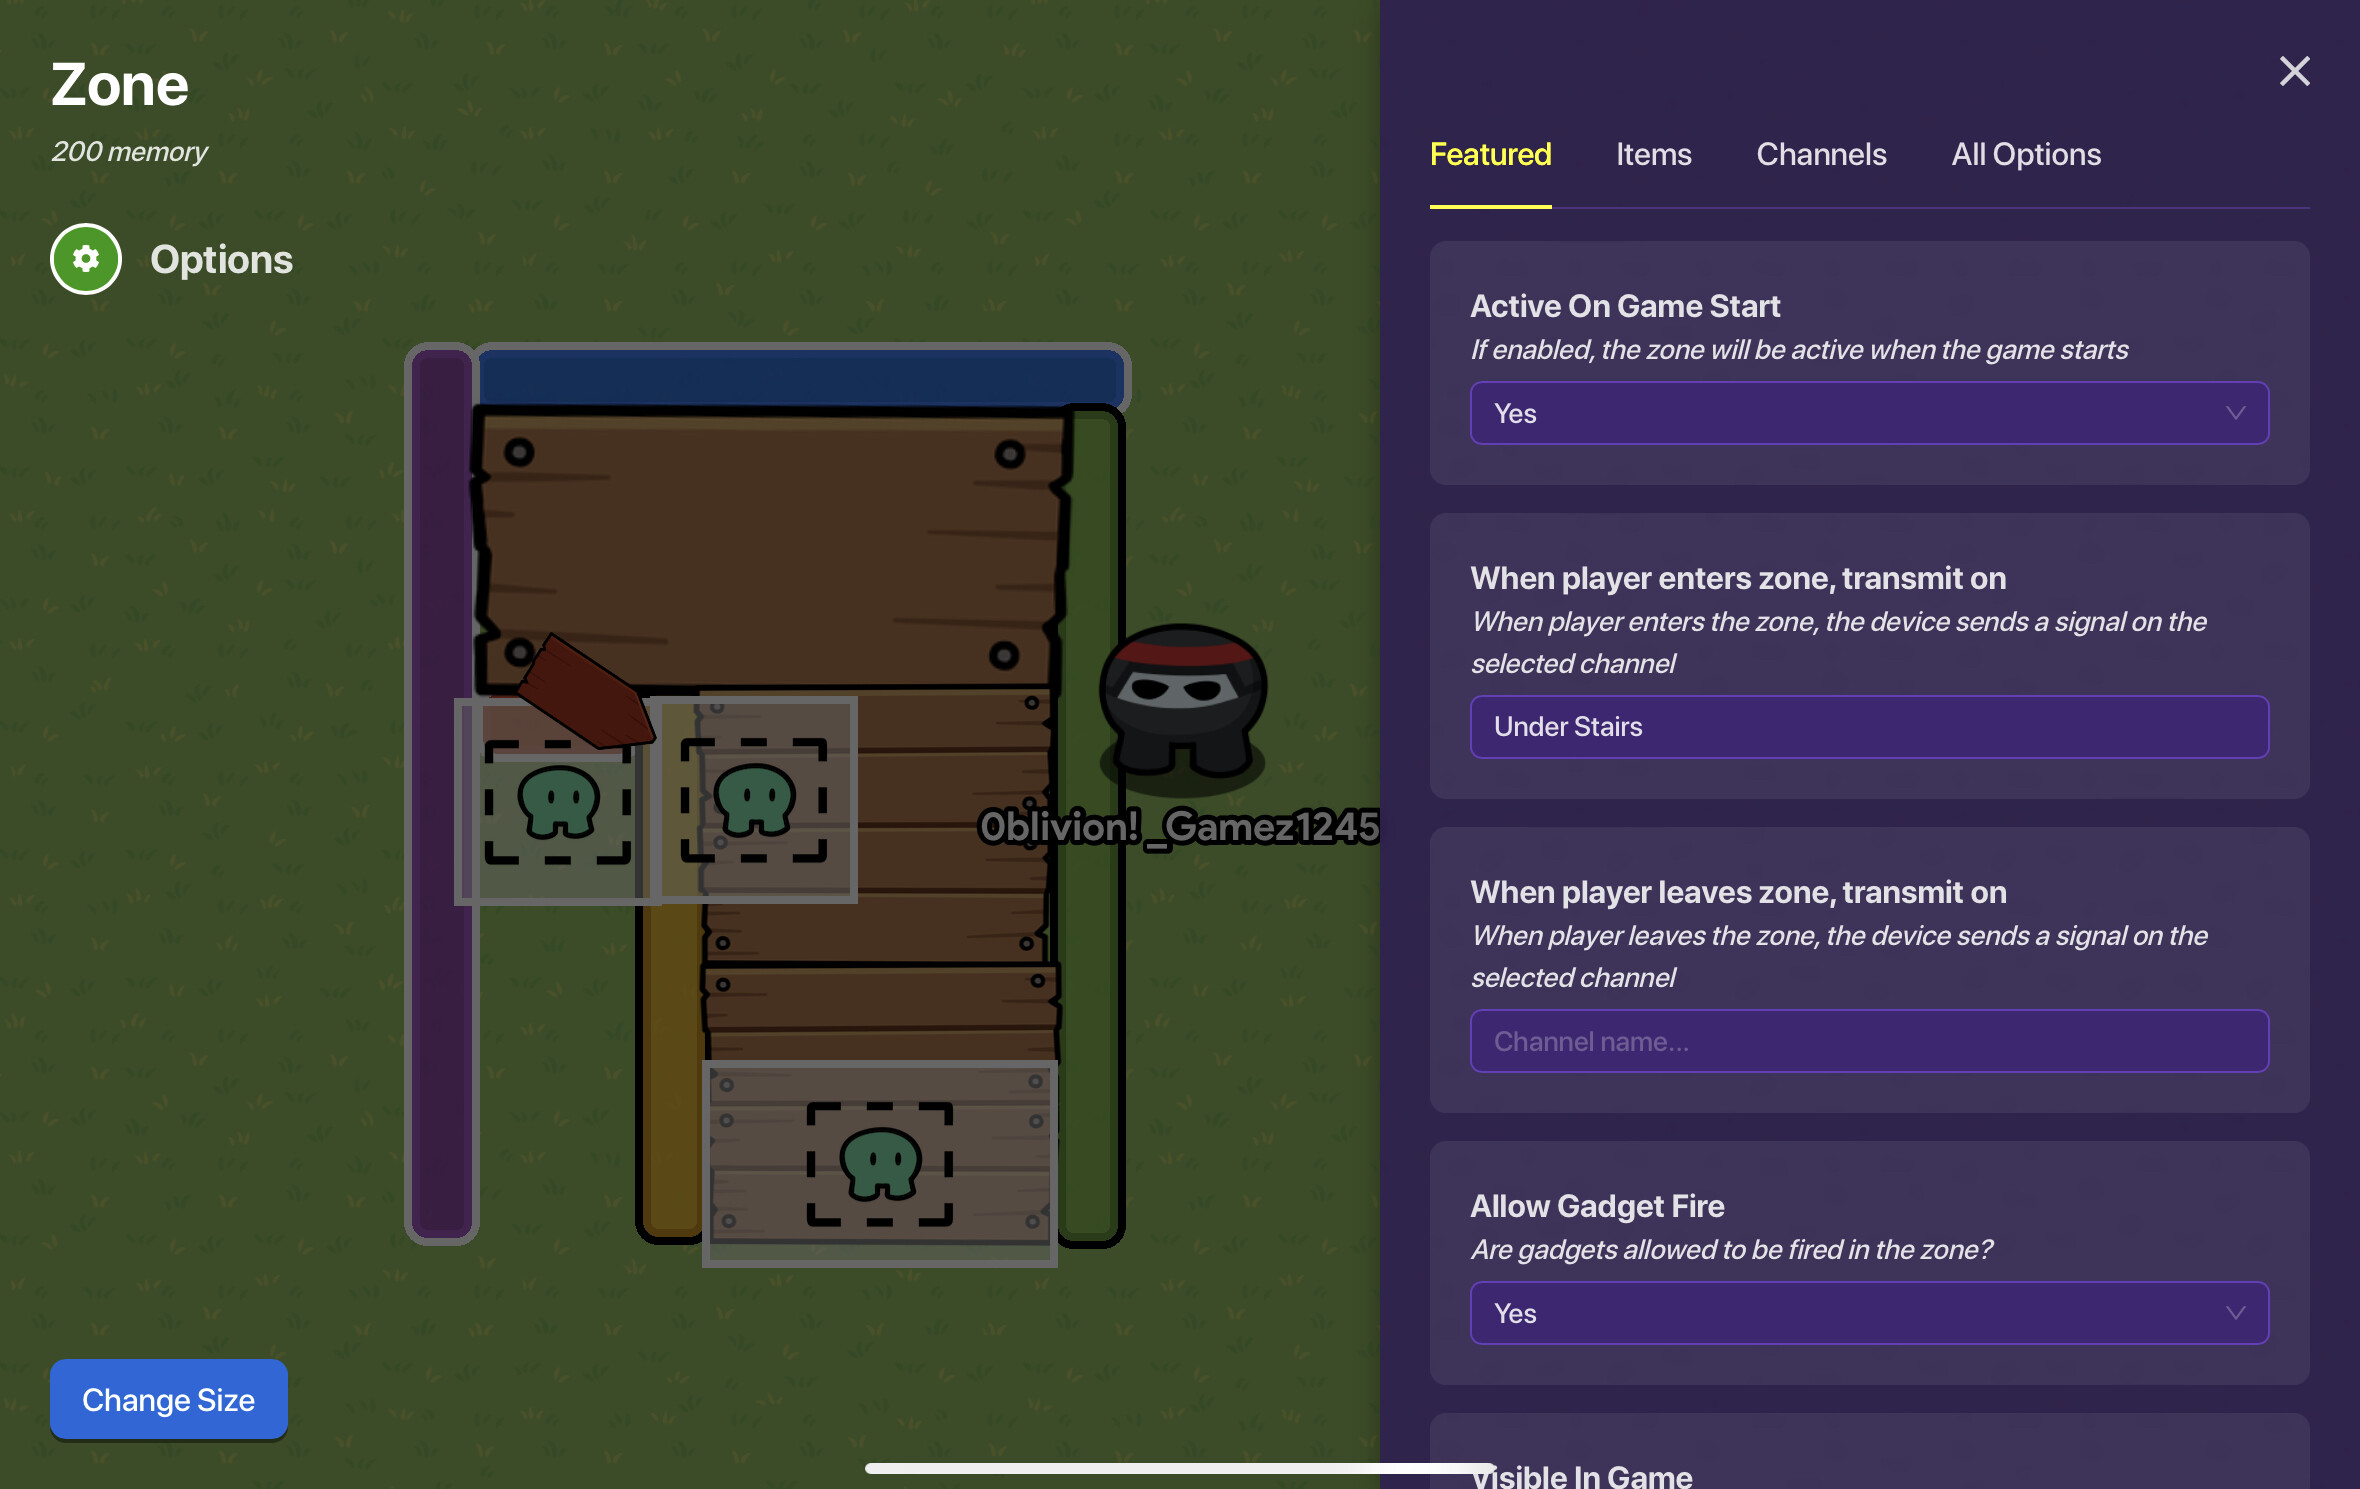
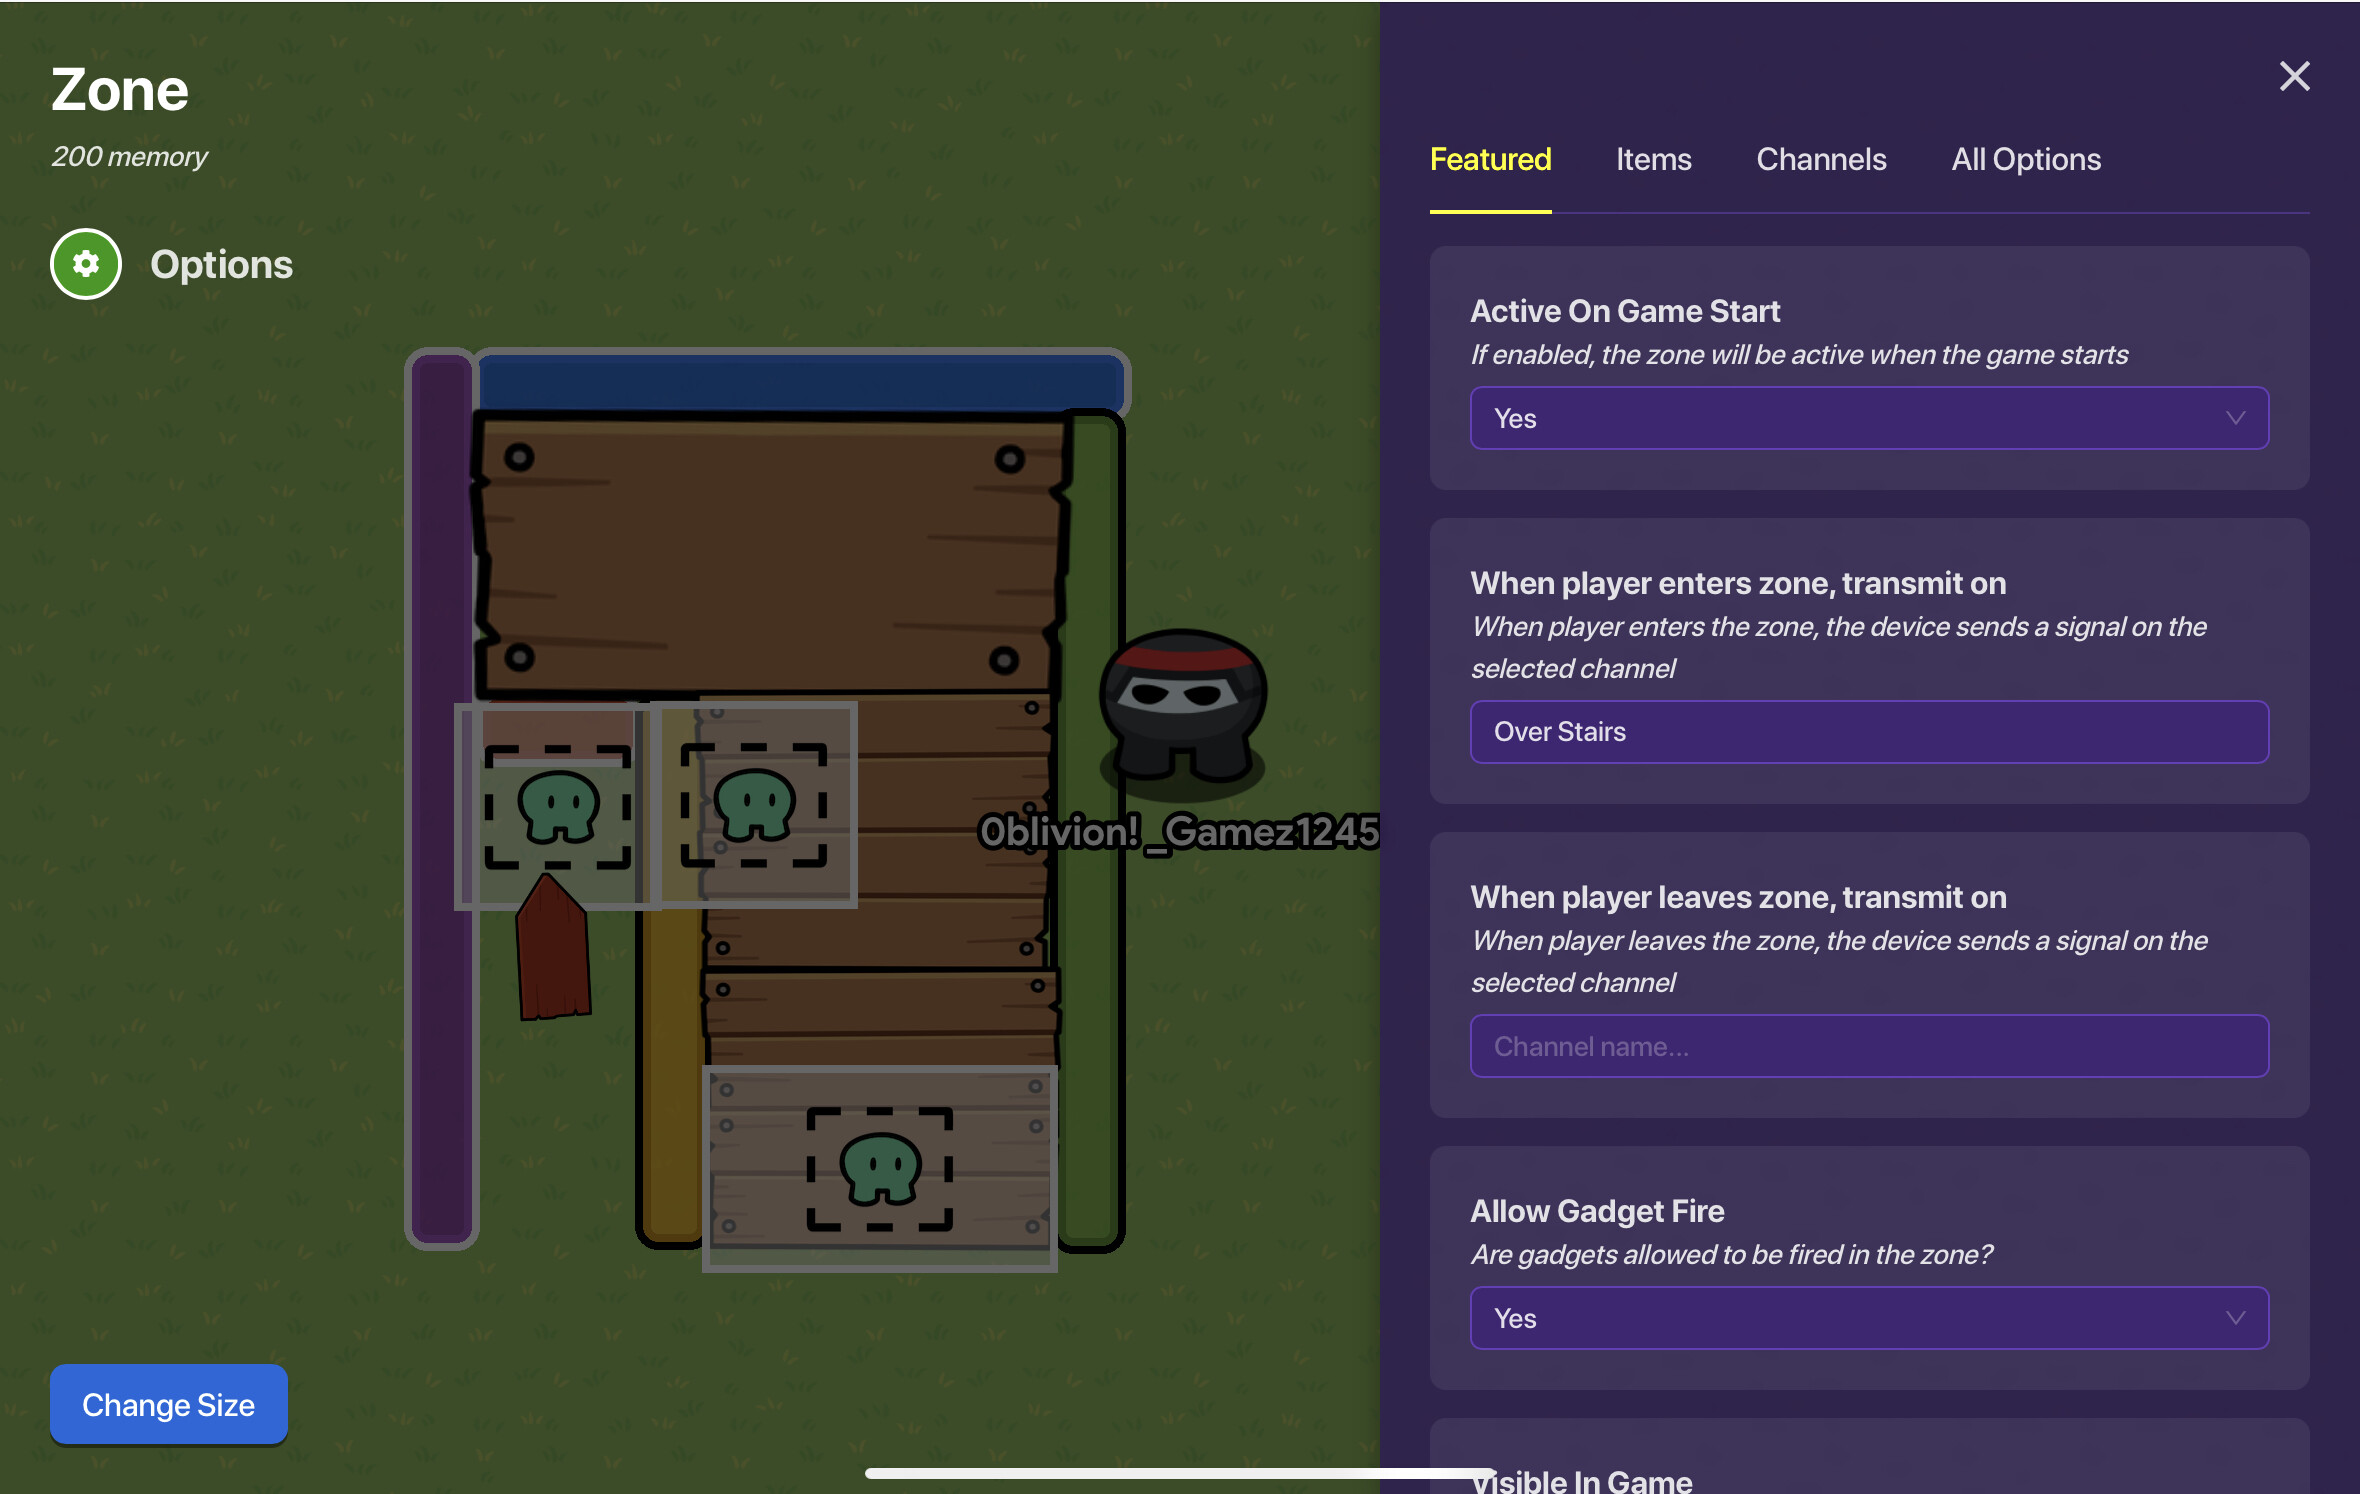
Add 3 zones like so.
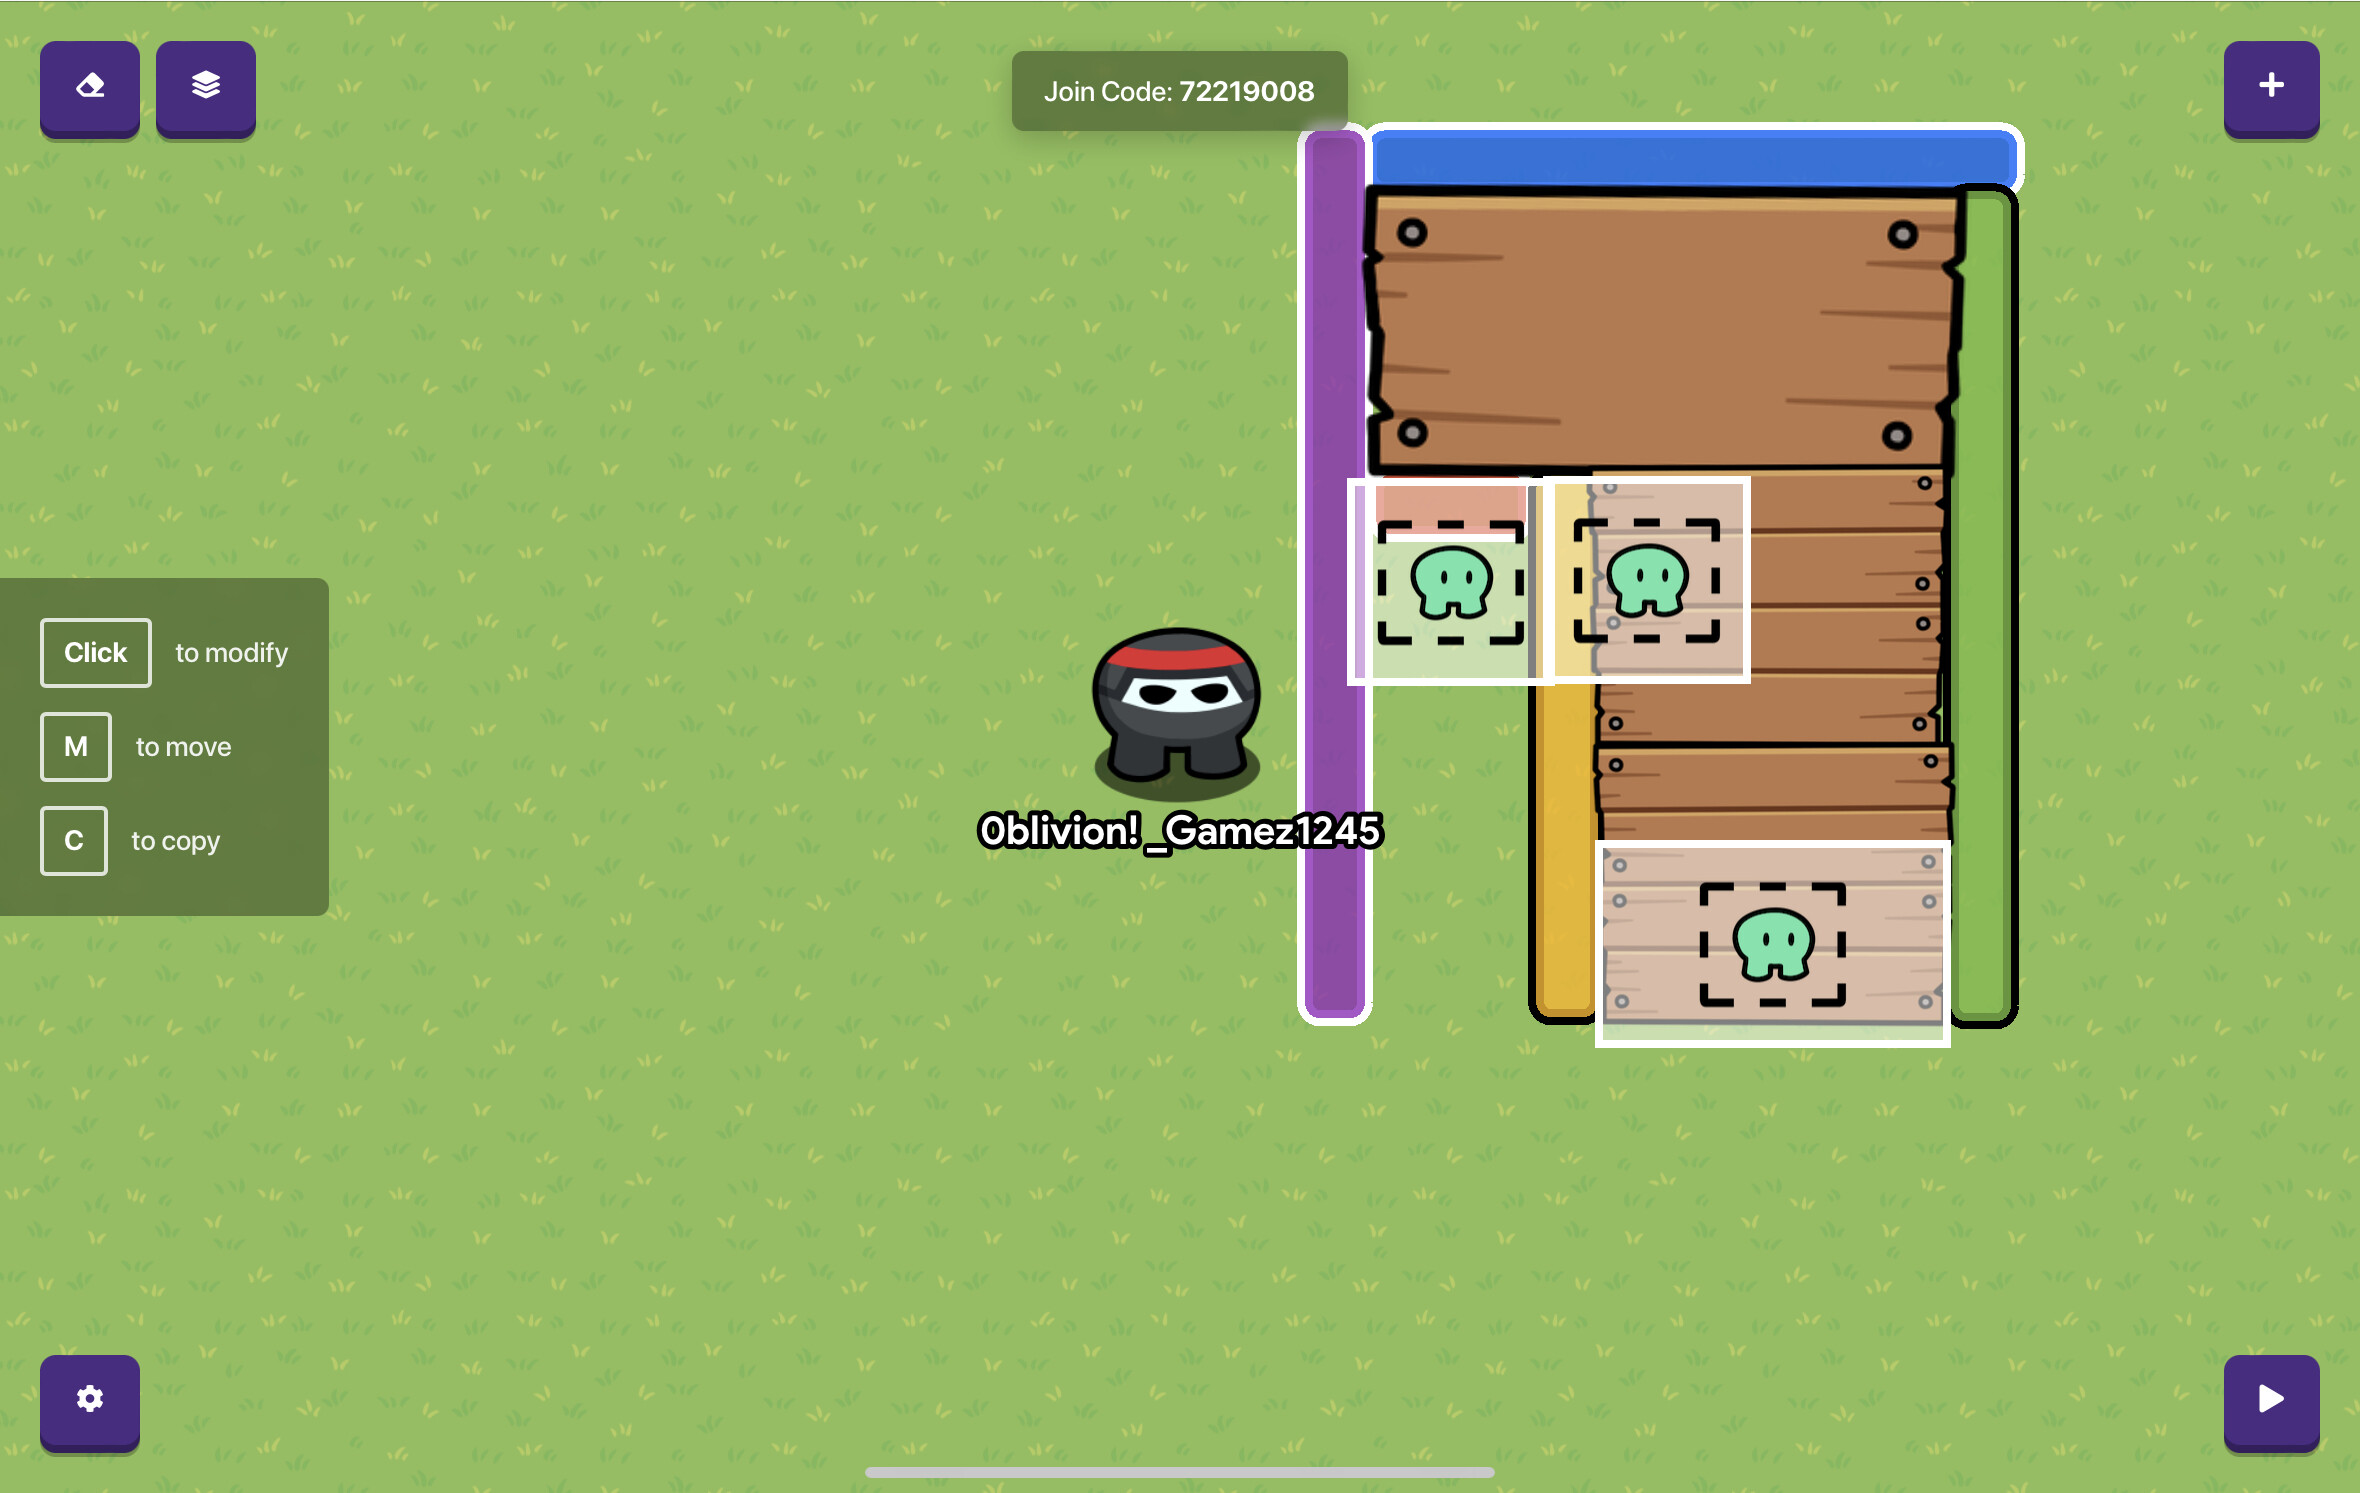
5.
When the player enters this zone, send the channel Under Stairs.
And when the player enters this zone, send the channel Over Stairs.
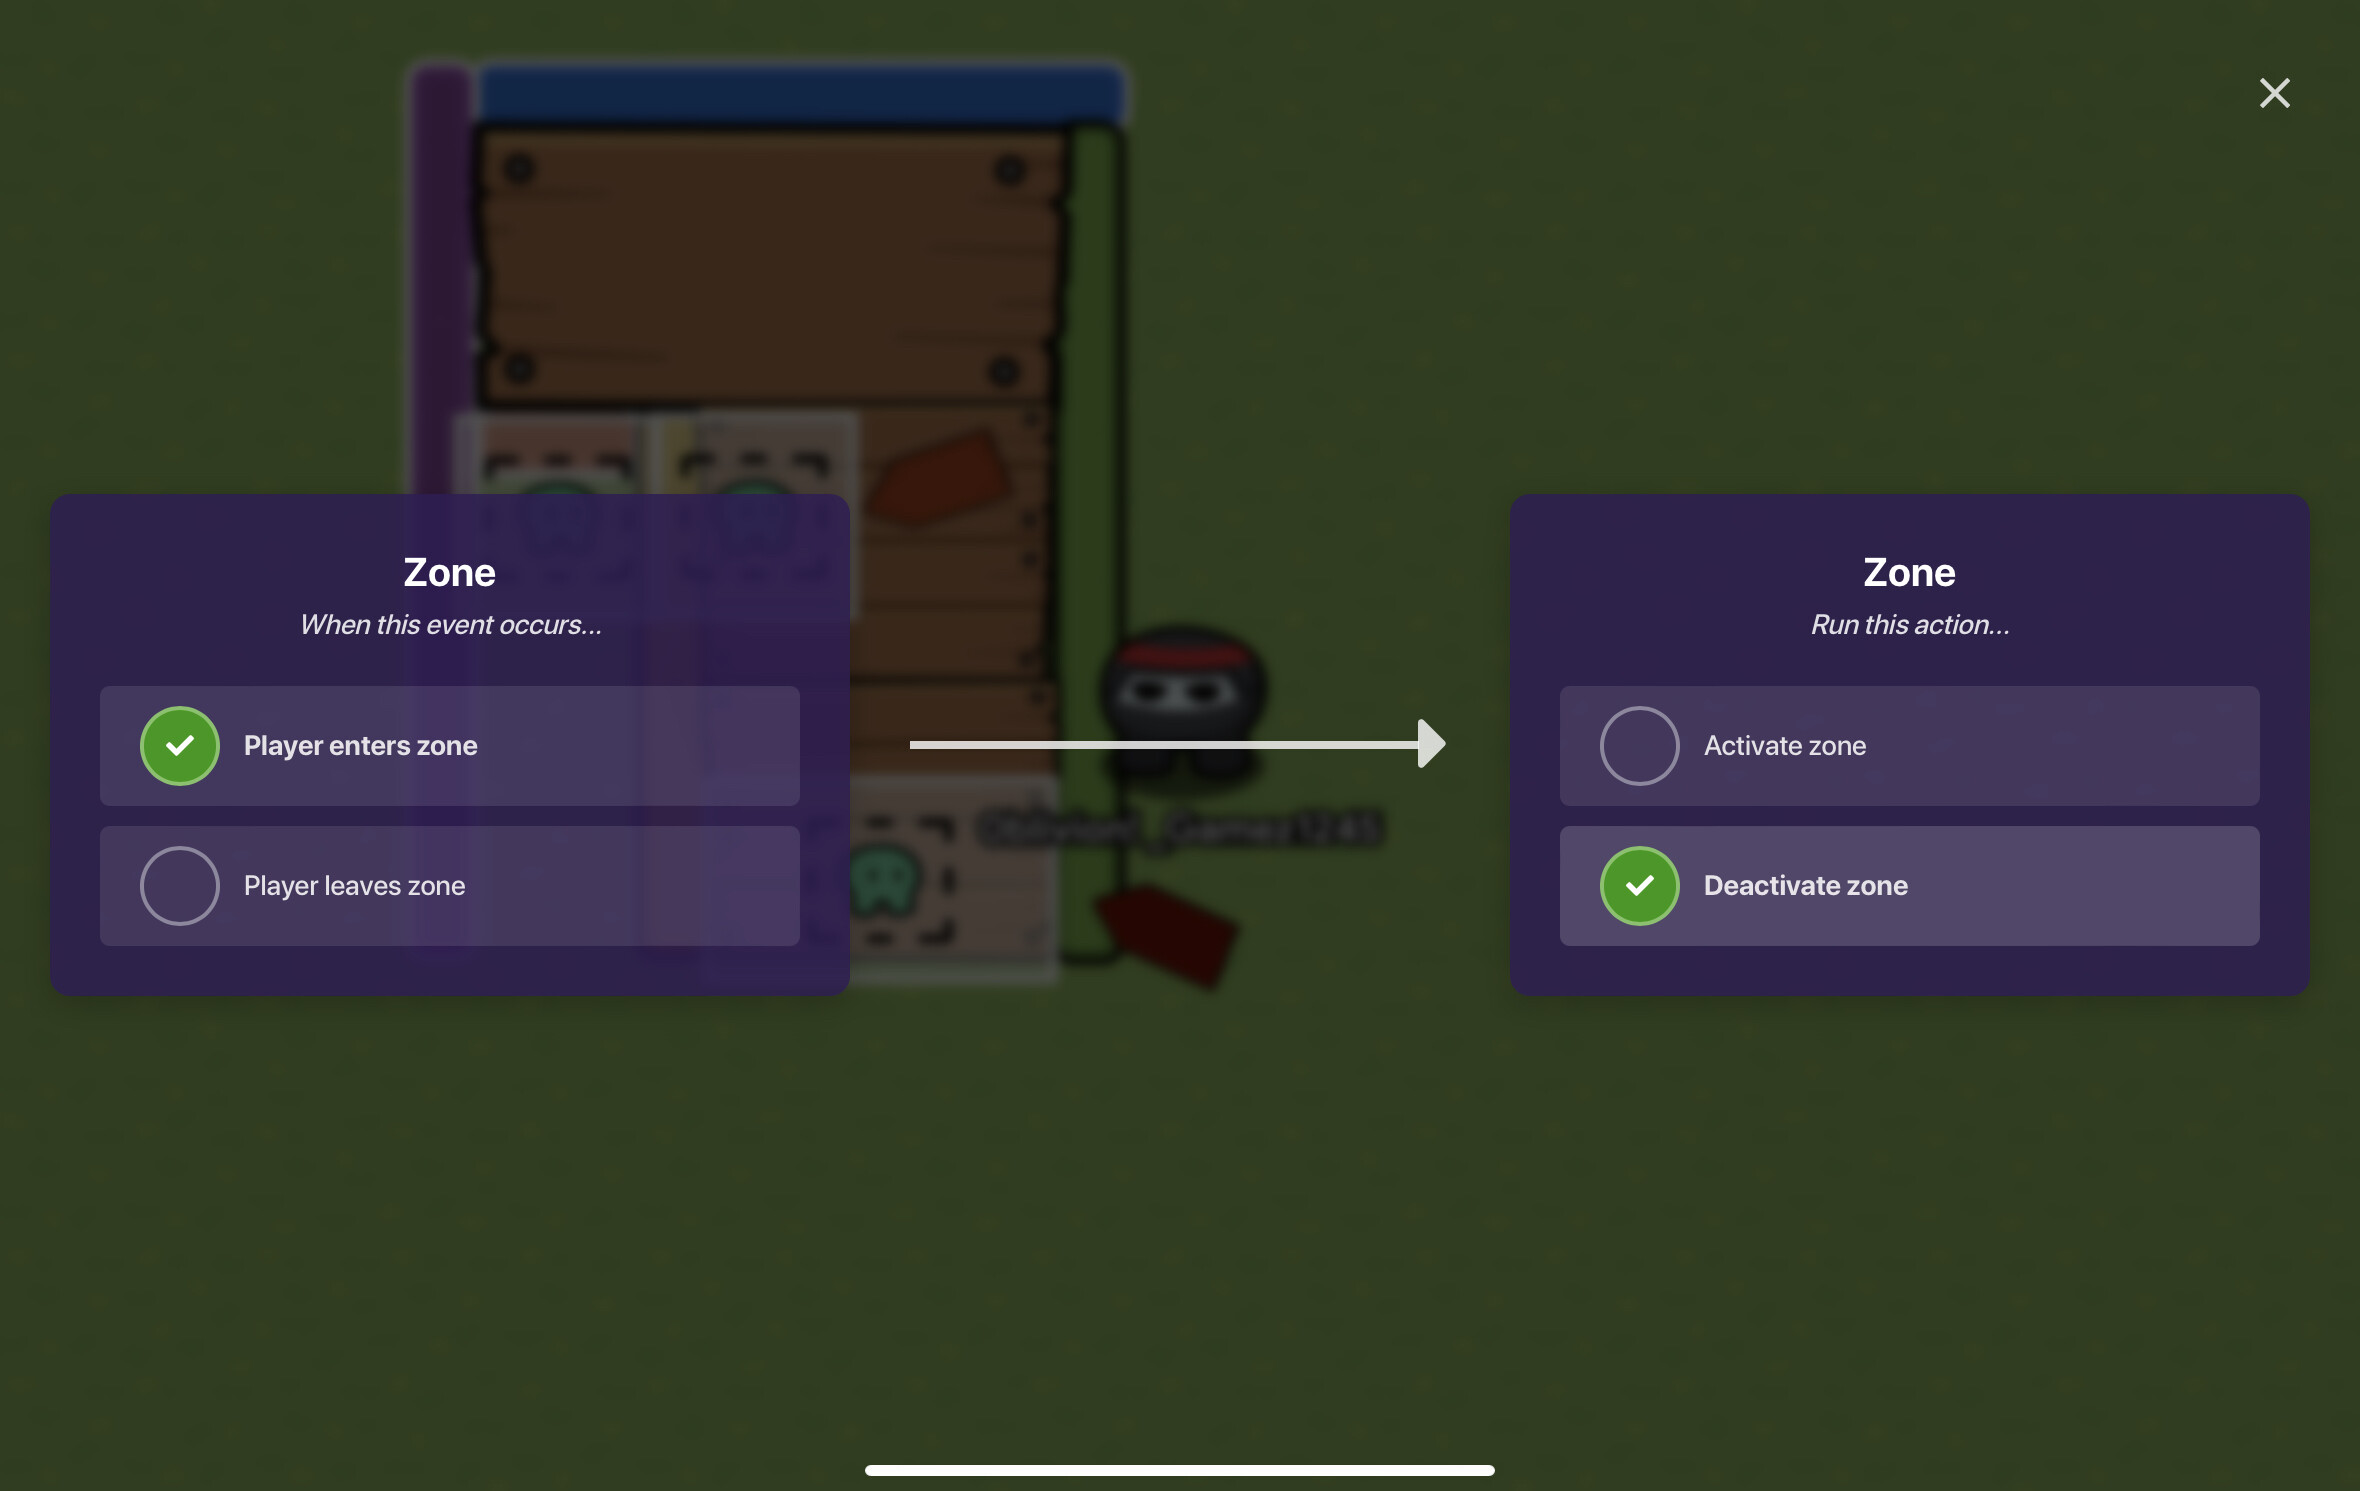
6.
Connect a wire between the red arrow zone to the orange arrow zone saying:
Player enters zone—————Deactivate zone.
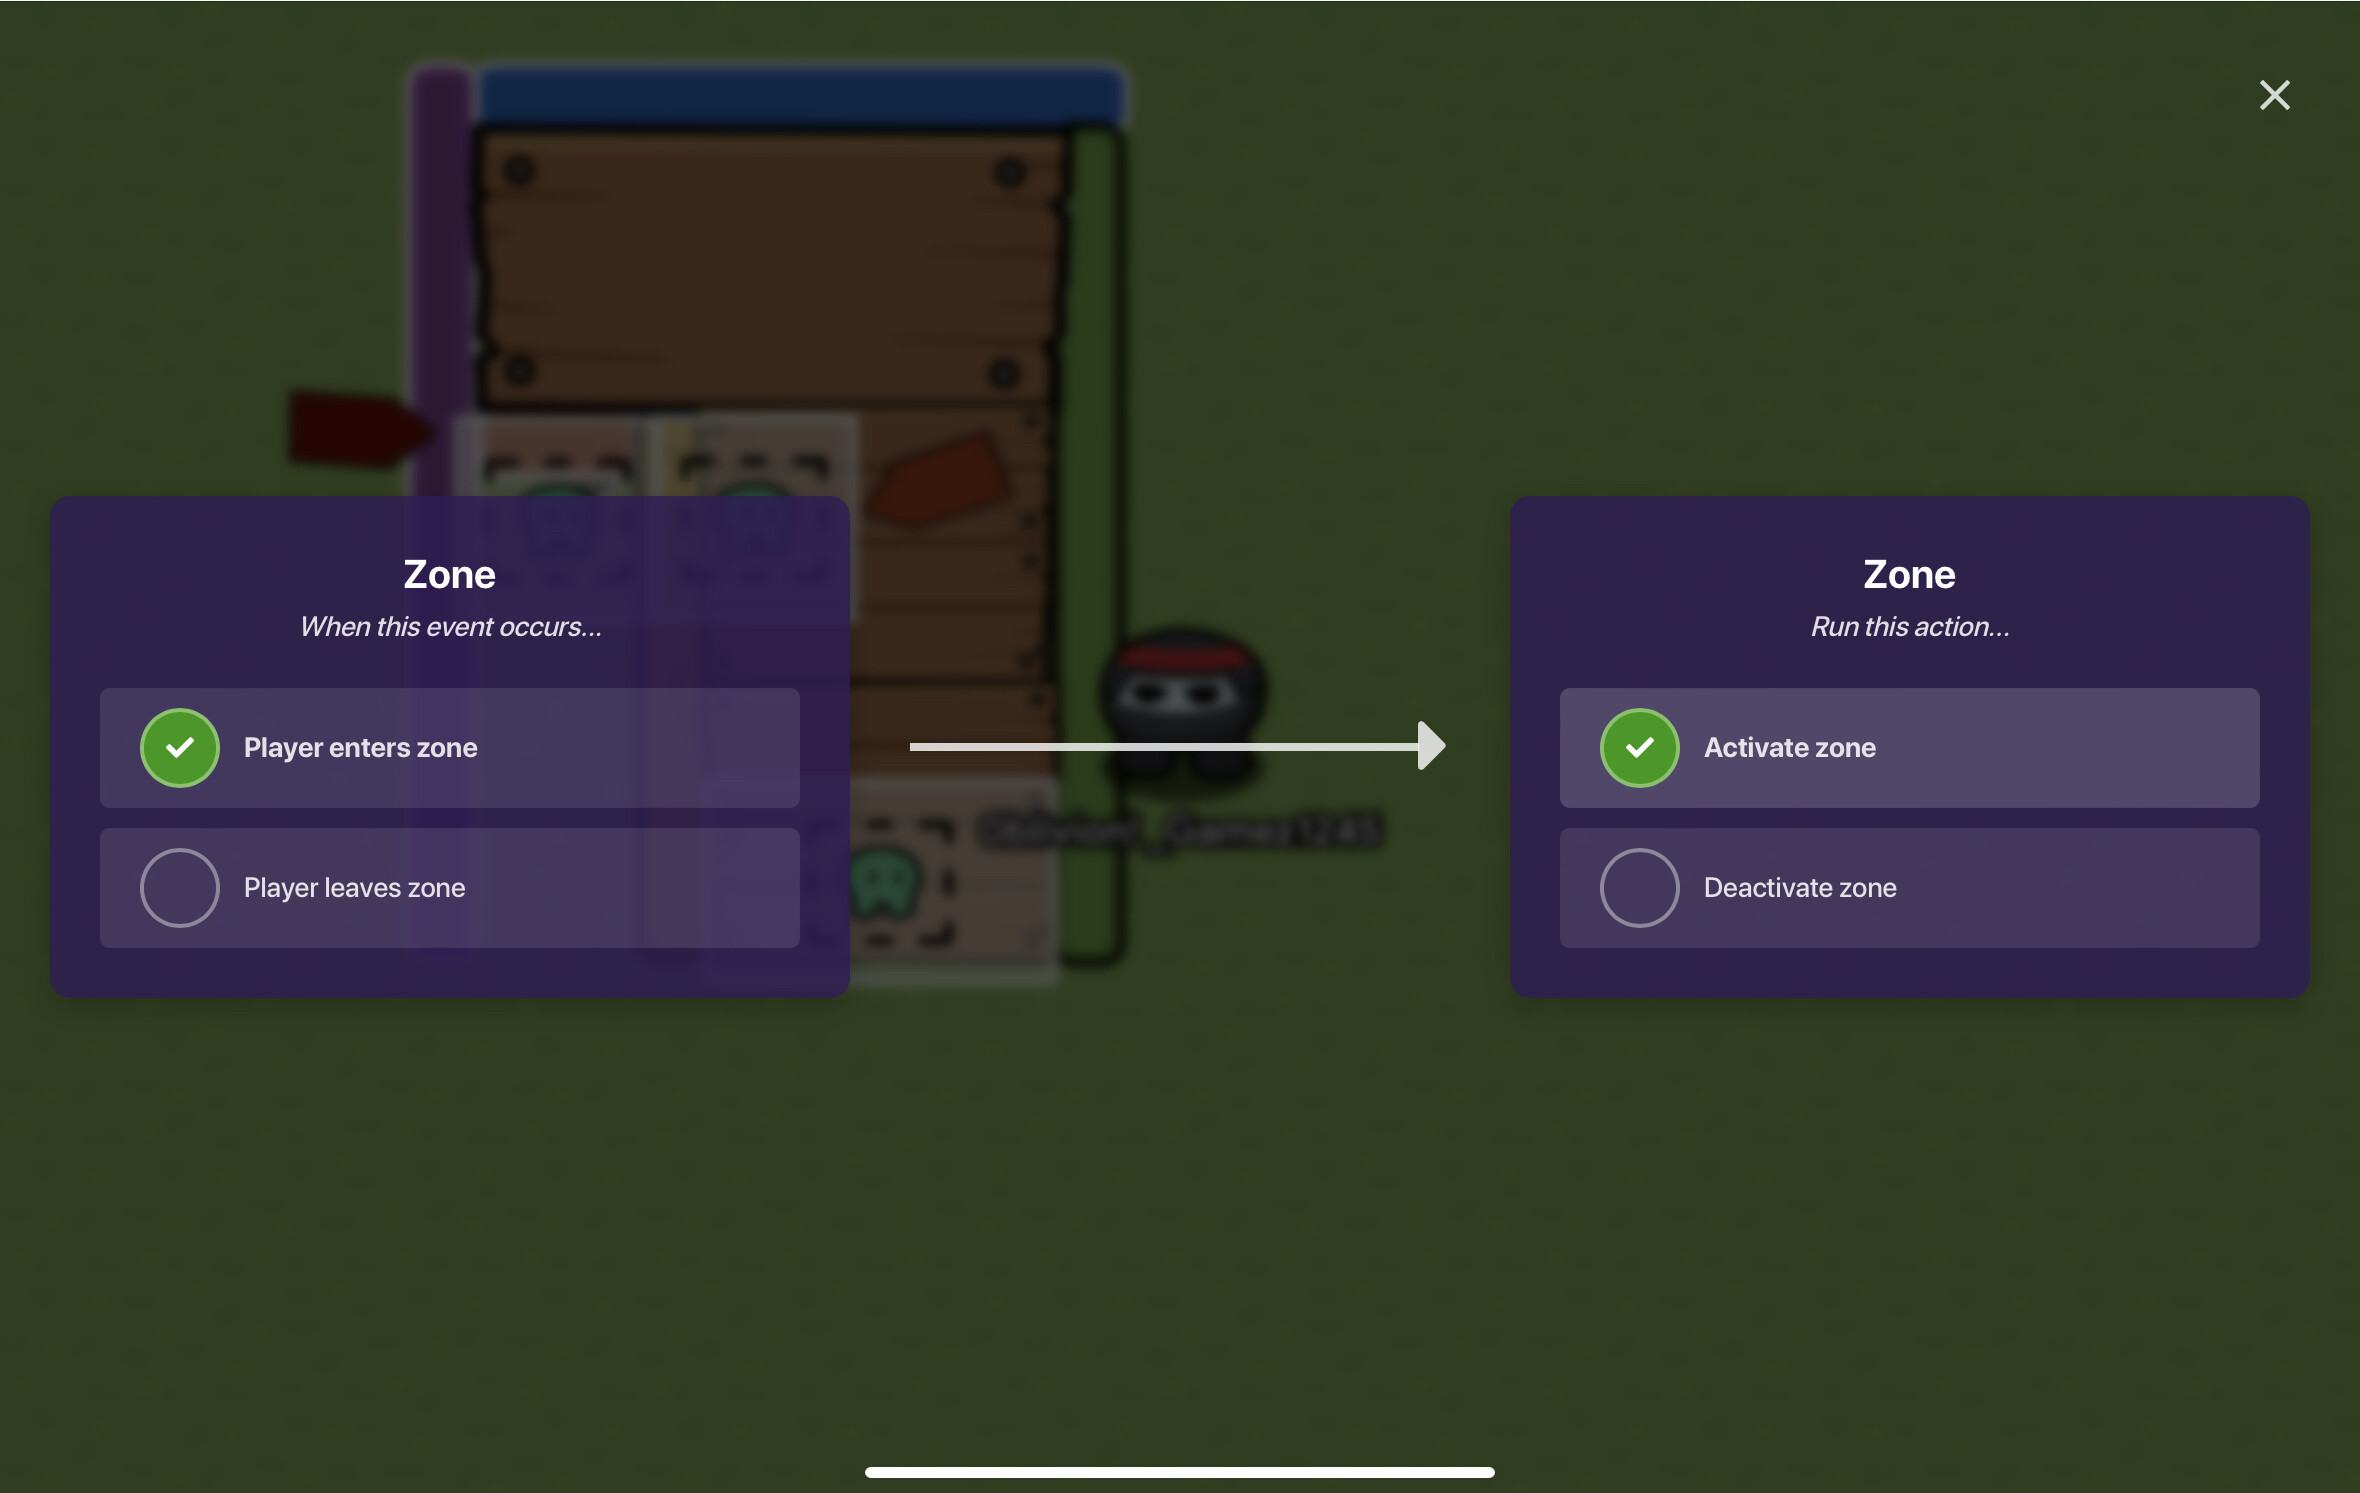
7.
Connect another wire between the red arrow zone to the orange arrow zone saying:
Player enters zone—————Activate zone.
8.
Add a yellow barrier like so. Set visible in game to no.
9.
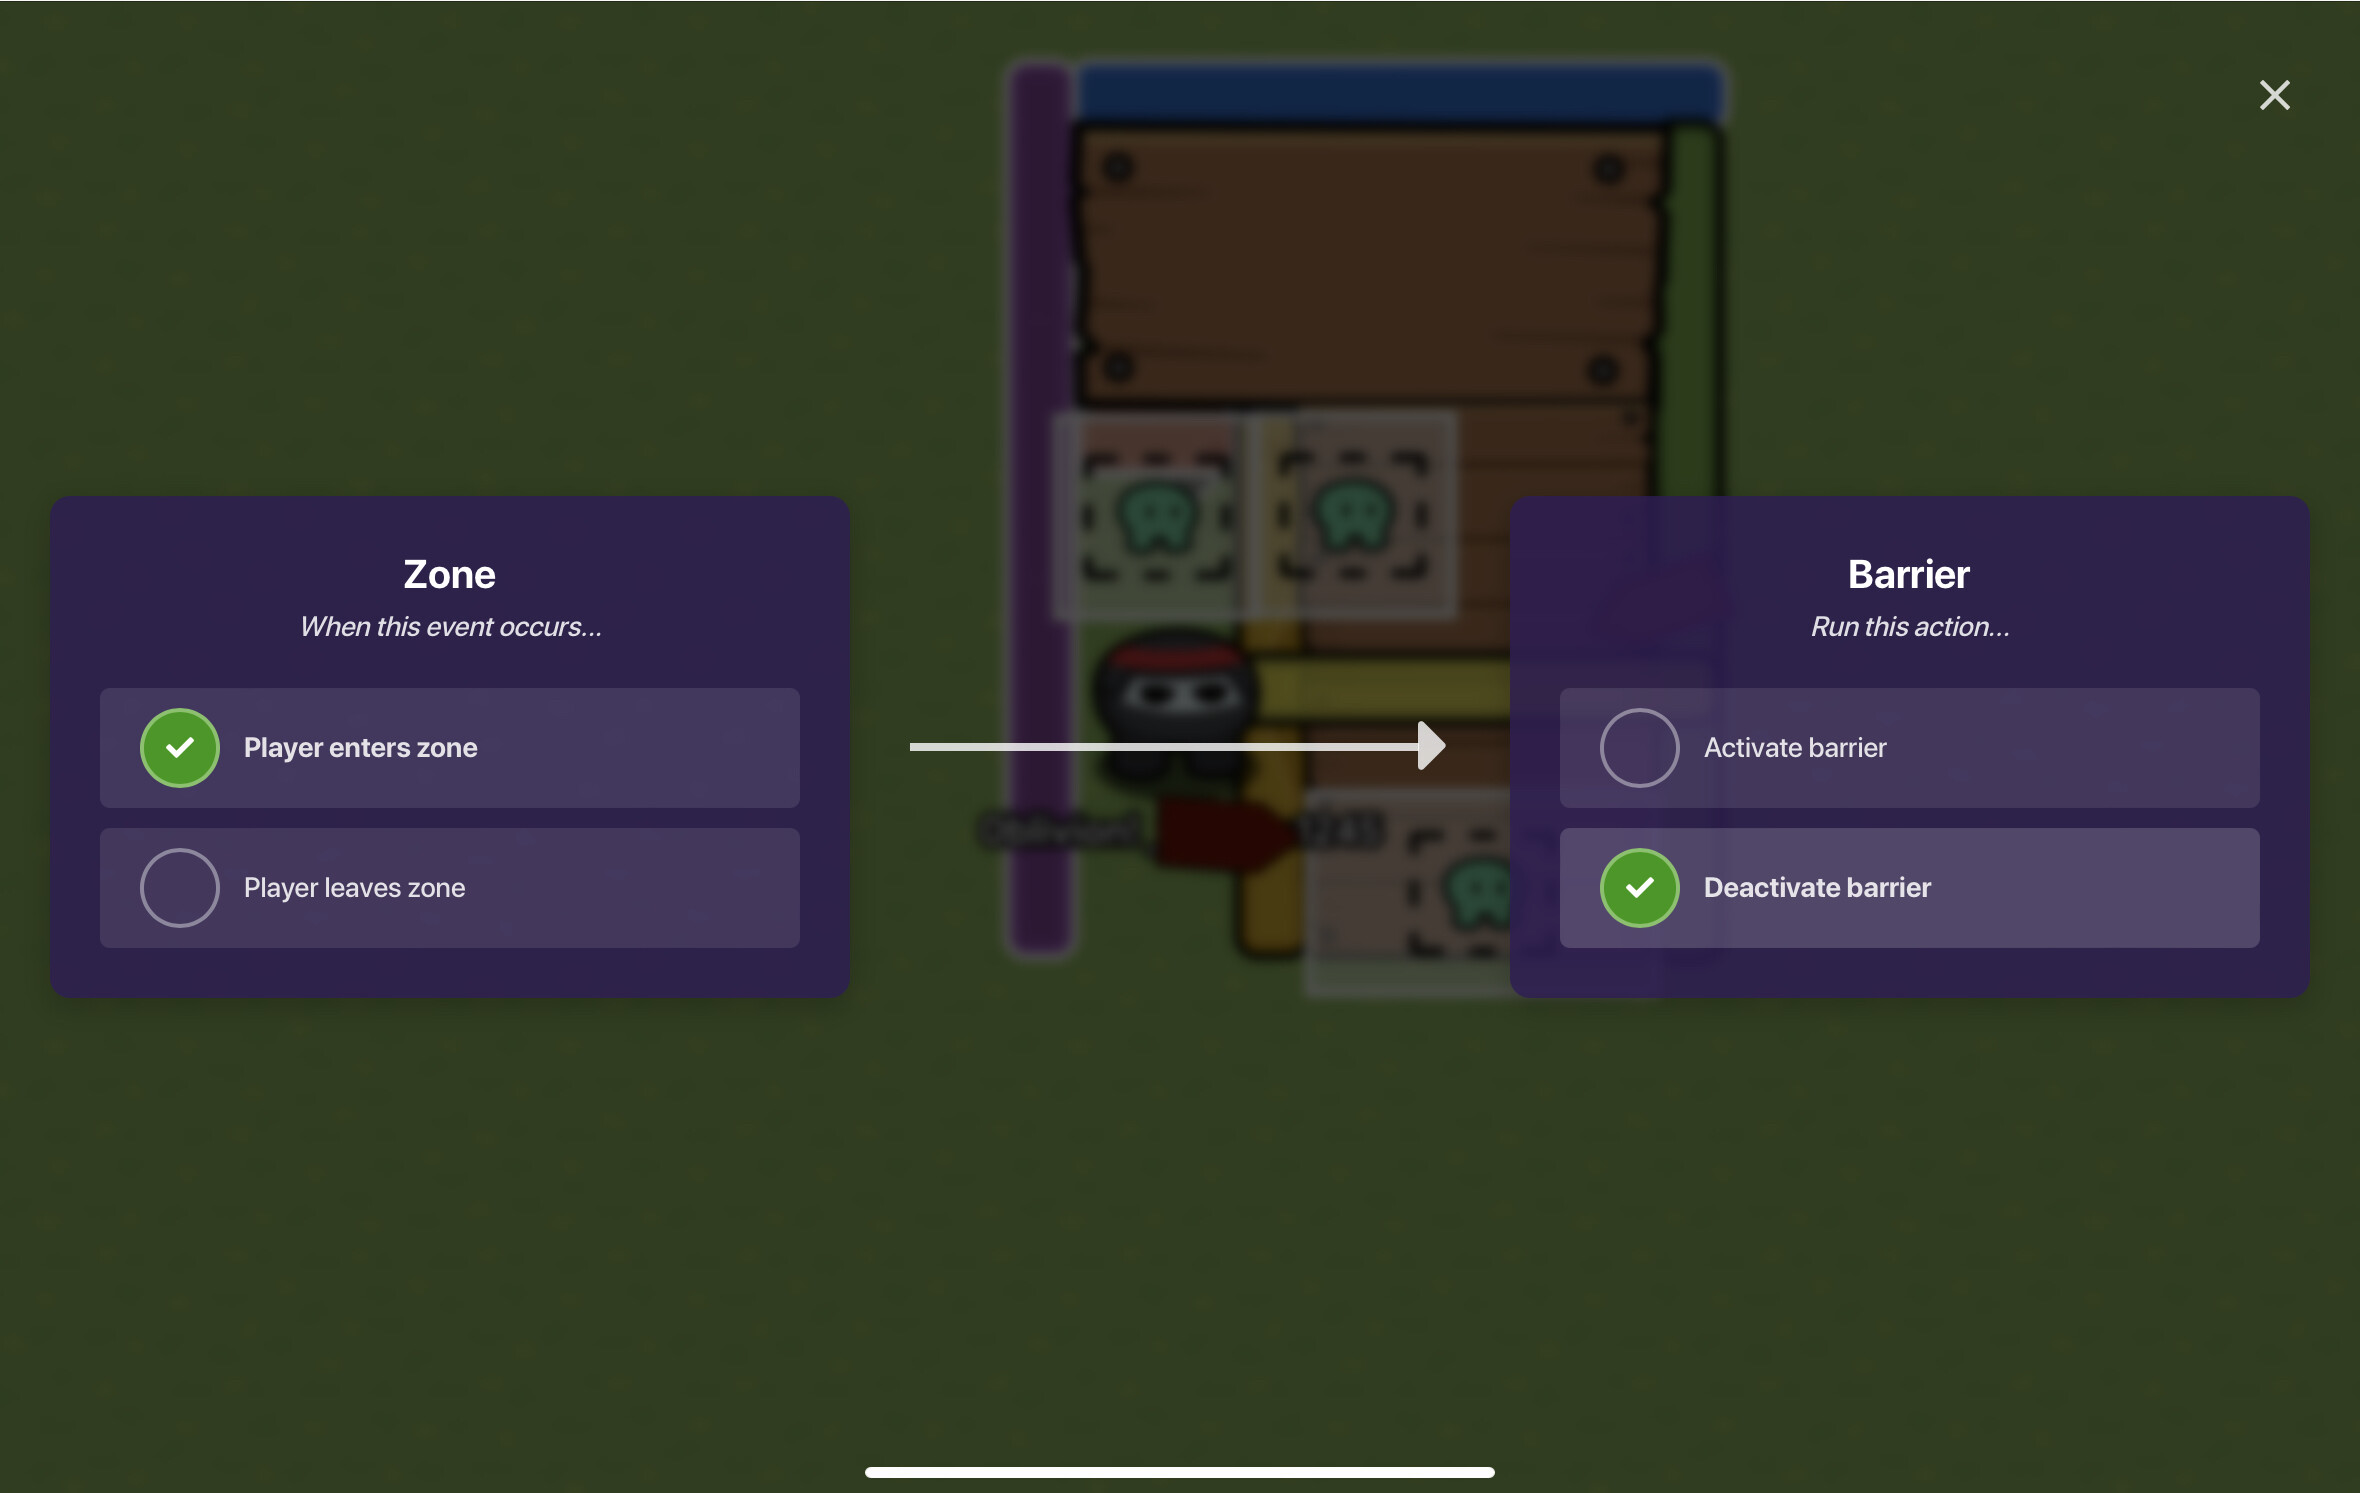
Connect another wire between the red arrow zone to the yellow barrier saying:
Player enters zone—————Deactivate barrier.
10.
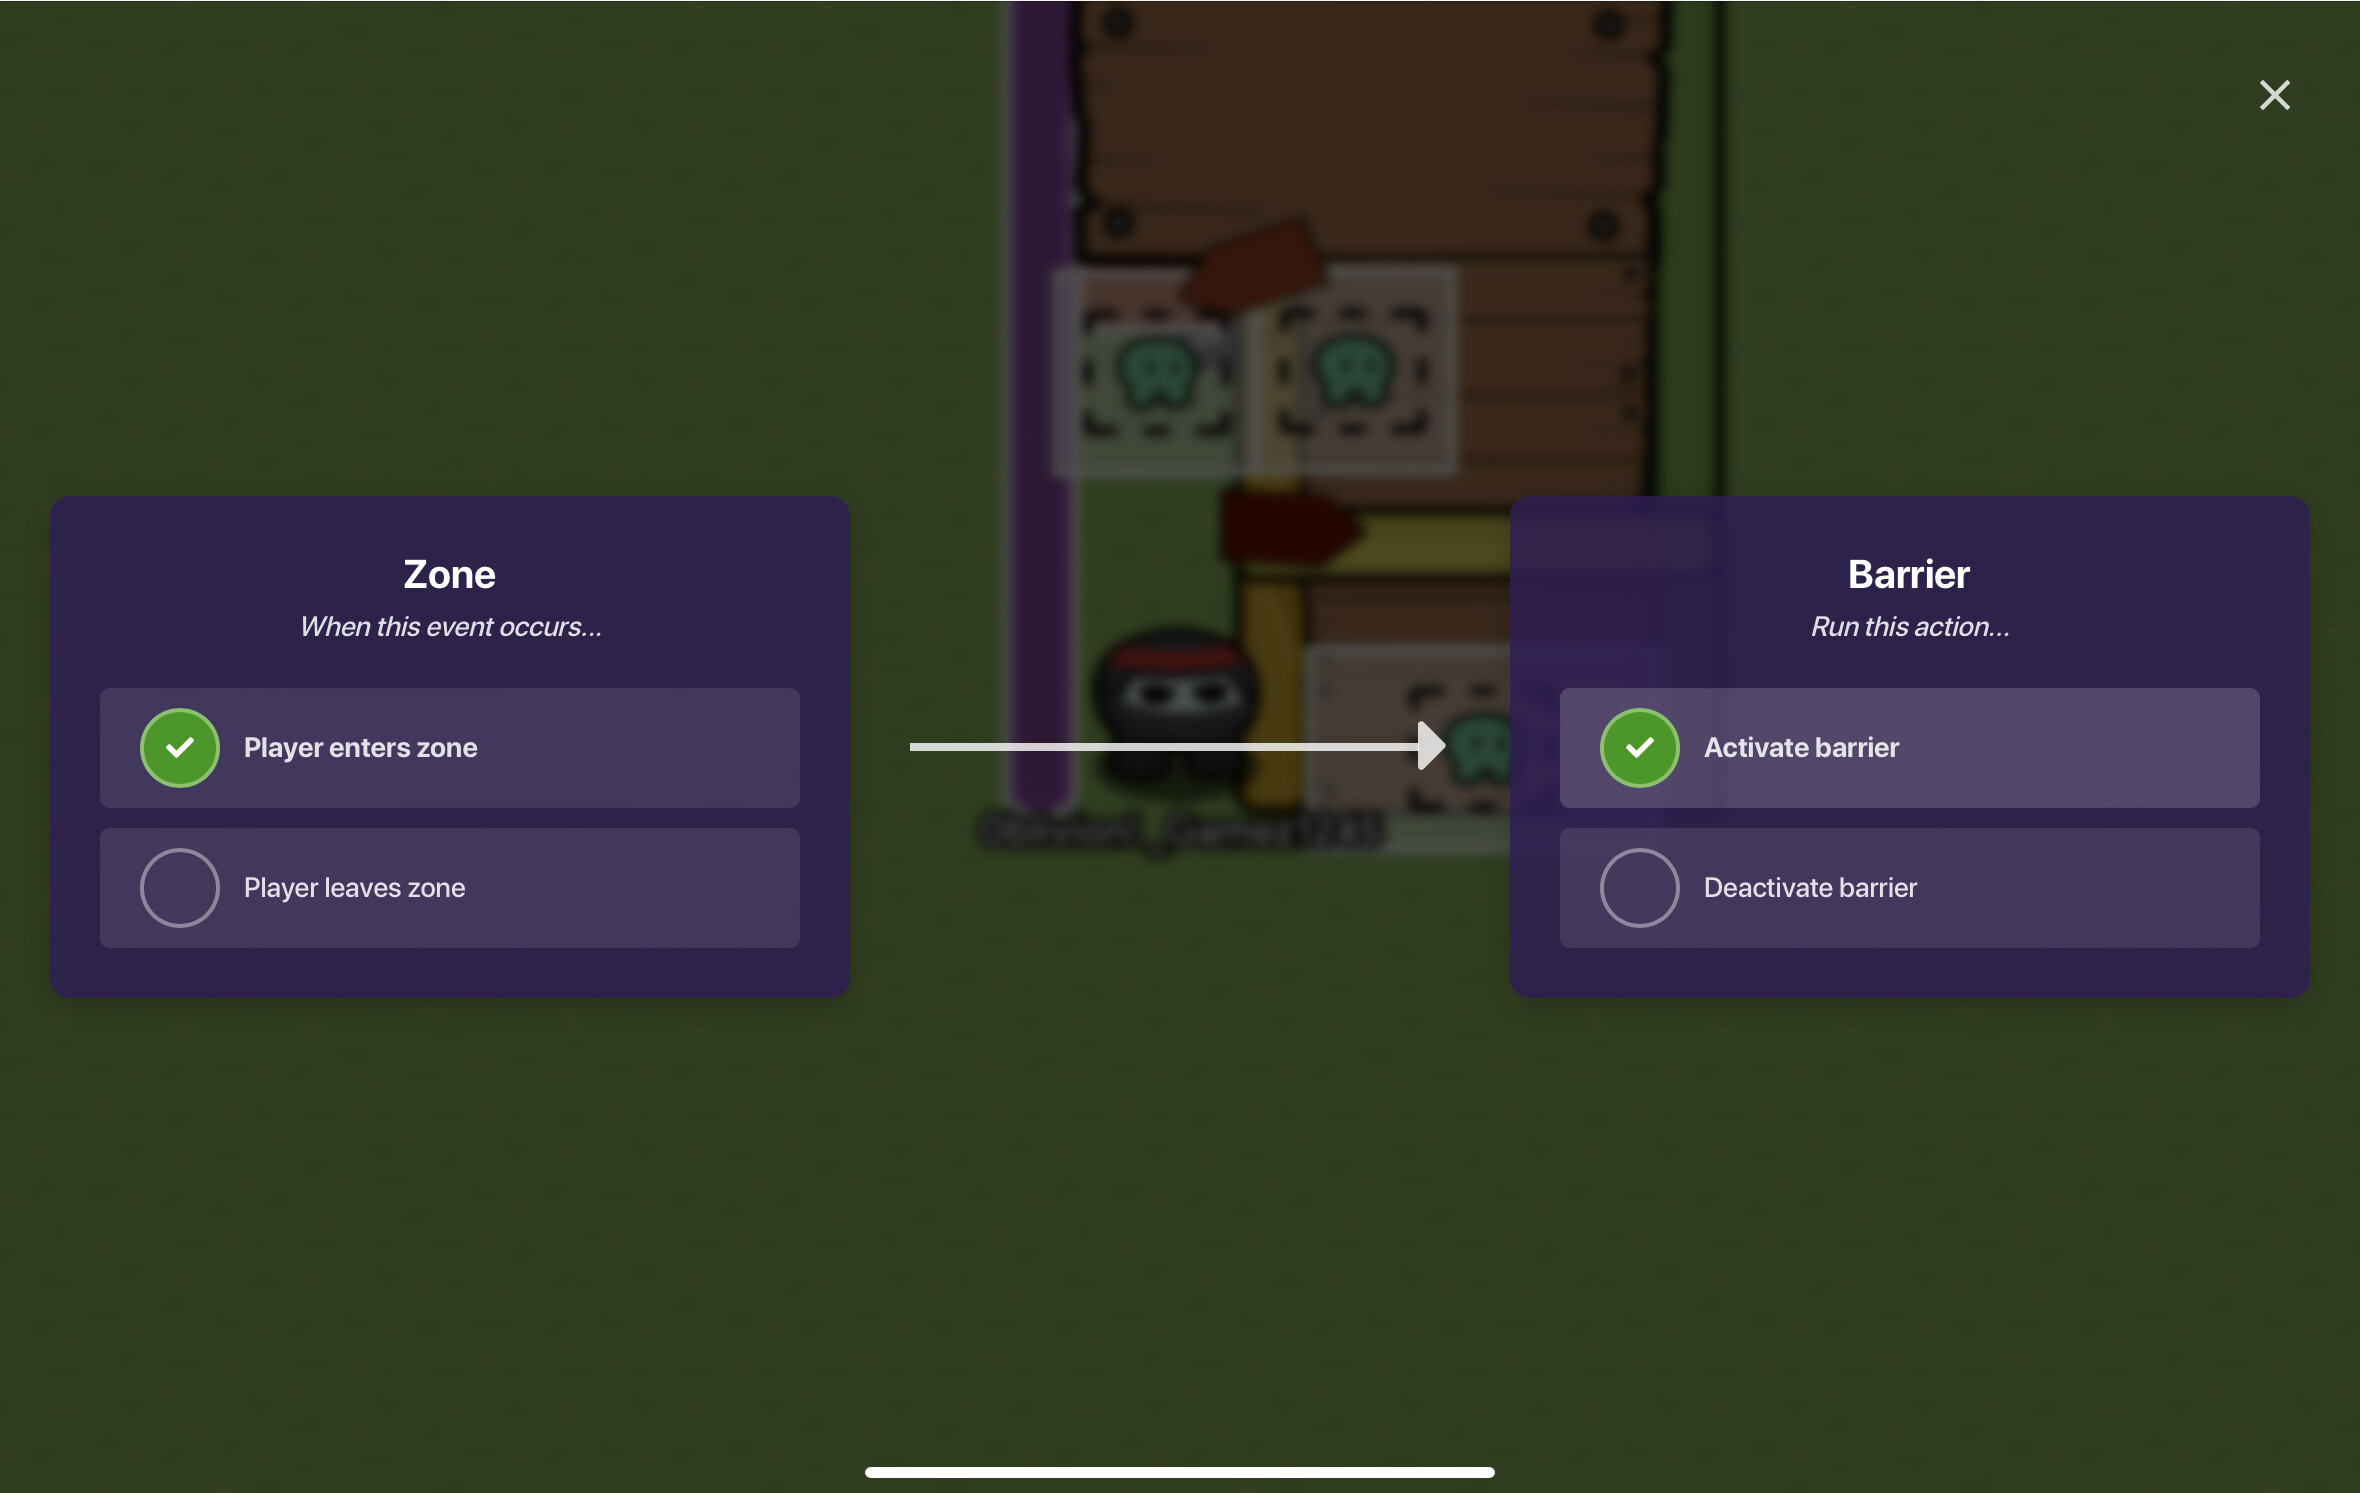
Connect another wire between the zone with the orange arrow and the yellow barrier saying:
Player enters zone—————Activate barrier.
11.
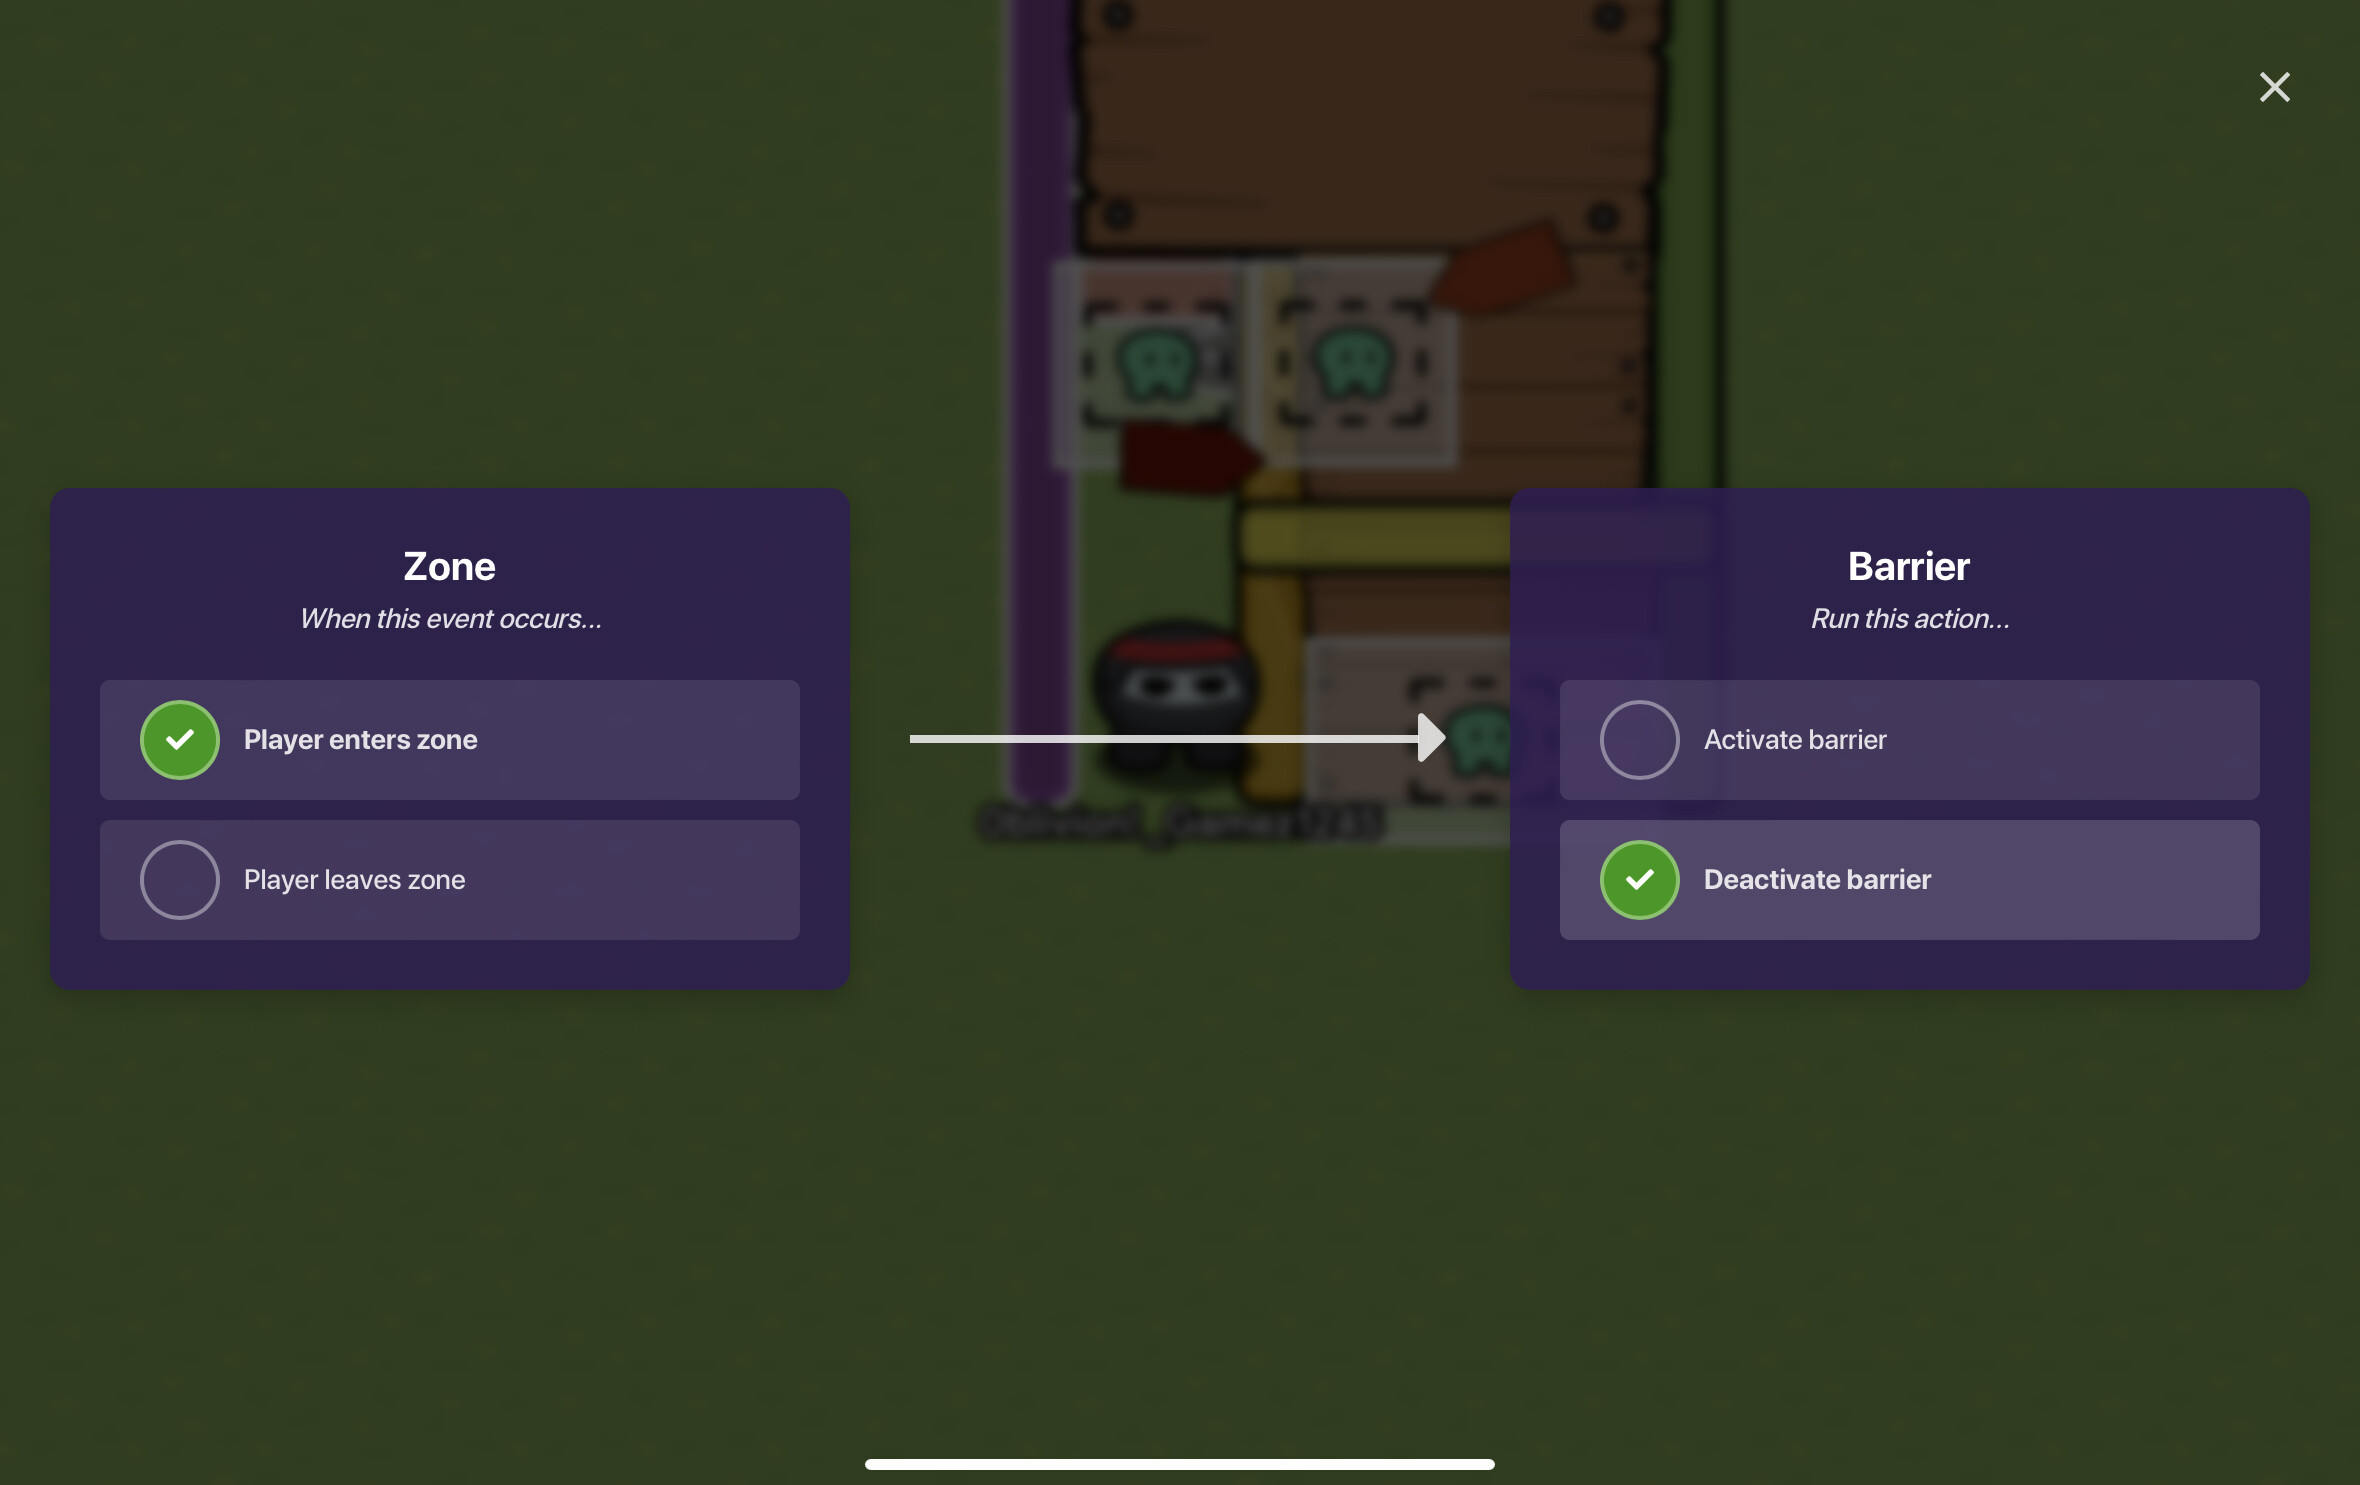
Connect one last wire between the zone that the orange arrow is pointing to and the orange barrier saying:
Player enters zone—————Deactivate barrier.
TIP:
You want the zone to be just past the orange barrier so that it can trigger!
Be flexible with this, you cold make a 10 story castle with this technique, just used in a different way!
But remember, perseverance is key!
CREDITS:
I came up with technique on my own, but I don’t know if others have done this before.