Simular to How to make a Survival Game where you NEED a few things to survive | Difficulty 4/10 by Blizzy. Have you ever wondered how to make a hunger system in your game? Well, this tutorial will show how to do that.
Why do it?
It will add more challenge to your game to get food and consume it to survive. Perfect for Survival Games.
Step One: Making the Hunger Level
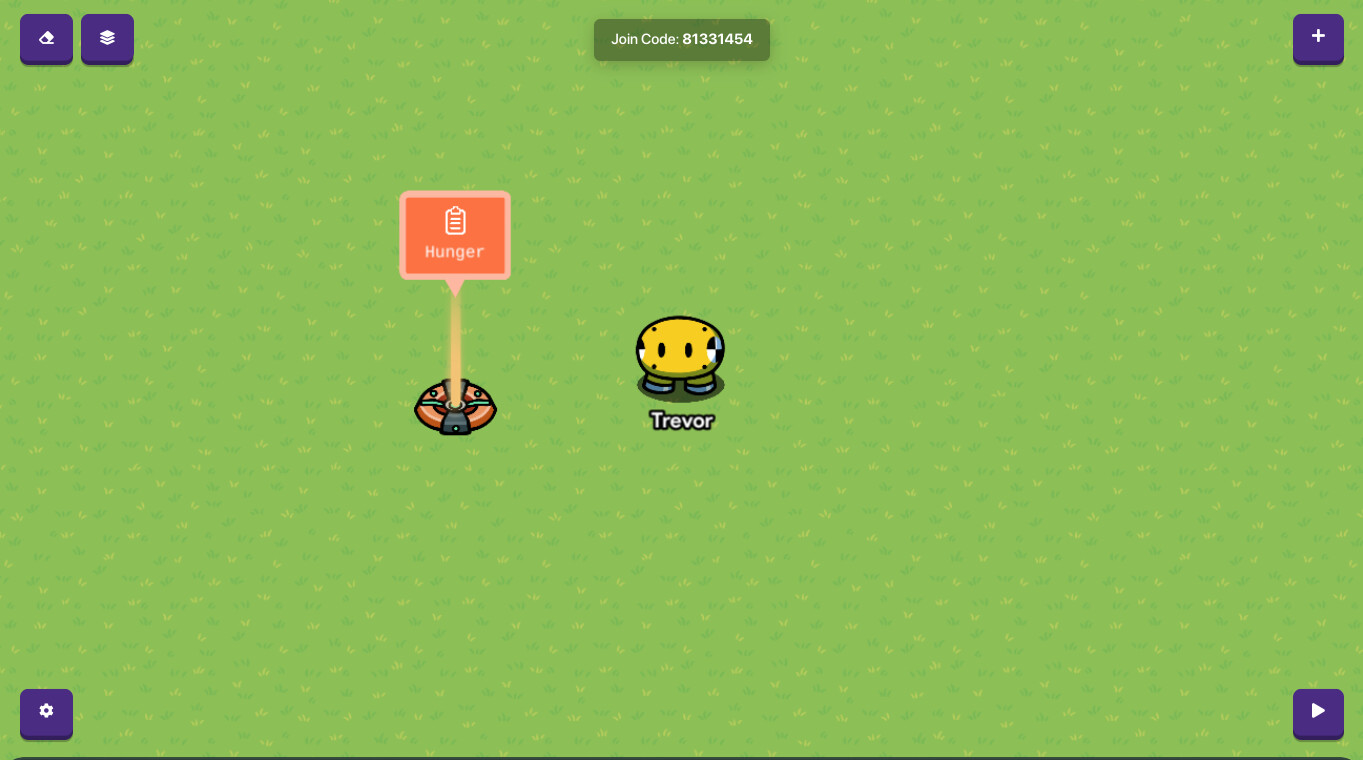
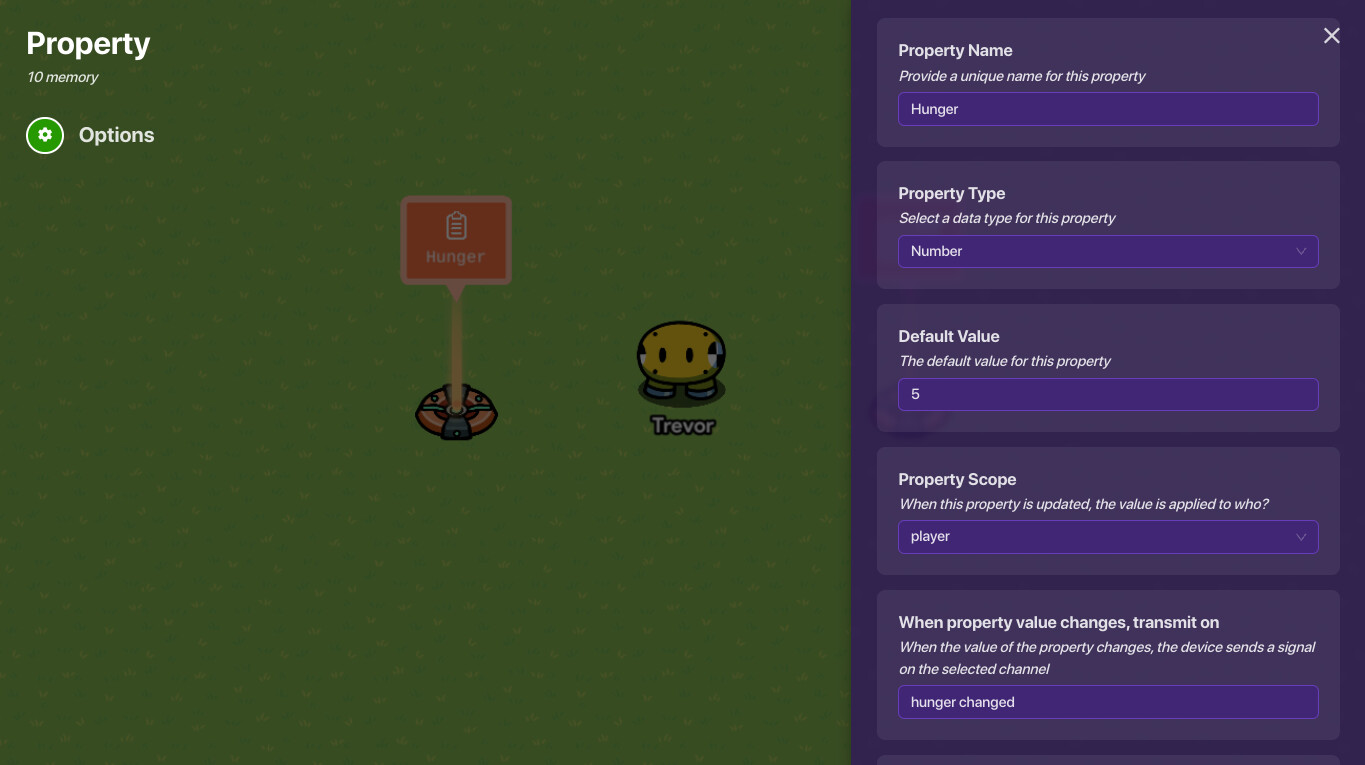
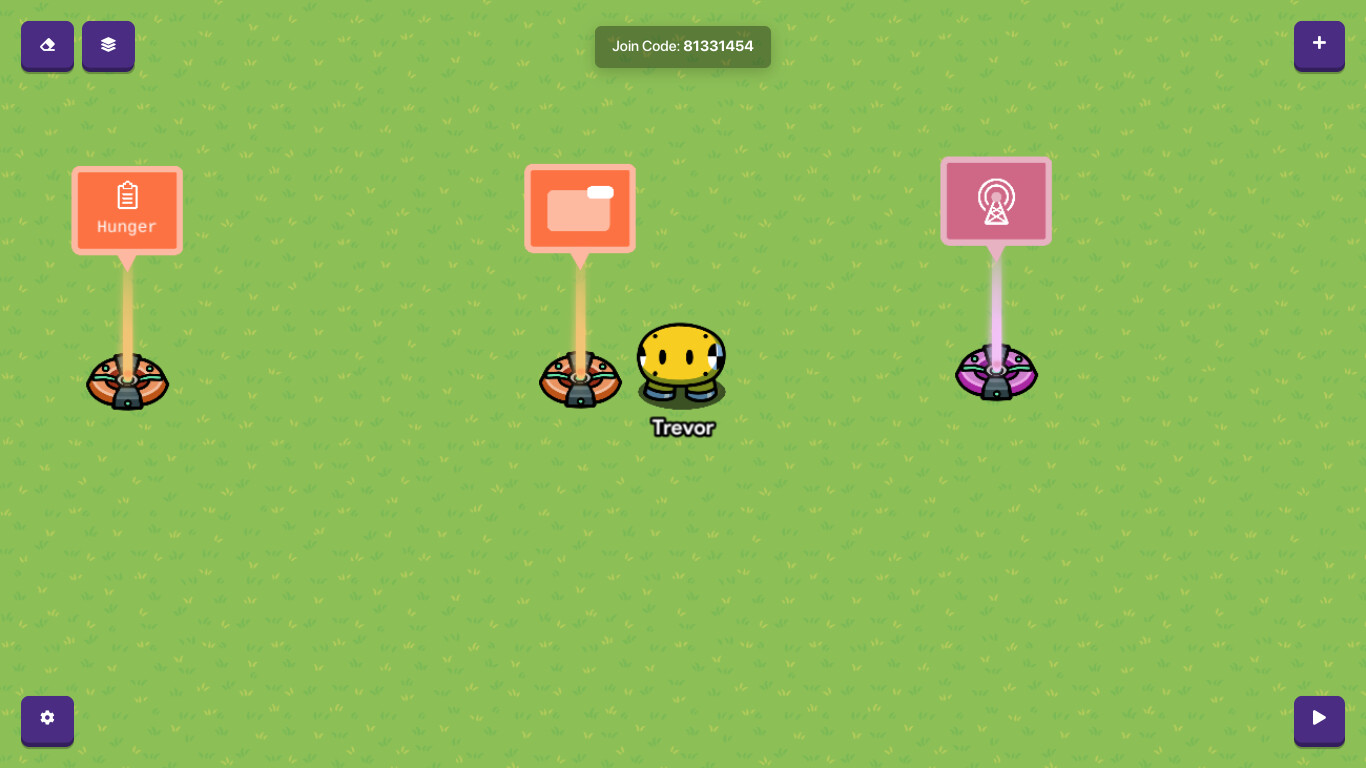
You will First want to place a property device:
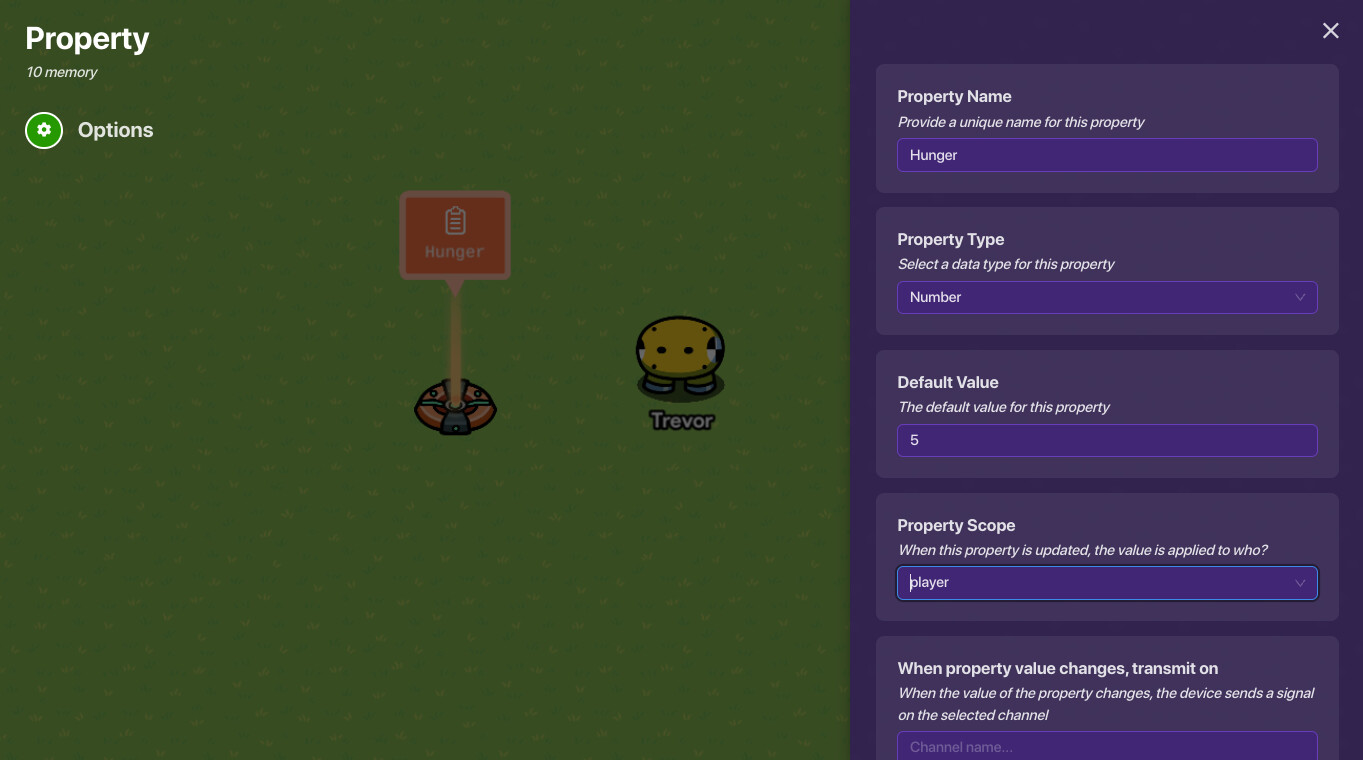
Then the settings. First, for simplicity, name it “Hunger”, “Hunger Level”, or somewhere along the lines. Set the property type to “Number”, then set “Initial Value” to the max hunger level. Then set “Property Scope” to “player”.
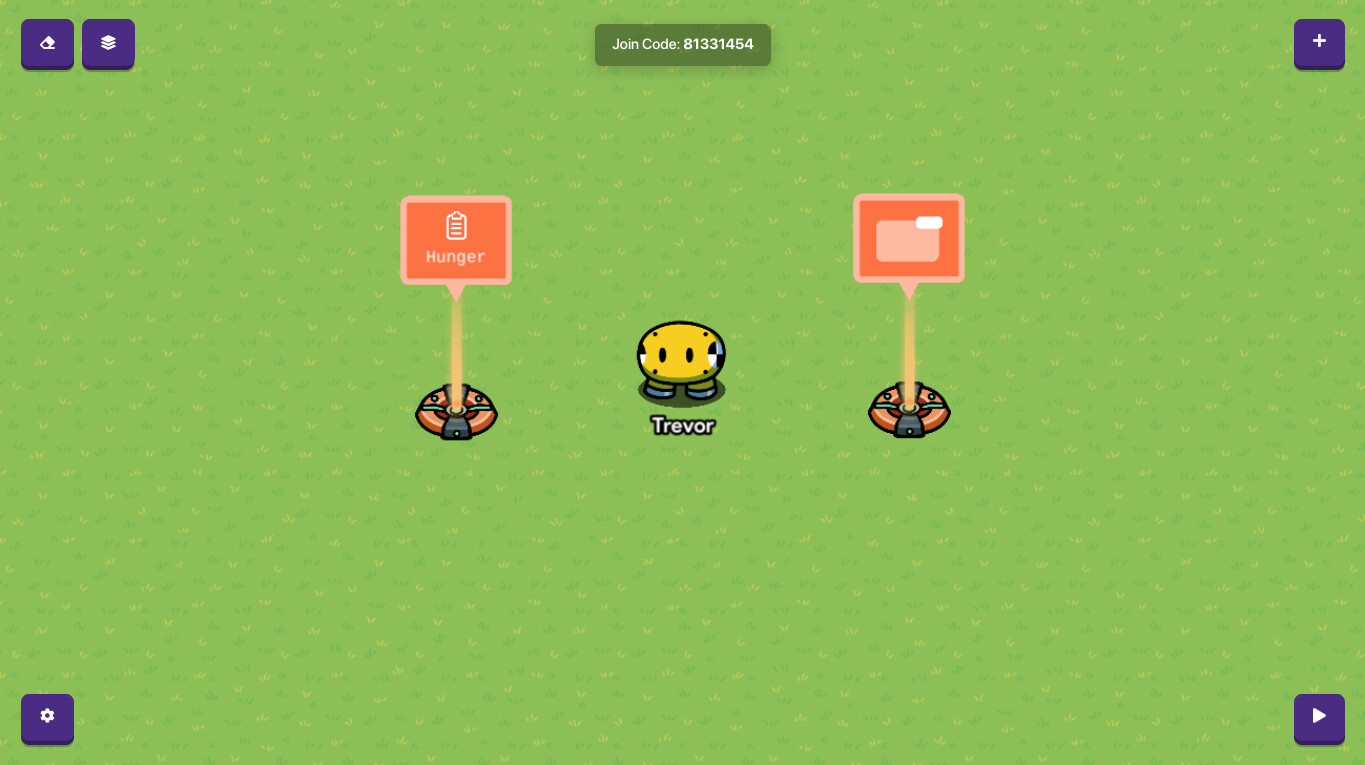
Now, we want a way to show the hunger level. We’ll use a Game Overlay for this.
Before we continue, I forgot to tell you that you need to broadcast a channel when the property changes. Go to the property’s settings, then type something like “hunger changed”, “hunger gained/loss” or somewhere along these lines.
Now, go to the Game Overlay’s settings. Then keep “Overlay Type” to “Text,” and set “Overlay Position” to where you want to display the hunger.
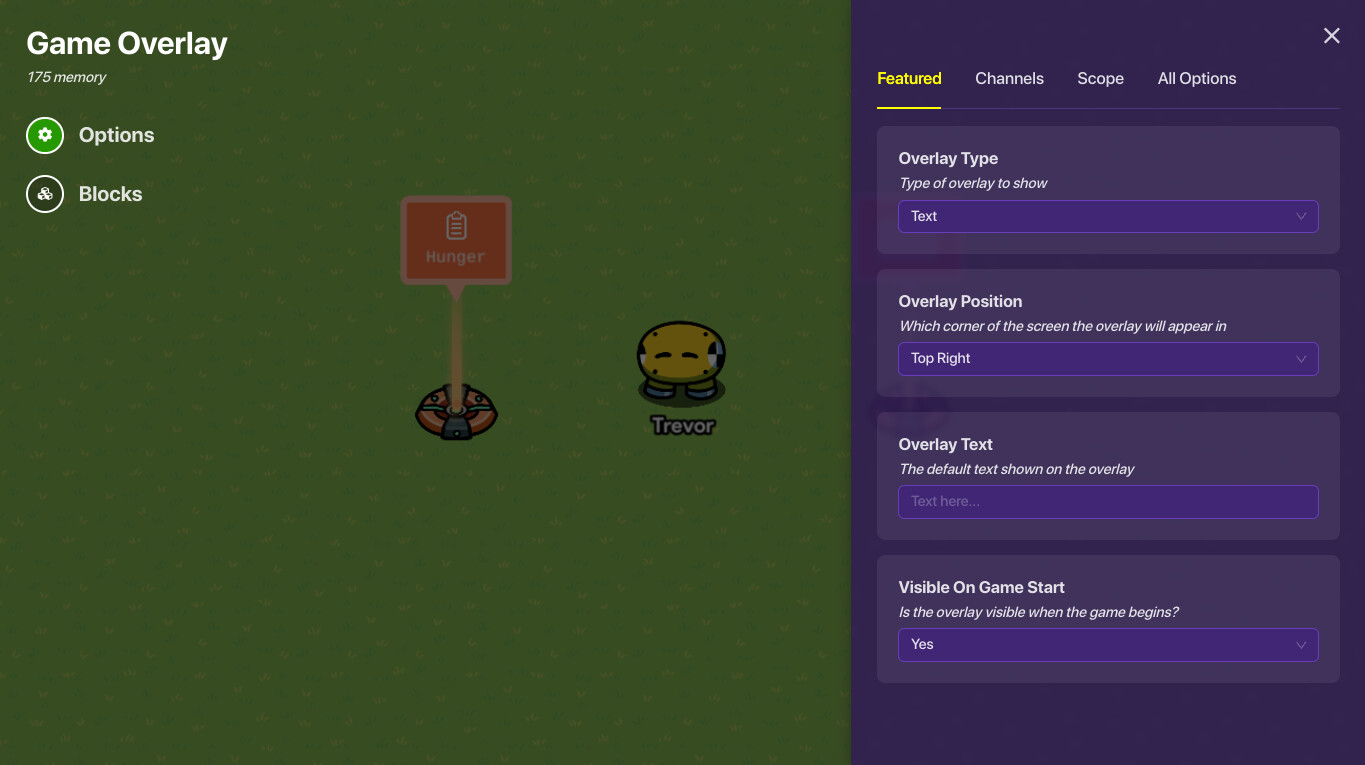
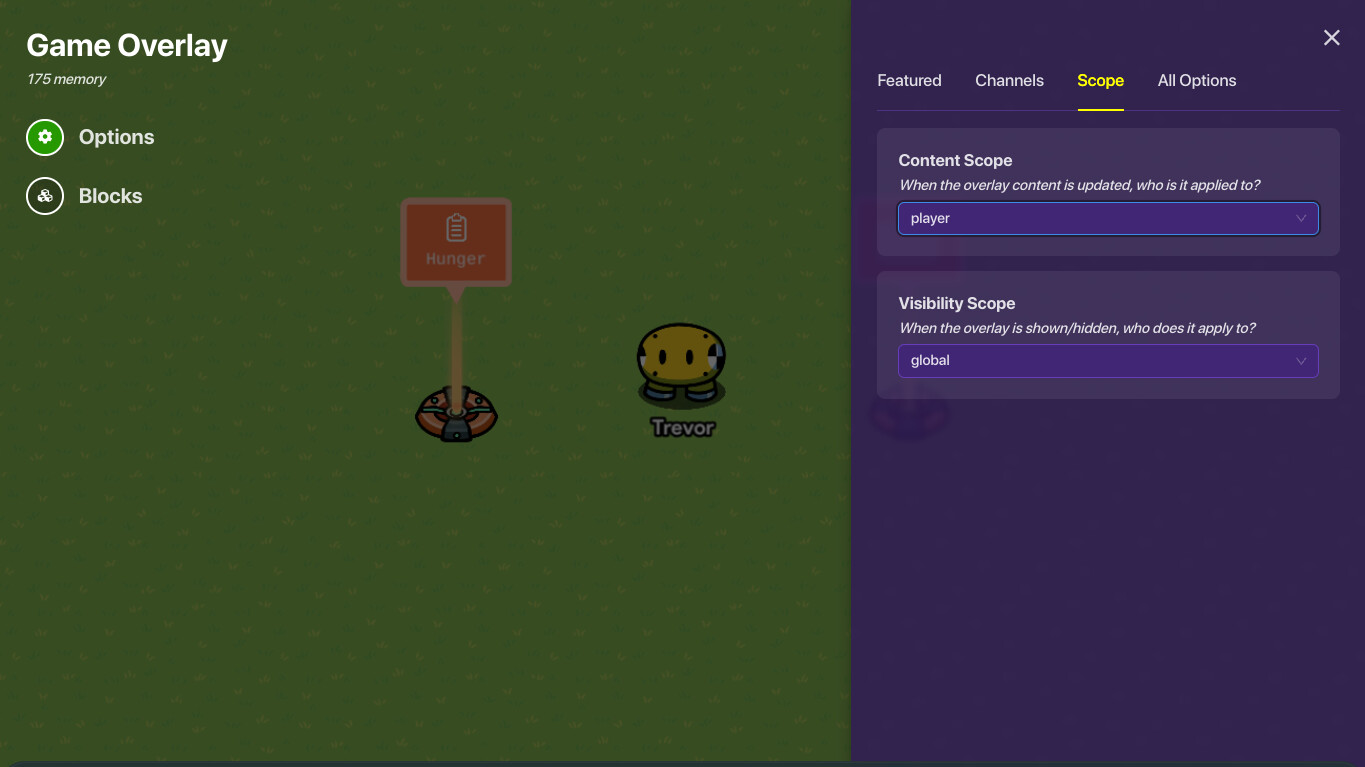
Then, go to the “Scope” category, then set “Content Scope” to, again, “player.”
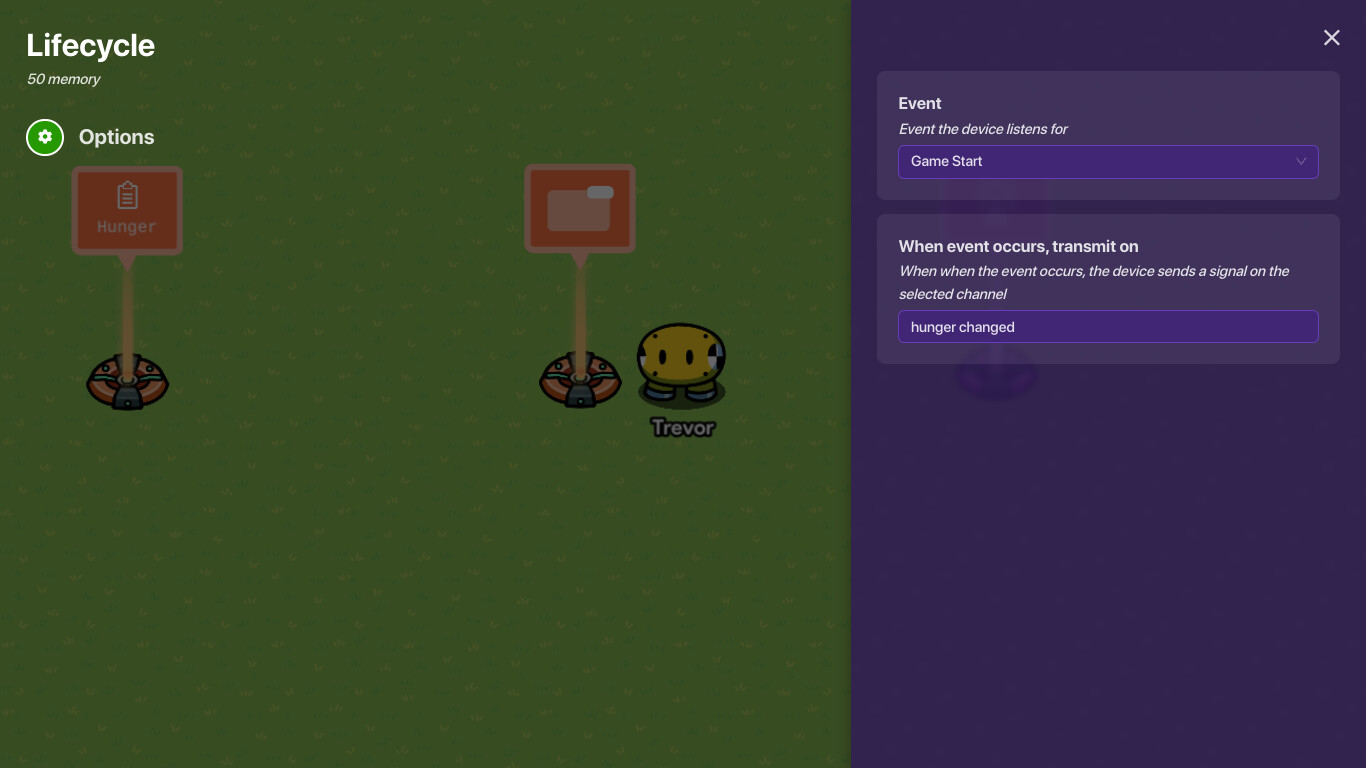
We are done with the relay for now. Now, let’s add a Lifecycle device.
Now, go to the Lifecycle Settings. Then just set “When event occurs, transmit on” to the channel you just created earlier.
Then, go to the Game Overlay’s settings again. Then select “Blocks.”
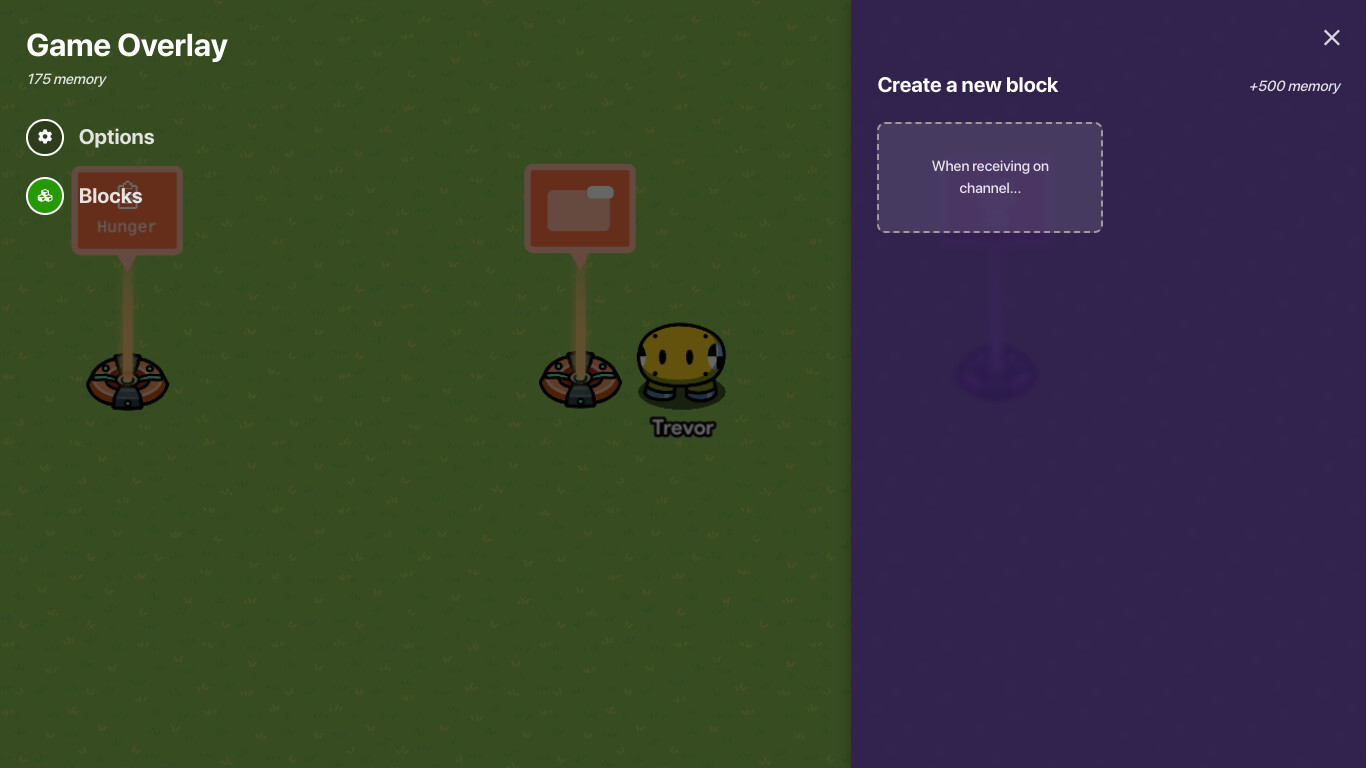
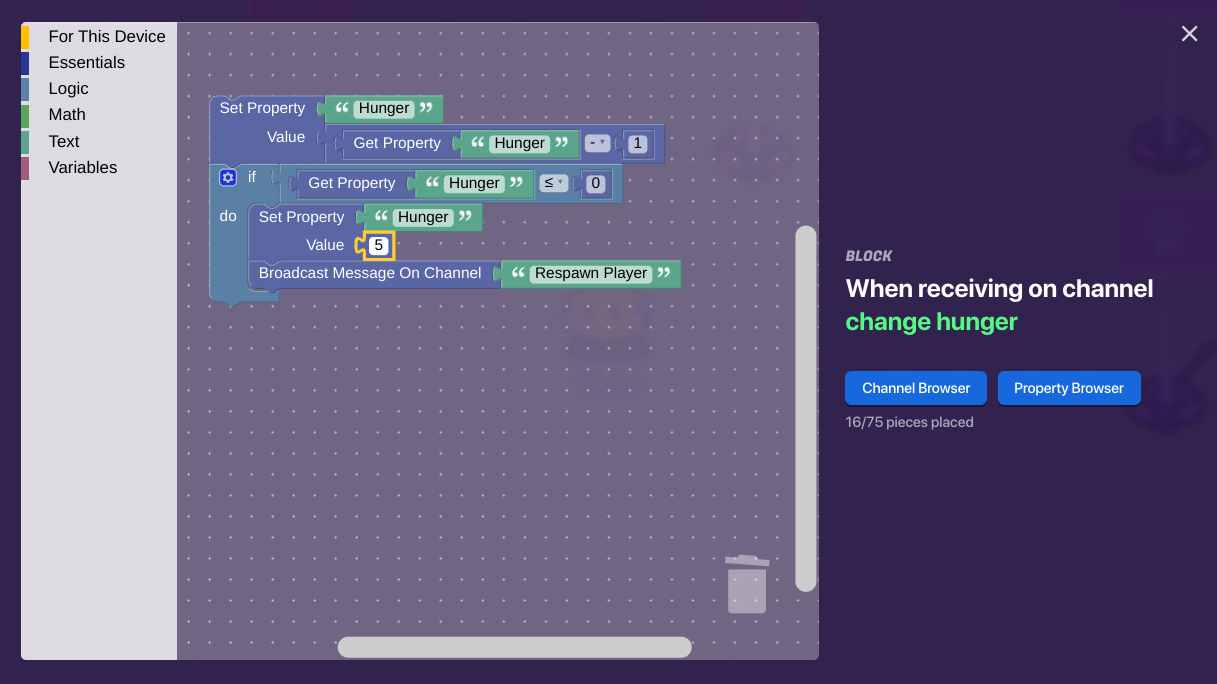
Then, click “When receiving on channel.” Then you could just click the text box, then click what you typed earlier.
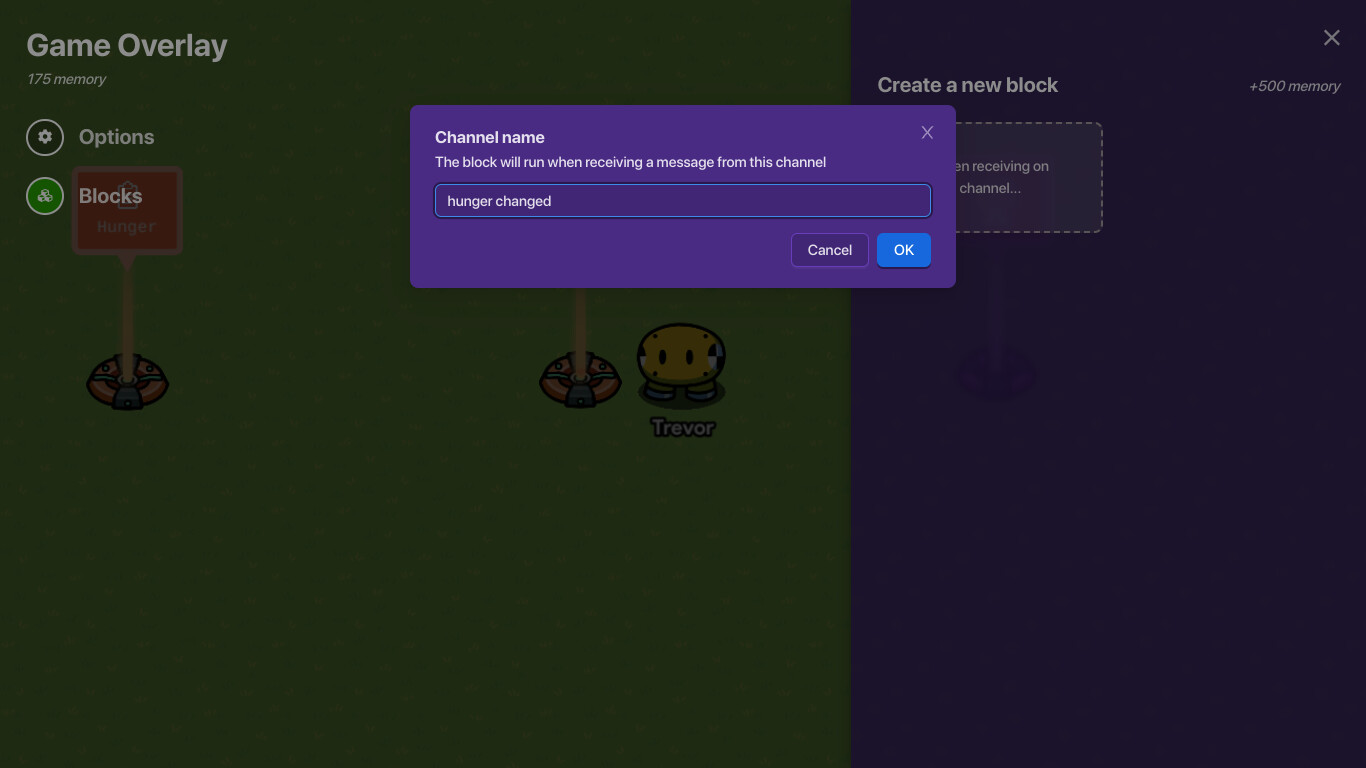
Then, click OK. You should get to somewhere where it looks somethink like this:

Now copy this (for the number, if your max hunger is not 5, the replace it with your max health):
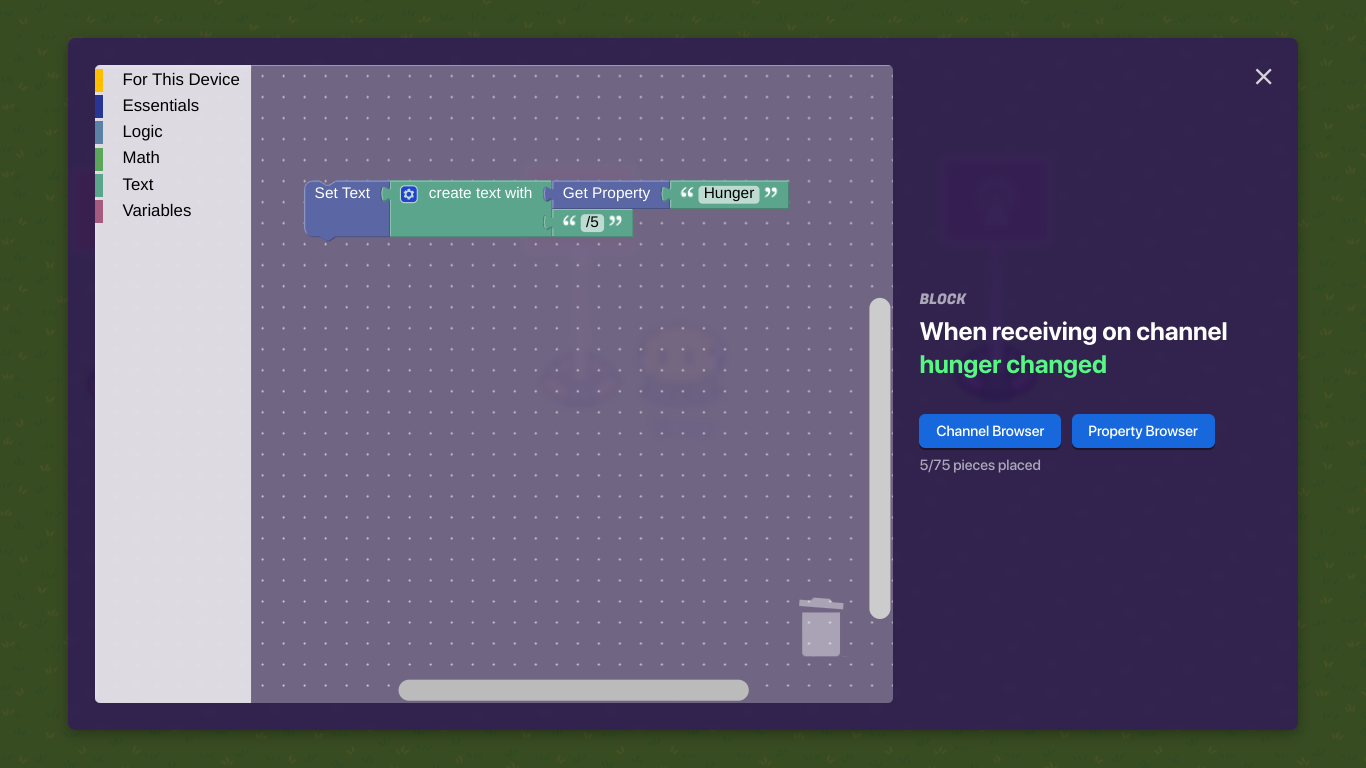
Now, click the small X, then you are done with Step 1!
Step Two: Decreasing the Hunger
To start, just add another Lifecycle.

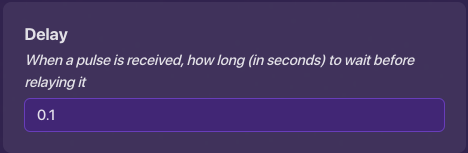
Then, add a Wire Repeater. Then go to it’s settings, then set “Delay” to how long you have to wait to get your hunger decrease.

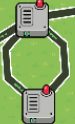
Now, add another Wire Repeater, but don’t change the settings.
Now, add a wire from the Lifecycle you most recently placed the the first Wire Repeater you placed.

Then, check “Event occurs.”

Then, click the little X.
Now wire the first Wire Repeater to the most recent, than Vice Verca! It should look something like this:

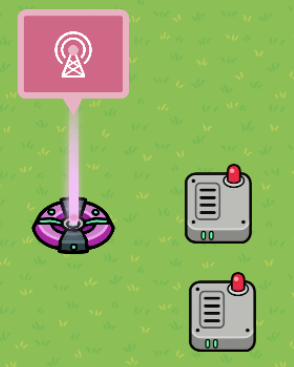
You will now want to add a Vending Machine. In settings, choose a random item for “Required Item.” Then, set "Required Item Amount to 0. And for “When item purchased, transmit on,” type a new thing like “hunger loss,” “change hunger,” or somewhere along these lines.
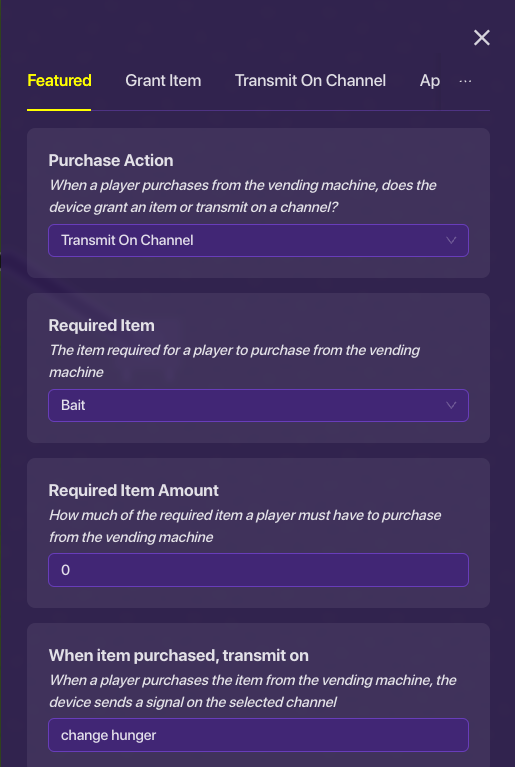
Now go to Appearance to change these settings. Set “Visible in Game” to “No.” Then set “Sound Enabled” to “No”
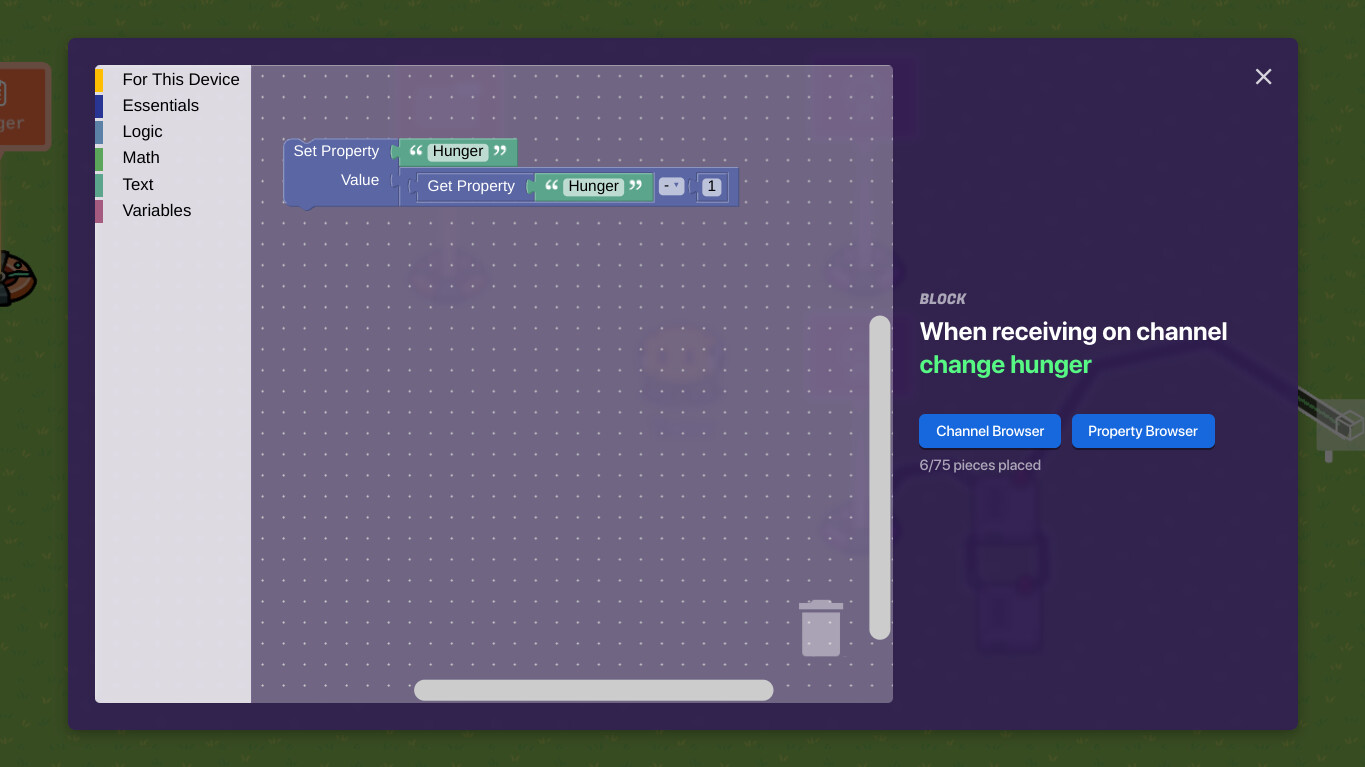
Now, go to the Game Overlay to make a new script. By doing the same steps to get to the coding screen in Step 1. The only difference is that it has to be the most recent channel. Now copy this:
Now you are done with Step 2!
[details = “Step 3: Re-spawning the Player when hunger is 0”]
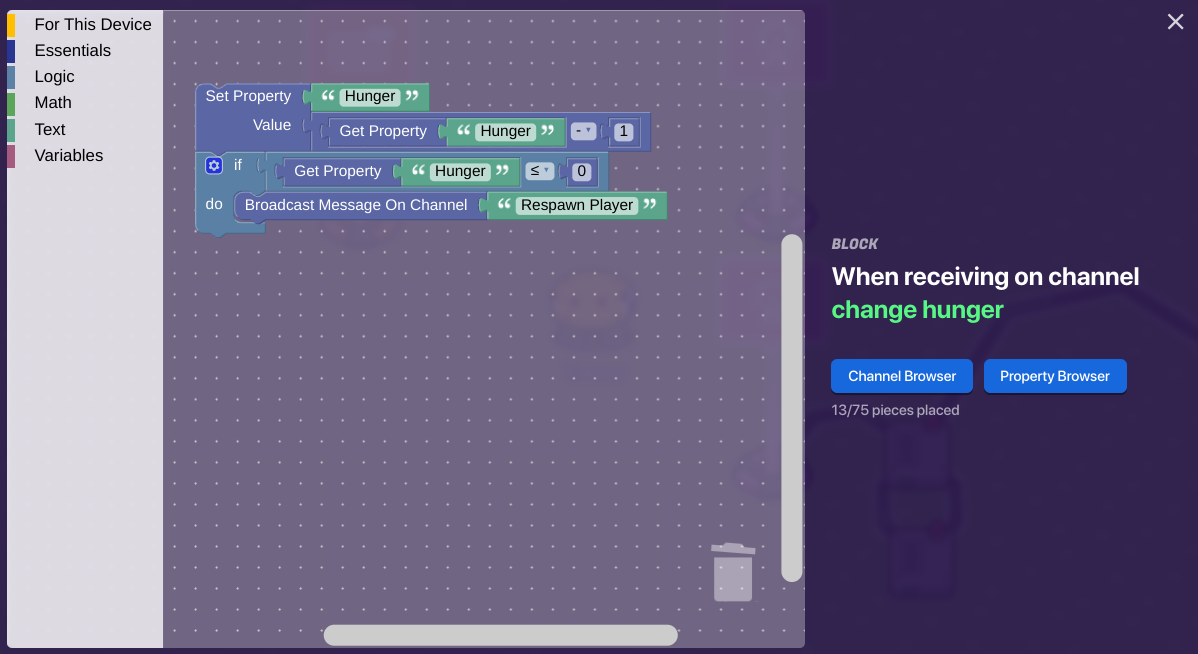
You may notice that your hunger level could be less than 0! This will fix that problem. Go to your most recent script. Then revise it to this:
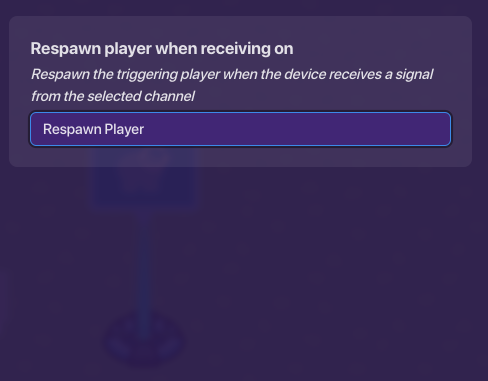
Now, add a Respawn Device. And set “Respawn player when receiving on” to the most recent channel you made (not the one to decrease the hunger)
Ah, as you see, when you re-spawn, you keep hunger 0. revise the most recent script to this:
(For this script, if your max hunger isn’t 5, change the number it sets your property to your max hunger. to your max hunger.) And Hay Presto! You’re done with Step 3!
[/details]
[details = “Step 4: Food”]
To add food, you first need to add an Item Spawner. Then, set “Item” to any food you want. Then, Create a new Wire Repeater with a delay of 0.1 seconds.
Then add another one, but don’t change the settings. Then create this setup:
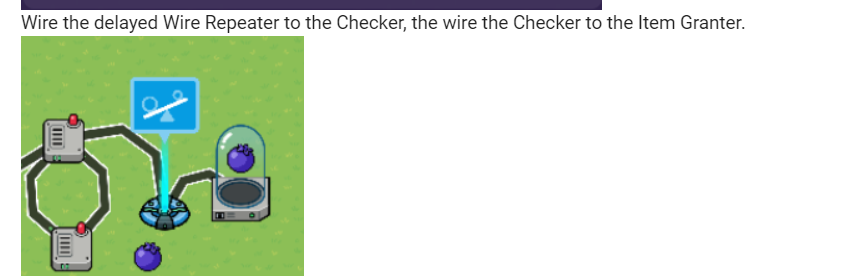
Add a Checker, then check if the player has collected the food.
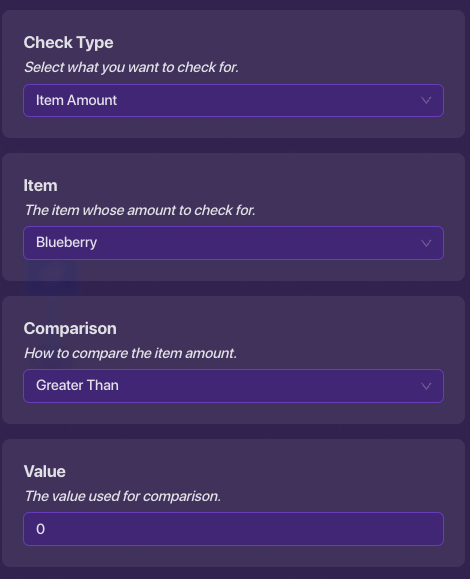
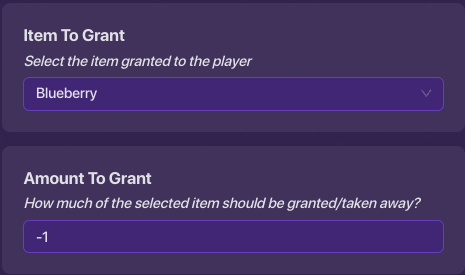
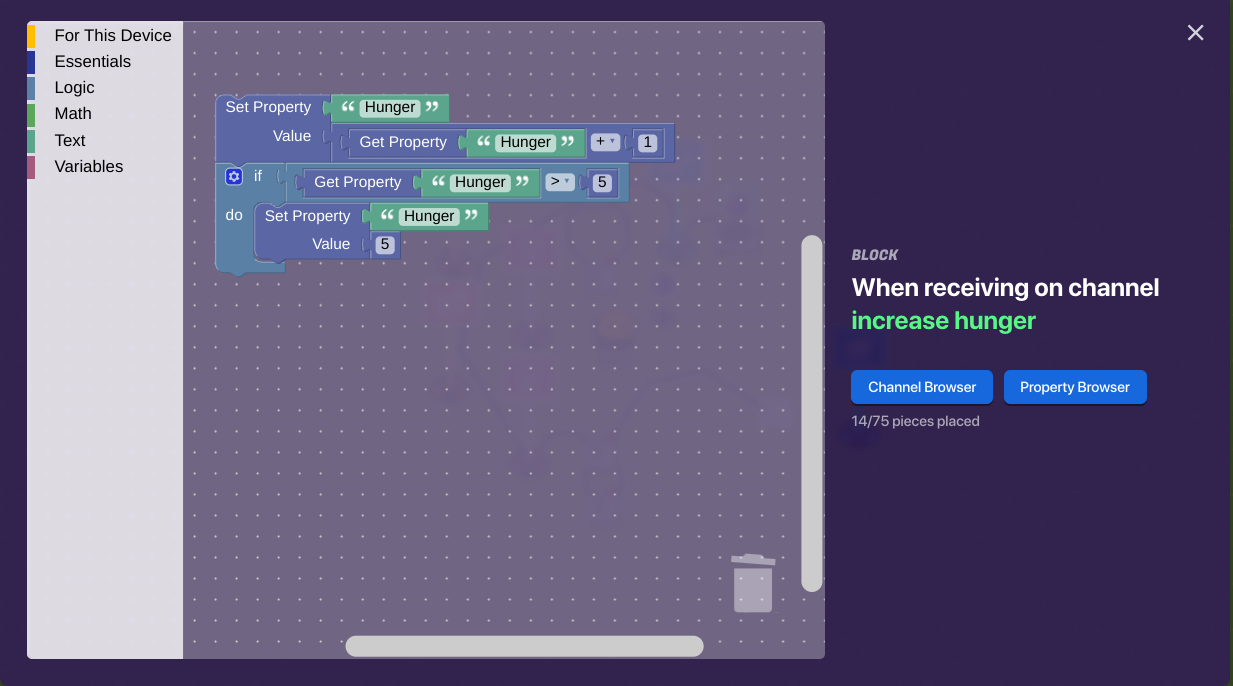
Now, in the “When check passes” area, type another phrase like “hunger increase” or somewhere along those lines. Then, add an Item Granter. Set the granted item to the food, and set the “Item Amount” to -1.
Wire the delayed Wire Repeater to the Checker, the wire the Checker to the Item Granter.
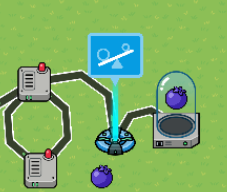
Then wire the most recent Lifecycle to the delayed Wire Repeater. Now, create a script with your most recent channel triggering it, then copy this (if your max hunger is not 5, then set all numbers in the code except for the one number that says, “1”):
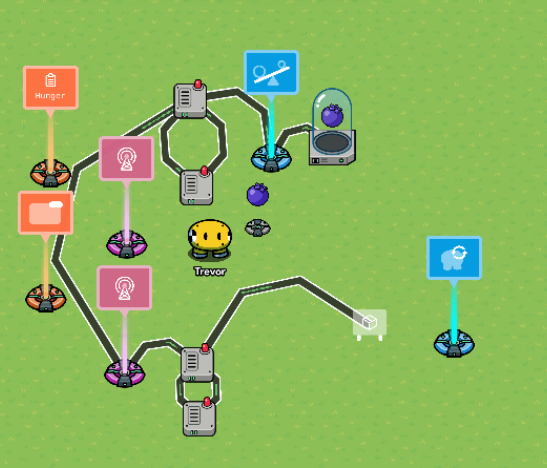
Final Product:
[/details]
Was this useful?
- Yes
- No
0
voters
Difficulty
- 0/5 or

- 1/5 or

- 2/5 or

- 3/5 or

- 4/5 or

- 5/5 or

- 6/5 or
 /
/
0
voters