Welcome to The Second Edition of The Dungeon Crawler Guide
(Part 2)
A while back I made The Ultimate Dungeon Crawler Guide based on my gimkit creative game, Gim Dungeon. A few months later I started work on another game Gim Dungeon: Immersion, another dungeon crawler designed to be a lot better than the first. This is the legendary guidebook for it…
Warning: This guide is much harder than the old one, this is meant to be for skilled members of the gimkit community, I’ll still try to make it as simple as possible, however this goes much more in depth and adds significant additions that might be confusing for some.
Note: Some parts of this guide are incomplete or in development, meaning that features of the Legendary Dungeon Crawler Guide will be changed in the future, expanded upon, and made more comprehensive!
Update Log
- Added 2/4 Advanced Guide sections
The Legendary Dungeon Crawler Guide Contains…
(Click the arrow to see the tutorials)
---------[Basics]---------
1. The Menu Screen - (Game Modes, Lobby)
Every game (at least that I make) starts with the most valuable and essential part first: The Title Screen. This screen is what players will see first when they enter the game, so you want to make it feel as grand as possible. If you are unsure what a title screen is, it is basicly a place where players can modify and start the game in order to get the best experience possible. For this Title Screen we will be creating a simple start button, a way to change the difficulty of the game, as well as the lobby for all of the non-host players!
To get started we are going to need to build two rooms, one with enough space for the host to walk around and press a few buttons in order to change how the game works, and the other room for the players to wait for the host to start the game. Here is an example:
⭐- Device Discovered: Spawn Pads
Spawn Pads are a device that is essential for almost every game, allowing you to choose where people start the game at, or even where they respawn when they get knocked out!
⭐- Device Discovered: Triggers
Triggers are one of the most useful devices due to their ability to be stepped on to trigger different events and contain powerful block code!
⭐- Device Discovered: Teleporters
Teleporters allow players to be instantly transported to different parts of the map and can even be used to make some rudimentary vehicles!
⭐- Device Discovered: Buttons
A simple but effective device, the button allows for an easy activation method that players can interact with in game, making some interesting events play out!
⭐- Device Discovered: Text
Text is great for telling players interesting locations and describing their situation!
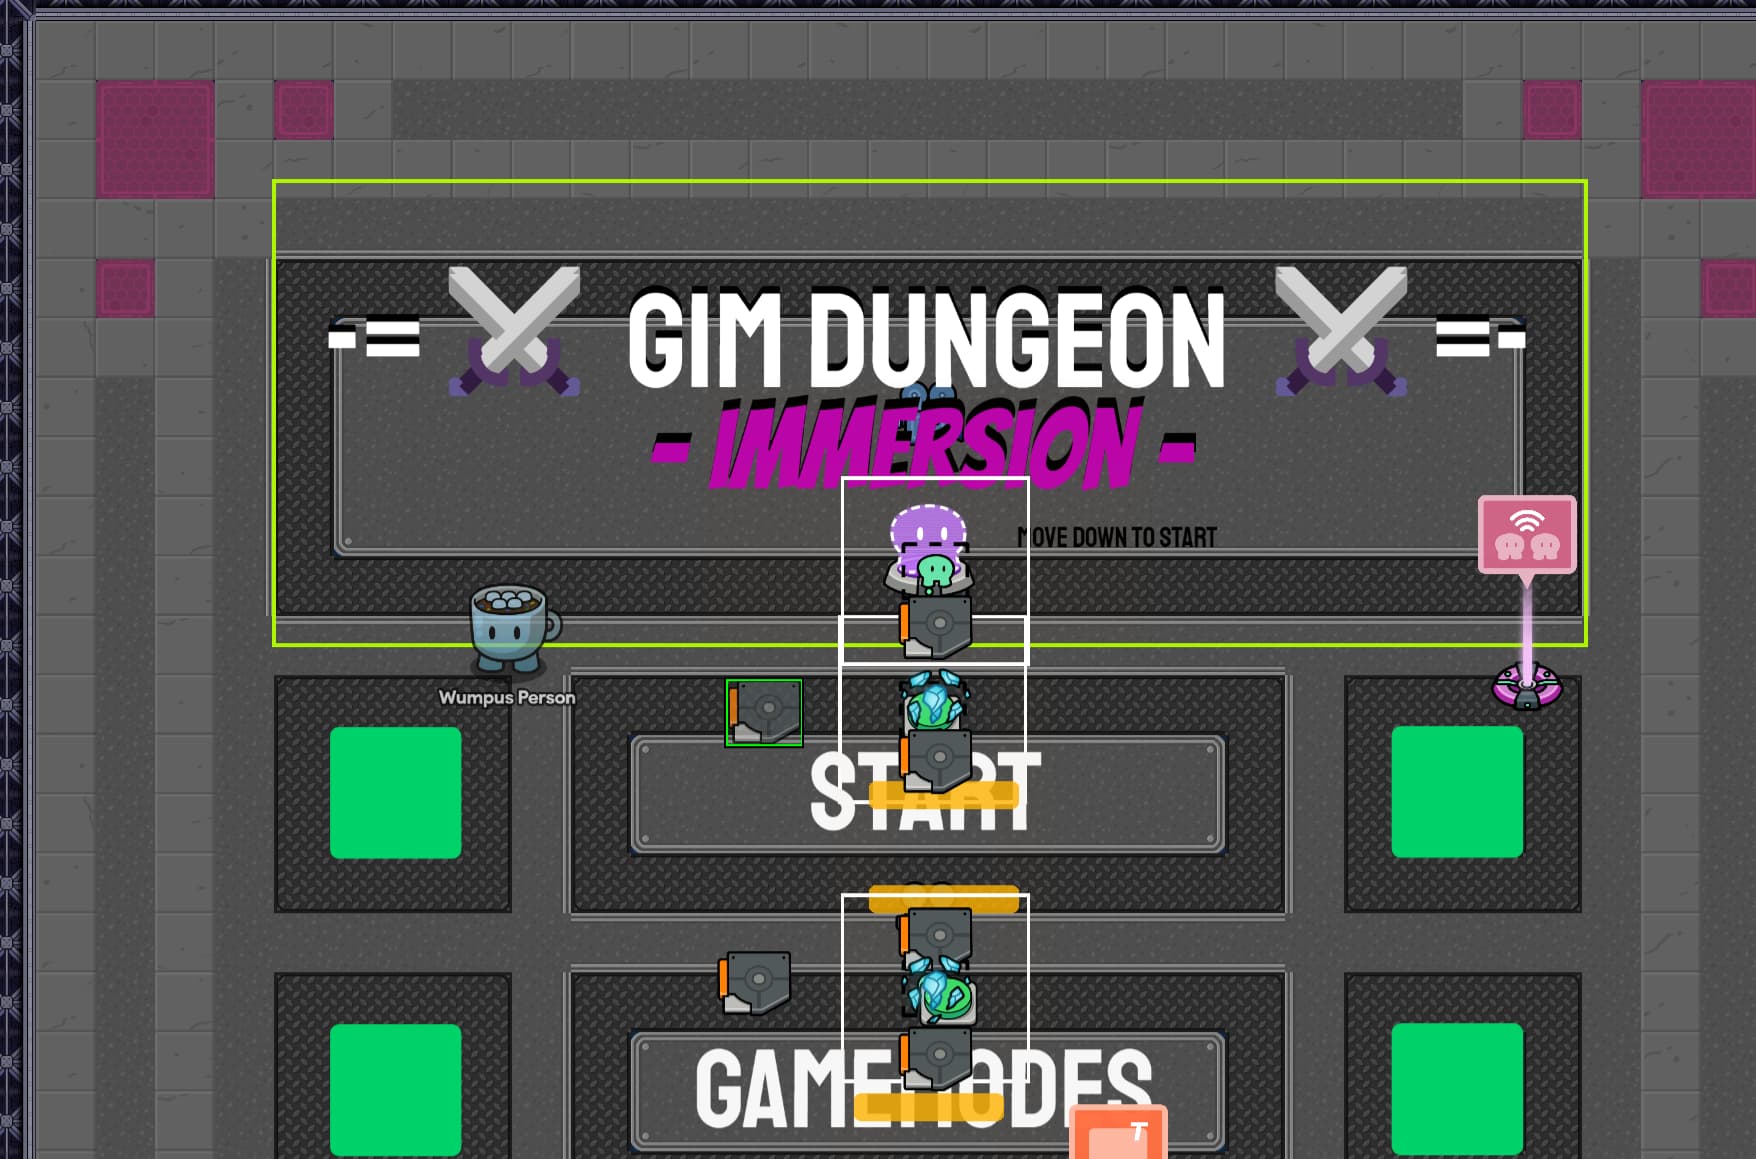
This picture shows the basic menu screen that only the host can see due to the use of a spawn pad, this spawn pad should be set so that only the host spawns and it should bring them there at any phase of the game (pre-game and in-game). This is so that once the game starts, the host can interact with the buttons and choose what gamemode they want and when to start it!
This next picture shows an example of the lobby, where the players are stored until the host starts the game:

This image shows the lobby that the players will spawn in, the room doesn’t need to be anything fancy, just an area for people to wait in.
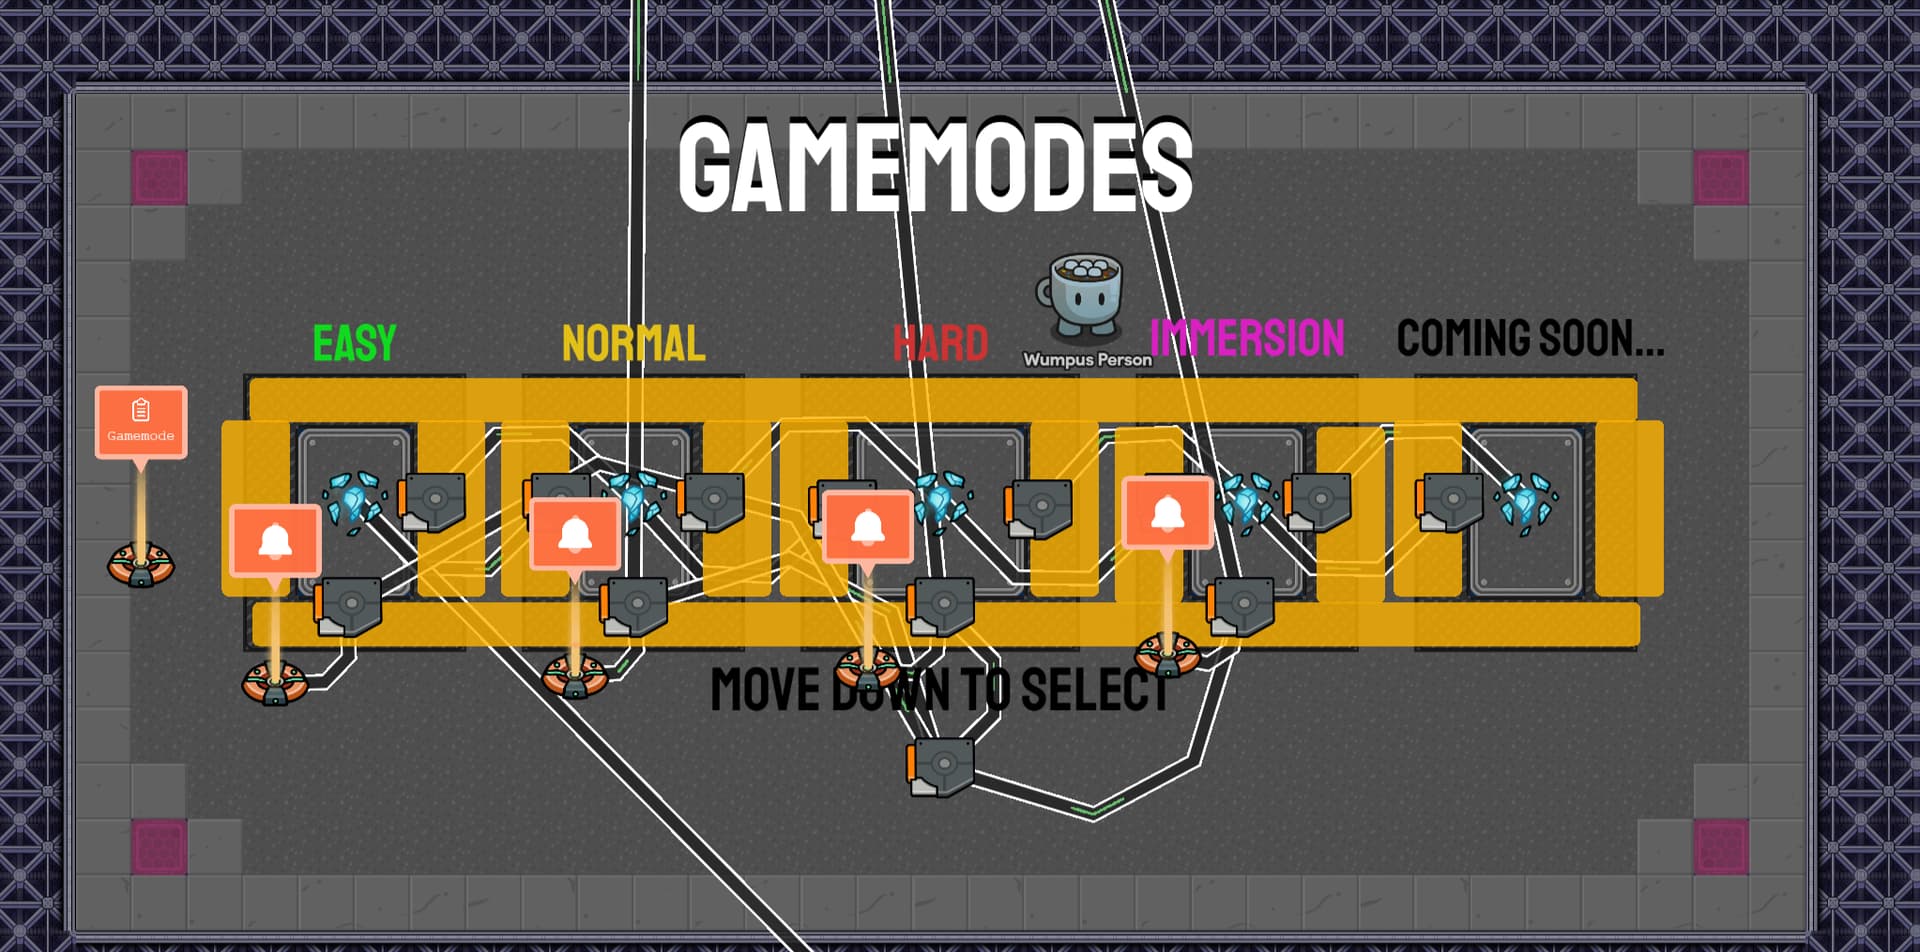
Now it is time for the interesting stuff, the gamemode selector! This is a bit more complex than the stuff before so get prepared. Here is a small example of the room you could make:
⭐- Device Discovered: Barriers
Barriers can be used to block places off using an invisible force, or a decoration for neon lighting!
⭐- Device Discovered: Properties
Properties are super useful and act like variables that can only be modified by code blocks!
⭐- Device Discovered: Notifications
Notifications are used to alert different users about almost anything you could want!
After building the gamemode selection room and making it so that you can teleport here with the press of a button (in the menu screen make it so that pressing the gamemode button teleports you here) add a button near each gamemode in order so that the host can press the button for the difficulty they want to chose! Pressing a button will activate a trigger that uses some code like this:
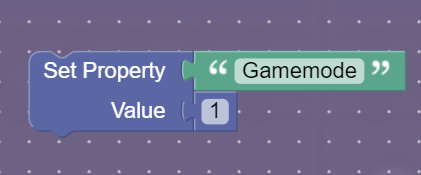
This code is basicly changing the value of the gamemode property (see the picture above this one to see the property), for selecting easy mode the property will be changed to the number one, for normal mode its two, hard is three, and so on. This makes it so that if we ever want to check for what the difficulty is set to we can just have an if statement that looks at the property!
End of The Menu Screen Guide
2. The Tutorial
The tutorial is an essential game piece that can be easy or hard to implement depending on what type of tutorial you want to have, if you want the game to teach the player then you don’t even really have to have a set space for the user, however this often makes the player quit due to not understanding the mechanics fully. For this guide I’ll be showing you how to make a simple and easy to understand in game tutorial with props!
Here is an example for a simple tutorial room you can make, inspired by the classic tutorials that official gimkit games often have:
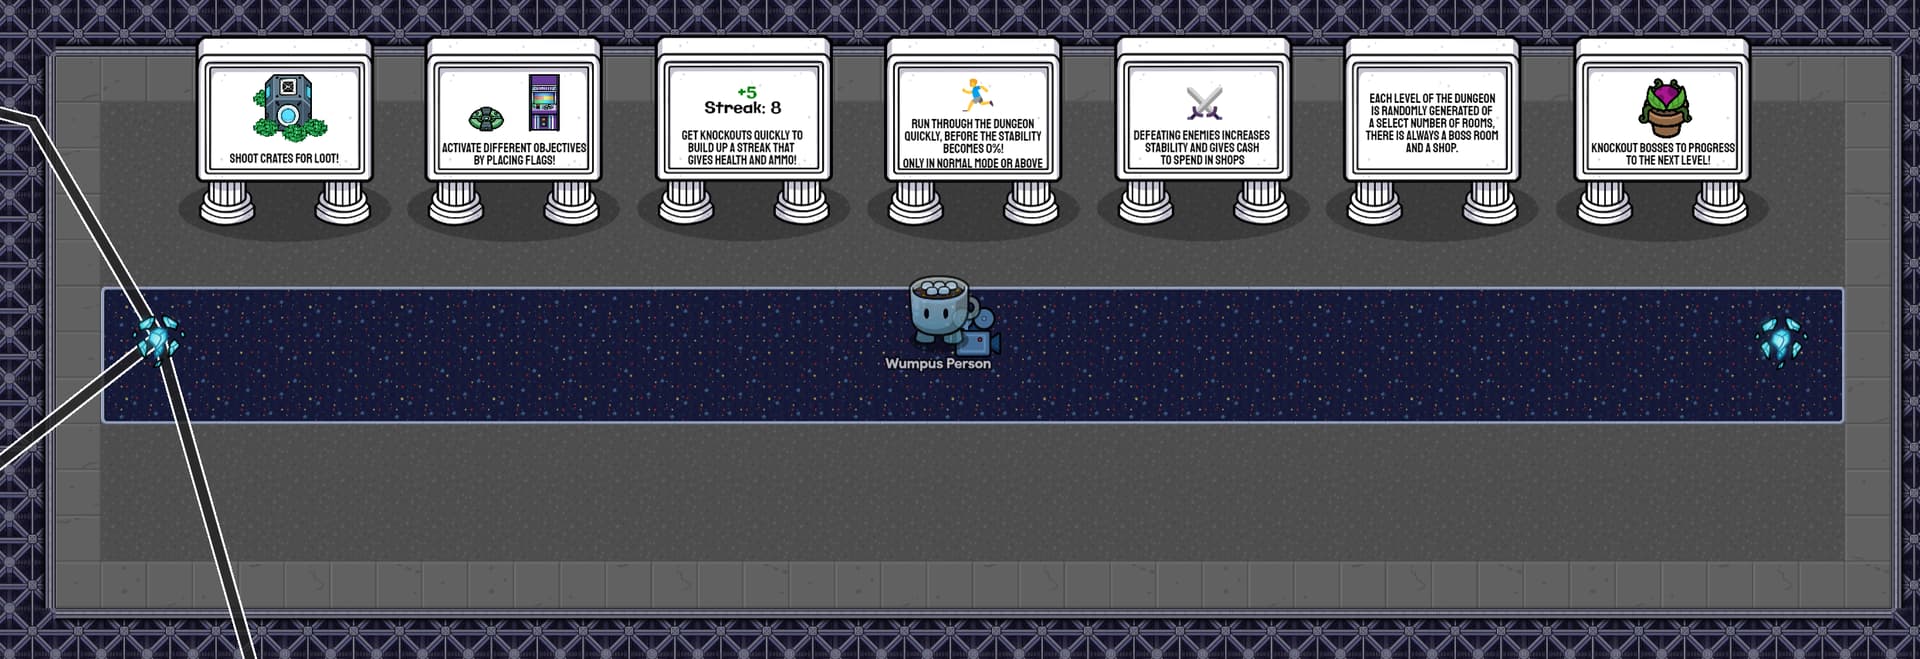
While this tutorial shows the basic mechanics that players need to know, it also leaves features out in order to not overwhelm the user. This is not as important for gimkit creative games as they are often very simple, however the majority of the audience are kids so they might not completely comprehend what your game is about! In addition to describing the game, you might want to have images shown in order to make it even easier to understand your idea! To make the experience as enjoyable as possible you will want to find a good balance!
End of The Tutorial Guide
---------[Advanced]---------
3. The First Rooms - (Decoration Tips)
For the first few rooms you want to create, you should make a simple outline then slowly fill it in, adding details as you go. There isn’t really a great process for how to do this, however here are a few ideas for rooms if you need them!
|
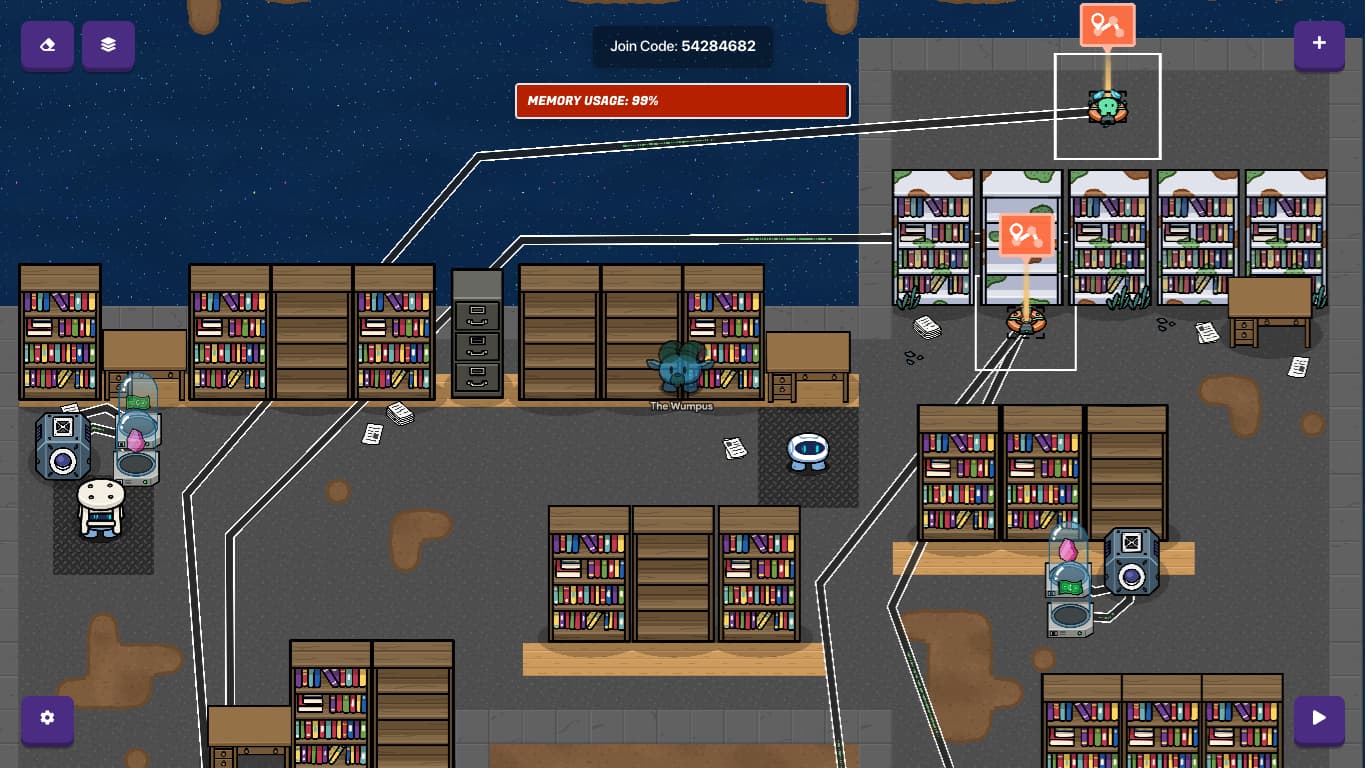
The Library
|
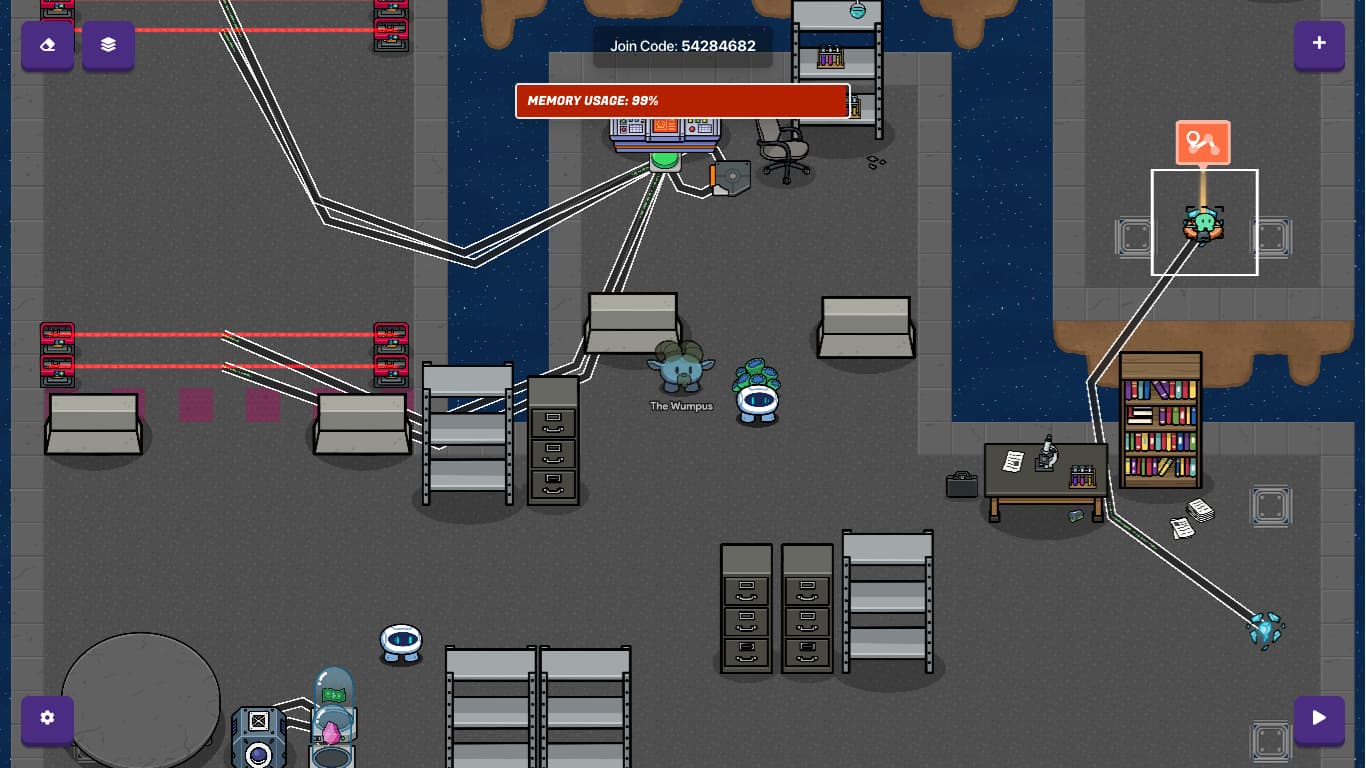
A Security Room
|
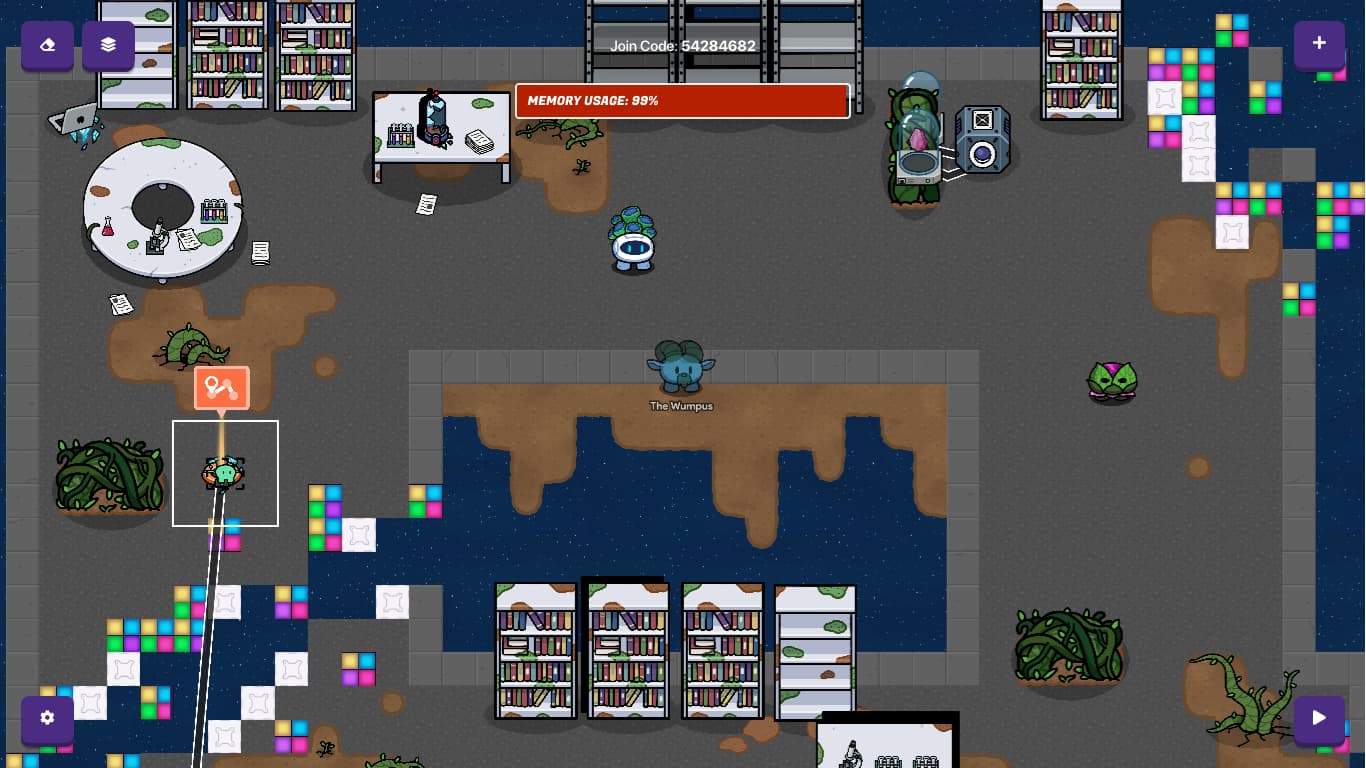
An Infected Lab
Hopefully some of those inspire you, however to make these rooms truly feel alive you need lots of decoration, a few things you can do are:
- Adding carpets where the room seems empty, making another layer of decoration without having any collision problems.
- Try putting most props closer to the edges of a room so that it doesn’t get in the way of fast paced battles.
- Make most of your props be destructible, so that players can make their own paths through the room, at the risk of having enemies attack them from unexpected locations.
End of The Decoration Guide
4. The Dungeon Mechanics - (Knockout Streak, Managing Ammo)
Now if you have ever played a game of One Way Out you’ll know that most of the gameplay is hiding behind props, occasionally popping your head out to fire a few laser blasts. This gameplay (while still fun) can get boring fast. For Gim Dungeon I decided to add a few interesting features, one of which was a knockout streak. This allowed players to feel rewarded for acting quickly and running through the dungeon at a faster pace, because whenever they knocked out a few enemies fast, they would get extra ammo, health, and loot, making hiding behind walls feel much less fun.
Here is how I made it:
-
I created a simple property called Knockout Timer, and connected it to a repeater that reduced the property by one every few seconds,
-
Then using a knockout manager and a trigger with some code blocks I created a system that would boost the Knockout Timer property by a few points, each time a sentry was knocked out.
-
After that I added some code to the previous trigger that made the game broadcast a signal depending on how good your current knockout streak was.
-
I created a few Speed Managers, Item Granters, and Health Managers then connected them to the broadcasts previously mentioned, giving a higher reward each time the streak increased.
Here are some screenshots of the system:
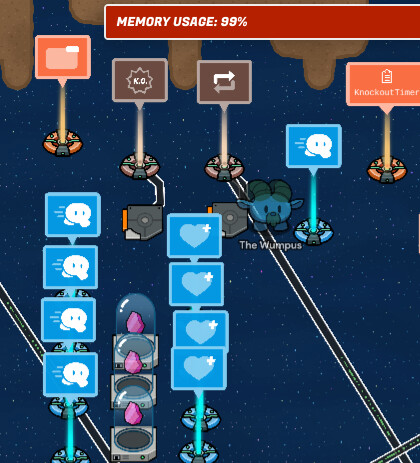
An image of the entire knockout streak system
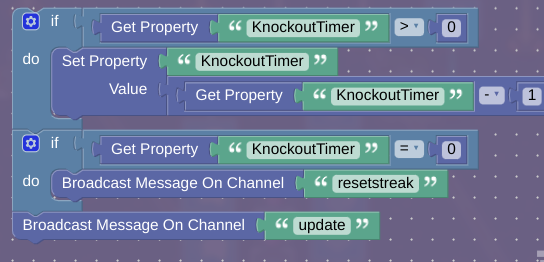
Code for the knockout timer
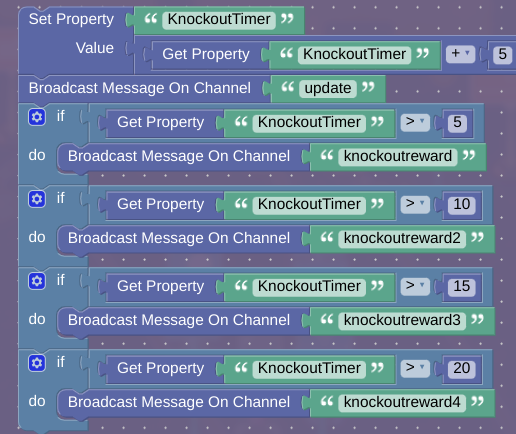
Code for the Streak Manager, giving items depending on the streak
Another mechanic I had the dungeon simulate was the managing of ammo. Throughout your time in Gim Dungeon you will constantly be having to buy and conserve your ammo reserves in order to have a fighting chance against the bosses at the end of the level. This mechanic is supposed to be a scaling challenge, meaning the harder the gamemode, the harder it is to conserve ammo. To make this a thing I added crates all around the rooms which players could shoot, destroying the crate and giving them some extra ammo reserves.
Here is an example:
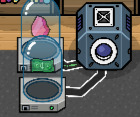
Image of a crate
This crate, once shot would give the player a small amount of light shards, and cash, not enough to sustain them for the entire run, but enough to keep them alive for a while. This constant mechanic makes the game steadily harder as you progress, but in the beginning it makes the game quite tame.
End of The Dungeon Mechanics Guide
5. The Merchant Shop - (Fair Pricing, Loot Tables)
COMING SOON
6. Dungeon Stability (More Dungeon Mechanics)
COMING SOON
---------[Mastery]---------
7. How to Conserve Memory
COMING SOON
8. Randomly Generated Levels
COMING SOON
9. The Final Boss - (Special Attacks, Balancing Difficulty)
COMING SOON
---------[Other]---------
10. How to Create a Game Trailer (Recording, Editing Basics, How to Youtube Somewhat Successfully)
COMING SOON
Do you think this guide explained things well?
- Yes
- Kinda
- Not Really
Do you think I should finish the guide?
- Yes
- Maybe
- No