I have been Answering Peoples Gimkit doors questions a lot and my Solutions to them are quite smart and…well… Now I think I am now interested in making my own Official
Ultimate guide to Gimkit Doors My only concern would be people would take credit for doors stuff already made, But my Solution That I hope Works is, Make it the way I want it the way I love it
Although This Guide is a Wiki I do not grant permission for ANYONE to edit it
Unless I say so and think your thing will be helpful (Many ideas may be denied since I want to be original.
Now Lets start
'83’s Section was removed because of Body Limit)
Check out Fleets guide on Rng for Multiplayer If you plan on having a multiplayer game
Timothy Mechanic
All your going to need is this
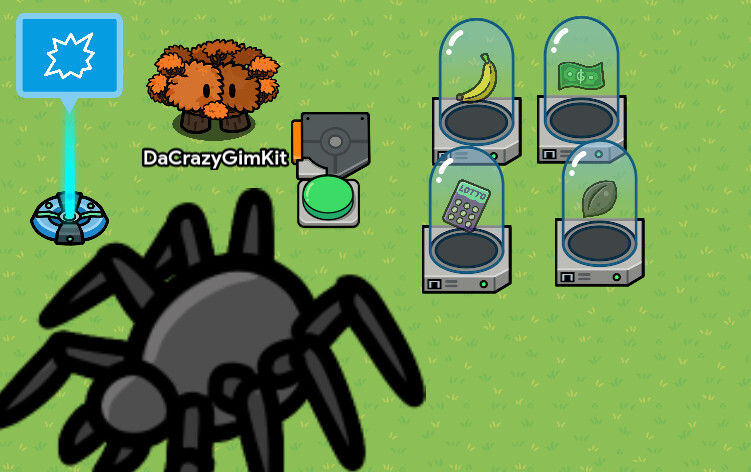
*GimkitSuggestor not Included (Gims sold separately)
First get your trigger and go to blocks
and create a new block

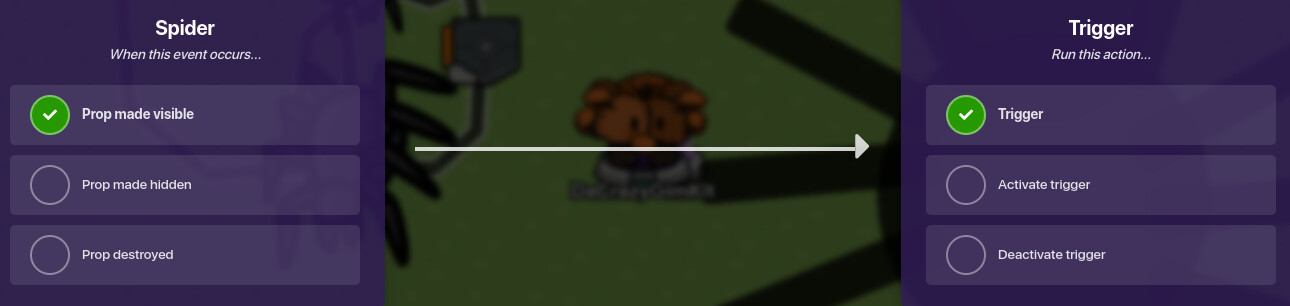
And then press the when triggered button and add this to the code
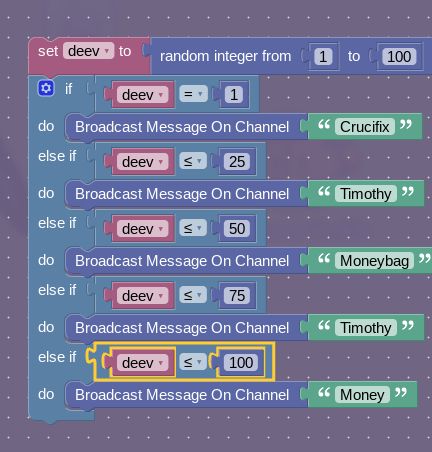
Remember one of those channels has to be Timothy
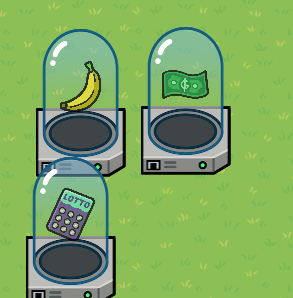
now get your Item granters and set as many as you want to be randomly picked out of the drawer
Lastly Set your Timothy Channel to your spider
Remember to have Timothy hidden on game start and his scope is to the player


Now WALLA you have Timothy Mechanic And Timothy Conveniently already built in to Gimkit
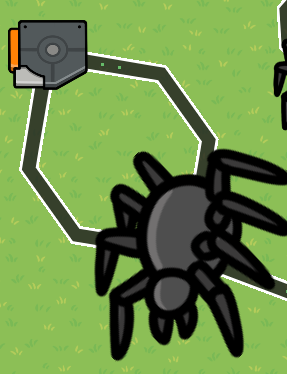
Timothy Hugging player scene
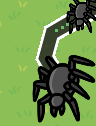
All your going to need is the spider prop and However many minus 1, triggers there is spiders. I used a button to activate the animation but connect it to your Timothy mechanic system if you made that and have all props hidden on game start
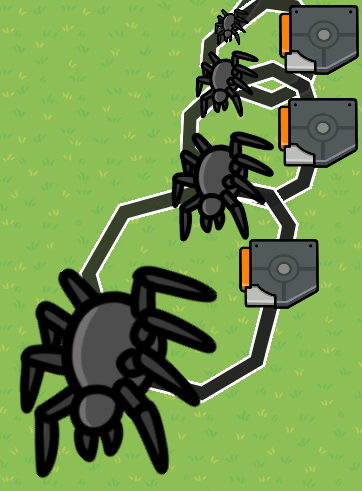
The more spiders the bigger it gets to simulate something jumping at your face
I used 4 but you use as much as much as you want to make it cleaner
Now get wires and make it so when spider prop turns on it triggers the trigger

then connect the trigger to the next spider so that spider appears
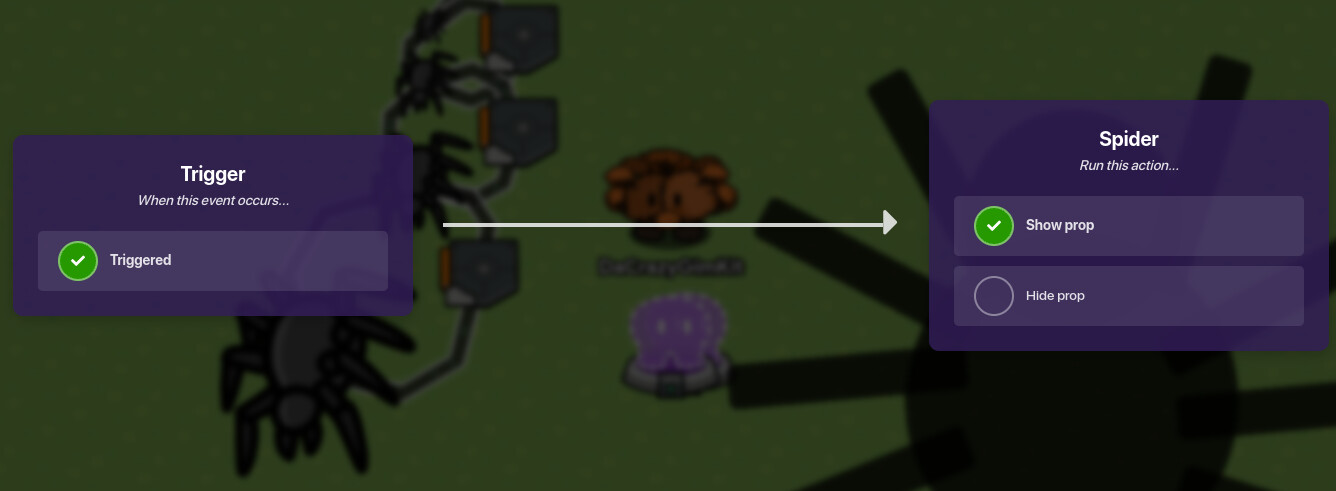
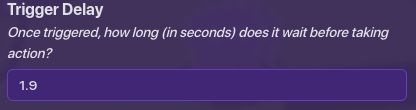
Dont forget to set your triggers delay to atleast 0.5 to 1 to make it fast
(my Example is not)
and lastly connect the prop to the last prop you used to make the last prop disappear.
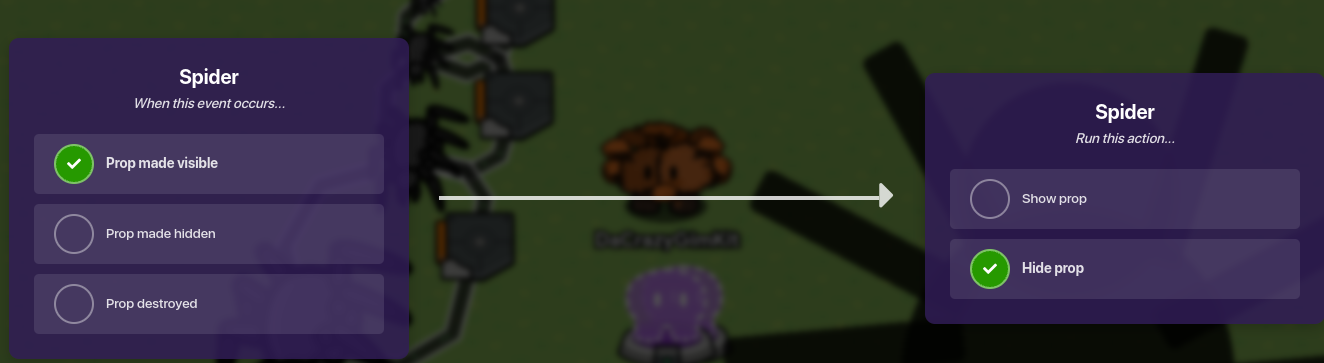
now to end the animation when its over, Get a trigger and make your very last spider connect to it
and this is the wiring
and then make the trigger hide the last spider prop
It should end up like this

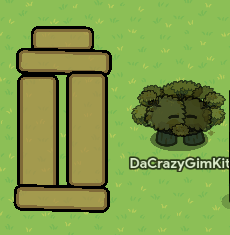
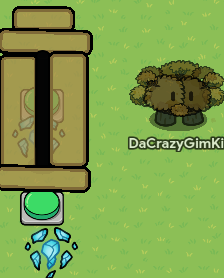
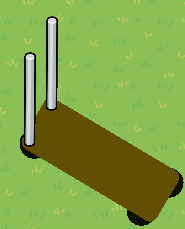
Closet
Your going to need 11 rectangle barriers and 1 metal pole
First, set 6 of them to the font of
R:101, G:83, B:41
I couldnt get a screenshot of it because it would hide the font menu everytime i tried to screenshot
and turn outline off all 6 while at it

Now for the rest of your barriers set them to
R:170, G:141, B:75 and keep the outline on,
And now turn and shape them to look like this
and remember make it around the same height but slightly higher to simulate the normal height of the closet
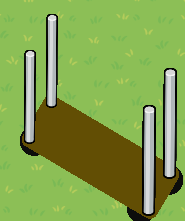
Now get your 6 barriers left aside and turn them as small as possible
![]()
And now put them onto your closet like this

Lastly Get your Metal pole and set its color all the way to black and put it in the middle where you see that empty spot
Your Result is this,

Bonus
Add a button right in front of closet and make it so when you press it you get into closet and when your in closet have another button, but to exit
Or
Turn off collision of barriers and the metal pole to use less memory
I dont have wires because Its better to use channels for this specific object but you know what to do (Hopefully) and I have the teleporters and buttons visible so you know where to put them but make them invisible


And there you go there is your functional doors closet
Rush Mechanic (By LandynSpeedo802)
What You’ll Need
2 Triggers
1 Respawn
2 Zones
Optional: 1 Encounter Randomizer Trigger (See my Item Randomizer Trigger Guide For This!
Tip: If using The Encounter Trigger, don’t use the first zone.
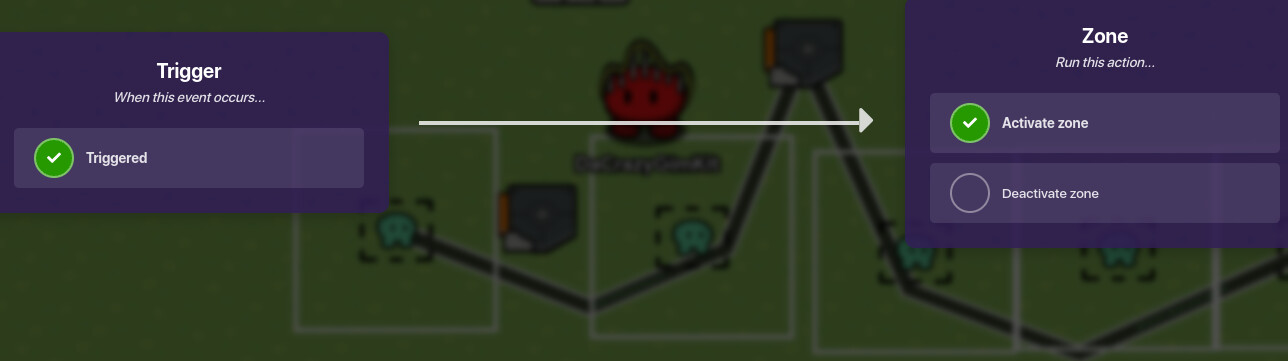
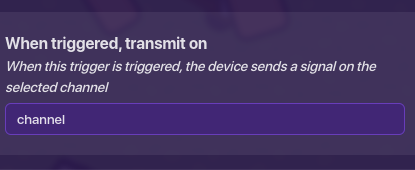
Step 1. Place the zone in front of the entrance of the room. Have it transmit on “Rush_Coming” when the player enters it.
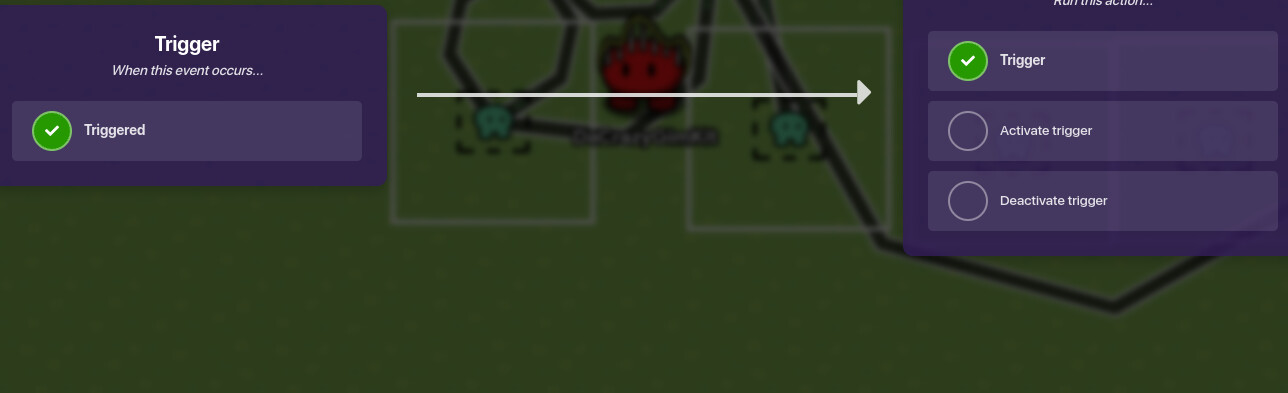
Step 2. Grab one of the triggers and have the delay be from 4-6 seconds. It’s up to you on the delay. Then, have it transmit on “Rush_Here” when triggered and trigger when receiving on “Rush_Coming.”
Step 3. Have the second zone activate when receiving on “Rush_Here” and deactivate on “Rush_Leave.” Then, have it transmit on “Rush_D3ath” when player enters the zone.
Step 4. Have the second trigger receive on “Rush_Here” and the delay be 1.5 seconds. Then, have it transmit on “Rush_Leave.”
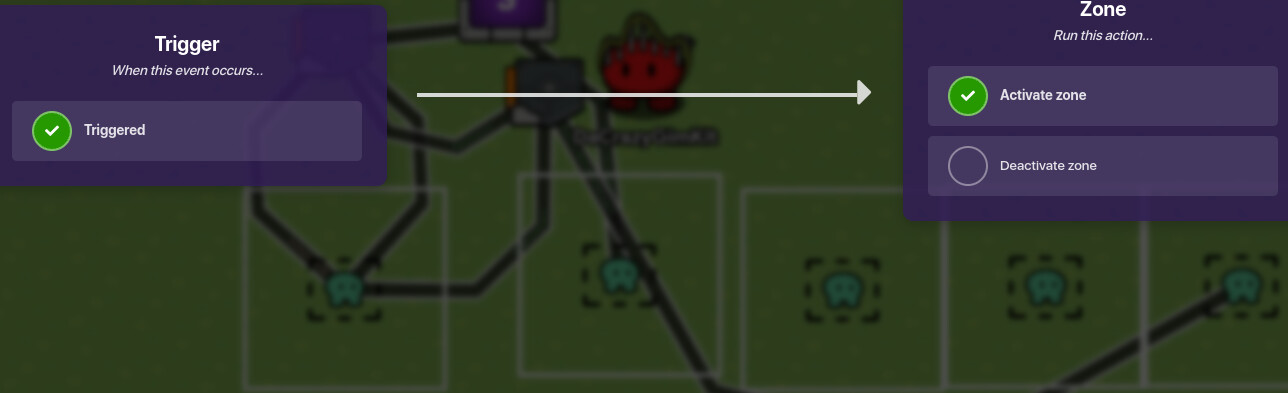
Step 5. Have the respawner respawn the player when receiving on “Rush_D3ath.”
And you’re done!
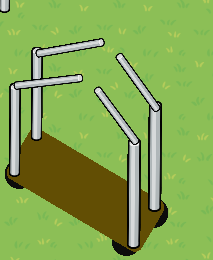
Luggage cart❗
Your going to need 3 circle barriers about the size of a gimkit foot (legitimately a gimkit foot)
![]()
1 rectangle barrier, 12 metal poles 4 are black, this emoji ![]()
So lets start
step 1:
get your barriers and do this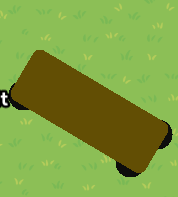
Layer your wheels like this

the One named plainly ¨Barrier¨ is the top brown part
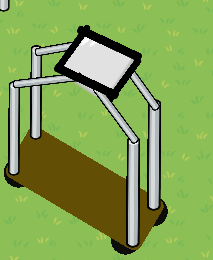
Step 2:
get your metal poles and do these steps to make the sideways illusion you must have 2 poles longer than the other 2
place your shorter one on the top part of cart
now get your longer ones and put on other side
now get four more metal poles and their size compared to your other poles should be this: Were working with the tiny one
tilt your poles and you should have this
now for the last of you poles, you should have 4 leftover that are black.
now try to tilt and size them to copy this
it should be rectangular-ish
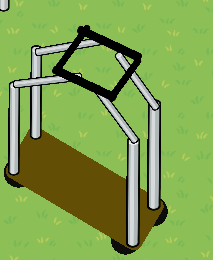
now lastly you need your emoji… at least 2 to fit whole rectangle
size and fit into the little rectangle area at top til your sastified and have this Final Product
Dupe Mechanic (By LandynSpeedo802)
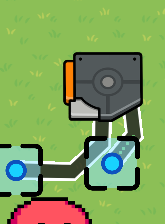
So, Dupe! Before we get into how to make him, let’s learn what he actually is. Basically, at any given time, you may enter a Dupe Room. There will be multiple door numbers, and you have to memorize which door is the correct one. If you guess wrong and open a “Dupe” door, you will get jumpscared by Dupe and he’ll take some of your help. Sounds complicated, but in truth, this is actually pretty easy! First, let’s look at the art.
This is my own design, but it’s up to you what he wants to look like.
What you’ll need
2 Texts
1 Property
1 Camera Point
1 Damager
1 Zone
1 Trigger
Optionl: 1 Encounter Randomizer Trigger (See my “Item Randomizer Trigger” Guide)
1 Zone, if not using the trigger
Step 1: Create a property and name it Door_Number. Have it be a number property, and set it to player and value to 0.
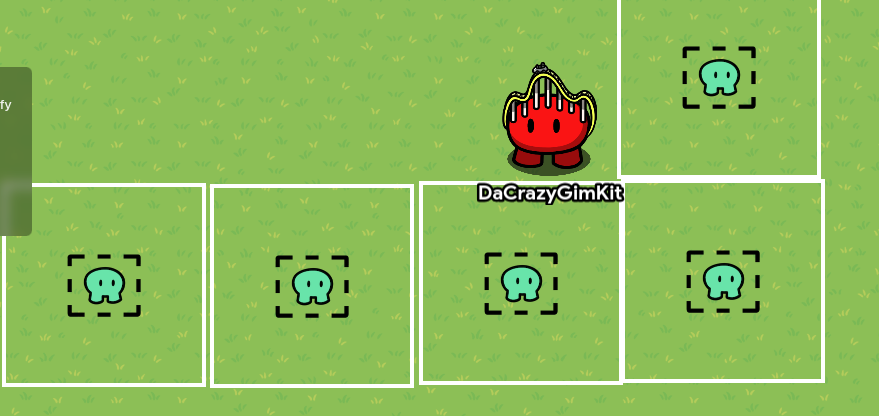
Step 2. Have it to where every time you enter a room, the Door_Number increases by 1. Then, in the Dupe Room, have there be 2 doors.
Step 3. Go into the code of one of the texts (this is the CORRECT door) and have the text be set to “Get Property Door_Number + 1.” Then, have the OTHER text (this is the DUPE door) set to “Get Property Door_Number -1.” Have them set the text to this when Receiving on “Dupe_Room.”
Step 4. If you are using the zone instead of the trigger, put the zone in front of the entrance to the room and have it transmit on “Dupe_Room.”
Step 5. Have the OTHER zone (the required zone) be in front of the Dupe Door and have it transmit on “Wrong_Door.”
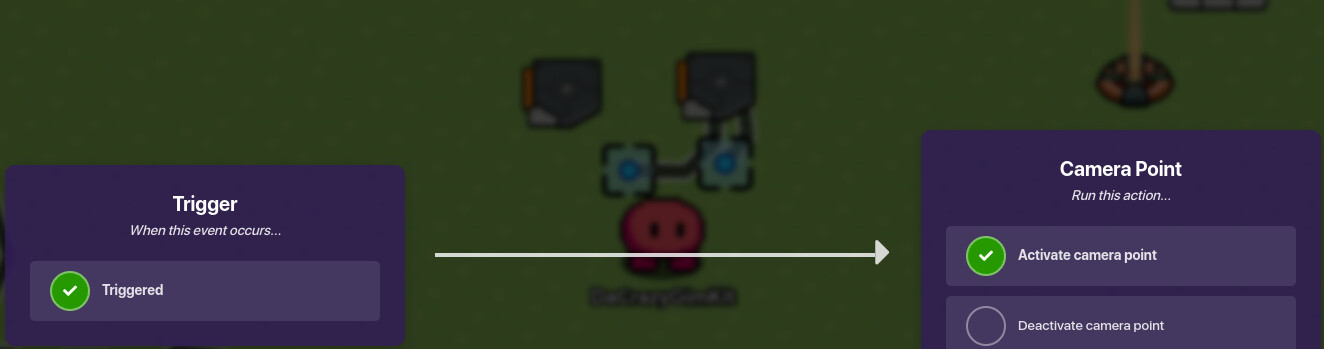
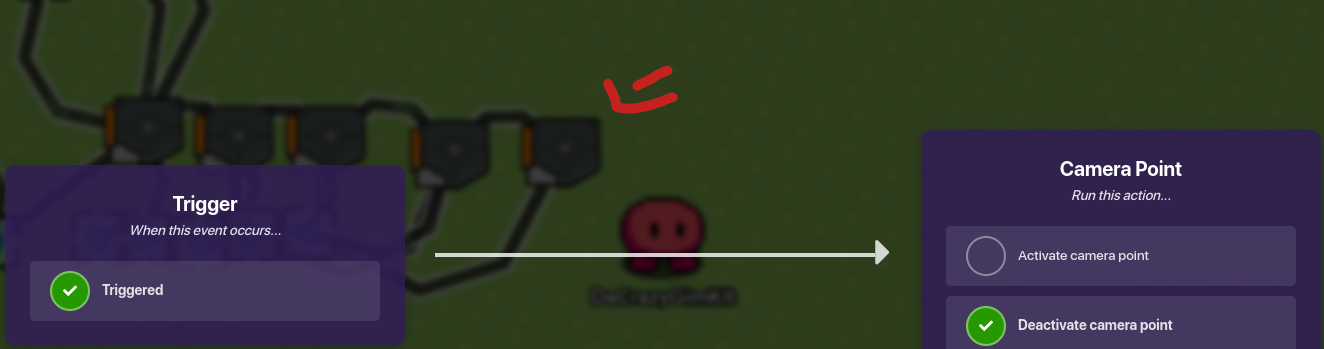
Step 6. Have the Camera Point activate when Receiving on “Wrong_Door,” and have it point towards your Dupe Art. Have it Deactivate on “Dupe_End.”)
Step 7. Have the damager damage set to 25 and damage the player when Receiving on “Wrong_Door.”
Step 8. Have the trigger trigger when receiving on “Wrong Door” and it’s delay be 1.5 seconds. Have it transmit on "Dupe_End.
And you’re done! Simple as that!
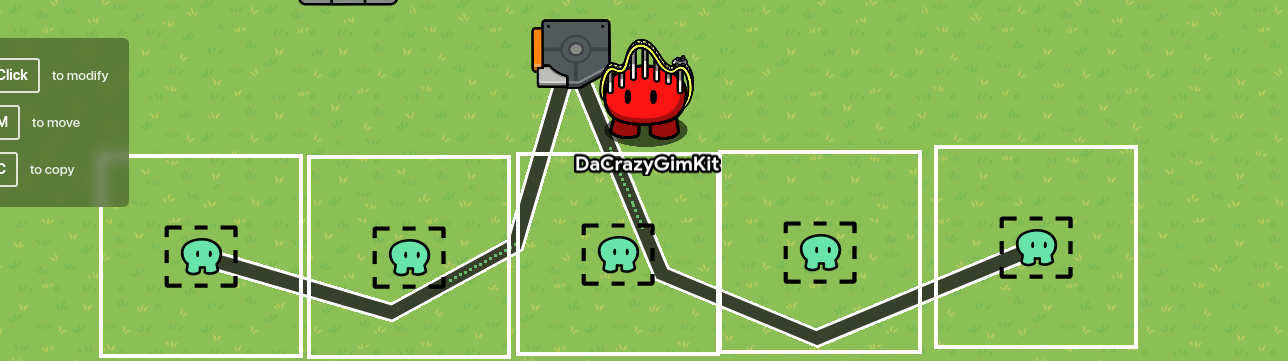
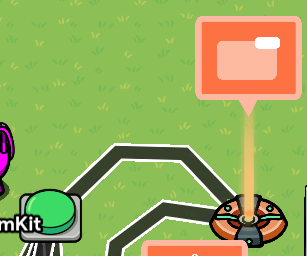
Seek Cutscene
Firstly Your going to need As Many Camera Points and triggers that you want Remember You must have the same amount of triggers as camera points you have chosen

Ignore the wires just for Right now
Now You need to get a zone and connect it to the first trigger thats on the left side of the screen,

Now connect That trigger to the first trigger


And copy that through all the triggers you have

Now Get your Camera points and align them as best as you can with your triggers.
Then for each trigger connect each camera point to their designated trigger, and have them set to
once you got that complete, Every 2 triggers, do the same thing but then connect your trigger to another camera point next to it
Set the Camera point on the left to

And Then just copy this process the whole way through
on your last trigger you only have to use 1 wire
Now If I Told you Correctly, you should be able to step on the zone and your screen will
move quite cleanly in the direction Of Seek, when its over you should be put back in your normal camera view And then RUN FOR DEAR LIFE
Seek chase (may be Faulty, Due to Poorly Written Description written)
Your going to need as much zones for as long your chase is gonna be
I am using 5 to make it short so I can explain how to make it, and have 1 delayed trigger to represent that seek is awakening/Cutscene
So first get your zone that will activate the chase and wire it to a counter

and then connect your trigger to your zone that will be the zone that is seeks hitbox I(which if in that zone you uh…
the wire on the left is going to the first zone and on the right is the activating the chase zone
Now get 1 delayed trigger for every 2 zones that are in your chase.
now connect your first trigger to your second trigger
and connect your first trigger to your first zone thats on the left and have it activate the zone
now connect your second trigger to your next zone for it to activate and the same trigger connect to the first zone for it to deactivate
get another trigger to get the whole process to go on and on for the rest of the chase
(forgive me if this doesnt make sense)
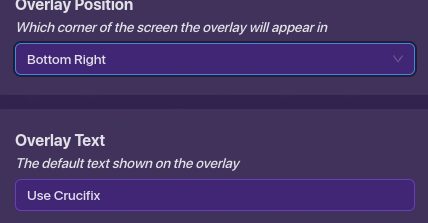
Crucifix Mechanic
You will need 1 zone (for each entity encounter), 1 checker, 1 trigger that is deactivated at game start, 1 overlay set as a button, A item Granter, and whatever dispenses your crucifix
First set your overlay to a button and have it pop up on the bottom right of screen
Now have your trigger connect to your overlay
now get your second trigger and have it when button pressed it triggers that trigger
but this trigger will then hide the overlay

Now get your item granter and set it to whatever item is your crucifix and have it set to -1
and then connect your overlay to the granter

now get your checker and have it check for your crucifix, this is a extra security check to make sure you didnt use your crucifix earlier,
now connect your checker to your first trigger and if the check is successful it triggers the trigger
now get the zone and wire it to your checker
and lastly connect whatever gives you your crucifix and have it wired to the trigger for the trigger to activate
El´ Goblino
Pretty self Explainatory just copy this with barriers and blackboard legs with
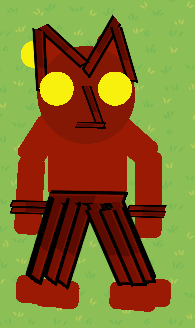
this color R:155 G:26 B:3
Eyes: Research
For all Pressure fans out there this mechanic is going to sorta of relate to Eye-Festation
where he lures your vision towards him, but in this specifically you have 2 seconds to look away before your gim gets ¨tempted¨ to look
Randomised Amount Pseudo coins ❗
For a newbie on properties this is impressive and easy,
All your going to need is 1 trigger and 1 overlay.
First go into your trigger and do this
now go to your overlay and go to blocks

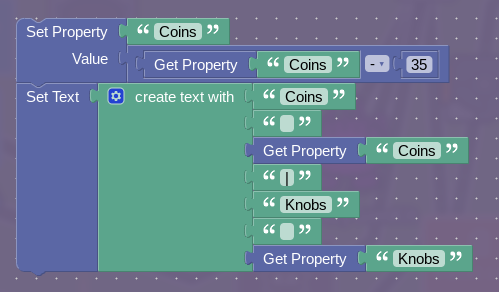
now go put this into your overlay

This is not the whole code but you should get the gist since that image is the only code you need
Now go to devices and grab 2 property devices
and name one Coins and the other Knobs and have the set to this

And I think thats it
Pseudo Coins Spending ❗
Pretty basic, MUST HAVE COMPLETED RANDOMISED AMOUNT PSEUDO COINS ENTRY get a button and get another Overlay and have your button turn off your first overlay from past entry

now connect your button to your new overlay for it to turn on

now get 3 checkers and have each at a time set to this


they will all transmit on the same channel when check passes but one which is this one
because if its less than required amount: the coins should not change because you aint got enough to purchase anything
now wire your button to every checker with this setting

Ignore the name of checker its just for Organization
now go to your overlay and have it run on the channel that will transmit after check passes

put this code in
now wire your trigger to your new overlay for that overlay to turn off then connect your trigger to you first overlay to turn on first overlay to keep the coin gaining process going
And WALLA thats it
Snare
Follow this guide to make snare:
How to make a "Snare" trap! [Difficulty: 🟩]
- Yes
Copyright (c) 2024 Gimkitsuggestor
All rights Reserved