Hola! Welcome to the first Cassian guide!
This guide is about how to make a map that informs people who play through it about something. (I do not mean maps where the kit has educational questions. Go play an official game mode.)
This guide is probably around ![]() , because the base system is pretty easy. However, it can be built at a harder difficulty (
, because the base system is pretty easy. However, it can be built at a harder difficulty (![]() ) with add-ons. I have organized this guide into a few parts:
) with add-ons. I have organized this guide into a few parts:
Concept
It is hard to have an informational map without information. Your most used device will likely be either the Text device or the Popup.
The problem with making an informational map is that it can quickly become boring. Many of the add-ons are small systems that display information in an interesting way.
Here is a list of what not to do:
- Don’t have large chunks of text. No one really wants to read more than two sentences at a time. If you hit the character limit for a textbox (256 characters) or popup (512 characters), you have written too much.
(quoted from Roman Empire - Wikipedia)
- Don’t use poor grammar. When you are trying to teach people something, bad grammar or spelling may confuse them.

- Don’t make your map interesting by using bad color combinations. If I ever see this in your map, I will quit playing almost immediately.
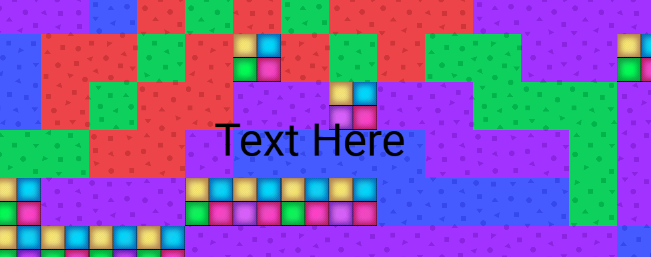
No one wants bright colors or the plastic terrain. Because your map’s content may be less interesting [than a normal map], you need to have solid aesthetic elements. The same goes for text colors and popup colors. Bad colors suck. Reading them sucks. Do not use:
![]()
![]()

![]()

![]()

![]()
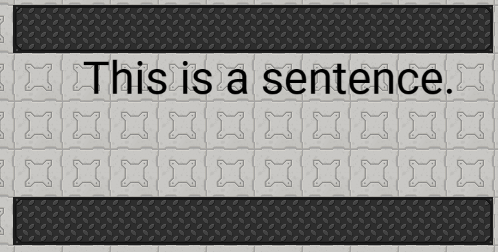
Classic always works:

![]()
Or complementary colors:
![]()
![]()
It is also important to make sure that the person playing your map cannot just skip through it. If a player is just given a bunch of text, they will quickly pass it by. You could set the player’s speed low, or barriers and zones can be used to force the player down the right path.
Normal procedures like making a pregame lobby should still be followed in an informational map. Do not forget these.
Now that we’ve covered the concepts, let’s build something.
Core System
Before you start building, go to settings in the bottom left corner.
Go to the “Map Options” section. Click on the “Health and Shield” tab. Scroll down and change the settings to not show health and shield.

Due to placing a large amount of wires, some keybinds may help with this project.
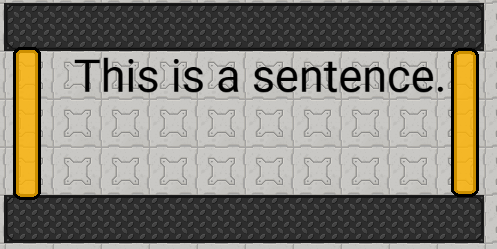
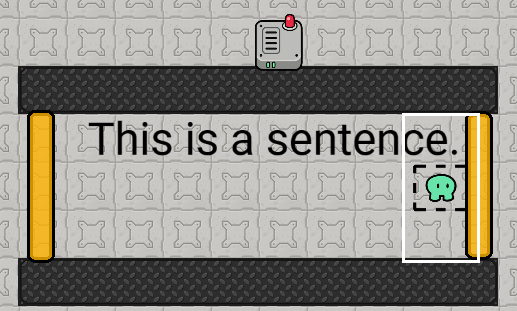
We need a place to put text and a way to slow players down. A corridor is ideal for this.
Start by making one from walls.
Next, add your text.
Add barriers to the ends of your hallway. They should probably be a color that makes thematic sense.
Set the first barrier (in this case on the right) to be inactive on game start. 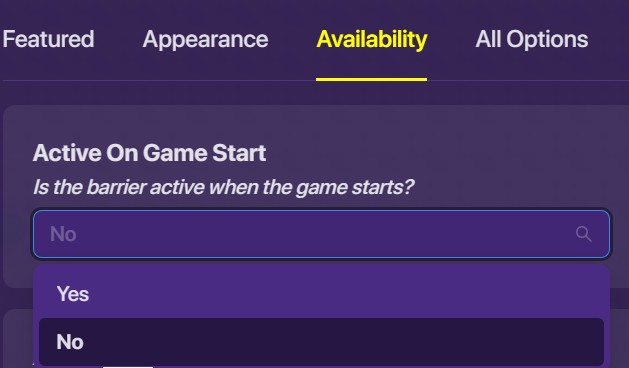
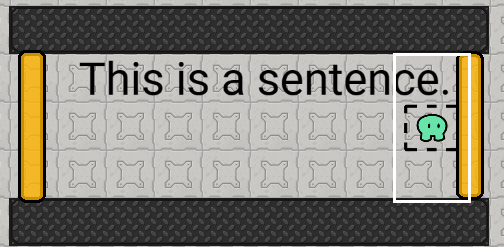
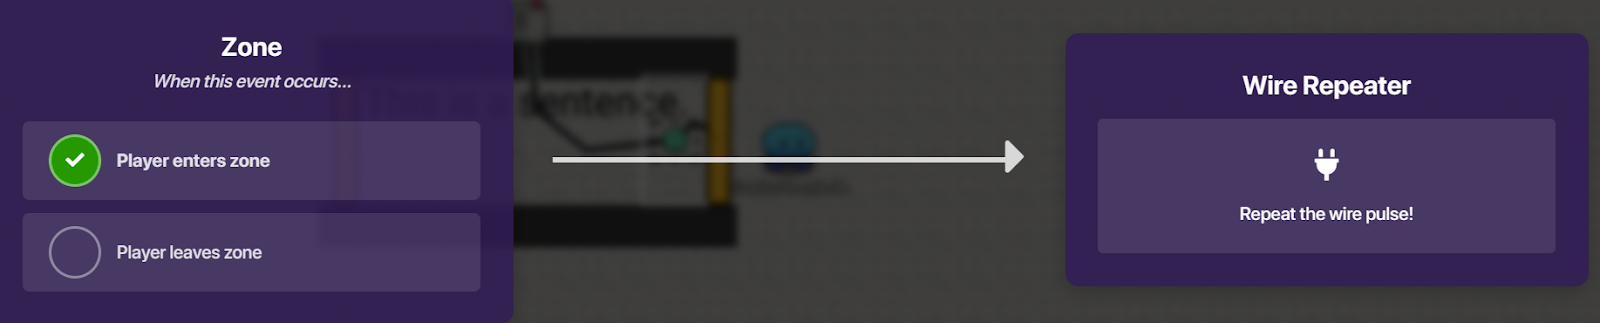
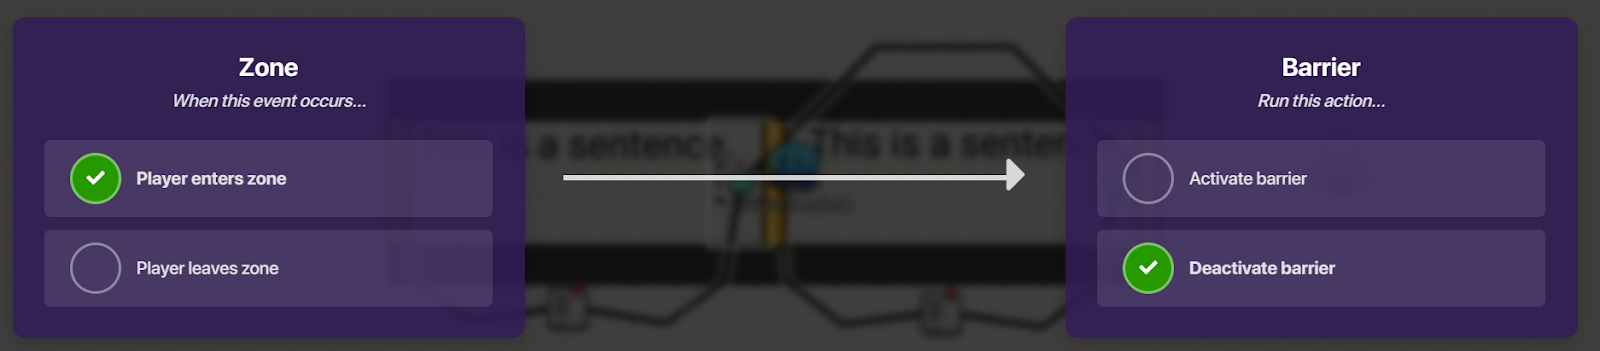
Next, place a zone.
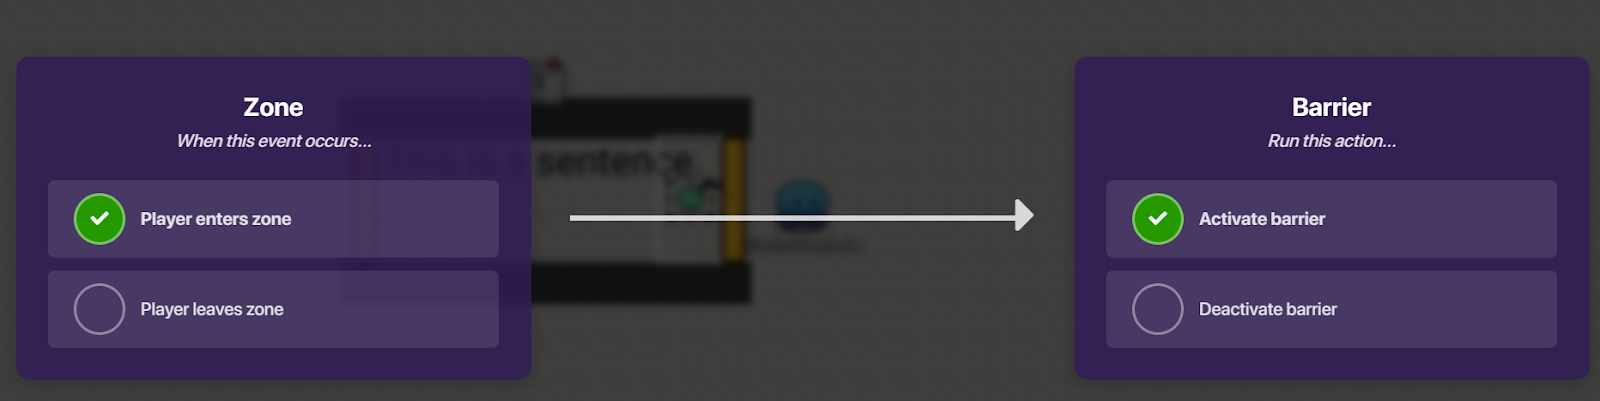
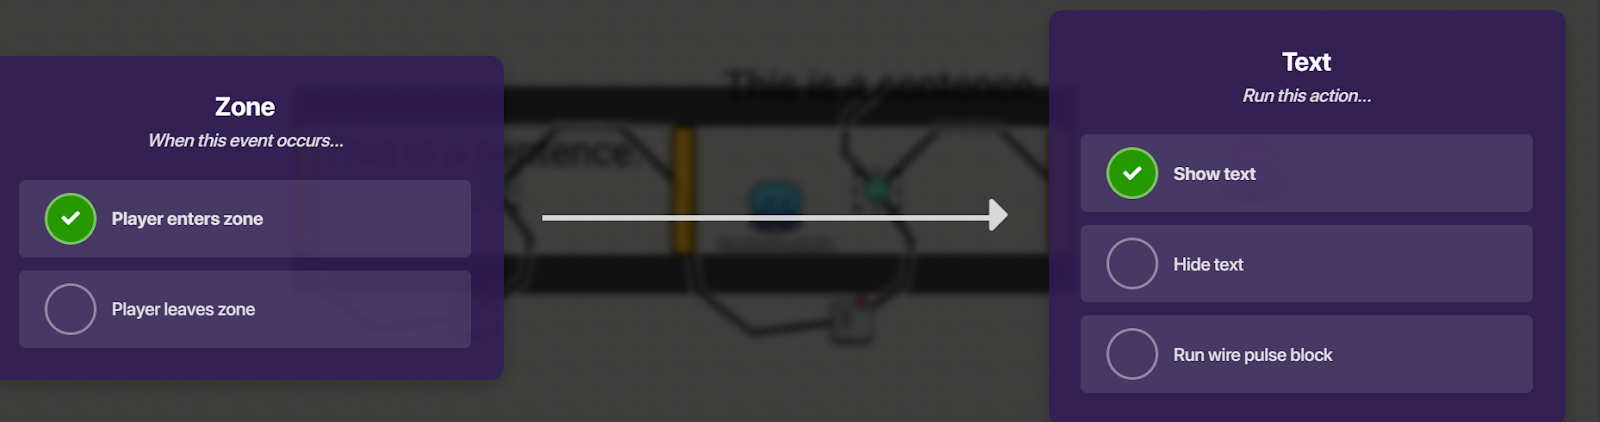
Wire the zone to the first barrier.
Next, place a wire repeater.
Wire the zone to the wire repeater.
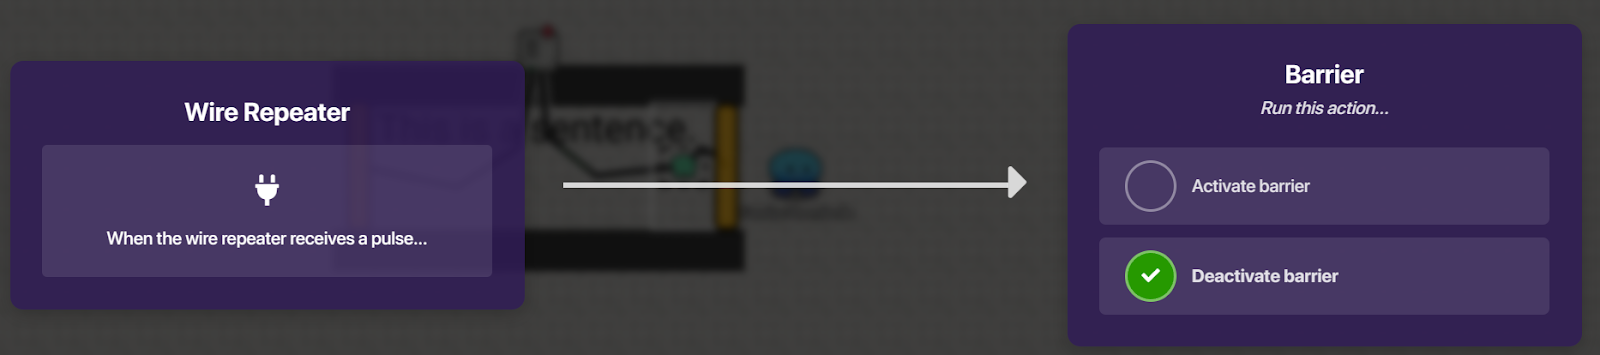
In the repeater settings, change the delay to three seconds.

Wire the repeater to the second barrier.
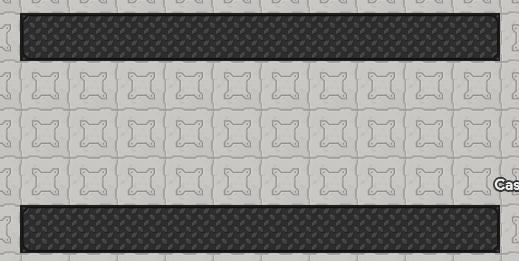
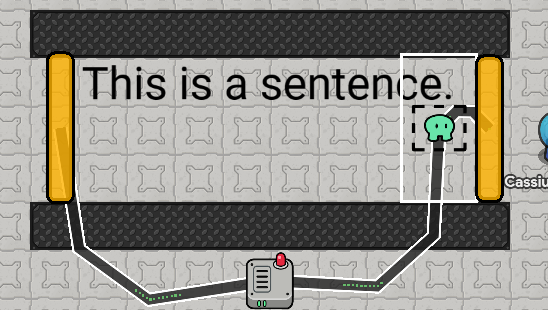
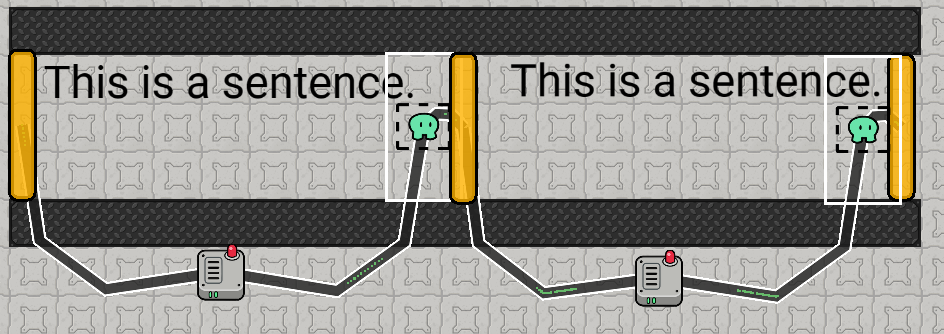
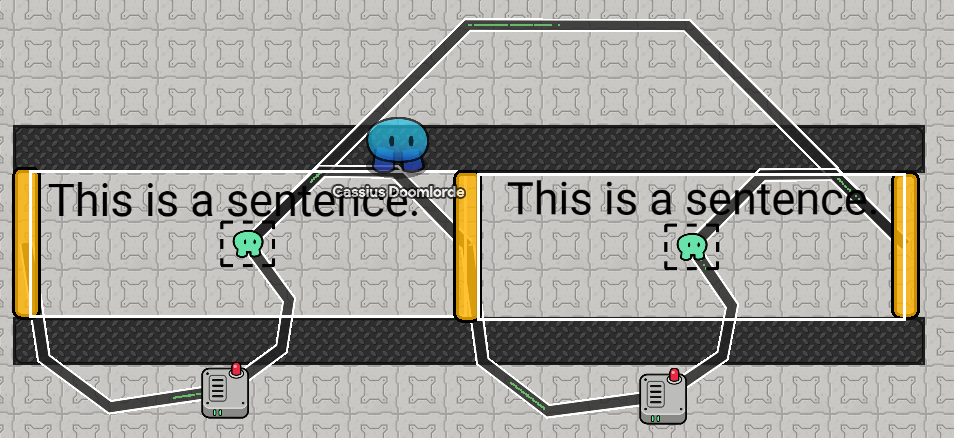
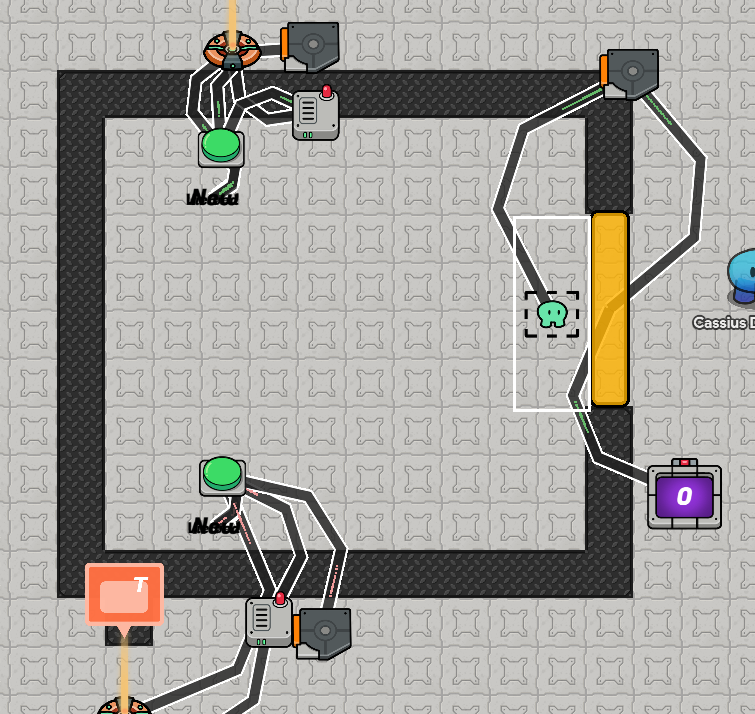
The finished product will look something like this:
Now you will need to extend the mechanism. This is pretty much just duplicating it.The only difference is relating to the barriers.You will reuse the barrier on the left. You just need to hook it up like you did with the right one. Do not change it so it is inactive on game start. It will look something like this:
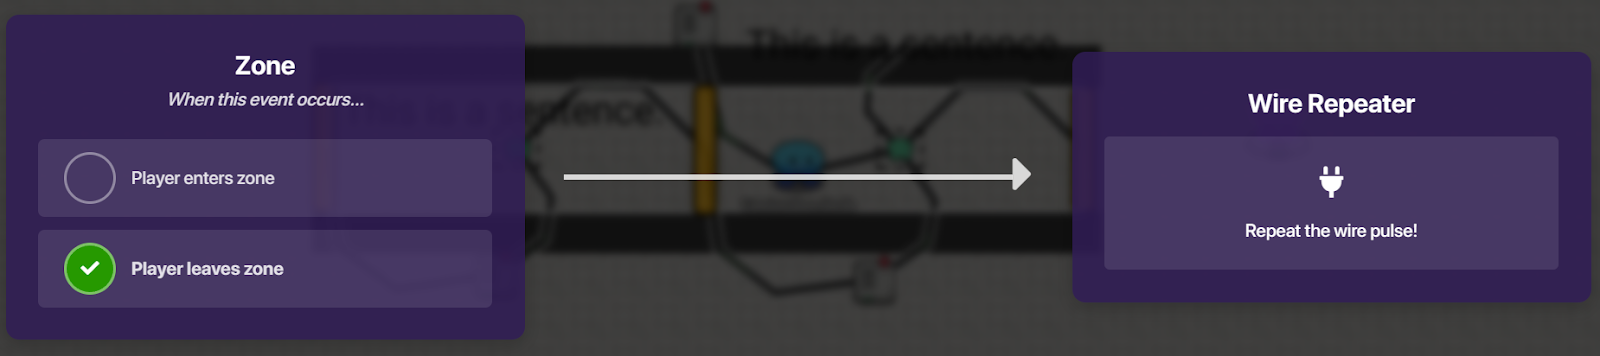
Now you need to wire zones to the barrier two back: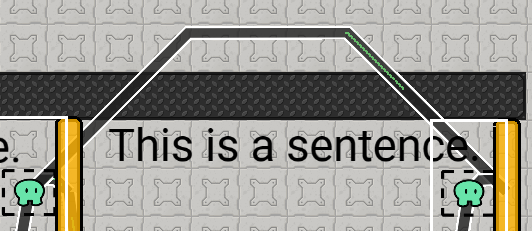
Set up the wire like this:
What did this last wire do? It makes it so you can walk through the section again later.
Mini expansion
Mini Expansion
You can make the text disappear when you walk away from it.
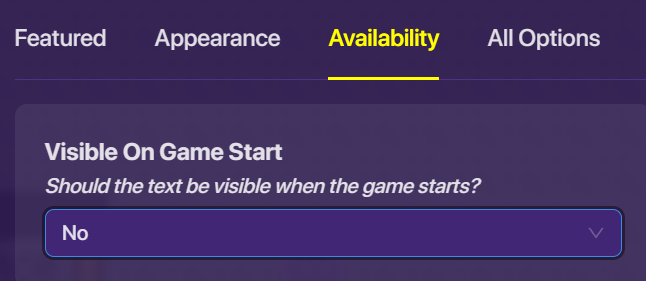
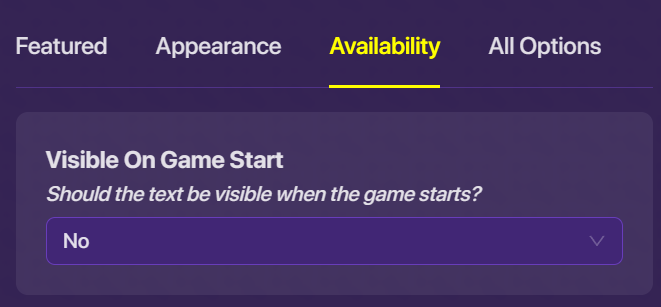
The first step is to set all the text to be not visible on game start.
Next, expand the zones to fill the entire space. (If you don’t know how, click here.)
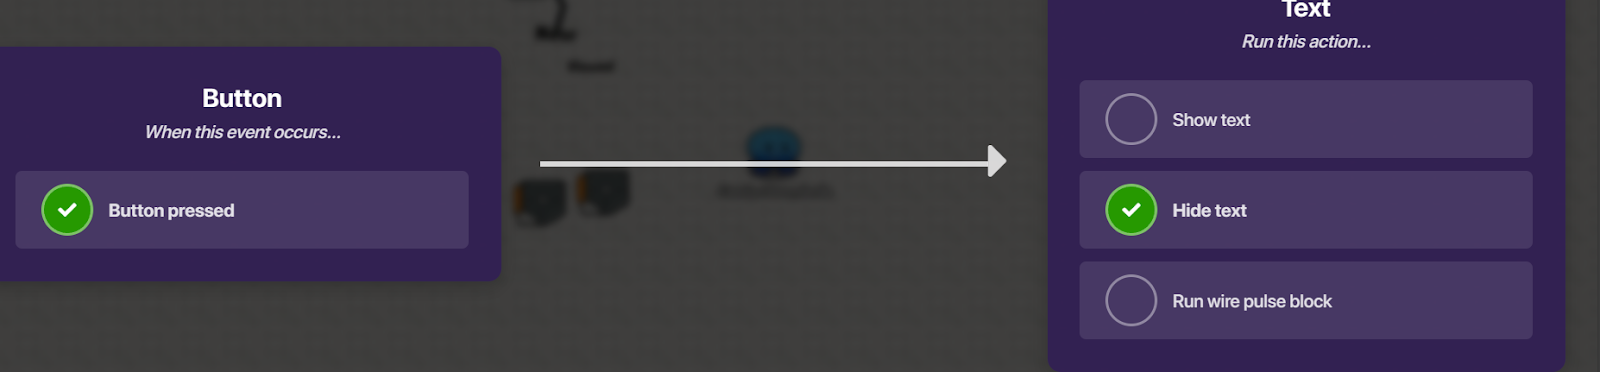
Wire a zone to the text in its section:
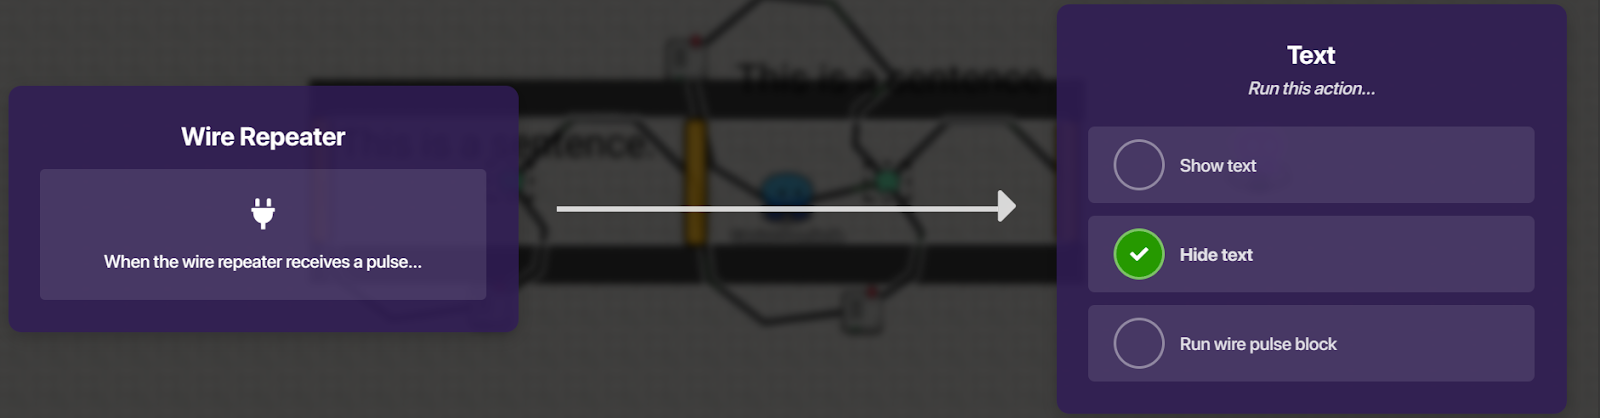
Now place a wire repeater with no delay.
Wire the zone to the repeater:
Then wire the repeater to the text:
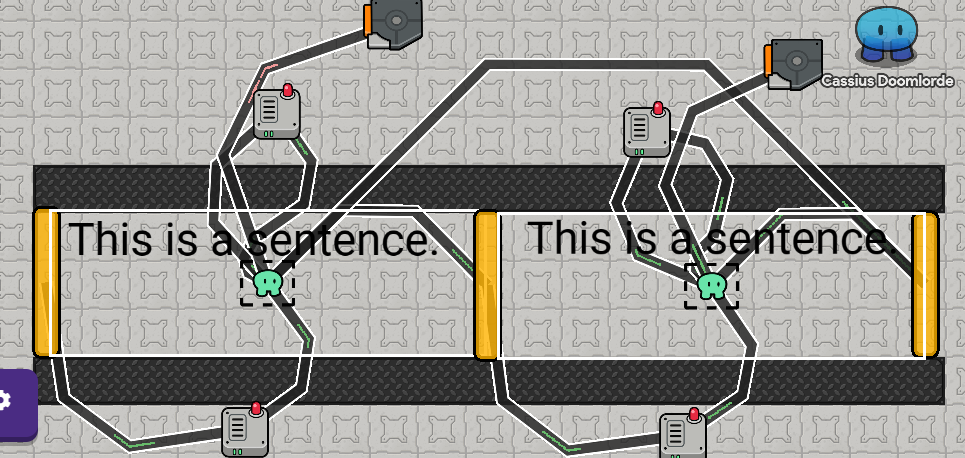
You can now do the same thing with the rest of the corridor, making sure that you match the right zone and text. The end result will look something like this:
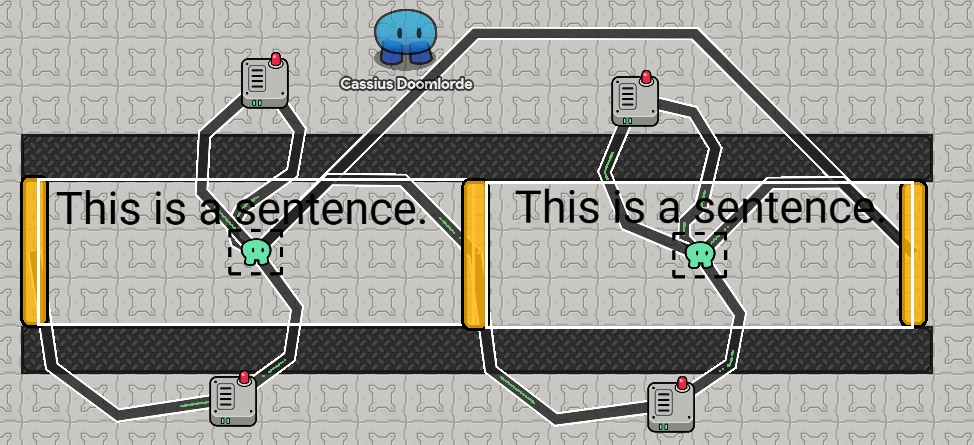
Here’s what it looks like to walk through:

That’s the end of the main mechanism.
Add-Ons
Maybe you want your players to do something more than walking to find information. There more simple ways to show text. Here are my top choices:
Button with popup (🟩)
This is how to make a slick button with a popup attached to it.
This might scare some of you, but the first part of this mechanism is a button.![]()
The next part is a popup. ![]()
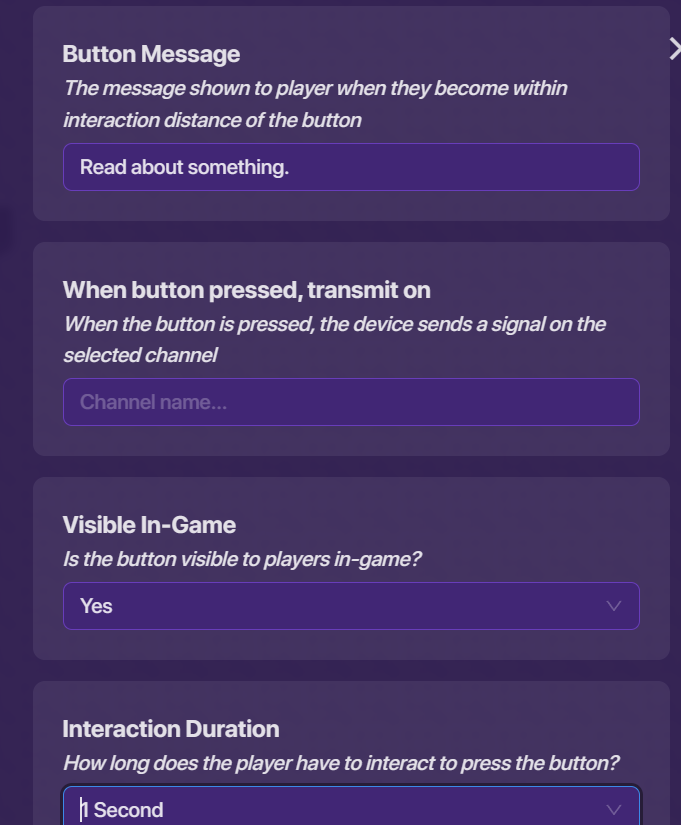
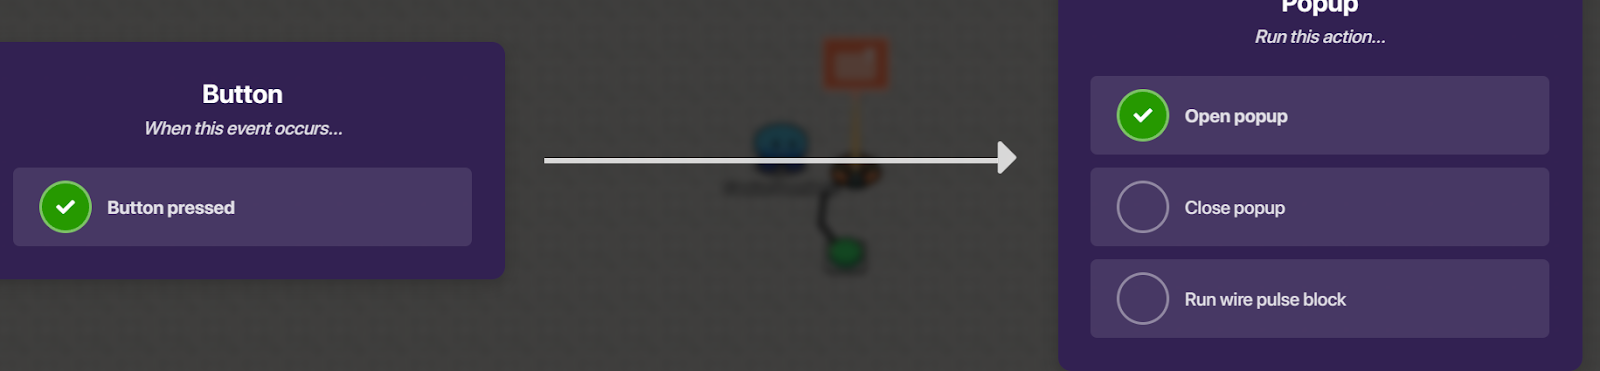
Go into the button’s settings. Configure it like this:
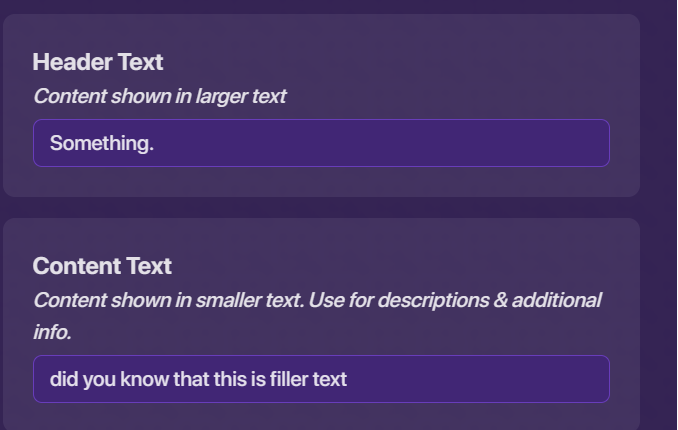
Next, open the popup’s settings. Fill in the text on them.
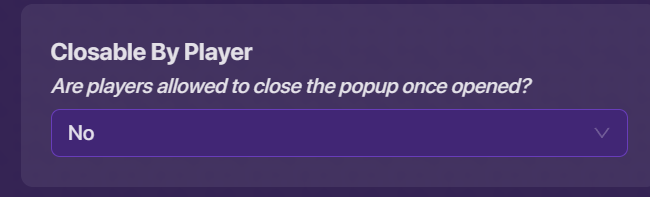
Go to the “All Options” tab in the popup settings. Scroll down. Make the popup not closable by player.
Next, wire the button to the popup.
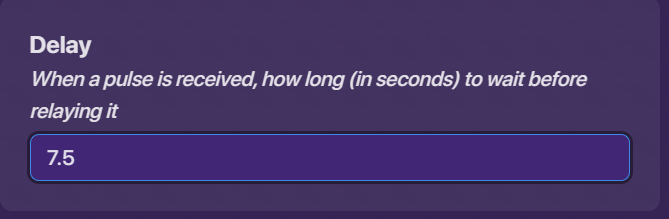
Place a wire repeater. Make its delay the length of time you want the popup to stay open. (Longer for long texts, short for short things. Around 7.5 seconds is a good length average.)
Wire the button to the repeater.

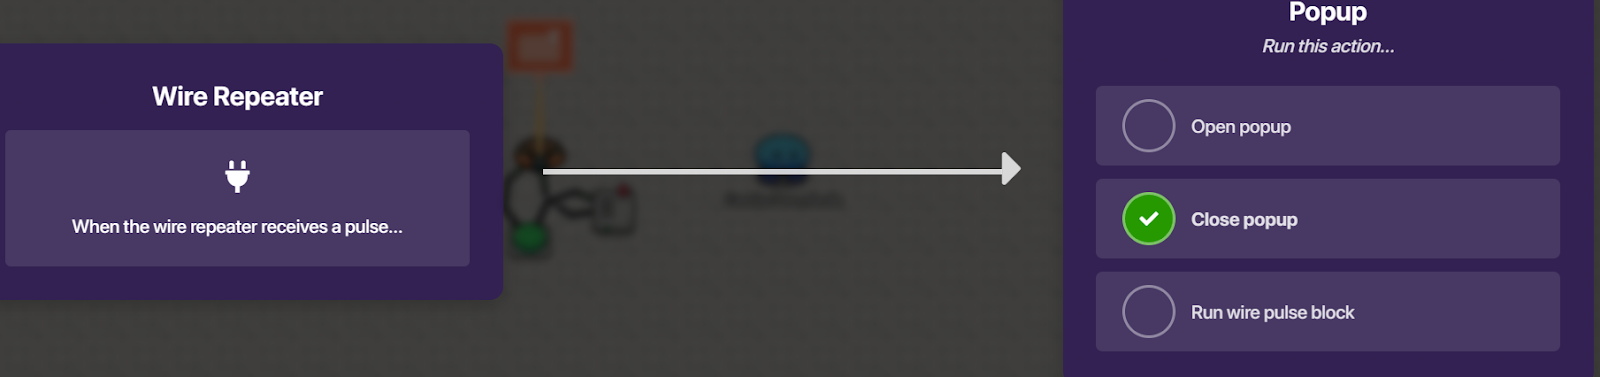
Wire the repeater to the popup.
Next, place down two textboxes. One of them should say “New” and the other “Viewed![]()
You may have to change the font size so they are about the same size. Set “Viewed” to not be visible on game start.
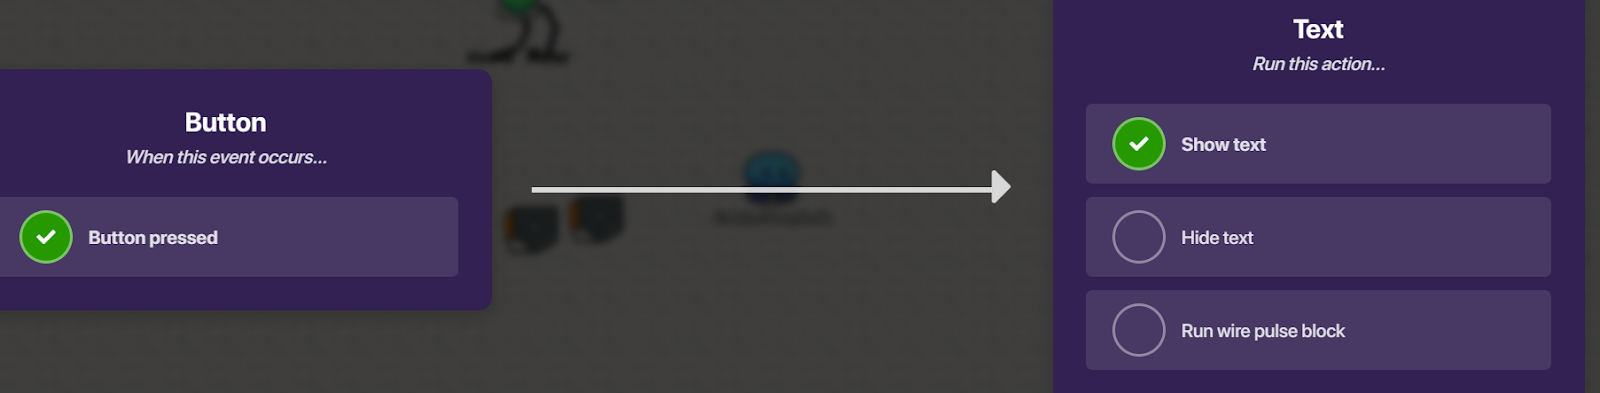
Wire the button to the “New” textbox.
Wire the button to the “Viewed” textbox.
Now, move the textboxes over each other.

Here’s a video of this:
Dungeon Room (🟨)
This works best with the buttons.
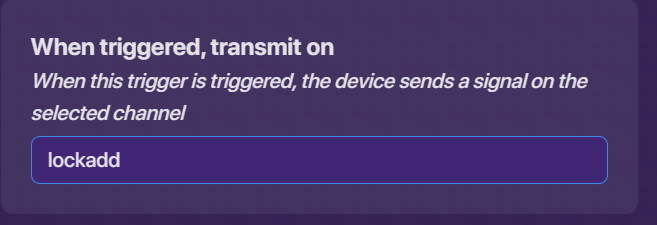
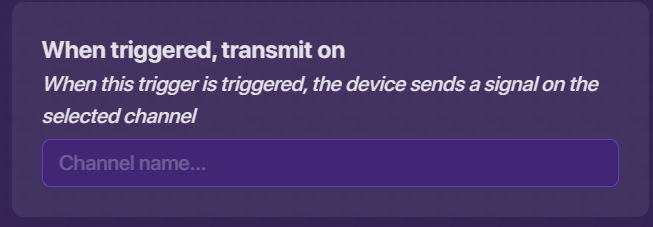
First, add a trigger that can only be triggered once.
You will need to set a transmission channel:
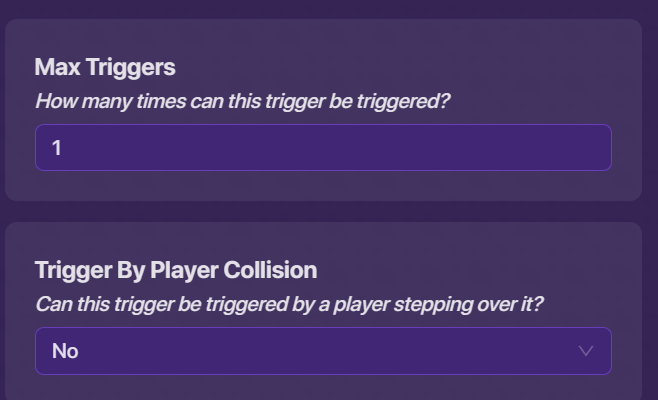
Change the settings in the configuration tab:
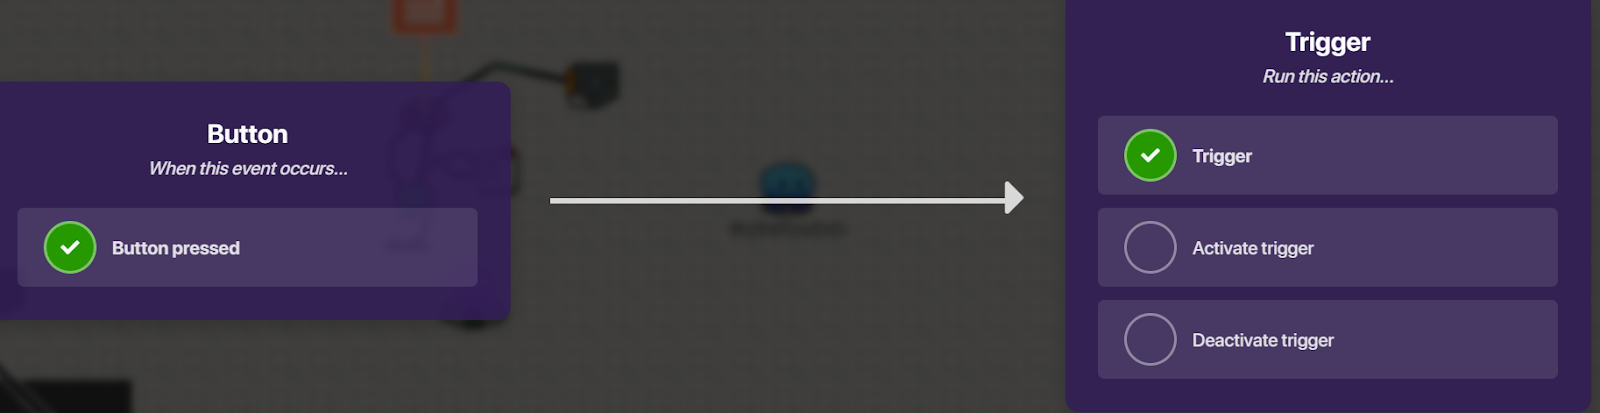
You will need to copy this trigger to have one for every button. Connect one to each button with wires.
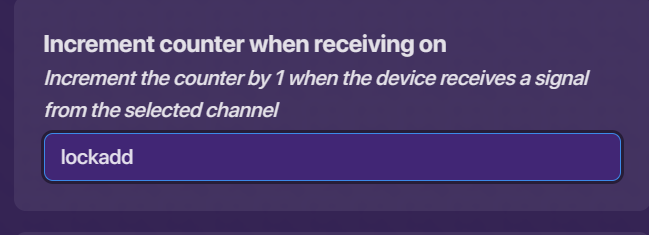
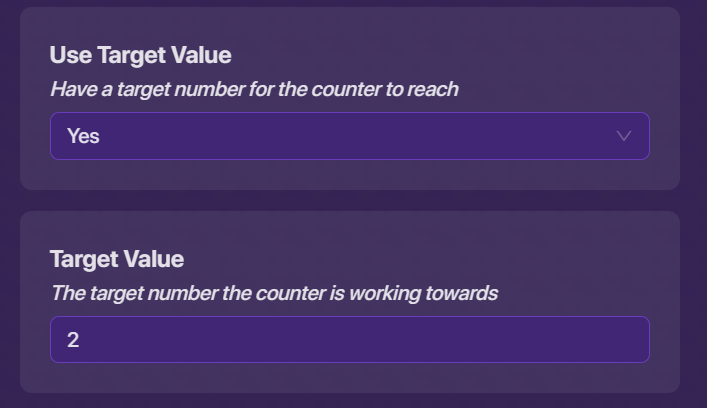
Next, place a counter. Set the counter to increment when it receives on the channel from the trigger.
Now, set a target value. This should be equal to the number of triggers.
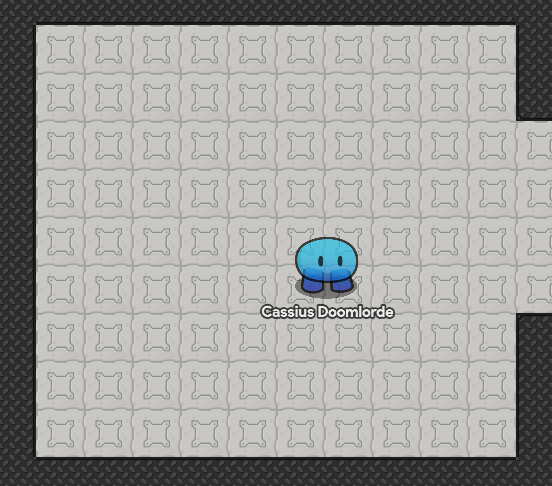
Now, build a room.
Make a square shape with a small hole.
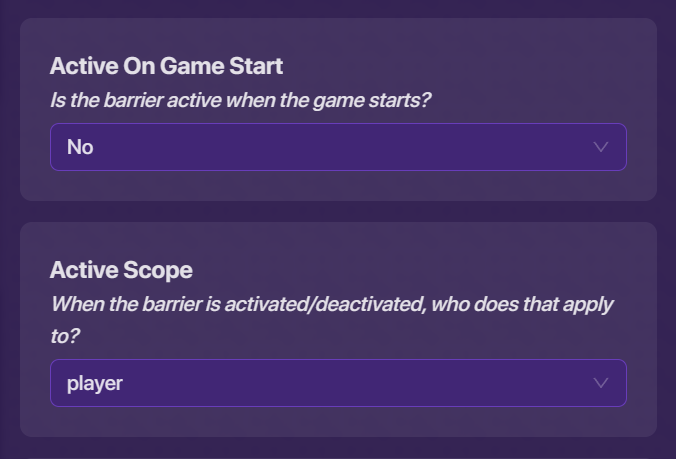
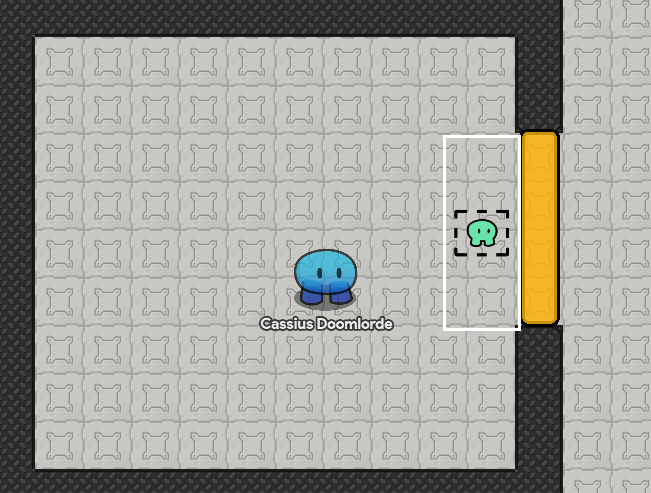
Add a barrier over the hole. Set it to be inactive on game start. Set scope to player.
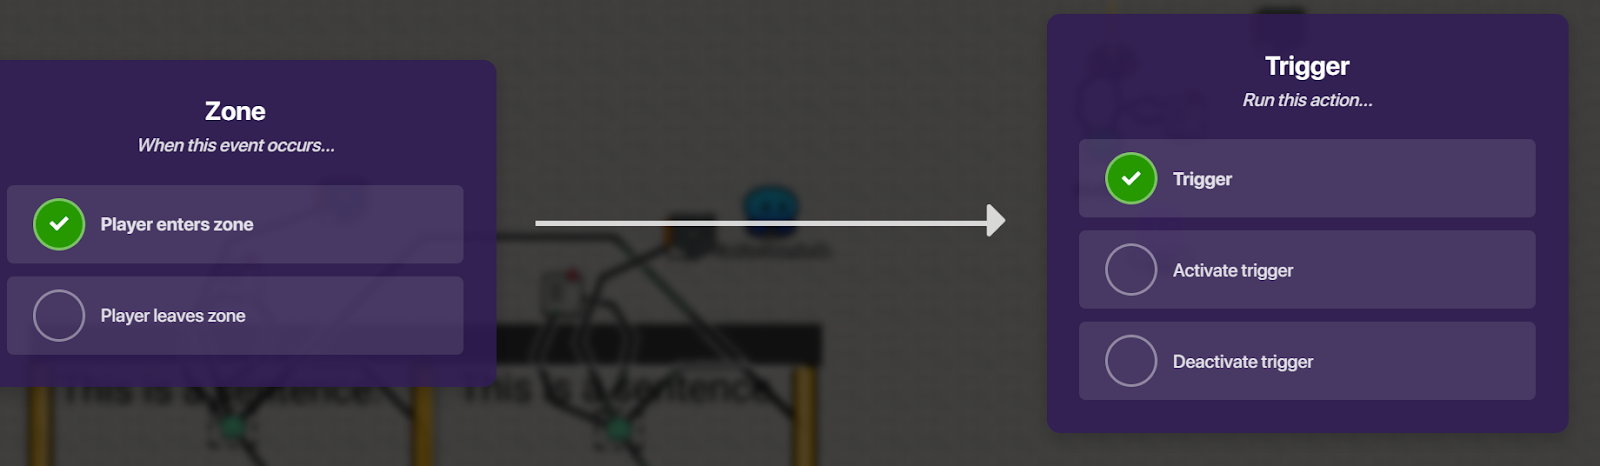
Place a zone on the inside of the room, just as the player enters.
Copy one of your single trigger triggers. Change it to not transmit on channel.
Now wire the zone to the trigger.
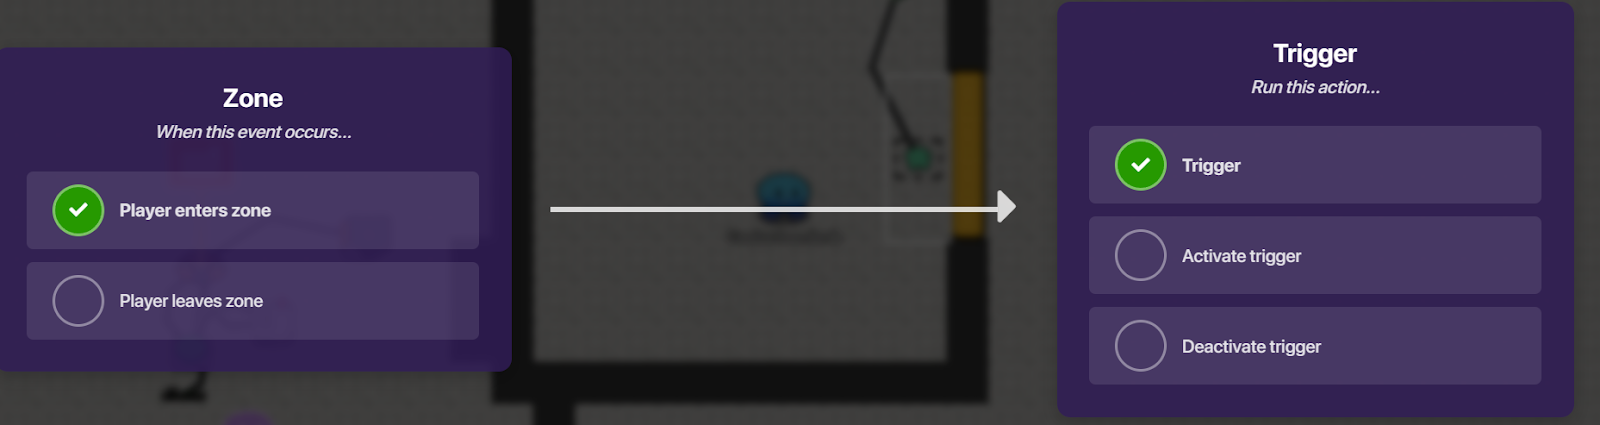
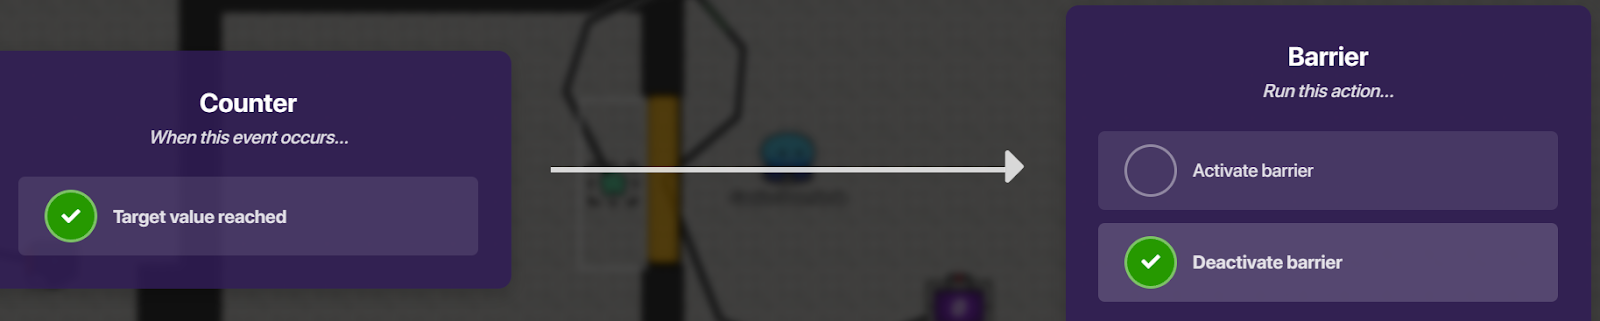
Wire the trigger to the barrier.

Wire the counter to the barrier.
Place all of your buttons in the room.
What my room looks like:
Movie (🟧)
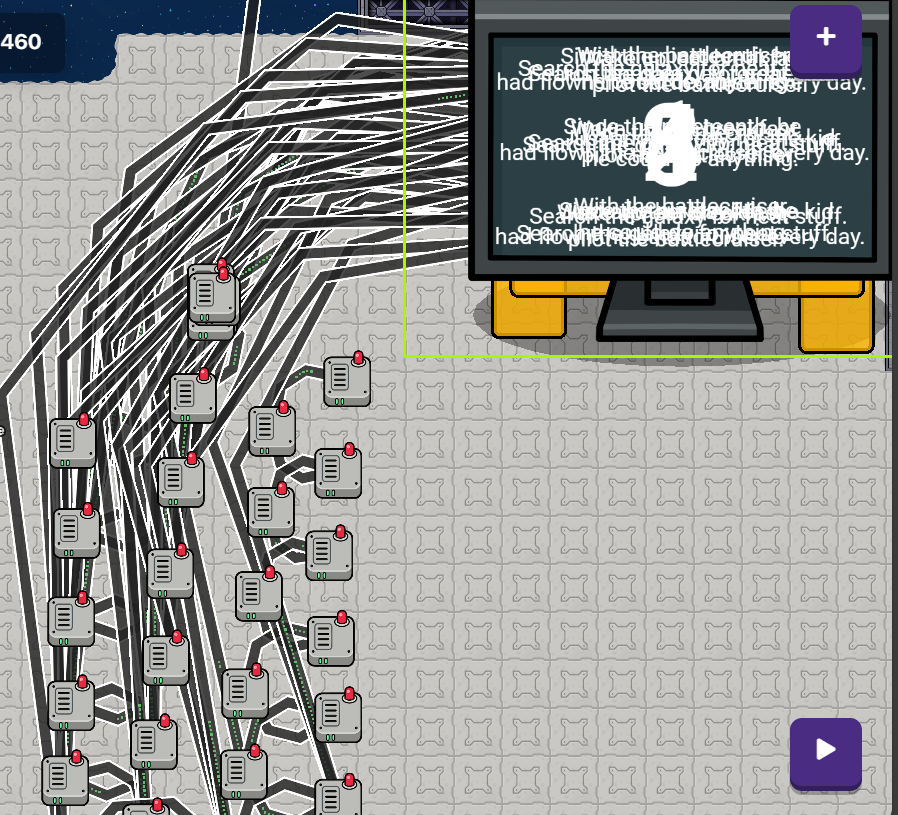
So this one is tedious. It involves a lot of wires, more for the longer it is. I do not feel like making a guide on this right now, but here is the concept:
You could make a movie out of emojis or (╯°□°)╯︵ ┻━┻ kind of things. You can also make a movie from moving text. Basically, you would make a chain of wire repeaters with a delay. Each repeater will turn off a piece of text and turn another on. I will provide a screenshot of why I don’t want to make a guide:
Progress Overlay [![]() ]
]
This has a little bit of block code. It is a retrofit to the rest of the systems. It will add a few devices.
The first step is to place a trigger. Enter its settings. In the featured tab, change the trigger to not be visible in game. Enter a channel for the trigger to broadcast on when it is triggered. I used the channel “Progress”.
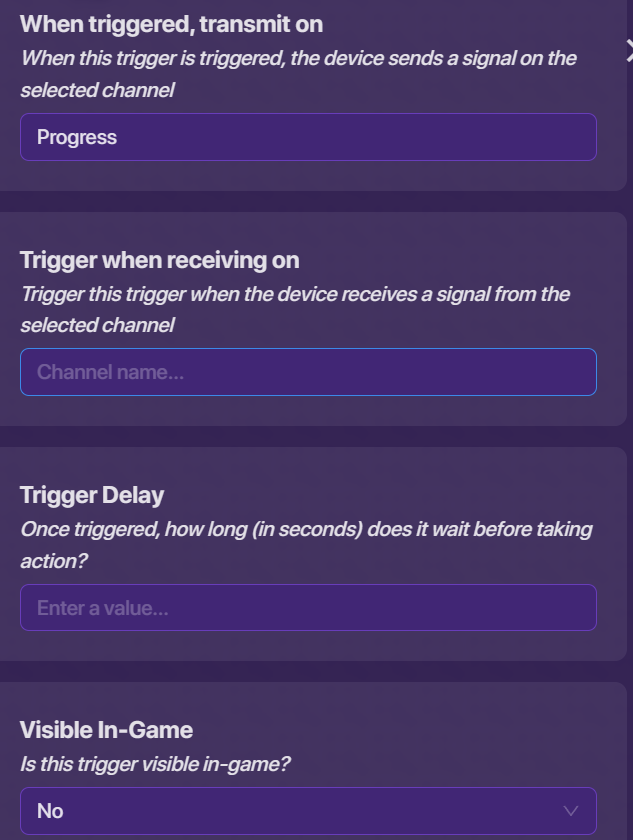
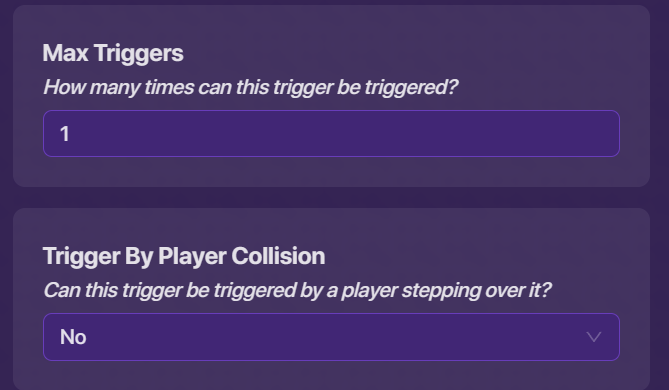
Now, go into the configuration tab. Change the settings to only trigger once, and for it to not trigger on player collision.
This trigger will be copied and used as an important part of the system. Copy the trigger and wire one for every zone.
Configure the wires like this:
Every button and zone should have exactly one trigger connected to it. You will have as many triggers as you have zones and buttons.
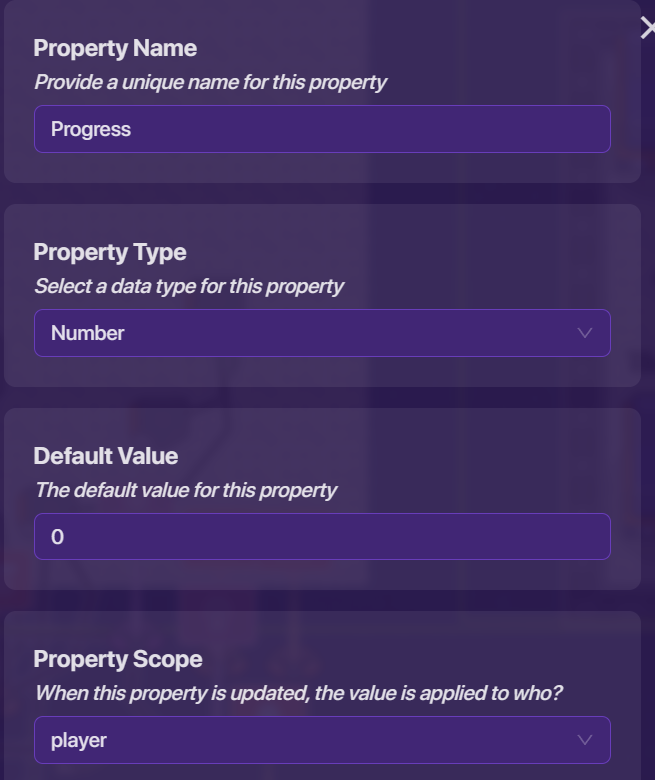
Next, place a property. Set it up like this:

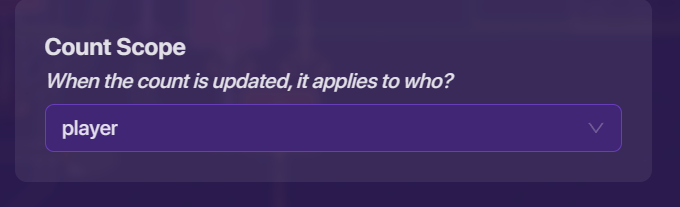
Next, place a counter. Configure it so it increments when it receives on the channel that you used in your trigger.

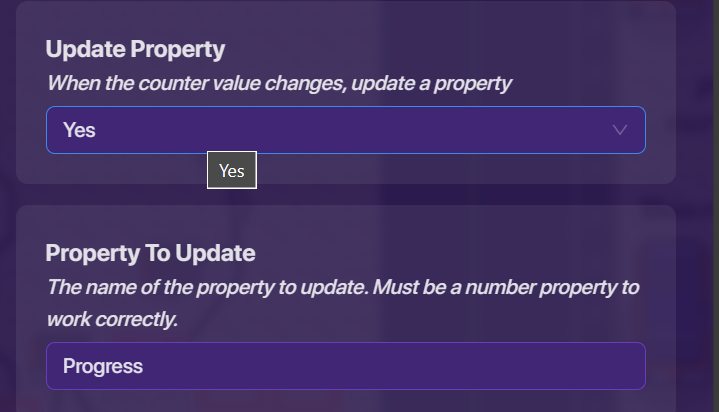
Go to the property tab in the counter settings. Change the settings so the count is the property you created.
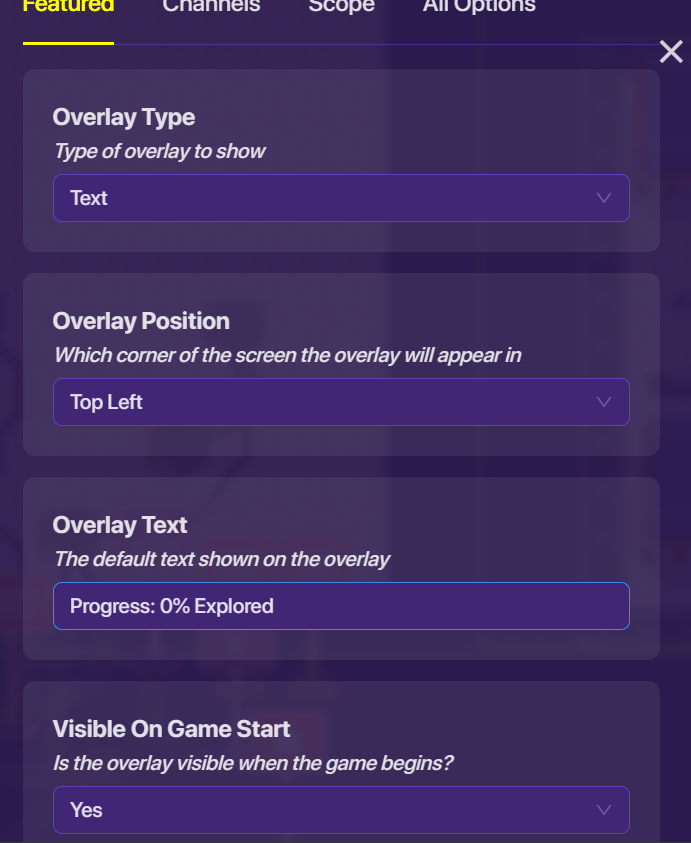
Next, you will need an overlay. Configure like this:
Go to the ‘Scope’ tag and set the update scope to ‘player’.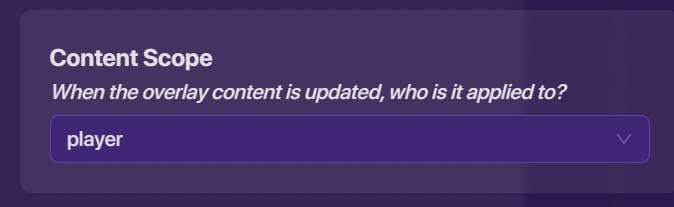
Next, you will need to go to the blocks section of the overlay. Create a “When Receiving on Channel” block. The channel will be the channel in the property for when it is updated.
The code is as follows:

The number ‘2’ in this code should be replaced with the number you get from this formula:
X=100/ number of triggers in system
This will produce the overlay.
Whenever you hit a trigger, the progress will go up.
Skip Code System (🟨)
This is not super hard. It is basically a way to have players skip ahead in the game to where they played before. (It is not a save or a checkpoint. It is for replaying later, not saving where a player is before they die.) It makes use of a progress code that the player is given when they reach a certain stage. This is entered into a questioner that checks the code. However, this system is currently suffering from a bug that makes it unusable. I will make a guide on this later when the bug is fixed.
- 1
- 2
- 3
- 4
- 5
Thank you for reading this Cassian Guide.
Please do not go welcoming me to the forums. I am not new. Thank you.