Credit to JoeTheChicken (https://forum.creative.gimkit.com/u/JoeTheChicken) for inspiration.
Here is the link to the original timer How to make a colon-separated timer (Difficulty: 🟨).
To create an overlay timer, you only need 3 properties, 1 game overlay device, 1 repeater, and 1 button/lifecycle.
This saves slightly more memory than the original clock.
Name one of each the properties “hours”, “minutes”, or “seconds” for organization. The properties should all have a starting value of 0 and be a number.
The default text of the overlay device should be 0:00:00.
Set the repeater to repeat every second, to start upon receiving a signal from the lifecycle/button, to NOT trigger upon starting the game, and to transmit a signal to a channel.
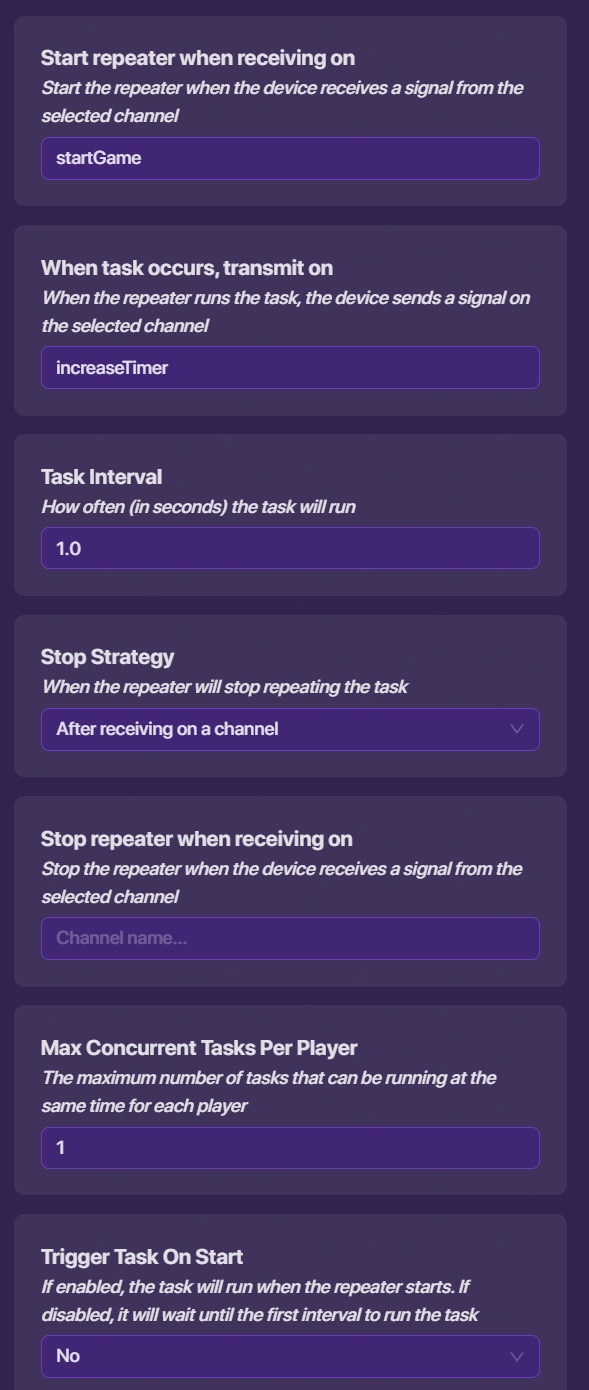
The channel that the repeater transmits to should activate the code inside the overlay device.
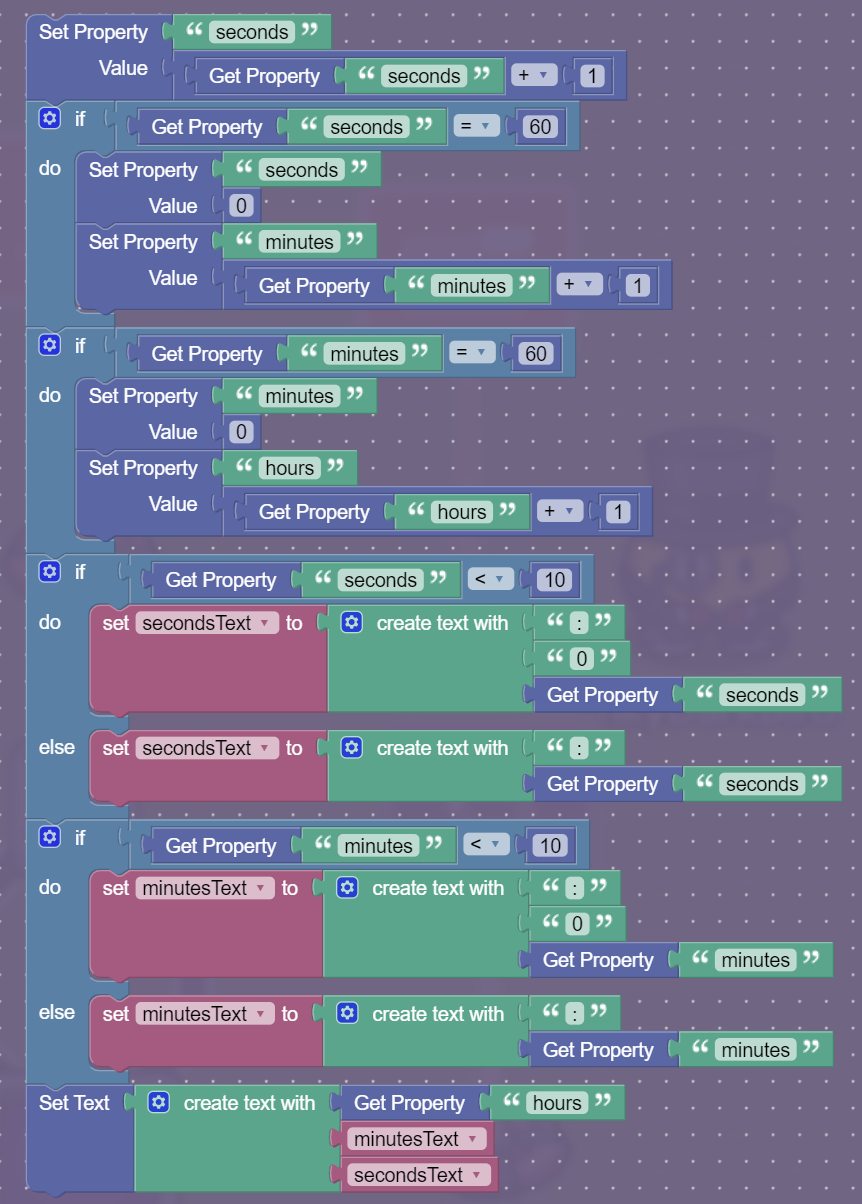
Upon receiving a signal from the repeater, the overlay device will increase the value of “seconds” by 1. If “seconds” or “minutes” is equal to 60, they are both reset to 0, and “minutes” or “hours” is increased by 1, respectively.
To make the clock look more like a standard digital clock that includes unnecessary 0s in the minutes and seconds, the code checks if “seconds” or “minutes” is a two-digit number. If they are two-digit numbers, the code sets the variables “secondsText” and “minutesText” to “:[seconds]” and “:[minutes]”, respectively. If the variables ARE NOT two-digit numbers, the variables are set to “:0[seconds]” and “:0[seconds]”.
Finally, the code concatenates “hours”, “minutesText”, and “secondsText” and sets the overlay device to that value.
I did not include the extra 0 for hours because this code already uses 72 blocks and no person is playing a Gimkit game for more than 10 hours.
Make sure to create the variables first before trying to store values.