Today I’ll show you how to private message players in Gimkit Creative. This system allows you to send a secret message to one person in a game. Note: The system can get buggy if multiple people use it simultaneously, so make sure that doesn’t happen. Another note: Using a similar chatting method helps you cut down on Dayy’s chat memory by so much. End product:
Recommended:
Knowledge of Player vs Global scope
Understanding of block code
Patience
Debugging
Anyway, let’s get into the tutorial!
First step, player IDs and name finding
Make that first. Make 2 properties named “player id” and “number of players” For “player id”, make it a player-scoped, number property with a default of 0. For “number of players”, make it a global-scoped, number property with a default of 0. Then, place down a popup. In the popup, change the settings to:
Open popup when receiving on: Show popup
Call to action label: Yes
Call to action channel: yes
Secondary call to action label: No
Content scope: player
Go into the blocks and place this:
Place a property named “p-player name”. For the property, make it a player-scoped, text property without a default.
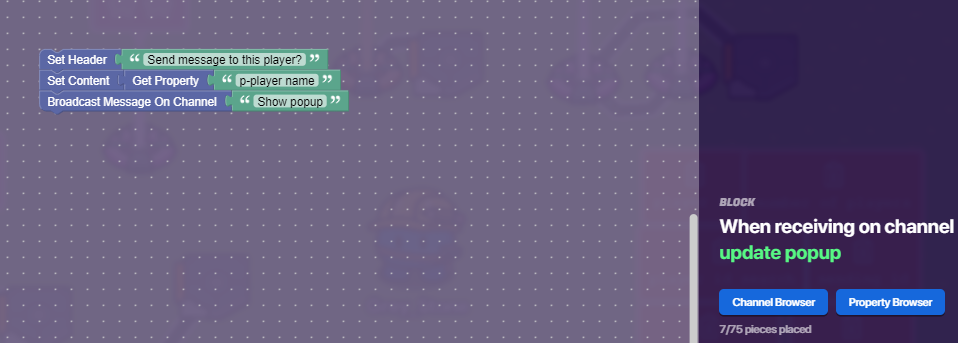
Now, place a trigger. Make it untriggerable by collision and invisible. Also, make it receive on “Chatting time”. In the blocks put this:

Place 2 properties named “player id search” and “sending id”. For “player id search”, make it a global-scoped, number property with a default of 0. For “sending id”, make it a global-scoped, number property with a default of 0.
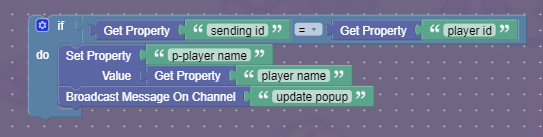
Next, wire the popup to the trigger. Secondary call to action clicked → trigger. Now, place a relay. Make it receive on “start search” and broadcast on “search”. Place another trigger. Make its settings the same as the other triggers, but make this one receive on “search”. In the code, put this:
Place a property named “player name”. For “player name”, make it a global-scoped, text property without a default.
Place another relay, but don’t change the settings. Wire the 2nd trigger to the relay.
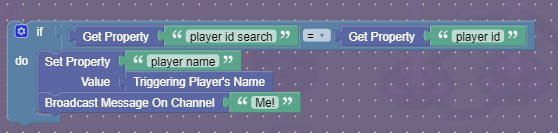
Triggered → trigger relay. Place yet another trigger. Make its settings the same as all of the others, but make this one not trigger on any channels. Wire the second relay to this trigger. Relay triggered → trigger. In the triggers block code, put this:
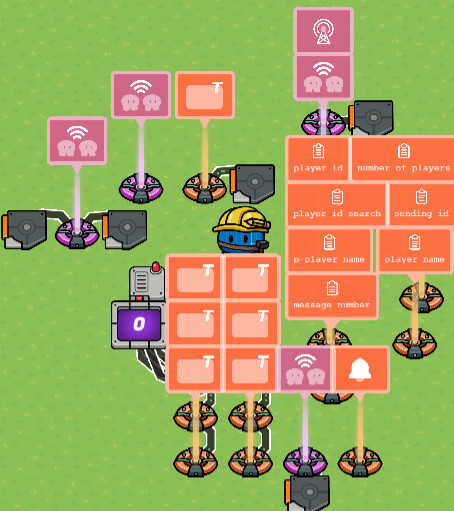
It should now look like this:
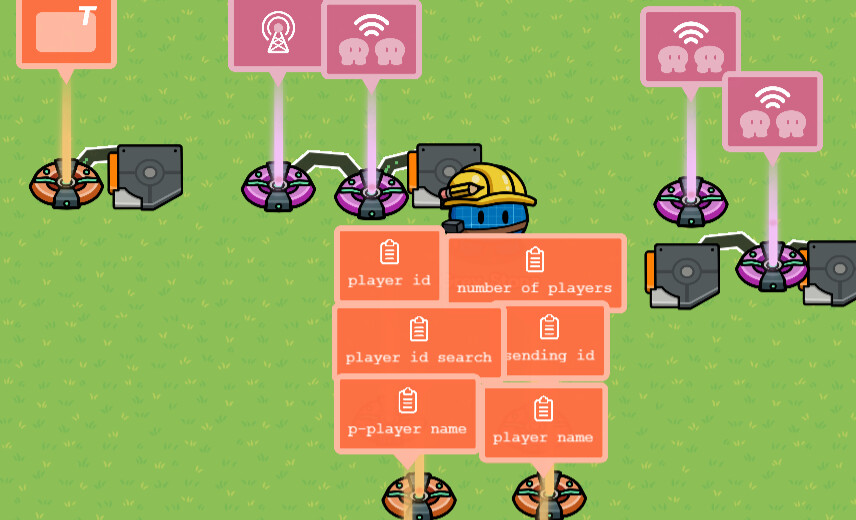
(Ignore the wires connecting the lifecycle, relay, and trigger. I used those for debugging.)
Second step, the messages
Now it’s time to make the messaging part. This part loosely follows @Dayy’s guide on making a popup chat system, but is way more memory efficient.
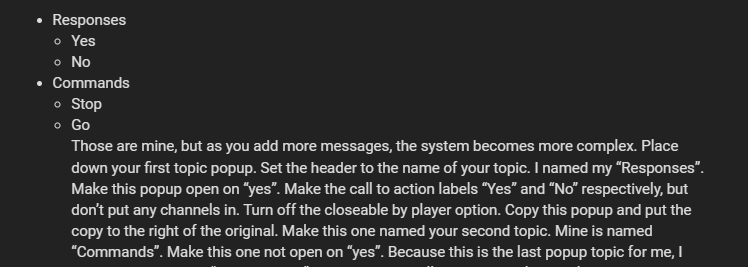
Place down a property named “message number”. Next, place a counter down. Make it increment on “counter”. Make it reset on “reset counter”. Also, make it update the “message number” property. Figure out what different messages you are going to have. I have these:
- Responses
- Yes
- No
- Commands
- Stop
- Go
Those are mine, but as you add more messages, the system becomes more complex. Place down your first topic popup. Set the header to the name of your topic. I named my “Responses”. Make this popup open on “yes”. Make the call to action labels “Yes” and “No” respectively, but don’t put any channels in. Turn off the closeable by player option. Copy this popup and put the copy to the right of the original. Make this one named your second topic. Mine is named “Commands”. Make this one not open on “yes”. Because this is the last popup topic for me, I have it broadcast on “reset counter” on the second call to action. Make your last topic popup broadcast on “reset counter” in its second call to action.
Wire the first popup to the second one. Secondary call to action pressed → open popup. Repeat these steps for however many topics you have. Now, copy your first row down. Make this row not broadcast on anything in all of its channel spots. Now, in every “Popup closed” broadcast slot on the second row, put “counter” in. Also, put “message” into every primary call to action message slot on the second row. You should change the message headers to whatever you want the message to say. For example, mine are “Yes” and “Stop”.
Now copy this row down again. Re-header these too. Mine would say “No” and “Go”. Repeat this for however many rows you want to have. In the bottom popup for every column, make it broadcast on “reset counter” on the second call to action channel.
Now, wire from the top to the bottom. Go from the top-leftmost popup to the next lower-leftmost popup. Primary call to action pressed → open popup. Wire that popup to the next lower one. Secondary call to action pressed → open popup. Repeat the secondary call to action → open popup wire chain to the bottom. Do that for each column.
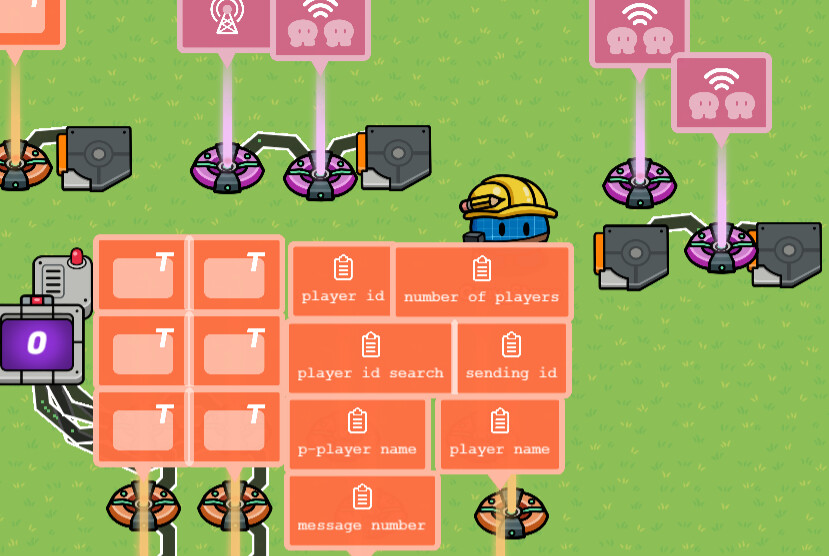
Now is the fun part. Count the number of popups in each column. Remember those numbers as column 1, column 2, etc. I would write it down. Now for the first column, find the top popup. Using wires and wire repeaters, wire it to the counter. Wire it as many times as column 1 is big. Make the wires go on Secondary call to action → increment counter. Repeat this for every column, doing a different column # for each. For me, I have 4 wires going into the counter, because I have 4 message popups. It should now look something like this:
Third step, sending the messages
Final stretch! This part tells the notification who to send the message to and what the message is.
Place down a relay. Make it relay on “message”. Place down a trigger. Make it invisible and uncollisionable, you know the drill. Make it have a delay of 0.1 seconds. In the block code put this:

Now place down a notification. Make the type “Info”. Go into the blocks and make something close to this:
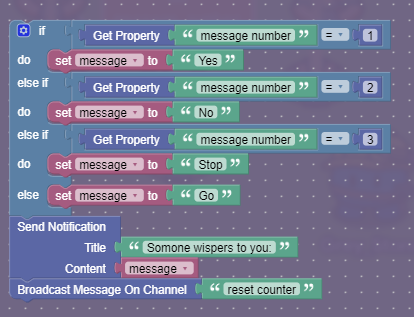
The if block part will change unless you use the same messages as me. When putting in the text, make it follow your popups. Ignore the first row for now. Get the headers of the first column of popups, ignoring the first row. Your first message will go under the “message number = 1” part of the if block. Repeat with all of the popups. It should look like this when you are done:
Now you have finished the guide! Congrats! Tell me if you have any issues and we can debug together. I will be free for most of the summer, so just ask! I’ll get back as soon as possible. If you want to make this open via a button, wire it to the second trigger you placed. Happy Gimkiting!
Explanation[1]
Gim stuff
If you were wondering why I don’t have the Dodge gim on, it’s because I needed an alt account to get more map slots. I only have 1,200 Gimbucks, so even if it came I wouldn’t be able to get it.
Ok, So what first happens when the game is started is that everyone gets an ID, called Player ID. Then, the game sets the ID it’s looking for and checks every one to see whose ID matches. If it does, it gets the name and stores it for later use. It then updates the popup and opens it again. It then opens up the chatting mechanism, which allows you to select your message. Once that happens, it records which one you chose, and then chooses who to send it to, and then gets the message you chose, and then sends it to the person you selected earlier. ↩︎