Microwave!
TryEverything’s Guide to a Functioning Microwave in Association with leo_flowers Working Kitchen Guide
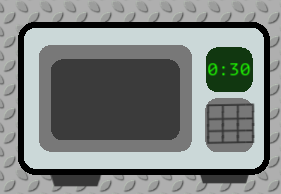
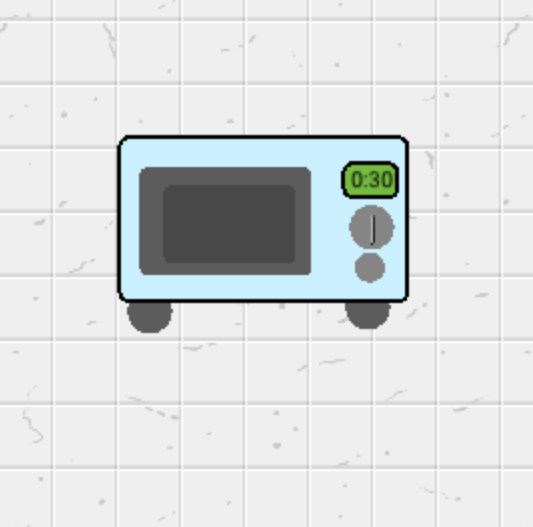
Step 1: Designing the Microwave
Materials: 4 Rectangular Barriers, 4 circular barriers, Text, metal pole
Set down Rectangular Barrier 1 (RB1) and color it blue. It will be the body of the microwave.
On top of RB1, set down RB2 as a dark grey barrier (door) and then RB3 as a lighter gray, transparent (interior). All of the above should be in the middle left region.
On the right upper side, set down a green barrier (RB4) Set text above it. Use CB1 and CB2 as dials. Set a metal pole above one of the dials. Finally, use CB3 and CB4 as bottom layer for the legs of the microwave. Done!
Step 2: The Timer
I made a :30 second timer for my microwave. (Contains small amount of block coding)
Materials: Text, Repeater, Button and Property
Wire as such: Button Pressed - Start Repeater - Repeater Runs task - Repeat Wire Pulse Block (text)
Property Settings : Name “Time”, Make it a number property. Set default to 30.
Repeater Settings: Task Interval: 1, Time to run: 30
Text Block:
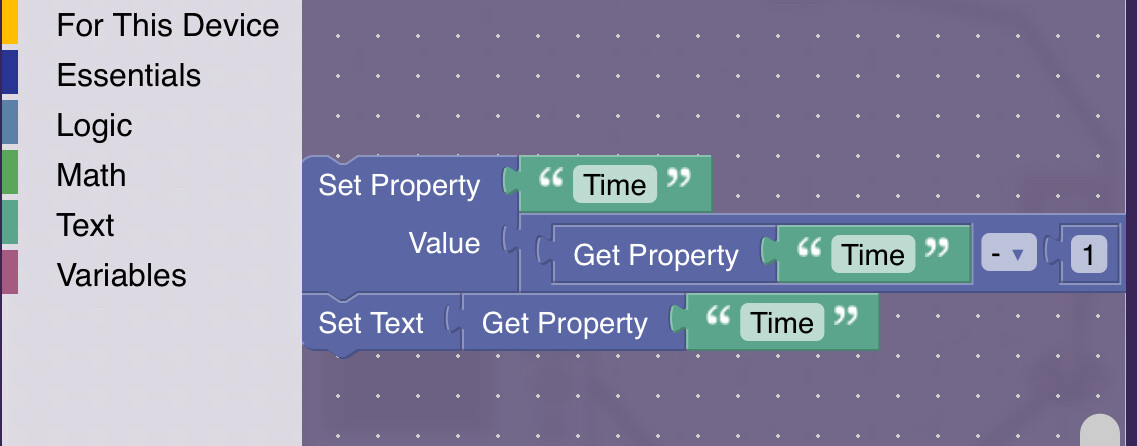
And that is all for the timer!
Step 3 (Optional): Cooking food
Materials - Two loafs of bread (or other food prop), wire repeater
Set down two bread (or other food prop) tint one a bit darker than the other (bread2) MAKE SURE BOTH BREAD ARE NOT VISIBLE ON GAME START.
Wire repeater delay: 30.0
Wire like so: Button pressed, show Bread1 —> Bread shown —> Wire Pulse —> Show Bread2 —> Bread2 Shown, hide Bread
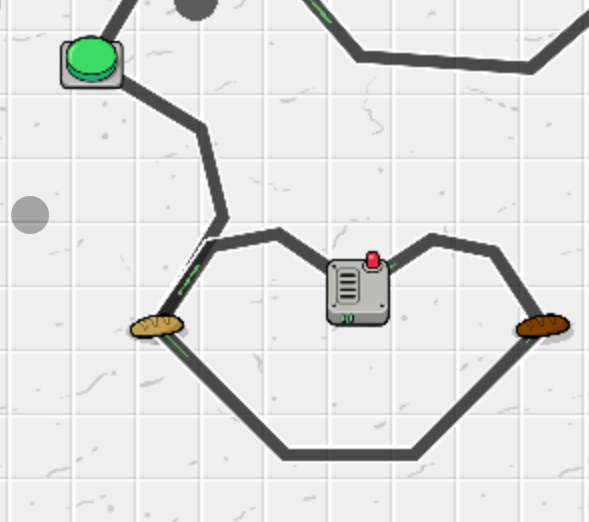
Move bread into the microwave, and it will cook! You could also make the bread get increasingly darker as time goes on by adding more props/wire repeaters. Just decrease the wire repeater time so the total amount is still 30 seconds cook time.
And that’s it!
Kitchen Sink!
Next up is a sink that REALLY gives you water!
Step 1: Design
Materials: Stone Column, Stone Sword, 2 Space Trash (faucet)
Set Stone Column on top of Sword Stone. This is the Base and Body of the sink. Add a dark gray rectangular barrier on top of stone body. This is the inside of the sink. Add a larger space trash “faucet” and a smaller one at an angle to make the water spout. If you don’t want your sink functional, you can stop here.
Step 2: Adding Water animation
Materials: At least 2 Rectangular Barriers. At least 6 Circular Barriers, a wire repeater for each barrier you have. Two buttons.
Wire repeaters must be set to around .2 sec. Barriers should be light blue and somewhat transparent (I find .75 works best) They should also NOT be visible on game start. Have all barriers set to HIDE ON CHANNEL X)
When making an animation, I find it helpful to lay out all the items side by side, and put a wire repeater under each one:

First, connect the button to the first wire repeater. Next, connect every wire repeater to the next. The last one can be left alone. Connect the button to the first wire repeater.
Move the circular barriers to come from the tap, first to last. When you press the button, it will look like it is pouring. Make the second button activate when button1 is pressed. When you press button2, make it send a channel to CHANNEL X. All the water should disappear. Finally, take a rectangular barrier and put it in the sink to look like water. Have it activate as you wish, to show a full sink.
Additional Animation: Repeat the previous processes, but in addition to the PREVIOUS WIRING, the second wire repeater to the first, but have it set to HIDE PROP. Do the same with third-second, fourth-third, etc. This will make it look like the water is bubbling when you add it to the tap.
Final Step!
Lastly, look at your two buttons. Set the channels so it when button1 pressed it sends a signal to A, and deactivates on A. Do the same with button2 but use channel B. Add a third button to activate with button 1. Hook this button to an item granter. Have it grant water.
That’s all for the sink! Thanks for reading!
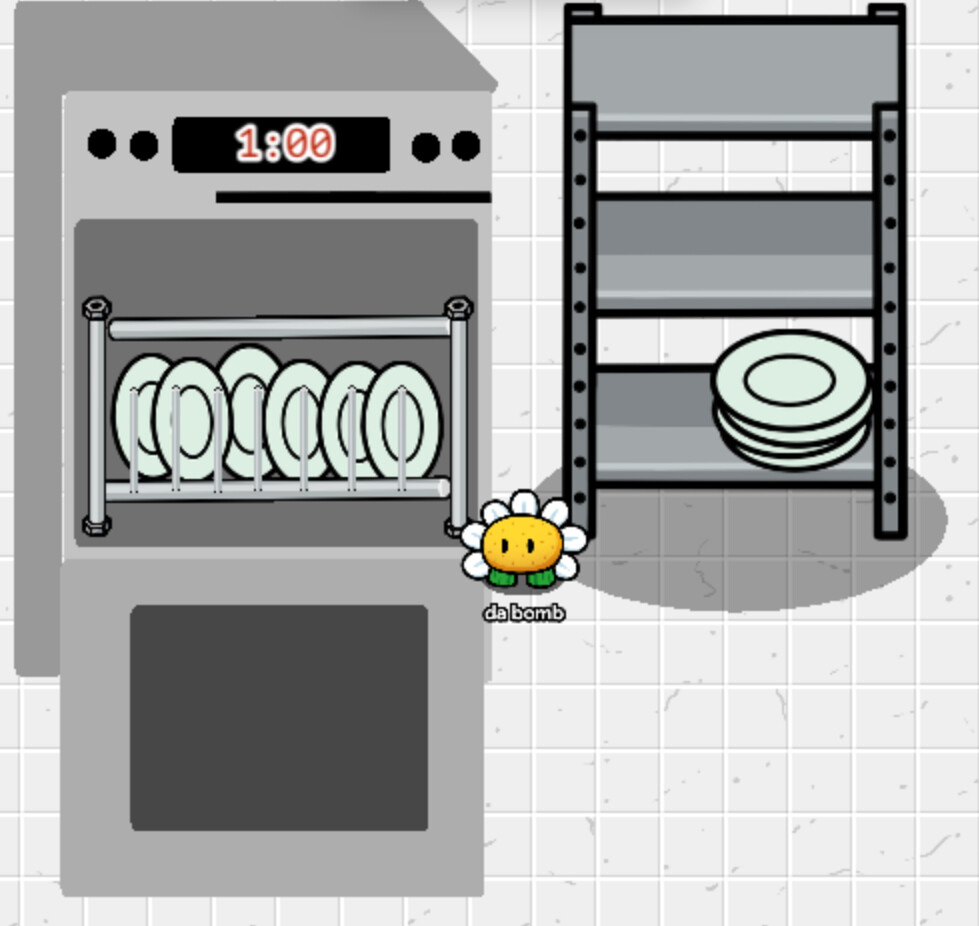
DISHWASHER!
I think my dishwasher is my fave design so far!
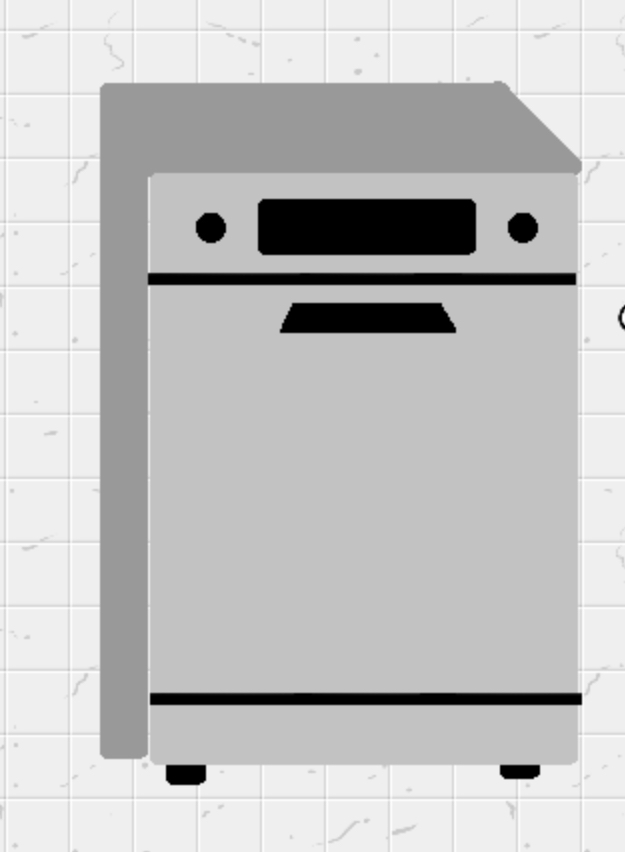
Step 1: Design (outer)
Materials: 1 Large Light Grey Rectangular Barrier, 4 black rectangular barriers, 2 light gray rectangular barriers, 4 black circle barriers and 3 dark gray rectangular barriers. 6 Metal poles
First, set down the Light Gray large barrier to be the body of the dishwasher. Next make a line across the top and bottom of the dishwasher using black tinted metal poles. Add the display screen and buttons at the top using a black rectangular barrier and the circle barriers. The Feet are also black rectangular barriers, layered UNDER the body of the dishwasher.
Here is the slightly more tricky part. To make it look 3-d-ish, use the following image as a guide.
You need the dark grey barriers. Put the first two long ones along the top and left side. Then move the top one to the left a small amount. Add a third barrier and rotate it as such. DONE!
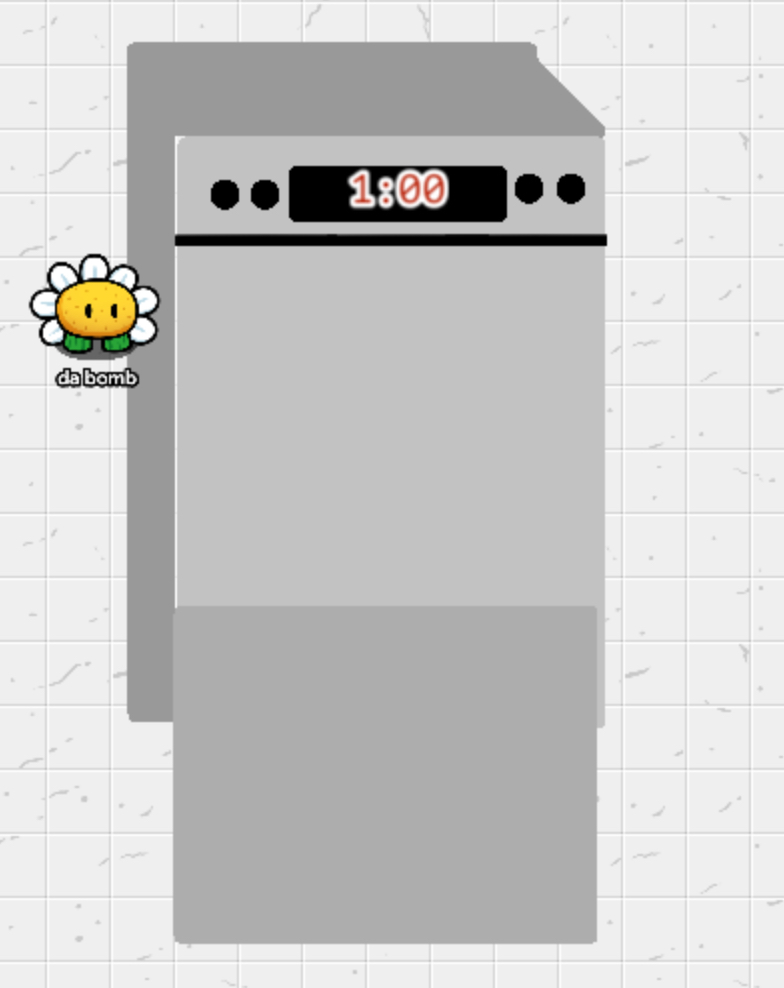
Step 2: Making it open-able.
Materials: Button, previous materials, 3 barriers, 11 metal poles, 5-10 plates metal shelf
Alright here is what you need to do. The following items need to become HIDDEN when button pressed: Trapazoidal barrier with it’s rectangle barrier accomplices, bottom poles for line and the leg barriers. Materials in bold above MUST be hidden on game start, and visible when button pressed. You can do this by using channels.
For the inside DESIGN, put down a light-ish gray barrier approximately where the bottom black line would have been, but facing down, like this:
Next you need to put down a darker barrier in the middle of the one you just set down. Complete the basis of the design by putting the third barrier in the middle of the dish washer. At this point it should look like this:
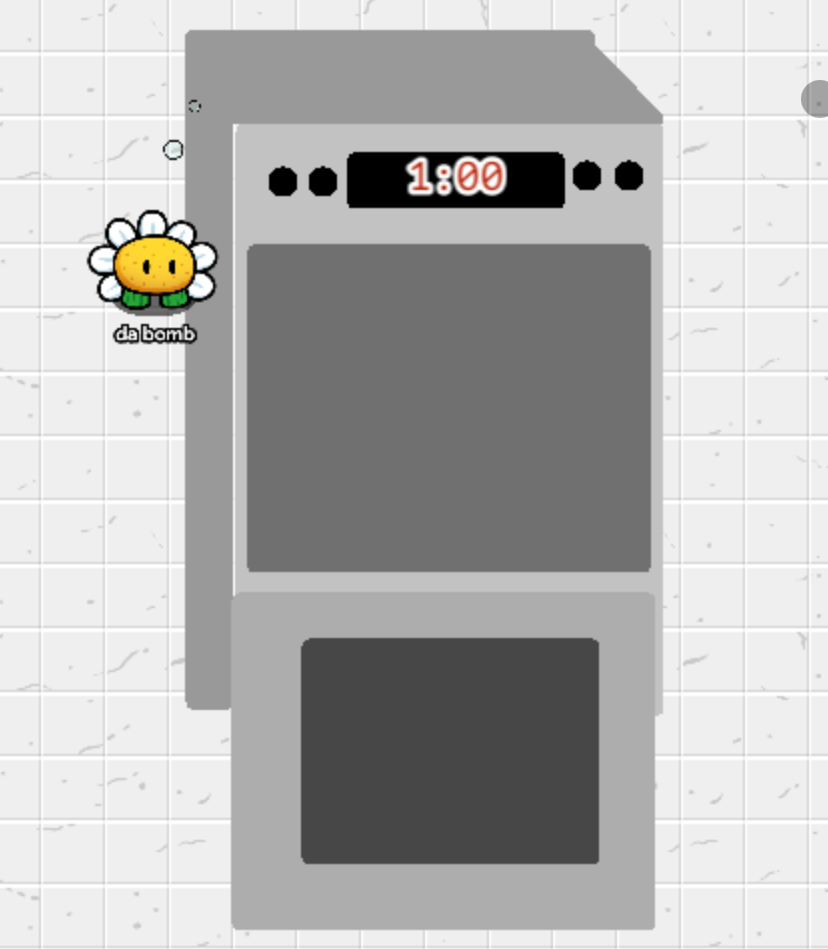
Put down a metal pole on each side of the inner barrier. Then put one on the bottom connecting the two. You can use space trash if you want the poles to look bolted in. From the horizontal pole, lay several vertical, small poles along. This is the inside of the dishwasher.
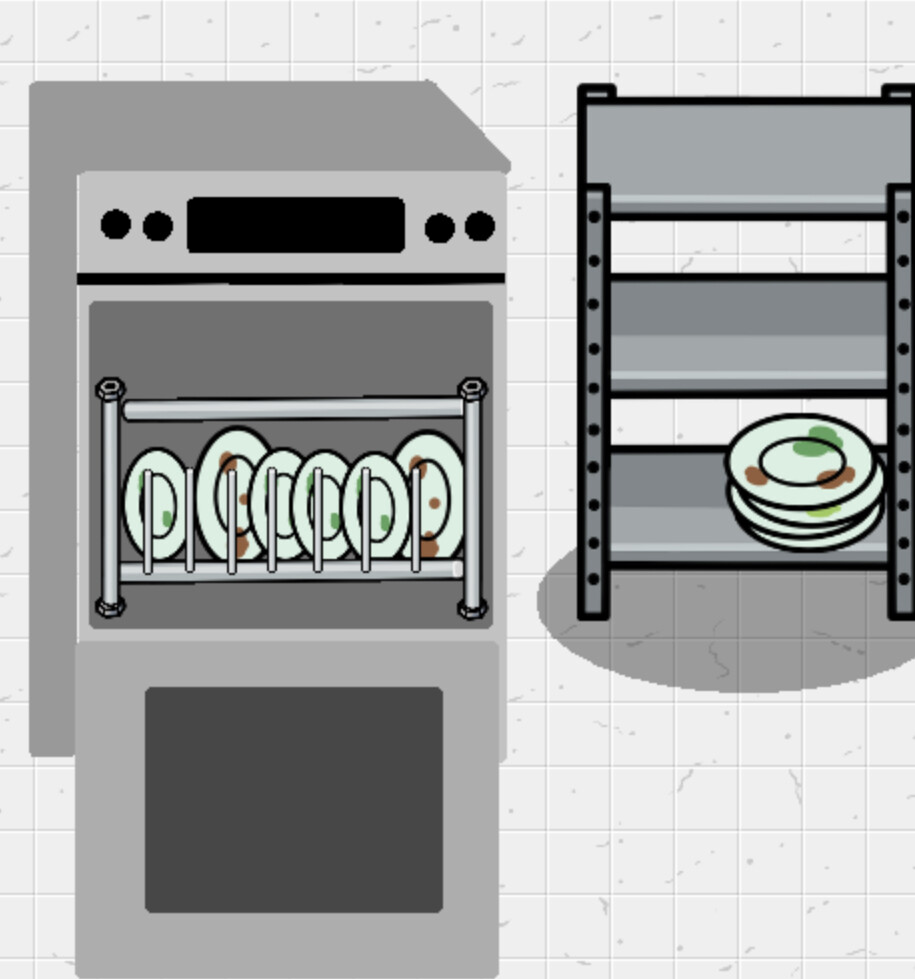
Step 3: Adding dishes/Cleaning function.
Materials: Your choice of amount of clean plates, and the same number of dirty (5 clean- 5 dirty, etc), Metal Shelf, 2 Buttons
Add a stack of dirty plates on a metal shelf near the dishwasher. Put a button saying something like “Load Dishes” below it. Have the button INACTIVE on game start, and ONLY ACTIVATE when the Open Dishwasher button is pushed.
Wire or make channels to connect the button to the stack of dirty plates, and any dirty dish you want to be in your dishwasher. When button is pressed, it should SHOW all of the DIRTY plate props. Make that button also activate a THIRD button, “Start Load”. Have this HIDE all of the dirty props, and show the OUTSIDE of the dishwasher again.
Dirty Plates
TIP: If you want to add a VISIBLE timer, use the same steps as in the Microwave guide!
When timer is over, have it automatically OPEN dishwasher (hide outside: show inside) but DONT connect it to the dirty plates. Instead, put a CLEAN plate in the same spot where the dirty plate was in EACH of the spots, and make THOSE visible!
Now, when the dishwasher opens after a full cycle, it will look like this!
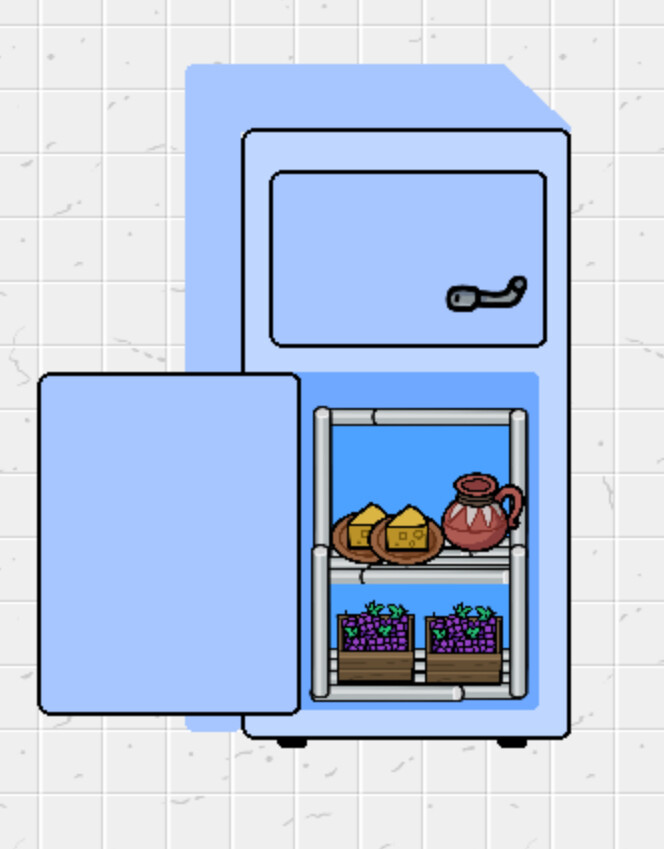
Fridge
Credit to leo_flowers for getting me started on this journey!
And without further ado, here is my working refrigerator guide!
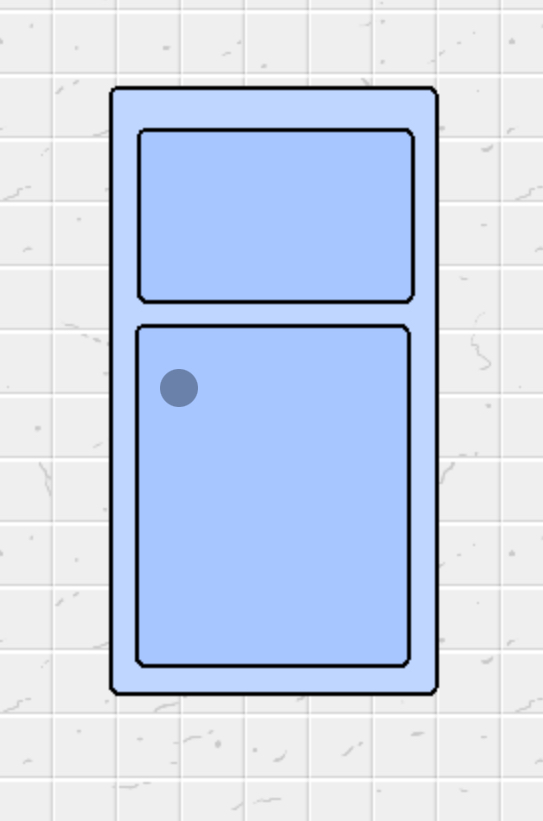
Step 1: Outer Design
Materials: 8 rectangular Barriers and 2 handle Space Trash
A) Set down 1 light barrier, then two darker barriers inside:
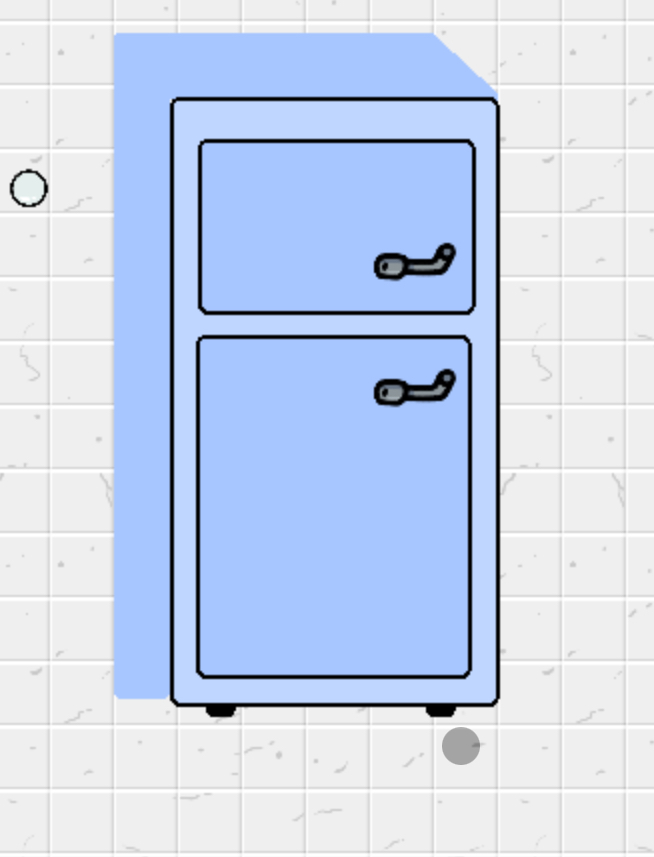
B) Add a Rotated Space Trash prop on each smaller barrier to be a handle, and two small black barriers for the legs.

C) Make it 3-D by adding threes rectangular barriers AROUND the fridge, one at an angle like this: (see also dishwasher guide)
Step 2: Interior
Make the following items be HIDDEN when a button is pressed: Middle Bottom Large Barrier (Door) and Door handle.
Add the following items (make them hidden by default, and visible by pressing the button): Barrier to use as open door and Dark barrier to be the shadowy inside.

Metal poles for the shelves.
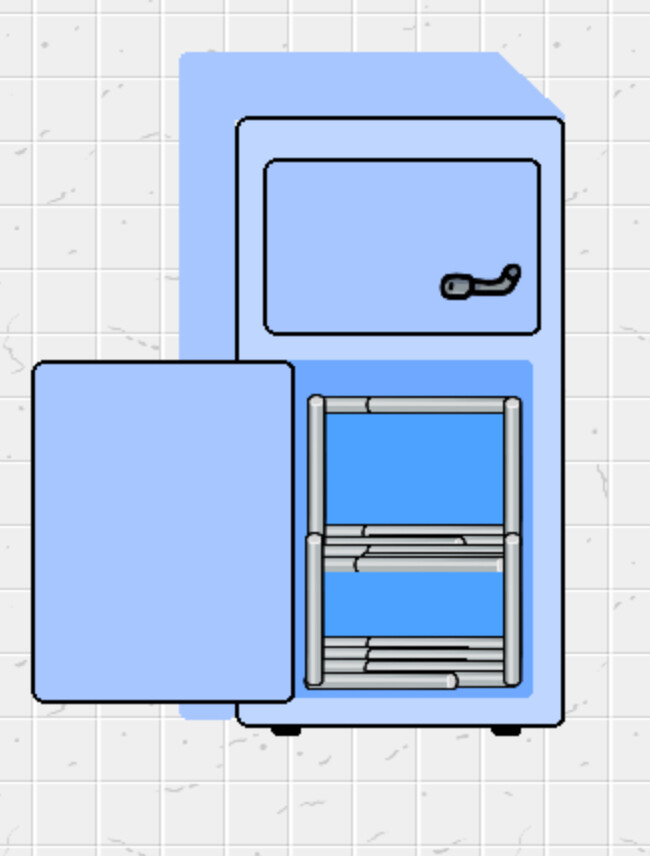
Your Choice of food items, with at least TWO items you will want to be choices for the Gim to select.
I chose Water and Grapes.
Step 3: Making it functional
You should have the button system already: press button —> Open fridge, hide outside and reveal insides
Next, have another button activate at the same time. Connect it to a POPUP. In popup settings, go to Call of Action. Call of Action 1 should say Item 1’s Name (ie: Grapes). Call of Action 2 should say item 2’s name (water) . Connect the POPUP to the coordinating item granters. I did this with wires.
That’s it! You have a functioning refrigerator to get snacks from!
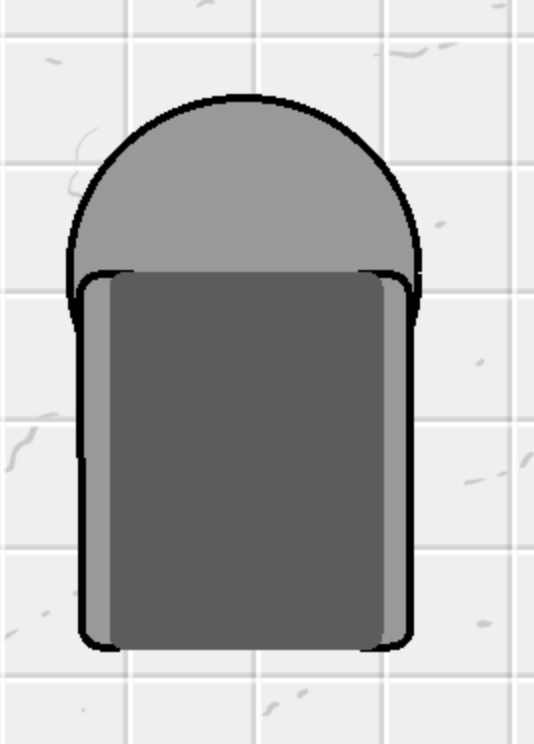
Automatic Trash Can/Bin
This has been such a journey of Gimkit for me! Here is How to Make an Automatic Trash Bin!
Step 1: Design part A
Materials: 9 rectangular barriers, 1 circle barrier, 3 metal poles.
Set down a large grey rectangle barrier. Behind it, have a lighter barrier, so that ONLY the edges leek out the sides. Set down the circle barrier. At this point it looks like this:
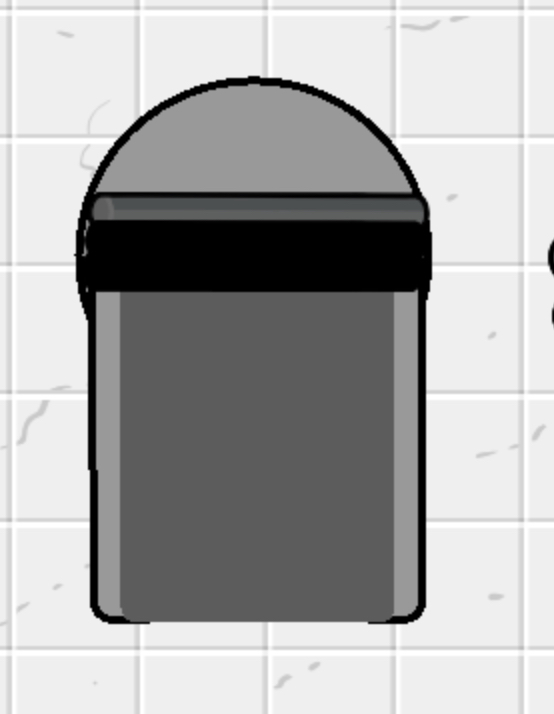
Add two BLACK metal poles and one grey pole one top like this:
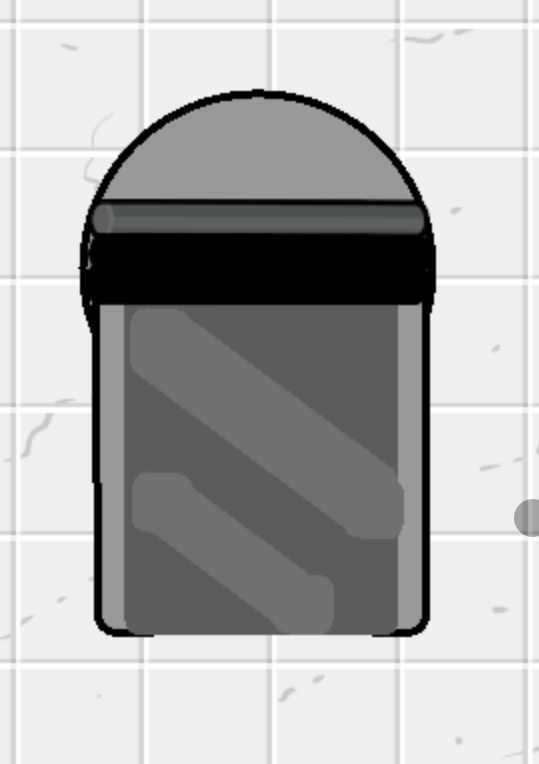
To make the trash the shiny, add lighter gray barriers in a line across it, diagonally as such:
Step 2: Design Part B
The only prop that will be hidden when triggered is the Circular barrier. Make the following items HIDDEN on game start
4 rectangular barriers. Set one and the same place the circle barrier would be. Add a small, darker one on the bottom of that same barrier. Then, if you wish to make it a bit more 3D, add two very small barriers at a diagonal line, and connect them as such:

Step 3: Open/Close
Design complete! Now how to make it automatic? Rather than using a button, we will use a zone! Put the zone in front of the trash bin. Use channels to connect it to the circular barrier (enter zone, hide barrier). Channel it as well to the rectangular barriers added in Step 2, but make it so it SHOWS upon entrence. Now on the same channels, make it activate circle barrier upon LEAVING and the others deactivate on leaving.
Step 4: To throw things away
Materials: Button, Popup(s), item granter (s)
Make button activate when entering zone and deactivate on leaving. Connect button to a popup. POPUP calls of action should say what items you will throw away. To have more than 1 item, use one of the call to actions buttons as a NEXT button, opening another popup.
Now connect each call to action to the coordinating item granter. set amount to however much you want it to throw away (if you want it to throw away all of that type of item, put 100000 or something)
And that’s the end!
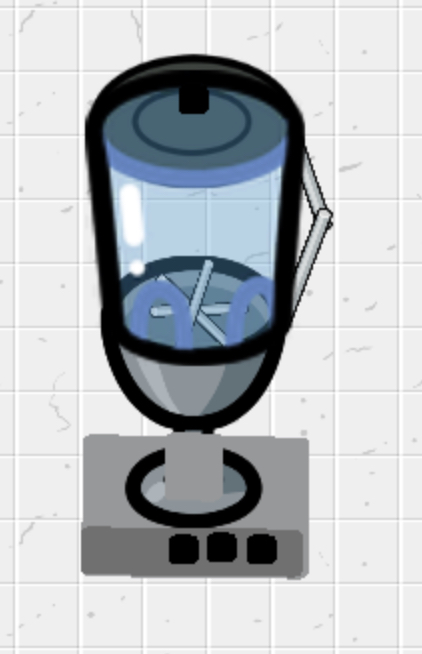
Blender!
Why do I feel like I need an introduction every time? Anyway….
Step 1: Design
Materials: Metal Cup, Glass Cup, Ceramic Plate, Metal Poles, 6-7 Rectangular barriers
Enlarge the two cups, and set the Glass cup on top of the Metal Cup. Tint a ceramic plate grey, and set on top of glass cup, for the lid. On the lid, you can add a rectangular barrier.
Add two metal poles at angles to make the handle. Add three metal poles under the glass cup to look like blades. Add a large grey barrier underneath the metal cup to be the base of the blender. Add a darker one at the bottom to make it look a bit 3D. On the darker barrier, add barriers (black) to look like buttons.
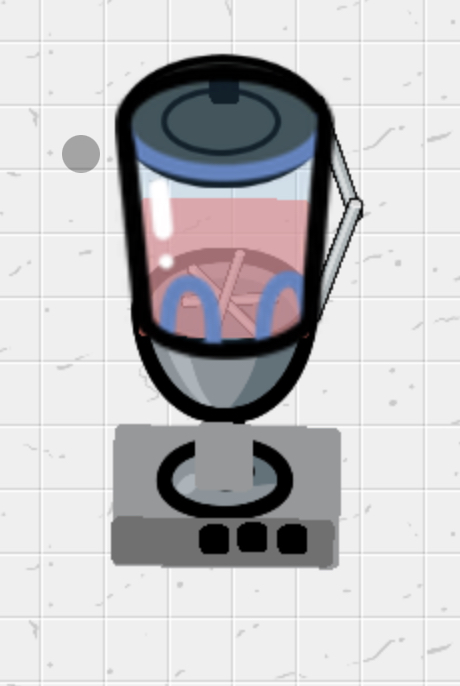
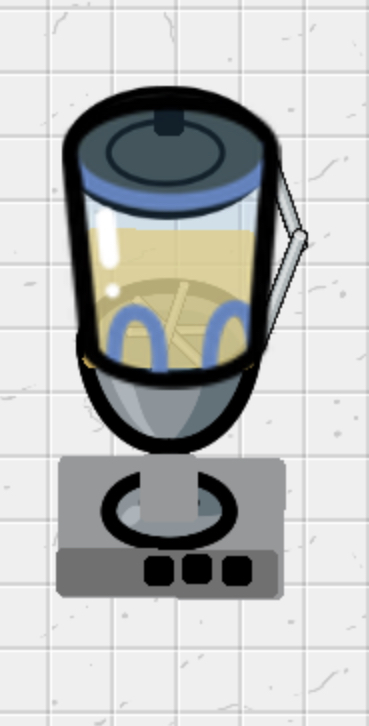
Step 2: Functionality
All you need to do is add a rectangular barrier behind the glass cup, to look like juice. Hook it to a button to make it visible! If you wanna be bougie like that, you can make animation for the blades, and make the barrier get darker over time.
You can make the blender as big as you want, just be sure not to get stuck in it!
Hehe he…… anyway that’s all!
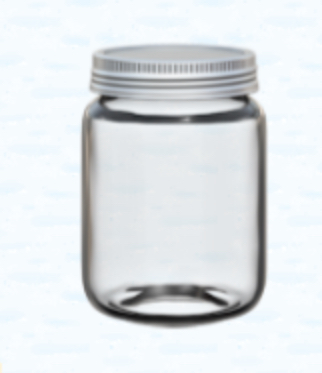
JAR OF MAYO
Set down an emoji and make it a clear jar.
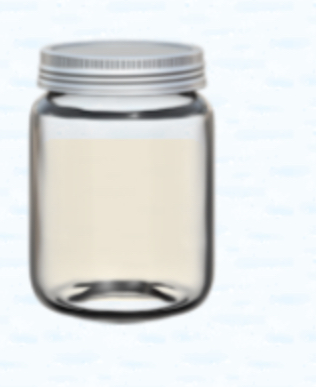
Add a mayo-colored barrier and set UNDER the text
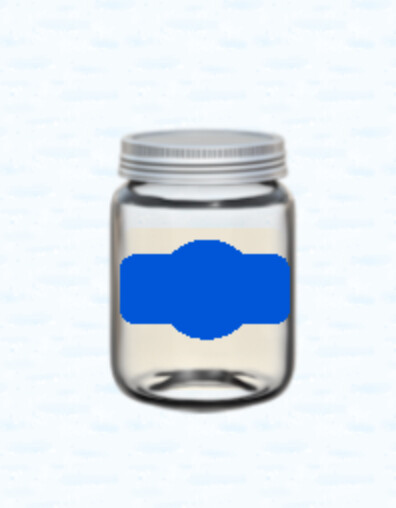
Now make a dark blue circular barrier and a dark blue rectangular barrier. Set on top of the jar, and center the circular barrier.
Lastly, set down two more text devices. The first one says “Mayo” in White Strattlitches or whatever it is. The second one is a bow emoji.

That’s all! Thanks for reading