Here is the fully completed and revised version of Part 2 and 3 combined.
For the bathroom, I used barriers to make the to1let and bathtub and sink, and shower and… (And it took forever) So do ![]() this.
this.
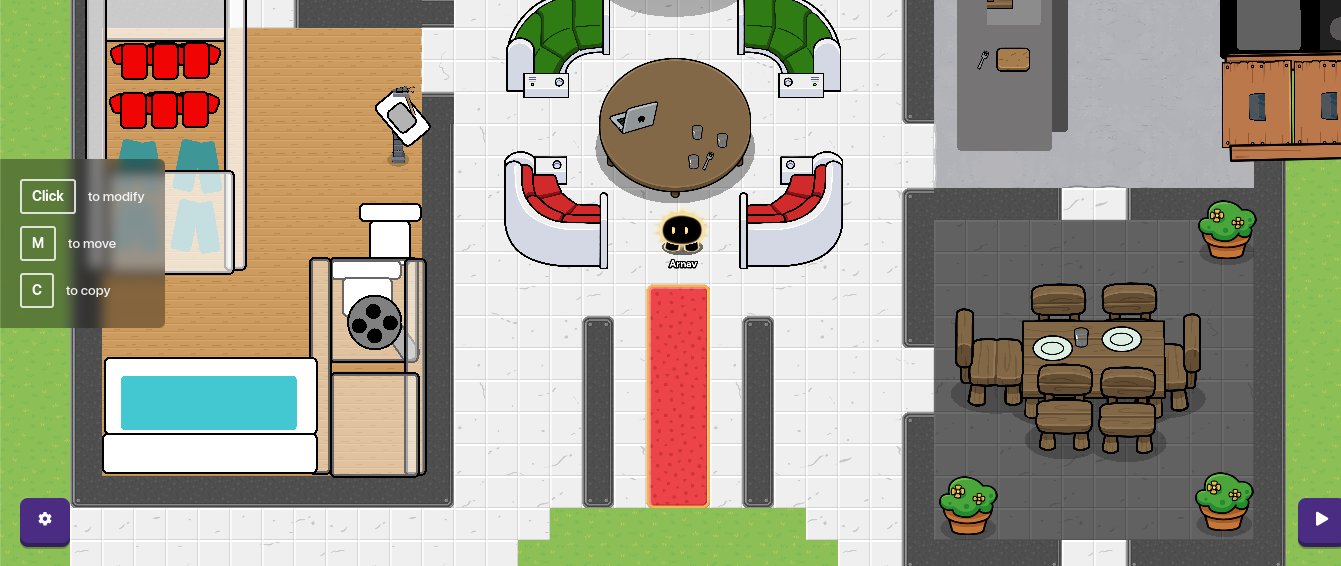
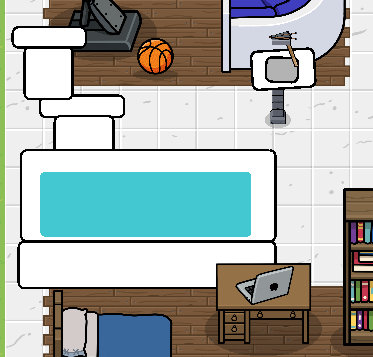
First Floor
For this, have the flooring the same as the original house. Use light marble tiling. 30x38 are the dimensions. WxL
I added the dimensions because the floor is so big!![]()
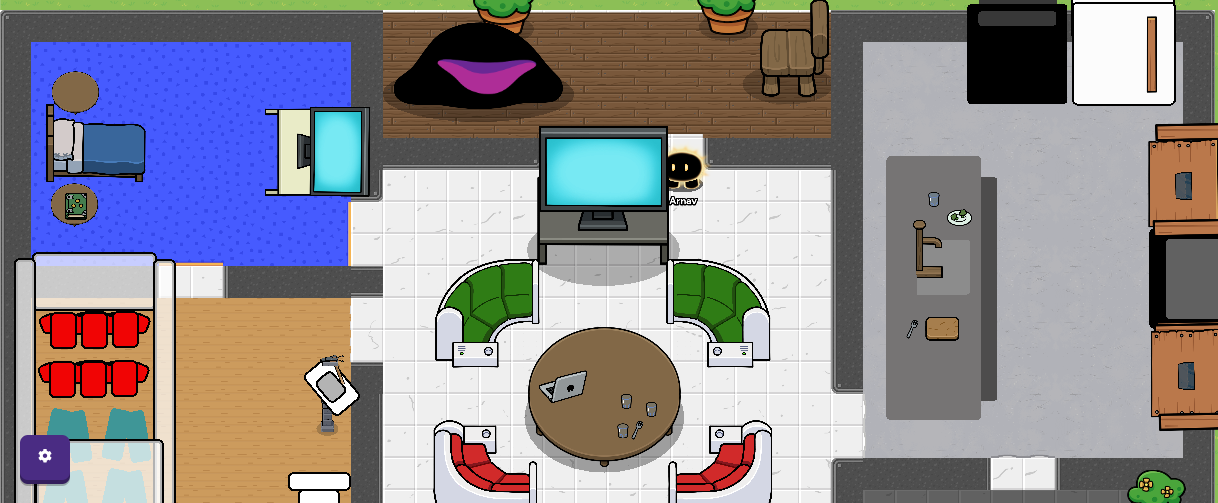
Hallway and Living Room
Now use the red plastic for the hallway.
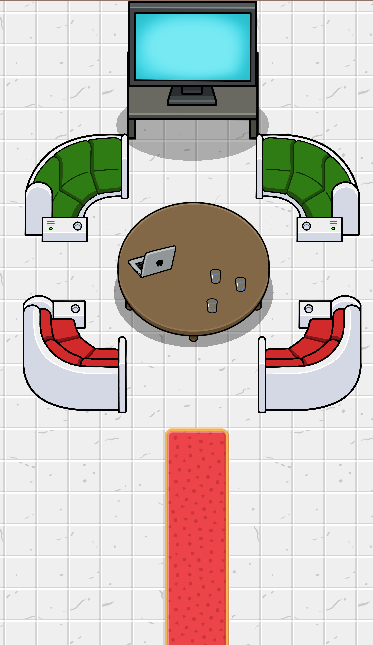
Also, for the first room, which is the Living Room, take the sofa’s and arrange them in a circle just in front of the hallway, you can use all the same sofa’s or different colors, just make sure to flip them for the other side. Then take a round table and place it in the middle of the four sofa’s. You can put anything you want on it, maybe a laptop and some plates and glasses. At the front, get a rectangle table and place a television on it.
Master Bedroom
For this, we will make a bedroom, on the top left corner, change the width to 7 and length to 13 tiles to plastic blue. Keep a tile distance from the edges. Here, take a horizontal medieval bed, and place it against the wall, you could take two beds and smash them together, but another guide already does that, so we’ll just do one bed. Take two round tables and shrink them, put them on either side of the bed. Now you got sidetables, you can place laptops, but I used a codex. Then, take a rectangle table and place a television on it, so the Master Bedroom has it’s own personal TV.

Kitchen
Here, we will mostly use barriers.
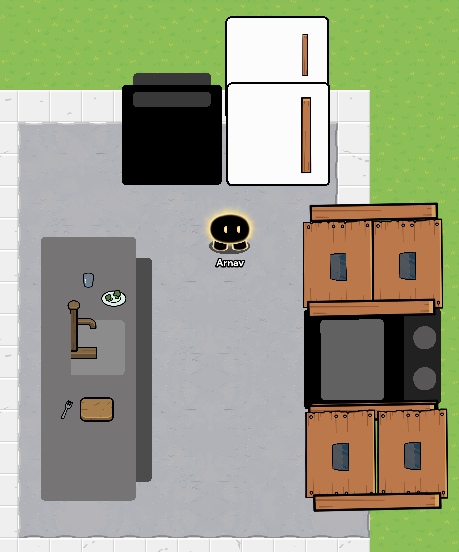
Okay, now we will make the kitchen. Here make the tiling 10x10, and a tiling distance from the edges. Use concrete.
For the fridge, take to square barriers to make the two sections of a fridge, use a pole for the handle.
For the dishwasher (which is on the left of the fridge) use a black barrier square, and two thin gray slits, one at the top, and one just under the top edge.
For the cabinets, I suggest checking out How to make a wooden cabinet. Make four of the cabinets, and stack them two on two, in the middle.
For the stove, take a black barrier box, and take a smaller gray box on it, and use a thinner dark grey box to add a sense of depth to the stove, use small grey circles as burners on the stove.
For the counter, take a long grey barrier, and place it at the left edge of the kitchen floor, take a darker barrier and place it under the first counter barrier and have it sticking out, to give it a sense of depth and height. Here, add a lighter barrier box for the sink. Use an armored stand and blotch out the other side of it to make it look like a tap. Use props like cutting boards, forks, glasses and plates.
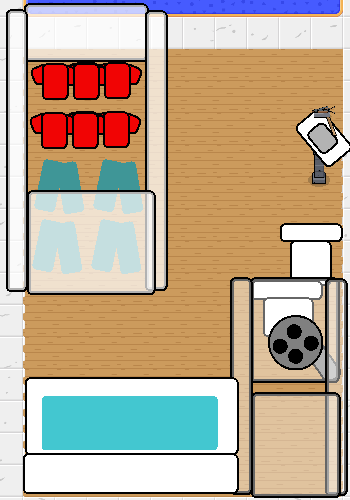
Master Bathroom
Okay, now we will build the Master Bathroom. Using an exposed boardwalk, make the tiles length 10 and width 14. Once again, keep a tile distance from the edges and from the Bedroom, it’s for the walls that we’ll add at the end.
For the bathtub, take two white barriers and place them to look like a tub, then make a smaller, blue barrier to place inside the top barrier to act as water.
For the t0ilet, make a square barrier for the trunk, take a thinner barrier as the seat, make another square barrier to place on the side of the slit which will act as the head, add another slit on that as the lid.
For the shower, take four barriers and make them see through, make a grey slit barrier as the handle, make a grey circles as the shower head, and make small black circles for the shower head holes.
For the closet, to be honest, I was too lazy to make hangers and storage compartments, so I just made the clothes and placed them on the floor. For the shirt, take a square barrier, and two smaller squares, take the smaller squares and twist them on either side of the shirt. For the pants, take two slits of barriers and make another version of it but flip, then just have them meet in the middle.
For the sink, take a stone column and place a white barrier, and make a smaller grey barrier and place it on the white barrier. Take a compressor and attack it to a blackboard leg, then attach it to the white barrier sink.
Back Porch
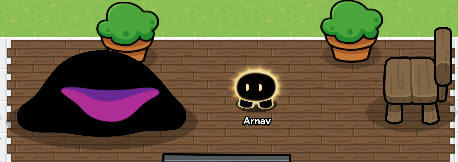
Now we’ll make the Back porch. Change the tiling to Cracked Oak. Use tiling width 4 and length 14. Here, keep a tile distance from the other rooms but have no distance between the edges of the first floor. Take a wooden chair, and use potted plants to dot both corners of the porch. For a beanbag, use a large snow pile and make it black, then use a smaller snow pile and make it whatever color you want Hopefully it looks like a bean bag
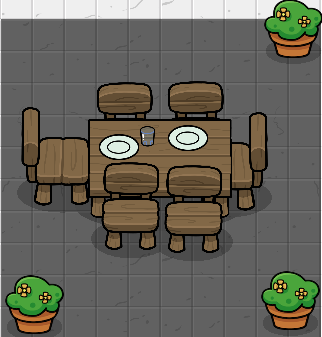
Dining Room
Obviously, with a kitchen, you need a dining room! Here, use dark marble with length of 8 and width of 11. Take a wooden table and surround it with wooden chairs, use potted plants on the corners, and you can add plates and glasses to the table.
Walls
Okay, for the walls, use the dark scraps, the walls should be one tile wide, and just fill in the spaces against the rooms. For now, I will show walls between the rooms, because it should be obvious that you would have to add walls all around the house.
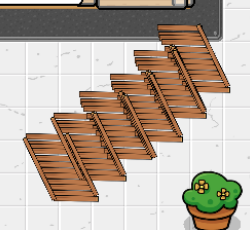
Add some trash cans around the house and potted plants, also for the stairs, take a bunch of poles and lay them side by side to make the staircase to the second floor.

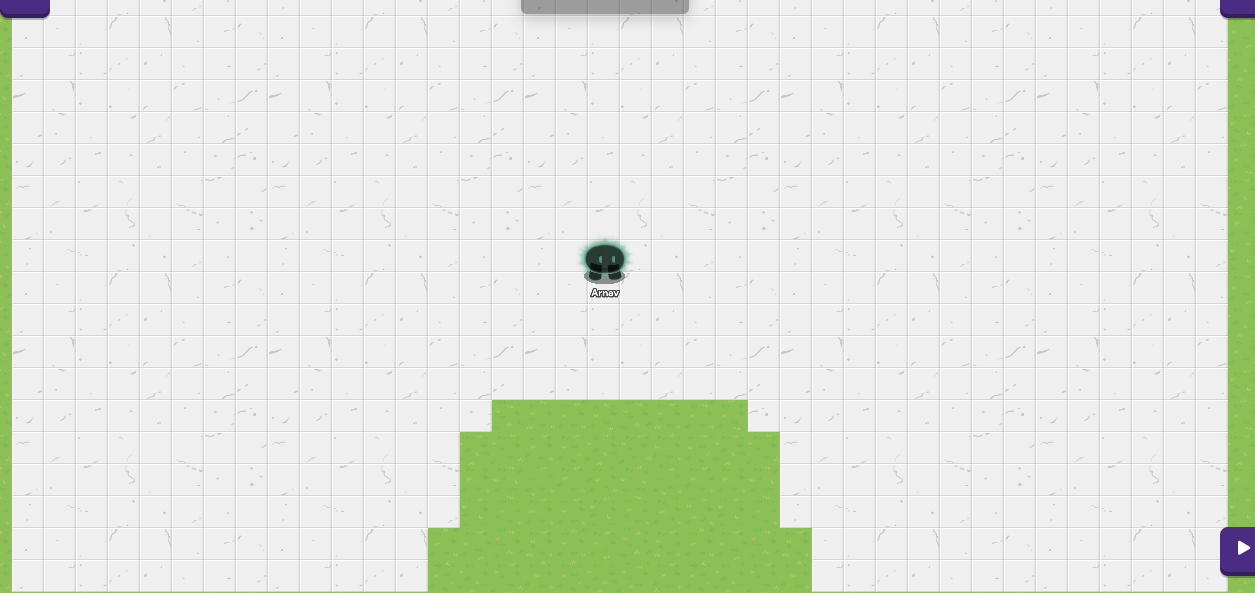
Sadly, the first floor is too big to fit entirely in the camera… ![]()
Second Floor
For the second floor, the dimensions are the same, except leave a hole as a sort of balcony to look into the first floor. Horizontally, keep a 12 tile distance from the edges, and vertically, keep an 8 tile distance.
Kids Bedroom
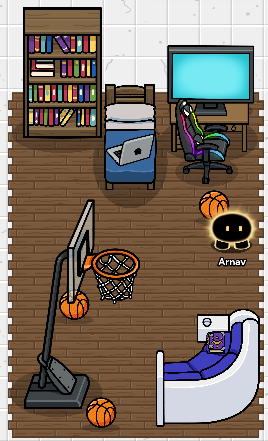
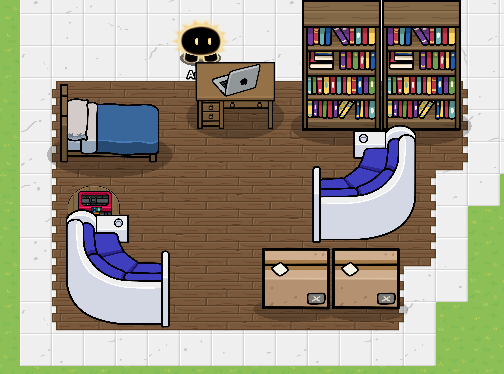
To make it easier, start with the second kids bedroom, and keep a five tile distance from that to the first bedroom.
Here, we will make 2 different kids bedrooms. For both bedrooms, use cracked Oak and with a dimension of 11 tiles wide and 8 tiles long. Remember, keep a one tile distance from the corners, and keep a three tile distance to the hole in the middle of the floor. For the top bedroom, add a vertical medieval bed to the top bedroom. On the left, add a bookshelf, on the right, add a desk with a gaming chair and a small television. Add a small basketball hoop and some scattered basketballs around the room, and add a sofa to the room. It’s obvious this room belongs to a teenager
For the second, room, use a horizontal medieval bed, and next to it, add a desk and a laptop. To the right of that also, add to bookshelves. Add a round table to the left of the bed, and add a 3-D printer on it. Keep one sofa next to the side table and one under the bookshelf. Keep two card boxes on the corner of the room, to make it look like they recently moved in or are still unpacking.
Kids Bathroom
Those five tiles that you kept in between the two bedrooms will act as the bathroom. Here, just copy the items for the bathroom you used on the first floor!
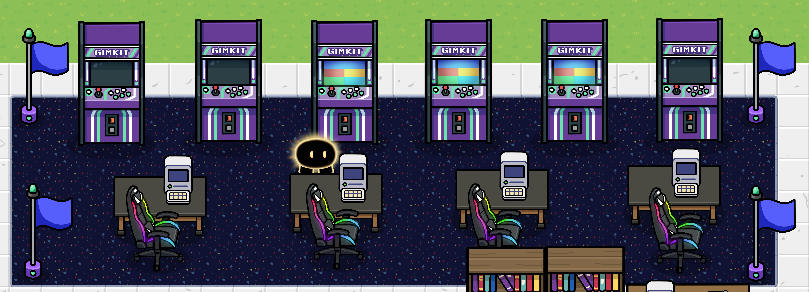
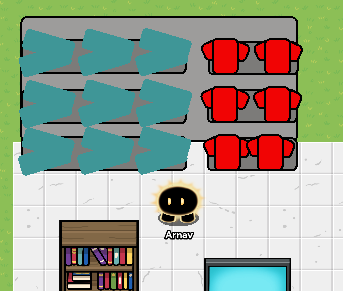
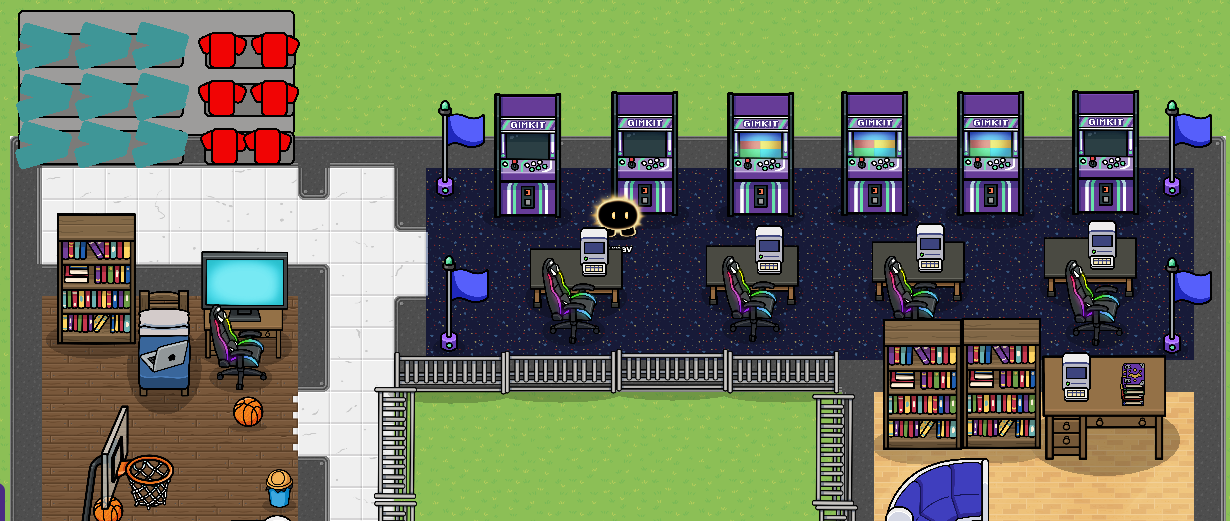
Theater
For this use, no surprise, the cinema carpet. Dimensions: Length is 11, Width is 12. Use gaming chairs and make three columns each with 5 chairs. For the projector, use a television and make them three TV’s long and two TV’s tall and now you have a mega screen.
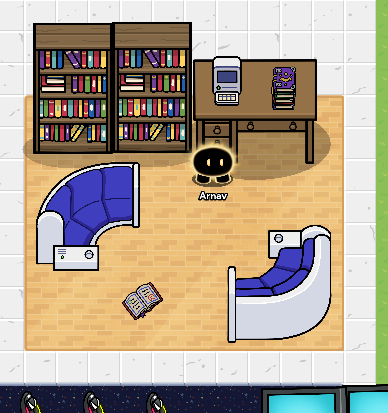
Work Room
Here, use gym floor, length should be 10 and width should be 8. Take a desk and add a computer and a codex stack on the desk. Add two bookshelves on the left of the desk, then add two sofas and place them however you choose across the room, you can keep a codex open or closed scattered across the room.
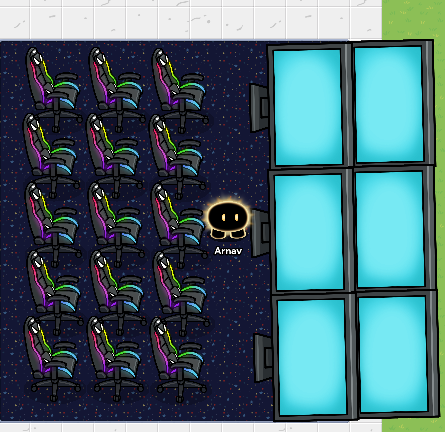
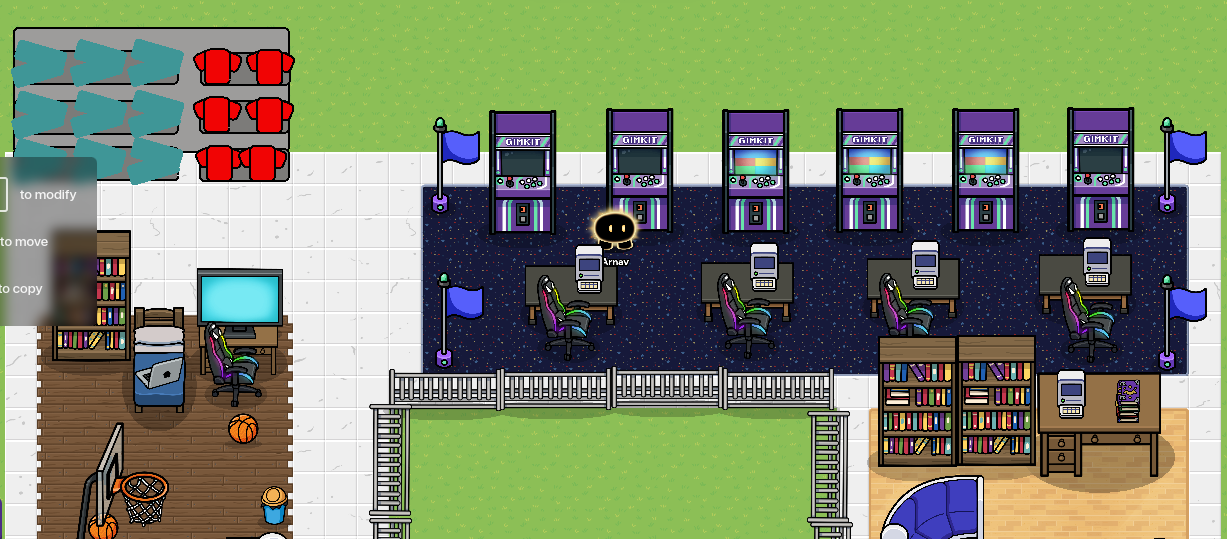
Arcade Room
Use cinema carpet again, this time with a width of 6 and a length of 24. Here, line it up with arcade machines, and dot each corner with an arena flag. Make a row of desks with computers and gaming chairs.
Mini closet
For this one, keep the marble tiling. Use a grey barrier and use dark grey slits as shelves, copy and paste the t-shirts and pants onto the shelves.
Stair Entrance
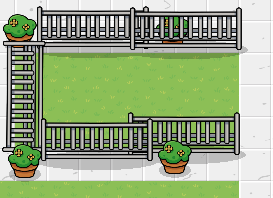
Make a hole in the last open area for the staircase, and dot it with potted plants and use bicycle railings for, well, a railing. Make the hole 3 tiles wide and 7 tiles long.
Walls
Use dark scraps for the walls, and basically outline all the rooms. I will edit some props so that I will be able to move around in the rooms, but here it is.
Small changes and finished Product
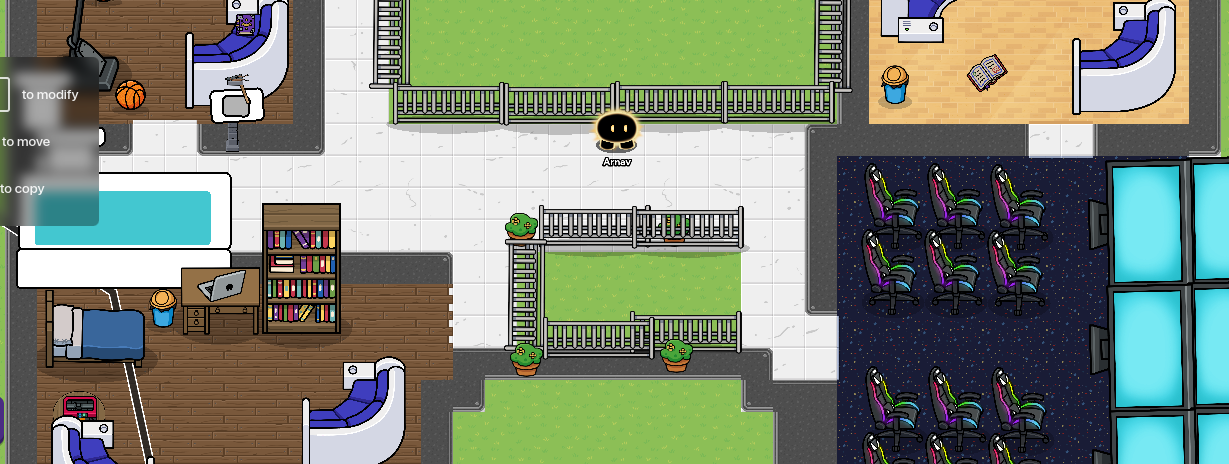
Add some trash cans in each of the rooms, and use bicycle railings around the loft.
And here it is!

Now, we’ve made the exterior and the interior. Time to make our house a fully functioning building!
Entering and Exiting
For the door, we can use a button, and have it say “Enter”. Then, place a teleporter at the entrance for the first floor interior. Wire the two. BUTTON CLICKED → TELEPORT PLAYER HERE, do the same thing for exiting, place a button at the entrance of the first floor saying go out, then wire it to a teleporter outside the door.
Watching TV
Here you can place a button in front of the TV, with the header text saying “Watch TV”. Then, use a teleporter to transport yourself into an empty area, use heading text for different shows, like Comedy, Romance, and Action. Again use a teleporter to take yourself into an open area and create your scene! Use props, heading texts and sentries to create your own mini shows! Once again, use a button and teleporter to take you back out off the scene and back into the header text, and then back into the house. For the wiring, use this same wiring for all of the buttons and teleporters BUTTON CLICKED → TELEPORT PLAYER HERE. You can do the same wiring for the theater room, and you can make games for the arcade using the same devices.
Cabinets
Take a button and wire it to a pop up. BUTTON CLICKED → OPEN POP-UP. Have the pop up say, Gain 1 plate. Do the same for the other cabinets, instead, gain a glass, fork etc.
Food from Fridge
For the fridge, take a button and item granter and wire them together. BUTTON CLICKED → GRANT ITEM. And now you get food!
Eating
Take an infected plate and make it not visible when the game starts, then, take a button and wire it to the prop. BUTTON CLICKED → SHOW PROP. You can also wire an item granter, have it grant strawberry, and have it grant -1, now it will take away that strawberry you had in your inventory, as if you ate it. But we won’t do the item granter, because, it will mess up one of our chores.
Entering the Second Floor.
Place a button in front of the stairs saying Enter Second Floor. Wire it to a teleporter, and have the teleporter placed in front of the staircase entrance to the second floor. BUTTON CLICKED → TELEPORT PLAYER HERE.
Reading
This involves any room with a bookshelf. Here, take a button, and place it in front of the bookshelf, have it say, Read Book. Wire it to a pop-up, BUTTON CLICKED → OPEN POP-UP. Write your story, and in the Primary call to action, write Keep Going, and for the Secondary call to action, write Stop. Make more pop-ups open up when you click the Primary Call to Action. PRIMARY CALL TO ACTION CLICKED → OPEN POP-UP. Kudos to @Bananas123 for making this an earlier topic! Now you have a book to read, and you can exit whenever you want!
Chores: Everybody hates chores, but every house has chores, and this one is no different. Even for VR gimkit players.
Cleaning the windows
For this, to start the chore, place a trigger at the front of the door. Set the delay to 120 secs. Then, make a barrier to cover each of the windows, set the transparency to .7, and make it invisible at the start of the game, use a garish color so the window looks, bleugh. Wire the trigger to the barrier, TRIGGERED → ACTIVATE BARRIER. This makes it so that every 120 sec, the windows get messed up, then wire the trigger to a notification, TRIGGERED → SEND NOTIFICATION. Have the notification warn about the needed clean on the windows. Then place a button in front of the windows and wire it to the barriers, have it take 15 sec to fully press the button. BUTTON CLICKED → DEACTIVATE BARRIER.
Clean the Floor
For this, use barriers to fill up each room, make sure to turn off collision, transparency to .6, use a garish color for the barriers, and make it invisible at the start of the game. Wire that same trigger to the barriers, TRIGGERED → ACTIVATE BARRIER. The idea is that when you enter, you have to start doing chores. Anyway, again, wire a notification button with the trigger, TRIGGERED → SEND NOTIFICATION. You can place a button in each room that asks you to clean up, wire the button to the barriers, have it take 15 sec or press the button, BUTTON CLICKED → DEACTIVATE BARRIER. Although, you could make a bunch of triggers for each chore, and set different trigger delays, if you don’t want 50 chores to notify you at once.
Cleaning dishes and other utensils
For this, place a button in front of the dishwasher (which is on the left of the fridge) and have it say clean utensils. Wire it to the infected plate. BUTTON CLICKED → HIDE PROP. Wire a pop-up to the button, and have it say, utensils cleaned, BUTTON CLICKED → OPEN POP-UP. Now you have cleaned your plate, and it is now automatically back in the cabinet.
Picking up Trash
For this one, place space trash all over the house, make sure they are not visible and turn off collision, and wire a trigger to them all, TRIGGERED → SHOW PROP, and a notification, TRIGGERED → SEND NOTIFICATION. Here, you can place one button next to any trash can, and wire it to all the space trash, BUTTON CLICKED → HIDE PROP. Now, relieved sigh you have a clean house again.
Get more food
Obviously, you need to replenish your food. So for this, for the granter item have the Grant Strategy be Grant Safe Amount. Wire the button to an Inventory Item Manager, BUTTON CLICKED → ACTIVATE MANAGER. Have the manager manage strawberries, give it a set amount of 10. Now, you should receive messages when collecting the strawberries, but after the tenth strawberry, you won’t receive a notification. Here, you can place a separate button and have it say, Replenish Food, set the time to press the button to 25. And wire that button to the manager, BUTTON CLICKED → CLEAR INVENTORY. Now, you will be able to collect more food from the fridge, since you ‘refilled’ it.
Making Food
Take a crafting table and place it right on the stove, but near enough to the ground so you can touch it. Then, wire a crafting recipe to the table, ITEM BEGINS CRAFTING → ACTIVATE RECIPE. For the crafting recipe, have the item created be a blueberry, or anything of your choice. Have it grant one item, let the ingredients be only one, have the ingredients needed be strawberries, and you need three strawberries to make it. Have the creation time be 10 sec and make sure it doesn’t expire. Once again, you can configure this to your liking, this is just what I made for myself.
Contributors: @SilentPrincess_33 for Making Food.
This took about, 8 to 10 days, so once again, ![]() !
!