Hello, Gimkit Community! In this guide I’ll walk you through the steps of making a tag/hide and seek game. There are many parts in a tag game, and this guide is the first of many that I’ll make. This guide will cover how to set teams and set the tagging team.
Step 1. Choose a theme and make a basic ‘lobby’.
Step 1A. Choose a theme. Make sure to look at different types of available terrains and props that will make your game look more realistic. That means that you shouldn’t choose a theme that doesn’t have many props and terrains to go with it.
I am making a medieval-themed tag game in this guide.
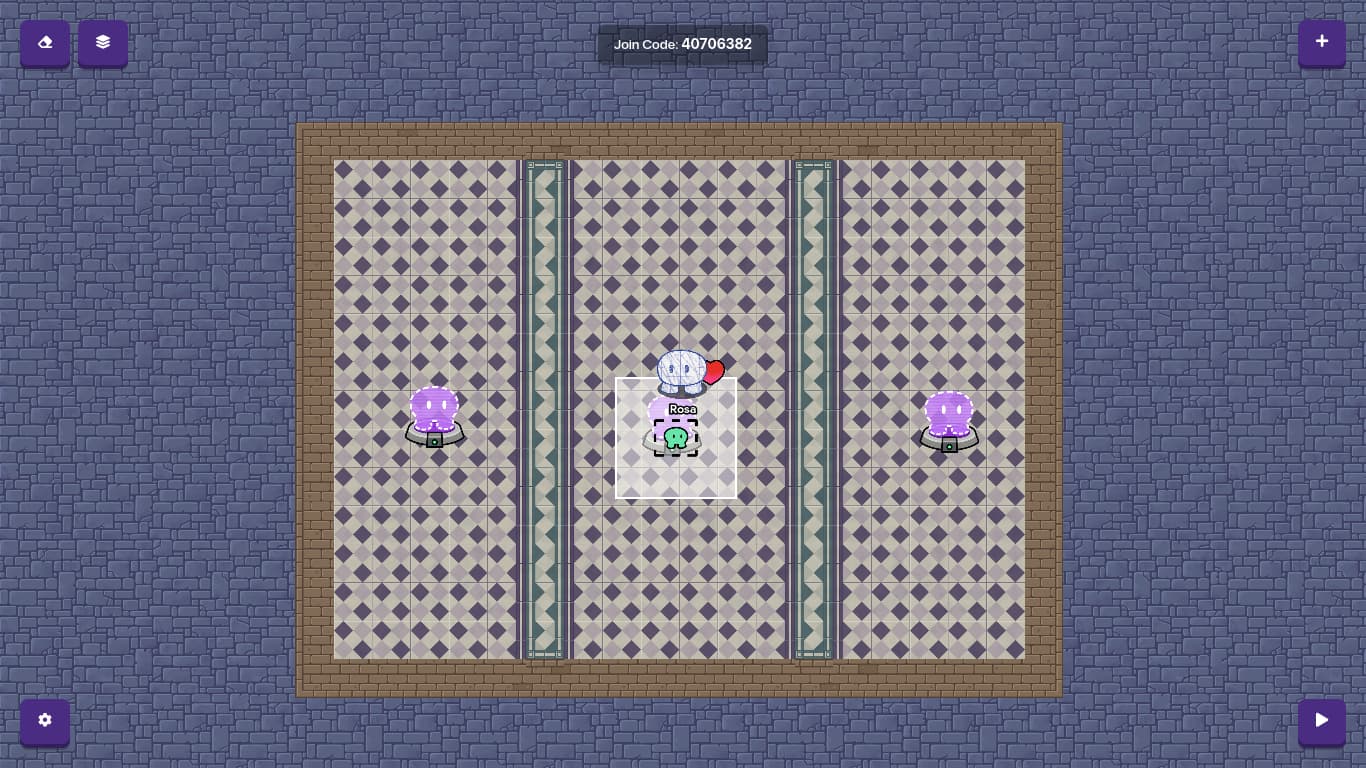
Step 1B. Then, somewhere in a corner where you know you won’t be making your game map, make a little rectangle for a lobby.

*Make sure to not make it a wall!
Then using the ‘WALL’ tool, make a border around the rectangle you made. I used a different color for a better understanding.

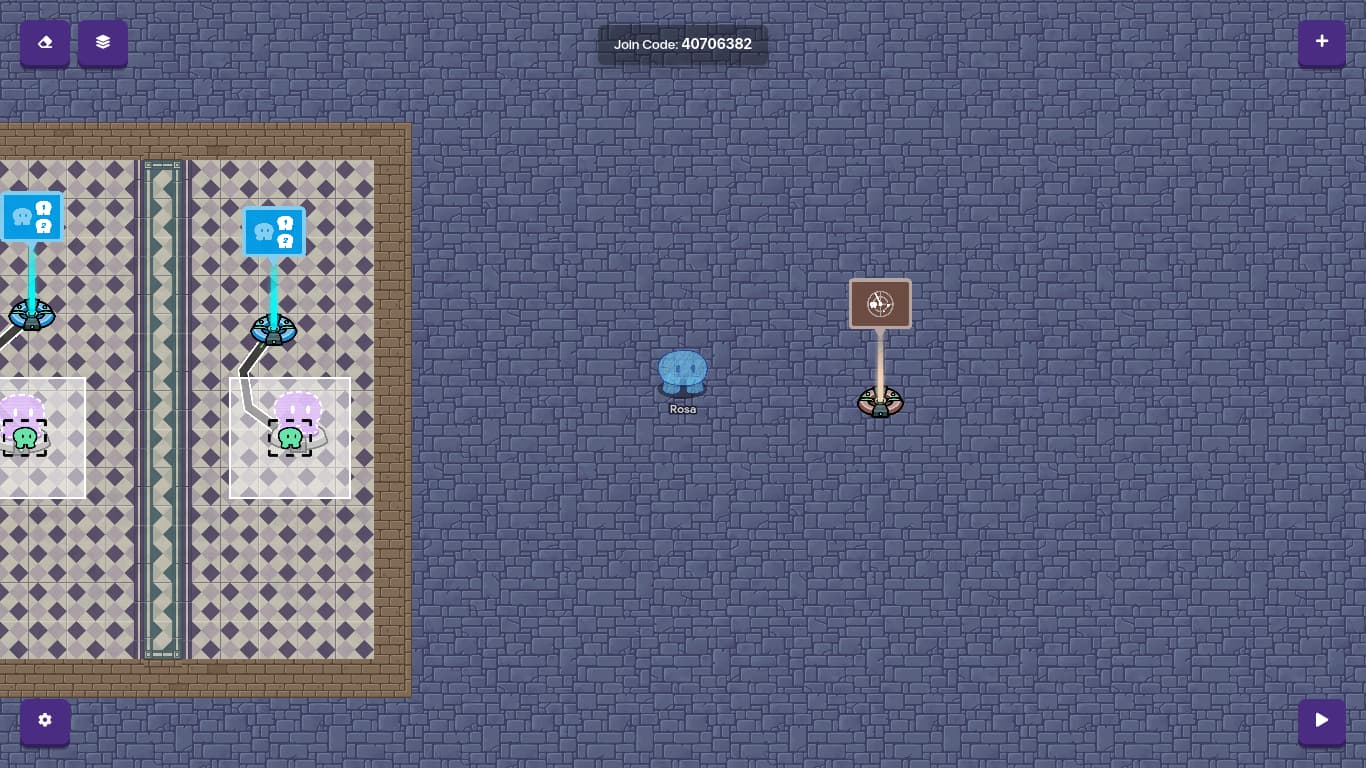
Step 1C. Add some spawners in your lobby. You want to add at least two. I did 3.
Make sure to divide up the spawners with walls, so that team members cannot change their teams!

Step 2. Switch to a certain team.
Step 2A. Add a zone that covers a spawner. Make sure it doesn’t cover another spawner.
(That heart is my trail-don’t worry!)
Copy&paste the zone so that it covers all the spawners.
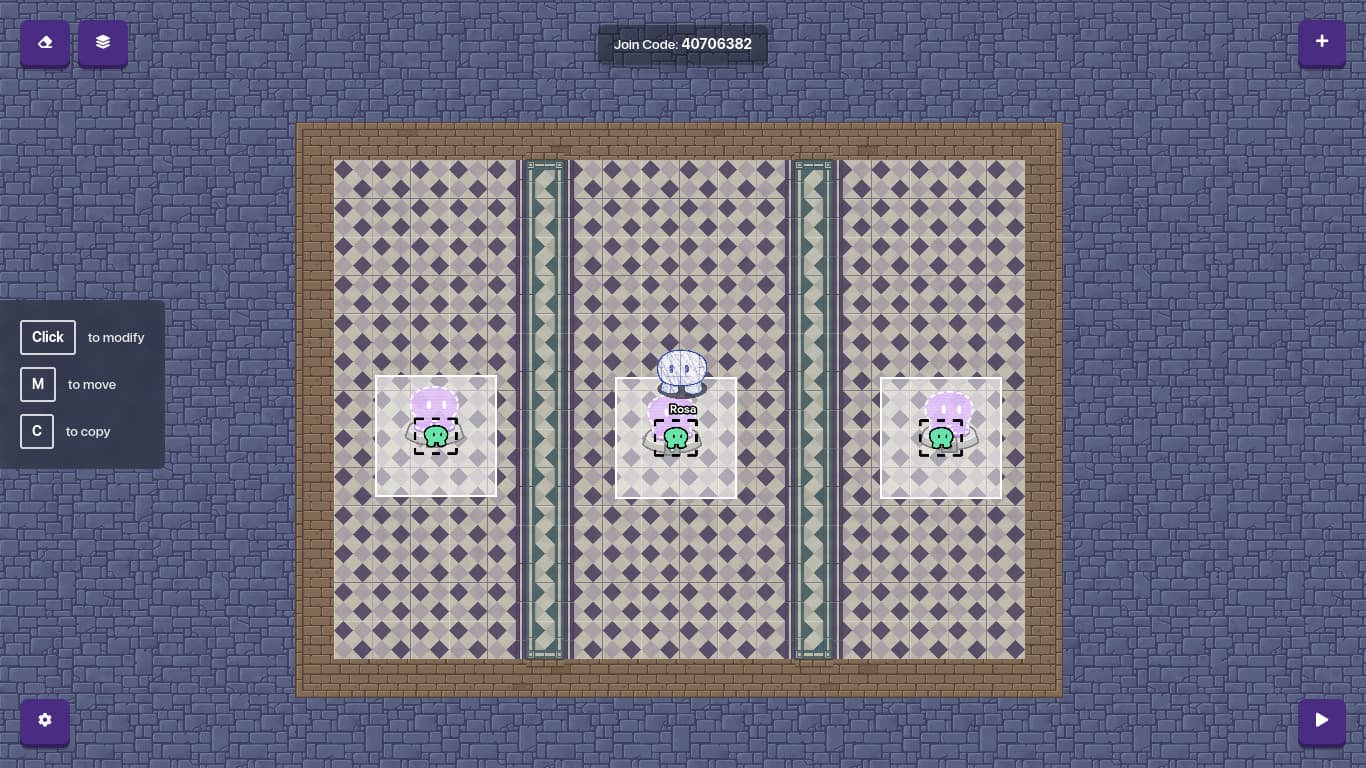
Step 2B. Add a team switcher. Copy&Paste it near each zone you have.
*It will be invisible in-game.
Connect each zone to its team switcher with wires. Make sure that it says, ‘When player ENTERS zone’, not ‘leaves’ zone.

Step 2C. Go into each team switcher and change its configured team from ‘RANDOM’ to whichever team you wish. MAKE SURE NONE OF THEM ARE THE SAME!

I made them team 1, team 2, and team 3. I advise you to do the same so you aren’t confused.
Step 3. Choosing the taggers/seekers.
This step has two possible methods- Random and Manual. Please be careful not to mix them up!
METHOD 1. MANUAL TAG SELECTION.
This method is simpler than method 2, but it is a bit boring.
Choose which of the spawners is going to be the ‘tagger’ spawner.
I chose the middle one.
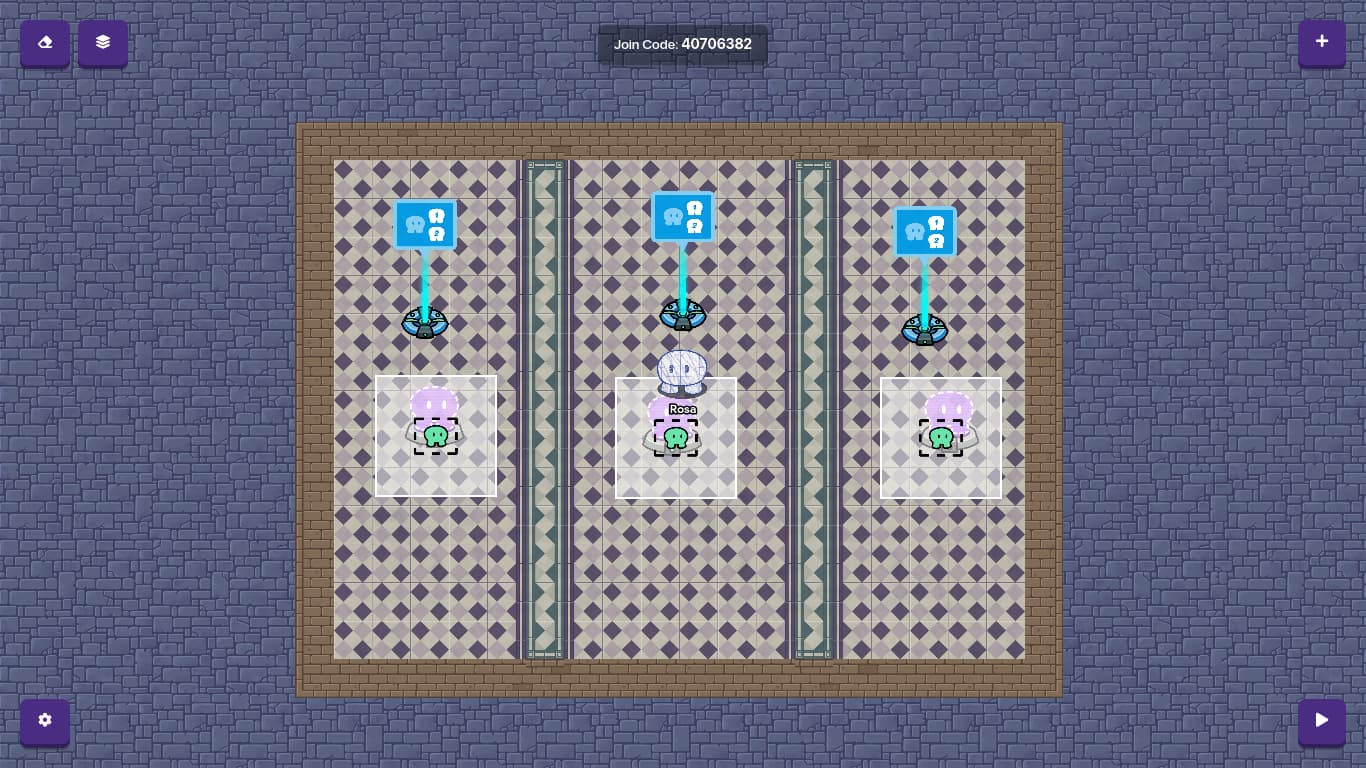
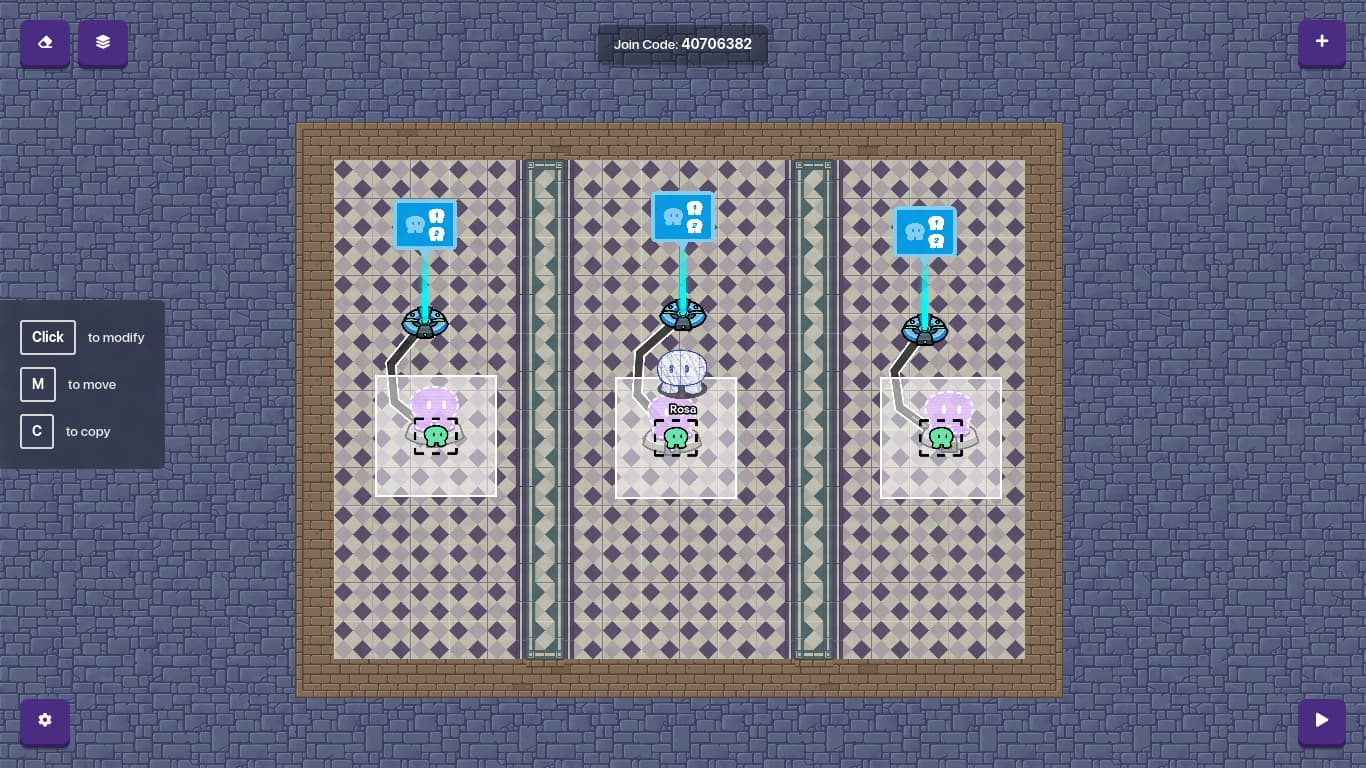
Add a tag zone.
Switch it into a zone type, not the entire map. (It isn’t required, but it is much simpler and you can see it visually,)

Fiddle around with the size a bit. Since this isn’t an actual game, I made it small.

Switch the tagging team to your chosen team. Mine was team 2.

METHOD 2. RANDOM TAG SELECTION.
This method is a bit complicated and requires repeated work, but it’s more fun.
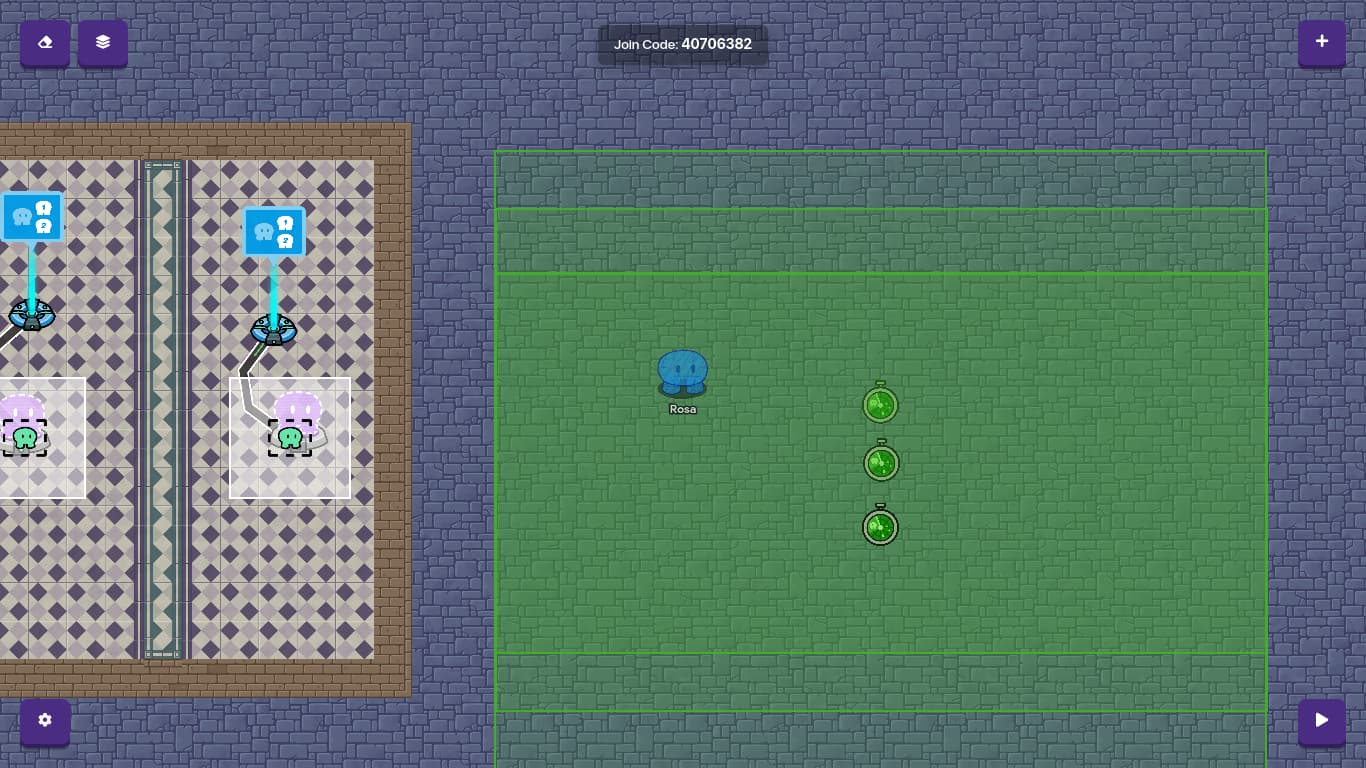
Add a tag zone.
Switch it into a zone type, not the entire map. (It’s optional, but I like this way better because you can visually see where the tag zone is.)
Change the size to your desired amount. I made mine pretty small.
Then, depending on how many teams there are, copy and paste the tag zone. I have 3 spawners, so I copy/pasted 2 times.
Important! To make it easier to edit the zones, don’t overlap the zones completely. Line the center (The drawing) side by side or up and down.
Click on one of them and make its tagger your first team. Click on the second one and make its tagger your second team. Do the same for all of them. MAKE SURE NONE OF THEM HAVE THE SAME TAGGERS!

Click on all of them again and change it so that it’s deactivated when the game starts.

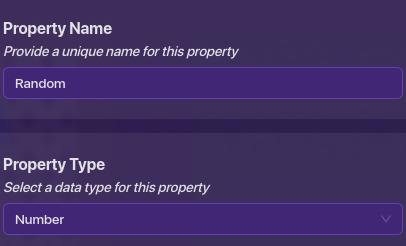
Then, add any device that has a ‘blocks’ feature. An item granter is good. Also make a property.

Name the property ‘RANDOM’ and change it so it’s a number property.
Go into the item granter or whatever device you chose as your code. Click on BLOCKS, then ‘When I Receive Broadcast Message’ and set the message to ‘Randomize’. Then, add this line of code:

But if you have only two teams or more than 3, MAKE SURE TO CHANGE THE ‘3’ TO YOUR NUMBER OF TEAMS!!!
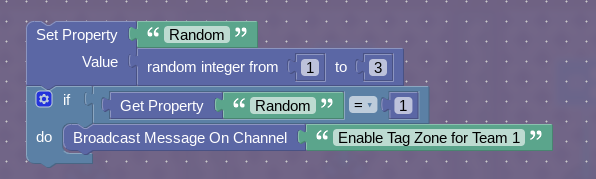
Repeat the ‘IF’ code by duplicating it. Make sure that if you have 2 teams, you have 2 ‘IF’ statements, if you have 3 teams, you must have 3 IF statements, and so on. And also make sure to change the names of the broadcast message for every IF statement! Here’s an example.
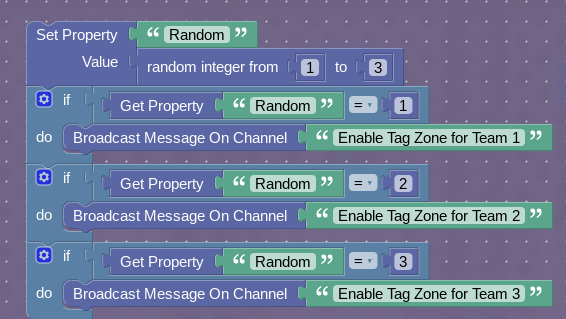
This is when you have 3 teams, like me.
If you added the code, then exit out. Add a zone. It should cover ALL OF YOUR SPAWNERS!!!

Click on the zone and click on ‘Channels’ tab.
When the player enters zone, broadcast message named ‘Randomize’.
Deactivate when receiving ‘Randomize’.

You’re almost done!
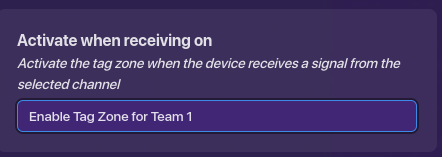
Click on each of the tag zones you made. If its configured tagger is team 1, go to channels and activate it when it receives Enable Tag Zone for Team 1. If it’s for team 2, make it for team 2, and so on.
Aaaaaand, that’s it! I’m sorry if that was complicated! I’ll come back with part 2 about making the actual game! Bye and thanks!