Chart Course is a task in navigation that requires you to trace a line to complete the task. Note: this guide works with @Im_pretty_Cool’s taskbar guide found here. Another note: when the guide talks about settings, the only ones you need to change are the ones listed, and keep the rest of the settings the same. Materials:
5 zones,
1 popup,
1 relay,
2 teleporters,
and 1 button.
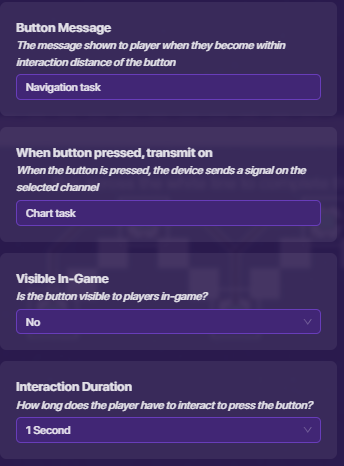
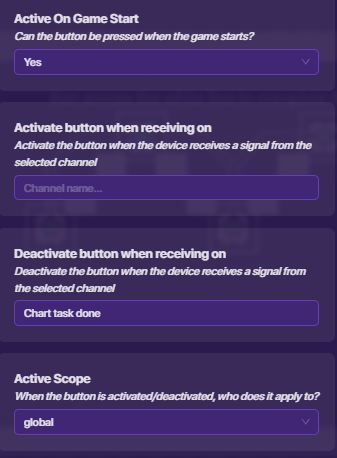
First place down a button. The settings:
Button message: Chart course
When pressed transmit on: Chart task
Deactivate when receiving on: Chart task done
Images
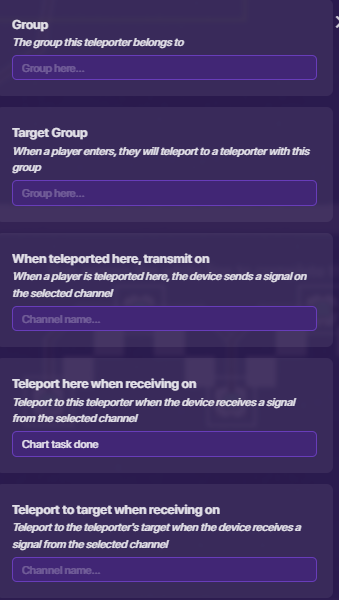
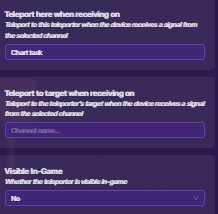
Next, place a teleporter next to the button. The settings:
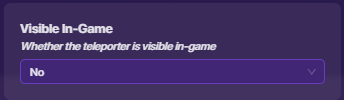
Visible in-game: No
Teleport here when receiving on: Chart task done
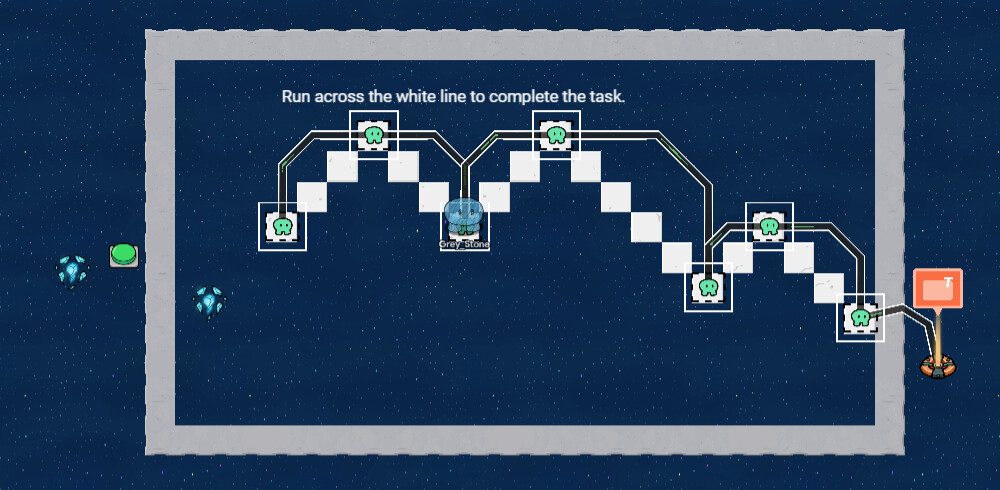
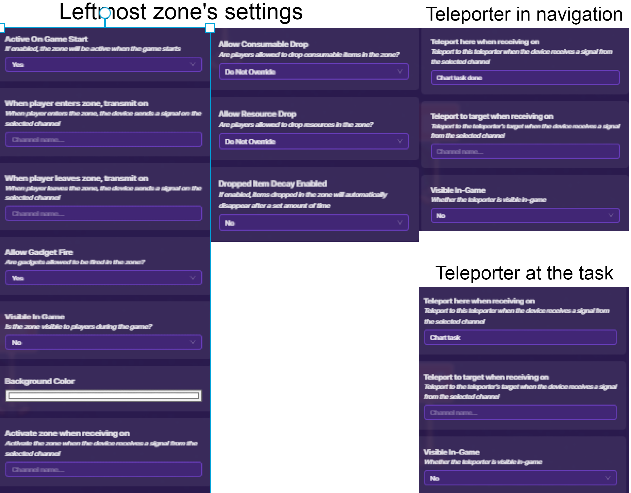
Next, make a room for the task to go in. Make a zig-zag line in the middle. On each of the points where the line changes direction, place a zone. The task will go from left to right. The leftmost zone’s settings:
Active on game start: Yes
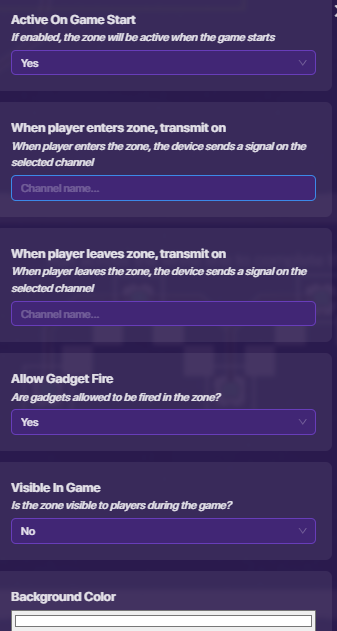
Then, for all of the other zones put this for the settings:
Active on game start: No
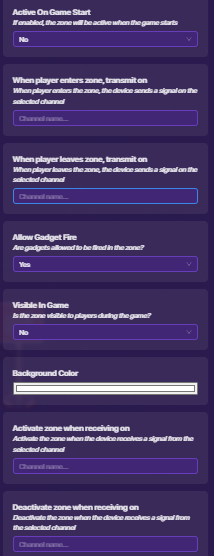
The rightmost zone has an additional setting where when a player enters it, it broadcasts on “Chart task done”.
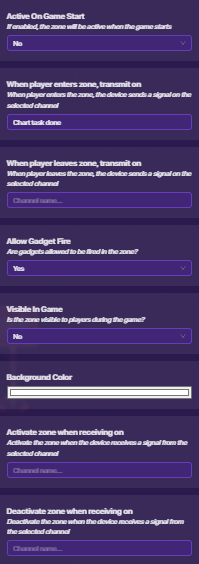
Next, wire all of the zones from left to right. When player enters zone => Activate zone. Do this for all of the zones. Ex: Leftmost zone is wired to the one on the right of it. That zone is wired to the one on its right. When you reach the end of the zone and wire trail, then place down a popup. The settings:
Header: Task done!
When popup closed, transmit on: Task done
Images
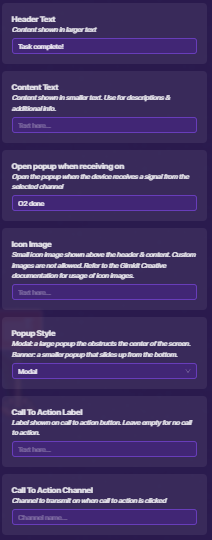
Ignore the “02 done” channel, that isn’t needed unless you are going to follow my tug gimong us that is in progress.
All you need to do now is put down a teleporter in the task room where the line is. The settings:
Visible in-game: No
Teleport here when receiving on: Chart task
Image
![]() There! You are done!
There! You are done! ![]() If you have any issues, just tell me in the comments. If you enjoyed this guide or found it helpful, a heart is always appreciated. Final image:
If you have any issues, just tell me in the comments. If you enjoyed this guide or found it helpful, a heart is always appreciated. Final image: