Hello, you who has decided to look at this guide! I’ve been making barrier art (sometimes I do prop though) for a while, and I have a lot of designs I want to share, but they don’t fall under one specific type, and I’ve never had enough of one type to make a singular guide. I bet other people have had this problem too of having a design they want to share, but they don’t want to make a whole guide around it. So I made this to be a collection of those barrier (and prop) art pieces and how to make them.
Rules:
Absolutely, positively, NO GRIEFING.
If you want to add a design, ask me (@Grapefruitt) first. If the design doesn’t fall under the 4 sections I have previously made, I’ll make a new section.
If your writing is low quality when you add your entry in, I will probably come edit it to have good grammar and just be better writing.
If your work is low quality, I will remove it (by low quality, I mean something anyone could throw together in 5 seconds).
Don’t click for fun.
Remove your check once you’re done editing
ONLY CLICK THE EDITING BOX IF YOU HAVE ASKED MY PERMISSION AND ARE ACTUALLY GOING TO ADD SOMETHING. Ahem (@OddAudtheAce is the only one allowed to edit without permission, because I live with them.)
Are you currently Editing?
Yes
REMOVE YOUR CHECK AFTER EDITING
Video game characters
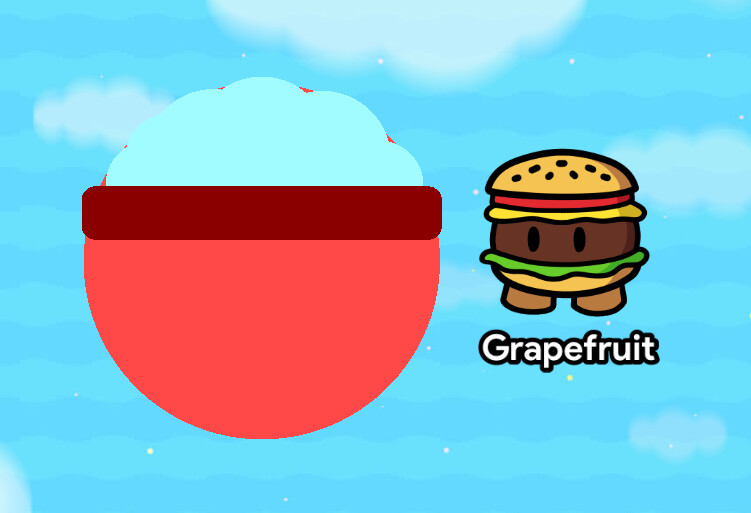
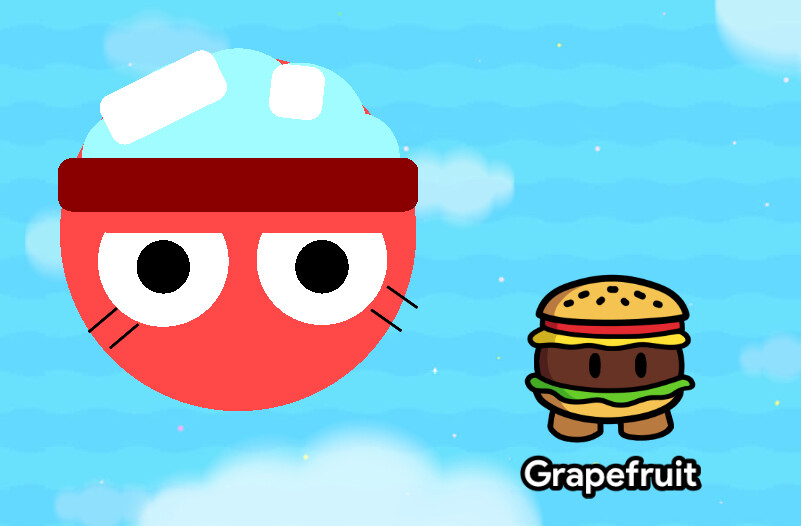
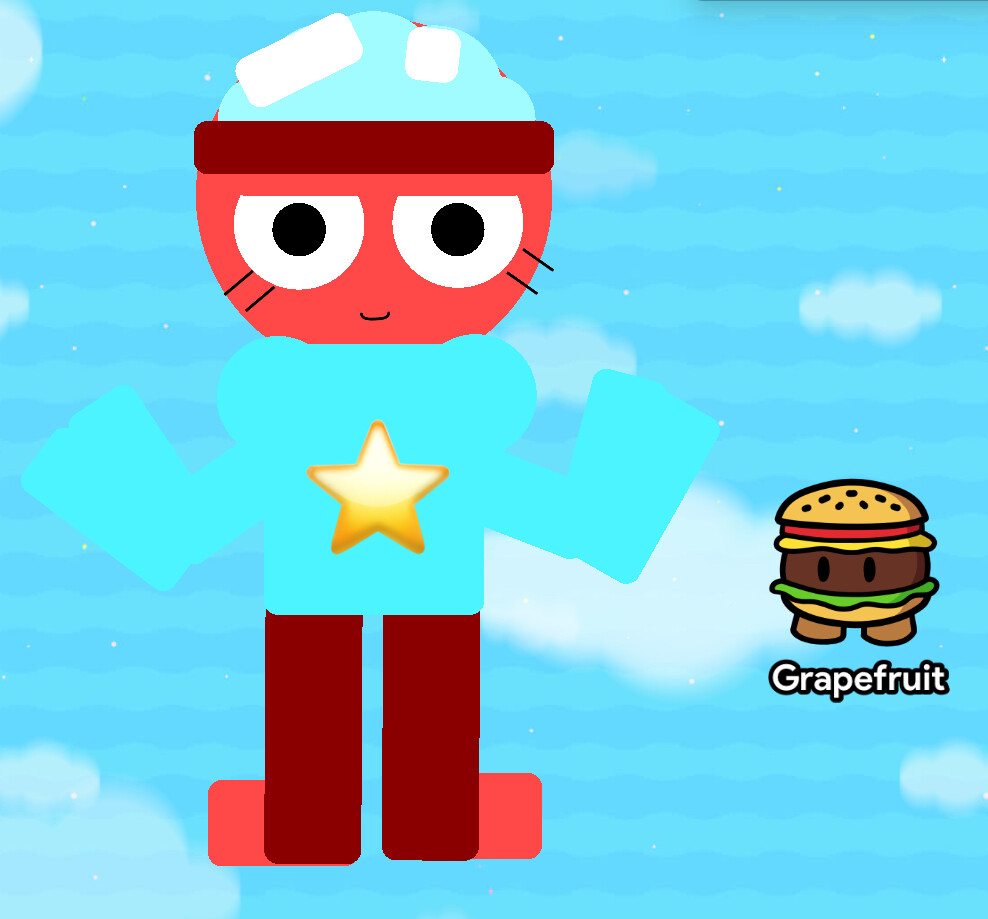
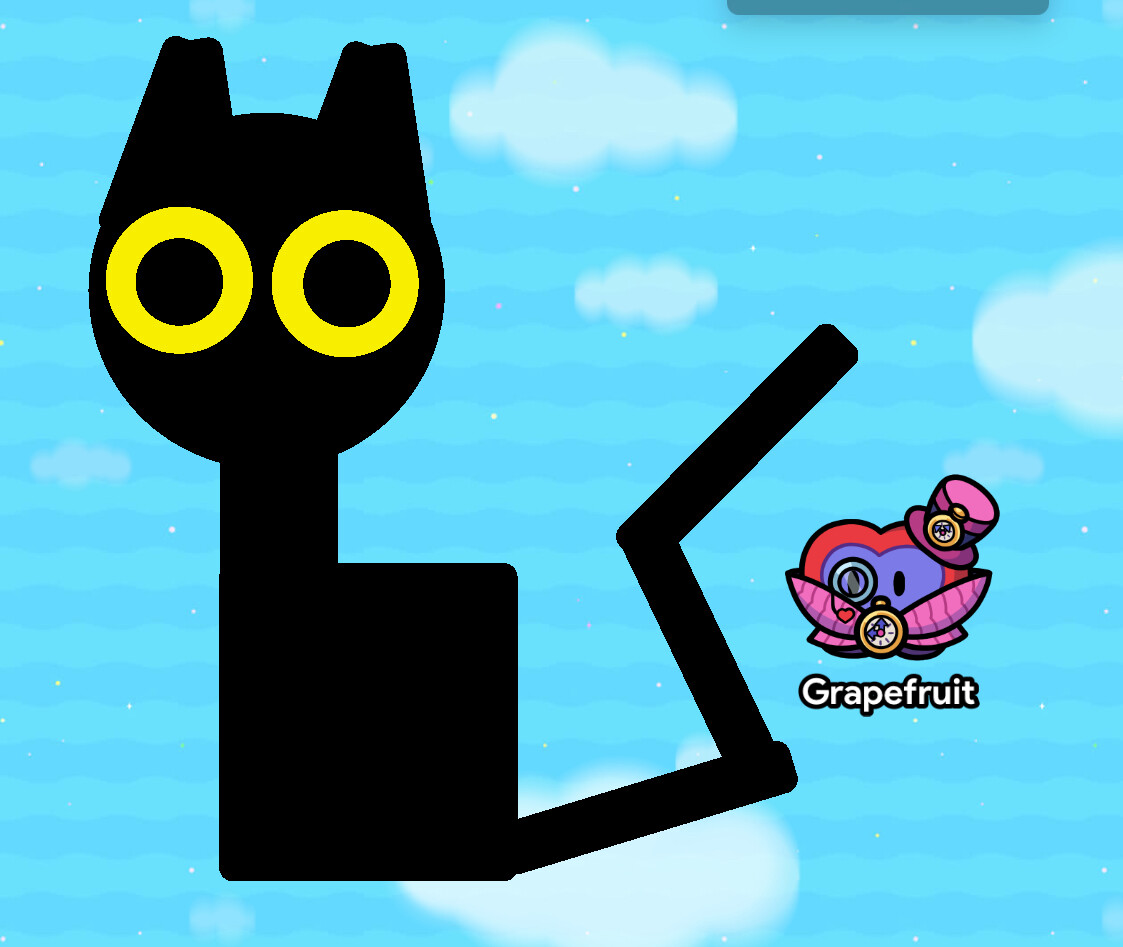
Gigi
All barriers in this character are 1.00 transparency and no outline
Step 1
First add a circular barrier (tinted R 255 G 72 B 72) and put a long rectangular barrier over it (R 138 G 0 B 0)

Step 2
Next, take 9 small circular barriers ( R 161 G 252 B 255) and place them on top of Gigi’s head. Make sure the rectangular barrier is layered above it! Then take two white rectangular barriers and place them on the head.

Step 3
Now, the face! Take two white circular barriers and place them on the head, then add two smaller black circles for the pupils. Then, take a rectangular barrier that’s the same color as Gigi’s head and place it partially above the eyes so it doesn’t look like she’s seen things. Now, get four of these | symbols (size 19) and tilt them to be her eyelashes. Then, take a ) symbol (size 21) and rotate it to be her mouth.


Step 4
Sweater time! Take 2 circular barriers ( R 75 G 244 B 255) and a rectangular barrier the same color as the circle ones to make her sweater neck (Disclaimer: all barriers will be the same color for the rest of this step). Take a rectangle to make her body. Next, take three rectangular barriers to make her arm. Make the first one point diagonally downward, then take the other two point diagonally upward and put them next to each other. Repeat this process for the other arm. Now, take a text box and put in a star emoji ![]() (size 81)
(size 81)


Step 5
On to the legs! Take 2 rectangular barriers that are the same color as the dark strip on Gigi’s head and place them below the sweater. Now take two small rectangles that are the same color as her head and use them for her feet.


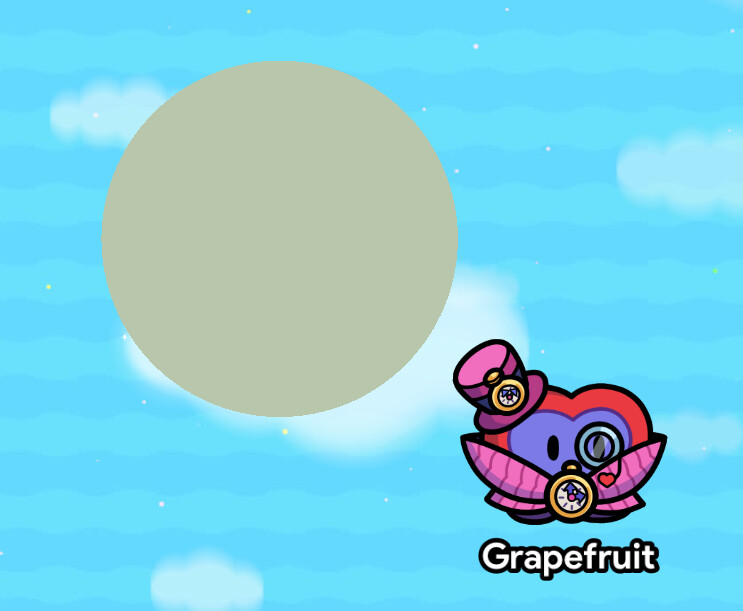
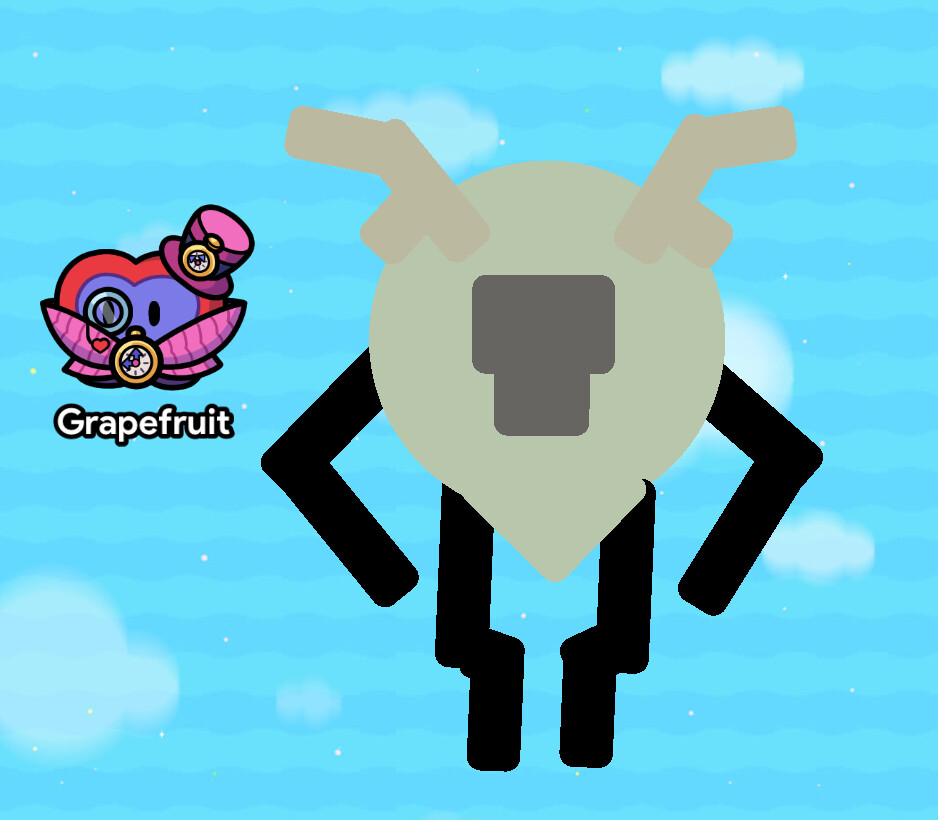
Deerclops
Step 1
So, take a circle barrier and place a R 184 G199 B192 tint on it. Then take a square barrier and place the same tint on it and put them like this.

Step 2
Now, take two black barriers and put them behind the circle. Then, add two others to be his forearms.


Step 3
Now take another two rectangular black barriers and put them behind him. Then, add a tiny square black barrier by each leg. These will be his joints. Then, add another two black barriers to finish off his legs.


Step 4
Face time! Take two rectangular barriers, one smaller than the other, each tinted R102 G101 B97 and put them on top of the circle barrier. Then, for the antlers, take 6 rectangular barriers tinted R187 G185 B160 and place them as seen in the photo below. Then, take a white circle and place it on the head and put a smaller black circle on top of that for the eye.


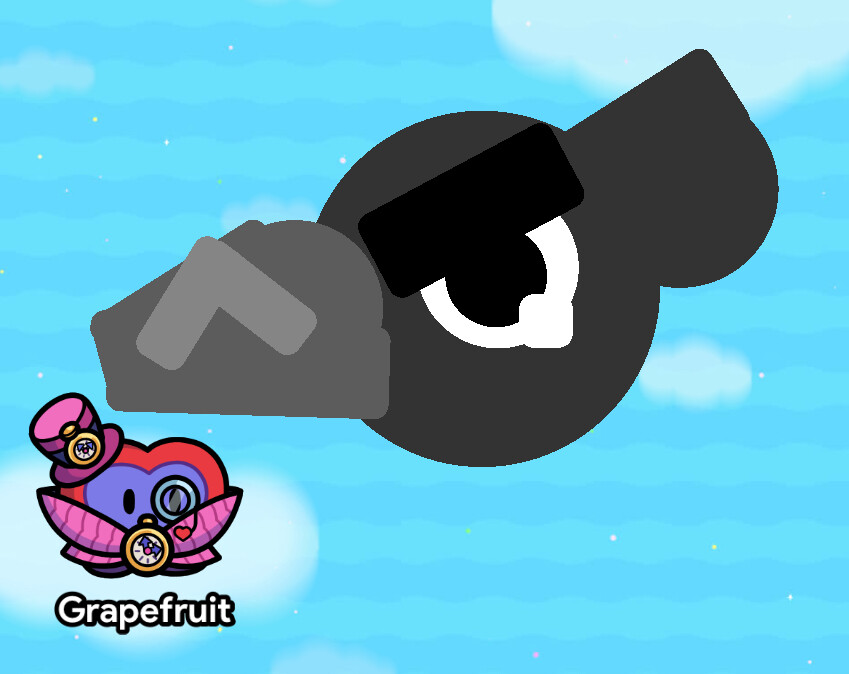
The boi (aka Quagsire)
Step 1
So first, start off with a normal square barrier tinted R 145 G 196 B 227. Then add a circle barrier on top in the same color.


Step 2
Take a metal pole tinted black and put it on the circle for the mouth. Then add two small black circular barriers for eyes. Then, take two small rectangular barriers tinted the same color as the body for the feet.


Step 3
Take four black metal poles and place them across the body. Then take two smaller black metal poles and connect them. These will be his arms.


Step 4
Take two | symbols in a text box and copy and paste it. These will make his lil fingers. Then take two . Symbols to make his nose.


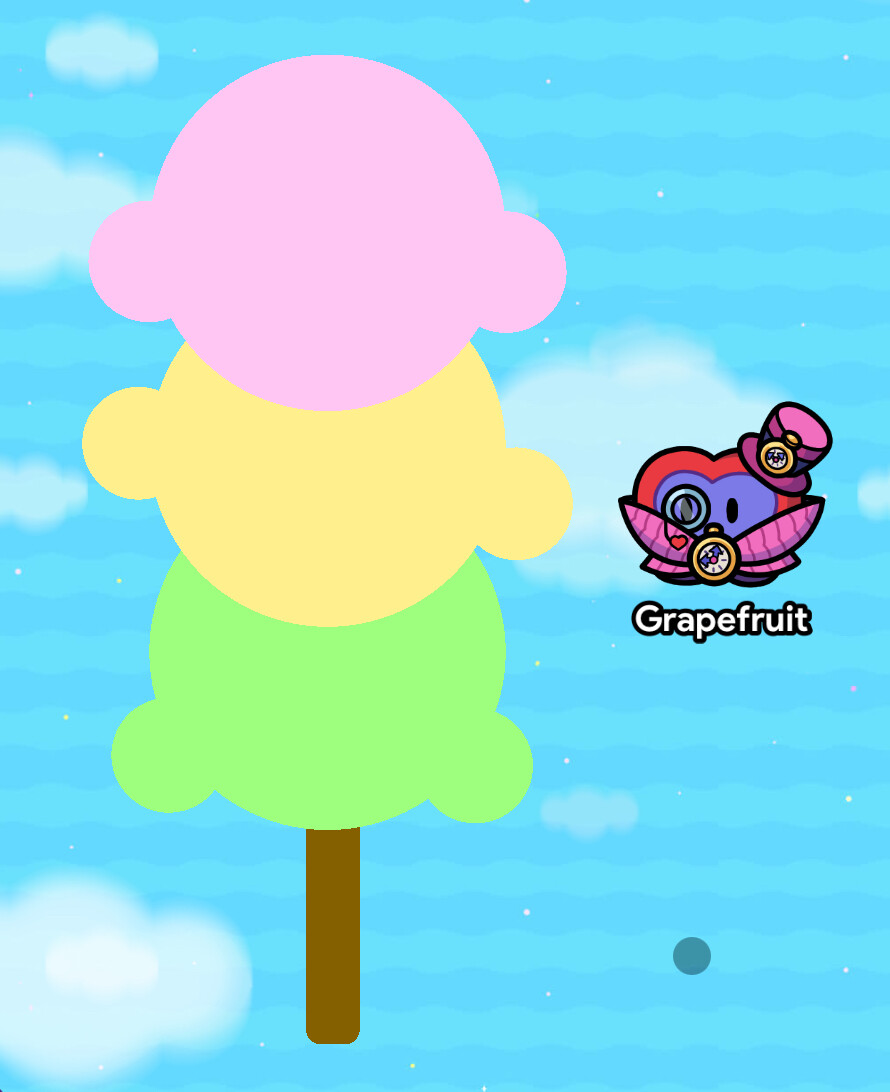
Kirby Dango
Step 1
First, take a rectangular barrier tinted R132 G96 B0. Then, take three circles, each tinted R255 G198 B243 (pink), R255 G240 B141 (yellow), and R158 G255 B126 (green). Then add two small circles on the side of each circle, tinted the same color as those circles.

Step 2
Now, take ceramic plates (tinted black) and two long rectangular barriers for the faces (you can switch these up). Next, take some small circles tinted R254 G187 B187 to be the mouths (you can change size and position to make different expressions). Then, take some small white circles and put them in the eyes of the kirbys with ceramic plates.


Step 3
Take small circles tinted R255, G127, B254 (pink), R254, G226, B48 (yellow), R47, G255, B47 (green) and place them under the kirby’s eyes to make blush.
Extra: Put some star emojis around them to make it pop!


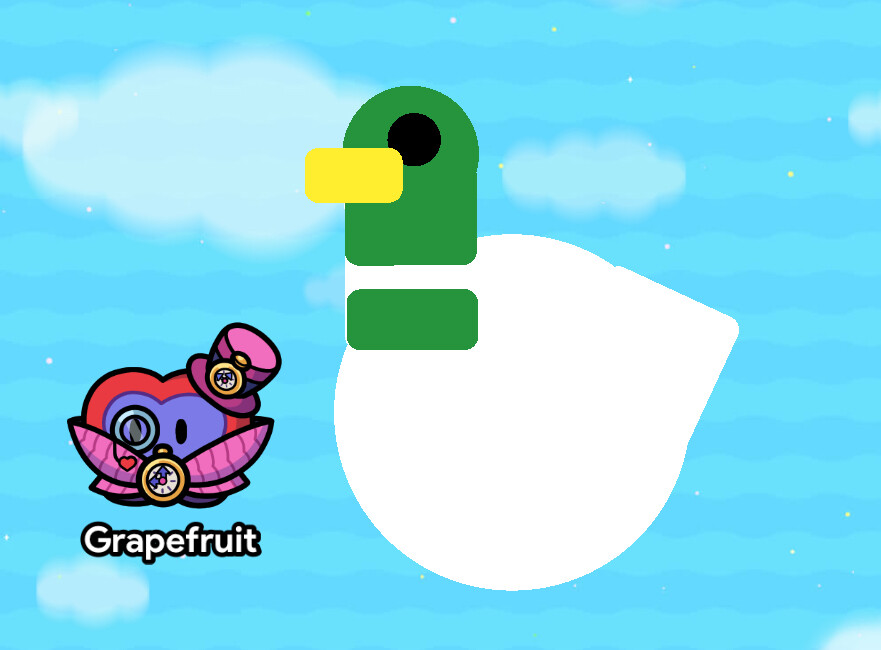
Silly Duck
Step 1
Take a large white circle and a small white square to be the body. Next, take a long white rectangle for the neck. Then take two smaller R38 G148 B60 rectangular barriers and put them on the neck, leaving a white stripe. Then take a circle (same tint as the green part of the neck), and place it on top of the neck to be the head.


Step 2
Add a rectangular barrier tinted R255 G238 B47 for the beak and a small black circle for the eye. Then take two rectangular barriers tinted the same as the beak and keep their outlines on. Put them on the bottom, they are feet.

Game Builder Garage Person
Step 1
Take a white square barrier. This is the head. Next, add 2 thin, black rectangles as the eyes. Now, take 2 small, thin, light gray rectangles and tilt them like they are a triangle. Then add a tiny light gray square where the 2 light gray barriers don’t cover up.


Step Two
Now, take a white rectangle. This is the body. Then, add a small light gray rectangle as the neck. Add 2 light gray rectangles at the waistline. These will be holders for the legs. Take 2 light gray rectangles on the bottom of the big white rectangle as the start of the legs. Then, take 2 thick white rectangles as the ends of the legs. Now, get 2 darker gray rectangles as the feet.


Step 3
Take 2 thin light gray rectangles and place them as the arms. Then, take 2 thick white rectangles to be the ends of the arms. Then take 4 small, thin, light gray rectangles to be the fingers and thumbs. And finally, take 2 dark gray rectangles to be the rest of the fingers.


Crow
Step 1
Take a circle tinted R51 G51 B51. Then take three rectangles and a circle tinted R92 G92 B92 and arrange them into the shape of a beak.


Step 2
Take a white circle and move it onto the large gray circle. Then take a small white square and put it in the lower right side of the circle. Now take a black circle, put it on the white circle, and make sure the tiny square is above the black circle in layers. Now take a black rectangle and put it above the eye.

Step 3
Take two rectangles tinted R133 G133 B133 and make them a half X shape on the beak. Then take a rectangle and a circle tinted the same color as Crow’s feathers to make the feather tuft.

Mimikyu (by @AKat)
You only need barriers and provided text
Ok I will keep borders on for easier visibility. For the finished product turn them off.
Text copypastes:
fake eyes
⬬
⬬
(Rotate)
48 size
real eyes
⬬
⬬
(Rotate)
31 size
@ @
21 size
w
74 size
zeyada font
Ffeeb4
(Tan color)

Monsters/Horror (but like, gimkit-friendly)
DeMarcus (sleep paralysis d3mon)
Step 1
Take a long black rectangular barrier for DeMarcus’s body. Then take six thin, long rectangles for limbs.


Step 2
Take a black circle and put it over the body for his face. Next, take two small black rectangles and place them on top of his head because DeMarcus wears a top hat. Then take a white circle and put it on the right side of his face for his eye.


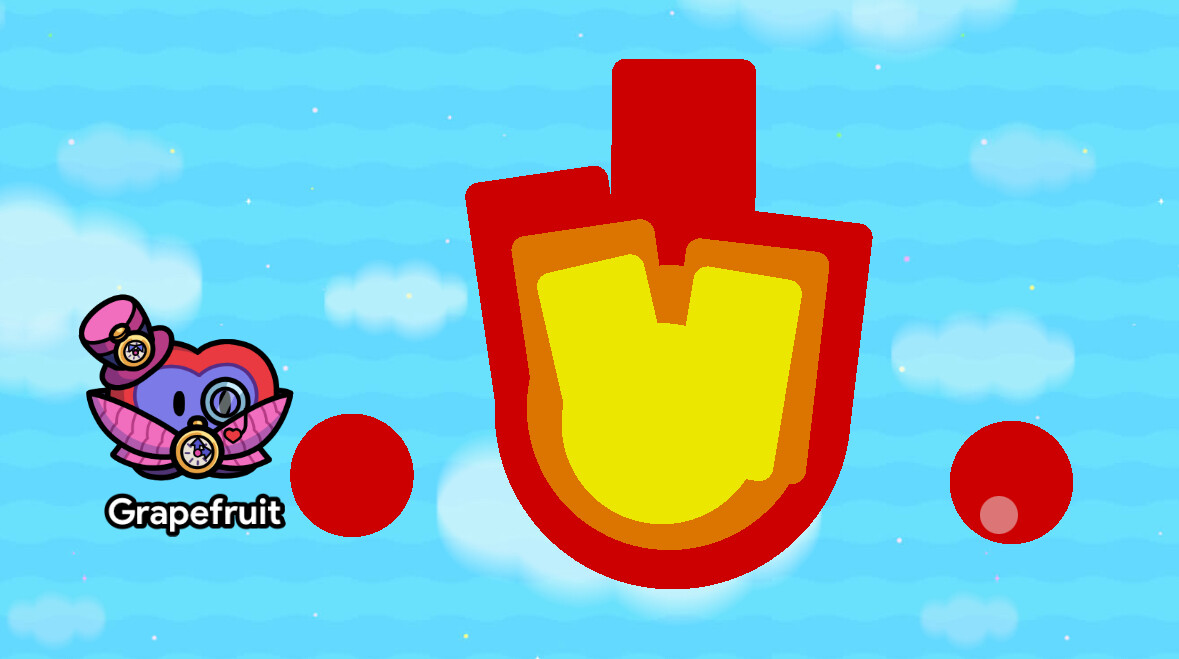
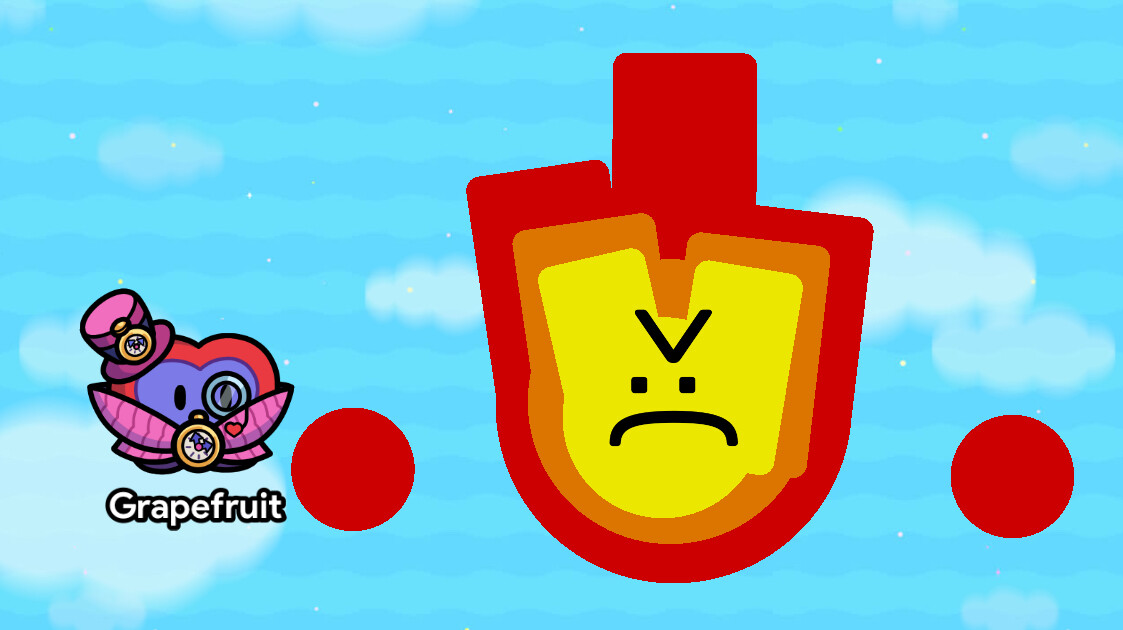
Fire creature (aka Nortus)
Step 1
Get a circle tinted R204 G0 B0 and take 3 rectangles of the same color and place them together. Repeat that step two more times getting smaller each time using different colors (R220 G117 B0 (orange) R235 G231 B0 (yellow).


Step 2
Get two small circles tinted the same red as the body. Place them on each side of Nortus to make his hands. Get a text box and use that to make his expression (I used >:( mainly because I accidentally spilled water on him).
Chat Noir
Step 1
Take a black circle. Then, take 4 black rectangular barriers and use those for the ears. Now, take two circles tinted R248 G239 B0 and put two smaller black circles in them for the pupils.


Step 2
Take two black rectangles to make the body. Then, take 3 black rectangles to make the tail.
[grid]


Dragon Head (Originally made by Anwen (not a forums user)
Step 1
Take a shield, tint it black, and make it big. Take two circular shields and tint them R117 G0 B195 (when you hear me say to tint something purple, I’m referring to this color) and rotate them to look like angry eyes. Take two alien plants tinted purple and rotate them and put them on the eyelids. Add another two alien plants tinted purple and put them on the side of the dragon’s head.


Step 2
Add two groundbreaking plants to the top of the head to make horns (they’re tinted purple btw). Take two medieval forks, tint them purple, and put them between the eyes to make a snout. Take two lava buckets (tinted purple ofc) and rotate them to make nostrils.


Dr. Amnesia (oc)
Step 1
Take two medium snow piles (the small one and the bigger one) and tint them black and stack them on each other.

Step 2
Take two small white circles and put them on the head. Then, take three white squares, and rotate two in the middle of the body to make the outside of the larger eye, and use the last white square to fill everything in. Then take a black circle and put it in the middle for a pupil.


Forest Lump (@OddAudtheAce’s OC)
Step 1
Take a green rectangle and circle barrier and line up the circle with the rectangle. Take 2 white circles and 1 white rectangle and put them on top of the face. Space out the white circles enough to fit in the rectangle. Add a light gray rectangle and tilt it.

Step 2
Take 2 thin, brown rectangles and tilt them so that they are opposite. Then take 6 small, brown, thin rectangles and put them in an antler pattern. Now, take a small black circle and put it on the mask. Then put a small red circle on the mask. These are the eyes.


Animals
Armadillo
Step 1
Take a circle barrier tinted R255 G220 B117 and put two rectangles of the same color on it. Now add a large rectangle tinted R92 G92 B92 for the shell.


Step 2
Take 3 rectangles tinted the same color as the head. Place two of them under the shell and one behind the shell. Now add 2 rectangles tinted R133 G133 B133 on the shell. Take a white circle and put it on the face. Take a slightly smaller black circle and put it in the white circle.


I have many more designs, but I just wanna start slow. If I’m doing anything wrong, please tell me! Criticism helps me a lot. Also, if I don’t get to your request, I’m likely busy/tired/procrastinating/forgetting common knowledge.
