Alright, found out some other people were making Smash, and I wanted to make the beginning of a guide to help who ever needs it at the end this guide will be complete. Oh and by the way this is a platformer mode If you make any edits to this Guide then put your name into the Contributors section and I will put you into the game!
Overview (this will be edited as I finish the parts)
Part 1: Maps+voting
Part 2: Kits+abilities (thanks to @Captain-Gim for the idea)
So for maps you can do whatever you want for them, whichever styles etc, for me I want to quickly shoutout @EGGacha , who came up with and will be designing all of my maps, and @AAREN whose amazing guide I used for this voting system.
Part 1
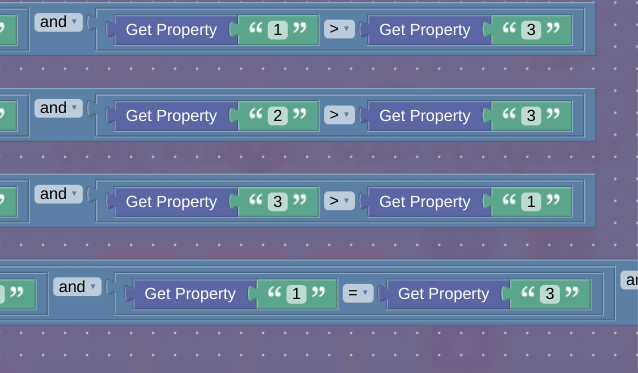
For the voting system I used Aaren’s method, and because I have that guide linked I am not going to go over it as it is unnecessary, so firstly make the voting system, you can have as many maps as you want, but I chose to go with three. The only thing that is different between my voting and Aaren’s is if the voting is equal and here is the code for that.
All of this is code in the trigger (the trigger delay for it is 25 secs for me)shown in Aaren’s guide

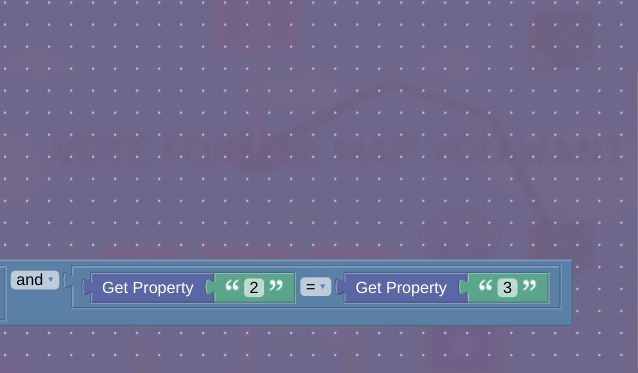
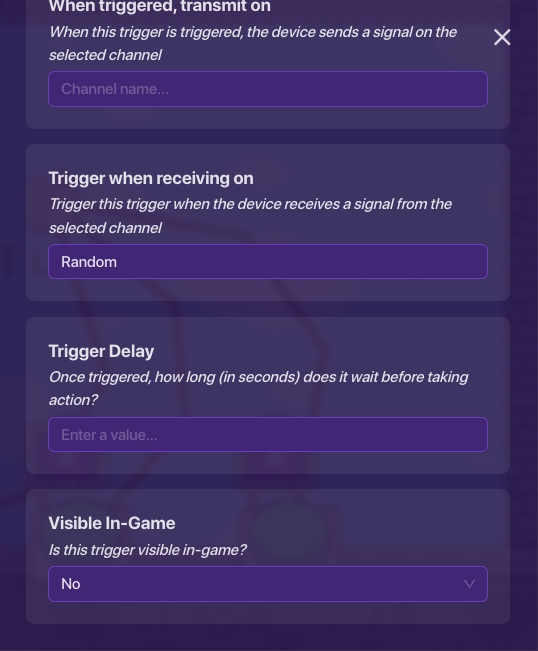
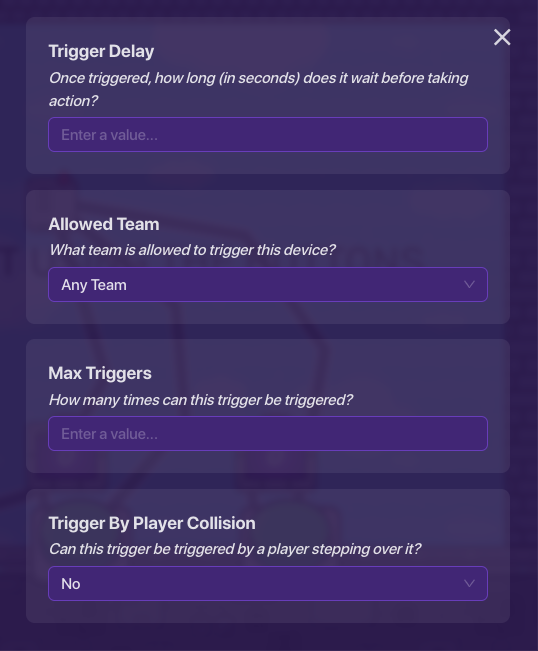
Now these are the settings for a second trigger that I added

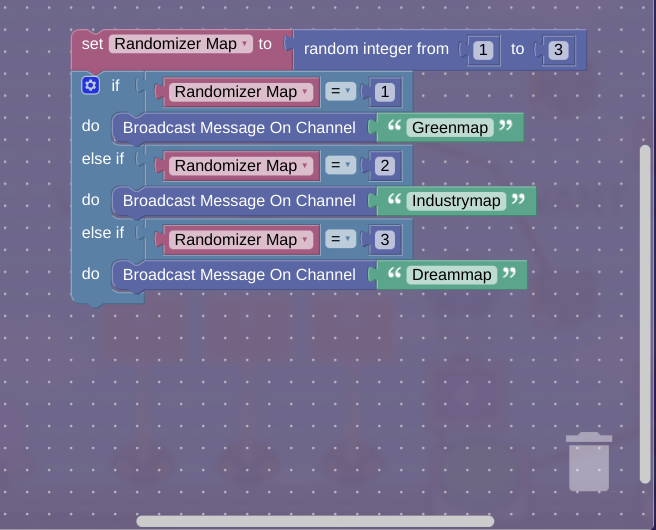
Block code for this trigger(I have the channels as the map names)
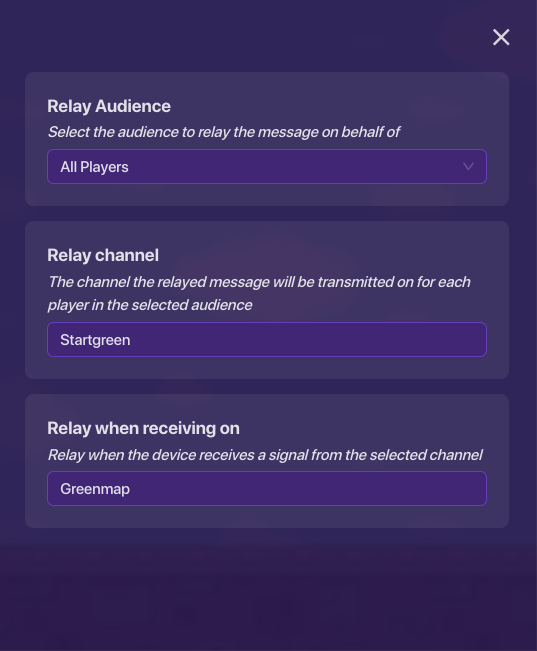
So after you have all this set-up then you want to put a relay down for each of the maps you have (right now I only have one set-up but it is the same thing for all of them except for the channel names)
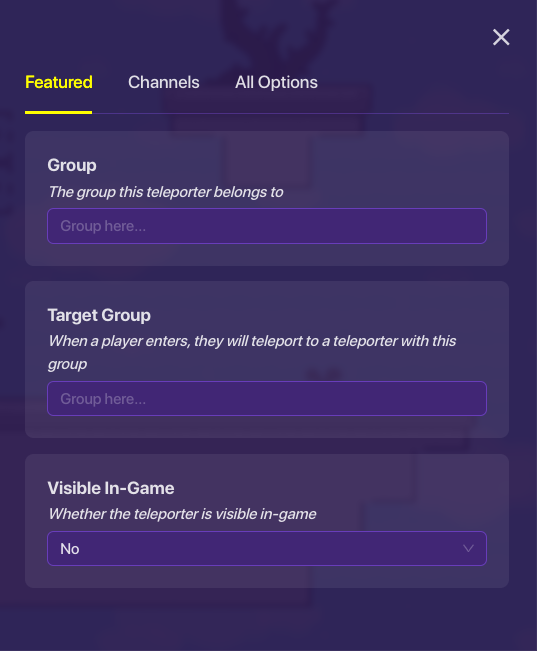
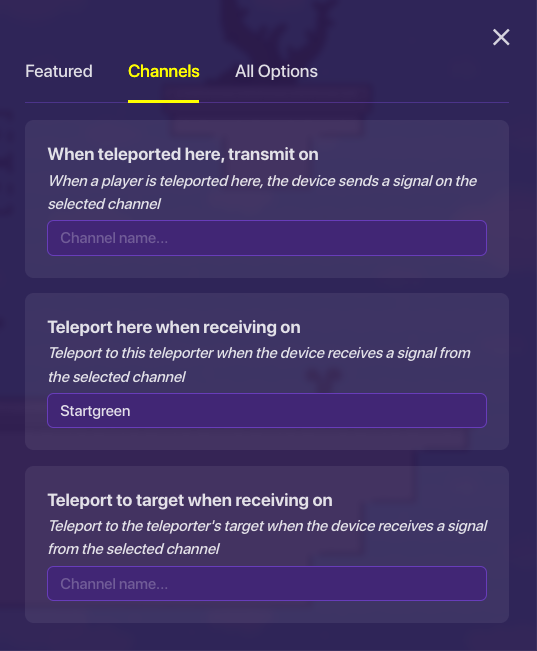
Then put a teleporter at wherever you want your players to spawn and set it up like this for all the teleporters:
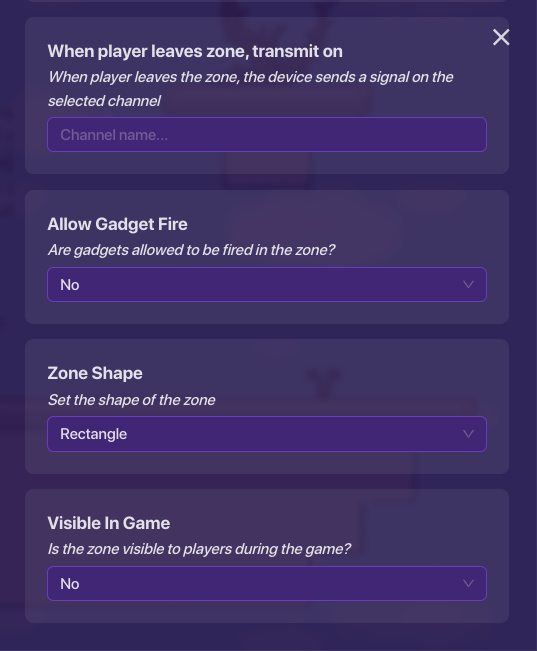
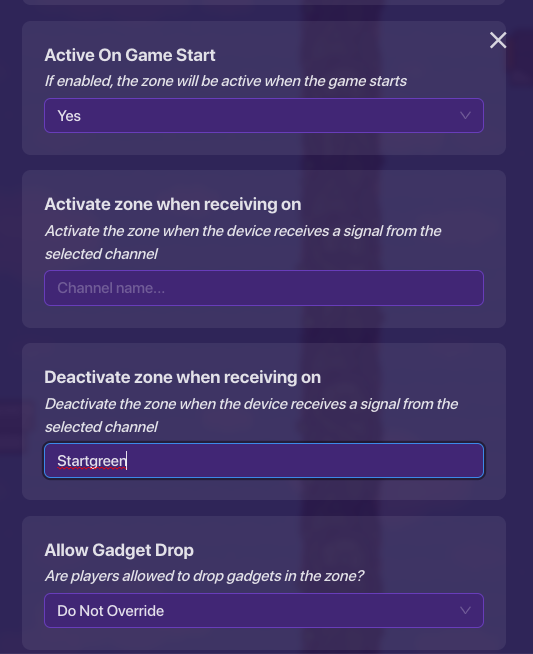
This part is optional but I have 2 zones over the fighting place set up like this with a trigger:
Zone 1:
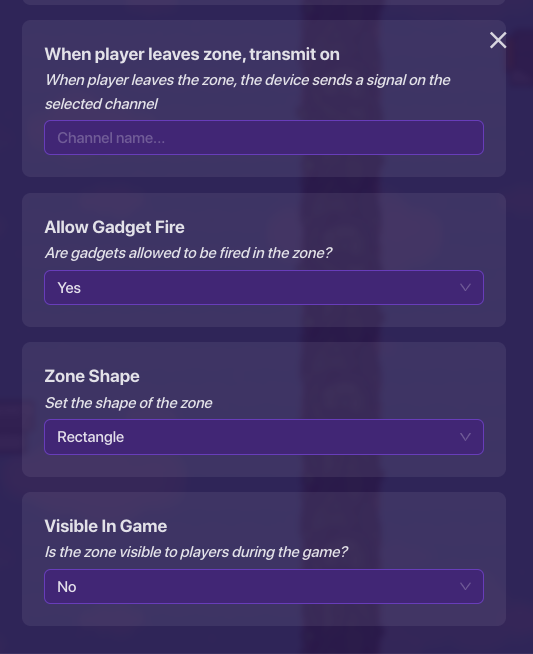
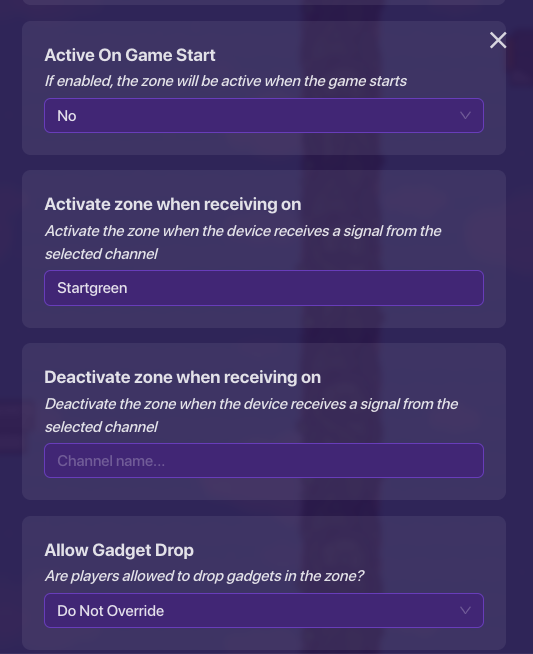
Zone 2:
Trigger:

Part 2
This part is going to be about Kits, because this is Gimkit, there are many sacrifices that I had to make including, weapons, abilities, etc. But I did my best here and I quickly explain my system for this. The way this will work is that there will be a Character Shop and a Power Up Shop (both of these are optional but recommended to make the game more interesting) Character Shop will have different Characters with different speeds, weapons and abilities, these will all be the same no matter who buys them, if you buy x character and your friend buys x character, you both will have the same base abilities, now the Power Ups is where there is going to be variation, these power Ups will include traps, health bonuses extra speed boosts and things like that, hopefully as GKC DLD becomes more advanced I will be able to add more abilities and power ups! These will be available through purchasing with cash, or with what ever you want the players to earn when they knock out others. Now to the actual steps of this:
I am only going to go over one power up and only one Character I made, the steps for it will be the same no matter what, it just depends on the speed/the ability you want them to purchase.
Shop Interface:
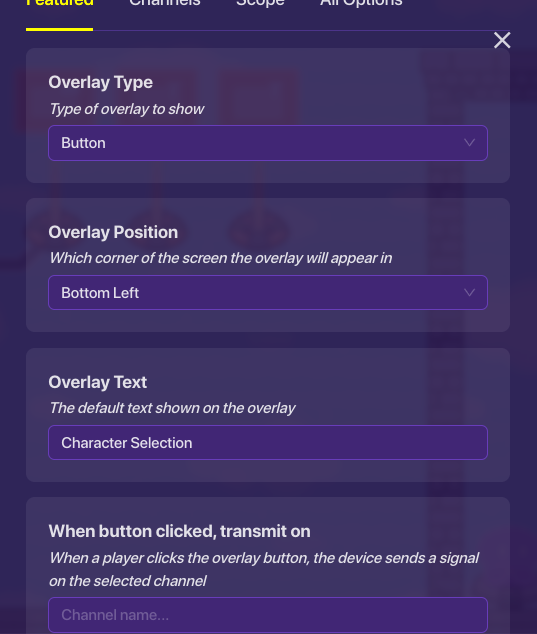
What You will need: Overlay that is a button type(mine looks like this)

One pop-up
Firstly, make sure your button is where ever you want and have the setting look like this
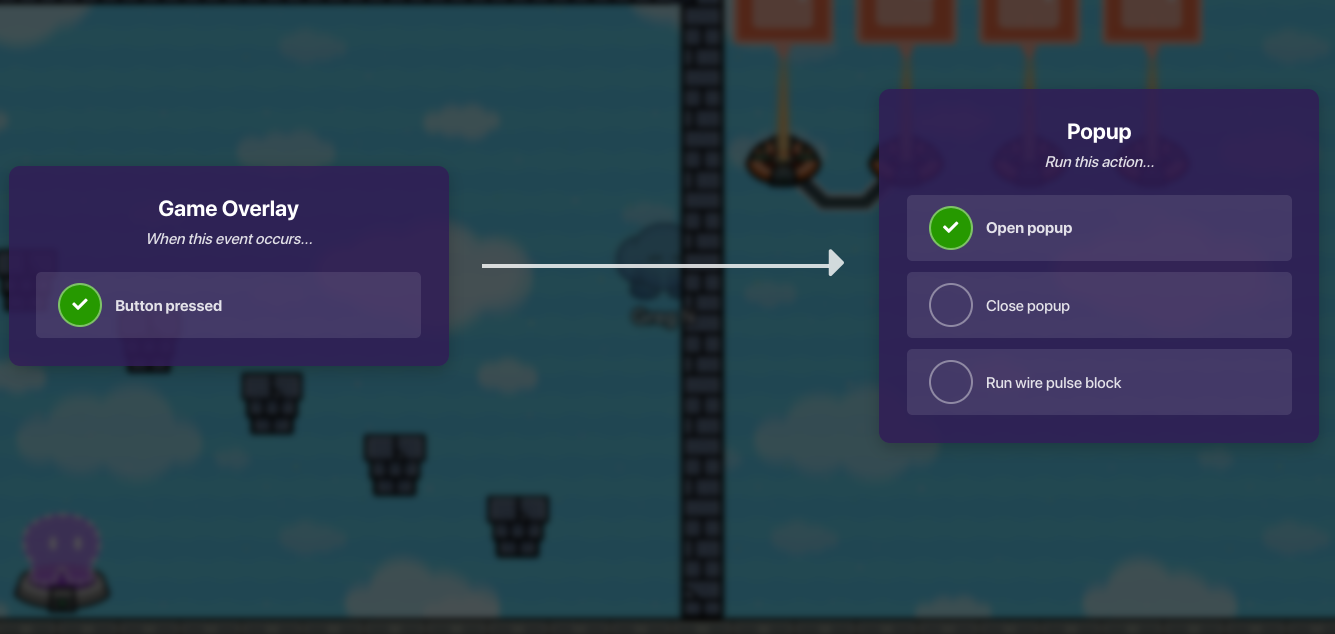
Then, wire the overlay to the pop-up and have it like this:
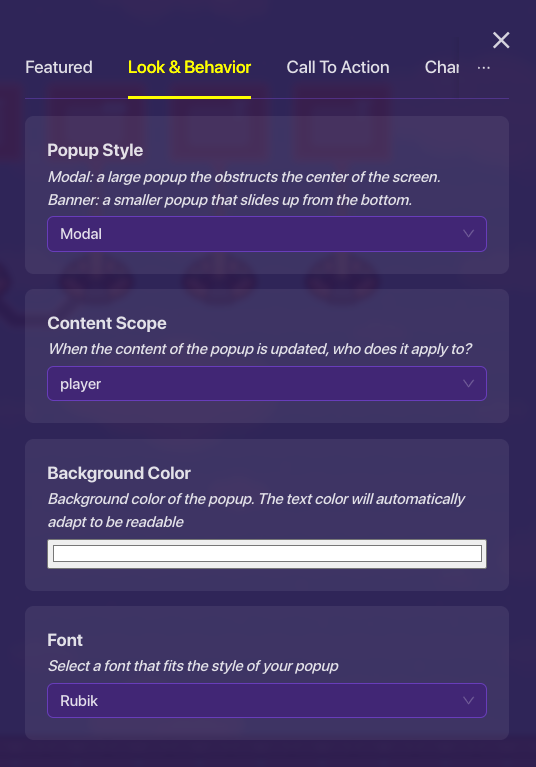
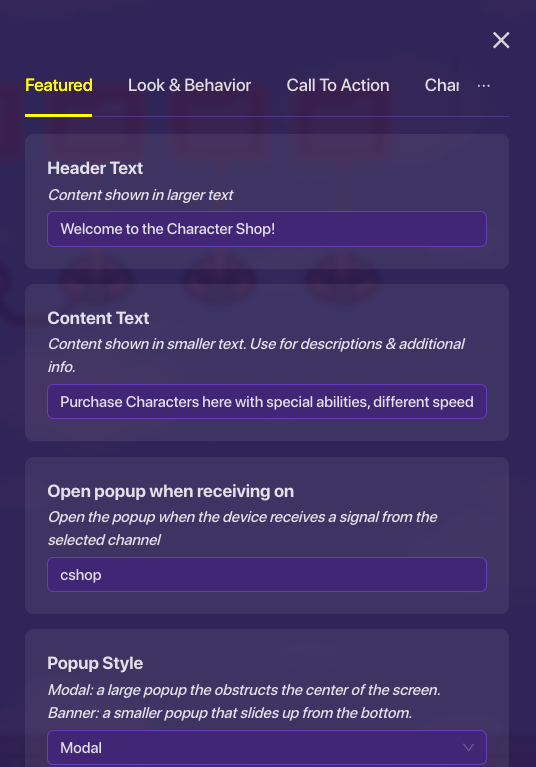
Then make the pop-up settings look like this:

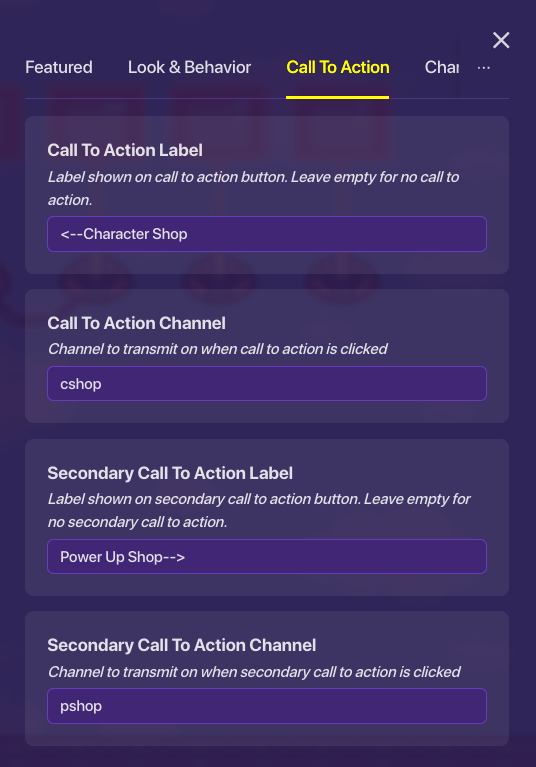
That is it for the shop selection interface, now onto the actual shops, make another pop-up for each shop that you have, I am only going to show one but it is the same thing for the other one just the channel that opens it is the channel that its action button signals, here are the settings:
Then make another pop-up with setting like this:
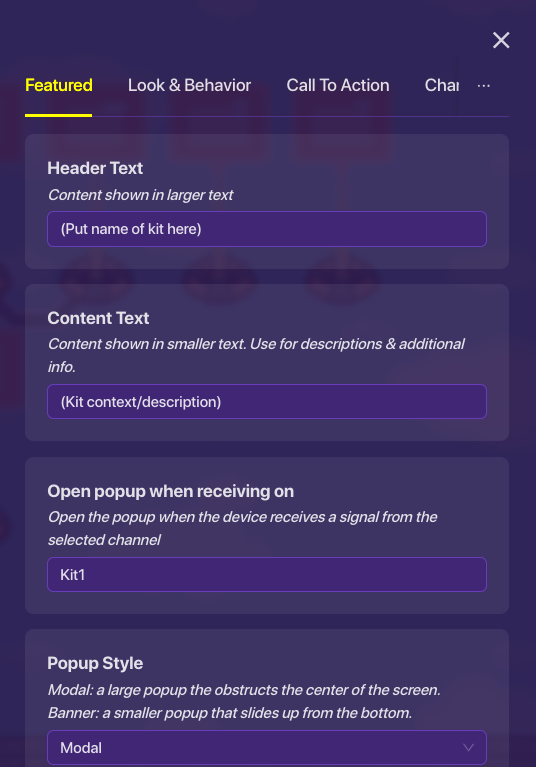
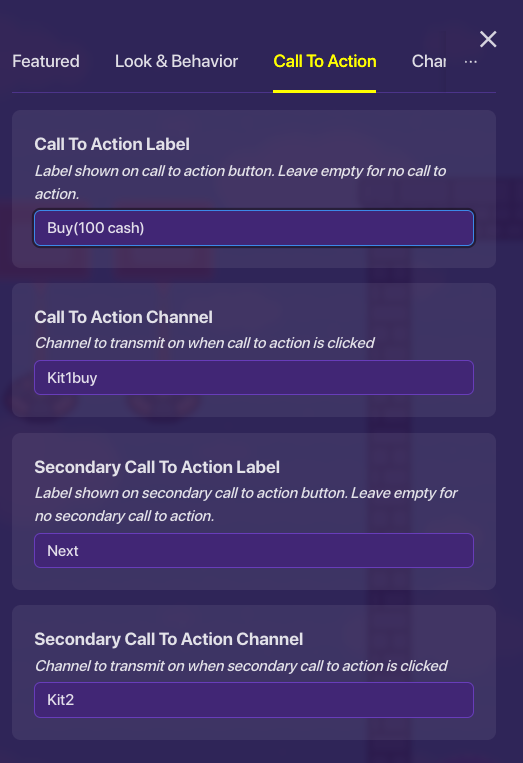
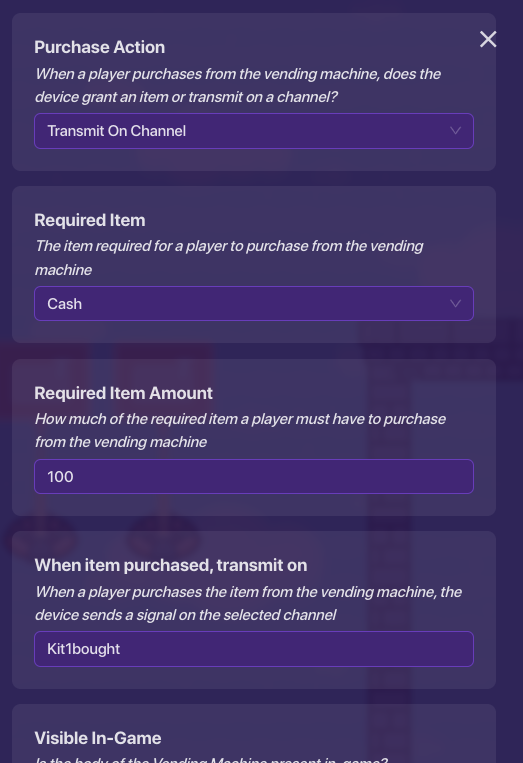
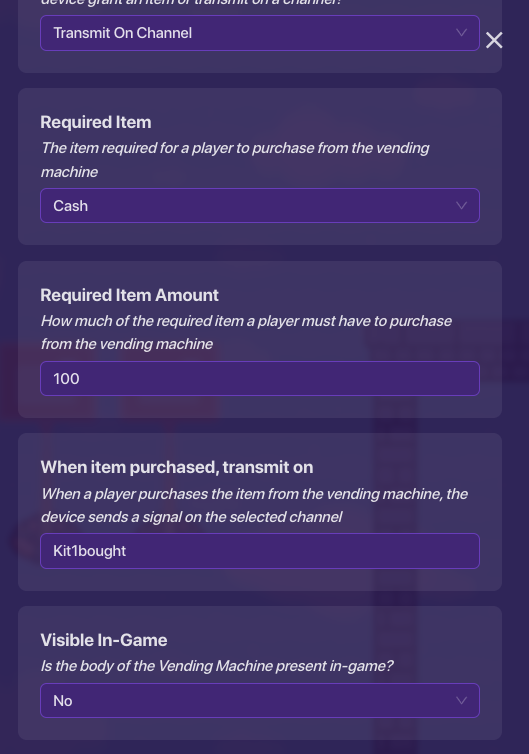
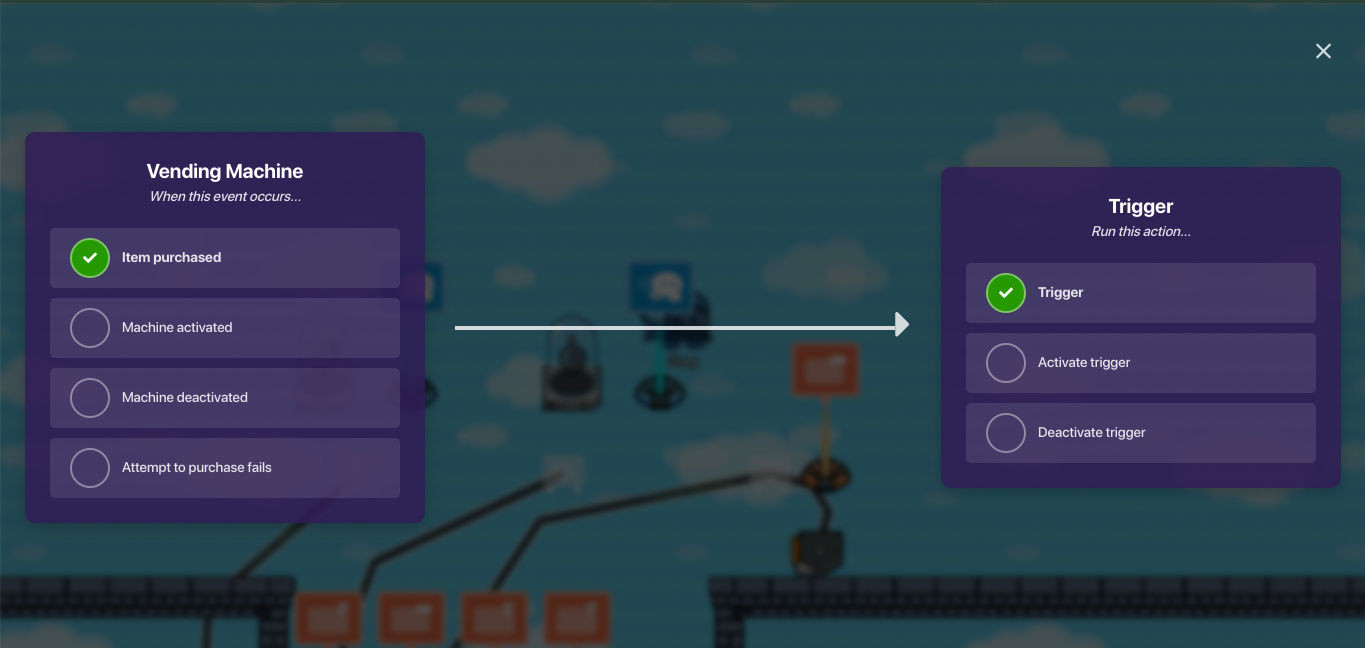
Then make vending machines like this, for my kit, it will make the player very fast, but they have a slow ok weapon. So I will need one vending machine that sends a signal to two an item granter, and a speed modifier, mine looks like this, for right now, I am not going to go into abilities. Here are the setting for the vending machine:
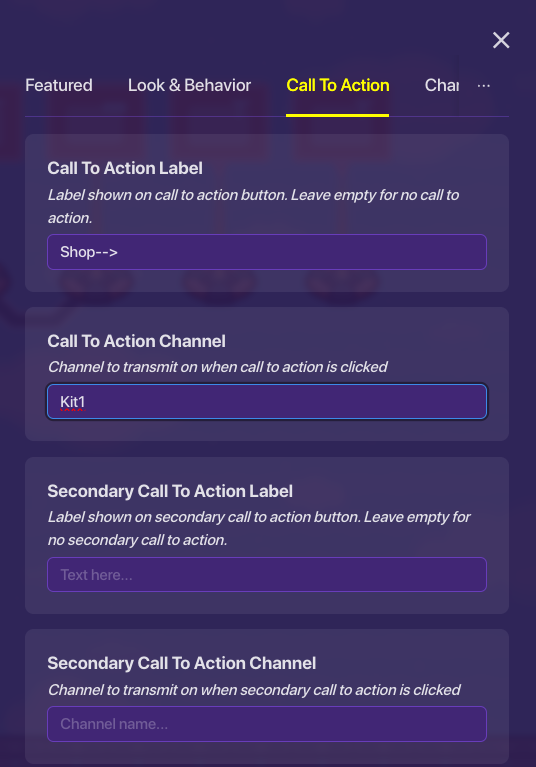
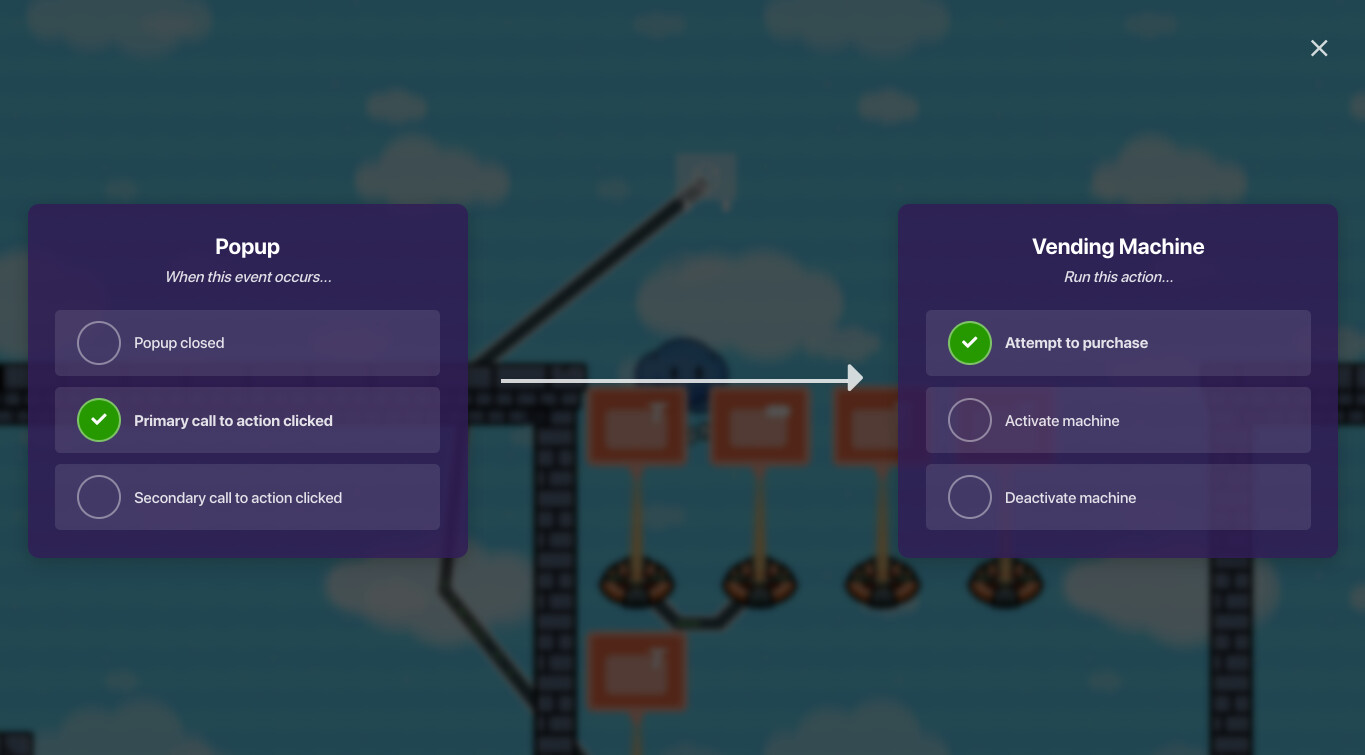
Then, wire the pop-up with the Kit 1 to the vending machine and make it like this:
Now make an item granter and make it so that when it receives a signal from Kit1bought, give it the item, then make a speed modifier that changes the player speed too what ever speed you have the kit set the player speed to when it receives a signal from Kit1bought.
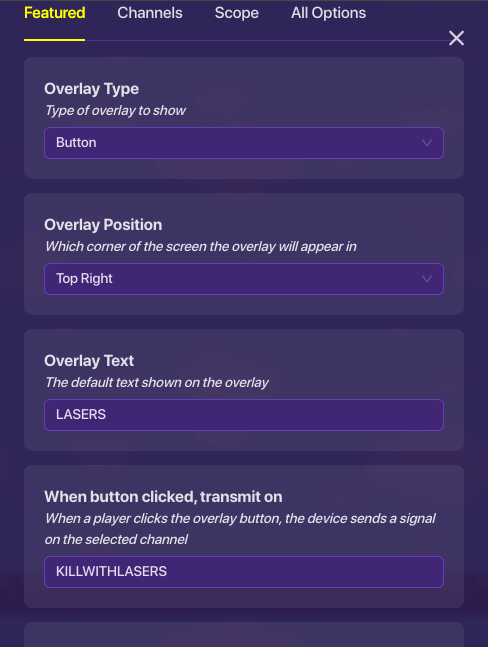
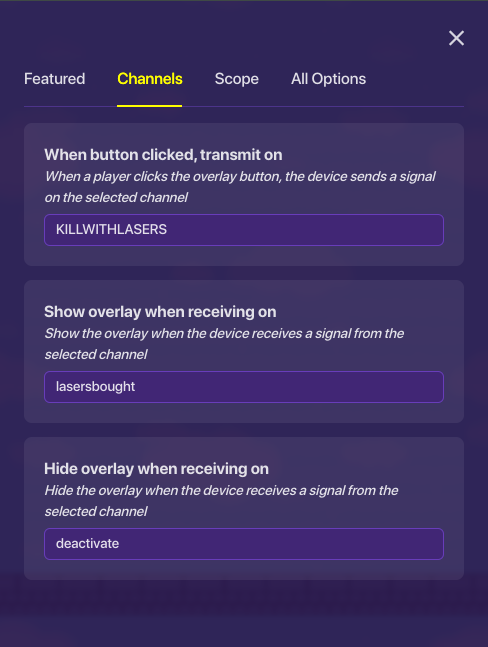
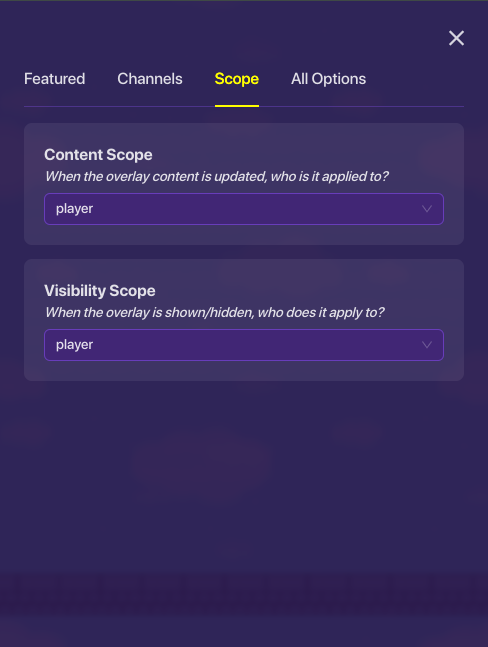
Alrighty, when you are seeing this you probably will not notice a change but I am coming back to edit this a few days later, now we are going to get into the abilities. You have abilities be whatever the heck you want, lasers, teleporters, whatever. I am just going to explain a way you can buy the abilities, and set up the abilities. Firstly, you know our abilities shop from before, we are gonna need that, make sure you have that set up (even tho there is nothing in it right now) alright, so I am not going to go over the buying part of the process, as it is already covered in the kit selection part, but I will be going over how to make the abilities. Firstly, have your vending machine send out a signal, then make a game overlay like this:
Then make a trigger that is connected via wire to your vending machine, like this:
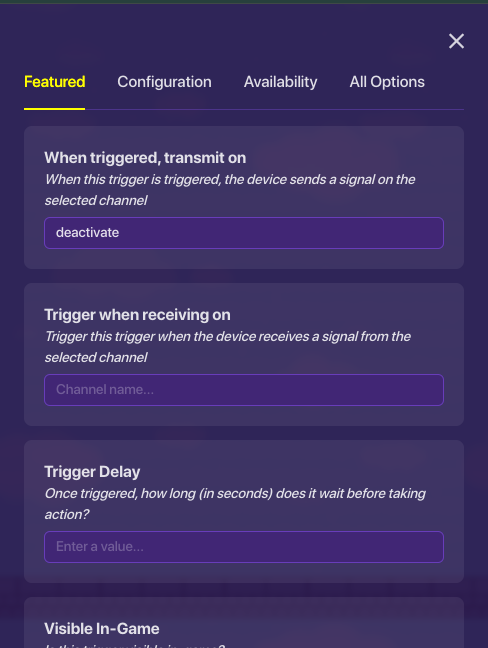
Then make your lasers activate then deactivate when the button is pressed, make sure that for all your abilities, you have it so that they will deactivate when another one is bought (that is the purpose of the trigger)
That was it for Part 2, this is my first ever guide so let me know if there is anything I could do better.