This is a guide about making geometry dash in GKC. I know there are some existing guides on this but I use a very different way. It is long so let’s get started.
Step 1—Starting position
Travel all the way to the left of the map for the start. Place a spawn pad and a blue barrier, leave the settings the same, and change the size as shown below.

Step 2—Top barrier
Copy the barrier and place it at the height of the first barrier as shown in the image below. Make it as long as you want you game to go to.


Step 4—Creating a hitbox
Create a zone, set the shape to a circle, and make it transmit on “Respawn” when player enters. This will respawn the player when the player touches the spike. Note: Make sure the zone is larger than the spike or it will not work.


Step 6—Increasing difficulty
If you’ve playtested by now, that was easy. So lets make it harder. Add spikes in the same place on the ceiling and floor.

Step 7—Drawing blocks
This game is still really easy. Since it doesn’t have the constant moving, it needs to be very hard. So let’s add more than just spikes. Lets add blocks.
(Copy paste here: “■”)
Add an anvil inside the block so you can stand. Make sure to layer it to the bottom!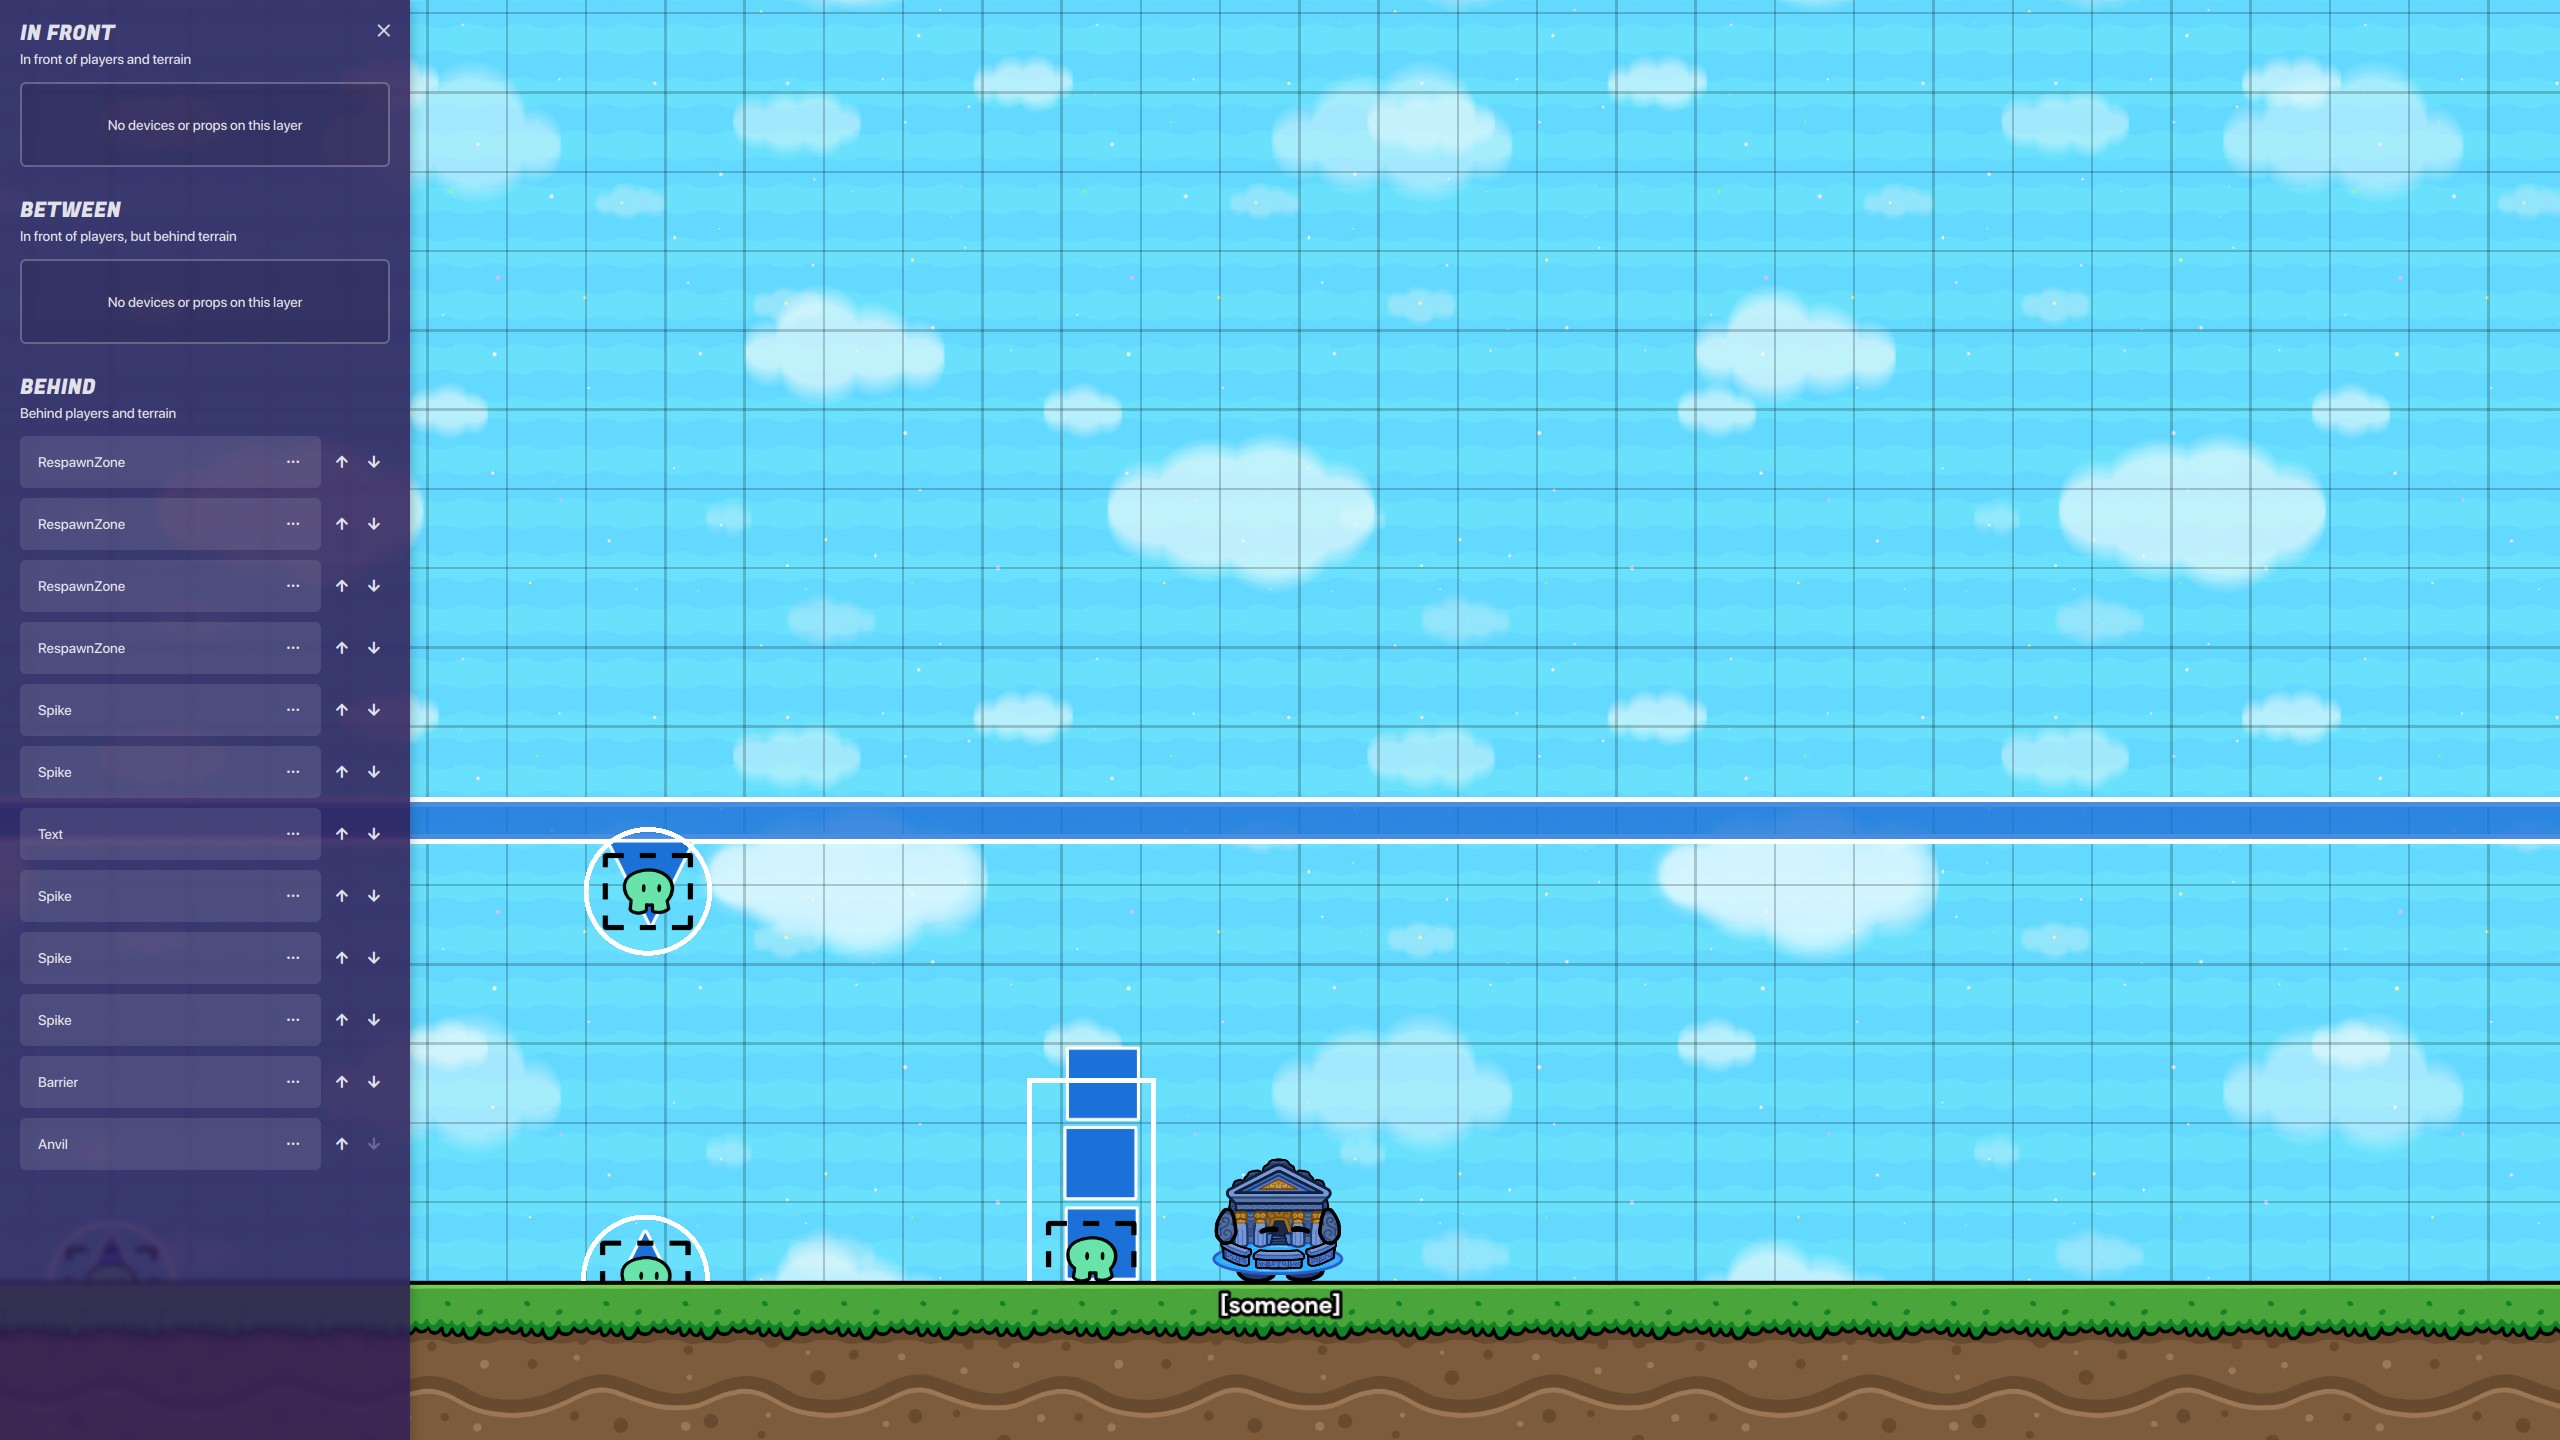
Step 8—Building the level
Now you need to build the rest of the level. Spikes, blocks, whatever you decide you want in it. I’m not actually giving you every obstacle’s exact type and location, am I?
Step 9—Creating score zones
Scoring:
To make a scoring system, I add random zones throughout the gameplay to give you score. Here’s how.
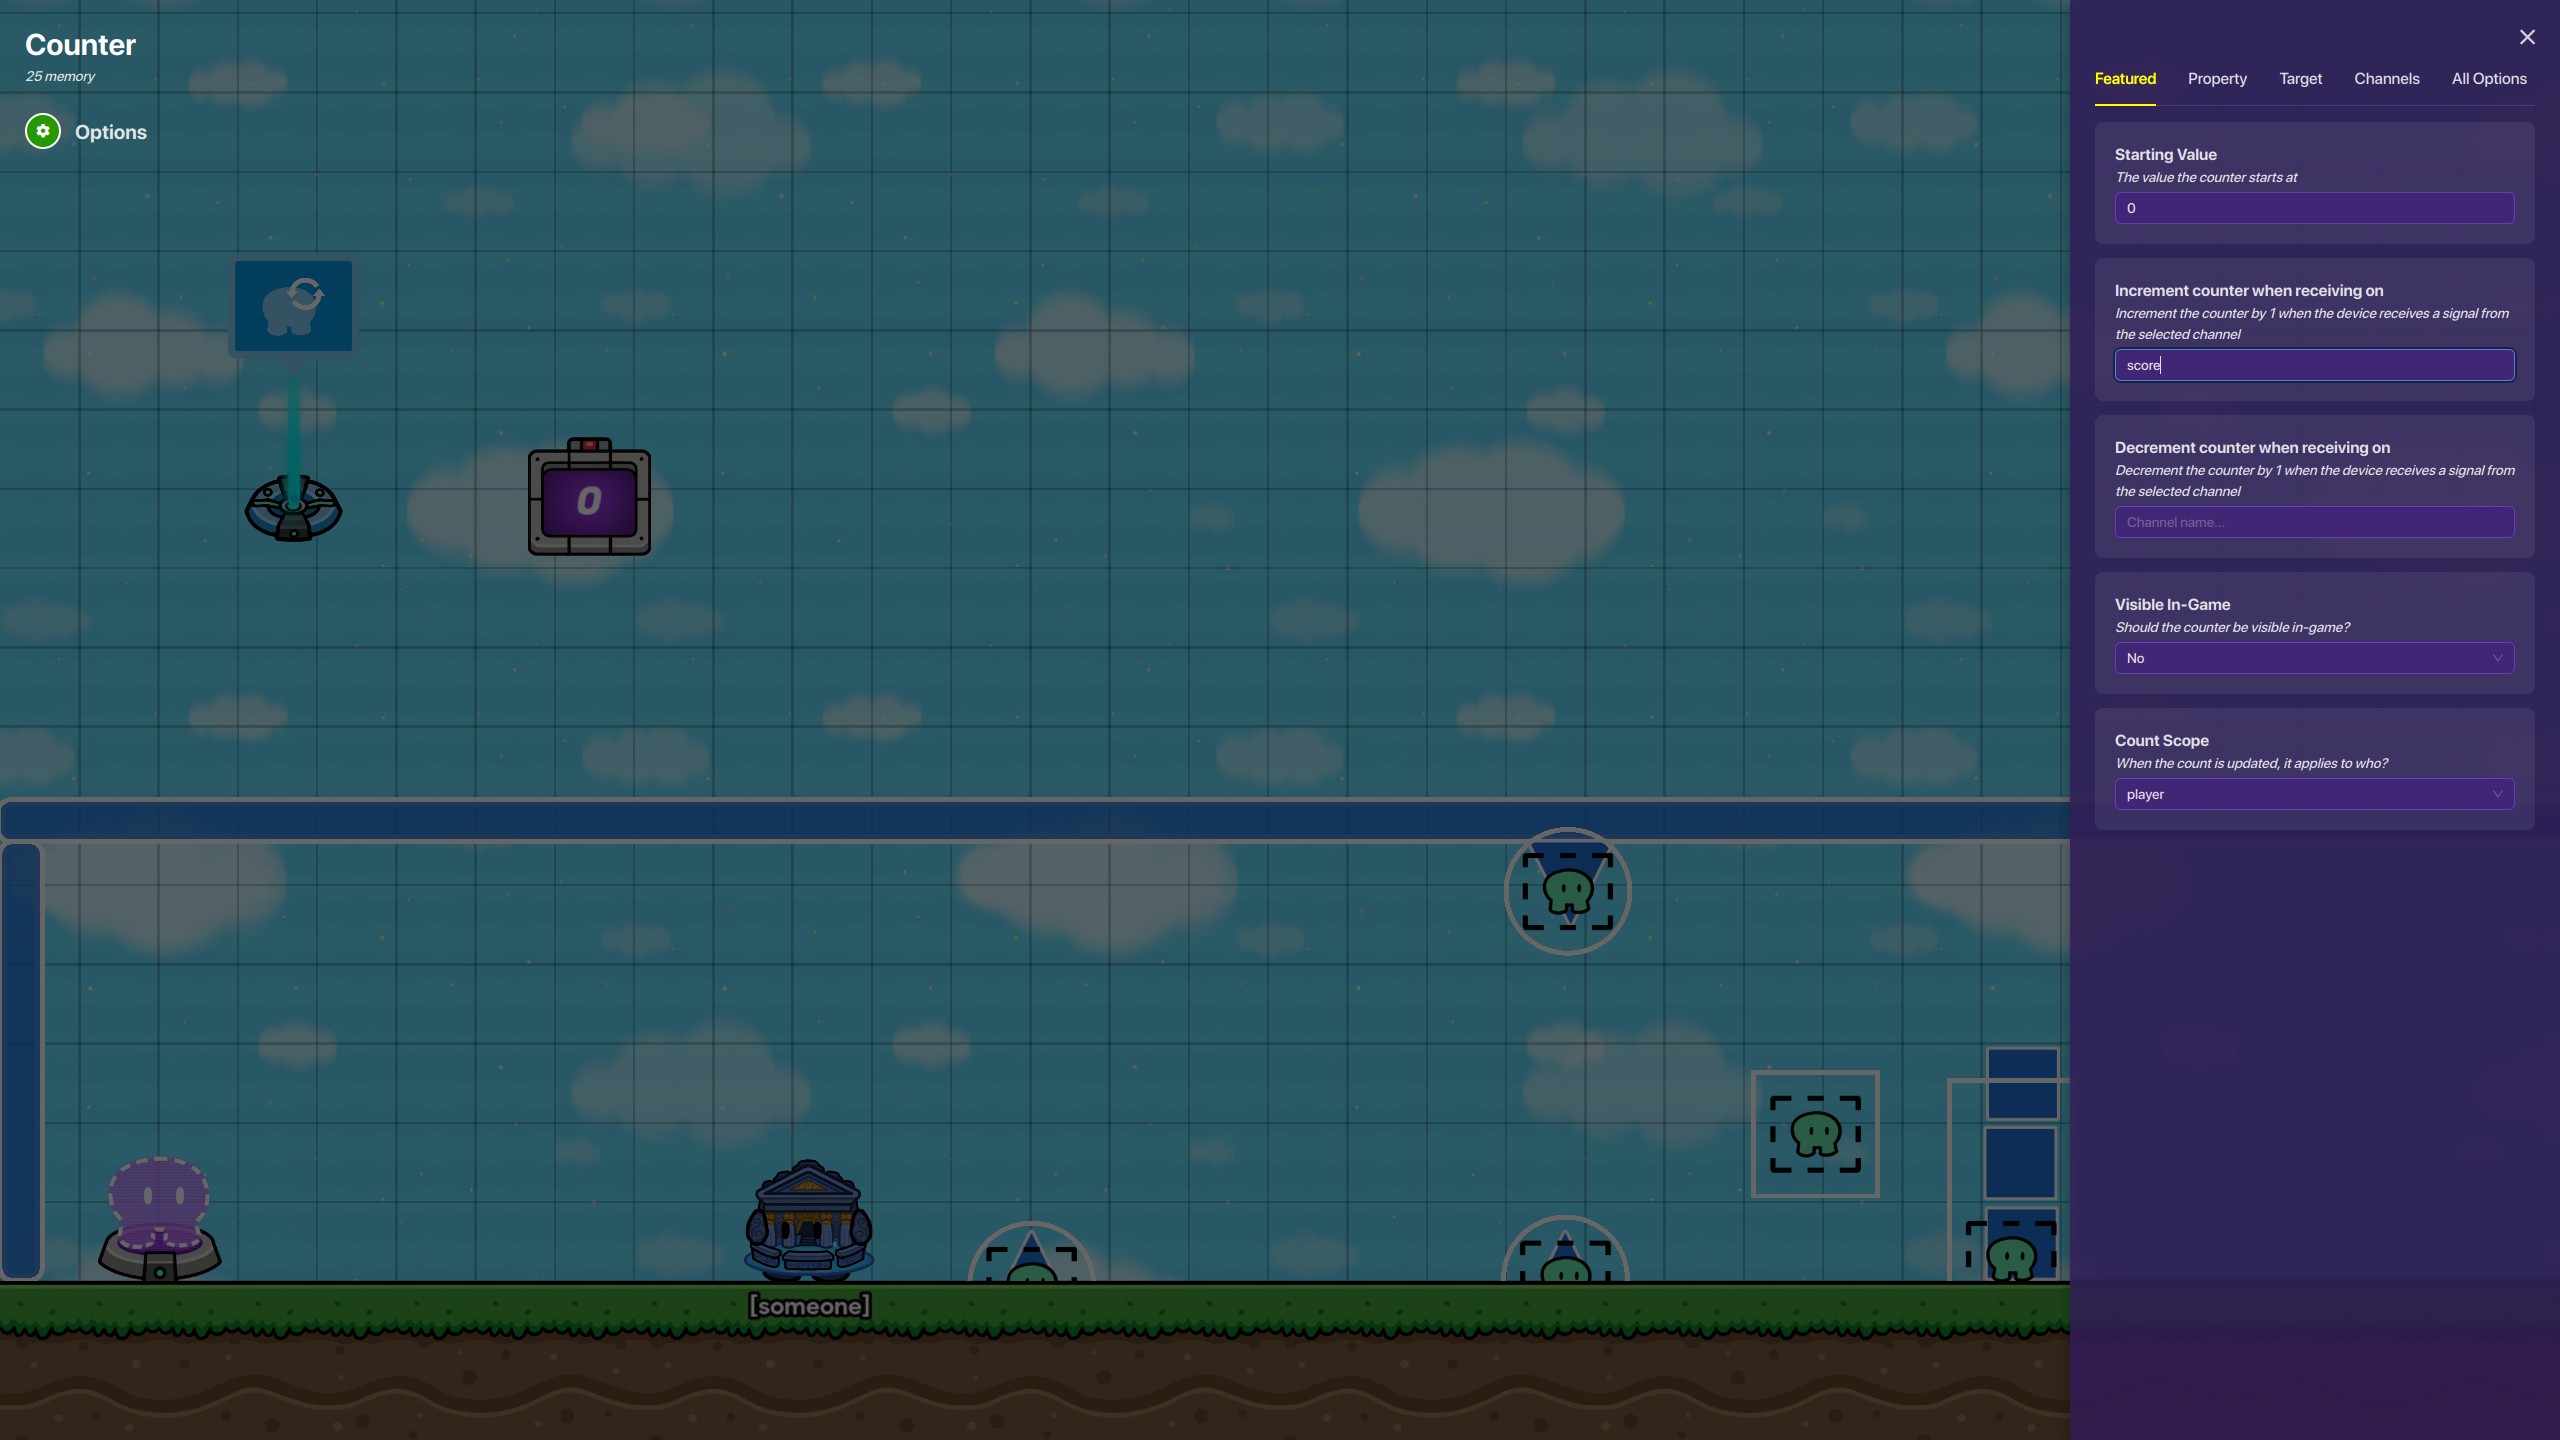
For every score point, add a zone. When player enters zone, transmit on score.

Do that for every score point. Then, add a counter somewhere, make it not visible in game, the scope is player, and increment when receiving on score. Then, go in to property, change update property to yes, and put property name as score.

Step 10—Creating the score property
Create a property, name it score, the property type should be number, default value should be 0, and the scope should be player.

Step 11—Making a working score
Go into options > map options > score and set score type to property, the property should be score, and now your scoring system should work ![]()

Step 12—Fixing the scoring bug
So you may have realized a bug: you can activate each score zone multiple times. To fix this, add a trigger above each zone, set visible in game to no, trigger when receiving on “slowscore” and when triggered, transmit on “score”. Then go into configuration, set max triggers to 1, max trigger scope to player, and trigger by collision to no.

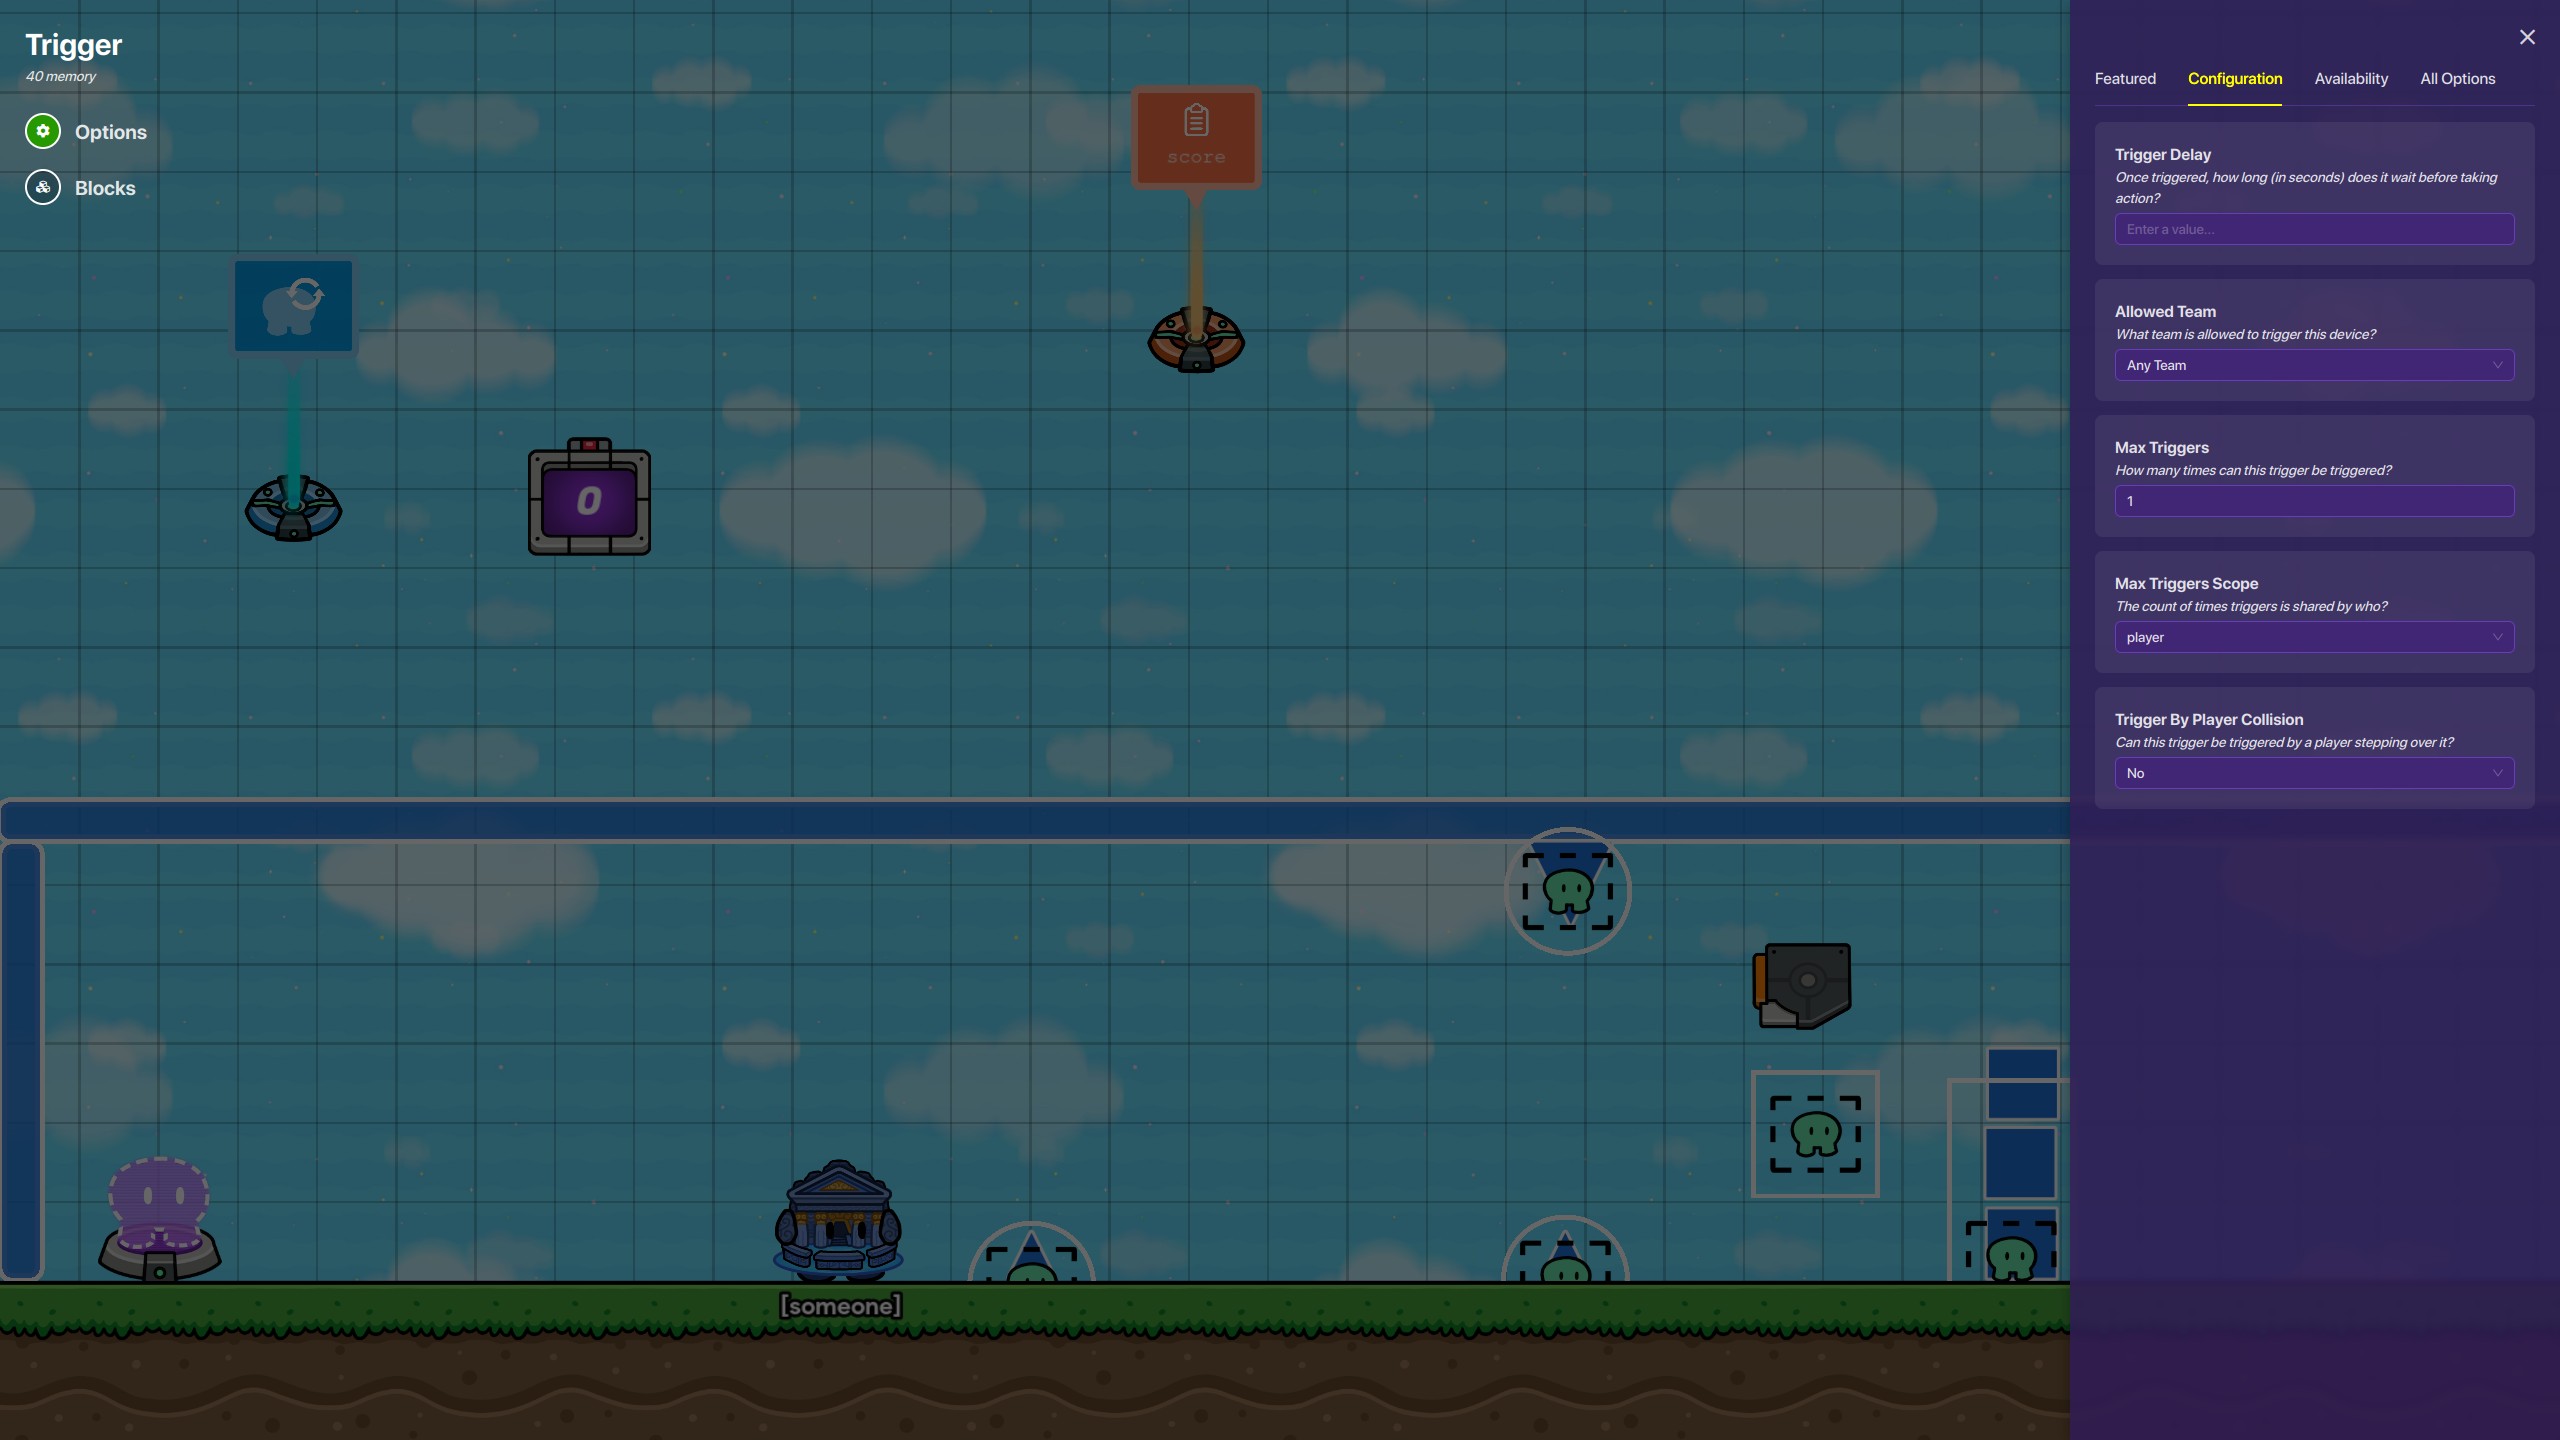
Now go back into the score zones and set them to transmit on “slowscore” instead of “score”.

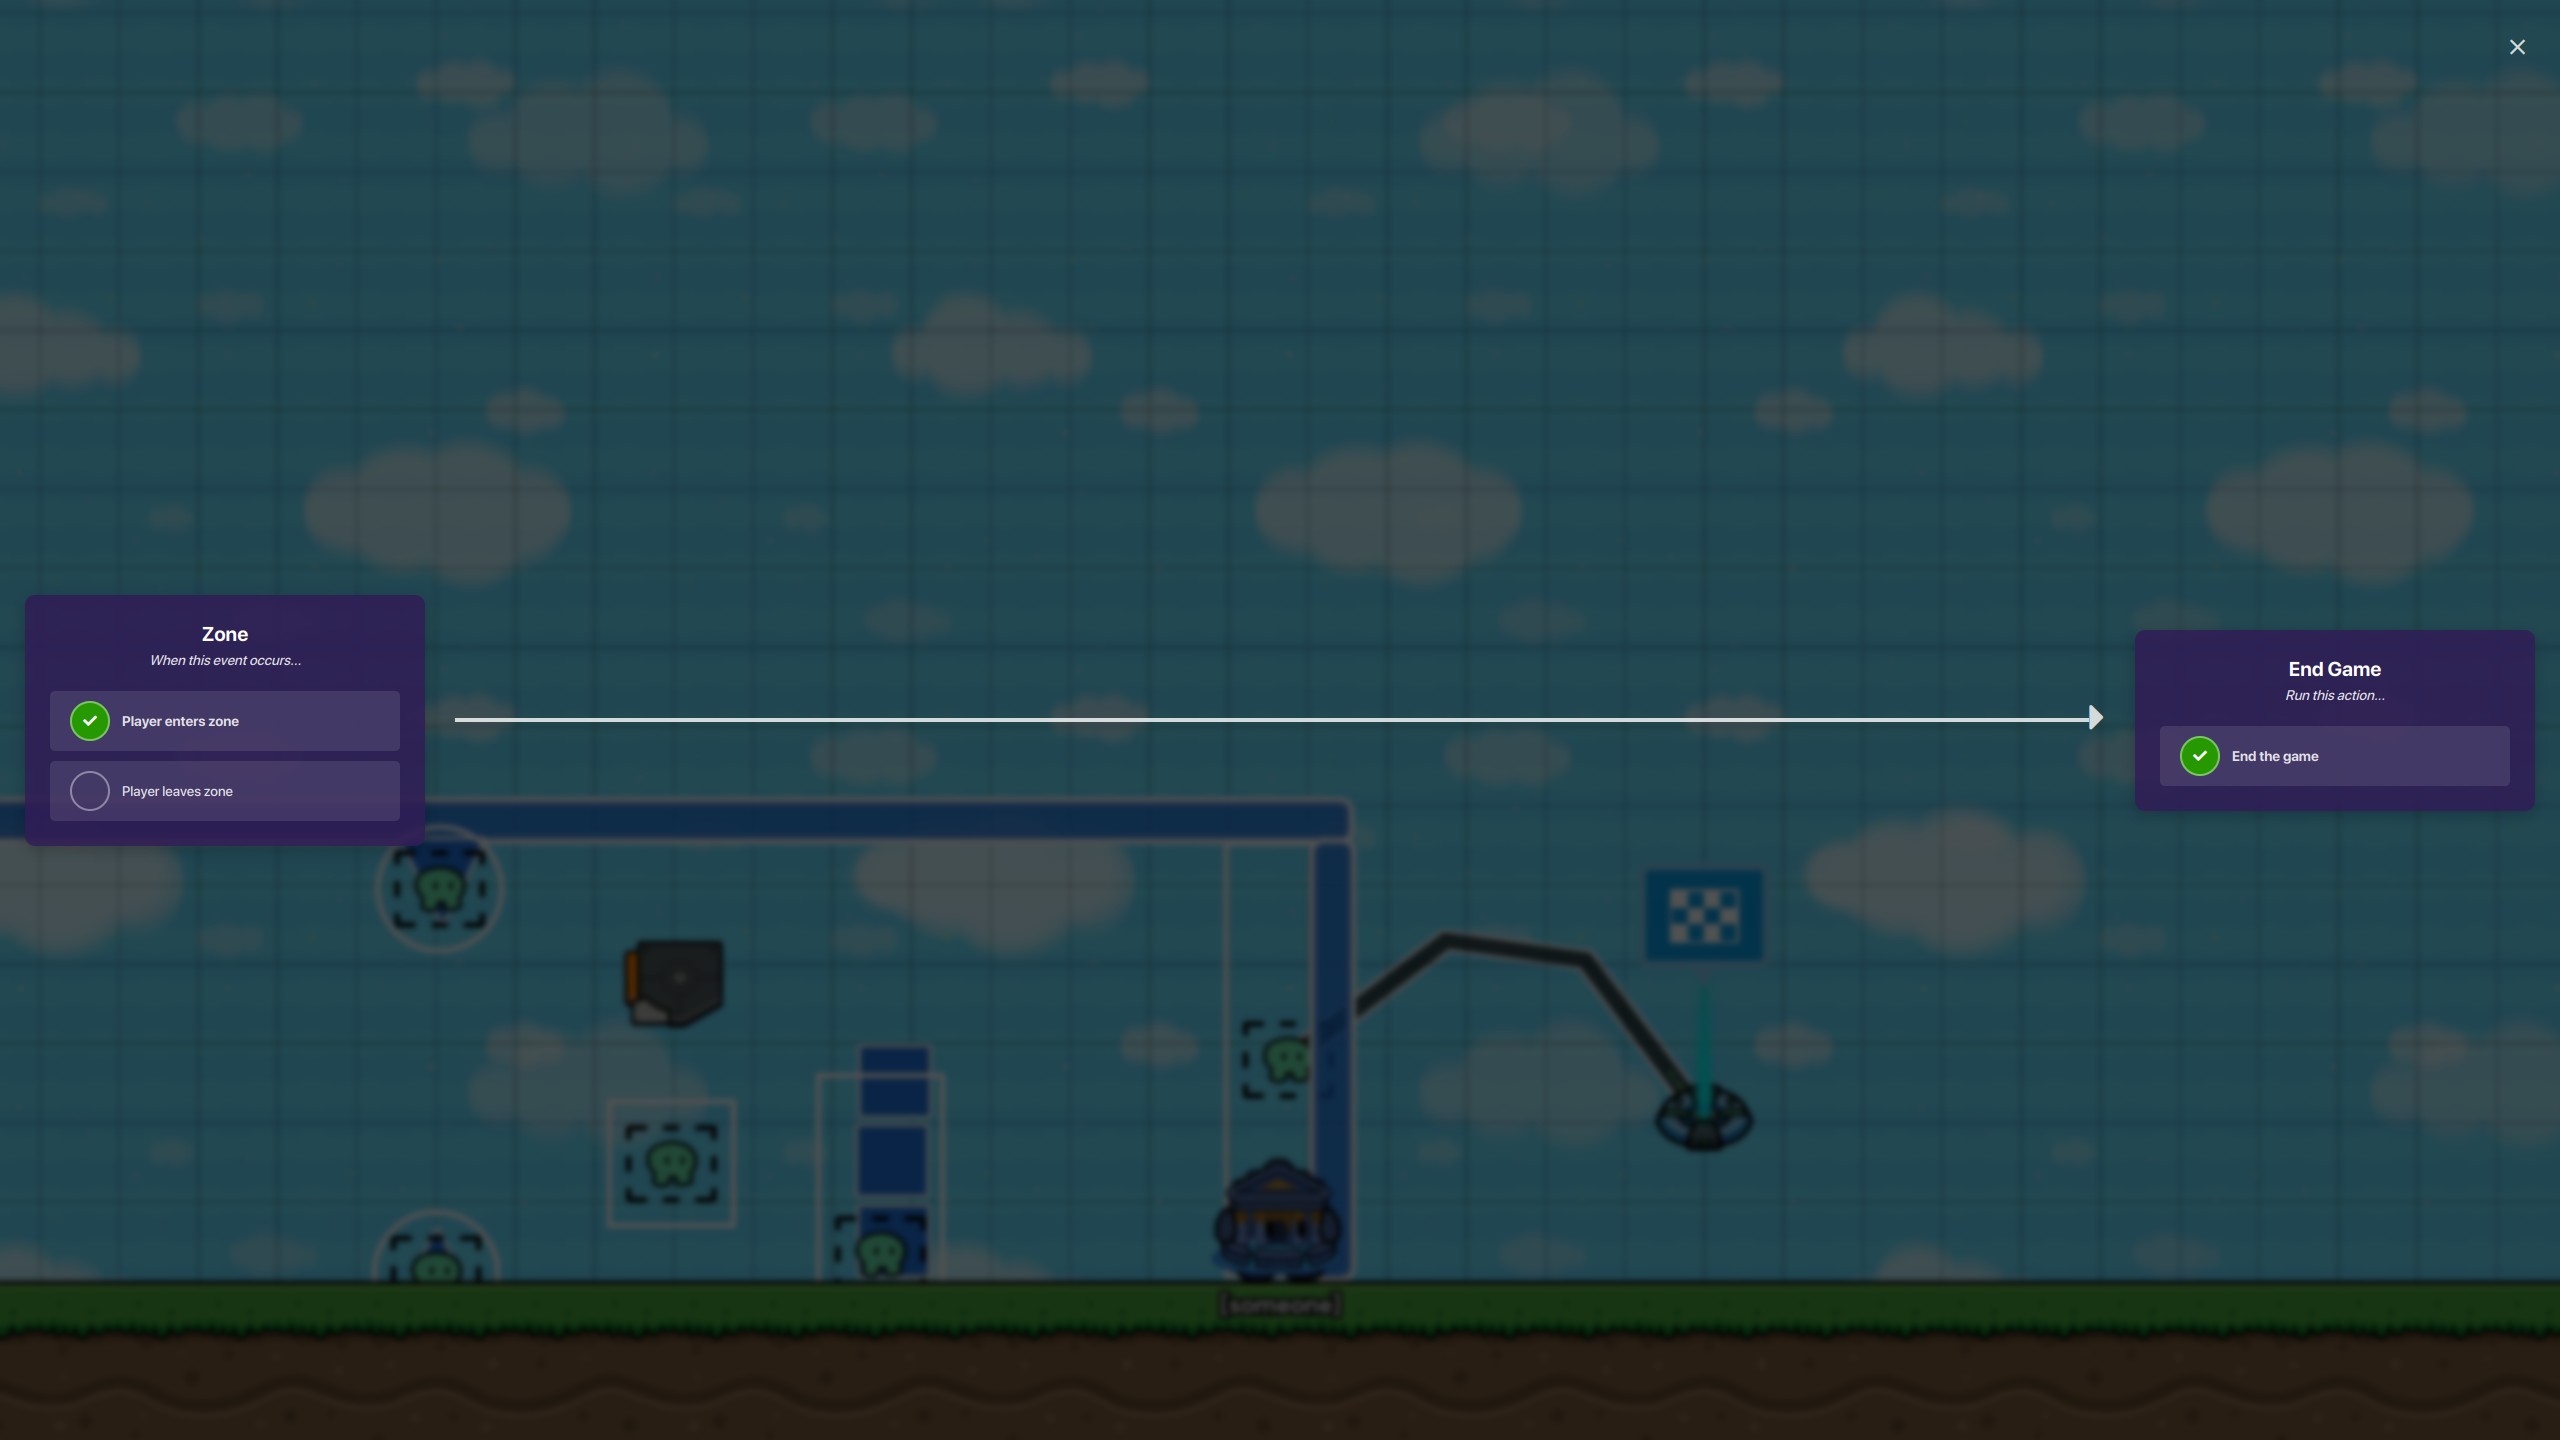
Step 13—Making an ending
To make an ending, you can go to where the game ends, copy the starting barrier and place it there. Then create a zone. Wire the zone to an end game device.
Optional Steps
Step 14—Respawn message
Create a notification. Go into blocks. Click on when receiving on channel and set the channel to respawn. Then add the following:
Add activity feed item for everyone > Create text with > Triggering player’s name & [respawn message].


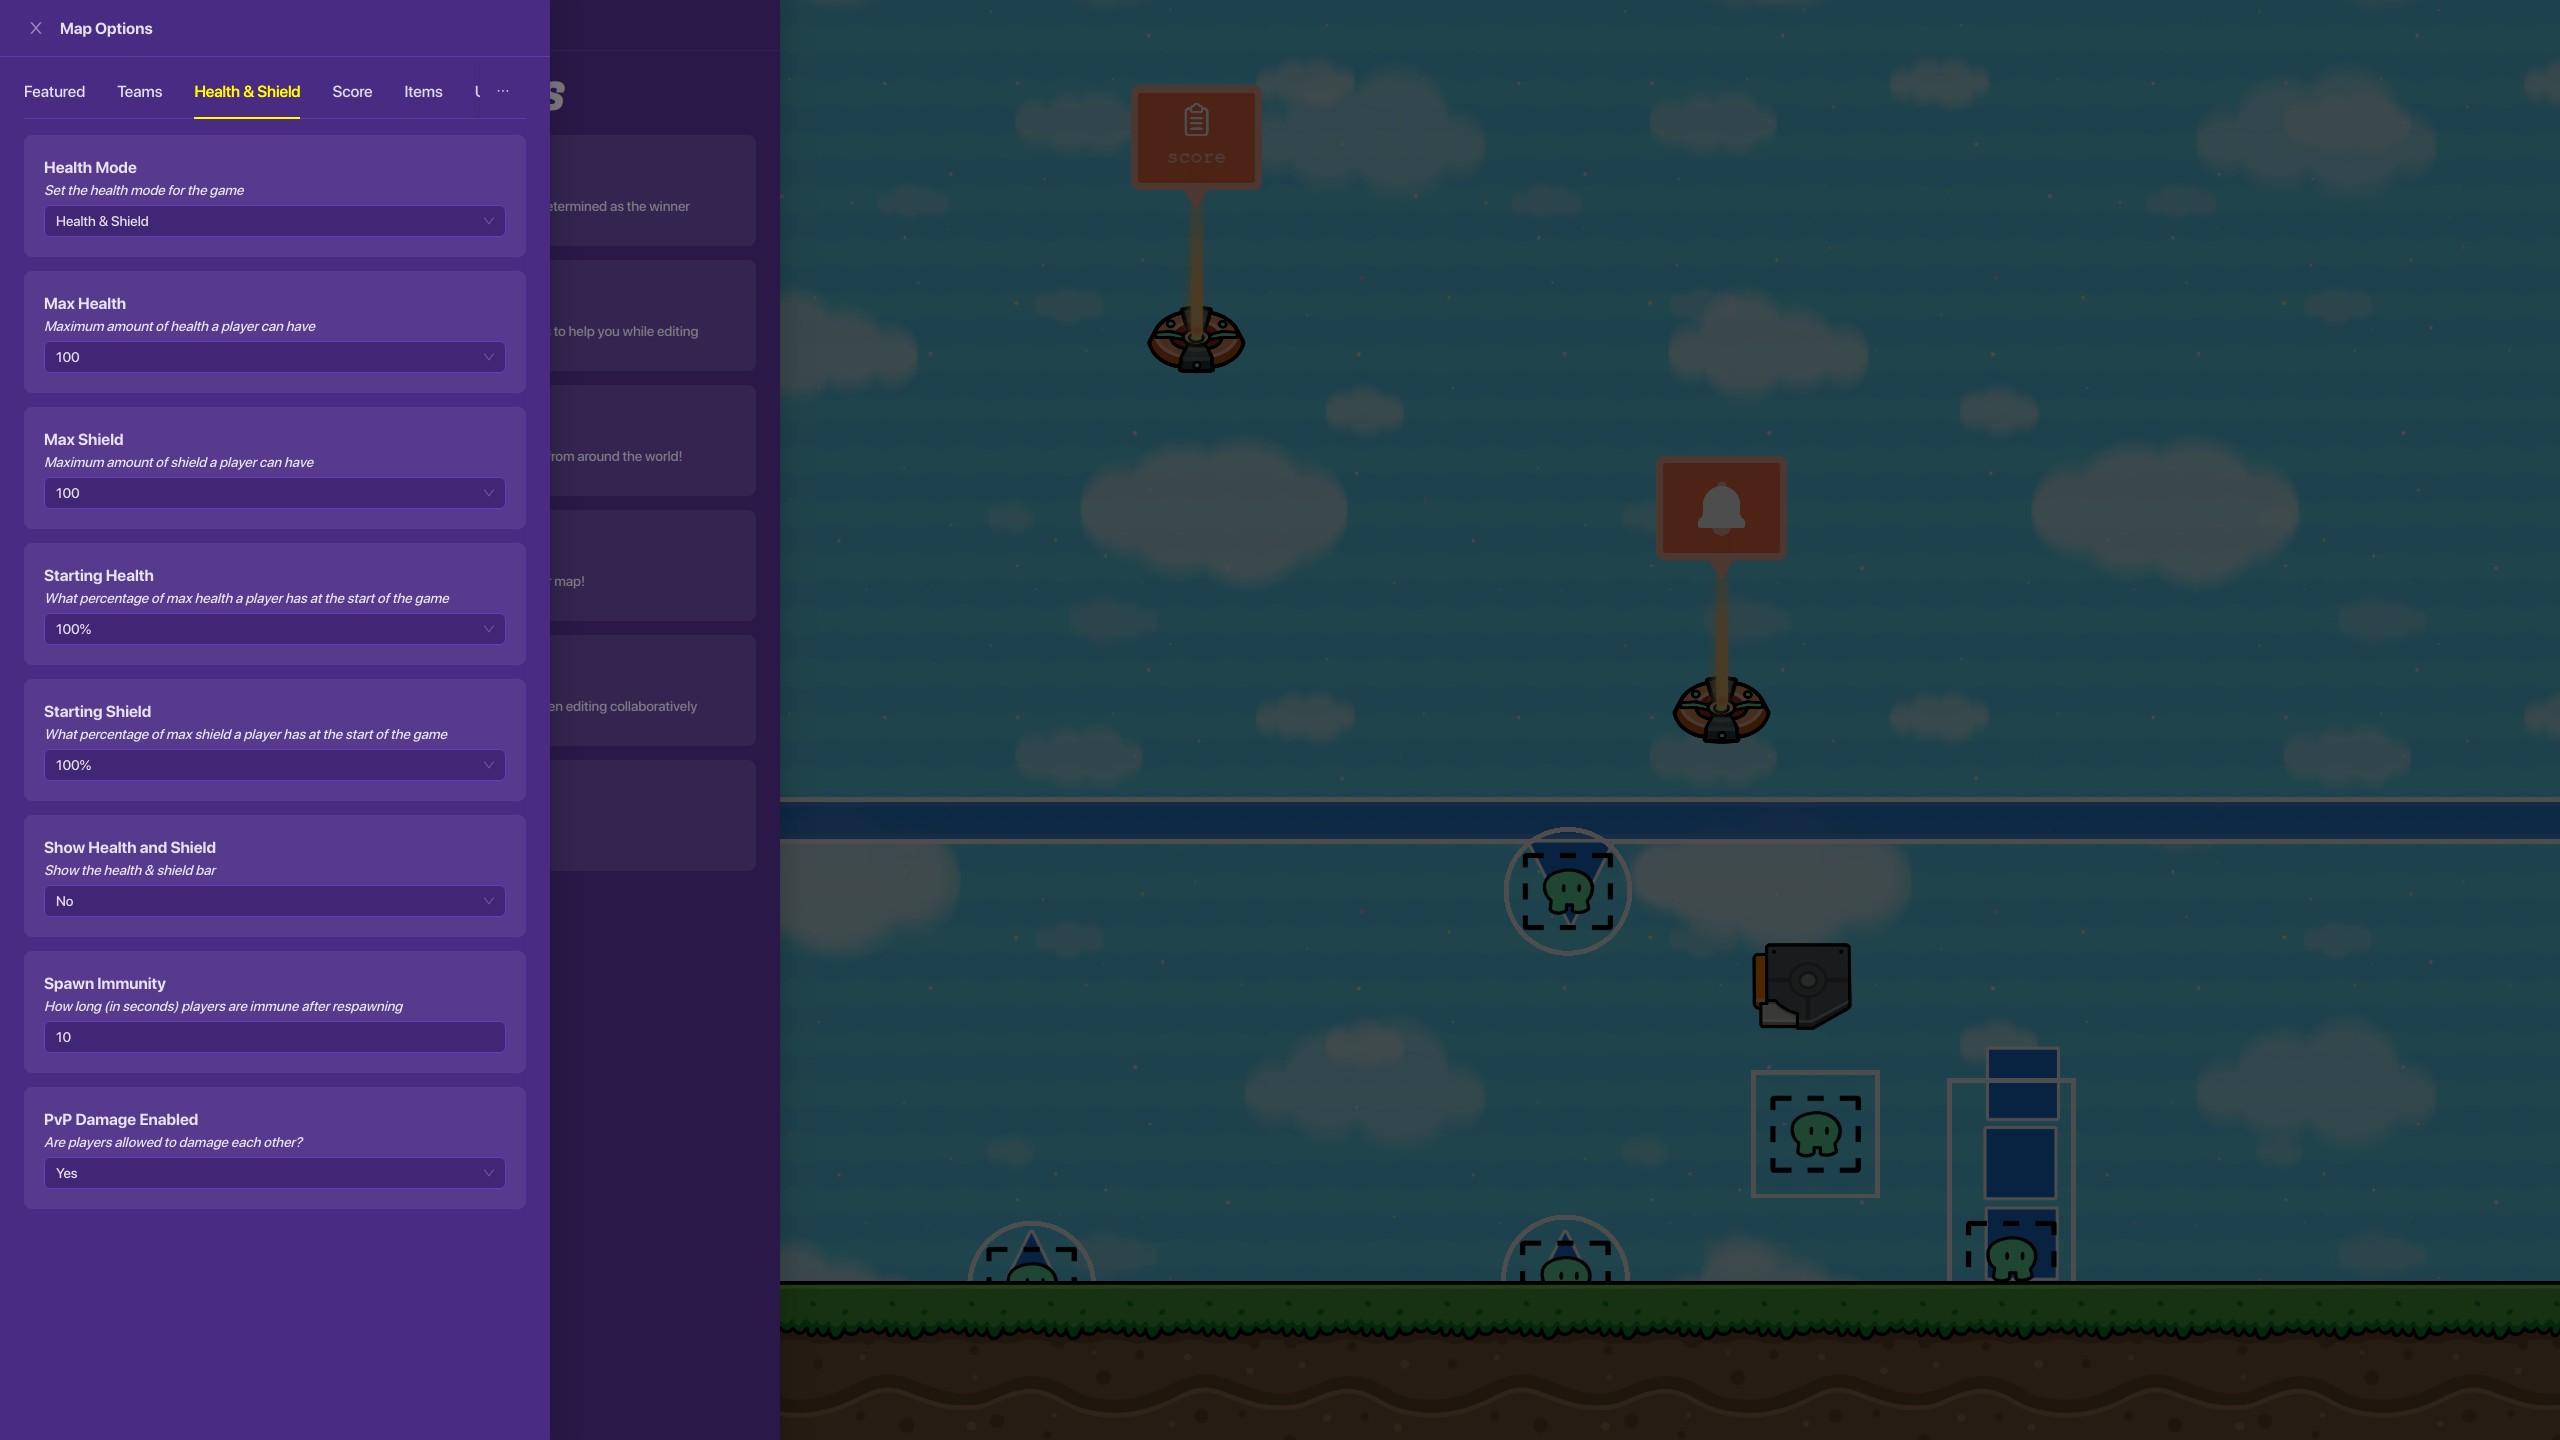
Step 15—Hiding unnecessary information
Go into options > map options > health and shield, turn off showing the health and shield bar. Then select items and set item slots to none.

Step 16—Background
Create a barrier. Set alpha to 1, collision to no, and show border to no. Change the color to whatever you want the background color to be. Then make it big enough to cover the entire visible area. You may need to copy it to make sure it is big enough. Change the layer to below everything so it doesn’t get in the way.

Now make another barrier with the same settings. Use a different color to make the background unique.

Tada! You now have a background!

Step 17—Floor terrain
Go into options > map options > floor terrain. There aren’t many options and this may be season ticket exclusive but I use classroom tile (blue), otherwise snow should work.


Step 18—Game clock
Go into options > map options > game clock. Set it to count up for a count of how long you’ve been playing or count down if you want to challenge yourself with a time limit.

Phew. ![]() That was a lot. Part two (making a second level) might come eventually. If there are any problems with the guide ping me. And… that’s it! (Also, you don’t have to use blue. Any color will work
That was a lot. Part two (making a second level) might come eventually. If there are any problems with the guide ping me. And… that’s it! (Also, you don’t have to use blue. Any color will work ![]() )
)
Difficulty level:
- 1/10 or

- 2/10 or

- 3/10 or
- 4/10 or

- 5/10 or
- 6/10 or

- 7/10 or
- 8/10 or

- 9/10 or
- 10/10 or

- 11/10 or
