Intro: So @Unit_72 needed help making an system where you can make alliances with other players, so I decided to make this guide. Let’s jump right in!
Devices:
- 1x Lifecycle
- 1x Game Overlay
- 1x Notification
- 1x Text
- 1x Barrier
- 2x Buttons
- 4x Barrier
- 5x Trigger
- 4-60x Team Switchers
Chapter 1: Showing Teams
Step 1: Use the Lifecycle (1/1). Set the “Event” to Game Start and “When event occurs, transmit on:” Set team.
Step 2: Use a Trigger (1/5). Set “Trigger when receiving on:” Set team. Create a block and set the following blockcode:

Step 3: Use Property (1/4). “Property Name” will be Team #. Set “Property Type” to Number and “Default Value” to 0. The “Scope” should be player and “When property value changes, transmit on:” Your Team Update.
Step 4: Use the Game Overlay (1/1). Set the “Content Scope” to player. Create a block and set the following blockcode:
“When receiving on channel” Your Team Update, run blockcode.

Chapter 2: The Interface
Step 1: Use the Text Device (1/1). Set the “Content” to No one wants an ally :(.
Step 2: Use a Button (1/2). Set the “Button Message” to Request Ally!. Set “When button pressed, transmit on:” Request Ally 1. “Activate when receiving on:” Reset and “Deactivate when receiving on:” Open alliances.
Step 3: Return to the Text Device. Create a block and set the following blockcode:
“When receiving on channel” Request Ally 1, run blockcode.
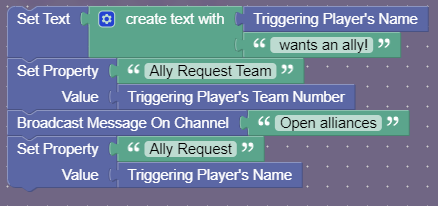
Step 4: Use a Button (2/2). Set the “Button Message” to Become Allies with them?. Set “When button pressed, transmit on:” Yes allies. Make sure that “Active on Game Start” is set to No. “Activate when receiving on:” Open alliances and “Deactivate when receiving on:” Reset.
Step 5: Return to the Text Device. Create a block and set the following blockcode:
“When receiving on channel” Reset, run blockcode.
![]()
Step 6: Use a Property (2/4). Set “Property Name” to Ally Request Team and “Property Type” to Number. The “Default Value” should be 0.
Chapter 3: Switching Teams
Step 1: Use a Trigger (2/5). Set “Trigger when receiving on:” Yes allies. Create a block and set the following blockcode:

Step 2: Use the Team Switcher (All). Make sure to set “Switch Strategy” to Specific Team.
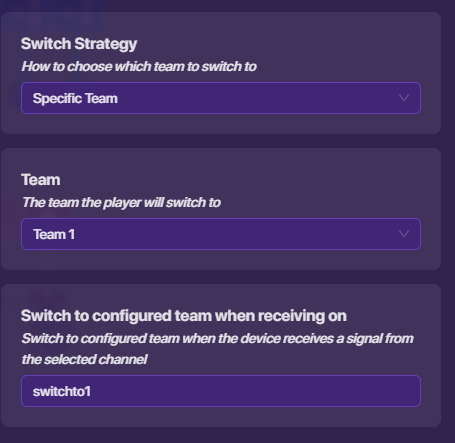
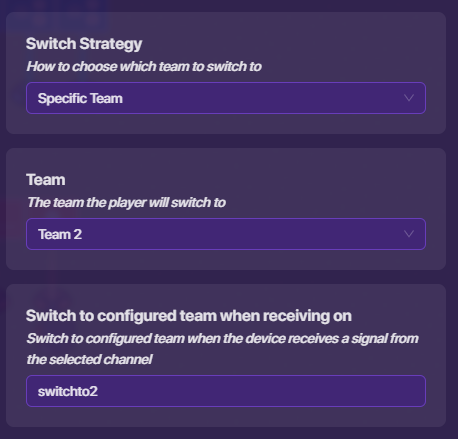
Do you see what is happening?
For every team switcher you use (max of 60) you want to set:
Team: Team [#]
Broadcast: switchto[#]
Chapter 4: Notification
Step 1: Use a Trigger (3/5). Set “Trigger when receiving on:” Yes allies. Then, set “Trigger Delay” to 0.5 seconds. Lastly, set “When triggered, transmit on:” Ally Announcement.
Step 2: Use a Property (3/4). Set “Property Name” to Ally Request.
Step 3: Use a Property (4/4). Set “Property Name” to Ally Accept.
Step 4: Use the Notification (1/1). Set “Notification Type” to Info. Create a block and set the following blockcode:
“When receiving on channel” Ally Announcement, run blockcode.
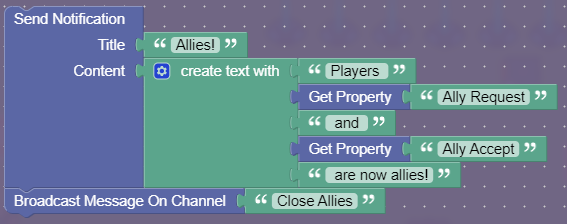
Chapter 5: Reset
Step 1: Use a Trigger (4/5). Set “Trigger when receiving on:” Yes allies. Then, “Trigger Delay” to 2. Create a block and set the following blockcode:
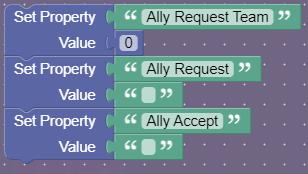
Chapter 6: Wrapping Up
Step 1: Use a Trigger (5/5). Set “Trigger when receiving on:” Yes allies. Then, set “Trigger Delay” to 1.5 seconds. Lastly, set “When triggered, transmit on:” Set team.
Step 2: Use the Barrier (1/1). Set “Active on Game Start” to No and “Active Scope” to team. The last thing, set “Activate when receiving on:” Close Allies
Overview
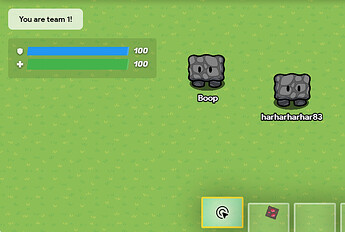
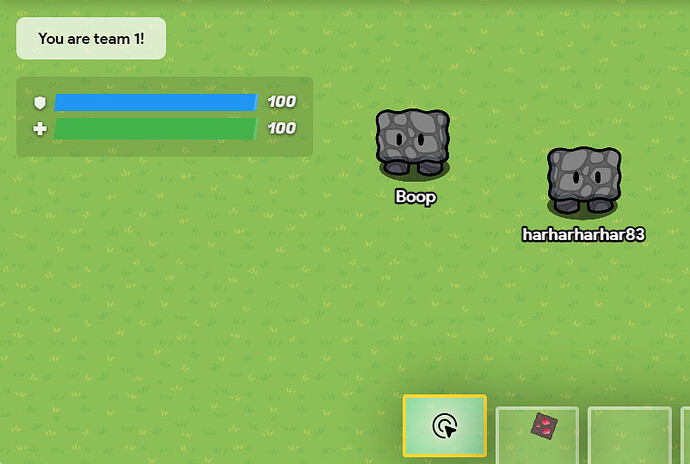
The game starts and harharharhar83’s team is 1.
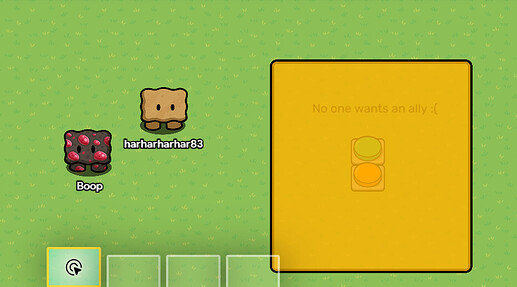
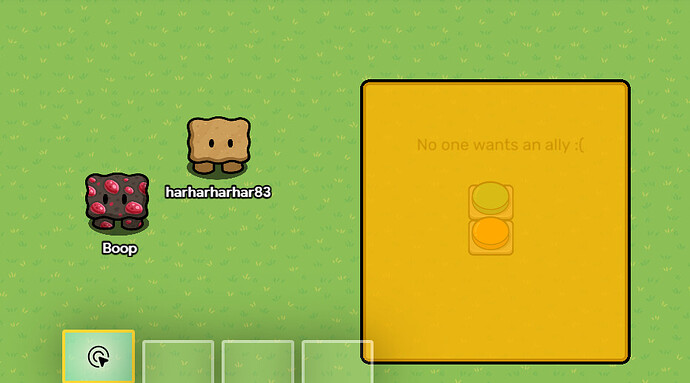
So now Boop here wants an ally so he is going to click this button and the text will magically change:
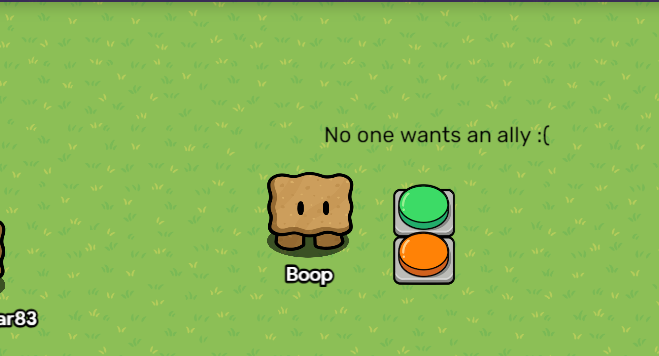 →
→ 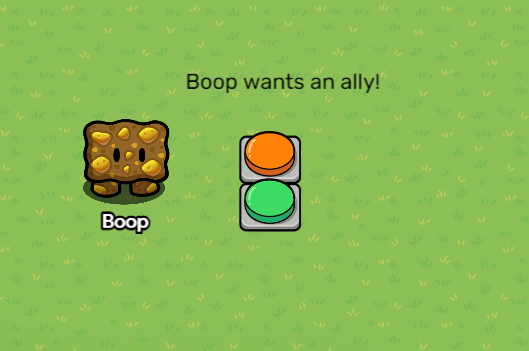
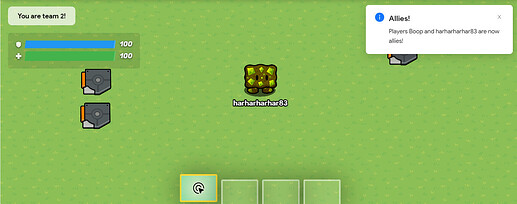
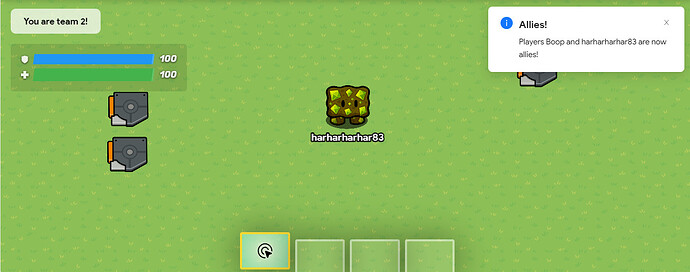
Now harharharhar83 will walk over and click the new button to become Boop’s ally! He will respawn, now on Team 2 (Boop’s team) and the Ally space is locked from him and Boop. They entire lobby receives a notification that they are now allies.
Outro: As I said before, I made this to help @Unit_72! Hope everyone else liked it though too! Tomorrow I’m going to clean it up and make it easier to read!
- 1
- 2
- 3
- 4
- 5
- 6
- 7
- 8
- 9
- 10
- 11
