Back again. Please read all the way through. Thanks for clicking. Identify any bugs please and ping me! Thanks for being a part of this! I will attempt to help you not just know this… but to understand this. I am aware of other guides about clickers, but I did my best to make this as beginner-friendly as possible. ![]()
2% memory just so ya know.
Soooooo, you might want to make a clicker game, but it looks hard… right? In this, I will cover the clicking part, upgrades, lucky headstarts, and possible uses for an objective. This game will end once you have 1,000 cash.
Clicking Part (Easy)
Wherever you go, you can click! The engine of the clicking part is a game overlay. For the main part, you need the following devices:
- 2 Game Overlays, one Button other Tracked Item
- 1 Item Granter
- the text is unneeded. It was just to show which is which.
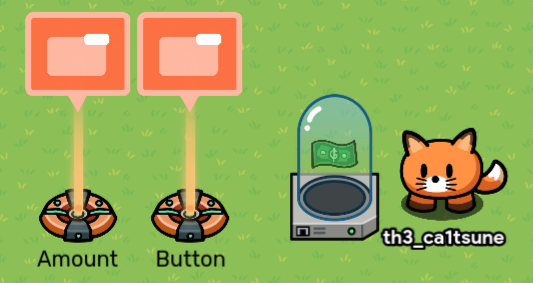
Make both game overlays active on the game start. For the tracker, please apply these settings:
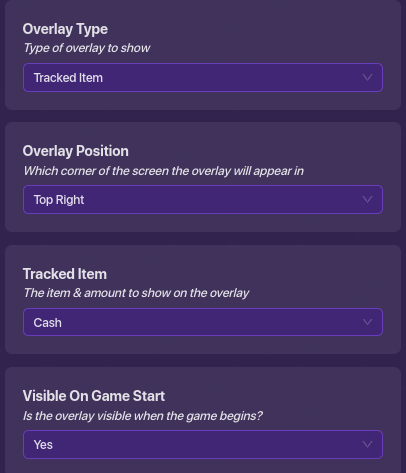
This will be permanently on screen from the start, but it will be modified as you click.
For the other game overlay:
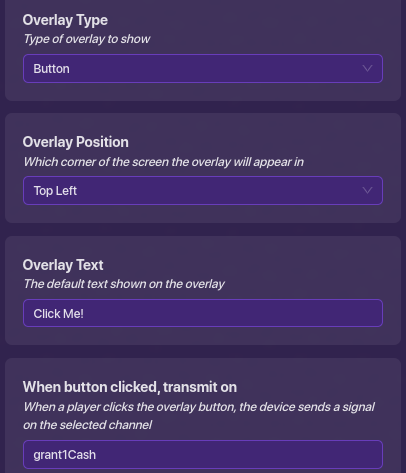
It should also be visible on game start, but it should deactivate on the transmission of “upgradeOne.”
The item granter should give cash because that is what the game overlay is tracking. It should be granted on “grant1Cash.” The amount granted is 1. Make sure it deactivates on “upgradeOne.”
If you actually read that, you completed step one! clap clap clap Now onto the lucky headstart! Is this going in your favor?
Lucky Headstart (Easy to Execute, A little harder to Understand)
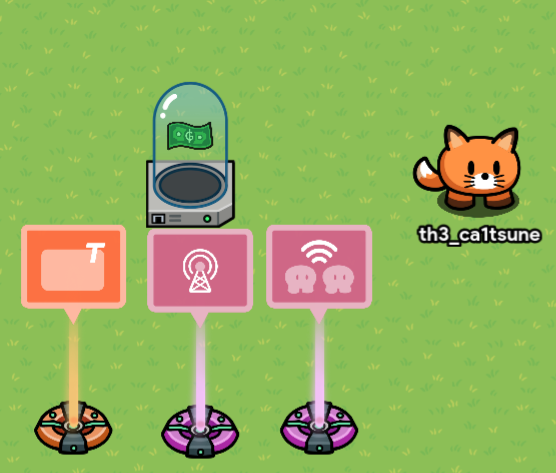
- 1 Relay
- 1 Lifecycle
- 1 Popup
- 1 Item Granter (again)
Let’s start with the engine of the mechanic, the Lifecycle. We don’t change the event, as we want the headstart to be given out at the game start. All we do is make it transmit on “luckyBegin.”
The relay is a secondary engine for the mechanic, and the setting should look like this:
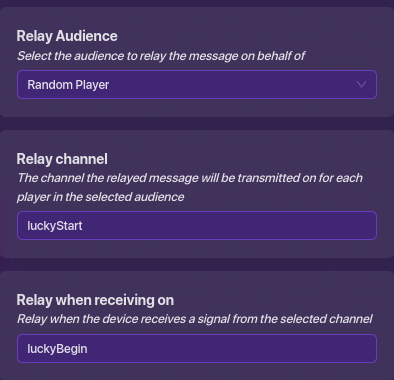
We want the audience to be a random player because we want it to be different. If we chose all players, then the point would be gone, everyone would have a headstart.
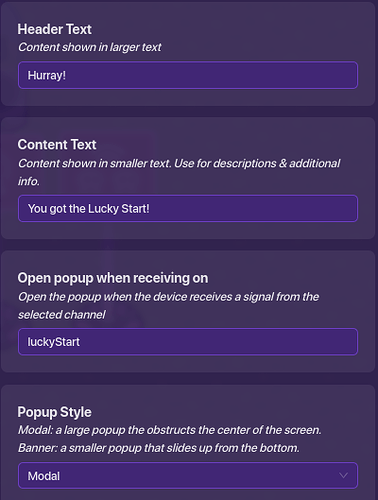
Now, luckyStart will be used for two different things. When the relay transmits on that, a popup will show up notifying the player of their luck.
Apply the below settings:
Now the item granter. Make it grant cash, obviously at this point on luckyStart. You choose how much money, but I did 100.
You now made a player feel lucky, but will they maintain the lead with UPGRADES on the field? You are moving on in your journey of spamming clicks.
Upgrades! (Medium)
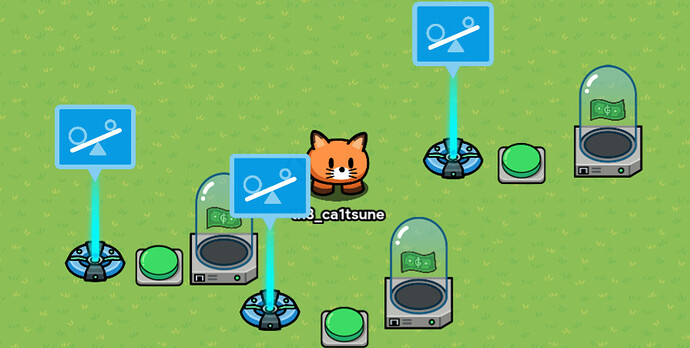
For this, I will be making 3 upgrade levels. Vending Machines are an alternative to this, but buttons and checkers are more memory efficient. You will need:
3 sets of checkers, buttons, and item granters, and 3 more game overlay buttons, accompanied by 3 more item granters. So pay attention to this, because this work will get really intricate. Let’s start with the upgraded buttons.
For the first upgrade, apply the below to the channels. Make sure it is off on game start, if it was on, then people would progress too quickly!
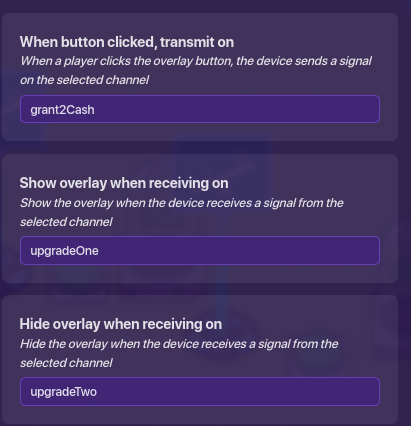
The granter should have a bit more than the previous, and I did 10. NOTE: TO PREVENT ME FROM RAMBLING, I WILL NOT SAY WHAT CHANNELS TO DO, AS THEY ARE NUMBERED.
The second upgrade:
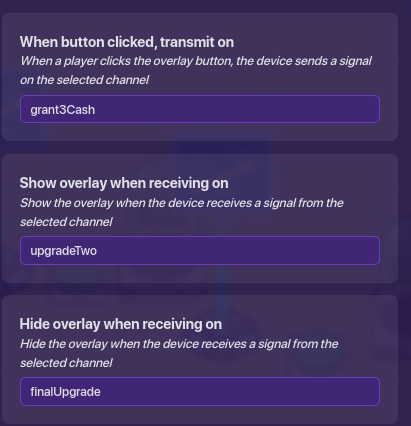
And the third:
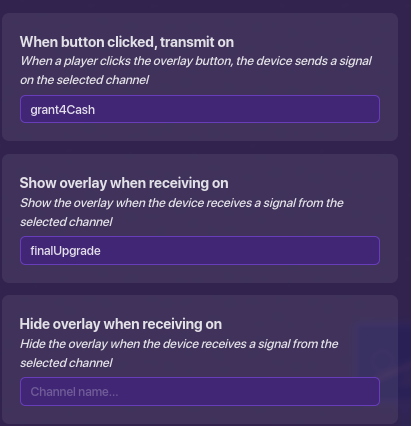
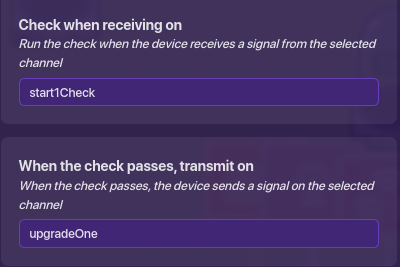
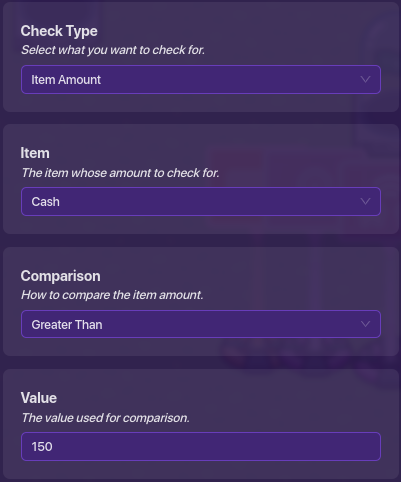
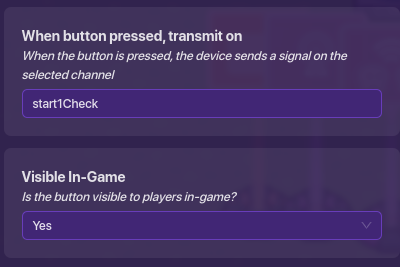
The checker is the most important part of “purchasing” the upgrades. The item granters will be negative so it seems like you are paying. The button is the engine and starts the reaction.
Upgrade One:
Checker:
Button:
Item Granter:
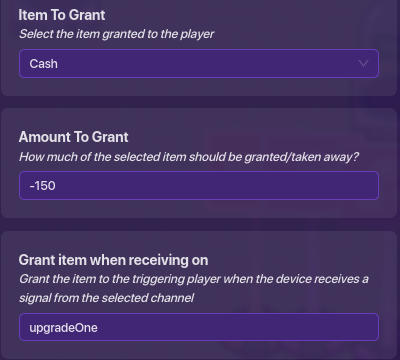
The second is virtually the same, but with the 150’s as 300’s and upgradeTwo replaces upgradeOne. And 1’s in channels are replaced by 2’s. The final has 500 instead of 300. finalUpgrade replaces upgradeTwo. and 2’s in channels are replaced by 3’s. You completed step 3!
Now onto the last part. You almost have the backbone of a clicker! Now the end is near.
Ending at 1,000 or more (Easy)
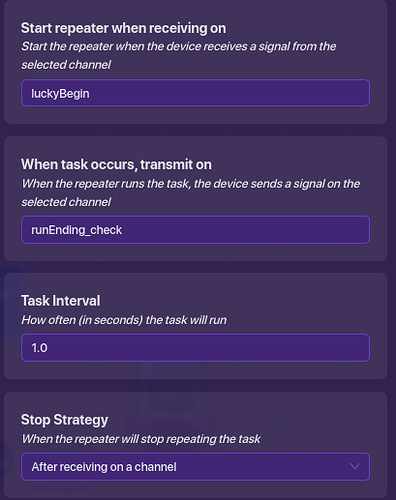
All you need (don’t you hate me for using a repeater):
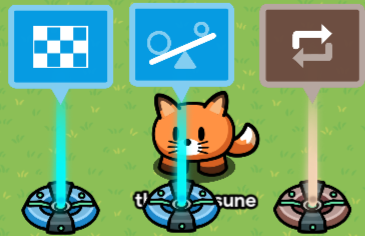
The Repeater:
Checker:
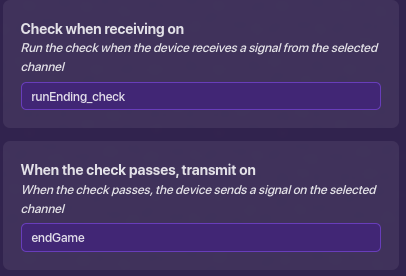
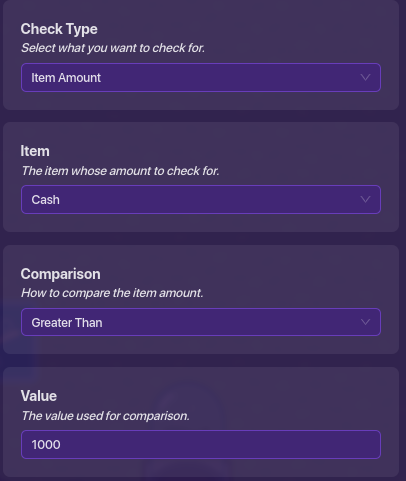
End Game ends on the transmission of “endGame.”
You’re done! That’s the mechanics, it’s up to you to pick everything else. Till next time!
