have you ever wondered “hey I want to make the plustrap fight from fnaf ar in Gimkit creative”. if you did I will be actually be surprised (The plushtrap fights in fnaf ar suck.) I will show you how to make this thing in part 1
(part 2 coming soon).
item list & build
- 5 buttons
- 3 repeaters
- 2 counters
- 2 zones
- 2 camera views
- 2 checkers
- 2 properties
- 1 sentry
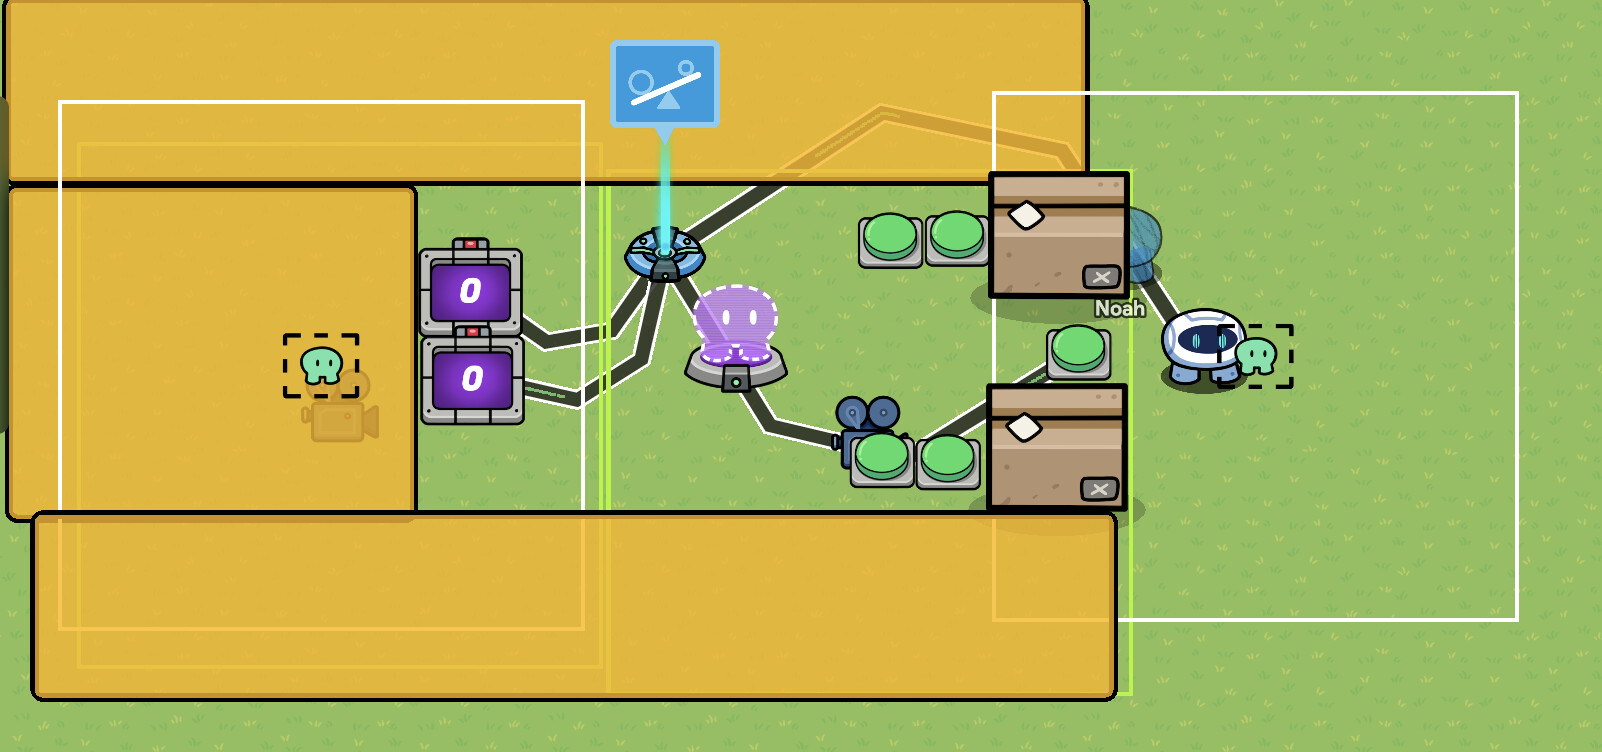
this is what it should look like

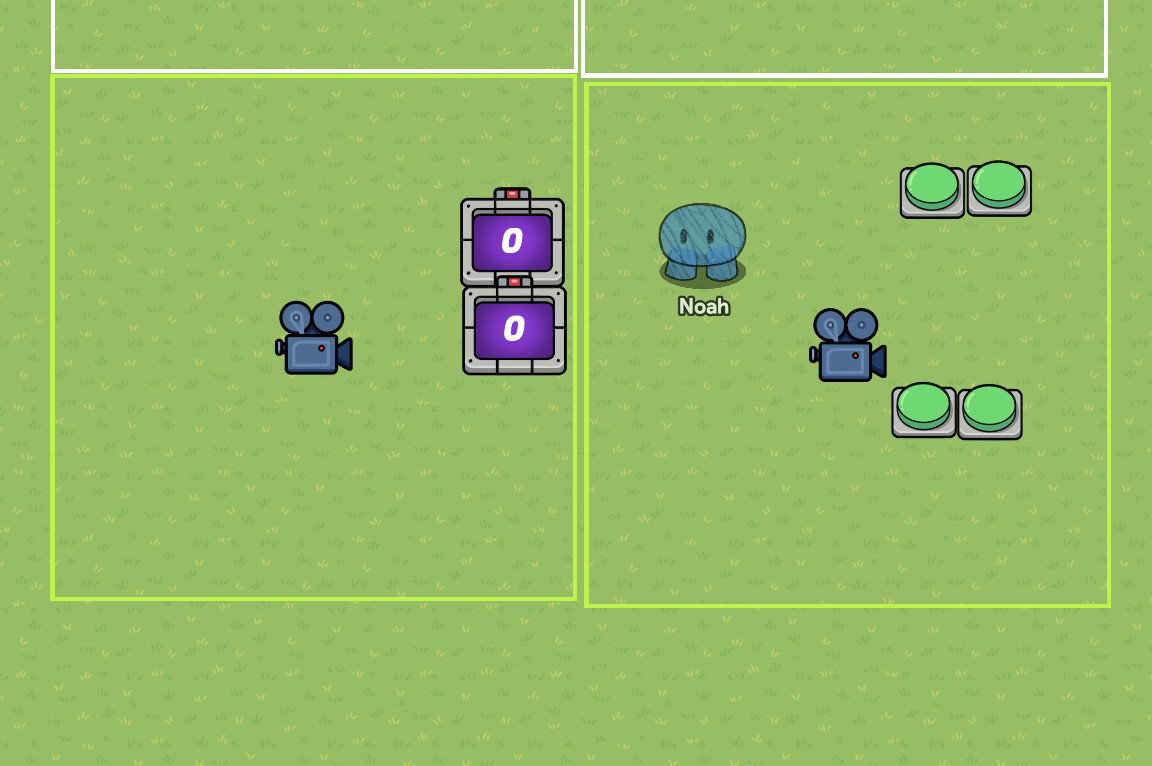
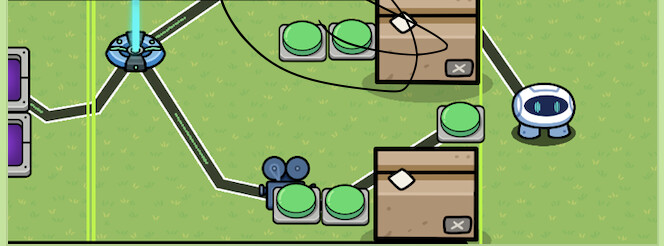
let’s start with the camera devices in FNAF AR:SD you can’t see the fuse box while charging a generator ( unless you are hacking). So put 4 buttons in the first box and the 2 counters in the second box it should look like this once you are done.
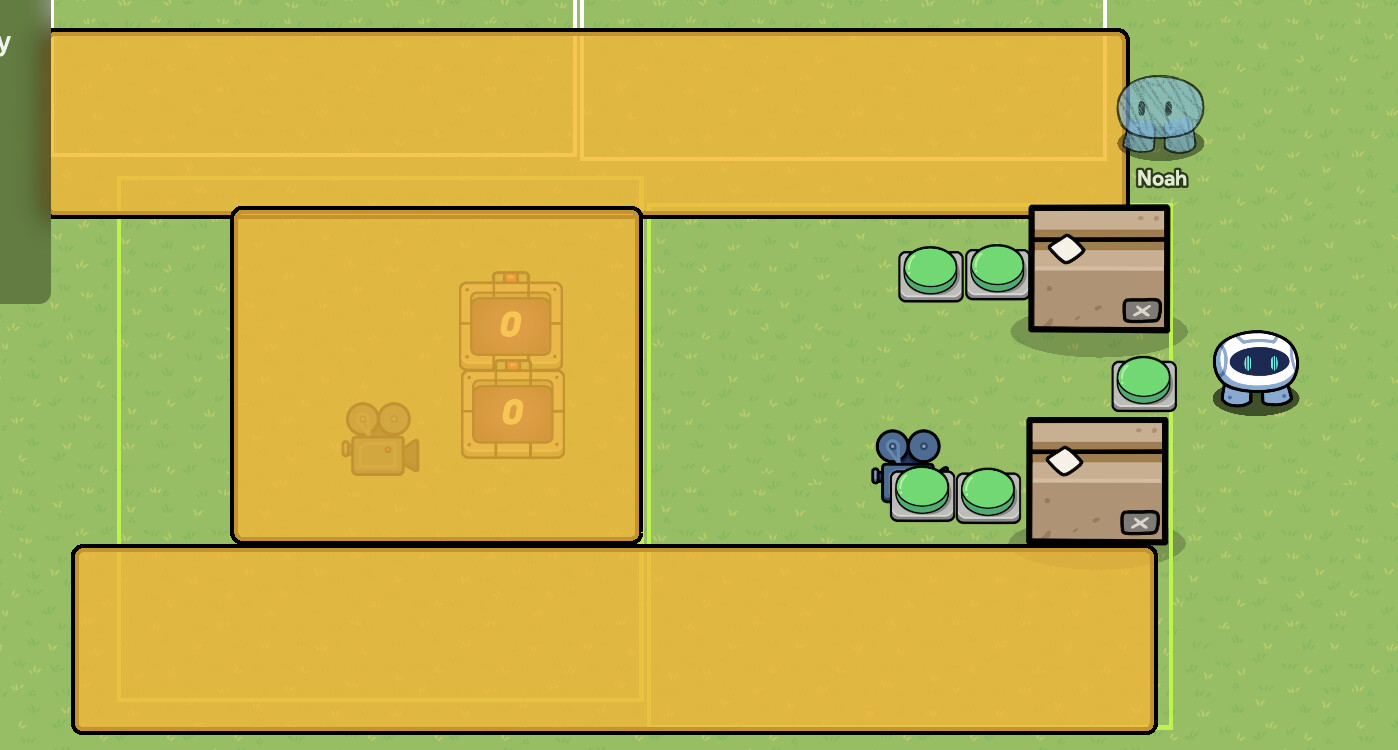
Ok now we are almost done with the building part. So first you should put the 5th button in the front of all of them. Secondly you put the sentry in front of the 5th button and also add some props to prevent the sentry from damaging the player. I used cardboard boxes since it fits the theme of the one from fnaf ar. I almost forgot to tell you to to put walls or a barrier around the player to prevent them from getting out so after this it should look like this.
mechanics
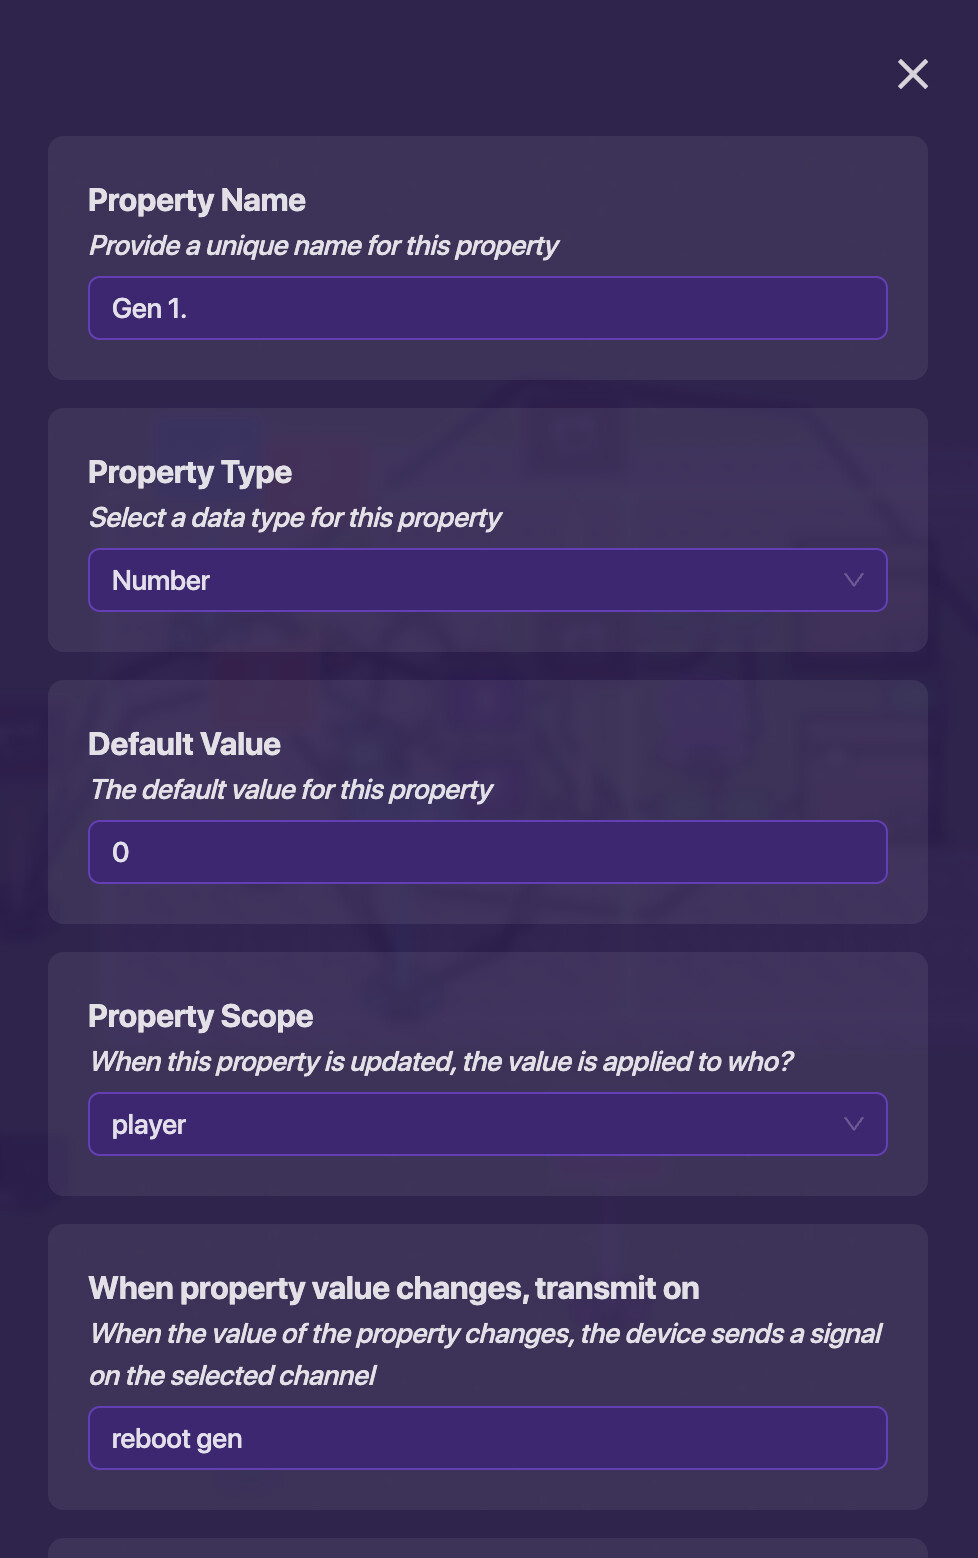
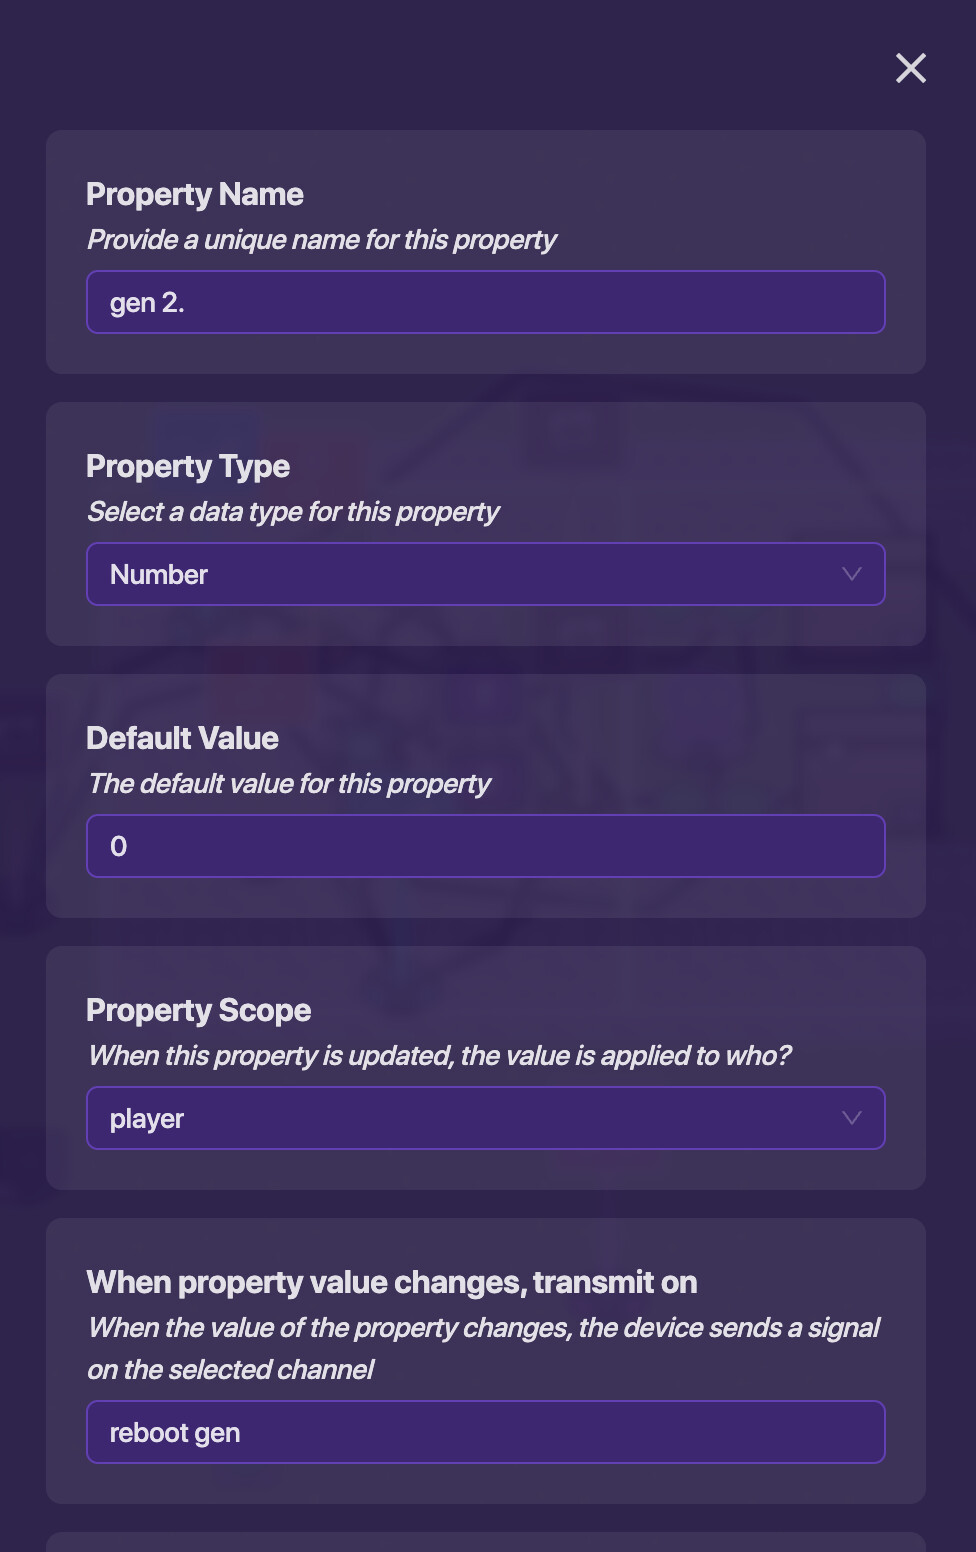
so if you want to make a working gen system you need 2 properties i will call them gen 1 and gen 2 you can call them whatever you want to call them. ok so set both of the property devices to this.
ok after you do that you should go to your counters and put this into the first one.

you do the same for the other but use gen 2 as the property but before we go to the checkers we should set the counters to this.
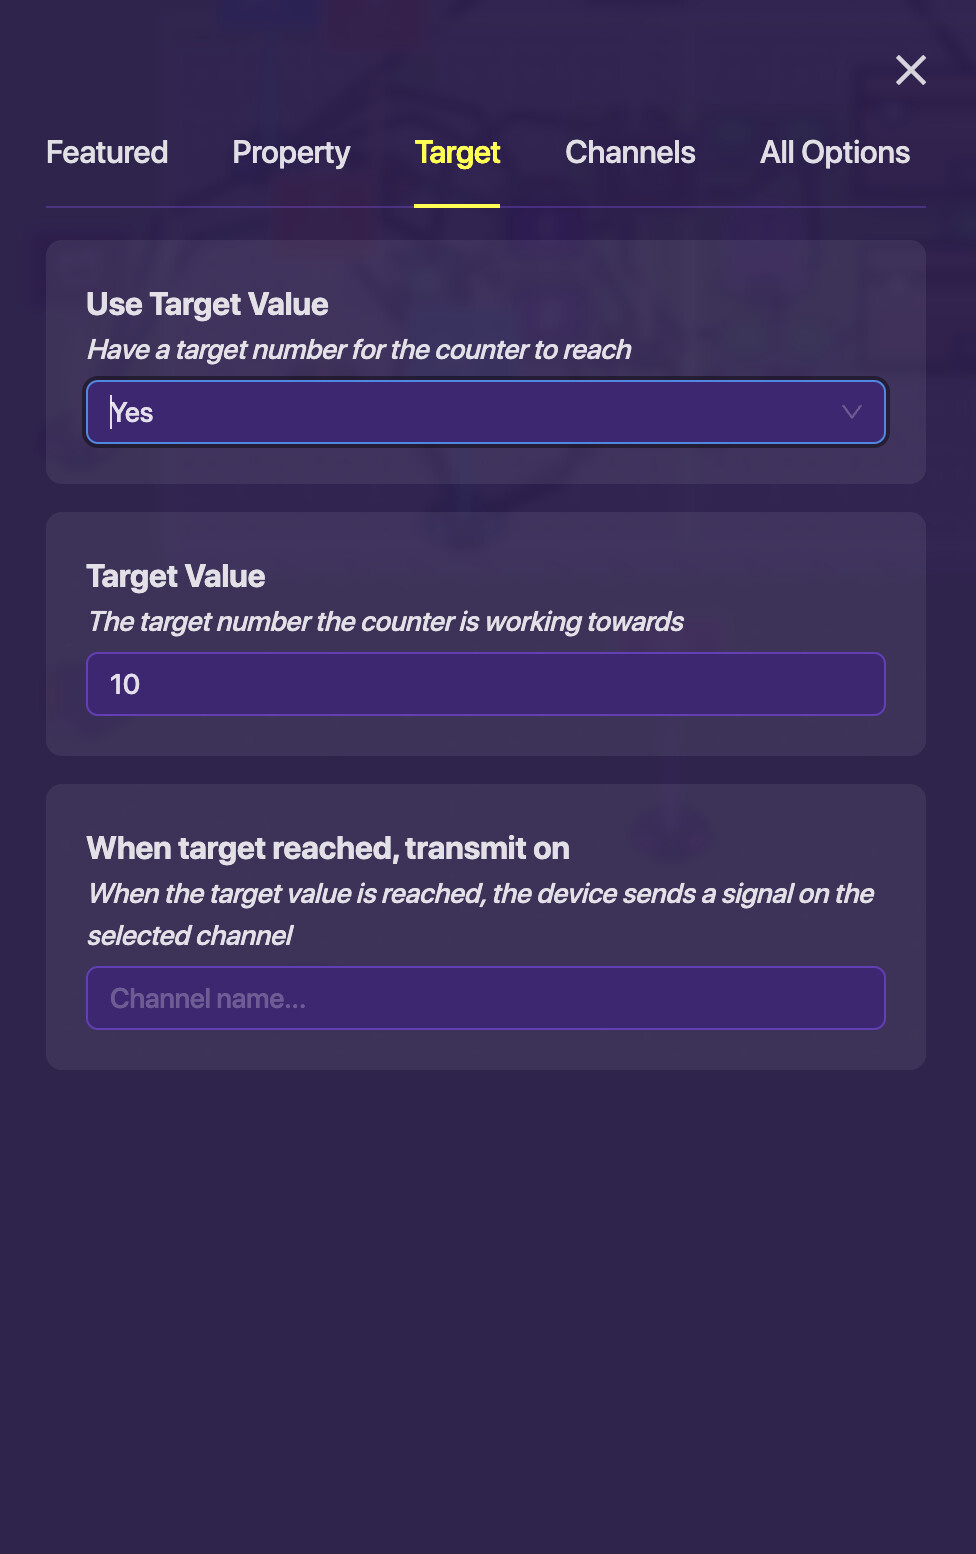
you can set it to something else if you want to mess with difficulty.
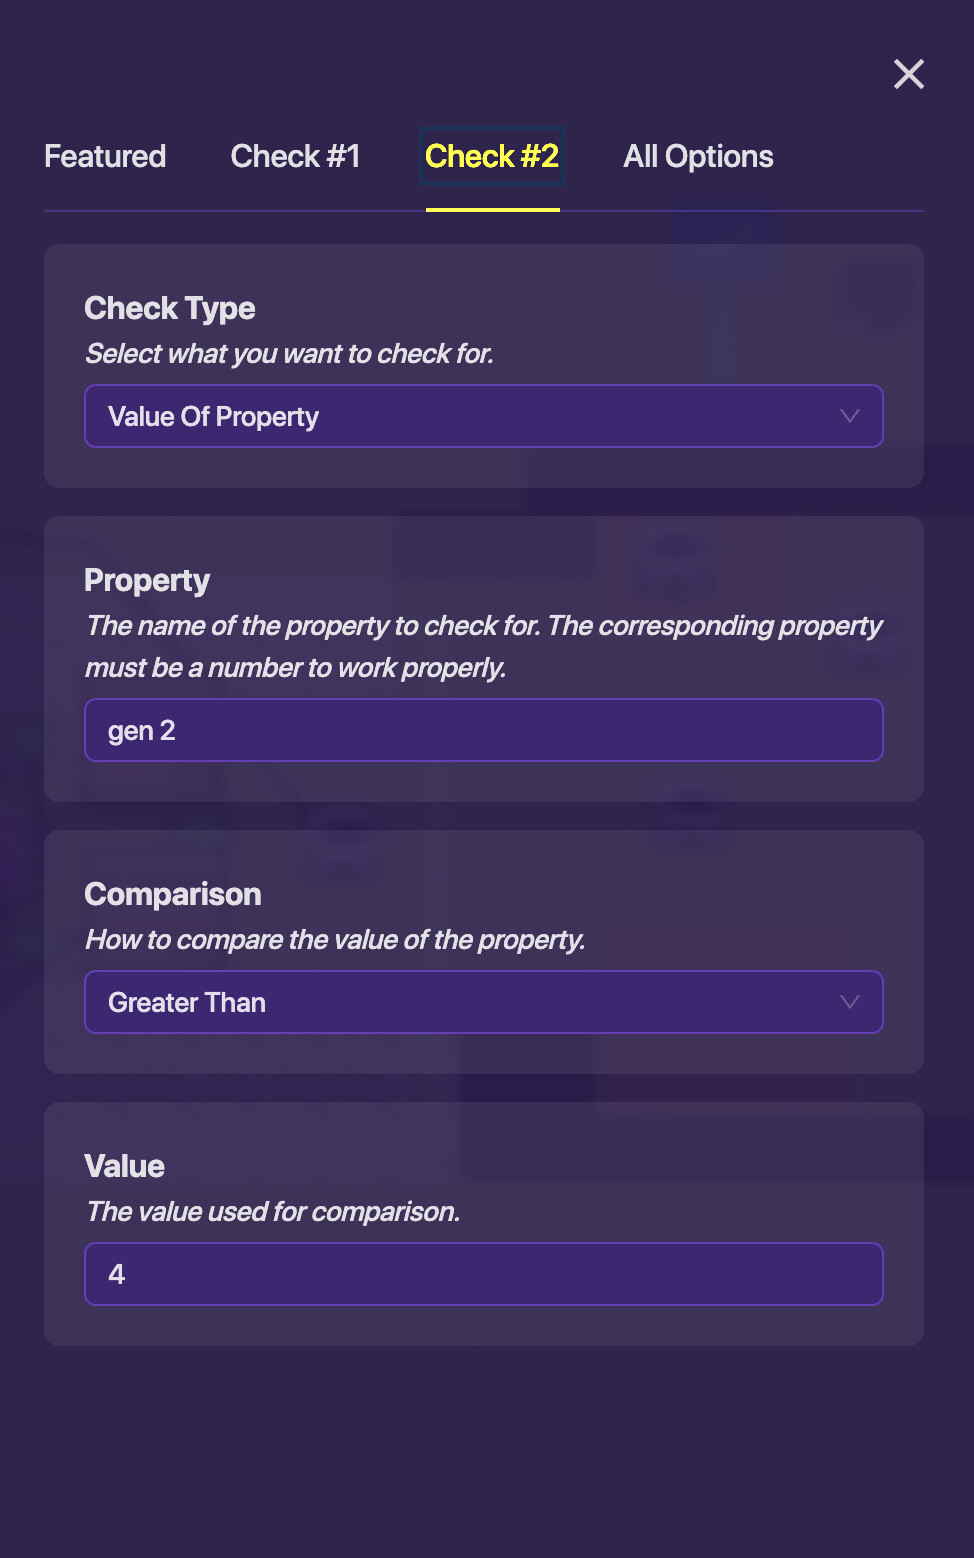
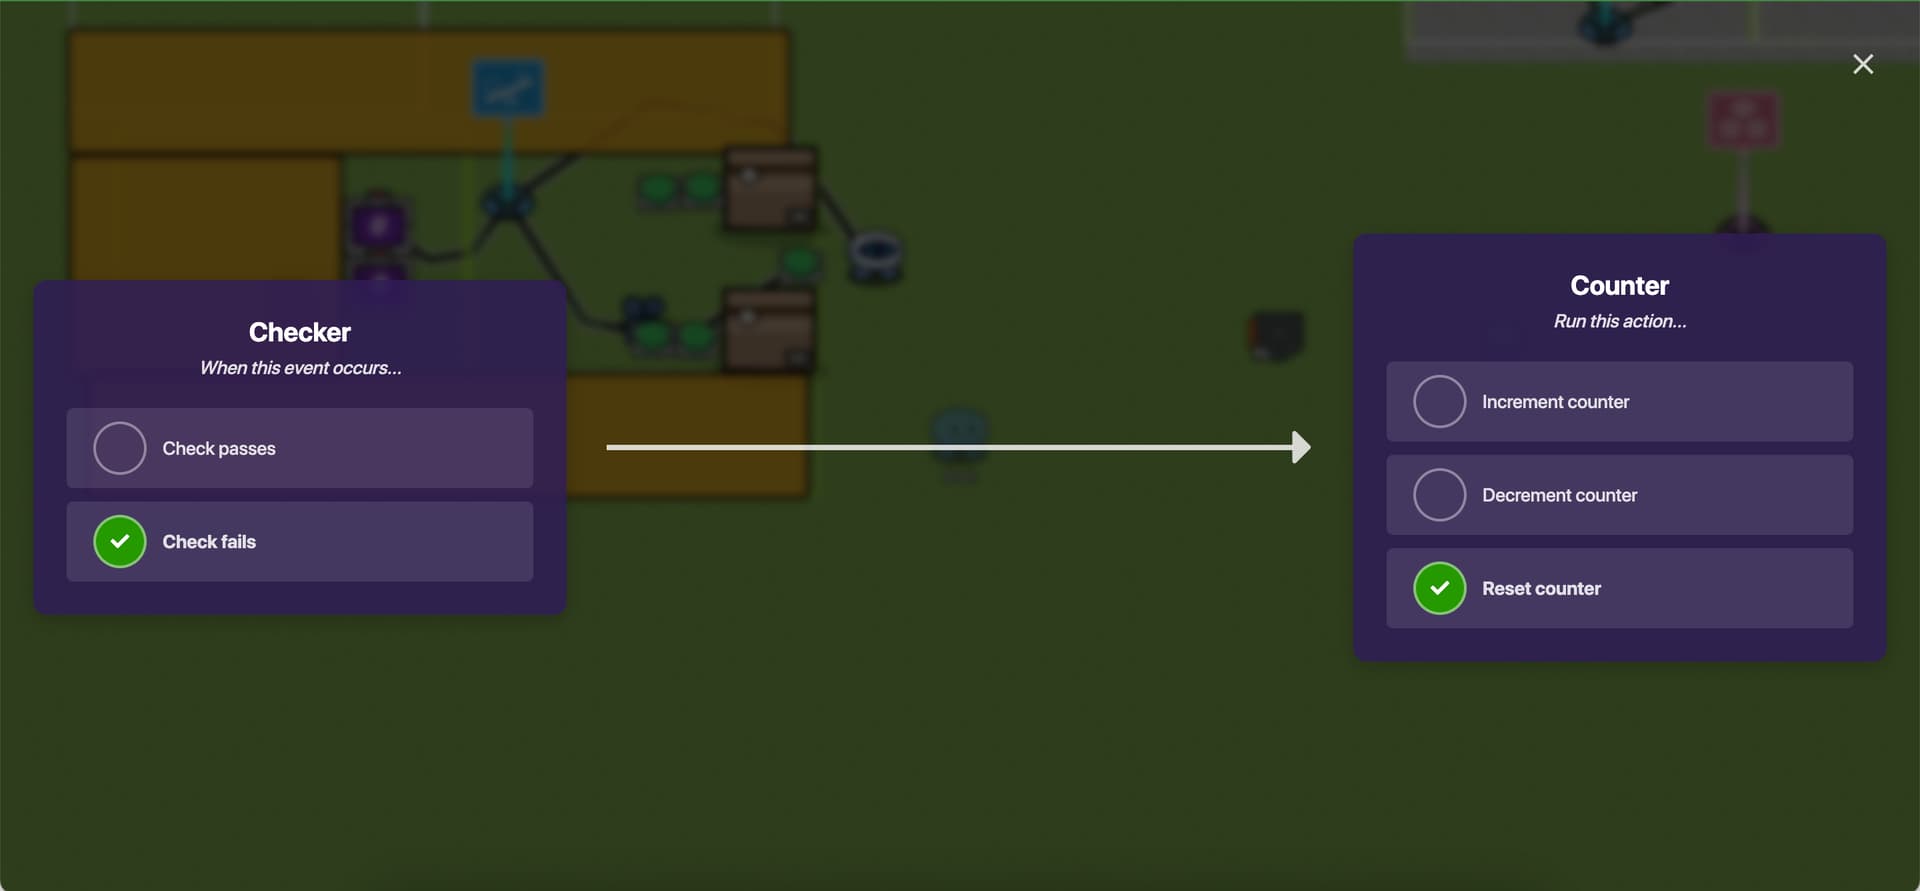
now it’s time to use the checker devices so you open the checker devices and then you set it to this

now we go to check 1 on both devices set check one to this.

you can change the comparison value to be something else if you want to mess with difficulty
for check 2 set it to this.
so you need to wire up a few things so this can work so here is what you need to wire up.
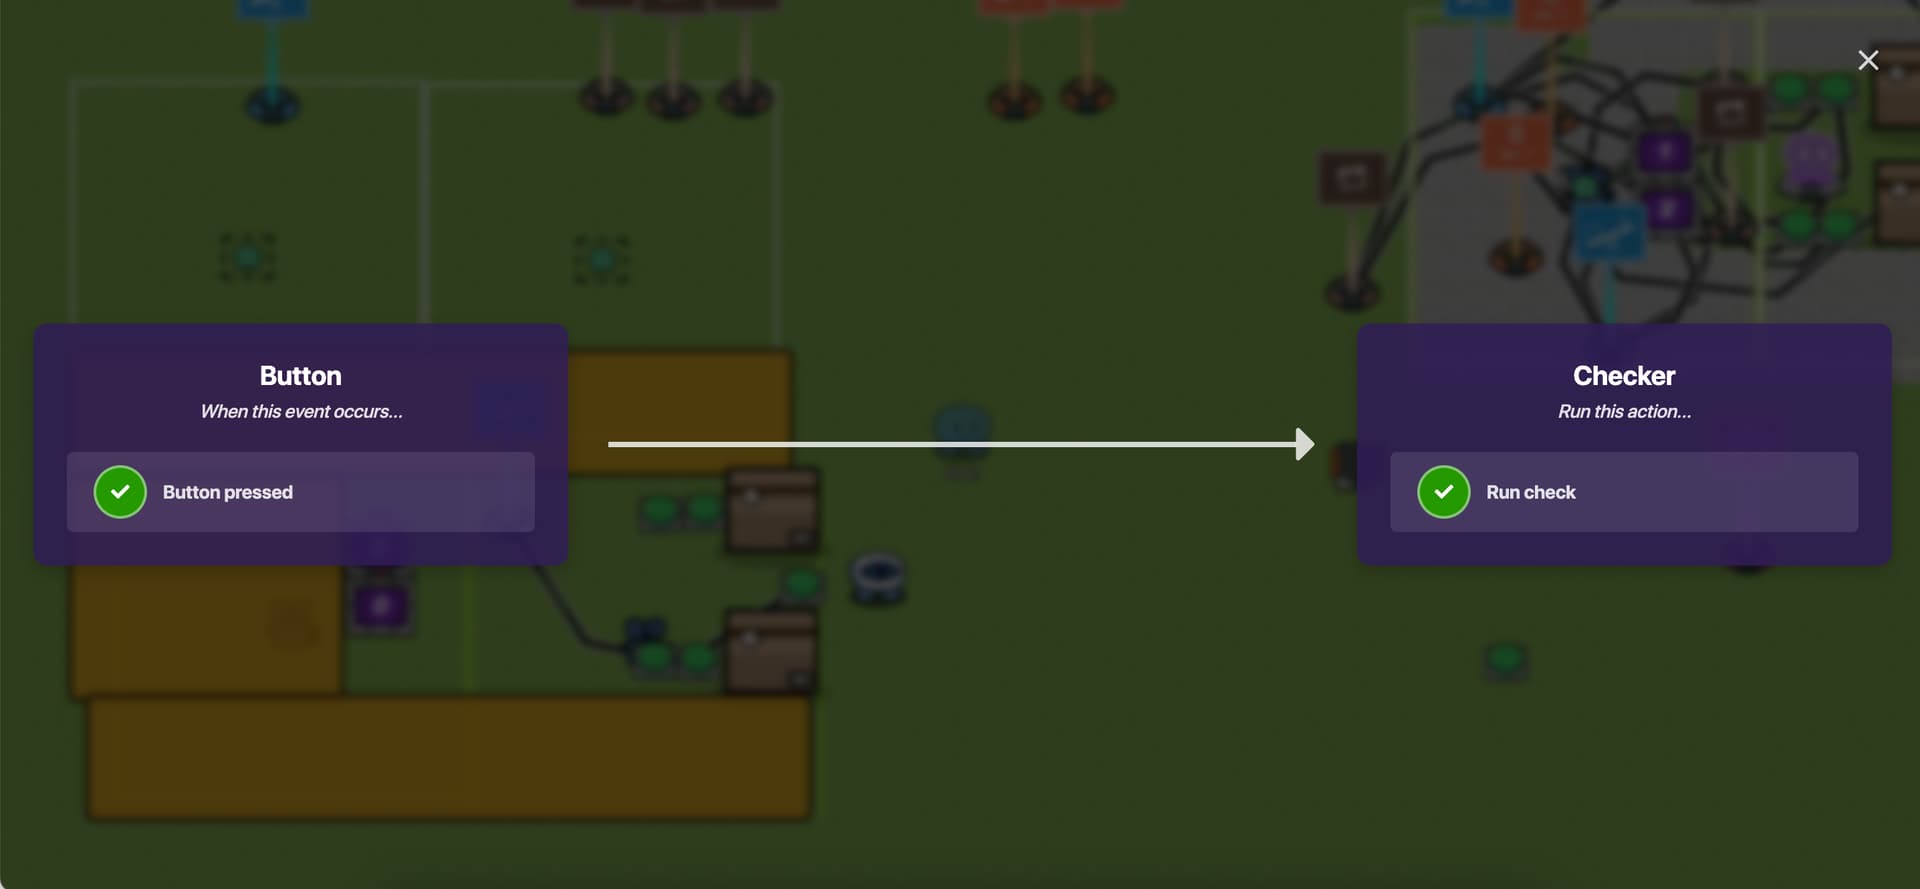
the middle button and the checker to this.
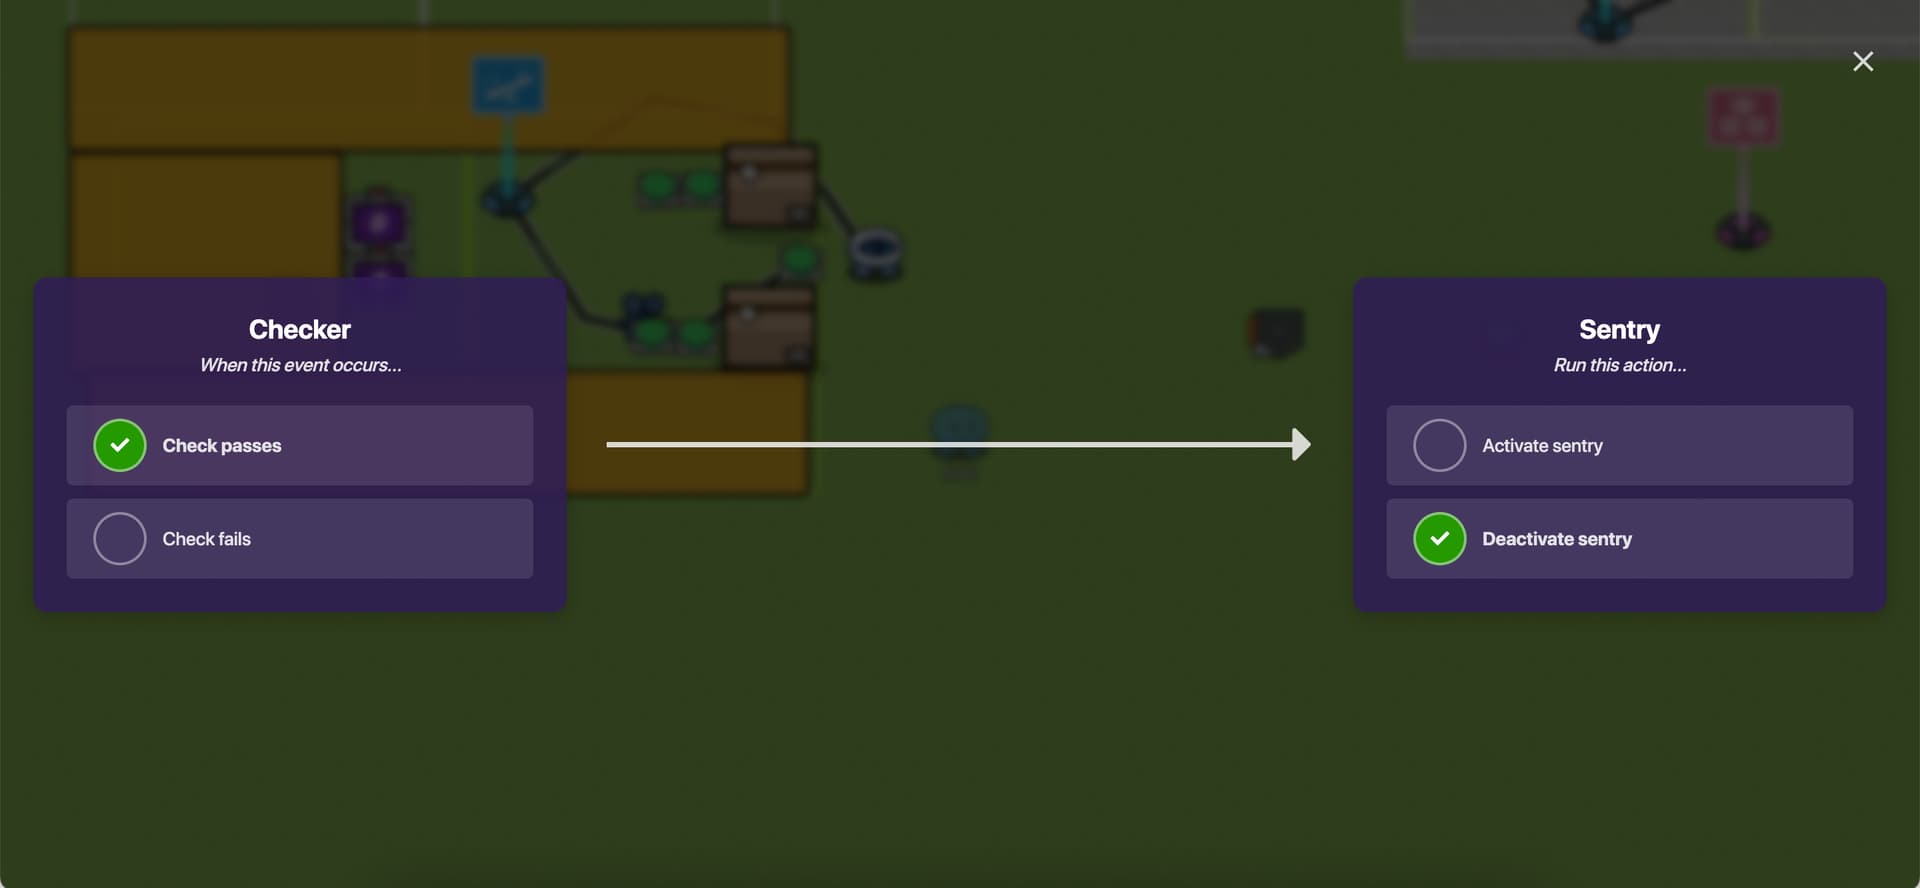
now you wire the checker and sentry to this.
wire your checker to both counters and set it to this.
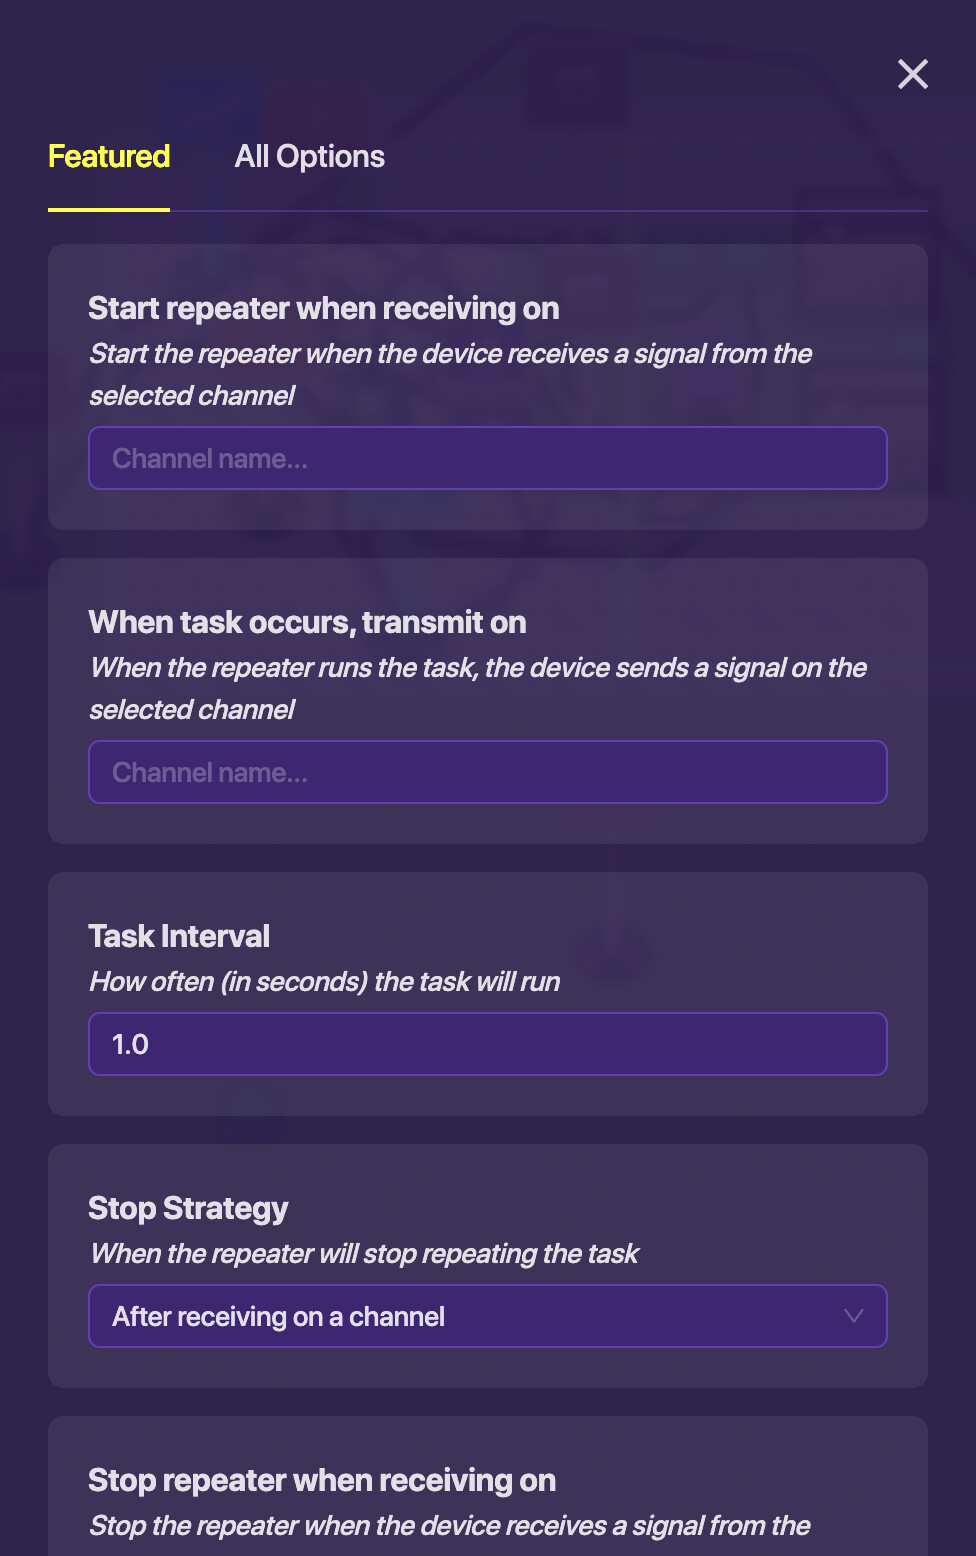
ok now it’s time I explain few things about plushtrap in fnaf ar. First once you charge a generator it doesn’t stop unless you get your finger of the shock button, you die, or you overcharge a generator. so to fix this we need to use repeaters get 2 repeaters and then set them to this.
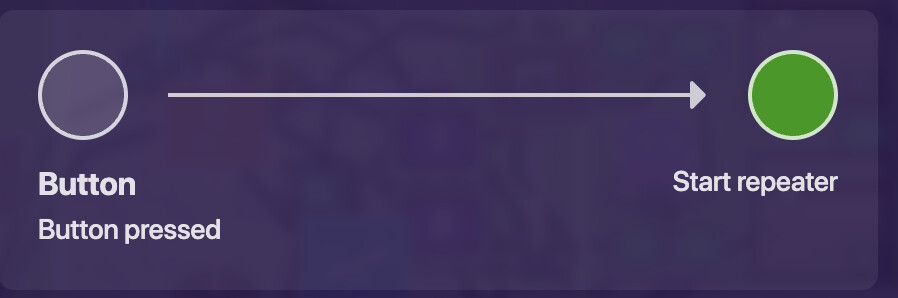
now it’s time to wire these things up to the buttons. You first wire these buttons to the first repeater.
an for the right button you set the wire to this.
then get the left button and set it to this.

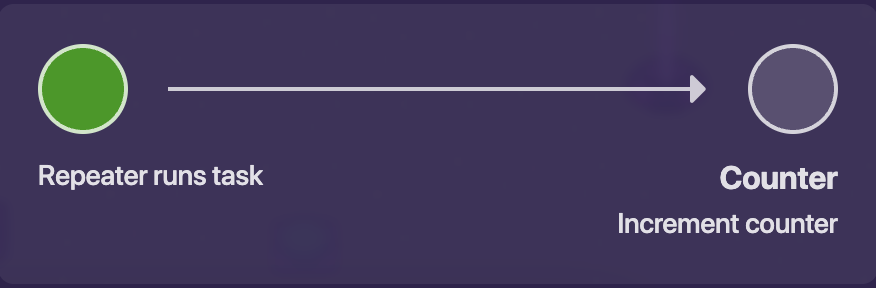
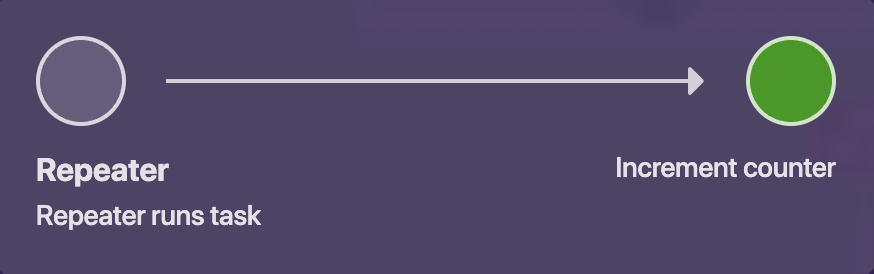
So you now need to wire your repeater to one of the counters and set it to this.
you do this again but on the other two buttons and the other counter.
now its time to use the zones so you get both zones and before you start putting these things anywhere you like you have to listen to me on where to put it the 1st one has to be with the counters. So put it with them in range of the counters and that camera view thing. For the second one put it next to the sentry and the shocker button make sure you have range to press the button here is the most important step Do not put the zones in the range of the generator buttons if you do that you will break the game in the process Here is a picture to explain this rule if you have the attention span of a goldfish.
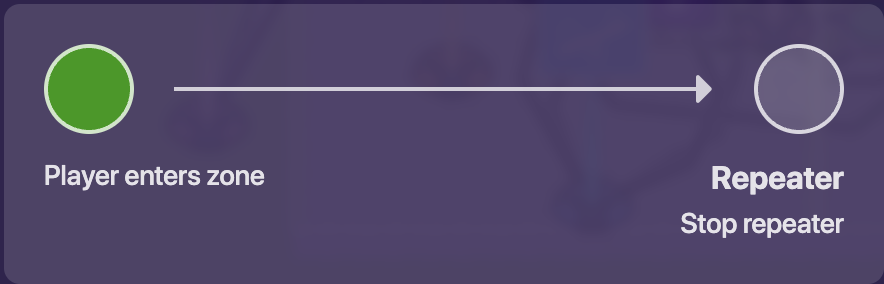
now it’s time for the wires wire both zones to both of the repeaters and set it to this.
**Don’t forget to do WIRE UP BOTH ZONES TO BOTH REPEATERS OR ELSE IT WONT WORK! **
now it’s time to wire the repeater 1 to Gen1 and repeater 2 to Gen 2 and set it to this.
At this point you have the basics for the shock mechanic. There is more to this but I want to include this in the planned difficulty scaling part of part 2. Also if you don’t like how much wires I used I’m considering to make a version of this with minimum wires as possible.
I hope you had a good time following my guide I plan on making a part 2. maybe after that I may make the normal fnaf ar fights without using other people. (though I may have to make miracles for that to happen) see you soon ; ) -zombie
credits:
zombieeater0908 - creator of this guide ( I don’t know why I put myself here)
Ilumix - creators of FNAF AR
Scott Cawthon- creator of FNAF
BTW this took too long to make. So the next part will come out in early 2024.
DISCLAIMER: do not publish the map you put this in