In this tutorial, you will learn how to update stats using counters and vending machines using wires.
Step 1: Setting up the vending machine:

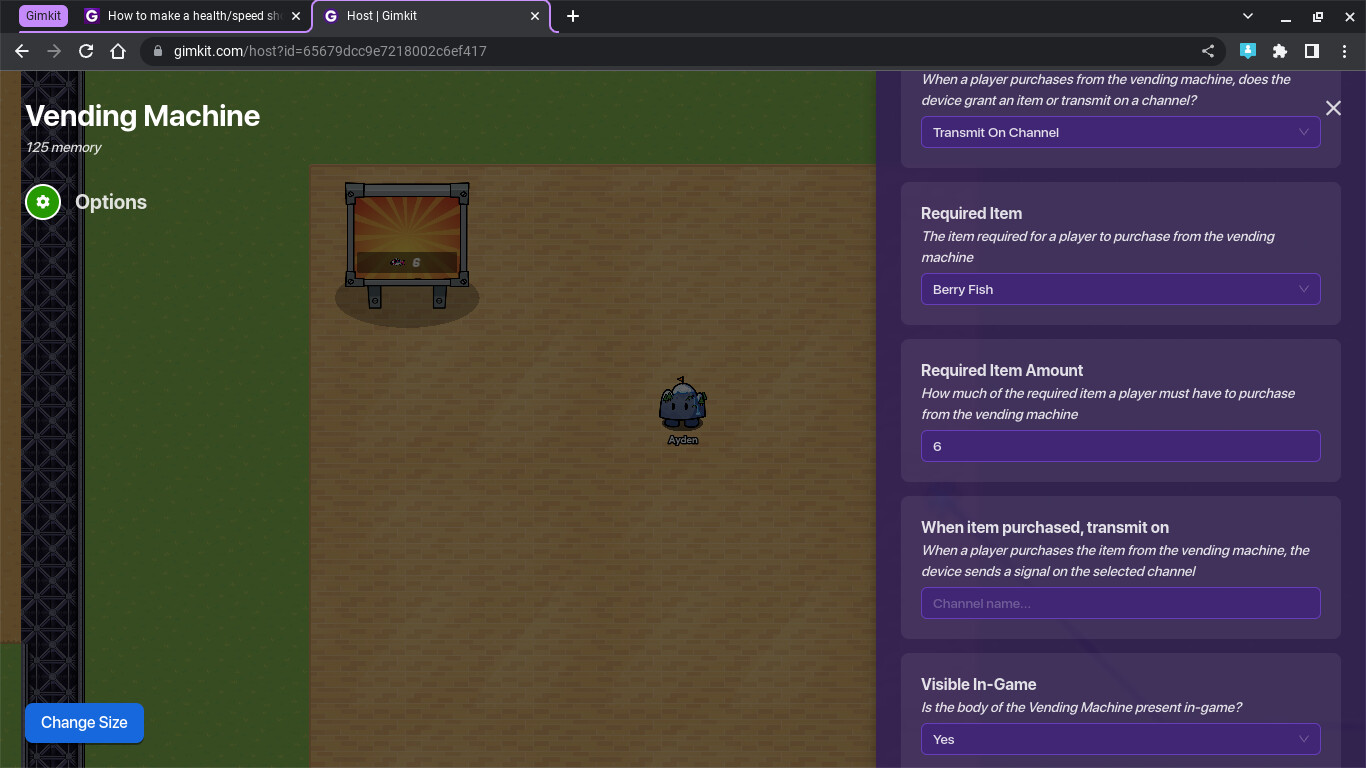
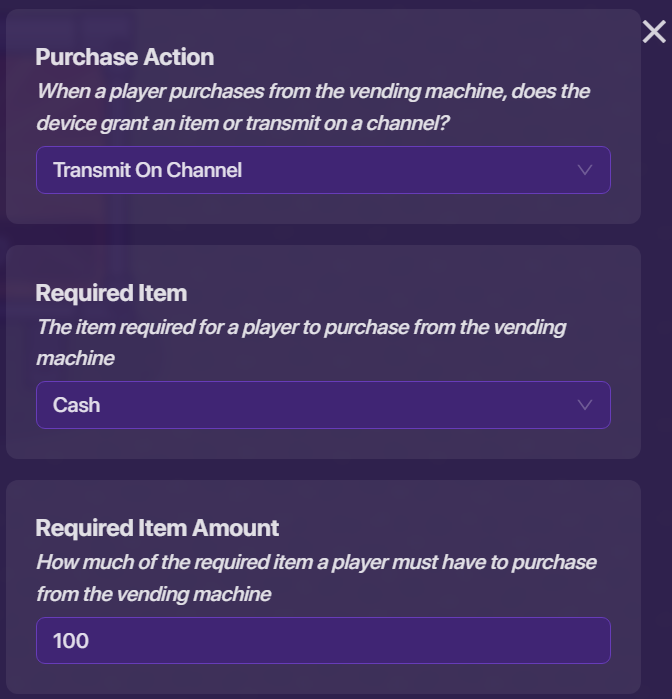
The vending machine should be outputting a signal, not an item. Set the price to whatever you want.
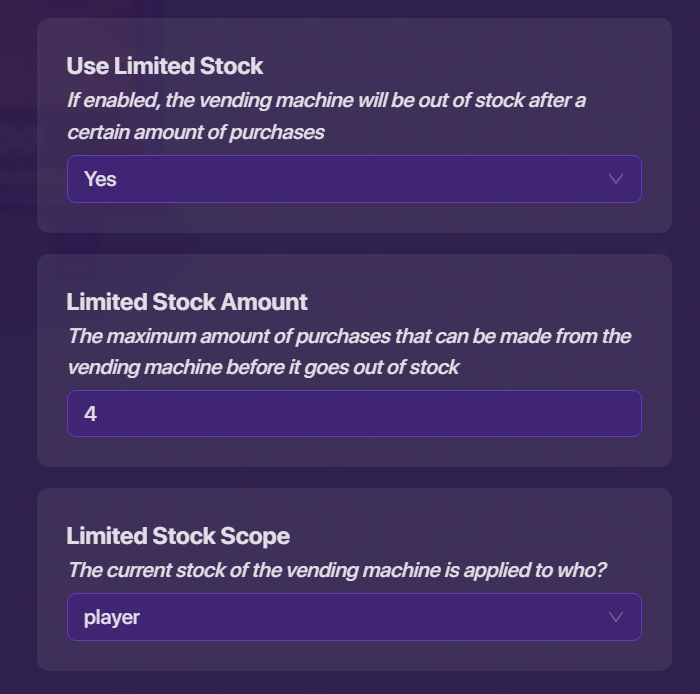
Make sure you are using limited stock! This will break if you arent! Set it to how many upgrades you want them to do. In this case I am using four, but you don’t have to. Just keep in mind, the more upgrades, the more work.
If you are planning on making a health increaser, you don’t have to read the rest of the instructions. All you have to do is set the max shield to whatever you want, and wire a health granter to the vending machine, so that when you purchase from the machine, it grants you shield. Now, speed modifiers are very different. If you are making one of those, or something similar, continue reading.
Step 2: Making the counters
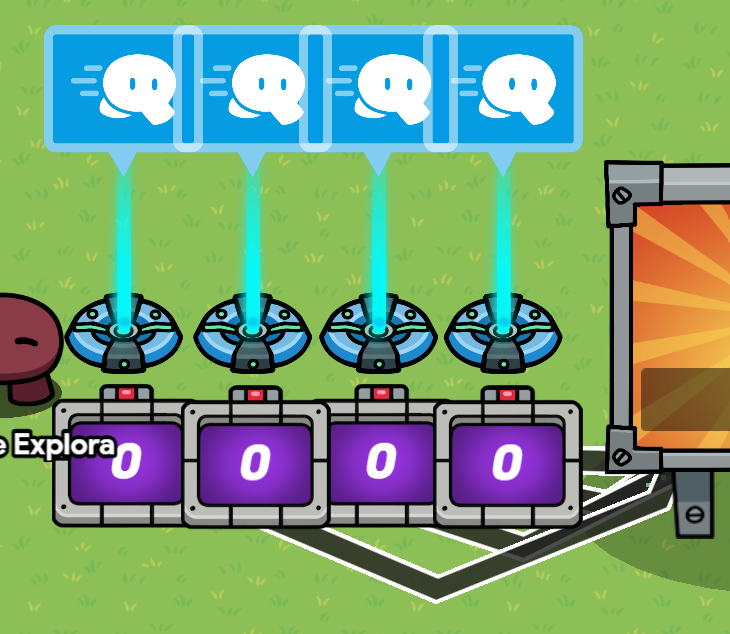
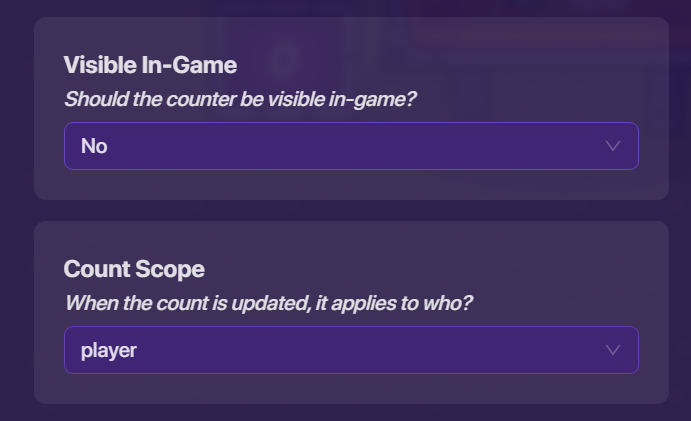
Create an array of counters. The amount of counters should be the same as the amount of upgrades you want. The counters should only update for the player, and they shouldn’t be visible in game.
Next, connect wires from the vending machine to the counters, so that when there is a purchase, the counter increases.

The counters should have targets. Each counter will have a progressively higher target. In this case, it is from 1 to 4. This makes it so that when the counter increases, one of the counters will output a signal, and only that one. Also, the counter should start at 0
Step 3: Making the modifiers
Place down your speed modifiers and wire them up to their respective counter, so that when the counter reaches its target, it will set the current speed.
The modifiers need to update to a specific value. In my case, I have 4 modifiers, so I should set the modifier activated by the first counter, to the lowest speed value. The next modifier should be higher, and so on.
You may be wondering why we need this complex system. Well, speed modifiers can only set speed, not change it. They also can’t be changed by properties or counters, so those are out the window. These counters are important because they will activate sequentially, allowing the speed to set as if it was adding.
And that should be all! If you test it, when you upgrade the ability using the vending machine, it will actually increase the stat! Thanks for reading!