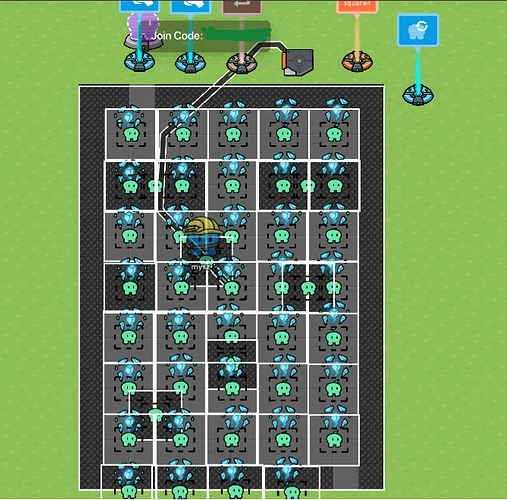
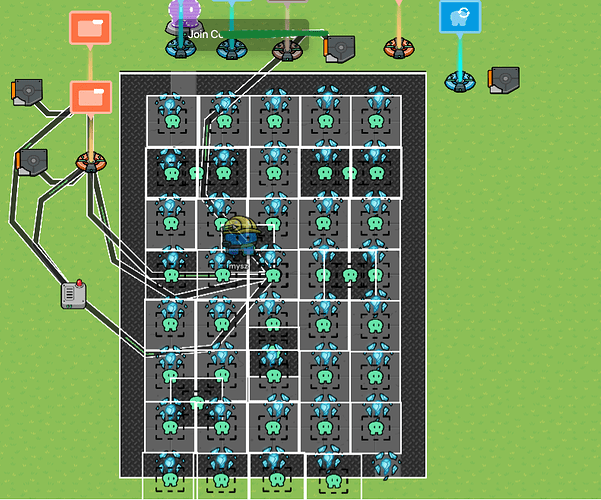
Introduction:
Welcome, and today I’ll show you how to make a dropper-styled minigame!
This is part 2 of the Pacer Test Series
What you’ll need for this guide:
Zones
Terrain(Of your choice)
Speed Modifier x2
Repeater x1
Teleporters
Trigger x1
Property x1
Wire Repeater x1
Step 1:
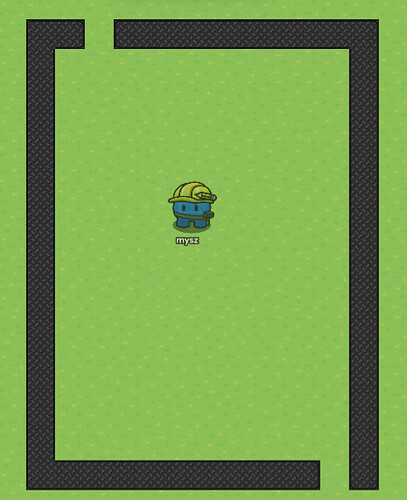
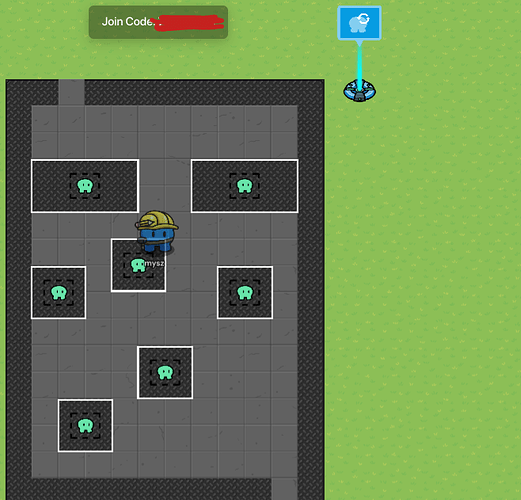
First, create the outline of your dropper. It can be as big as you want. Make the edges wall terrain, or put barriers at the borders. Create an entrance and exit
Your dropper should now look like this:
Step 2: Making The Boundaries
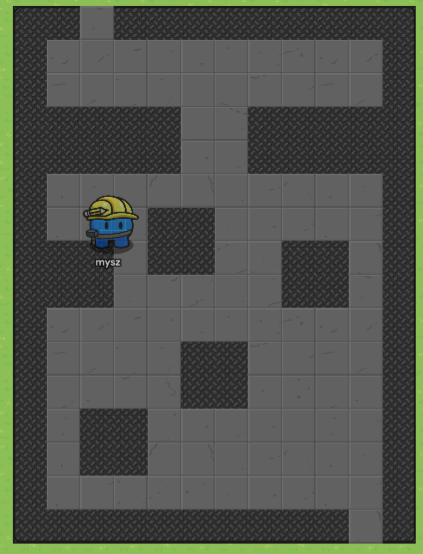
Create as much terrain as you want in the dropper. This will signify the places you cannot touch, or else you will die. Fill in the dropper with terrain.
Your dropper should now look like this:
Step 3: Creating the Zones
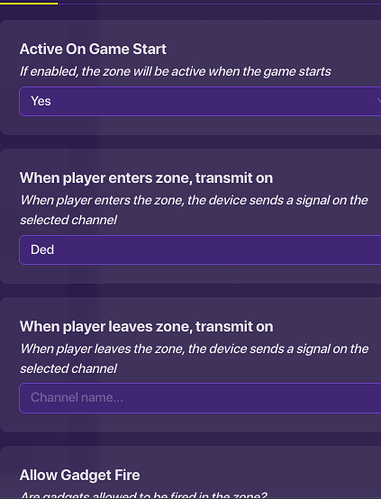
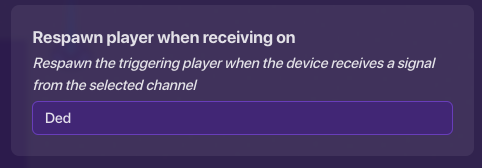
Add zones in the borders, in all of the “evil” tiles. Now, make it so that when you touch the zones, you respawn.
Your Dropper should now look like this:
Step 4: Removing the Movement
Place Down a zone that covers the perimeter of the dropper.
Make it so that when a player enters the zone, broadcast on channel “Speed”. When the player leaves, broadcast on channel “Speed1”.
Make two speed modifiers. The first one should change the speed to 0 when receiving “Speed”.
The second one should make the speed 1 when receiving on channel “Speed1”.
Now, make 2x2 tile zones that cover the entire dropper.
Your Dropper should now look like this:
Step 5: Teleporters and Triggers.
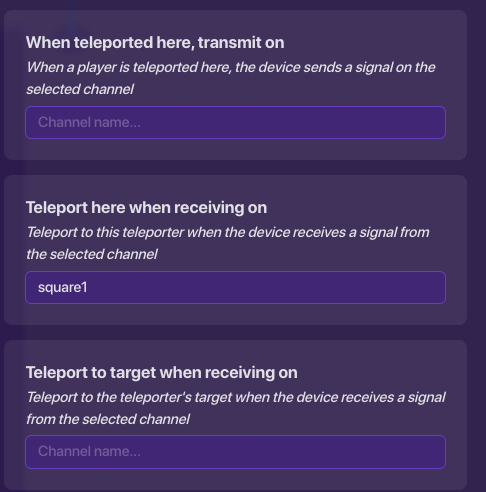
Place a teleporter at the top of each zone. Make the settings say this:
Now copy that, but change the number from 1-40. The teleporter number goes from left to right.
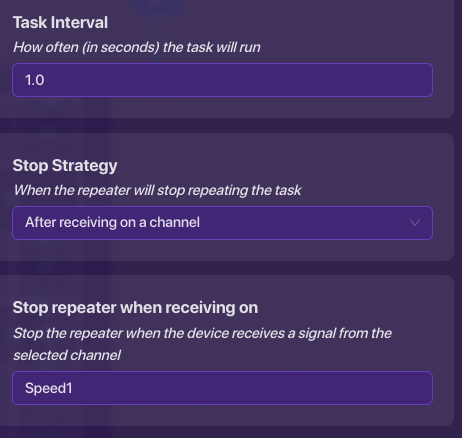
Place down a repeater that starts when the player enters the zone and stops when the player leaves the zone.
Turn off “Trigger Task on Start”.
Now, place down a trigger, and wire the repeater to the trigger. The trigger should have no player collision, and can not be stepped on.
Place down a property that is a number value and has a default value 0. Make the active scope “player”. Also, make it called “square#”.
Now, create block code for the trigger.
Your Dropper Should Look like this:
Step 6: Lefts and Rights
Create Two Game Overlays that are only activated when you enter the dropper.
They should be buttons. One should say “Left”, one should say “Right”. They should be activated when the player enters the zone and deactivated when the player leaves the zone. This can be done using wire repeaters.
Wire them to triggers so that when the buttons are pressed, “Trigger”.
Create this block code:
Next, place down a trigger. Make it so that when the player respawns, set the property “square#” to 1.
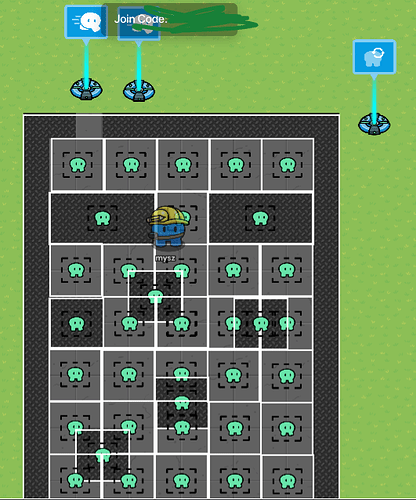
Now, your final result should look like this:

Exit Poll:
Please complete this poll before exiting:
- 0/10 or

- 1/10 or

- 2/10 or

- 3/10 or

- 4/10 or

- 5/10 or

- 6/10 or

- 7/10 or

- 8/10 or

- 9/10 or

- 10/10 or

- 11/10 or
 /
/
Sorry for image inconsistency. Follow the last one!
Thanks, and happy Gimkitting!
