Introduction
In this guide I will be showing you how to make a calculator where you can input numbers, choose the equation symbol, and see your calculations.
However, this calculator is a relatively simple one and can only: Input positive whole numbers, only have 2 values inputted, clear (no backspace).
Also this uses 10% memory, so while it is a cool add to your map, it isn’t great for very high memory crammed maps unless necessary.
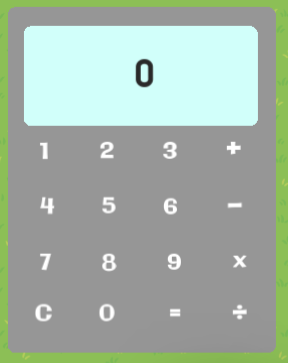
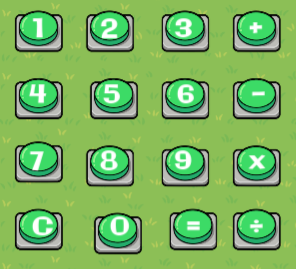
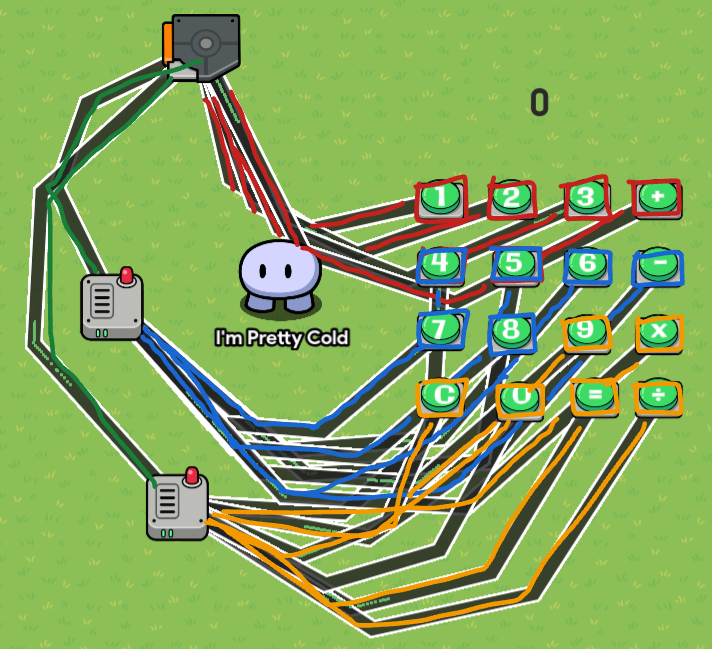
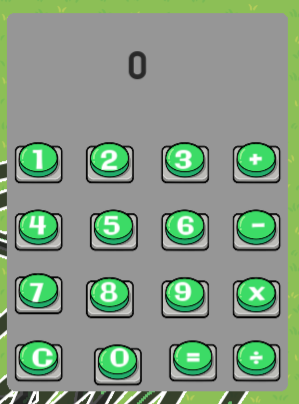
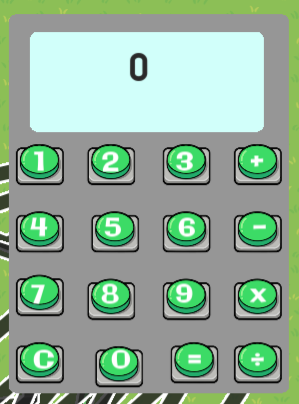
What the finished calculator will look like (with optional barriers for looks):
Also make sure to check out this calculator guide by @JoeTheChicken ! It’s awesome, but uses buttons and counters to manually increase and decrease the values by 1 while with mine you can input the values with just pressing the number buttons.
Alright, let’s get started!
The Basics
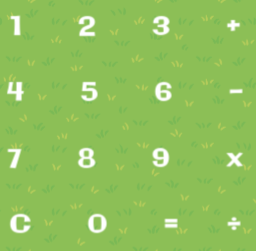
Place down a text device. Paste this into it:
1 2 3 +
4 5 6 –
7 8 9 x
C 0 = ÷
This is the layout of the calculator, and I put it here to save you time. You can also make each one a separate text device to have more control around each individually, but that costs more memory. And also, why?
Ok, so you should have this now (I made the font Galindo and colored the text white):
Next, a slightly tedious part. Place a button down below each number and make the settings like this:
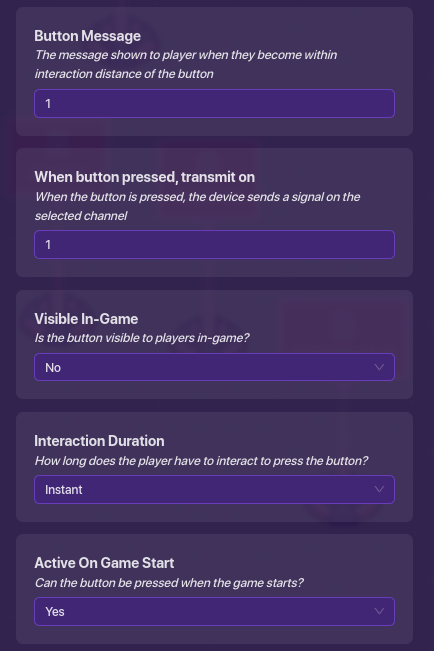
(This is the button for 1)

(Button for 2)
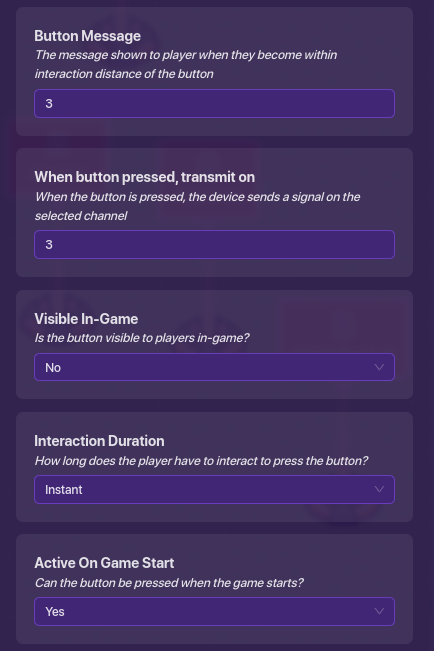
(Button for 3)
See a pattern? Yup, I just made the message and channel the number. Also I made interaction duration Instant because I feel like that’s more like an actual calculator. I had to make the buttons Not Visible In-Game even though I liked the look because buttons naturally have collision that cannot be turned off unless they are invisible, so players wouldn’t be able to reach the numbers in the middle if the buttons were visible.
Now also put buttons under the C, =, +, -, x, and ÷. Same settings, except make the buttons show and broadcast on Clear for C, = for =, + for +… yeah.
You should have this:
(No I didn’t have grid snap on for this, sorry)
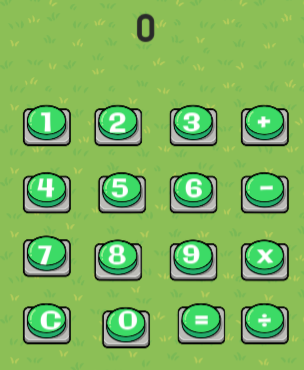
Finally, place another text device at the top. Just make it 0, and don’t add any blocks to it for now, but this will be the text that displays the values.
The Setting System
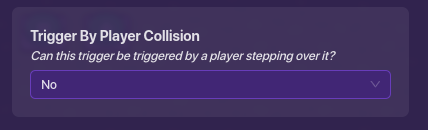
Place down a trigger. Make its settings look like this:
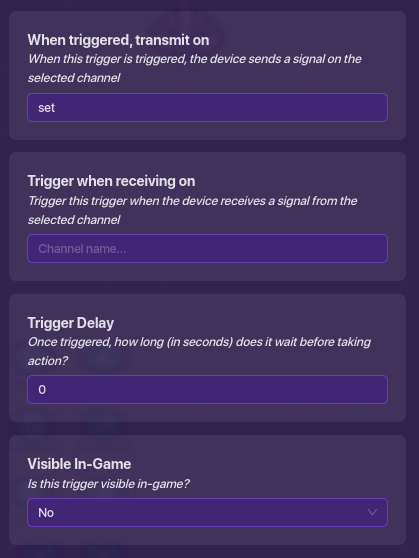
Basically, all this trigger does is broadcast on channel “set” when triggered. That’s it.
Now wire the buttons to the trigger: Button Pressed → Trigger
Wire four of them into the trigger. Then place a wire repeater. Wire the remaining buttons to the wire repeater: Button Pressed → Repeat Wire Pulse.
When that wire repeater can’t take anymore wires, make another, and do the same thing. Then lastly wire both of the wire repeaters to the trigger. When wire repeater receives a pulse → Trigger. All of the buttons wired up should take 1 trigger and 2 wire repeaters, with each device having 6 wires in it, looking like this:
Looks complicated? It’s not, I’m just terrible at making things look simple ![]() .
.
What I’m trying to show is that 1, 2, 3, and +, go into the trigger. 4, 5, 6, - , 7, and 8 go into the first wire repeater. 9, x, C, 0, =, ÷ go into the second wire repeater. Then, both the wire repeaters go into the trigger.
And what is all of this for? To make the channel “set” broadcast each time a button is pressed. Yup, that’s it. In fact, it doesn’t even matter what buttons are wired into the wire repeaters or triggers, as long as they all go the the trigger eventually. So just, ignore my rapid color scribbles.
All of the wires eventually trigger the trigger that broadcasts “set”.
Properties
Ready to make a bunch of properties? You better be. I generally don’t like making a bunch of properties at once without knowing what they’re used for, but in this case I think we have to because otherwise we would need to keep jumping in the middle of block code to make a property. I’ll try to explain what they’re used for, and you’ll get it more when we make the block case actually incorporating the properties.
We’ll be making 7 different properties.
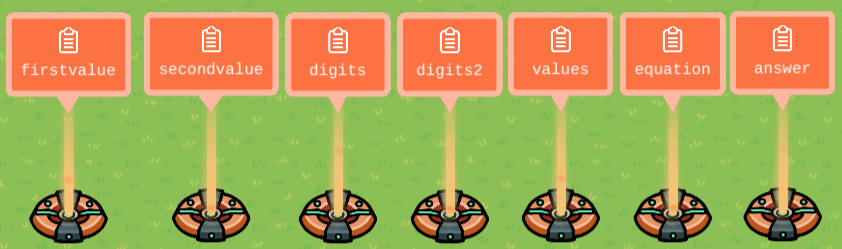
firstvalue
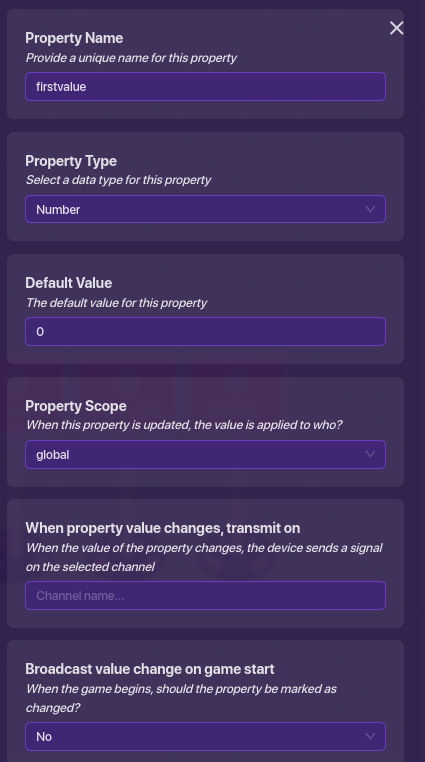
This is the property that keeps the value of the first value.
secondvalue
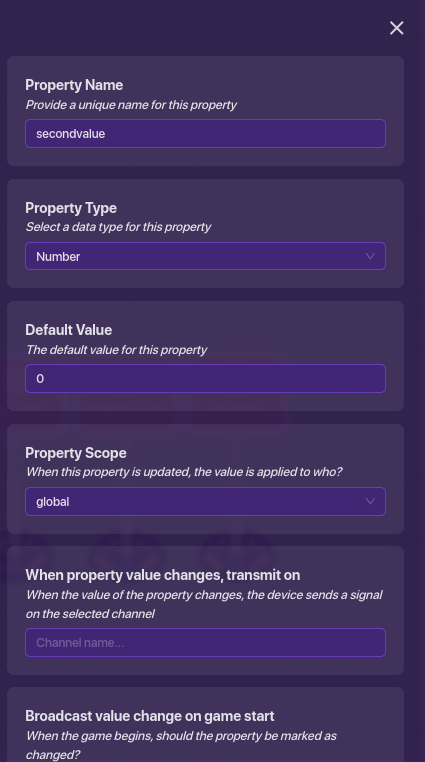
This is the property that keeps the value of the second value.
digits

This is the property that keeps track of the amount of digits in the first value.
digits2
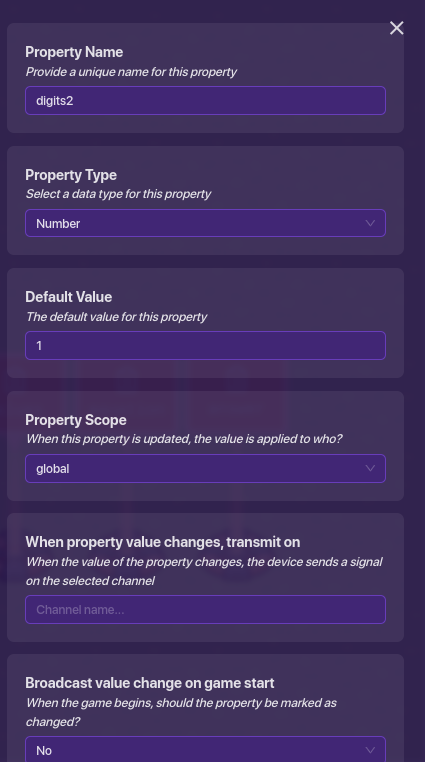
This is the property that keeps track of the amount of digits in the second value.
values
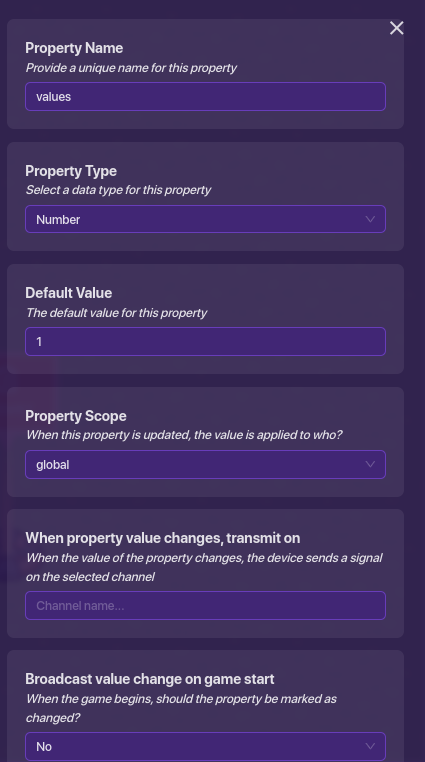
This is the property that keeps track of the amount of values in the equation.
equation

Probably not the best name for it, but this keeps track of the equation symbol used. This is the only text property used.
answer
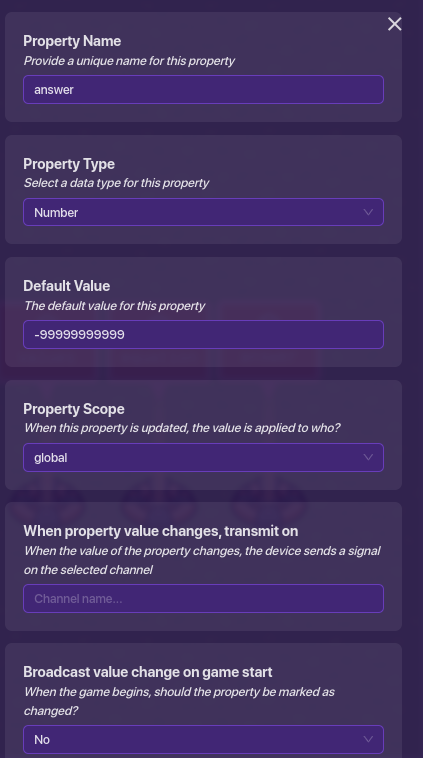
This is the property that stores the answer of the final equation.
Hopefully you got through that, and mostly understood their uses.
Blocks
Block time! The fun part, but also the most tedious part. Because we will be making a block for every single button.
Place down an item granter (it’s only used for the blocks, I use them because they are the lowest memory block device).
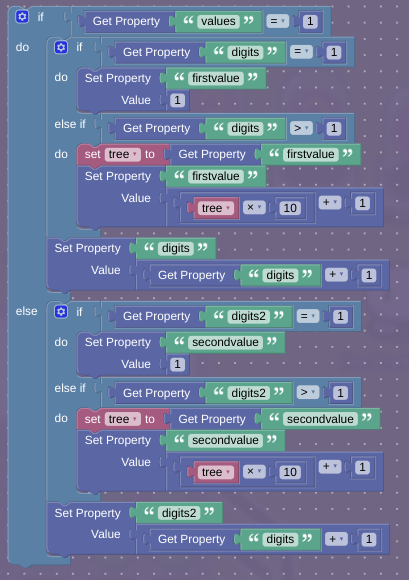
Make a block when receiving on channel “1”.

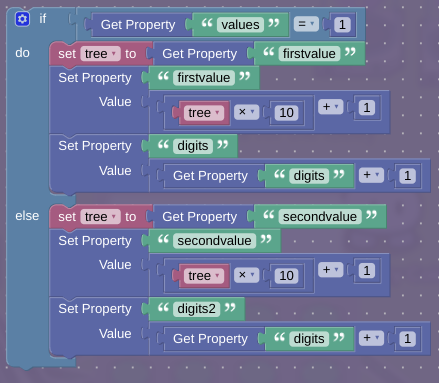
Here is the block you need to make:
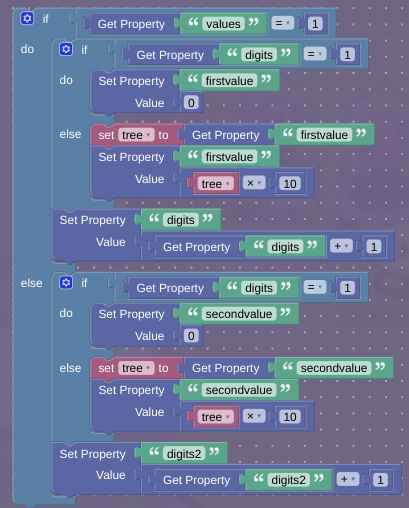
Update: @Grey_Stone has very helpfully pointed out that you actually don’t need the if statement checking if there are 1 or more digits. So the updated block would look like this:
Much simpler. Again, thanks to @Grey_Stone .
Let me try to explain.
First, it checks if there is one value or two. If there is one, it updates the first value, if there’s two it updates the second value. Then it multiplies the digits by 10, then adds 1. The variable named tree is just a random name. I didn’t know what to name it so I just randomly named it tree, but tree doesn’t mean anything special. Then it adds 1 to the digit property.
And, you have to do this for each number. Yup, I did say this was tedious. You mostly keep the blocks the same except for what you set first and second value to. I’ll show blocks for 2 and 3 and circle what changes.
Remember, use the updated easier blocks, refer to the updated channel 1 block for what I got rid of.
Block for channel 2:

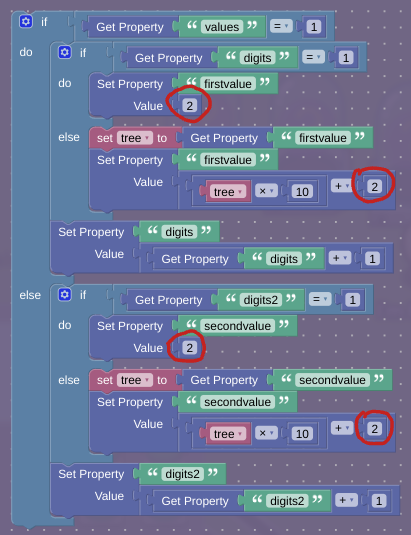
Block for channel 3:


Ok, now do that for channels 1 - 9. Channel 0 is a little more simple:

Because it’s just 0, we don’t need to add 0 so we just multiply it by 10.
Also devies have a block limit of 6, so when you finish 0-9 you should have filled one item granter and have 4 blocks in a new item granter.
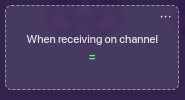
Now, we make the blocks for the equation symbols. Start with a block when receiving on channel “+”.

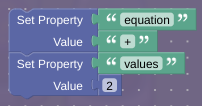
That simple. No long blocks for the equation symbol blocks!
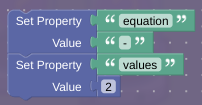
Here are the rest of the equation symbol blocks:
For -
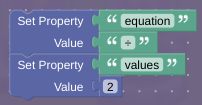
For ÷
For x
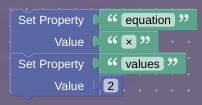
There is one thing for this block. Instead of putting the letter x like I’d been using in the value for “equation”, I used this symbol: ×
It’s just the actual multiplication symbol and looks better than the letter x in the equation.
Also you should have filled your second item granter with blocks and went on your third and final block item granter by now.
Alright, you’re almost done with blocks now! Just a few more to go. Make a block for channel “=”
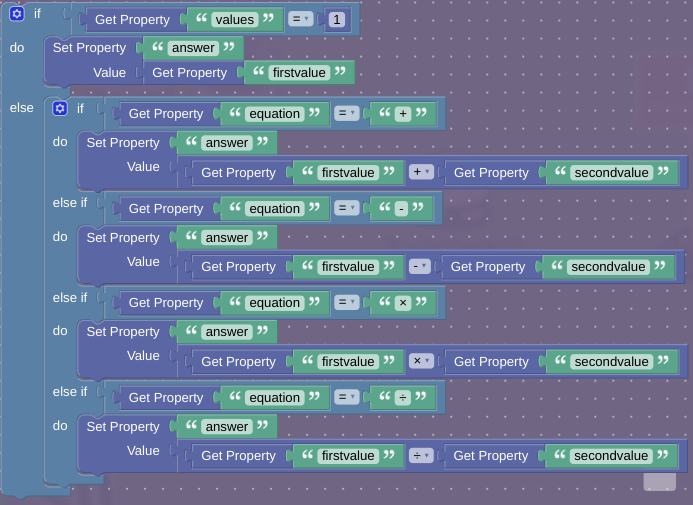
Looks a bit bulky, but just determines the equation symbol, then performs that equation.
Again, make sure that the Get Property “equation” = “×” uses the multiplication symbol ×, not x.
Ok, last block in your item granter. This is for the channel “Clear”

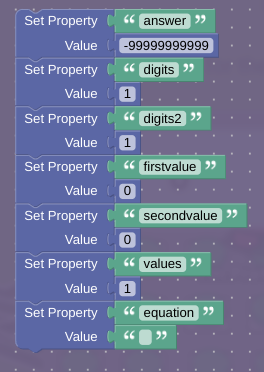
Just clears and resets all of the properties back to their original values.
Make sure property “equation” uses a text block because it’s a text property.
You’re so close to being done now! One last block. Go back to your 0 text above all of your numbers.

That one. Open a block receiving on the channel “set”. Remember this is the channel that all of the buttons will trigger when pressed?

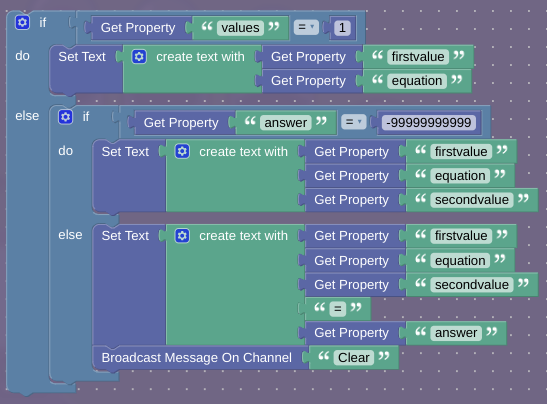
This block just sets the text to show the current equation. Also wondering why the property answer was set to -99999999999? What a random number. Well, it’s just to make sure that the answer hasn’t been calculated yet. Making it 0 wouldn’t work, because the actual answer to the equation could be 0. And, because the blocks set the answer, not add to it, it doesn’t actually matter what value it’s set to. But, on the slim chance that -99999999999 is the actual answer to the equation, welp we’ve got a problem.
Optional
To make the calculator look a bit better than just numbers on the ground, place down a rectangular barrier, no collision, set transparency 1. Color it grey and adjust its size under the calculator.
Now make a rectangular barrier, no collision, set transparency 1 but color it light blue. Position it like this:
Summary
Anddddddd… That should be the whole calculator done! You can test it now. You should be able to press the numbers, they should appear, you should be able to press equations and calculate them, and you can clear the equation. Hopefully I didn’t forget anything, and everything works.
There are probably numerous ways to simplify the block code or get rid of some properties, but I’m not a block wizard. This is how I did it, and this my way, though you are welcome to find ways to make it more simple. A ![]() would always be appreciated, as this guide took way too long. Have fun!
would always be appreciated, as this guide took way too long. Have fun!
- 0/10 or

- 1/10 or

- 2/10 or

- 3/10 or
- 4/10 or

- 5/10 or
- 6/10 or

- 7/10 or
- 8/10 or

- 9/10 or
- 10/10 or

- 11/10 or
