For a long time, I’ve wanted a weapon that could shoot through walls in gimkit. Such item has not yet been added… But I was thinking: what if I made a weapon that WAS the wall?
This is how you create my controllable turret! If you wanted to make one that’s more precise and complex, go ahead! This one only has 3 aiming spots, but the possibilities are endless.
Heads up: After testing it out on a sentry, I realized this thing only works on actual players, so make sure you use it in a pvp map.
Instructions
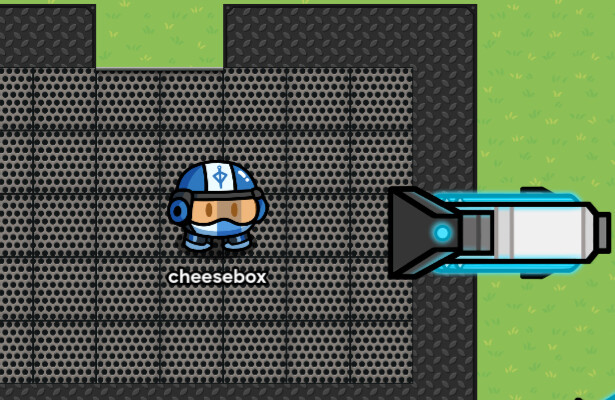
First of all, you’re gonna wanna protect whoever’s behind this gun, so you need to create a little control room for the player to control the gun inside of.
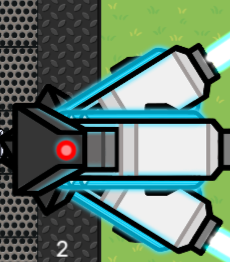
Now that you have the control room, you can add the ‘cannon’. You can create a cannon-like weapon using a rotated horizontal space barrier.
P.S. I also added a command table later on for that scifi feel
Now that we have our ‘gun’ , we can create the ‘controllable’ part.
We’ll need:
- 3 buttons
- 4 triggers
- 2 more space barriers
- Some lasers
- 1 property device
To start, name the property ‘lpos’ and set the default value to 2.
Then, set up 3 buttons next to your laser. Set their messages as up, down, and, of course, fire.
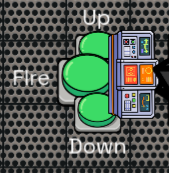
In the up button, set the when pressed, broadcast on channel to ‘lposup’.
In the down button, set the when pressed, broadcast on channel to ‘lposdown’.
In the fire button, set the when pressed, broadcast on channel to ‘laserfire’.
In all of them, set the activate on to ‘laseroff’ and the deactivate on to ‘laserfire’.
Now the triggers. To help specify which triggers I am talking about, I’ll use letters.
Trigger A. triggers on lposup.
Trigger B. triggers on lposdown.
Trigger C. triggers on laserfire, and broadcasts on ‘l_f’
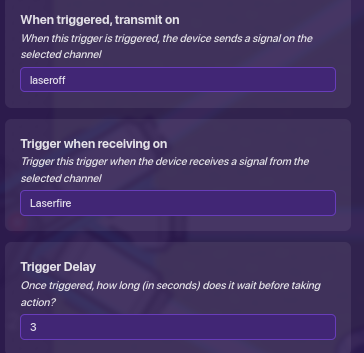
Trigger D. triggers on laserfire, and broadcasts on ‘laseroff’
In trigger A, put this block code in on when triggered:
In trigger B, put this block code in on when triggered:
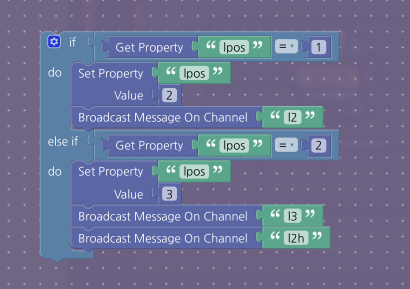
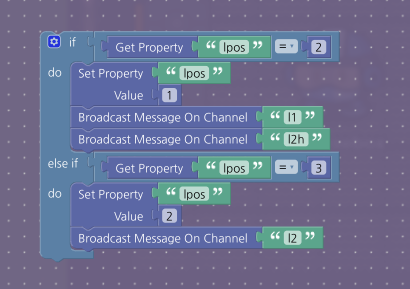
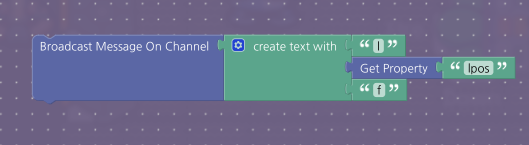
In trigger C, put this block code in on when triggered:
Set Trigger D’s settings to this:
After you have all that set up, put 2 more spaceship barriers under the first like so:
Have each one’s settings be as follows:
- Top - show on l1 , hide on l2,
- Middle - show on l2, hide on l2h
- Bottom - show on l3, hide on l2
Make sure the top and bottom ones haveActive on game start?set toNo
Now, the lasers. put them so they are ‘coming out’ of the ‘barrels’ of each barrier, like so:
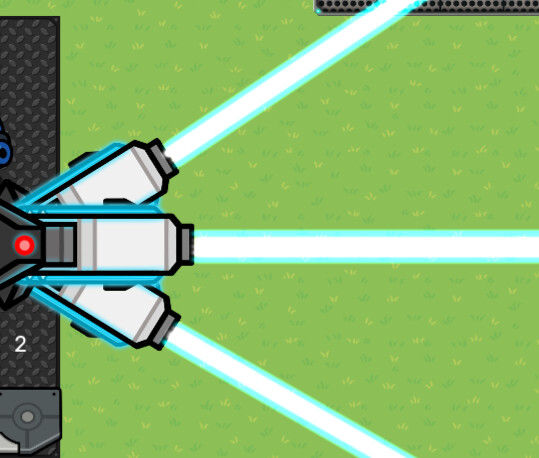
and set them all to not be active on gamestart. Set them all to deactivate on ‘laseroff’ And have their placement correspond with their activating channel.
So Top = l1f
Middle = l2f
and Bottom = l3f .
Set all of their damage to some crazy amount, like 2000 or whatever you want.
And now, you should have a controllable laser cannon! Thank you for reading, and please let me know if there was any step I missed, as I made it first and then reverse engineered the steps! Also, please vote on a difficulty!
- 1/10
- 2/10
- 3/10
- 4/10
- 5/10
- 6/10
- 7/10
- 8/10
- 9/10
- 10/10