(This just a prop light saber)


Step.3
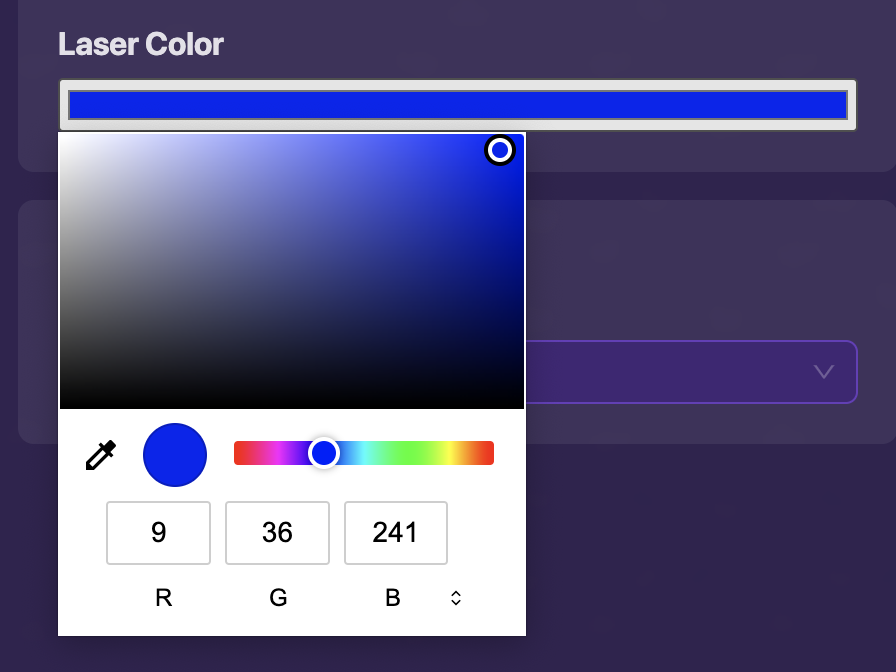
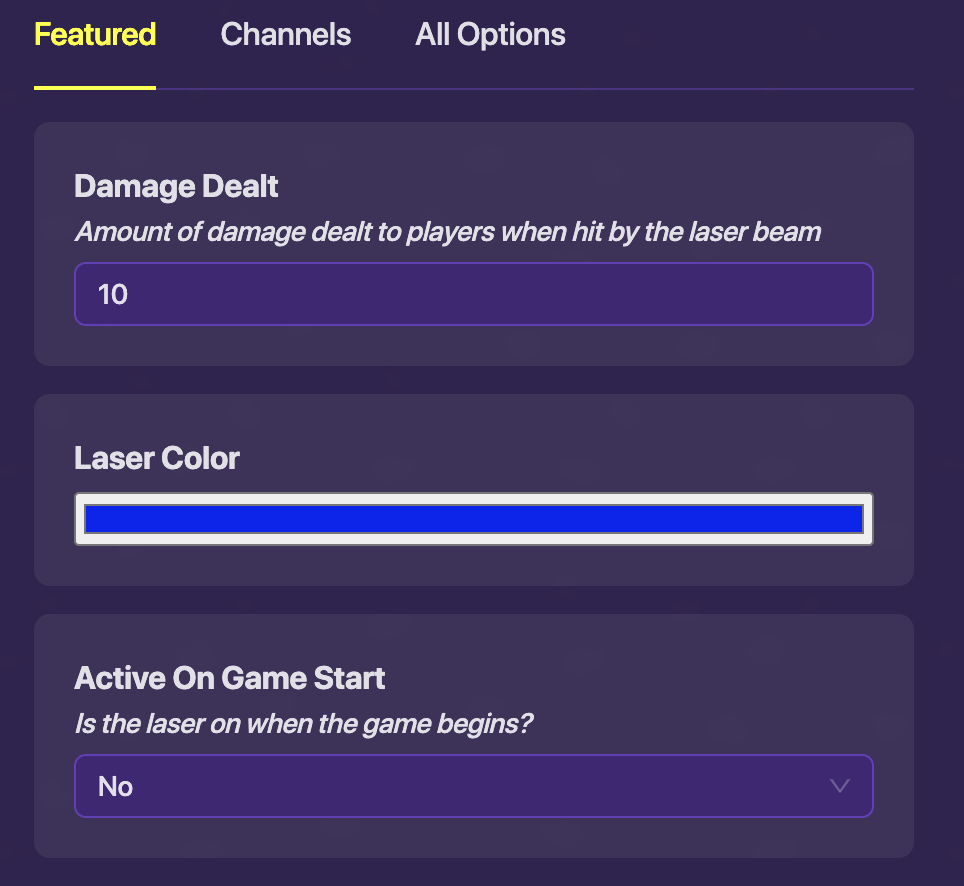
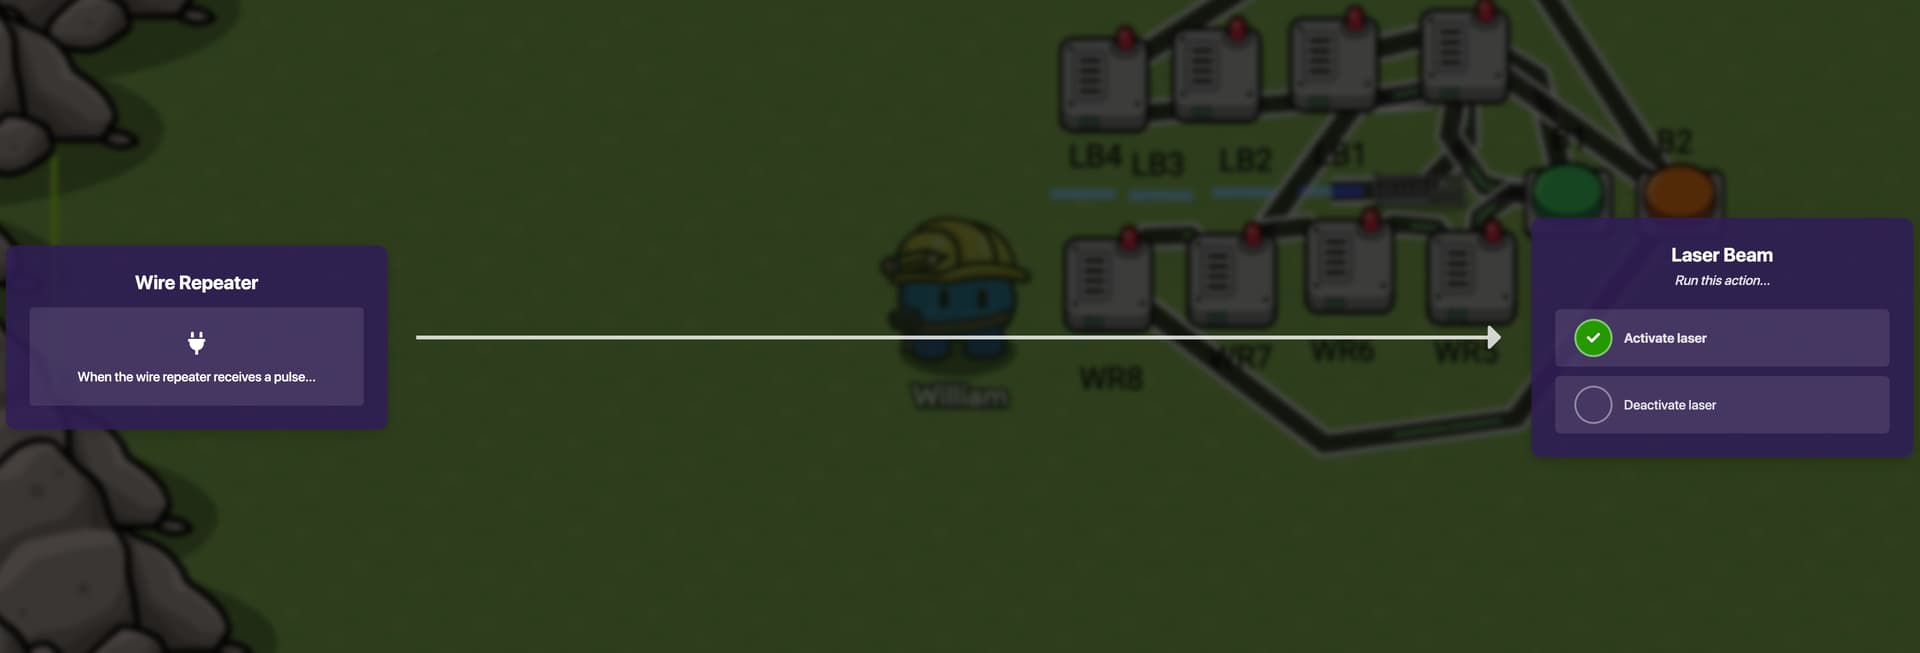
Change these settings in the laser beam:Change color to what ever color light saber you’ll like.
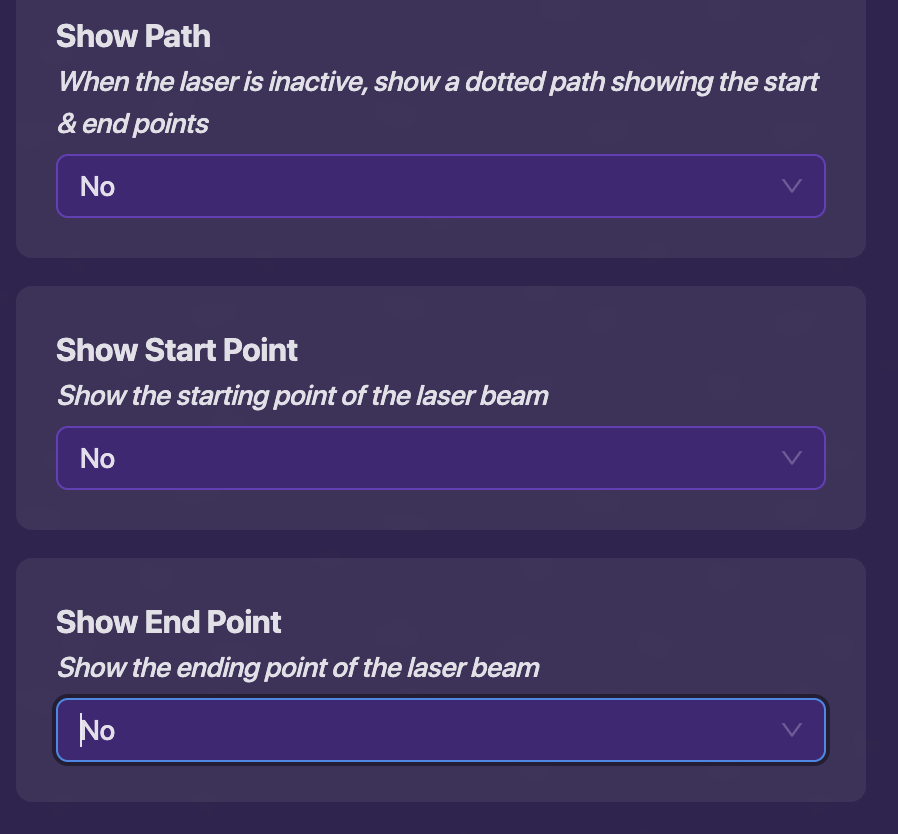
Show Path:No
Show Start Point:No
Show End Point:No

Then you’re done!!
Have fun building!!
How to make a On/Off Light Saber
How to make a On/Off Light Saber!!
Step.3
Change these settings in the laser beam:Change color to what ever color light saber you’ll like.
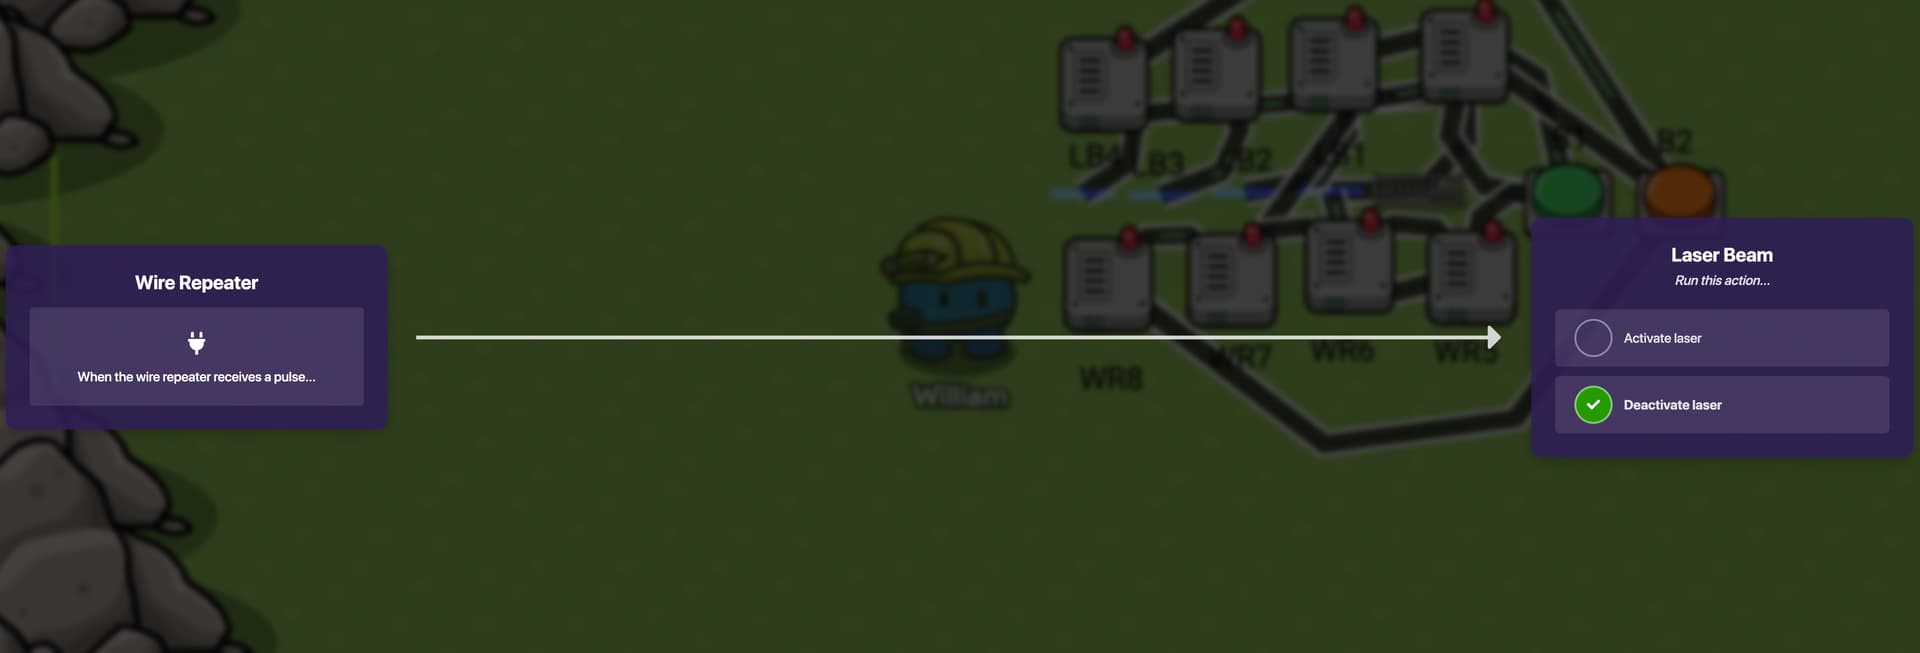
Active on game start:No
Show Path:No
Show Start Point:No
Show End Point:No
Step.4
Scale the laser beam to about the size that it is in this picture ![]()

Now copy that laser beam a few times.

Step.5
Get 2 wire repeater for ever laser beam you have.(ex i have 4 laser beams so ill get 8 wire repeaters.)Do 4 on top 4 on bottom
Make the Delay of each Wired Repeater 0.5
Step.6
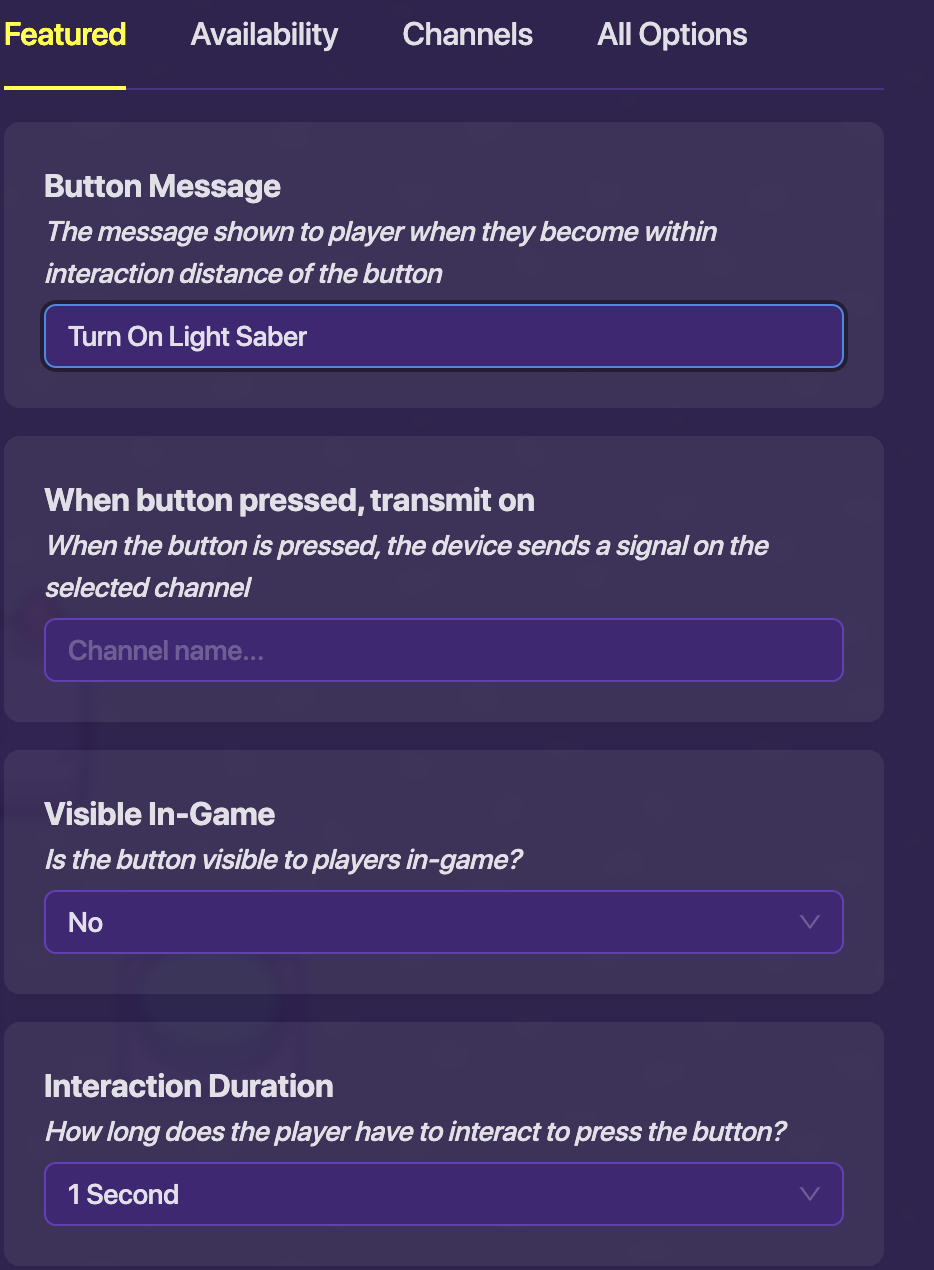
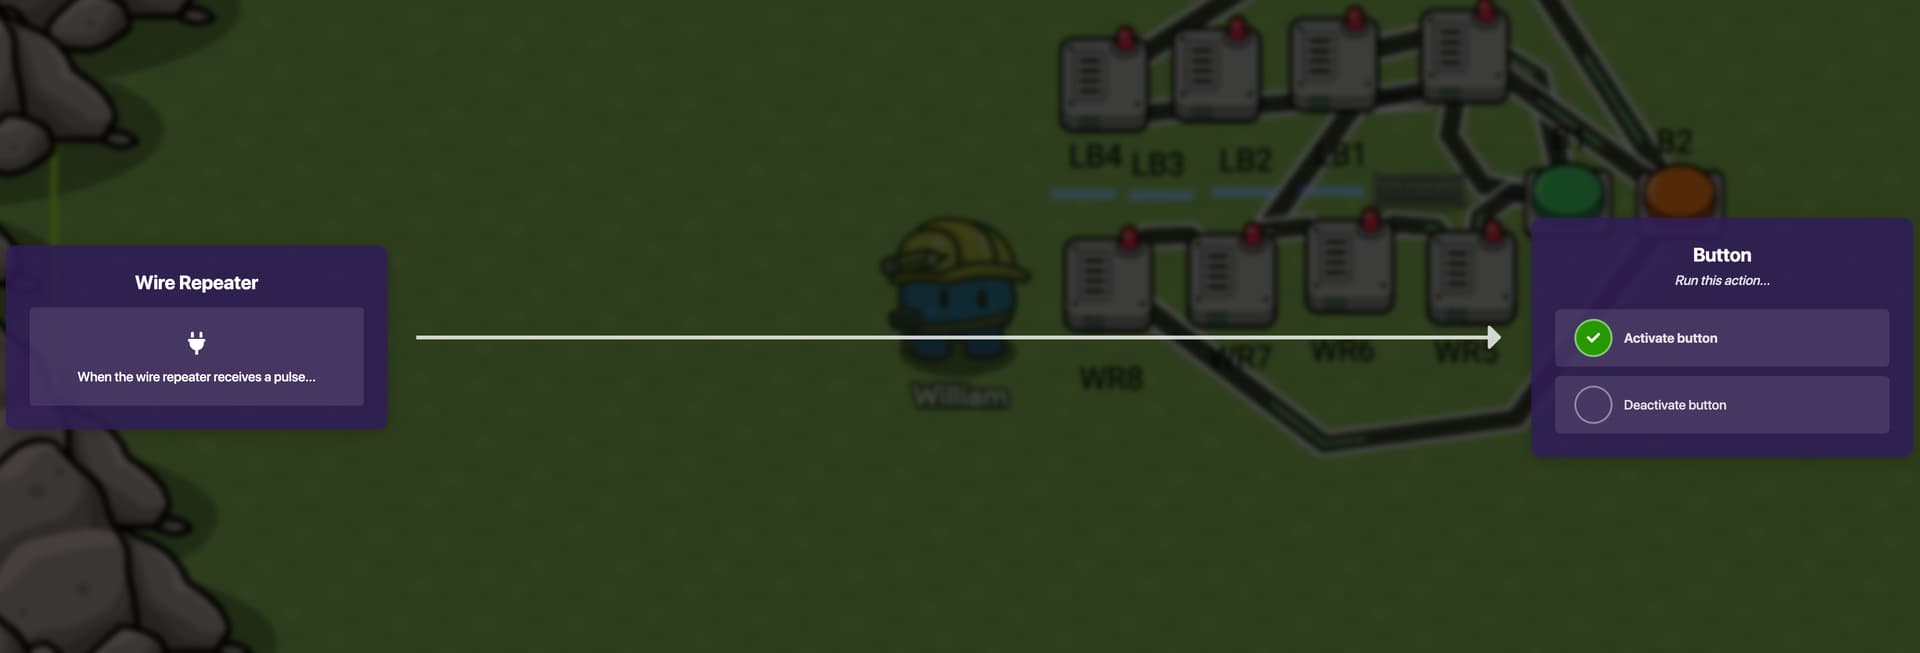
Get a button and change these settings: Visible in game:No
Button Message: Turn On Light Saber
Step.7
get another button but instead do these settings: Active on game start: No
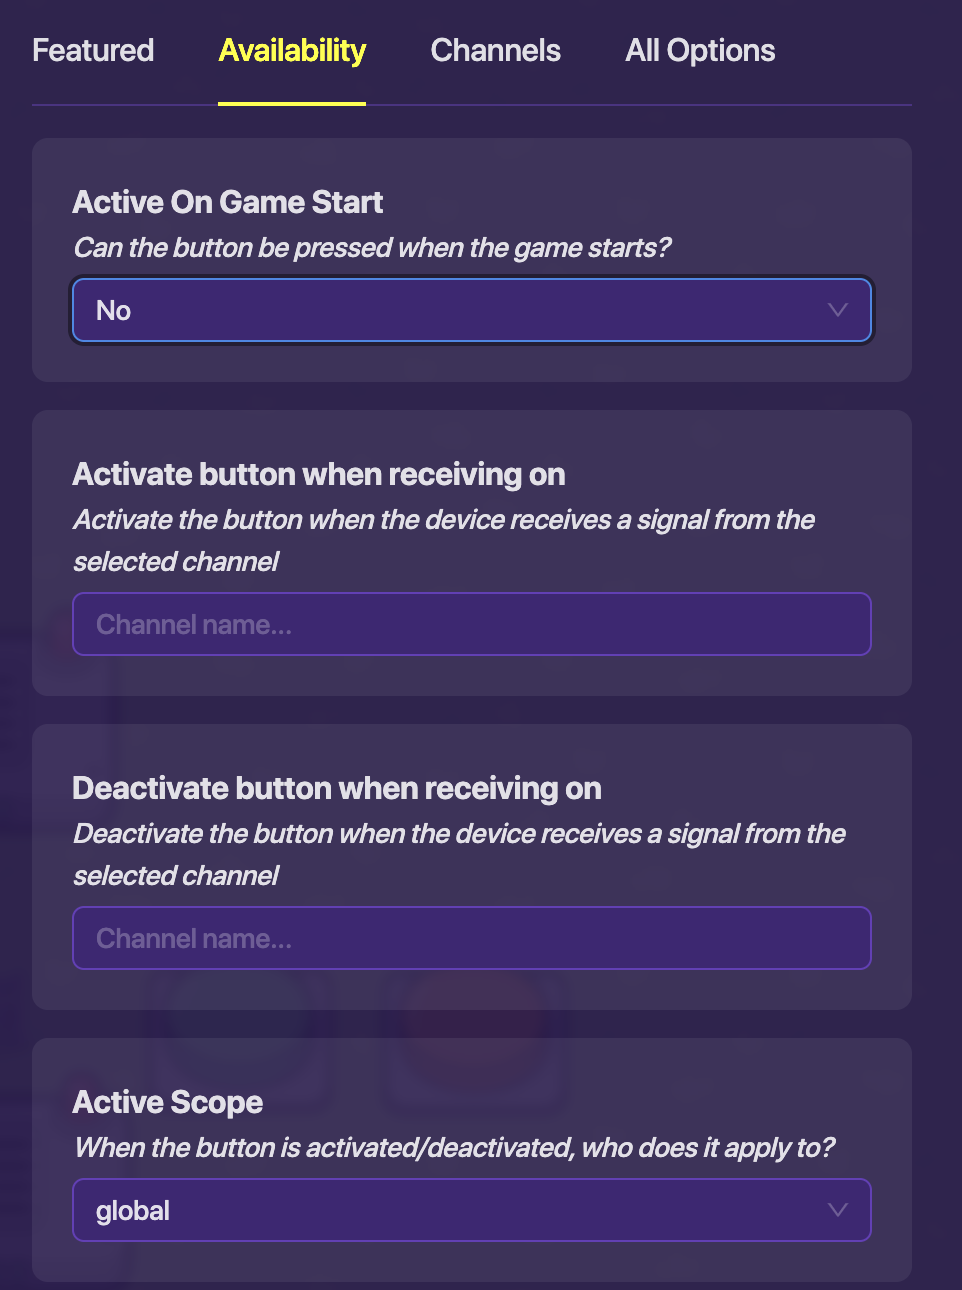
Button message: Turn Off Light Saber
Part 1 of Step.8
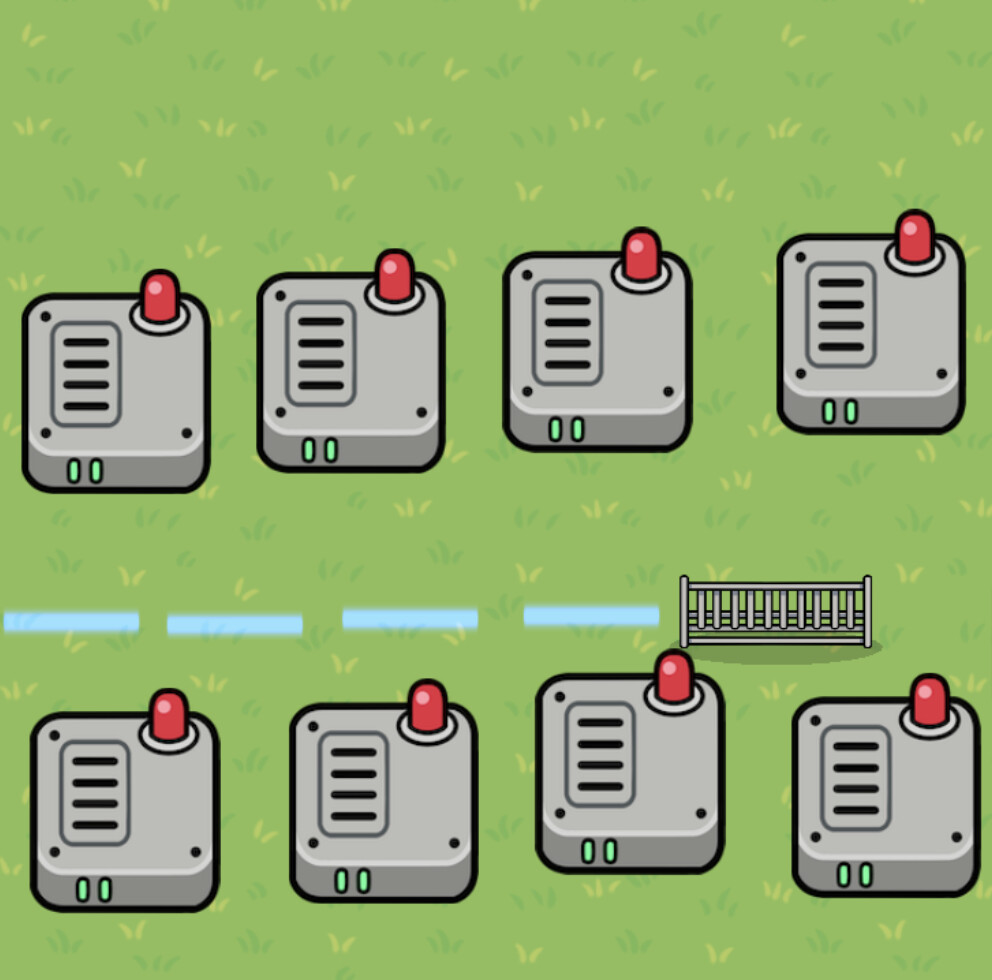
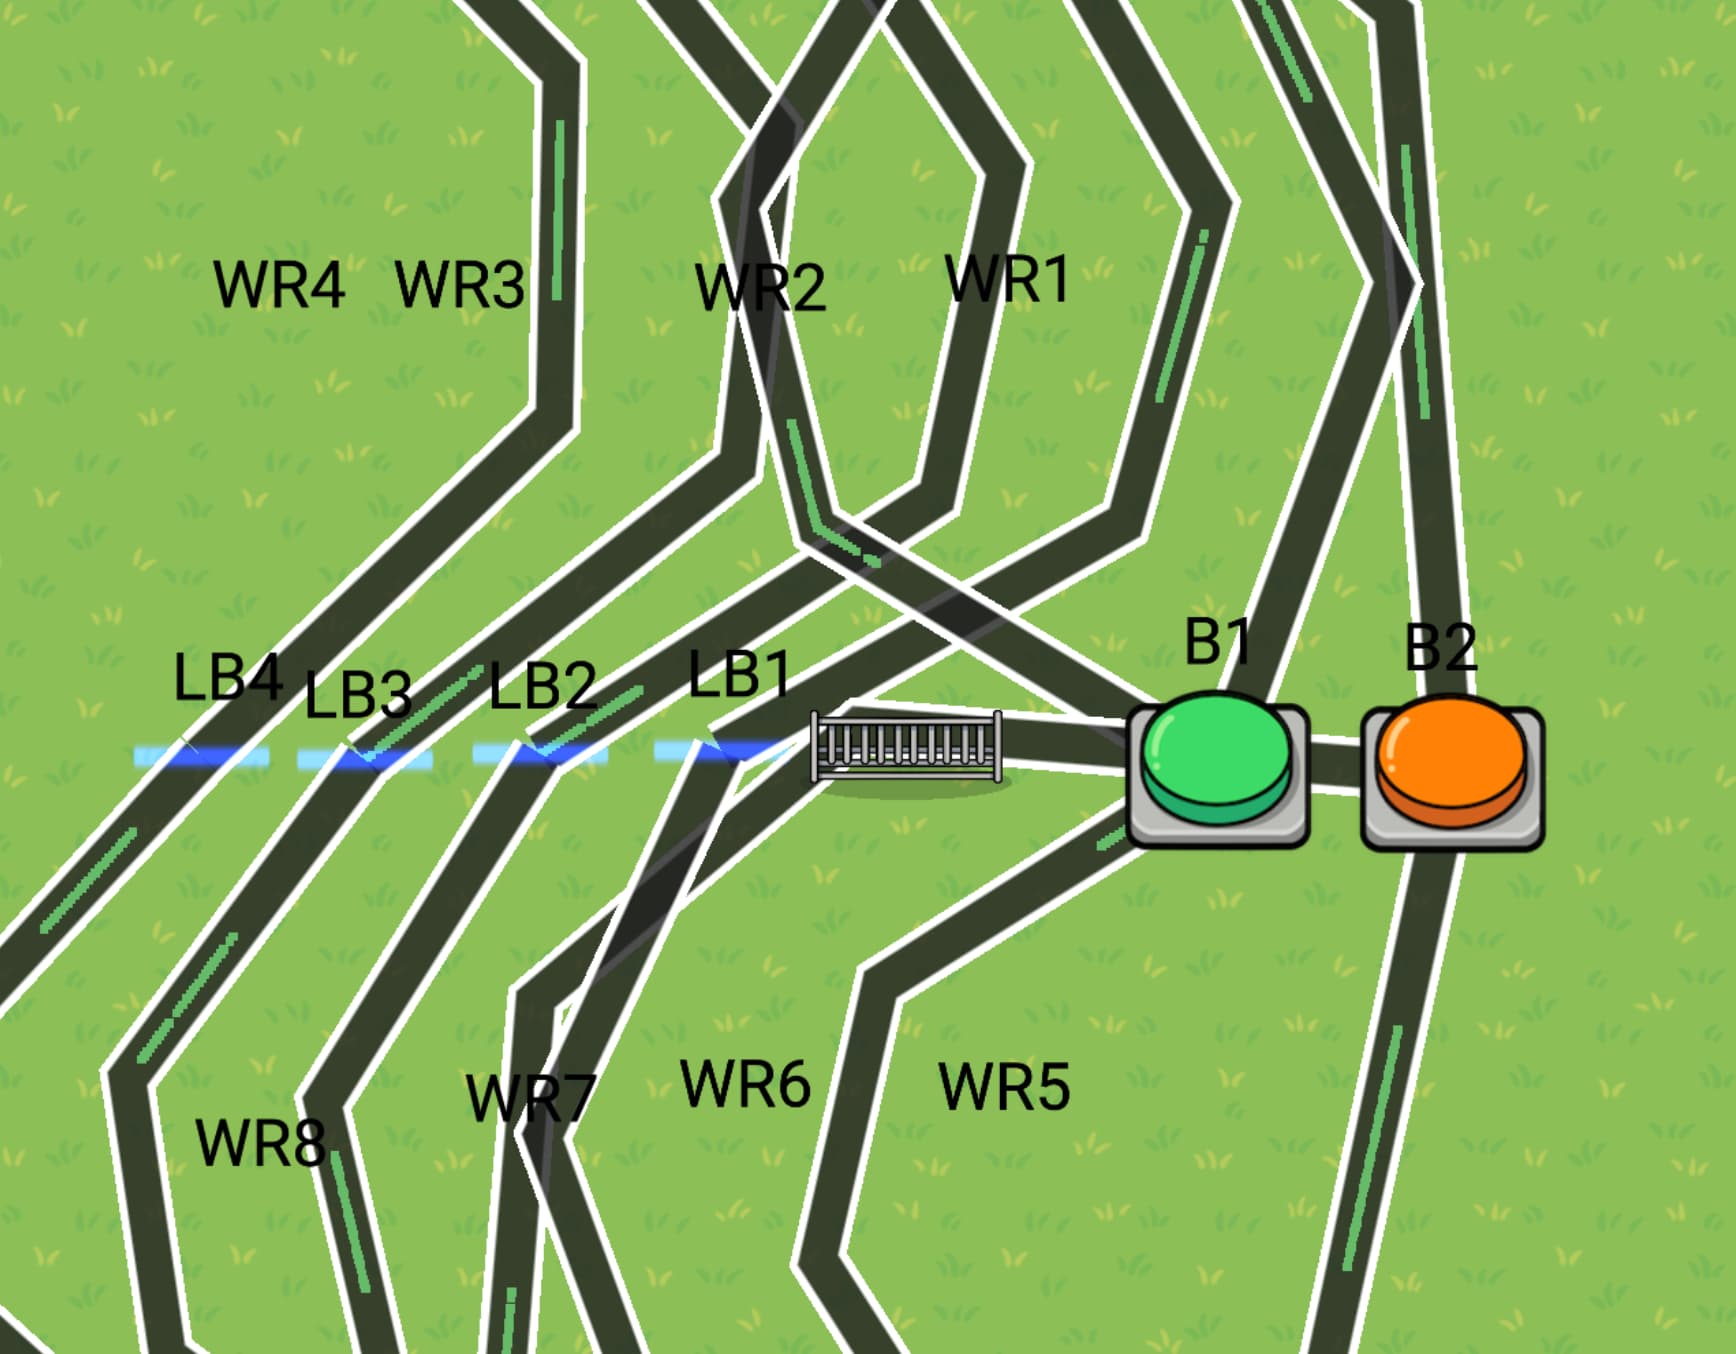
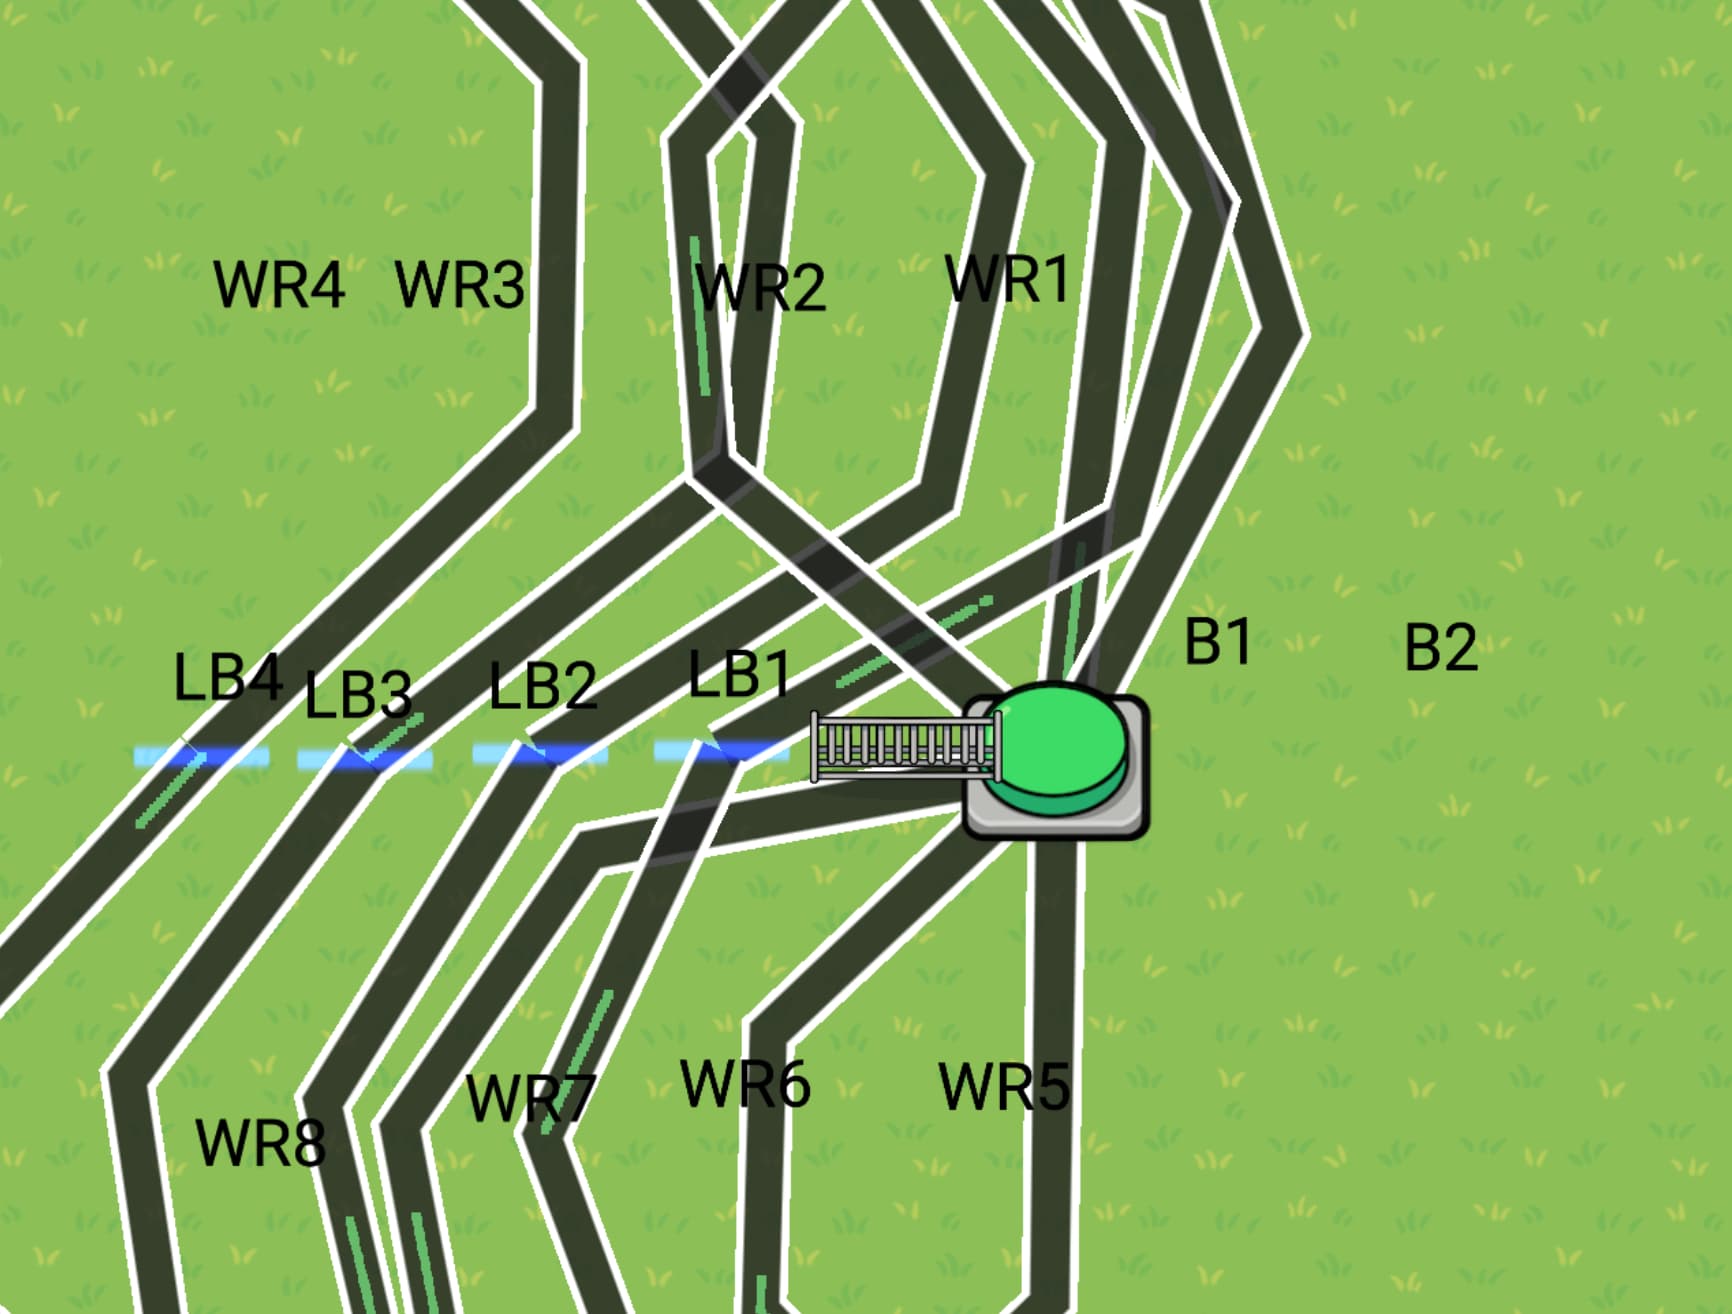
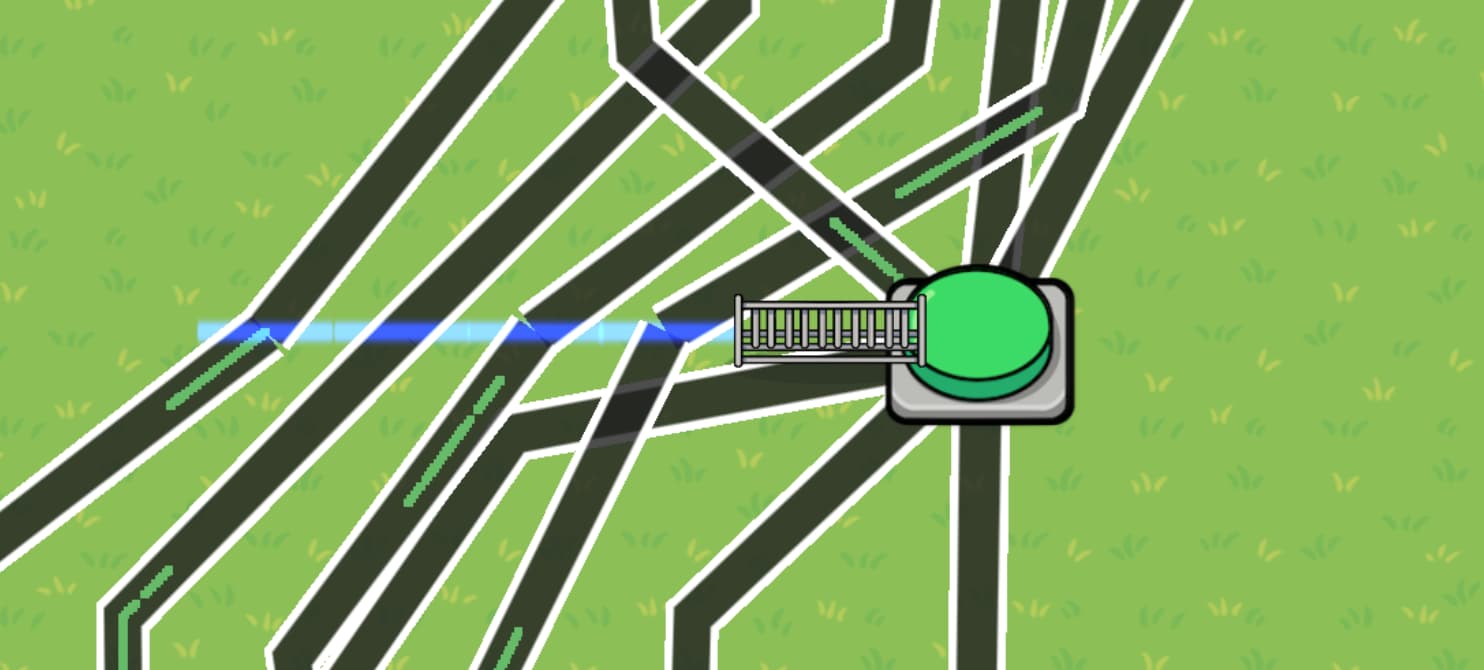
Now it is time to wire… ![]() ive added numbers right next to each device to make it easier
ive added numbers right next to each device to make it easier
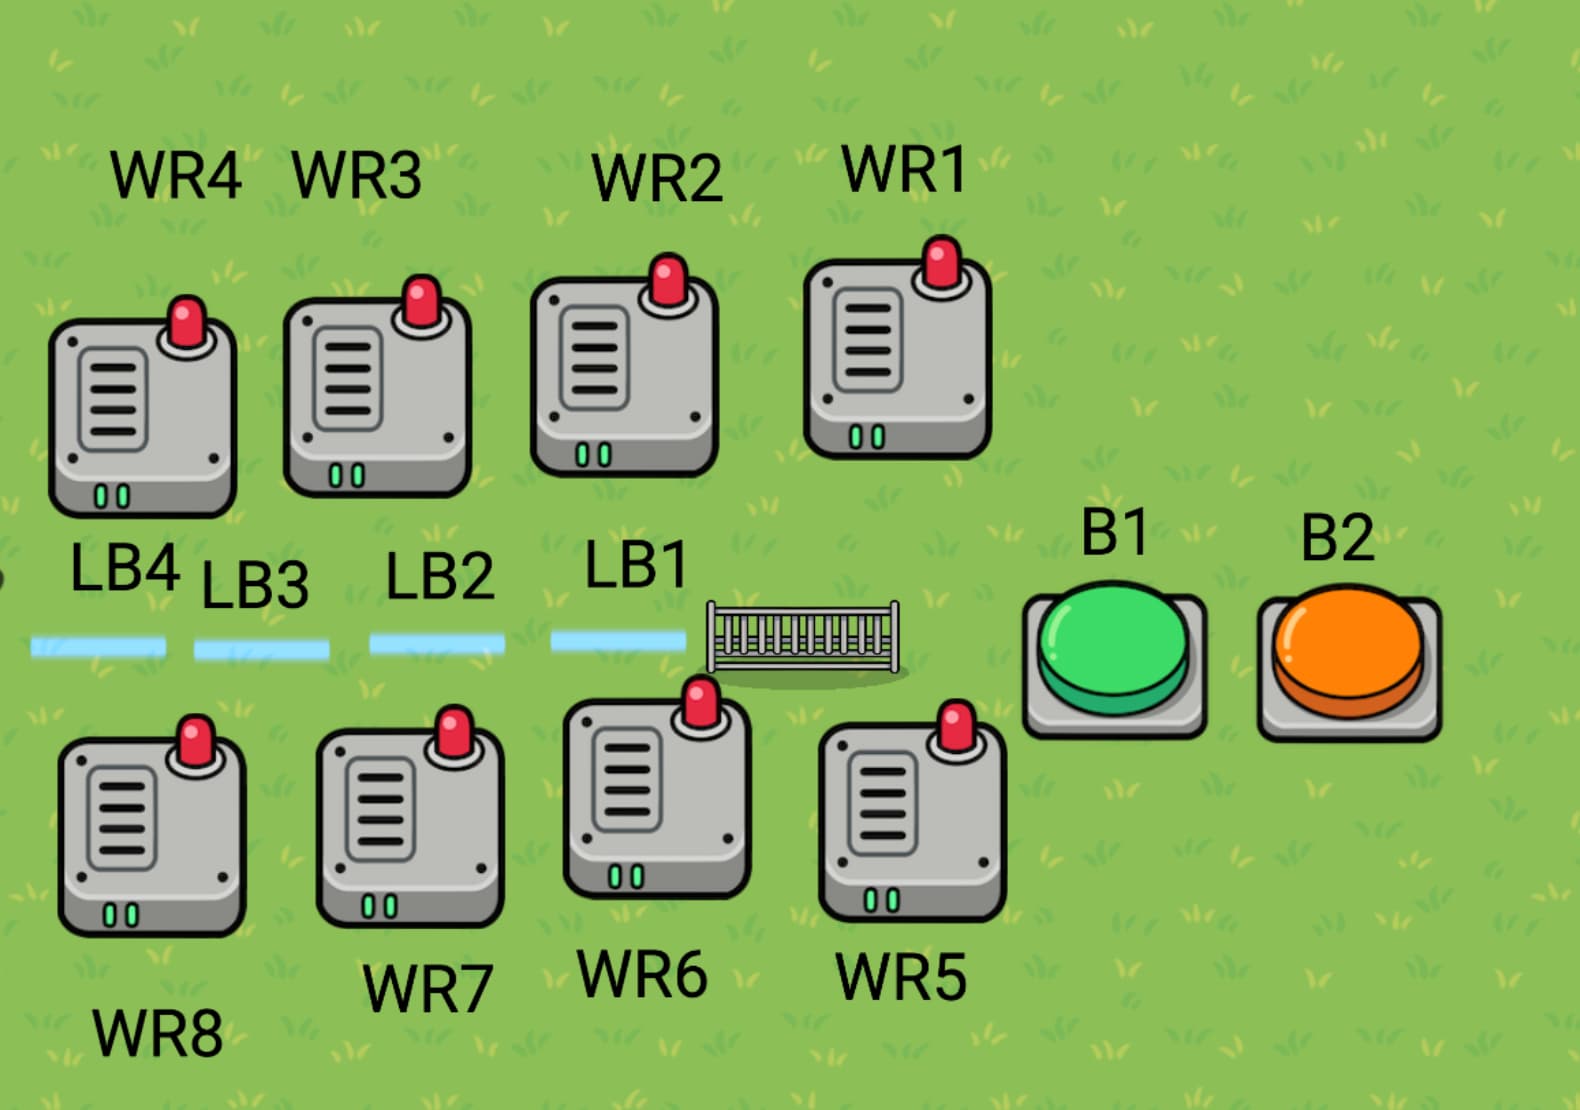
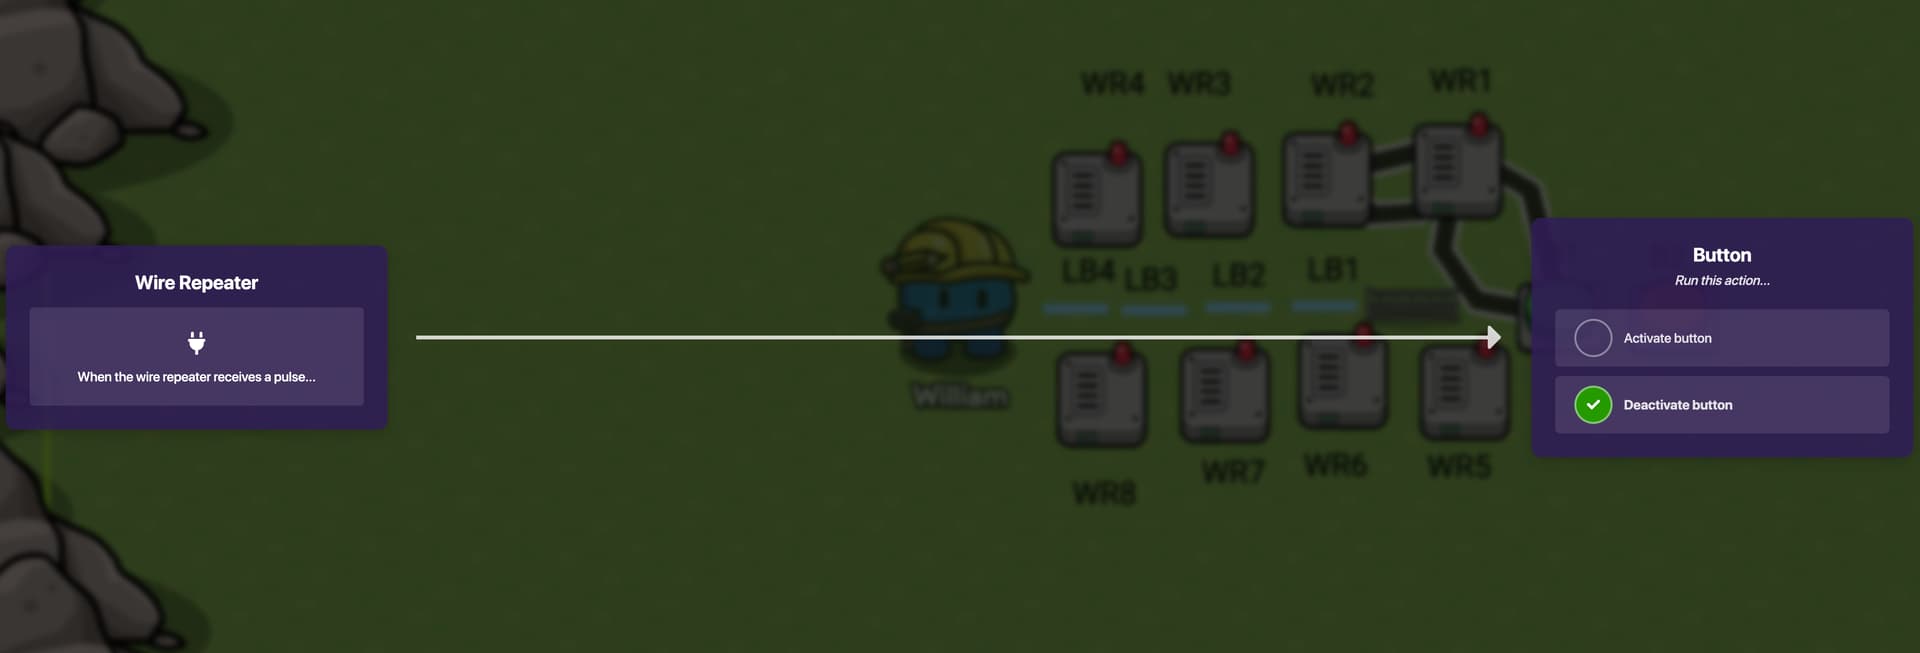
First Wire B1 to WR1 like this:
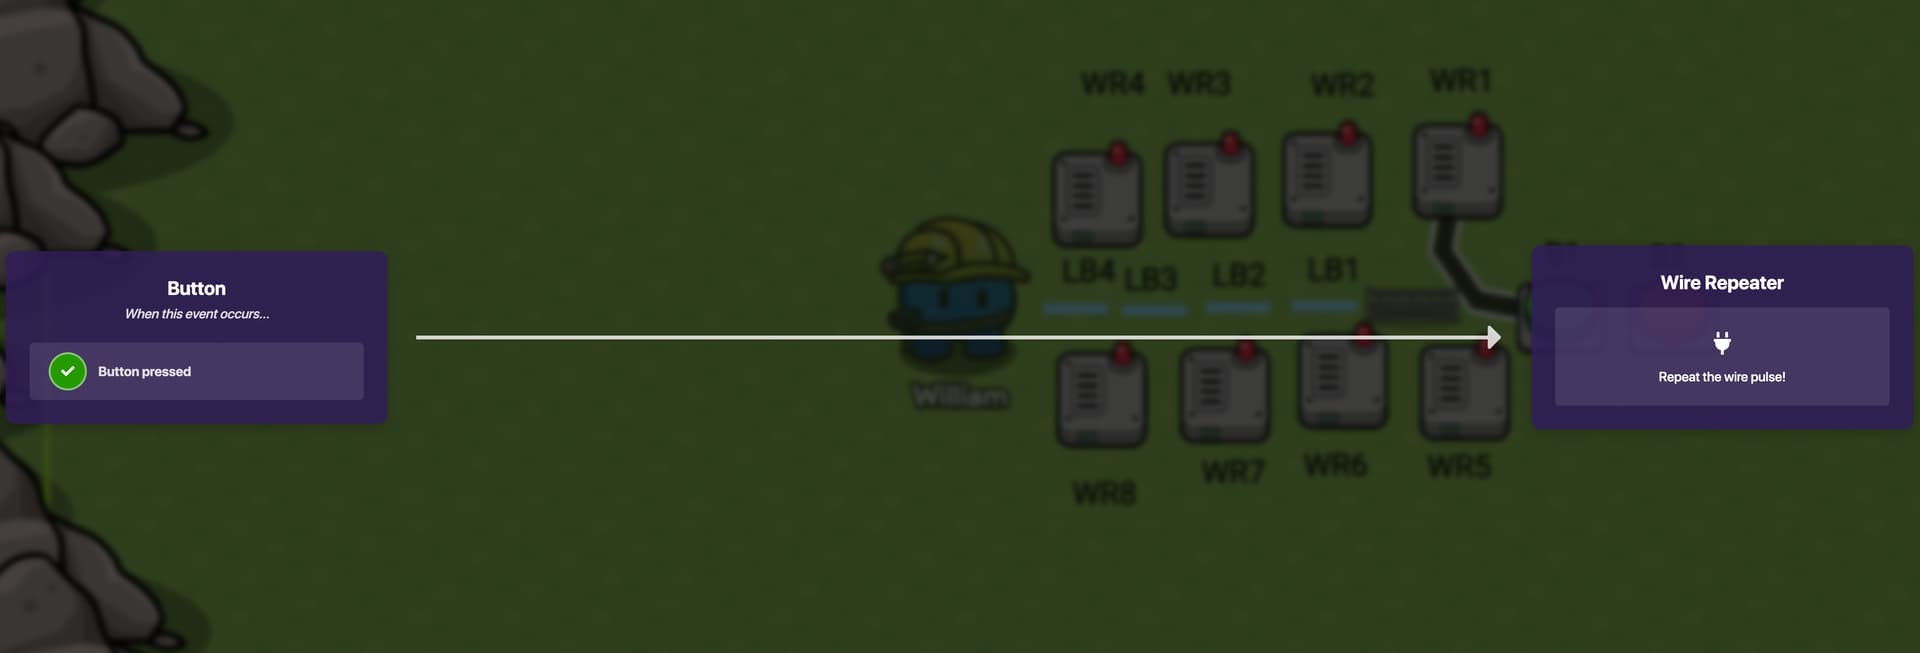
Then WR1 to WR2
Then WR2 to B1 like this:
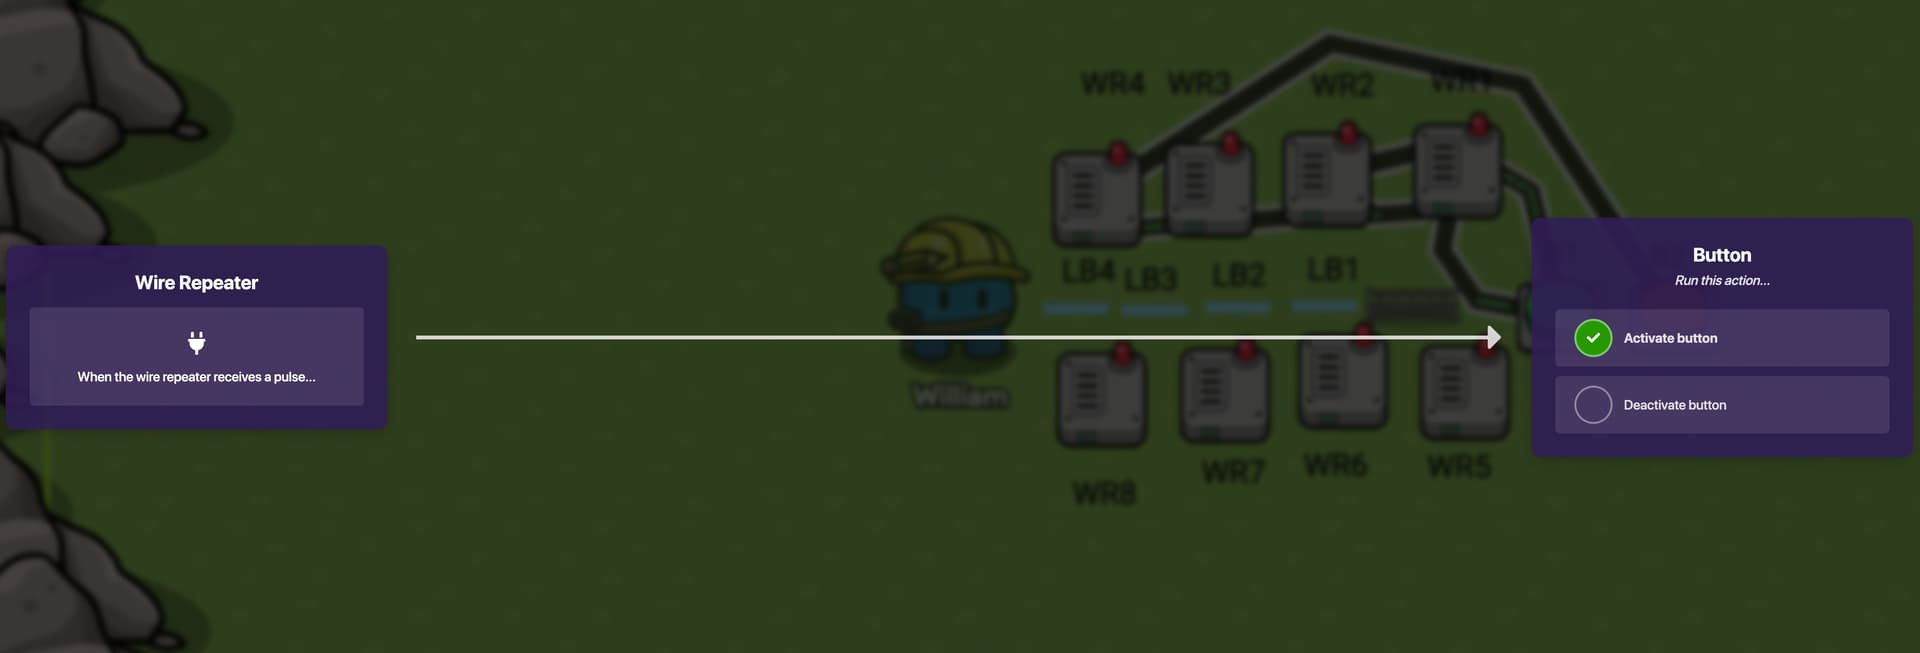
Then WR2 to WR3
Then WR3 to WR4
Then WR4 to B2 like this:
Then B2 to WR8 like this:
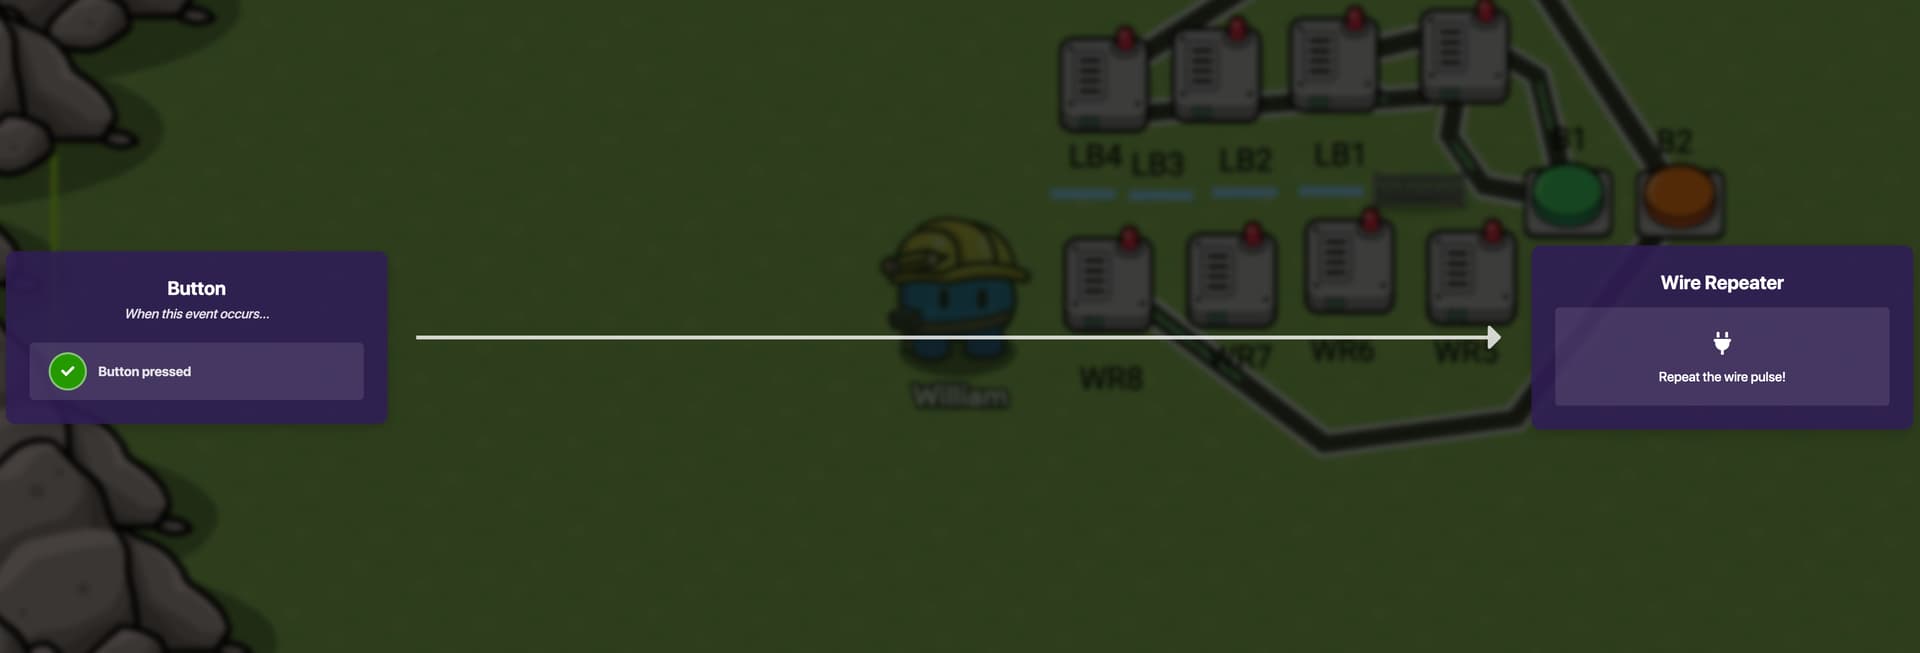
Then WR8 to WR7
Then WR7 to B2 like this:
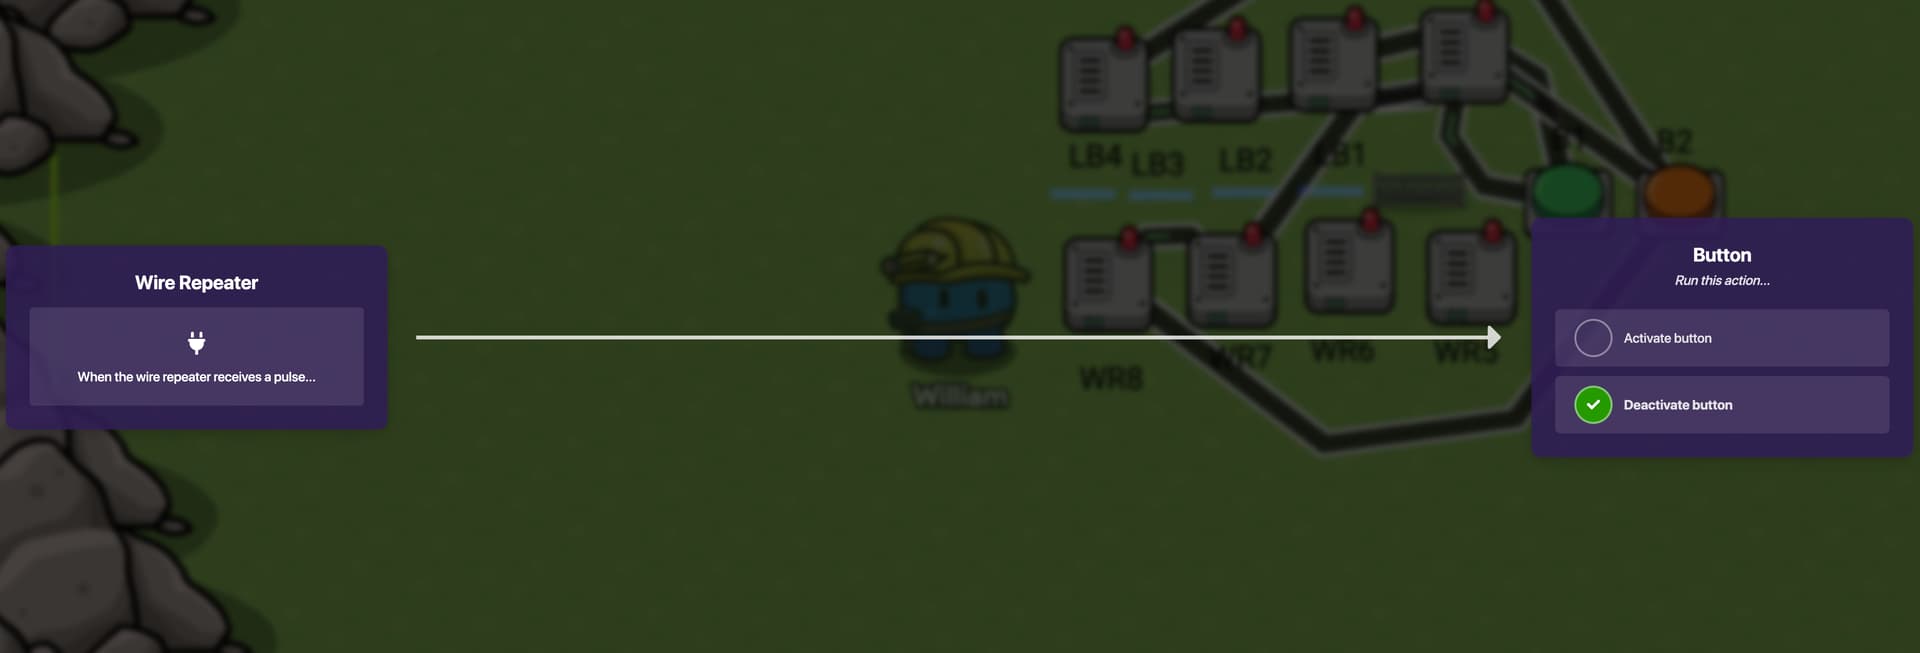
Then WR7 to WR6
Then WR6 to WR5
Then WR5 to B1 like this:
Part 2 of Step.8
WR1,2,3 and 4
to LB1,2,3 and 4 like this:
WR5,6,7 and 8
to LB1,2,3 and 4 like this:
Now move the wire repeaters to the side so you do not have wires every where in this next step.
Step.9
Move B1 onto B2 then move both of them right by the bicycle rack.
Next Put all the laser beams right by each other.
Then your done!!
Done!!
Please ![]() this took a lot of time.
this took a lot of time.
Thank you for Reading!