Want to make a Cruise Ship game for players to experience what it is like on a cruise vacation? You have come to the right place. This requires a computer to build in Gimkit Creative. I will walkthrough all the steps right now.
Table of Contents:
Create the Lobby
Create the Lobby:
Step 1:
-
Click on the “Options” button.
-
Click on “Map Options” and select any “Water” color on Background Terrain.
Step 2:
-
Click on the Add (E) button or click on the “E” key on your keyboard.
-
Click on the “Terrain” button, set the terrain as a floor, and click on “Boardwalk” or “Exposed Boardwalk”.
-
Place down the terrains anywhere on the map until the lobby is big enough for all players or at your own choice.
Step 3:
-
Click on the Add (E) button or click on the “E” key on your keyboard.
-
Click on the “Props” button and click on any fence (vertical or horizontal).
-
Place the fences around the boardwalk until it look like this:
-
Design the lobby however you like it (If you want, you can add the game’s title, release date, game instructions, and emojis in the lobby area).

Step 4:
- If you want, you can place down a camera view on the lobby by clicking on the “Add (E)” button or the “E” key on your keyboard and click “Devices” and select “Camera View”.
- Place the Camera View in the middle of the lobby area.
- To add the spawn pad, click on the “Add (E)” button, select “Devices” and select “Spawn Pad”.
- Place the Spawn Pad anywhere in the lobby area.
- Click on the Spawn Pad and adjust its settings like this:
Visible in Game: No
Use During Phase: Pre-Game
Allowed Team: Any Team
Allowed Player Type: Everybody
Create the Boarding Area (Outside the Cruise Ship)
Create the Boarding Area (Outside the Cruise Ship):
The boarding area is the next step you need to create in a Cruise game.
Step 1:
- Click on the Add (E) button or click on the “E” key on your keyboard.
- Click on the “Terrain” button, set the terrain as a floor and click on “Boardwalk” or “Exposed Boardwalk”.
- Place the terrains anywhere on the map until the boarding area is big enough and is completed.
Step 2:
- Click on the Add (E) button or click on the “E” key on your keyboard.
- Click on the “Props” button and search for any fence (vertical or horizontal).
- Place the fences around the boarding area just like you did to the lobby.
Step 3:
- Click on the Add (E) button or click on the “E” key on your keyboard.
- Click on the “Devices” button and search for the vending machines (you need 3 or 4 of these).
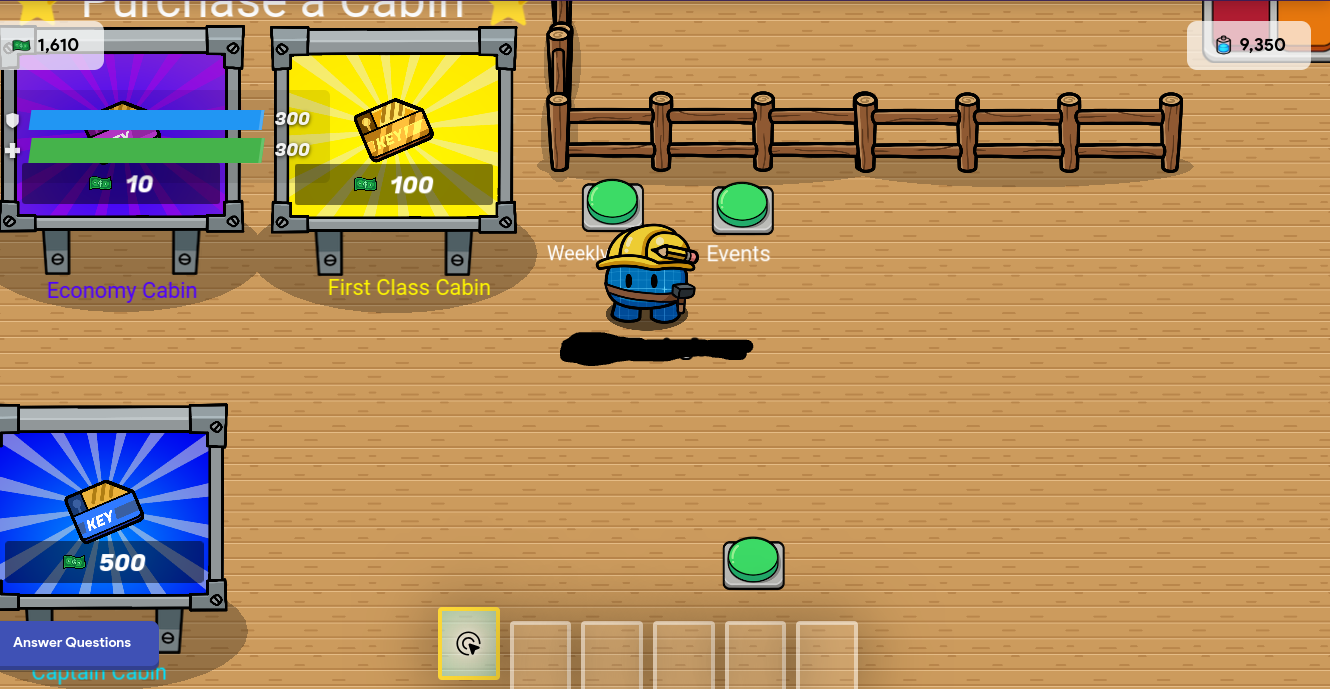
- Place 2 on one row and place the other 2 on the other row. This will be the Purchase Cabins area where players go and purchase a cabin.
- Edit the Vending Machines and adjust the settings like this:
Required Item: Cash
Required Amount: [Set Price]
Granted Item: Any Keycard
Granted Amount: [Any Positive Amount - No Negative Numbers] - Change the colors of the vending machines to your own choice or leave it as it is.
Step 4 - This Step is Optional:
Please redirect to the next required step if you wish to not use the optional steps.
- For the Daily or Weekly Rewards to be set, please click on the Add (E) button or by clicking on the “E” key on your keyboard.
- Click on the “Devices” button and click on “Button”.
- Place the button anywhere on the boarding area as long it does not go in the Purchase Cabins area.
- Click on the Add (E) button or by clicking on the “E” key on your keyboard.
- Click on the “Devices” button and click on “Item Granter”.
- Place the Item Granter next to the button.
- Click on the Add (E) button or by clicking on the “E” key on your keyboard.
- Click on the “Wires” button.
- Connect the output to the button while connecting the input to the item granter and configure the wire settings like this:
When this Event Occurs: Button Pressed
Run this Action: Grant Item
Step 5:
- To allow students to answer questions, click on the Add (E) button or by clicking the “E” key on your keyboard.
- Click on “Devices” and click on the “Questioner” device.
- Place the questioner anywhere on the map.
- Edit the following settings and boom. You added the questioner.
- Go to the link to find out how to answer questions from anywhere: Click Here
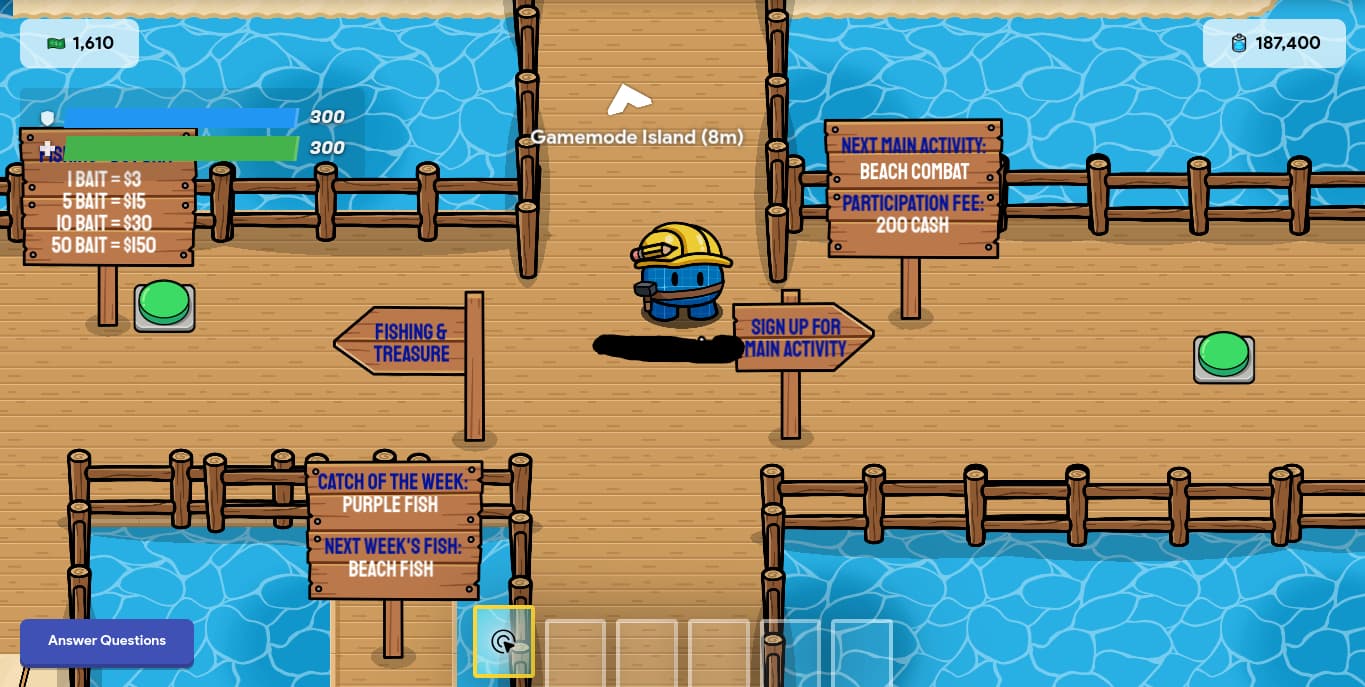
Here is my example of the boarding area:
Create Deck 1 (Inside the Cruise Ship)
Create Deck 1 (Inside the Cruise Ship):
Creating Deck 1 is the next part of creating a cruise vacation game. Let’s get started on that.
Step 1:
- Click on the Add (E) button or by clicking on the “E” key on your keyboard.
- Click on the “Terrain” button and click on “Marble Stone (Light)” and set it as the floor.
- Place the terrain until it is big enough for the elevator, exit, island exit, and the Muster Station.
- Click on the Add (E) button or by clicking on the “E” key on your keyboard.
- Click on the “Terrain” button and click on “Spaceship Corridor (White)” and set it as the wall.
- Place the terrain until it surrounds Deck 1 except the island entrance, emergency evacuation area, and boarding area.
Step 2:
- Click on the Add (E) button or by clicking on the “E” key on your keyboard.
- Click on the “Props” button and click on “Table”. Make sure it’s a gray one.
- Place the table closer to the wall.
- Click on the "Add (E) button or by clicking on the “E” key on your keyboard.
- Click on the “Devices” button and click on “Button”. You need 2 of these.
- Place one on the left and the other one on the right underneath the table.
- Adjust Button 1’s settings like this:
Button Message: Muster Station - Emergency Evacuation
When button pressed, transmit on: N/A
Visible in Game: No
Interaction Duration: 3 Seconds - Adjust Button 2’s settings like this:
Button Message: Muster Station - Lost Key Card
When button pressed, transmit on: N/A
Visible in Game: No
Interaction Duration: 3 Seconds - Click on the Add (E) button or by clicking on the “E” key on your keyboard.
- Click on “Devices” and click on “Notification”.
- Place the notification device next to Button 1.
- Edit the notification settings like this:
Notification Title: Emergency Evacuation
Notification Content: [Information about the evacuation including the location of the area.]
Send Notification when receiving on: N/A
Notification Type: Warning
Notification Placement: I recommend the Top Right. But you can place it anywhere you like.
Notification Duration: Specific Time Amount
Notification Duration (In Seconds): 30
Send Notification To: Everybody - Click on the Add (E) button or by clicking on the “E” key on your keyboard.
- Click on “Wires” and connect the button (output) and the notification device (input):
Button: Button Pressed
Notification: Send Notification - Click on the Add (E) button or by clicking on the “E” key on your keyboard.
- Click on “Devices” and click on “Team Switcher”.
- Place the Team Switcher device next to button 2.
- Adjust the Team Switcher settings like this:
Switch Strategy: Specific Team
Team: Spectators
Switch to configured team when receiving on: N/A - Click on the Add (E) button or by clicking on the “E” key on your keyboard.
- Click on “Wires” and connect the button (output) and the team switcher device (input):
Button: Button Pressed
Team Switcher: Switch player to configured team - To make the Help Center (Optional), you need Popups and Buttons. Use this Guide to Learn How to Make a Popup by using a button.
Step 3:
- Click on the Add (E) button or by clicking on the “E” key on your keyboard.
- Click on “Terrain” and click on "Metallic (Dark) and set it to a floor.
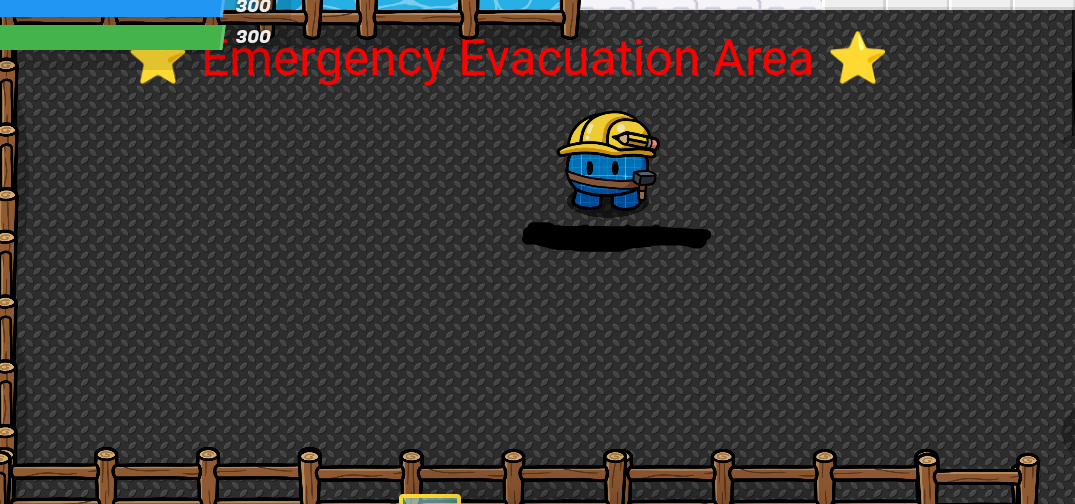
- Place the terrain until the Emergency Evacuation area is big enough for all the players to fit.
- Click on the Add (E) button or by clicking on the “E” key on your keyboard.
- Click on “Props” and click on any fence (vertical or horizontal).
- Place the fences until it surrounds the Emergency Evacuation area except leave some room for players to enter and exit.
Here is my example of Deck 1 (Inside the Cruise Ship):

Create Elevator (Teleport from 1 Deck to Another)
Create Elevator (Teleport from 1 Deck to Another):
Creating an elevator is the fourth step in making your cruise vacation game. This will allow players (passengers and captains) to teleport from 1 deck to another. Let’s get building.
Step 1:
- Click on the Add (E) button or by clicking on the “E” key on your keyboard.
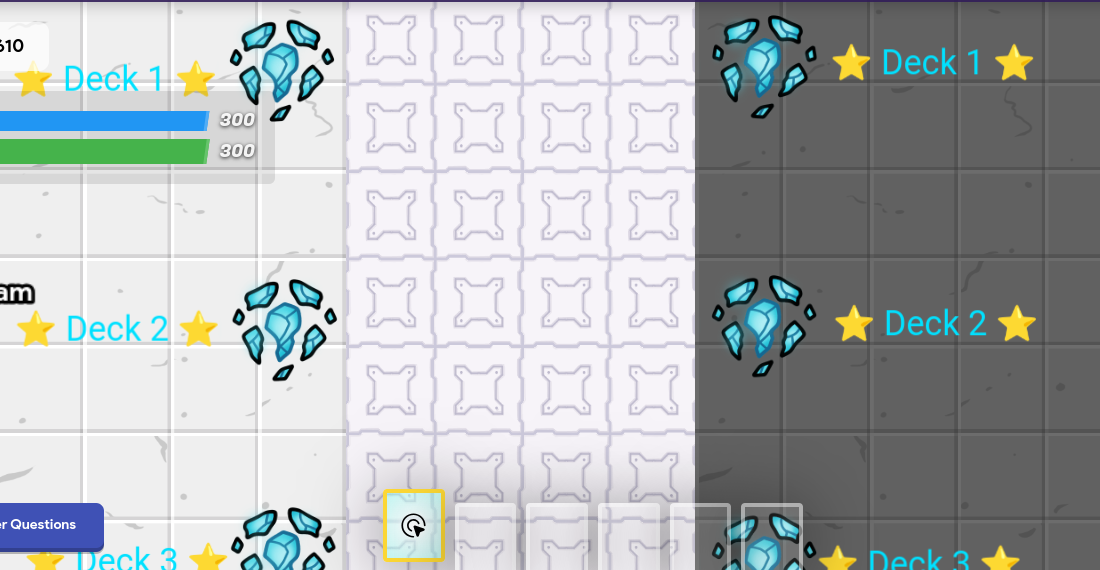
- Click on the “Devices” button and click on “Teleporter”. You need 8 of these for 1 elevator.
- Place the teleporters on the floor next to a wall that acts as the elevator wall.
- Adjust the following settings as you were on Deck 1 going to Deck 2:
Deck 1 Teleporter:
Group: Deck 1
Target Group: Deck 1
When teleported here, transmit on: N/A
Teleport here when receiving on: N/A
Teleport to Target when receiving on: N/A
Visible In-Game: Yes
Deck 2 Teleporter:
Group: Deck 2
Target Group: Deck 1
When teleported here, transmit on: N/A
Teleport here when receiving on: N/A
Teleport to Target when receiving on: N/A
Visible In-Game: Yes
Step 2:
- Click on the Add (E) button or by clicking the “E” key on your keyboard.
- Click on the “Devices” button and click on “Camera View”.
- Place the Camera View device in the middle of the elevator.
Here is my example of the Elevator From Deck 1 to Deck 2:
Create Remaining Decks (Inside the Cruise Ship)
Create Remaining Decks (Inside the Cruise Ship):
Create the Remaining Decks including the Outer Deck and the Captains-Only Deck is the fifth step in making a Cruise Vacation Game on Gimkit Creative. Let’s get started on that.
Step 1:
- Click on the Add (E) button or by clicking on the “E” key on your keyboard.
- Click on the “Terrain” button and click on “Marble Stone (Dark)” and set it as the floor.
- Place the Terrain until there is enough space for the walkway to the cabins and other locations.
- For the wall, do the wall steps you did in “Create Deck 1 (Inside the Cruise Ship)”.
Step 2:
- Click on the Add (E) button or by clicking on the “E” key on your keyboard.
- Click on the “Devices” button and click on “Barrier”. You need a couple of these for Decks 2, 3, and Captains-Only Deck.
- Place the barriers near each other. These will be the cabins or staterooms.
- You can change the colors of the barriers. Make sure it is shaped like a rectangle when you resize it.
- Click on the Add (E) button or by clicking on the “E” key on your keyboard.
- Click on the “Devices” button and click on “Item Granter”. You need a couple of these for Decks 2, 3, and Captains-Only Deck.
- Place one item granter next to the closed barrier and adjust the settings like this:
Item to Grant: [Any Keycard]
Amount to Grant: -1
Grant Item when receiving on: N/A
Grant Strategy: Don’t Grant - Click on the Add (E) button or by clicking on the “E” key on your keyboard.
- Click on the “Wires” button and connect the button (output) to the item granter (input) and adjust the settings:
Button: Button pressed
Item Granter: Grant Item - To activate the barrier, click on the Add (E) button or by clicking on the “E” key on your keyboard.
- Click on the “Wires” button and connect the button (output) to the barrier (input) and adjust the settings:
Button: Button pressed
Barrier: Activate Barrier - To deactivate the barrier, repeat the previous step but this time make the barrier deactivate.
- To add the walls to the cabin, click on the Add (E) button or by clicking on the “E” key on your keyboard.
- Click on the “Terrain” button and click on the type of terrain you want to use and set it as the wall.
- Place the terrain around the cabin until it is completed.
- Time to decorate the cabin. You do this by clicking on the Add (E) button or by clicking on the “E” key on your keyboard.
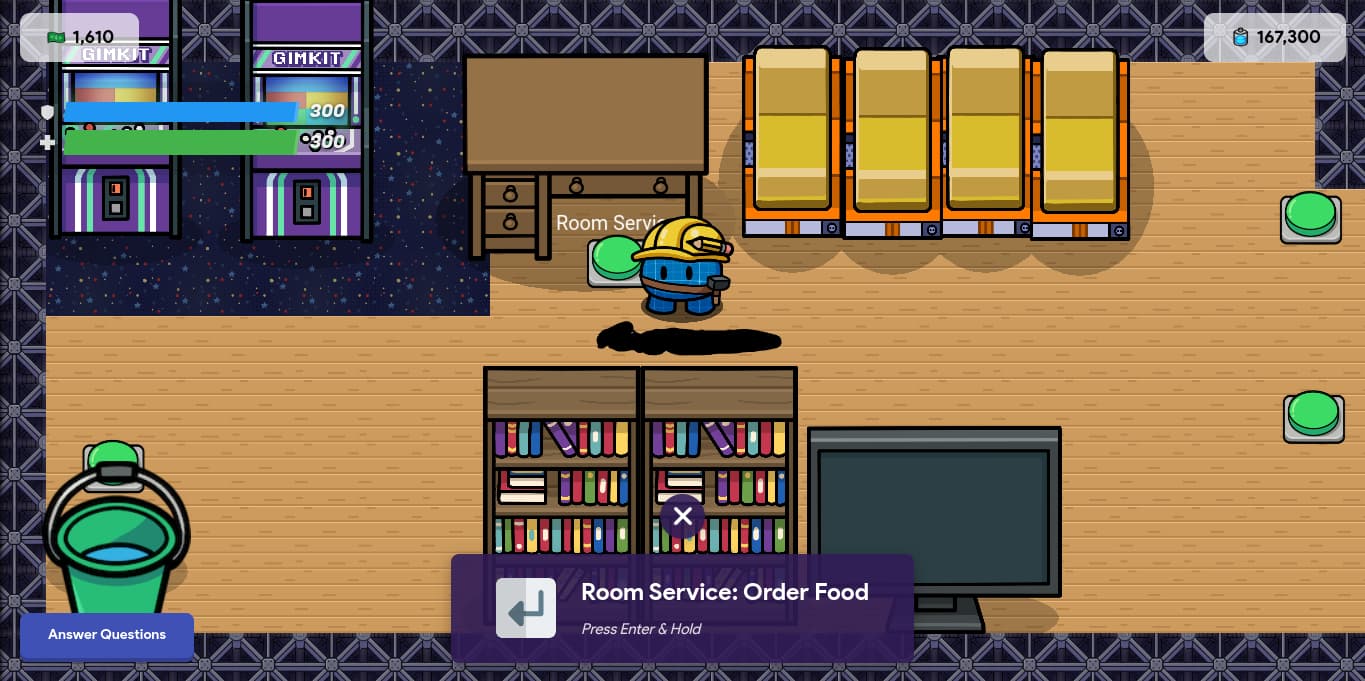
- Click on the “Props” button and click on the “bed” (You need 2-4 of these), you also need a table, a bookshelf, a TV, and an arcade machine or two (optional).
- Place these props and space them out evenly.
This is what a cabin would look like (I used the First Class cabin for my example):
Step 3:
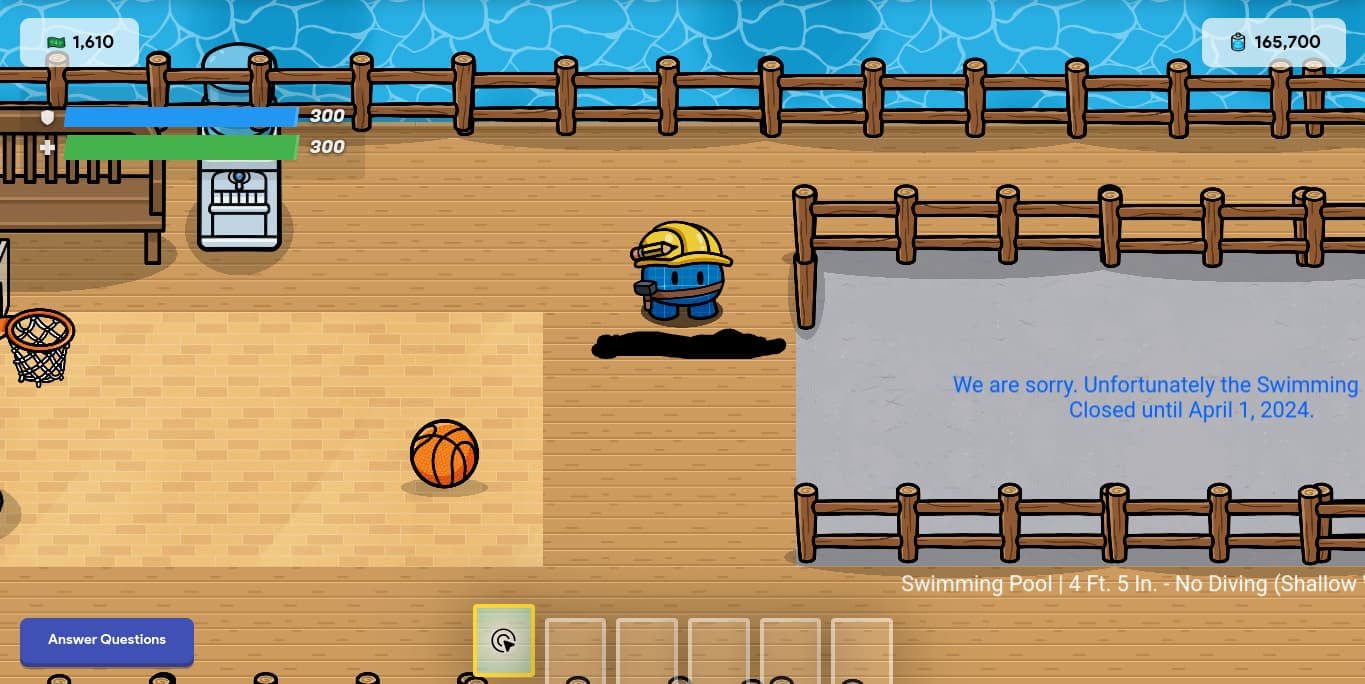
- No cruise ship is complete without an Outer Deck. Let’s make one now. To do this, you need to click on the Add (E) button or by clicking on the “E” key on your keyboard.
- Click on the “Terrain” button and search for “Boardwalk” or “Exposed Boardwalk” and set it as the floor.
- Place the terrain until there is enough space for all the Outer Deck activities.
- Click on the Add (E) button or by clicking on the “E” key on your keyboard.
- Click on the “Props” button and search for any fence (vertical or horizontal).
- Place the fences around the Outer Deck until the outer deck surrounding is blocked except for the entrance and exit of the Outer Deck.
- Click on the Add (E) button or by clicking on the “E” key on your keyboard.
- Click on the “Props” button and search for a basketball, basketball hoop, water dispenser, benches, and other beach related props.
- Place these props on the boardwalk of the Outer Deck.
Here is my example of the Outer Deck:
Step 4:
- To make the Deck locations such as a Spa or a Restaurant, you would do the same process just like you did the cabins and the Outer Deck, but do how you do the process (See Images for Clues).

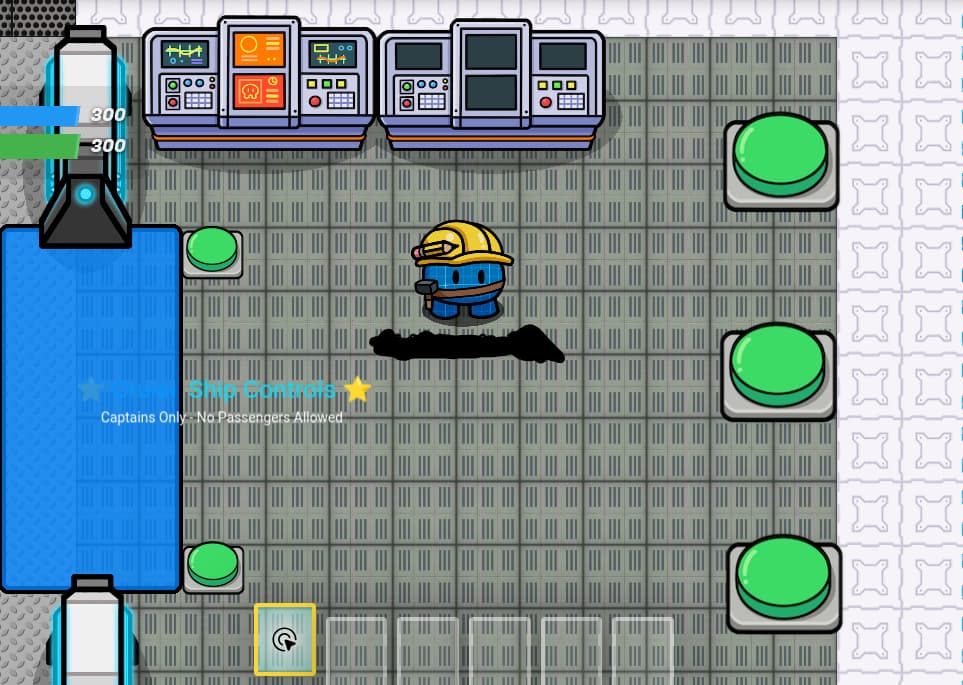
Step 5:
- To create the Cruise Ship Controls (Captains-Only), you would need to click on the Add (E) button or by clicking on the “E” key on your keyboard.
- Do the same process on the barrier you did when you build the cabins.
- Click on the “Props” button and click on “Space Barrier” (You need 2 of these) and “Command Table” (You need 2 of these).
- Place the props inside the Cruise Ship Controls.
- Click on the Add (E) button or by clicking on the “E” key on your keyboard.
- Click on the “Devices” button and click on “Button” (You need 3 of these).
- Place the buttons and configure the following settings for each:
Button Message: [Captain Announcement]
When button pressed, transmit on: N/A
Visible In-Game: Yes
Interaction Duration: 3 Seconds
Active On Game Start: Yes
Activate button when receiving on: N/A
Deactivate button when receiving on: N/A
Active Scope: Global - Now connect these buttons to the notifications by using a wire and adjust the settings for each:
Button: Button Pressed
Notification: Send Notification
Here is my example of the completed Cruise Ship Controls:
Create the Port/Island
Create the Port/Island:
Creating the Port or Island is the final part of creating a Cruise Vacation Game. Let’s build this tropical destination.
Step 1:
- Click on the Add (E) button or by clicking the “E” key on your keyboard.
- Click on the “Terrain” button and click on “Boardwalk” or “Exposed Boardwalk” and set it as a Floor.
- Place the terrain until it is long enough for the entrance of the port or island.
- Click on the Add (E) button or by clicking the “E” key on your keyboard.
- Click on the “Terrain” button and click on “Sand” and set it as a Floor.
- Place the terrain until it is big enough for the activities and stuff for the island or port.
Step 2:
- Click on the Add (E) button or by clicking the “E” key on your keyboard.
- Click on the “Props” button and click on any props that you’ll see on a port or island.
- Place the props until you think it is completed.
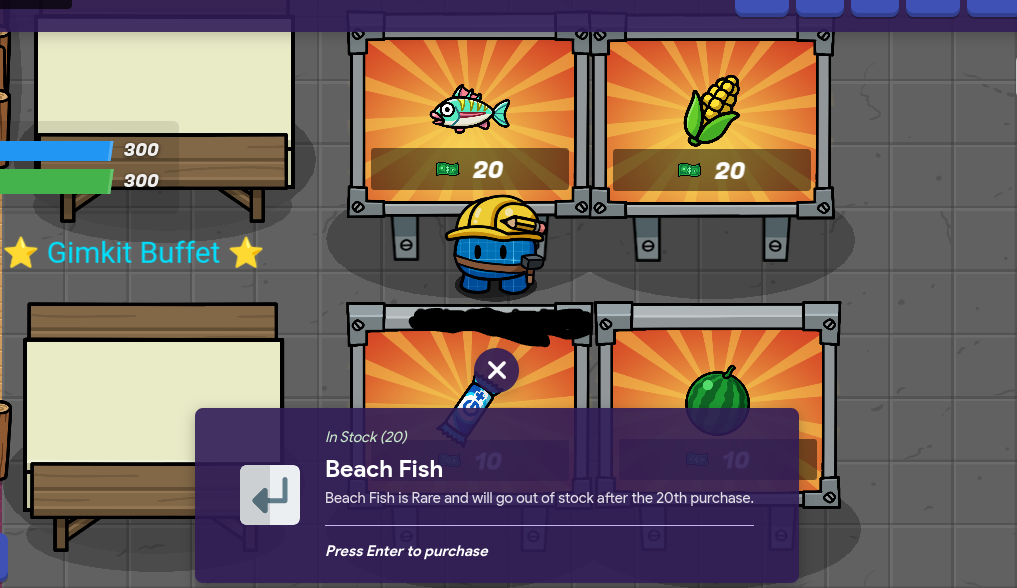
- Now add everything else like the vending machines for the food.
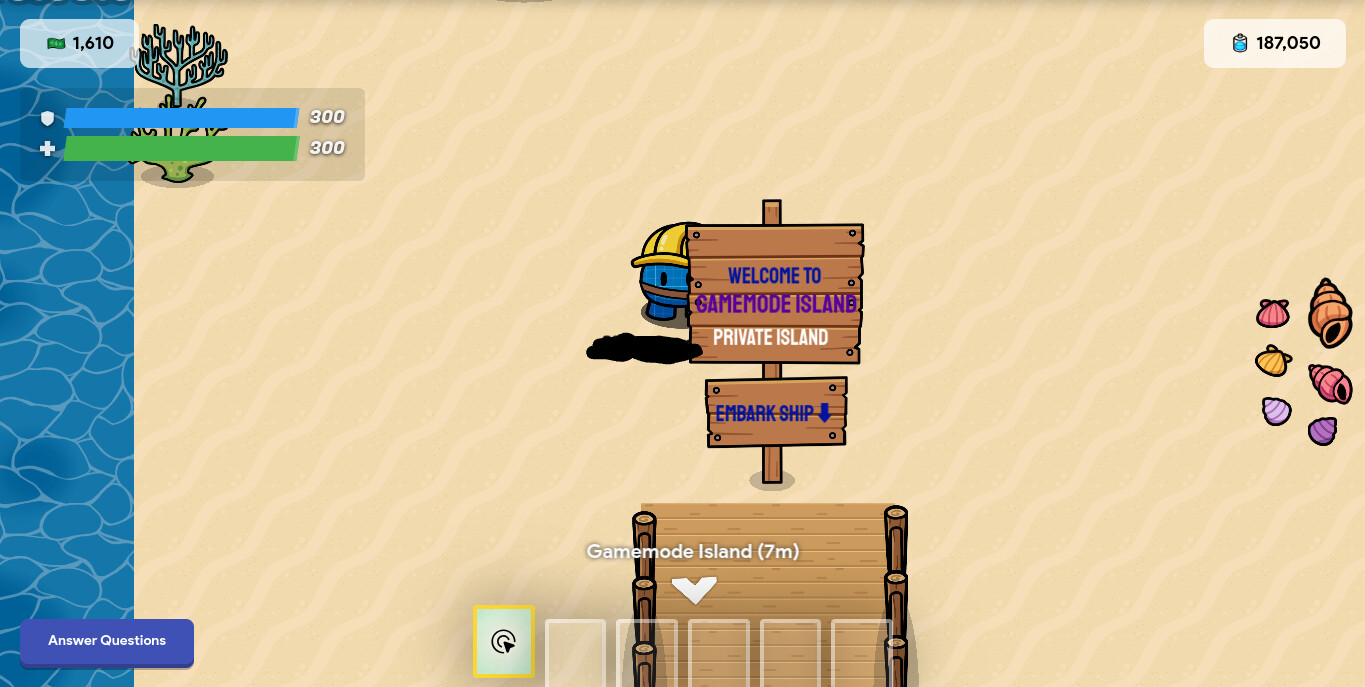
Here is an example of the Port/Island I made for Gimkit Cruise:
Tips on Creating a Successful Cruise Vacation Game
Tips on Creating a Successful Cruise Vacation Game:
- Allow players to party in the Cruise Club.
- Allow players to discover at an island or port.
- Offer various food in the restaurants in the cruise ship and the island or port.
- Allow players to explore and take a vacation on a small, medium, or large cruise.
- Allow players to take turns switching roles in a Cruise Ship.
- Run events for players to try seasonally like during Halloween or Christmas.
- Remember, these are only suggestions. You are welcome to be inspired by my game or create a new cruise made by you.
Poll on the Difficulty it took you to make a Cruise Vacation Game
What difficulty did it take you to make a Cruise Vacation Game on a scale of 0-10. 0 is for Very Easy and 10 for Dead Meat (Ultra Hard).
- 0/10 - Very Easy
- 1/10 - Super Easy
- 2/10 - Easy
- 3/10 - Easy, but not too Easy
- 4/10 - Easy-Intermediate
- 5/10 - Intermediate
- 6/10 - Intermediate-Hard
- 7/10 - Hard, but not too Hard
- 8/10 - Hard
- 9/10 - Super Hard
- 10/10 - Dead Meat
 (Ultra Hard)