THE UNDERSCORIAN METHOD OF ANIMATION: 
WIKI EDITING RULES
- Please edit with permission- and tell me what you are adding/editing.
- Only add things that are relevant and helpful.
EXTRA NOTICE
First, this is a simple mini guide, so feel free to ask questions if you need more in depth explanation. Second, I would highly appreciate and am open to ratings, but please explain what I should improve instead of just giving me a number, or, show me an animation you made with this system!
NOTICE
![]() [ First, before I begin this guide, this is not a duplicate. This is a certain method I use of making an animation, which there is not a guide about. ]
[ First, before I begin this guide, this is not a duplicate. This is a certain method I use of making an animation, which there is not a guide about. ] ![]()
INTRO
This way of making an animation, we will give each frame an identity. If you are to add multiple animations in your game, you may add a [special character/letter] in the channel of the frame NUMBER, however, if you are to make one animation in your game, you can just do the frame number for frame identification.
GUIDE
Step 1
First, create a trigger loop with the following sub-steps:
-
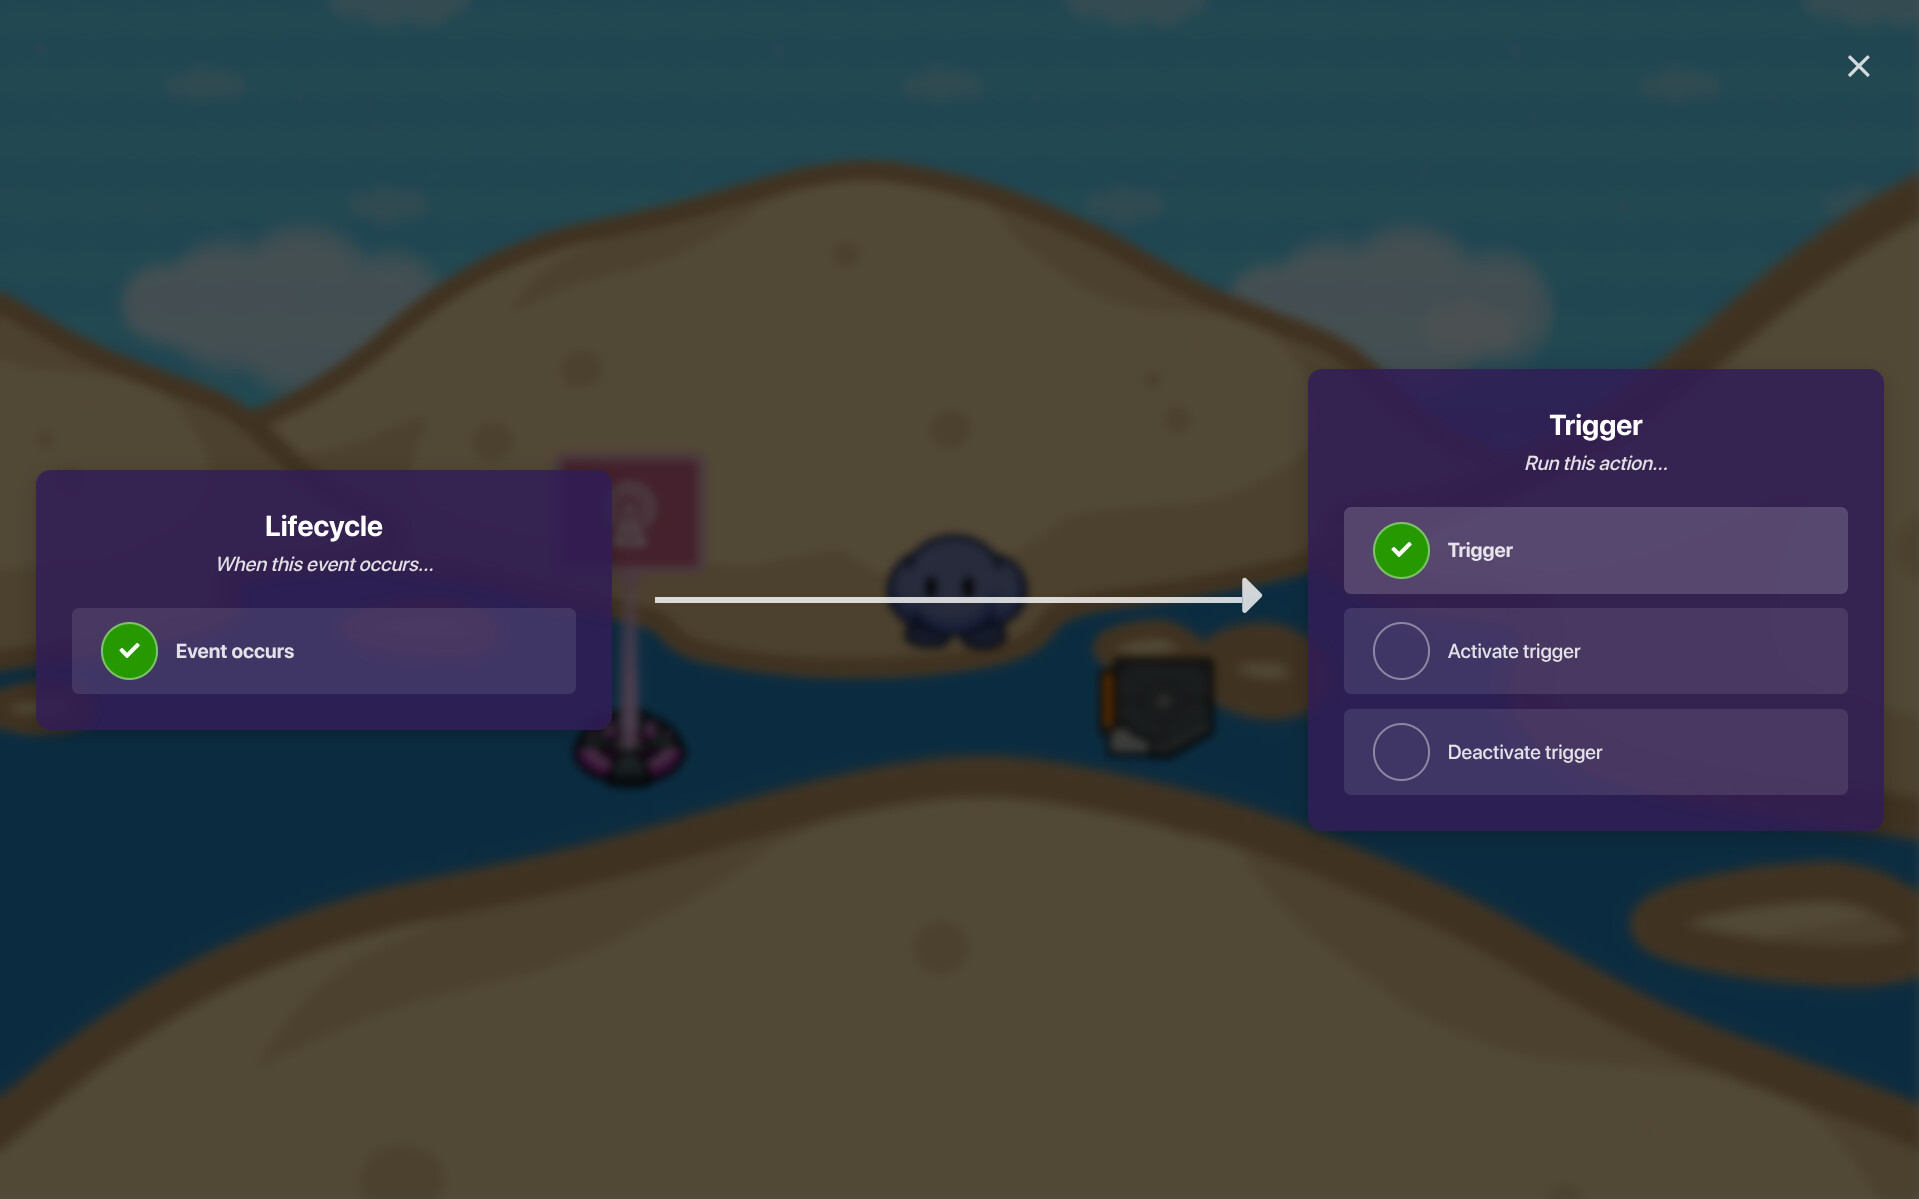
Place a lifecycle. Set the type to
game start. I recommend having the channel broadcasting set togstartfor a short abbreviation, and I will refer to that channel throughout the guide.
-
Place a trigger, and wire it to trigger from the lifecycle, and broadcast
trigger2, and set it to trigger ontrigger1.
-
Place a second trigger with the settings shown:

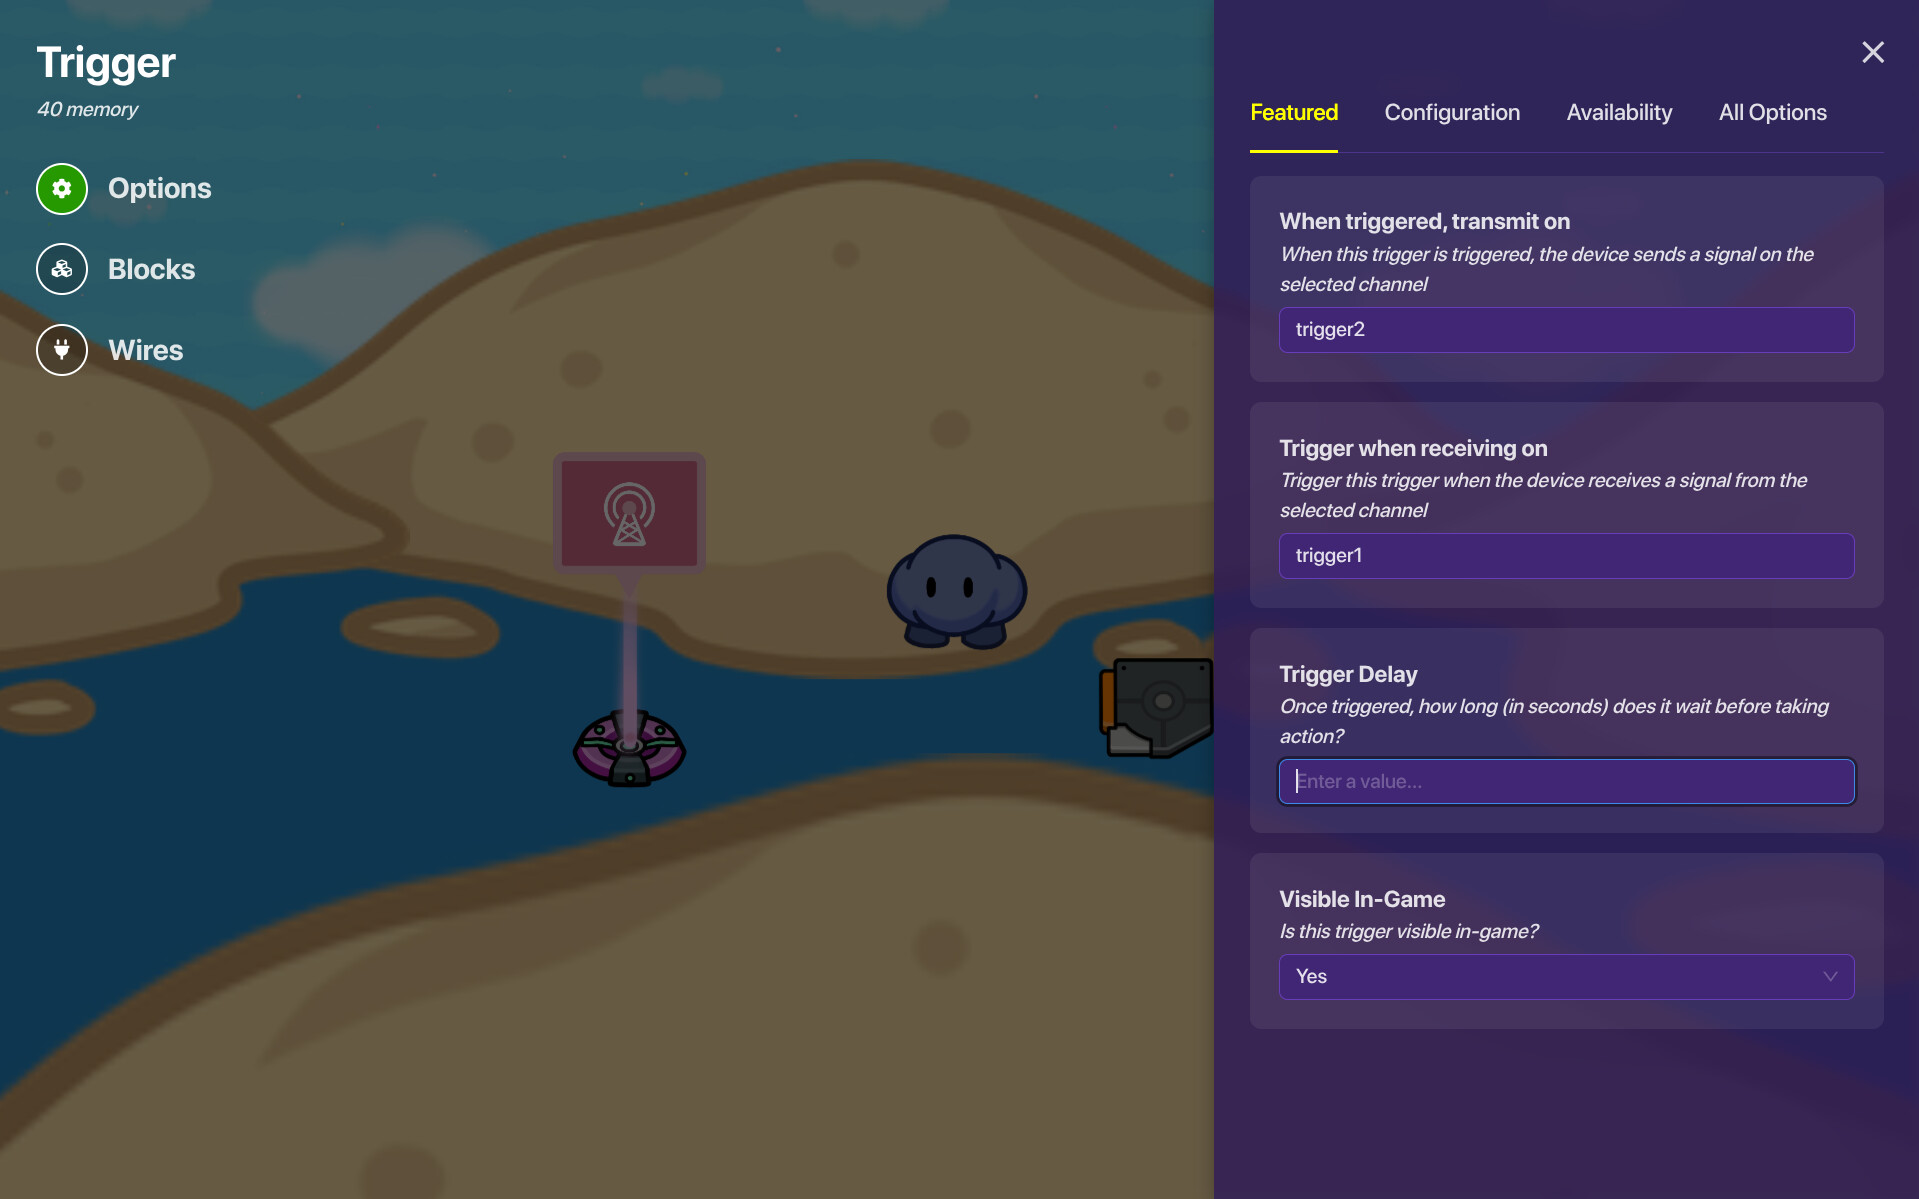
- Delay: (A value from 0.01 to 1 for the frame rate of the animation)
- Trigger when receiving on `trigger2`
- Broadcast `trigger1`
Now, your loop is functional.
Let’s move onto step 2!
Step 2
- Place a counter with the following settings:
- Count when receiving on `trigger1`
- Update property: true
- Property to update: `frameIdentity`
- Ya’ guessed it. Get a property, and have the name of the property
frameIdentity.
The settings will be:
- When property changes... broadcast: `setFrame`
Nice. You’re done with this sub-step.
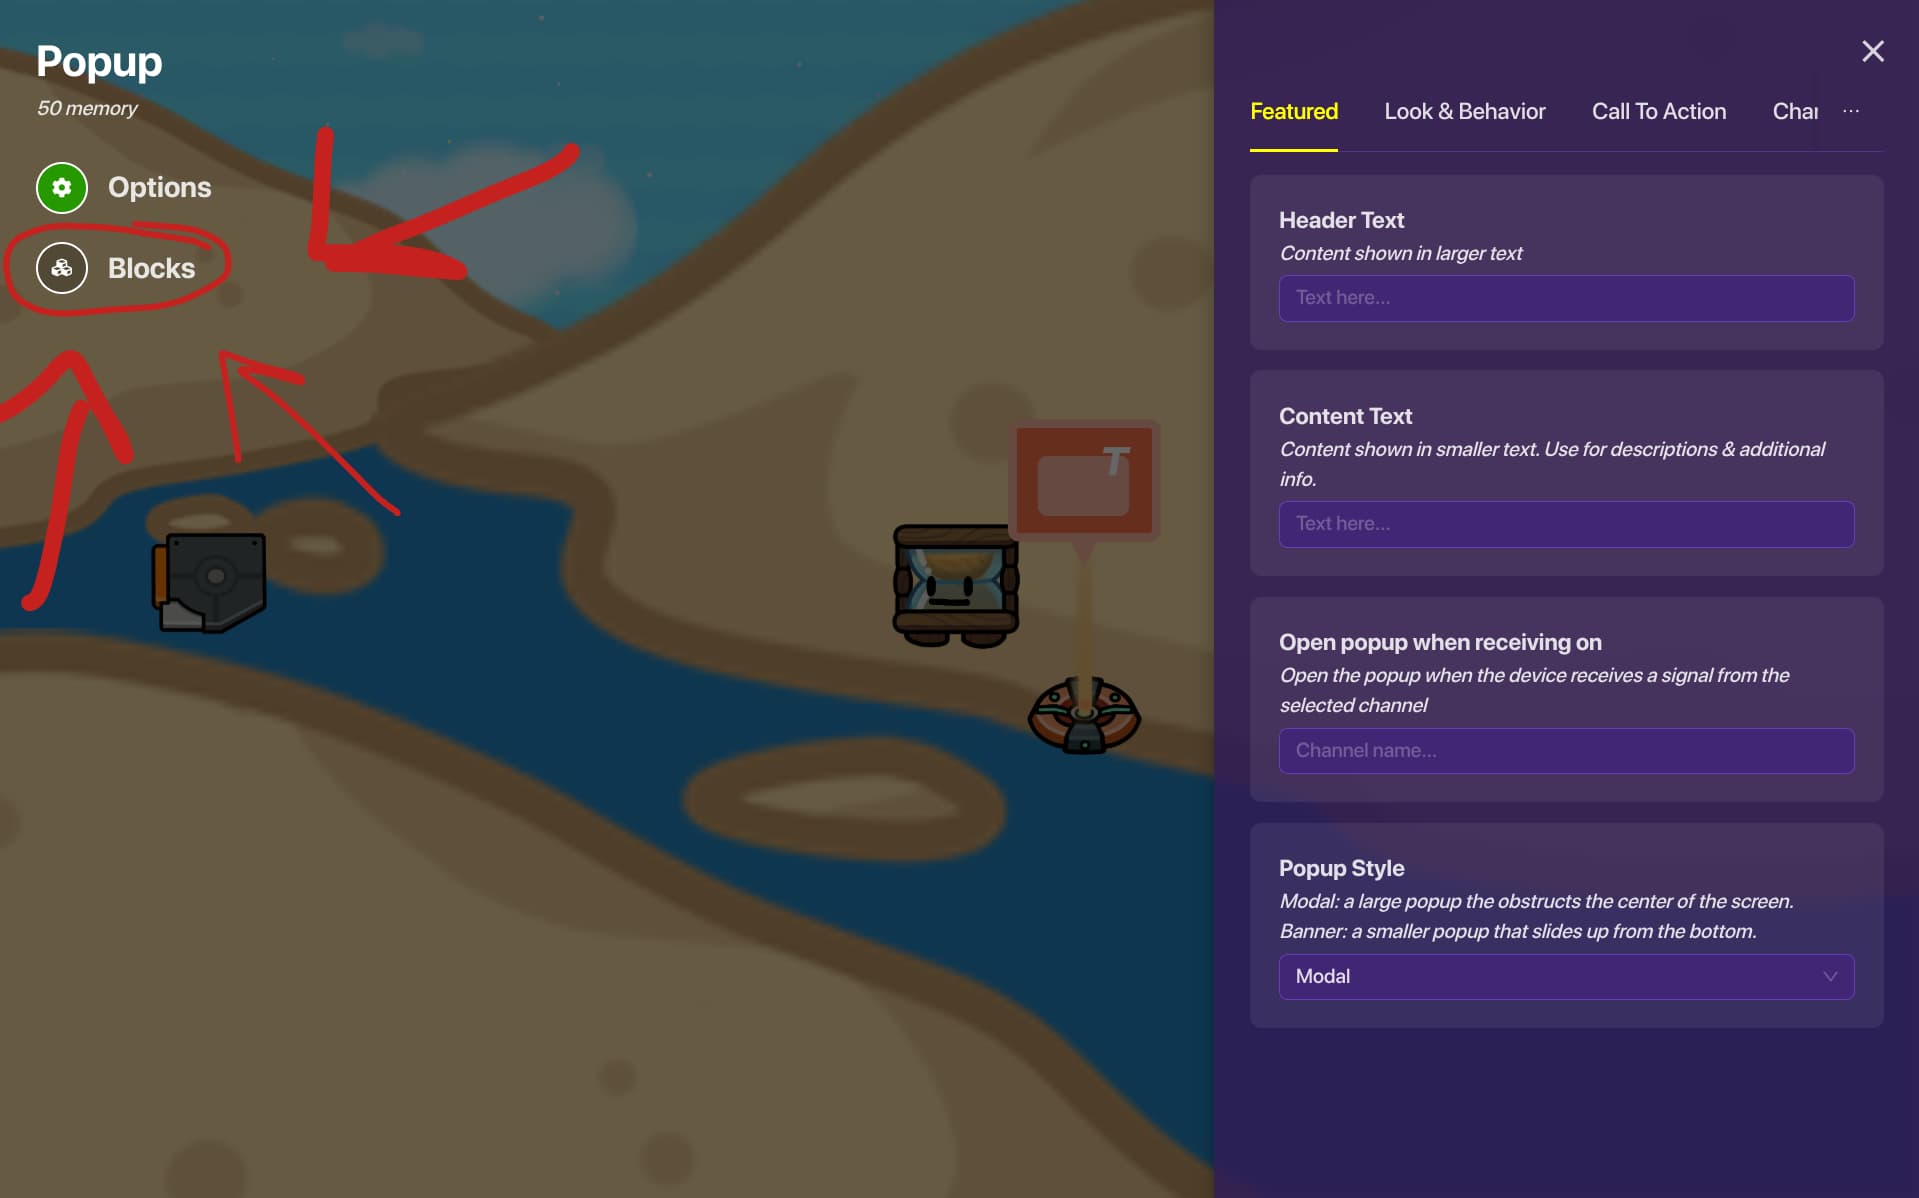
- You’ll have to do block code at some point in this guide (lol) and that time is now, this step of the guide. Now, pictures are the most helpful for this, so, the block code is self-explanatory. HOWEVER, first, get a popup device… but don’t do anything! This is for the block code.
How to get there? I hope you know, but here’s a lil’ instruction drawing:
The block code is quite simple. First, create a new block that runs onsetFrame.
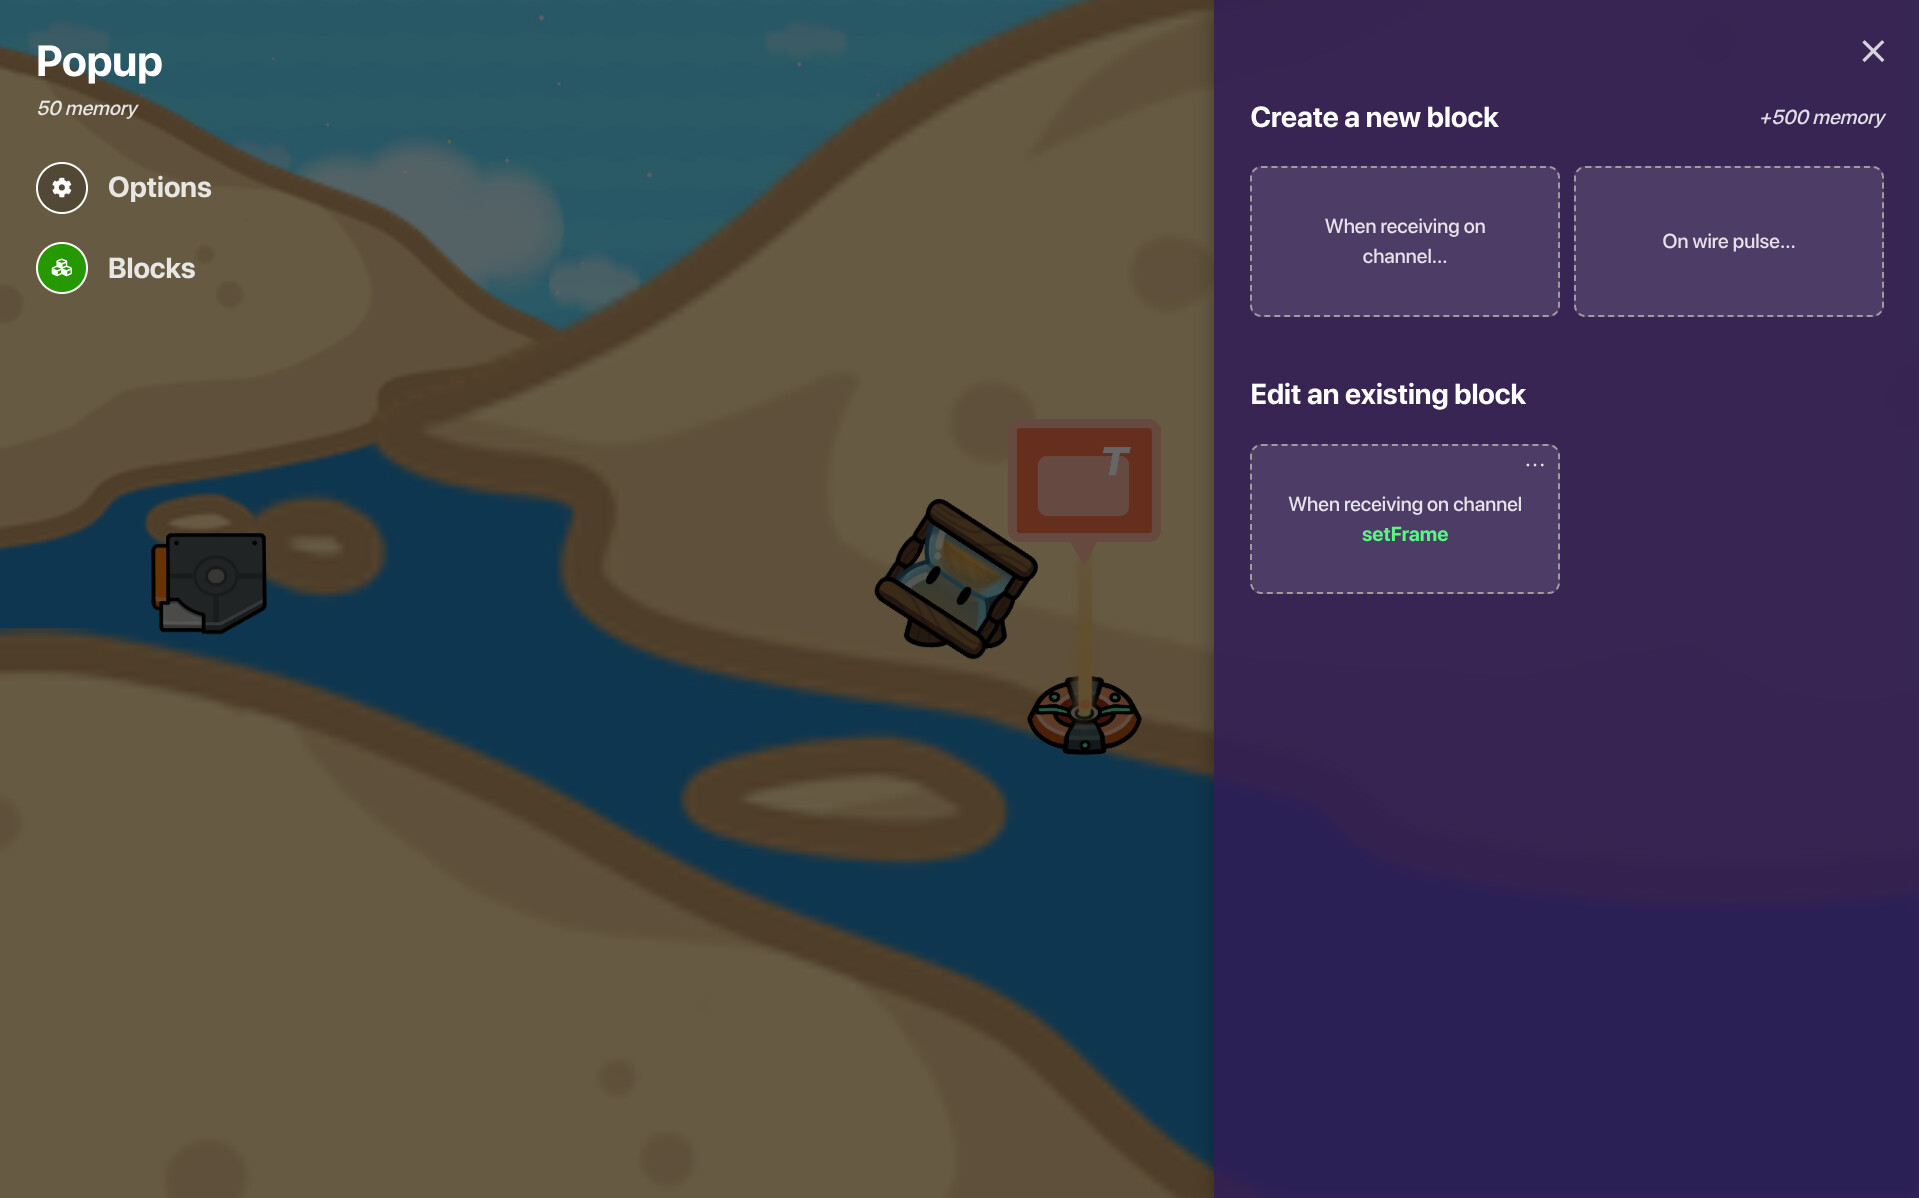
Now… for the block code.
BLOCK CODE:

BLOCK CODE EXPLANATION
So… what this does is broadcasts the current frame NUMBER. So, this is a pain, but a lot less of a pain than other animation methods, you’ll have to set the activate/deactivate setting for each frame for EVERY item in each frame, which sounds like a lot, but it is quite fun to do. But, for example, if your prop were to active/deactivate and then appear a little bit more the right, you’d have to do this:
## Prop 1
-Activate when receiving on.... [frame]
-Deactivate when receiving on.... [frame]
## Prop 2, appears in a later frame
-Activate when receiving on.... [frame]+[whatever number after]
-Deactivate when receiving on.... [frame]+[whatever number after]
Now, a common mistake I made was making two frames activate/deactivate on the SAME frame, so try to avoid that the best you can… it’s a pain if you made an animation and have to go back and find out what you messed up on.
