If you’re like me, you love almost every installation from the game series The Legend of Zelda. I always enjoyed the mood and energy of the classic dungeons, so I thought I would give my experience on making one.
My inspiration:
This classic guide from @Wumpus that I always thought was the best thing since sliced bread:
The Legendary Dungeon Crawler Guide
A room from one of these games:
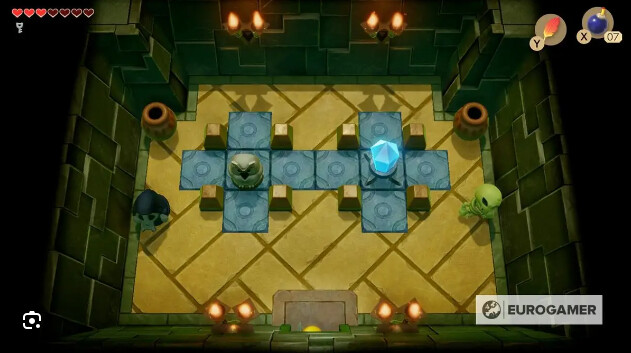
(Credit to the website Eurogamer)
Part One: Deciding the Theme
Your dungeon has to look cohesive to really immerse the players. Before you begin building, decide on a theme. In this guide, I will be using green dungeon walls.
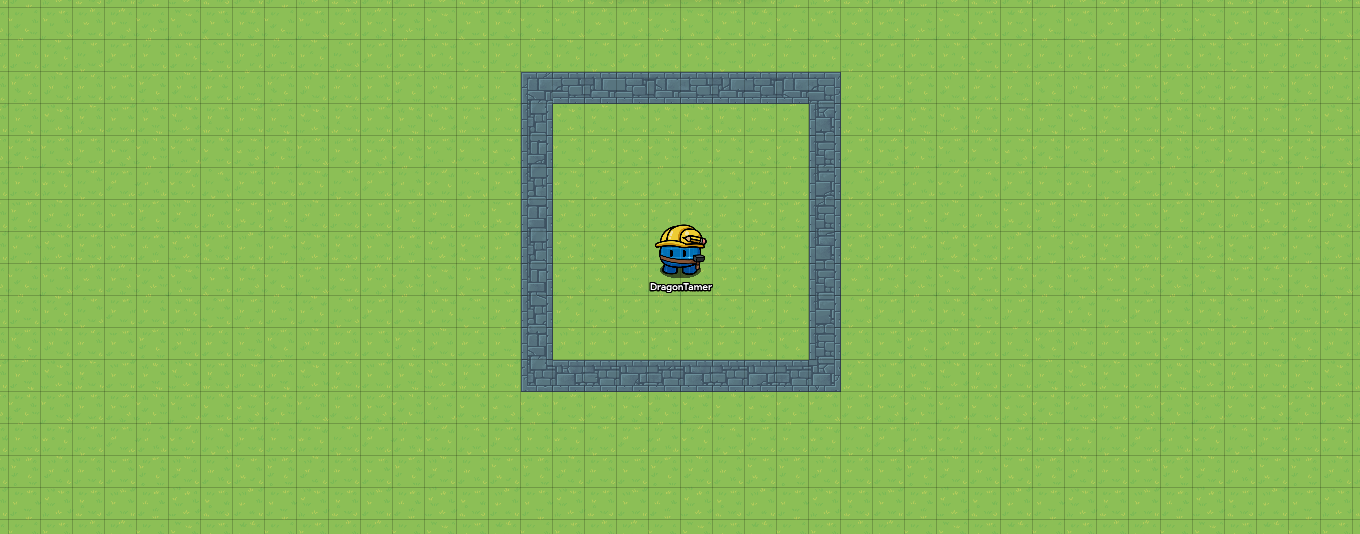
Part Two: Making the Frame
-
This guide uses a sort of modular room design. I reccomend a size of an 8x8 interior, making the walls 10x10 per room.
-
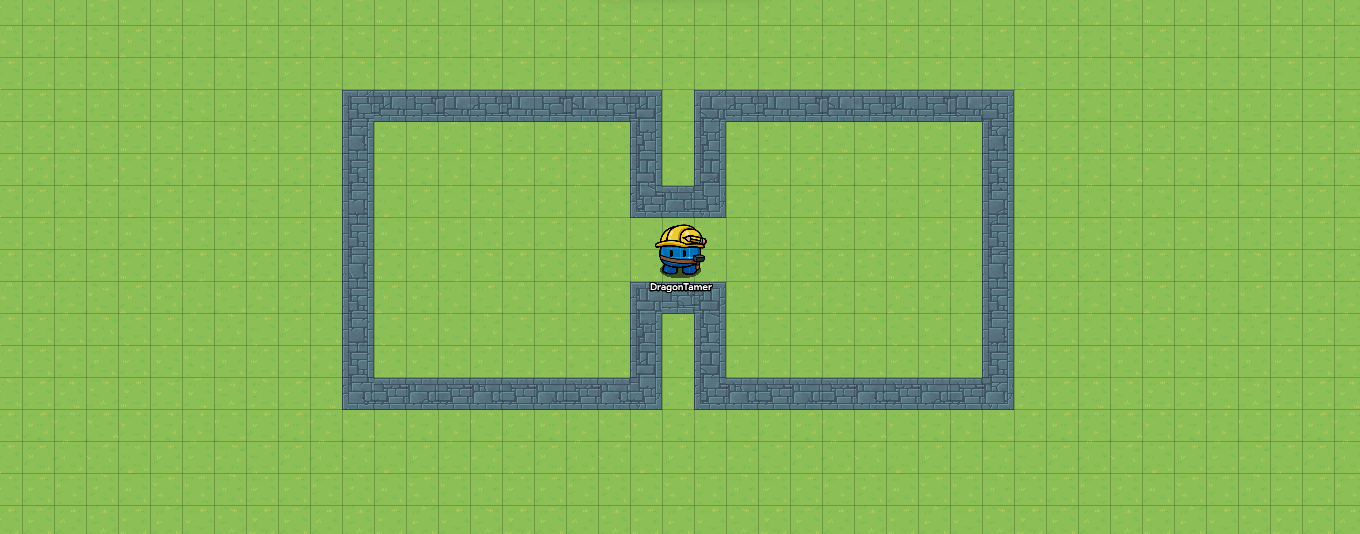
You’re probably thinking, “Well how do I get in?” This is when you make another room and insert a hallway.
-
Repeat this process to make as many rooms, hallways, and more as you want.
Part Three: The Puzzles
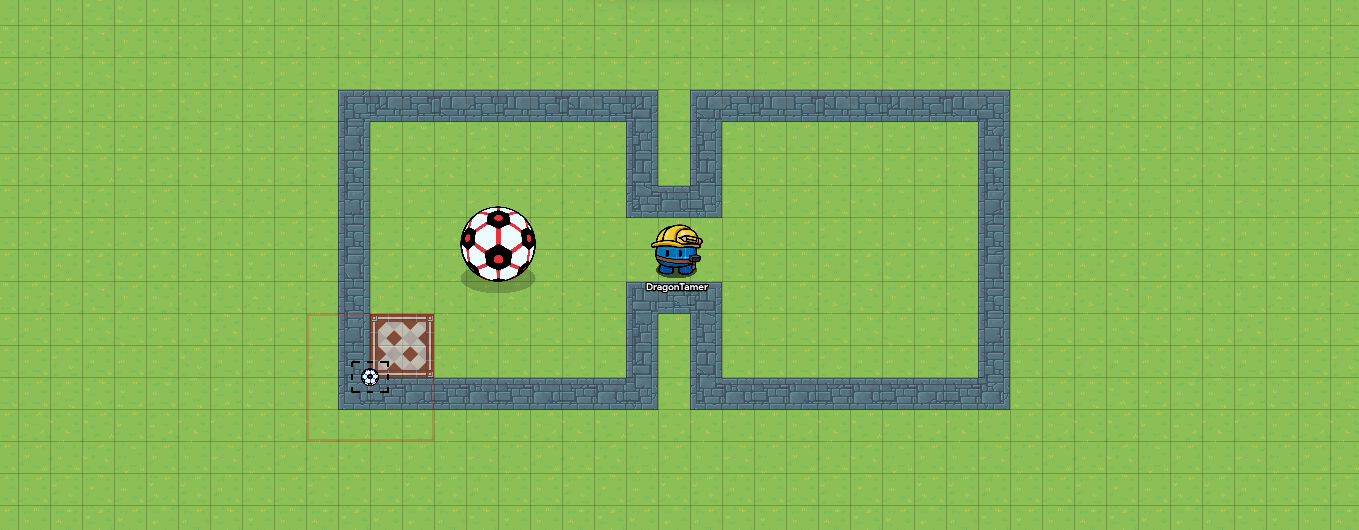
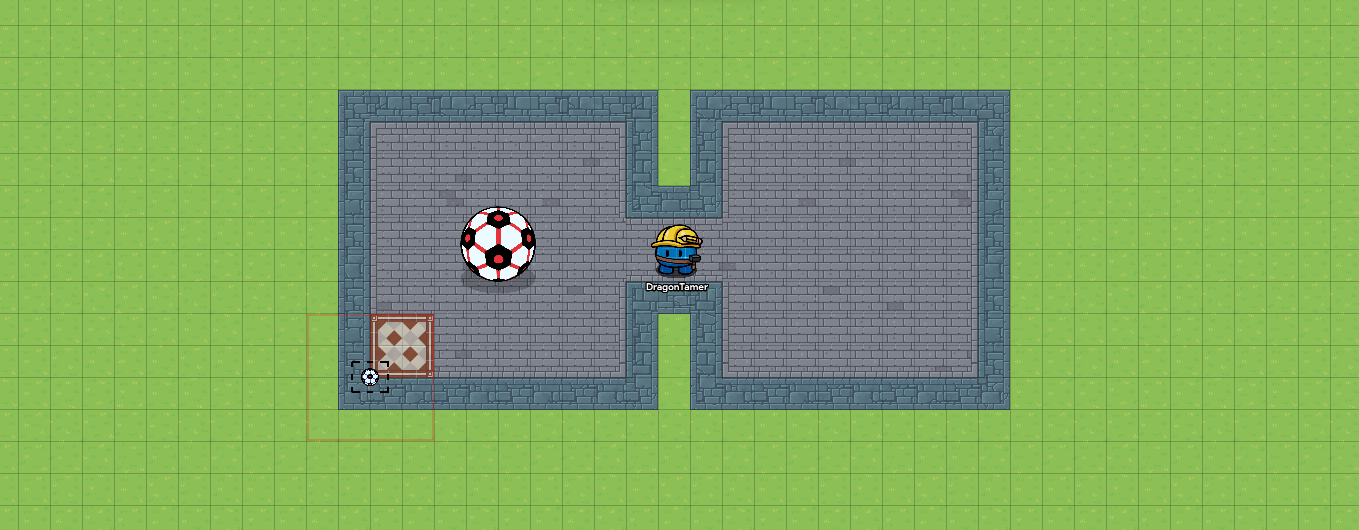
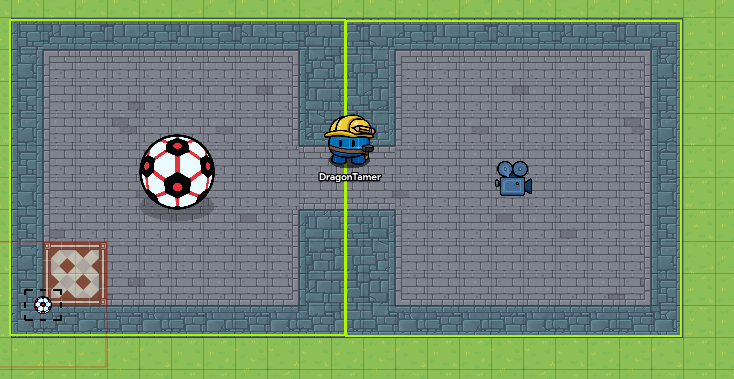
- These games are designed and played around puzzles. Here’s an example of a simple boulder-rolling puzzle.
1a. Give them a way to get a weapon. This can be a blaster, slingshot, whatever. I like hiding them in barrels that have a button. When you press the button, it deactivates the button, hides the barrel, and gives them a weapon. NOTE: Set all scopes to player with this.
1b. Decide where the boulder will go. Then mark the area with some terrain. I like castle tiles.
1c. Make a blastball that is the same color as the target tiles, and put an invisible goal over the tiles too.
1d. Wire the ball capture zone to whatever you want to activate!

Part Four: Doors
- Blocked doors are essential to this game, requiring players to find a key or solve a puzzle to continue. These are shockingly easy to make.
1a. For a keydoor, you need a barrier, button, checker, and item granter.
1b. Set the barrier to fill a doorway. Then put the button under it and make it invisible.
1c. Wire the button to the checker, with the checker set to see if the key item is greater than zero. If it is, than open the door(deactivate barrier) and give them negative one of the key item.
Part Five: Polishing
-
After all this, you hopefully have all the core mechanics in your dungeon and it is playable. However, it probably looks pretty bad at this point.
-
Floors.This is really easy: just grab a floor that makes sense and fill in all the areas.
-
Already this is a huge improvement, but we can make this better. Camera Zone Time!
-
Place your camera zones so that they cover all of the room and halfway across each hallway.
-
Fill in any missing areas in your camera zones, and you’re done!

Final Notes
Darkening the area
If you cover the whole dungeon with a black barrier, than you can cover the whole dungeon in a removable darkness! Note: do this last, because it becomes a pain to work with.
A slightly different floor
(suggested by @gimmaster12345)
If you are using layers or not, you can make the floor not have sharp edges like mine by placing it on the same level as the walls or building it underneath the walls, as both work.