Just like Santa, I can see if you’re editing my wiki, so don’t
[Unless it’s for grammar (I know some grammar in here is wrong)]
Let’s start off by me saying,"

welp."
- 22 properties
- 26 Triggers
- 20 tall whiteboards (Now dark red)
- 4 barriers
- 1 Lifecycle
- 20 Counters
- 20 Teleporters
Item total: 93, Memory: about 16%, Block code: 837 pieces (Probably could be somewhat simplified, to use less memory), averages 32 block code per trigger.
That sumarizes this guide thank you for reading and see you in another guide. Bye.
NO, it’s more complicted than that because we forgot that there are words in block code so get yourself ready for the deep dive of somewhere outta an ocean… How Move Tetris Pieces!!!
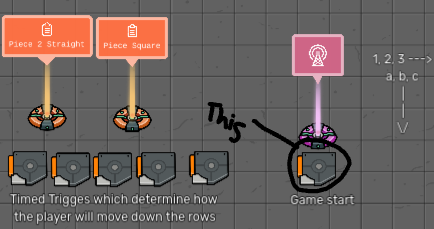
Yes, I figured out how to move simple pieces in a 4 by 5 area. So far there is a 1 by 2 piece and a 2 by 1 piece. I plan on making the Tetris disappering affect next.
Here is a video that should work, tell me if it doesn’t (Sorry for the lag, not high quality at all):
https://www.canva.com/design/DAGBdDruu7g/0AQ-ADQRjwqrkVstOrrQvg/edit?utm_content=DAGBdDruu7g&utm_campaign=designshare&utm_medium=link2&utm_source=sharebutton
Now excluding all stupidity click this and you can copy everything here into your game. I’ve also decided to explain how it works so you can learn, too.
The actual guide
I’ve provdided the materials above in wanting to save a few lines on this section. Parts of this are simple, but annoying. For example, you have to go into every Trigger to rename its block code. For now we’ll start simple and get to the end in the end.
Properties and Counters
Properties and Counters
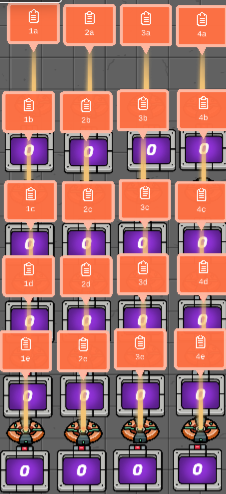
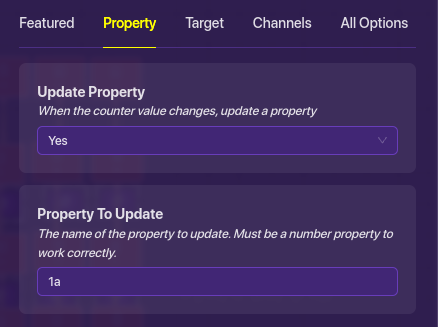
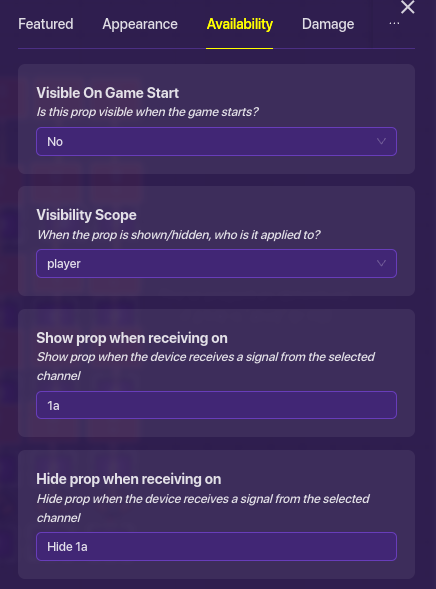
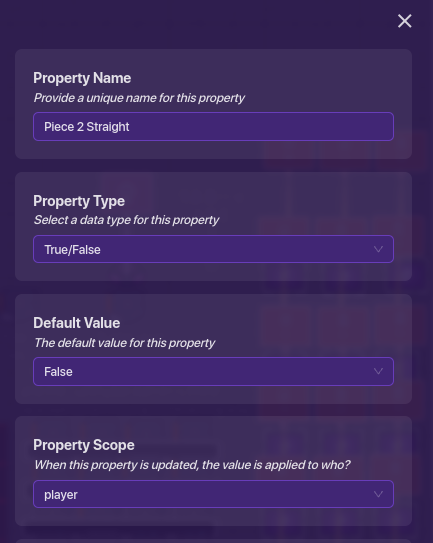
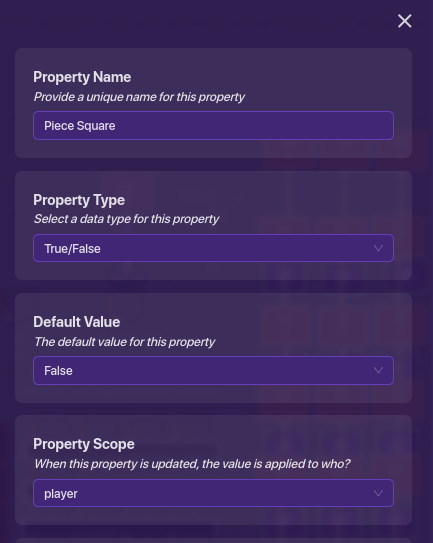
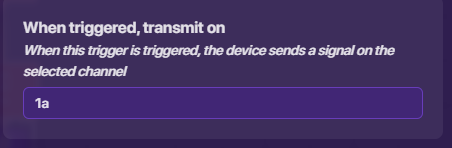
This is what it’ll look like in the end, if you go up to my picture it’s the area to the right. The properties and counters record if a tile is activated or not. For example, if you activated the Trigger 1a it would increase the counter 1a making the property 1a less than the Counter. This is what you put into the Property:

Now I’m not gonna post 20 pictures just for each one, so if your property for a tile on the right make it 2 instead of 1, or 3 instead of 2, or 4 instead of 3, and the other way around. If you want it to go down then make it “b” instead of “a” and “c” instead of “b” and so on, and backwards as well. Nothing else changes thuogh.
Now for the Counter:
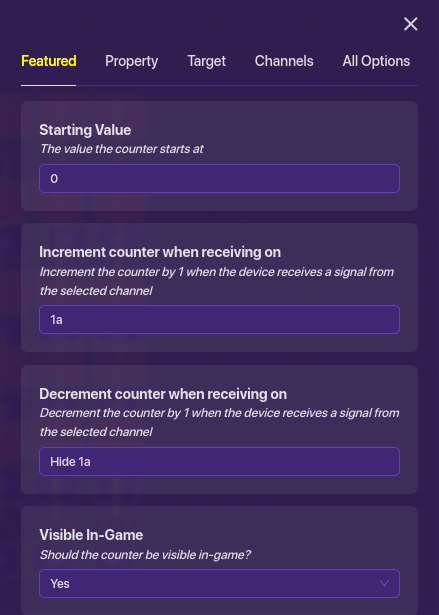

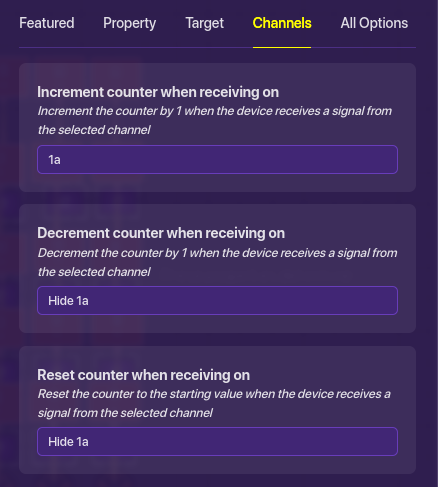
Now the same rule applys to the Counters as well as the properties, if you go right increase the number, and if down increase the lettter. Remember to keep the same Counter and Property number and letter. Now that was a warm-up.
Tetris Tiles
Tetris Tiles
Like in my last guide get a tall blackboard prop and color it dark, I did red. The tiles ares simple, just remember to keep what number and letter it is:
Game Start Collection
Game Start Collection
For this specific part of the guide there are a few things that you need for this:
- 1 Lifecycle
- 6 Triggers
- 2 Properties
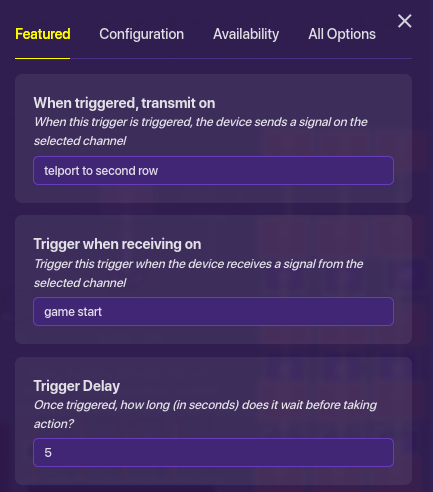
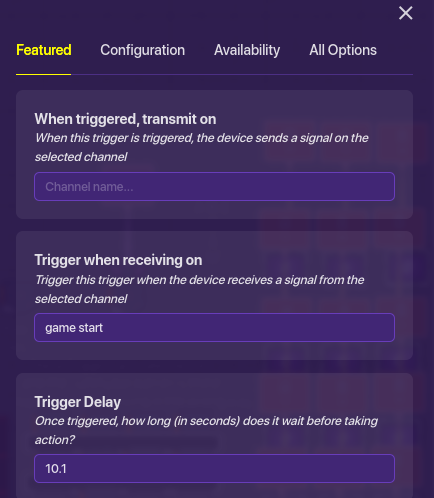
What this will do: This will allow players to be teleported to the next row and allow the Tetis pieces to be randomly selected. First we’ll start with one Trigger:


Then the Lifecycle: On game start transmit on “game start.”
Next the Properties, these will determine which Tetris piece has been selceted:
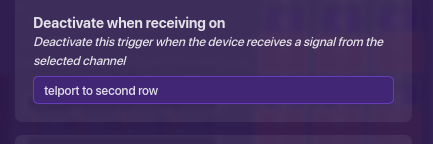
Finally the last five Triggers, these are what teleports the player down the Tetris board:
First Trigger:

Second Trigger:
Third Trigger:

Fourth Trigger:


Fifth Trigger:


That concludes that. You could simplfy some stuff one the 5 Triggers, but I haven’t, so tell th simplier version if you do it. I’ve worked on this for a while and just wanna get to the next section of the project. The best way to do something like this is to divide it into parts.
The Main Triggers and Teleporters
The Main Triggers and Teleporters
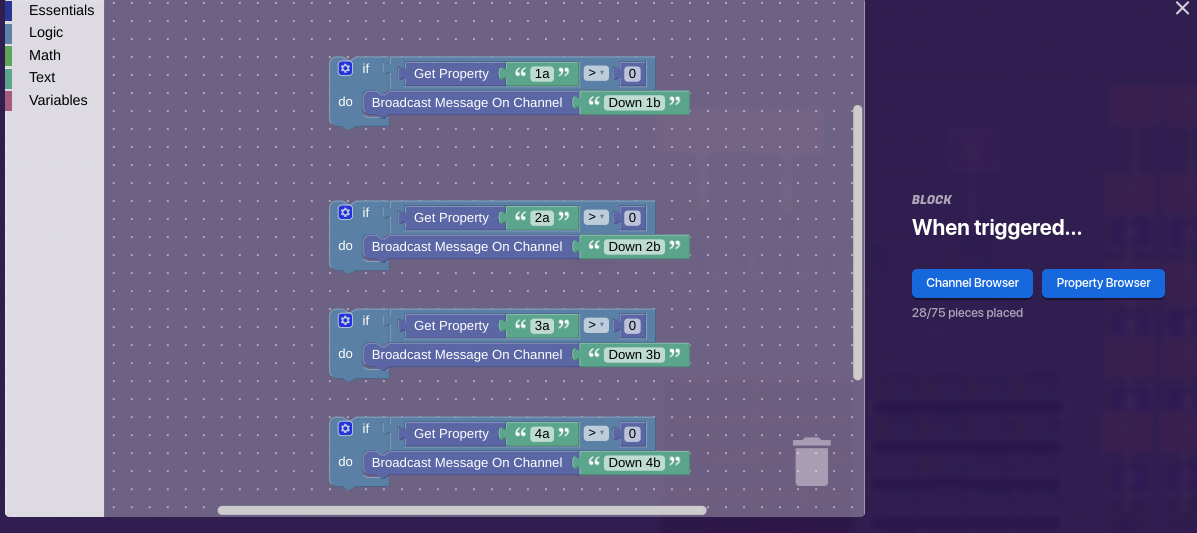
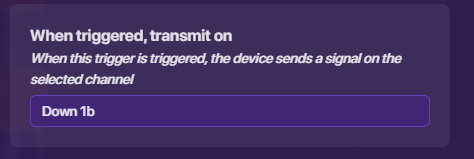
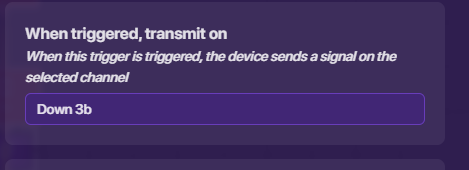
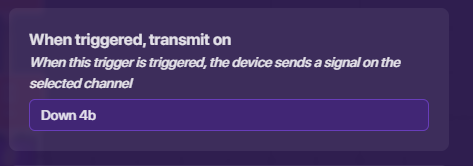
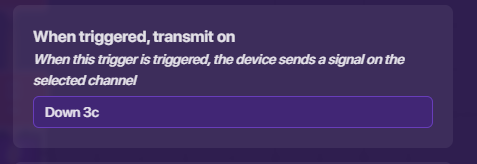
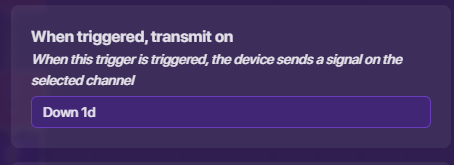
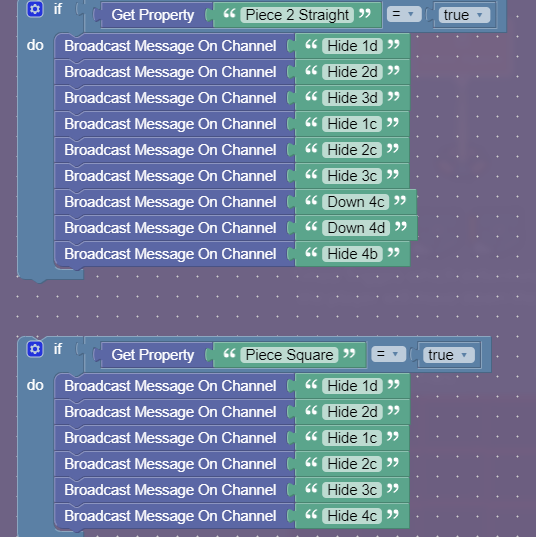
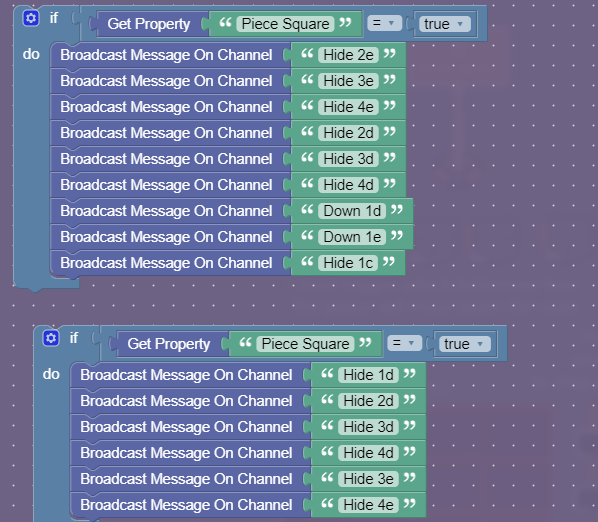
This part is the part of the guide of which I wish there were an easier way to do, but for now I’ll list every Trigger in it’s own section with it’s own code. This will help compact the guide. What these Triggers do is move the Tetris pieces in groups depending on what’s active and not. First let’s do the teleporters (There’s no teleporters for the first row):
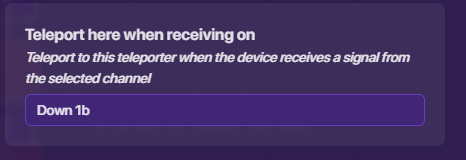
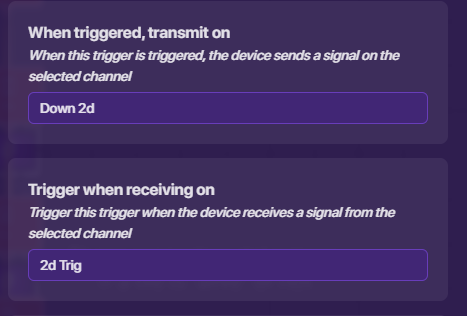
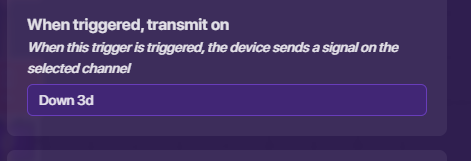
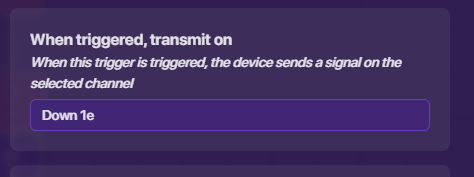
For whatever number and letter tile you have put this into it: Down (whatever it is).
Example above.
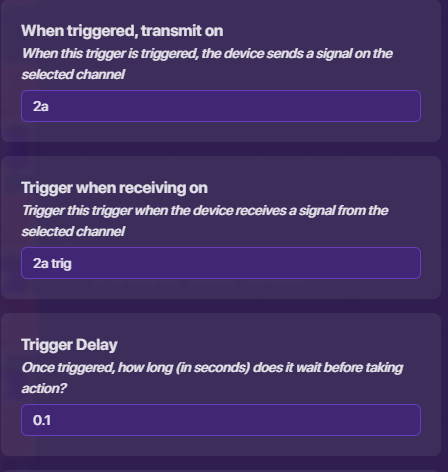
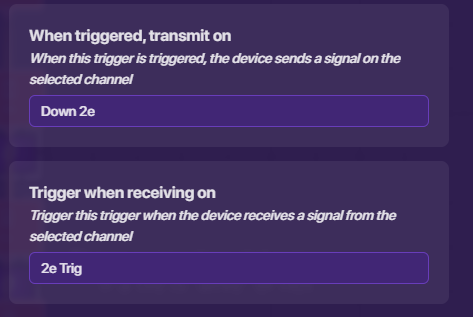
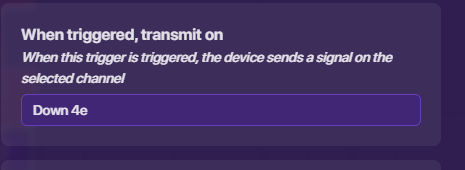
Now for all 20 Triggers:
“a” row

2a Trigger

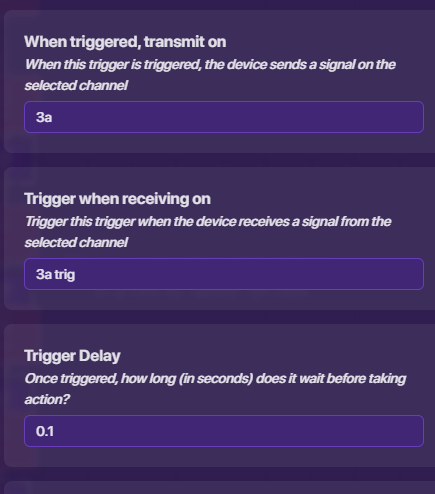
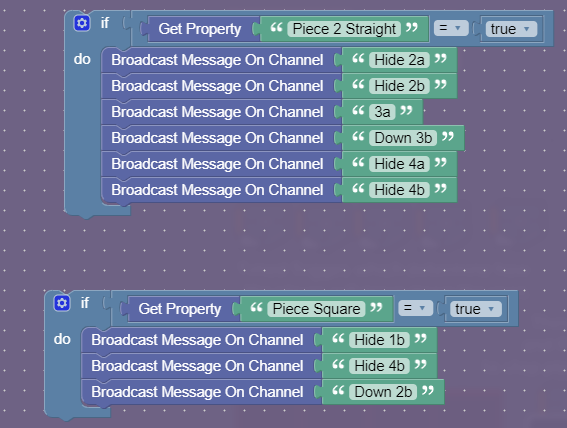
3a Trigger
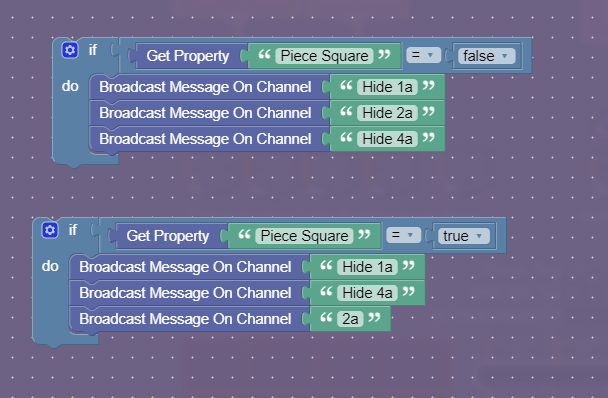
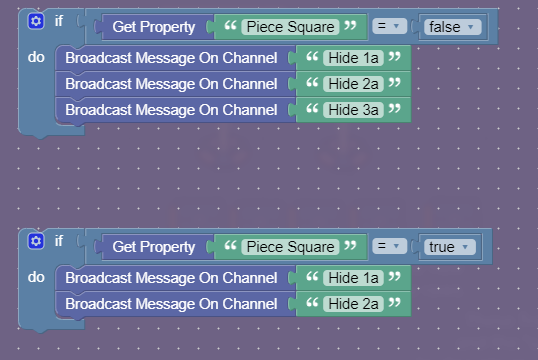
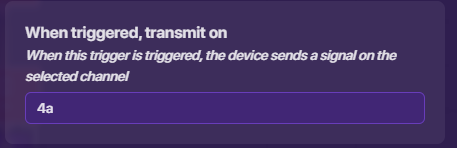
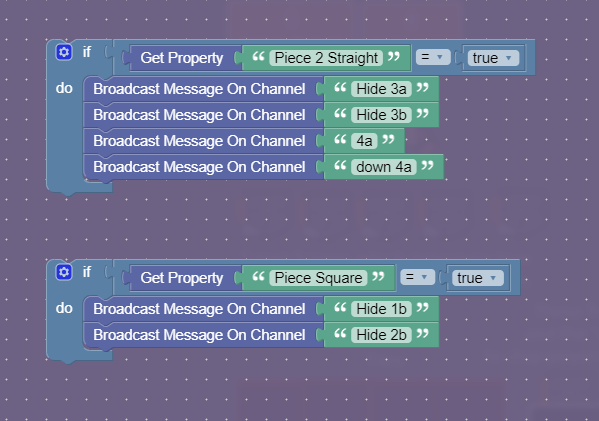
4a Trigger
“b” row
1b Trigger
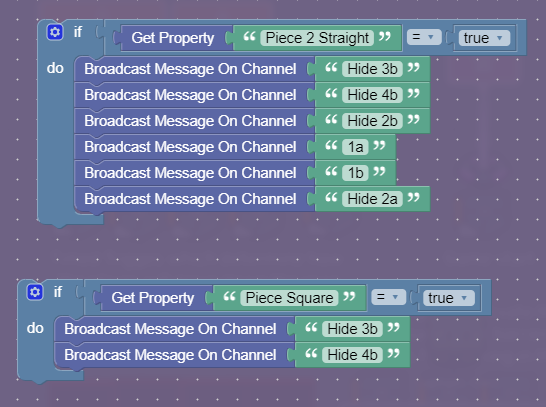


3b Trigger
4b Trigger
“c” row
1c Trigger


“d” row


“e” row


Outro
So far I’m proud of what I’ve done and will do, but there are a few things I’ve reliazed that may take forever to do:
- Turn pieces
- Push pieces down with “s” key (That’s the lowest on the list)
- Continue to make every possible combination possible
I will try my best to do all of these, but in my next guide I will try to show you how to make the score and Tetris piece disapperance. For now good bye, and thanks for reading. (I hope you did)
Remember tell me anything you’d like to see improved, if your having trouble, if your confused, or if there’s a better way I could’ve made the guide. For now remember to like, subscribe, and Bump one of my guides. (Don’t bump the other Tetris guide now, it’s outdated)
“Pound it, noggin’, see ya”
- 1/10
- 2/10
- 3/10
- 4/10
- 5/10
- 6/10
- 7/10
- 8/10
- 9/10
- 10/10
- 1/10
- 2/10
- 3/10
- 4/10
- 5/10
- 6/10
- 7/10
- 8/10
- 9/10
- 10/10