A lot of times, you have to use repeaters, whether it is to check if you have a certain amount of an item, a spawn pusher, an in game clock, regenerating health, lasers, or other things, repeaters are useful in Gimkit Creative Mode Maps. To my current knowledge, there are three types of repeaters…
-
Your Standard Repeater
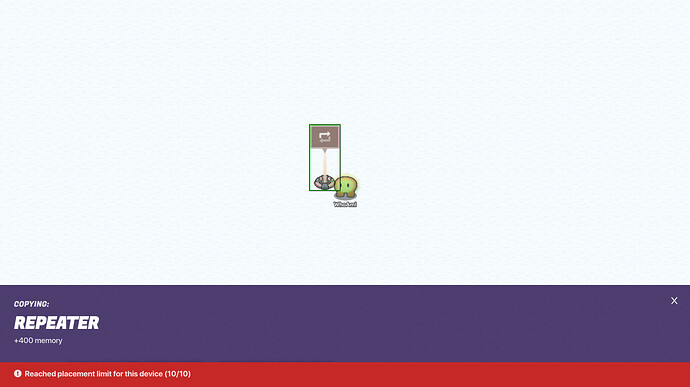
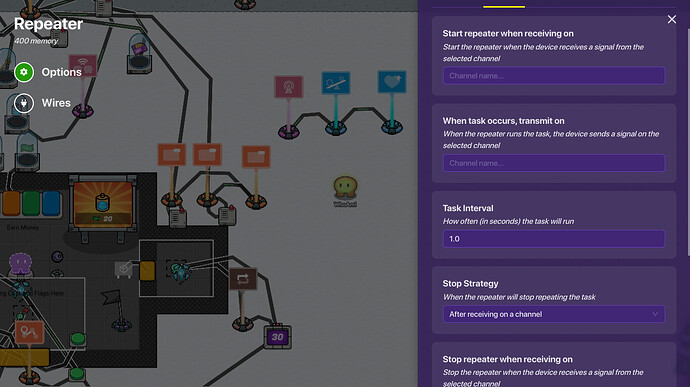
Your standard repeater, the built in way to repeat multiple tasks. You can configure multiple settings with them, including task interval, stop strategy, and activation on channels. But-There is a downside to these. You can only place 10 of these per map…so don’t really use these for individual lasers, or else you will run up short.
Pros: -
Can execute multiple tasks at once.
-
Can turn on and off at will
3.Easy UI to edit.
Cons: -
Only 10 can be placed
-
Can be buggy at times.
Next up…the wire repeater clock…I generally use these for turning lasers on and off that cannot be deactivated permanently and auto regenerating health. Some upsides of this repeater include,
a. They are cheap and easy to set up.
b. They do not count towards the wire repeater limit
c. Rarely break down.
However, these do have one major flaw…they cannot be deactivated by any means.
Cons:
a. Cannot be turned off.
b. Not very versatile in customization.
So, here’s how to make one! -
Take two wire repeaters.
-
How often do you want your task to repeat? Take that number, put it on the first repeater, and then double that number and put it on the second repeater.
-
Put a wire from the first repeater to the second, and vice versa.
-
All done! Now all you need is something to jumpstart it, like a lifecycle or button.
A wire repeater clock. Add something to start the clock in the first repeater. First repeater: Delay: 1 second. Second repeater: Delay 2 seconds.
And finally, the last repeater type that I know of- The Trigger Clock! This clock does not take up any repeater slots, and for the most important thing-They can be deactivated and activated at will. So, how to make them!
- Place down a trigger. Deactivate player collision if you want to, depends on what you are using this for.
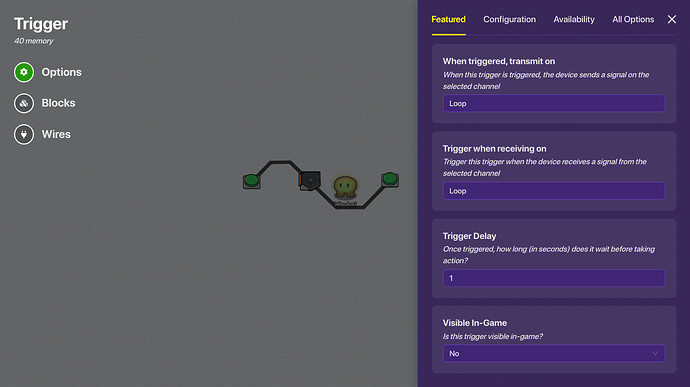
- Set the setting “when triggered, transmit on” to a channel of your choice, make sure that it does not tangle with any other channels. I’ll name my channel Loop.
- Set the setting “trigger when receiving on” to Loop as well.
- Set the trigger delay to the amount of time you want to pass between repetitions, I’ll do 1 second.
- All done! Now you just need something to jumpstart it, like a button, lifecycle, zone, etc.
- If you want to stop the trigger clock, all you need to do is put your method of triggering it and put a wire to the trigger clock.
On button/zone/trigger/etc activated -------- deactivate trigger. - If you wish to deactivate it, I recommend to change the “activate when receiving on” to a channel, and have your method of triggering also transmit on said channel. If your triggering device already transmits on a channel, simply use a trigger to transmit on an additional channel. (This might not work, because AUO, someone test this out.)
And that is the trigger clock!
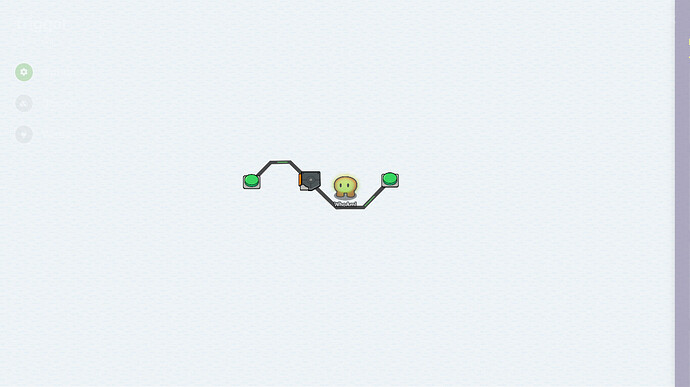
Trigger clock from exterior. Left button activates and triggers the trigger clock, right button deactivates the trigger clock.
A look at the settings of the trigger clock.
Anyway, I hope this was helpful and that you will use these in your own maps, and just to keep up my running joke, like and subscribe!
P.S. If you can figure out how to make other types of repeaters, you can tell me, and I can add it into the guide and give you credit for telling me.
P.P.S: If there are any mistakes, feel free to tell me and I will try my best to fix the mistake in the guide. Same goes for if it is hard to understand. Thank you for reading!
