hey, how ya doin?
- Very Good
- Good
- Mid
- Bad
- Very Bad
I decided to engineer a way for props to take damage, and respawn!
Overview
This method uses a couple of devices to create a prop that can take damage, and be destroyed by gadgets, then respawn. I can see this being useful in survival games, battle royale games, and really anything where you harvest materials. However, the system comes with a few drawbacks that will be explained later.
Btw, this project was sparked by this comment,
on this post:
So, thanks, @unavailible!

I started by gathering materials.
(Shown left to right above)
- Sentry
- Trigger
- Barrier
- Rock
Note: You can use any prop you want
Then I specified the settings of each:
Sentry:
You need to set the “When sentry knocked out, transmit on” to something like break.
Note
You will need to make specific channels for each object you want to make destructible. For example, if I wanted to have two rocks with this property, I would set the “When sentry knocked out, transmit on” for one as,
breakRock1
and the other as
breakRock2
Next, you set the Sentry Health to whatever you want the object’s health to be.
Now you set the Respawn Duration (Seconds) to however many seconds you want your object to take to respawn
Lastly, you set the Sentry Scale to an amount that allows it to appear underneath your prop.
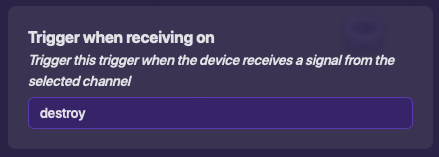
Trigger:
First, you need to make the trigger trigger when receiving on your break channel.
Then you need to give it a delay that is .5 greater than the respawn time of the sentry. For example, my respawn time is 2, and the delay would be 2.5.
Next you set a transmit channel. Use something like repair, respawn, or show.
Note
You will need to make specific channels for each object you want to make destructible. For example, if I wanted to have two rocks with this property, I would set the “When triggered, transmit on” for one as,
respawnRock1
and the other as
respawnRock2
Lastly for the trigger, you should make it so that it cannot be seen or triggered by player collision.
Barrier
First for the barrier, you should make it not visible in game, so you can’t see it underneath your prop.
Then, you edit the size of it so that it covers your sentry well. You can do this by viewing the settings of the barrier, then selecting “Change Size” in the bottom left corner. This makes it so that the sentry cannot see you, but you can still hit it.
Rock (Any Prop)
First and foremost, make it so that your prop has no collision. This basically allows us to use the barrier as a hitbox.
Lastly, you set it so that the prop hides when receiving on your break channel, and shows when receiving on your respawn channel.


Okay, that should be all. If you followed the guide correctly, you should have a system that allows a prop to be destroyed, and respawn.
Some Drawbacks
- This system only works with pickaxes, but some might consider that a plus.
- It takes a whopping 1,070 memory for each object with this system attached
- it can be a bit janky at times
How are ya now?
- Very Good
- Good
- Mid
- Bad
- Very Bad
Thanks!