Welcome one and all!
In this guide, we’ll be looking over how you can make players swap their scores randomly! This can be a great way to spice up your map. This guide will cover all 3 forms of scores, starting with items, then properties, then knockouts! By the end, you should have a system that when doing an input, like pushing a button or purchasing from a vending machine, player’s scores should shift around!
Final Product
Final Product

In this gif on the left side of the screen, you can see me pressing a button with 2 test dummies off to the side. On the right side, you can see the leaderboard and how the scores shift around.
Materials
This list is sorted first by the greatest number of devices to the least, then by how much memory they use.
“Property” ×4 (40 memory)
“Relay” ×3 (60 memory)
“Item Granter” ×1 (1,535 memory)
“Lifecycle” ×1 (50 memory)
“Button” ×1 (50 memory)
“Trigger” ×1 (40 memory)
“Counter” ×1 (25 memory)
“Wire” ×1 (10 memory) [1]
Total memory: 1,810
Glad you’ve decided to check this out! Without further ado, let’s start!
The Live Player Counter
The Live Player Counter
For this system to work, we’ll need a live player counter. Since most other guides lack detail or are no longer functional, here’s my take!
First, you’ll need a “Lifecycle” device with these settings:
Event:
Game Start
When event occurs, transmit on:Game started

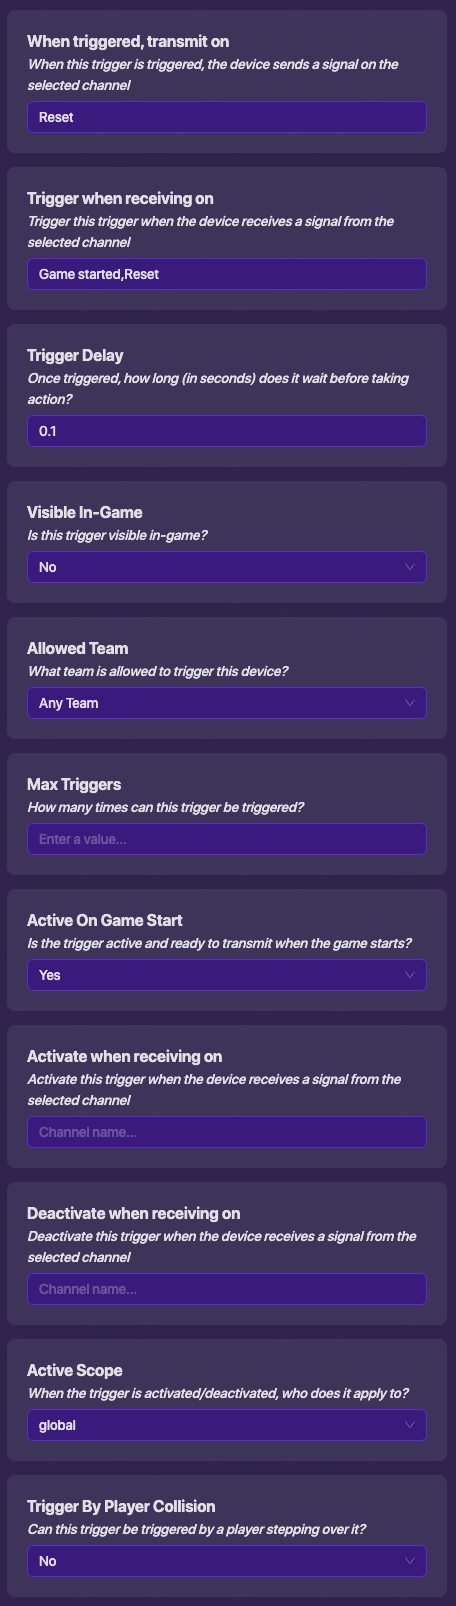
Now, you’ll need a “Trigger” device. This will be used to update the player count every couple game ticks. DO NOT USE REPEATERS, PLEASE!!! Set it up like this:
When triggered, transmit on:
Reset
Trigger when receiving on:Game started,Reset
Trigger Delay:0.1
Visible In-Game:No
Allowed Team:Any Team
Max Triggers:
Active On Game Start:Yes
Activate when receiving on:
Deactivate when receiving on:
Active Scope:global
Trigger By Player Collision:No
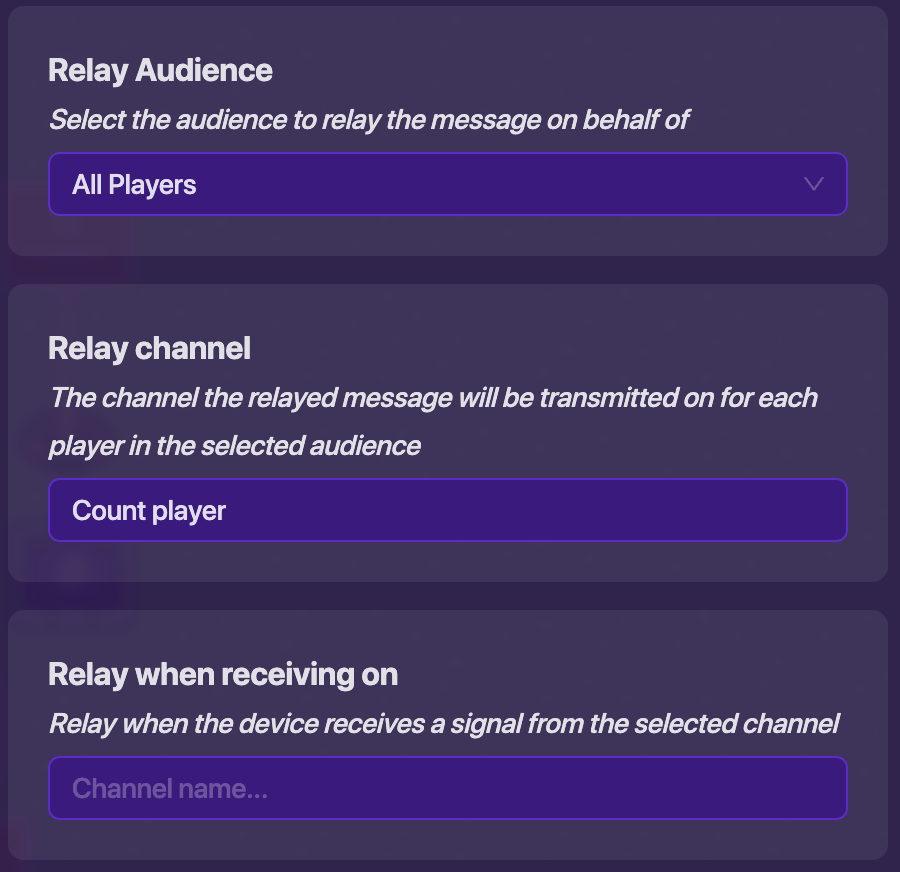
Next, you’ll need a “Relay” device. This will be used to send out a message to all players making sure they are accounted for.
Relay Audience:
All Players
Relay channel:Count player
Relay when receiving on:
Now you’ll need a “Property” device. This will be used to store how many players are in the game.
Property Name:
Players
Property Type:Number
Default Value:0
Property Scope:global
When property value changes, transmit on:
Broadcast value change on game start:No

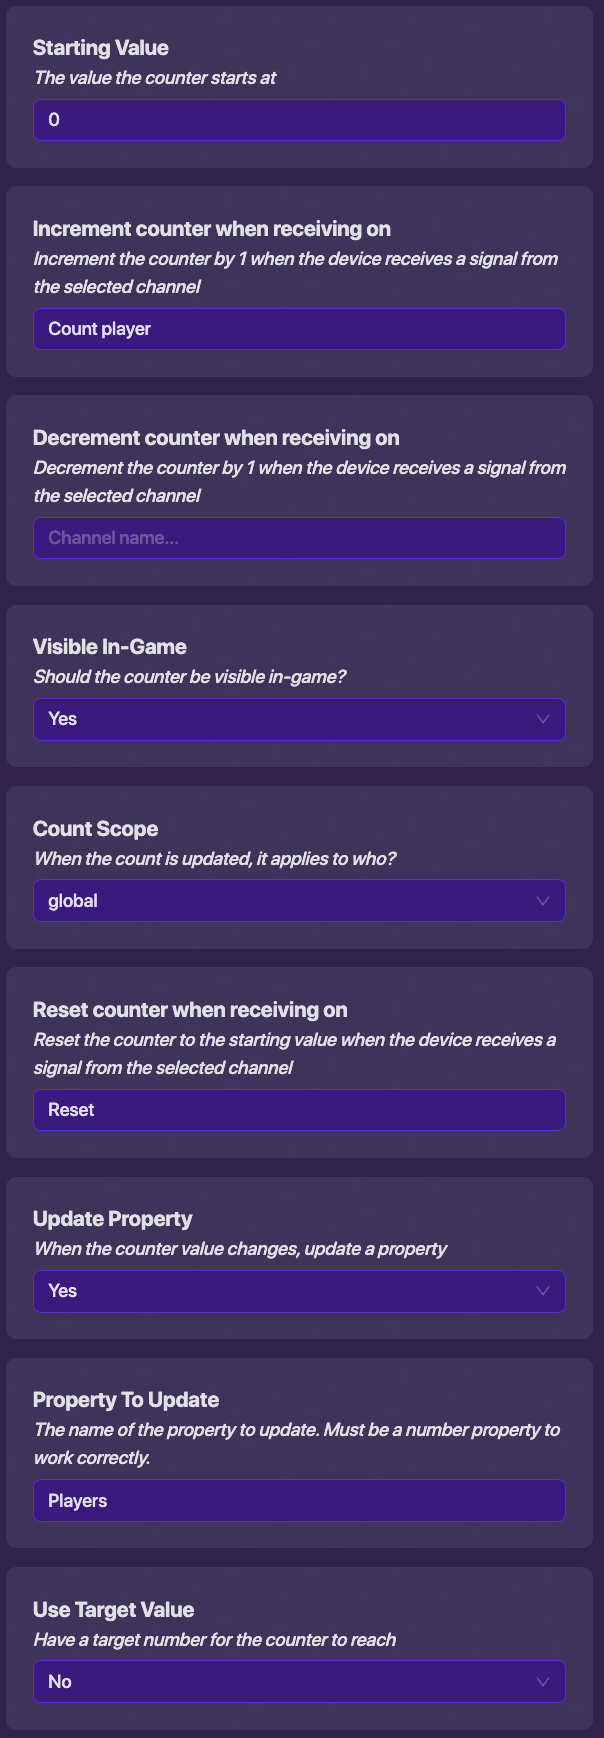
Next you’ll need a “Counter” device. This will be used to set the “Players” property.
Starting Value:
0
Increment counter when receiving on:Count player
Decrement counter when receiving on:
Visible In-Game:Yes←Turned on for playtesting purposes. Set toNoafter testing.
Count Scope:global
Reset counter when receiving on:Reset
Update Property:Yes
Property To Update:Players
Use Target Value:No
The final step is wiring the “Trigger” device to the “Relay” device. This will broadcast to other players, while giving the “Counter” device time to reset.
Trigger – When this event occurs:
Triggered→ Relay – Run this action:Trigger relay

You’ve finished your player counter! Make sure everything is working correctly. When you start the game, the “Counter” device should show how many players are currently in the game.
Swapping the Scores
Swapping the Scores
Before we continue, let me quickly address that this system is going to be set up for scores that track items. I will show you how to make this system work for properties and knockouts further into the guide.
Now that we know how many players there are, let’s swap their scores!
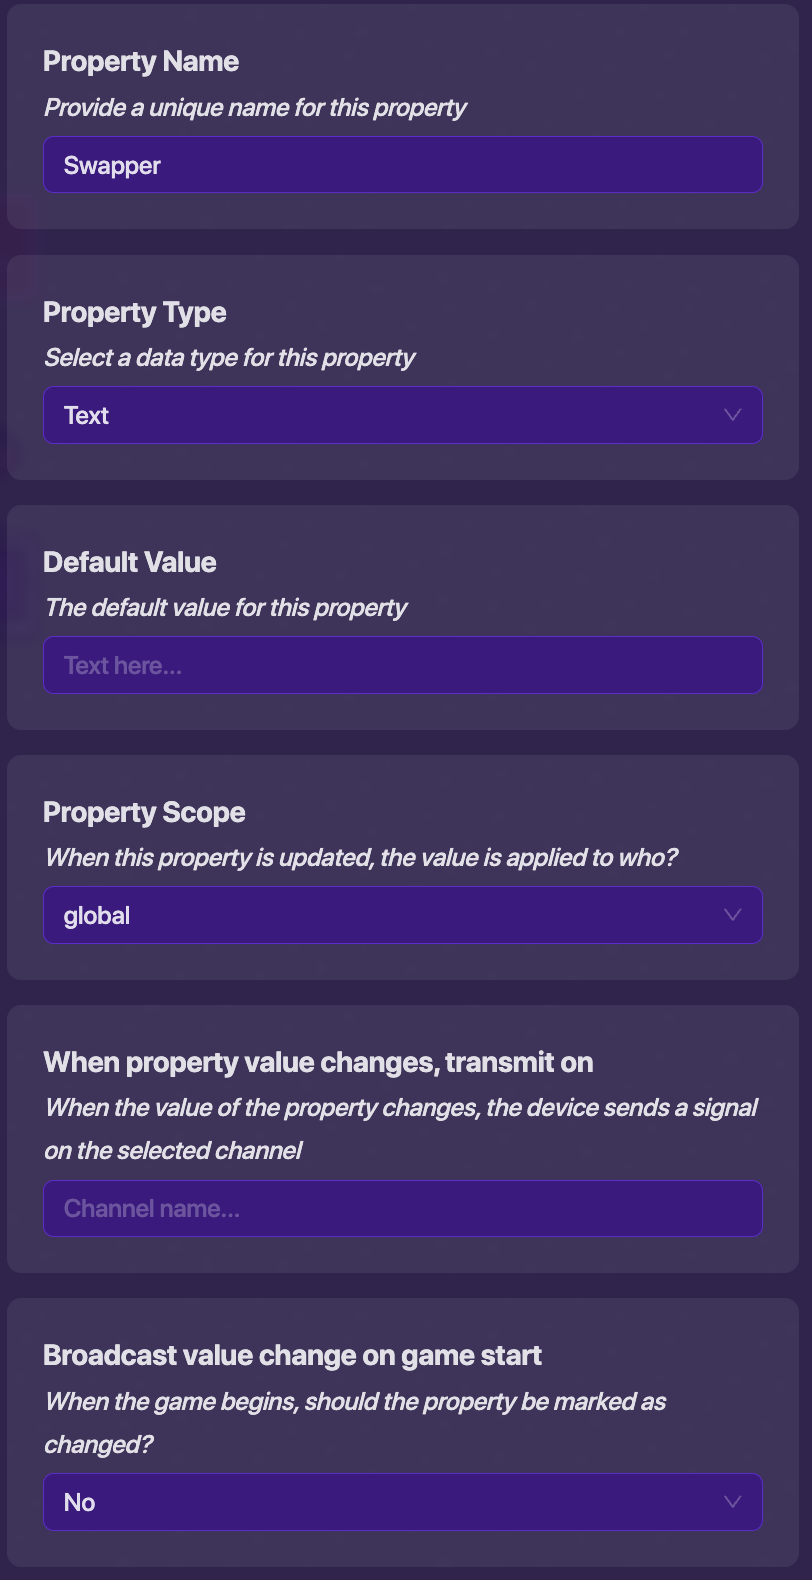
Let’s add in all of the needed “Property” devices first.
Property Name:
Swapper
Property Type:Text
Default Value:
Property Scope:global
When property value changes, transmit on:
Broadcast value change on game start:No
Property Name:
Swapped players
Property Type:Text
Default Value:
Property Scope:global
When property value changes, transmit on:
Broadcast value change on game start:No

Property Name:
Swap score
Property Type:Number
Default Value:0
Property Scope:global
When property value changes, transmit on:
Broadcast value change on game start:No
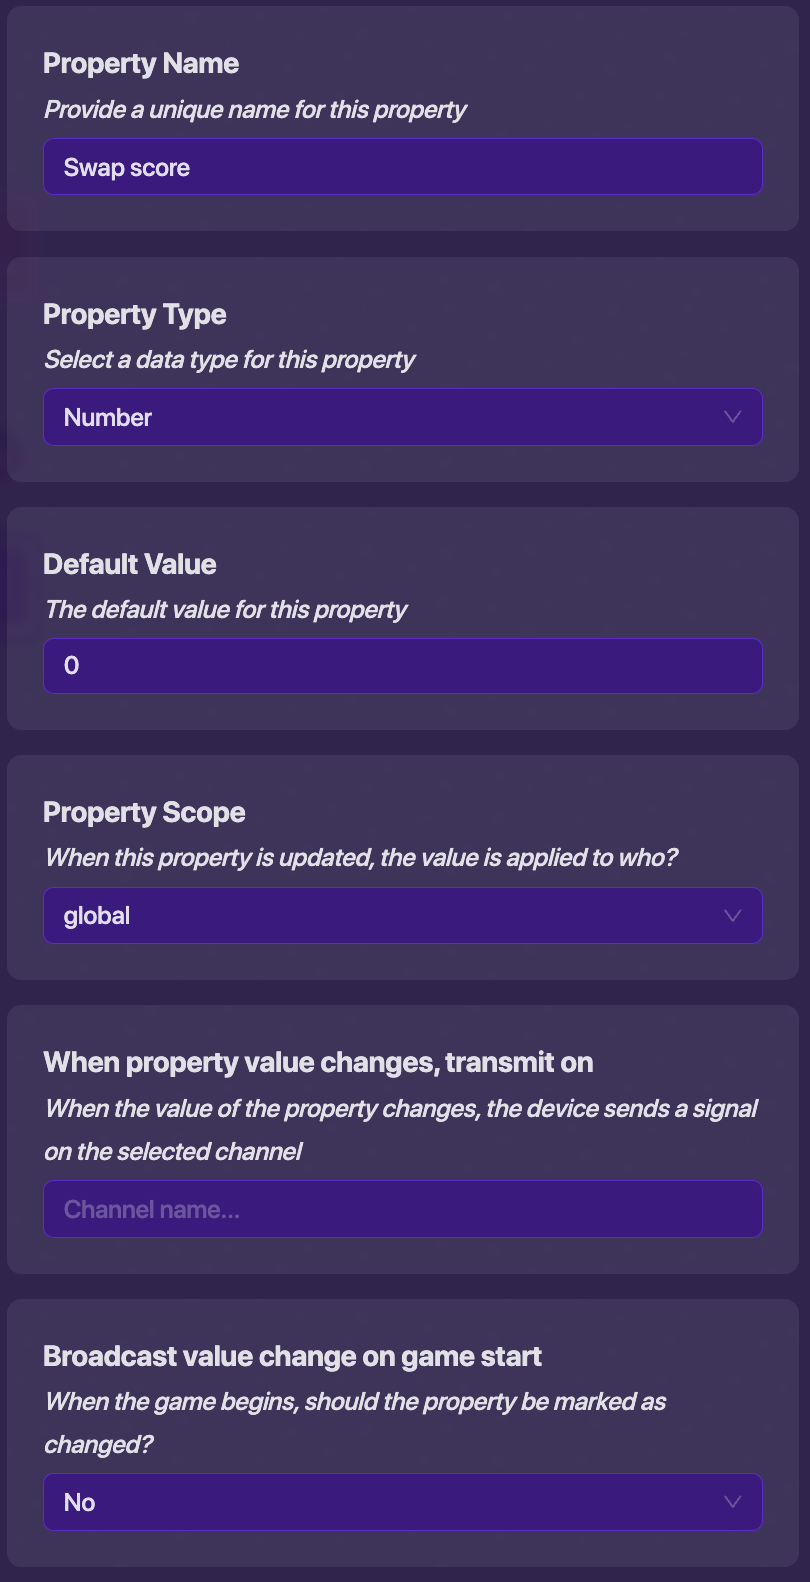
Let’s break down what these “Property” devices are doing. The “Swapper” property is going to hold the ID of the person who initiated the scores to be swapped. This will be used to make sure their score is swapped last and scores are swapped correctly. The “Swapped players” property will be used to hold the IDs of all the players that have had their score swapped, so the same player isn’t chosen twice. The “Swap score” property will hold the score of the previous player that had their score swapped to give to the next person.
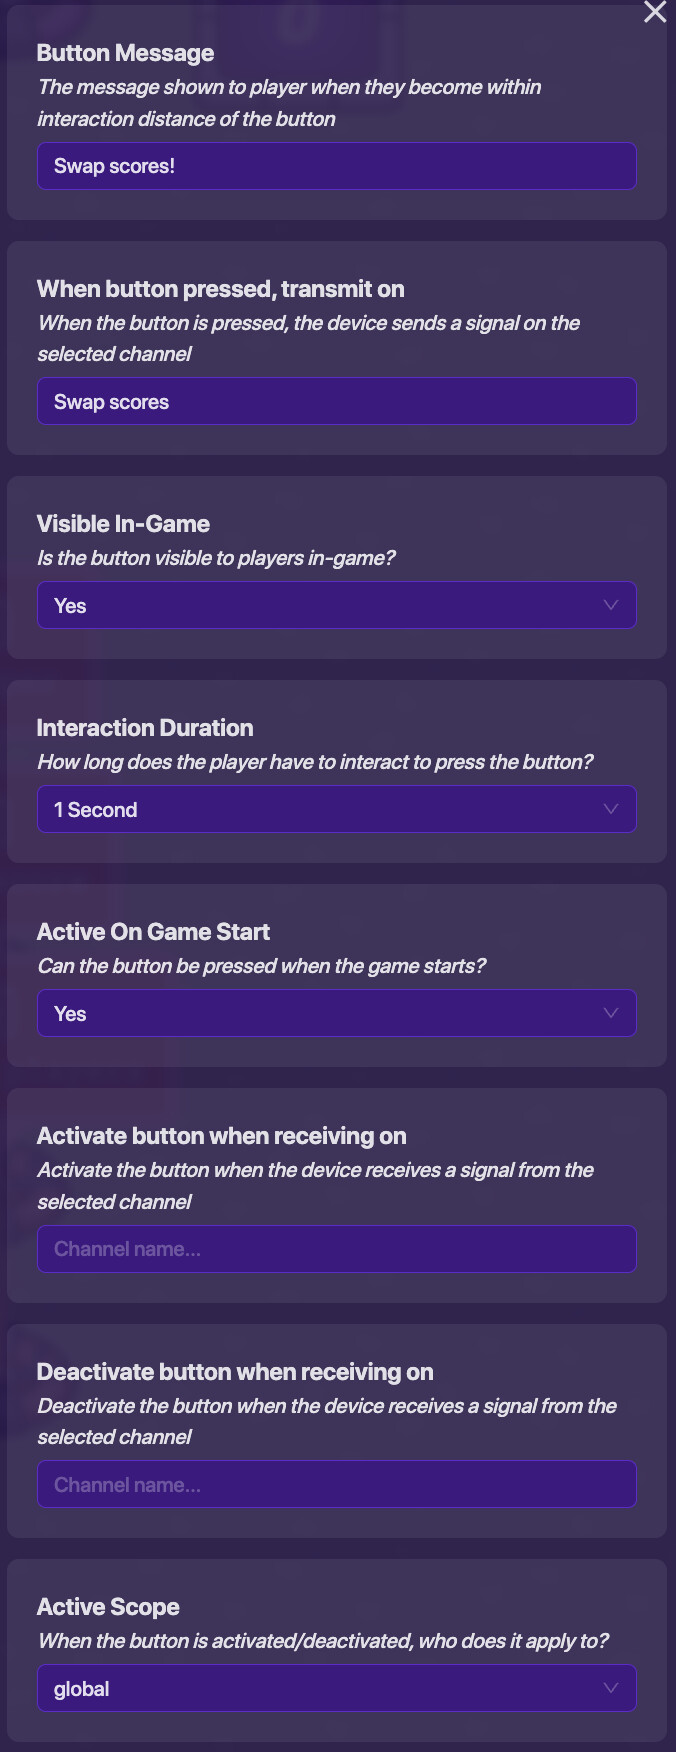
Now that the properties are in place, we can get to the fun stuff! We’ll need a way to engage the swap. I’ll be using a button, but you can use any system you want, like a vending machine for example. Here’s how the button will be set up:
Button Message:
Swap scores!
When button pressed, transmit on:Swap scores
Visible In-Game:Yes
Interaction Duration:1 Second
Active On Game Start:Yes
Activate when receiving on:
Deactivate when receiving on:
Active Scope:global
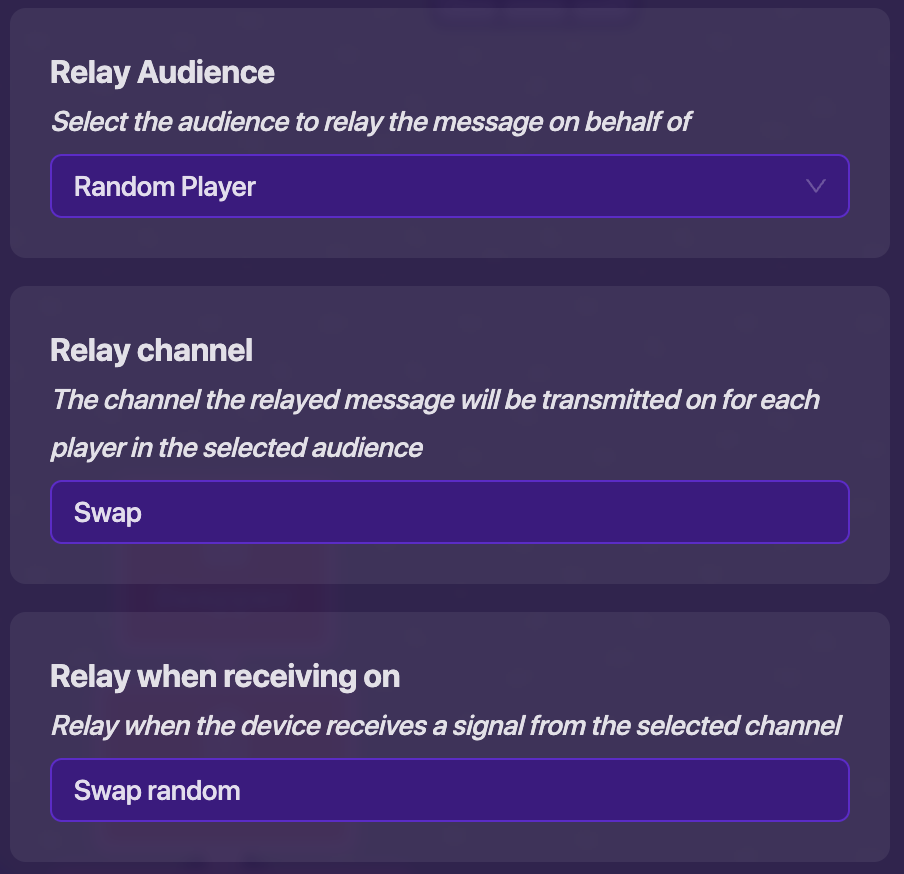
Next you’ll need a “Relay” device. This will choose a player at random to swap scores with.
Relay Audience:
Random Player
Relay channel:Swap
Relay when receiving on:Swap random
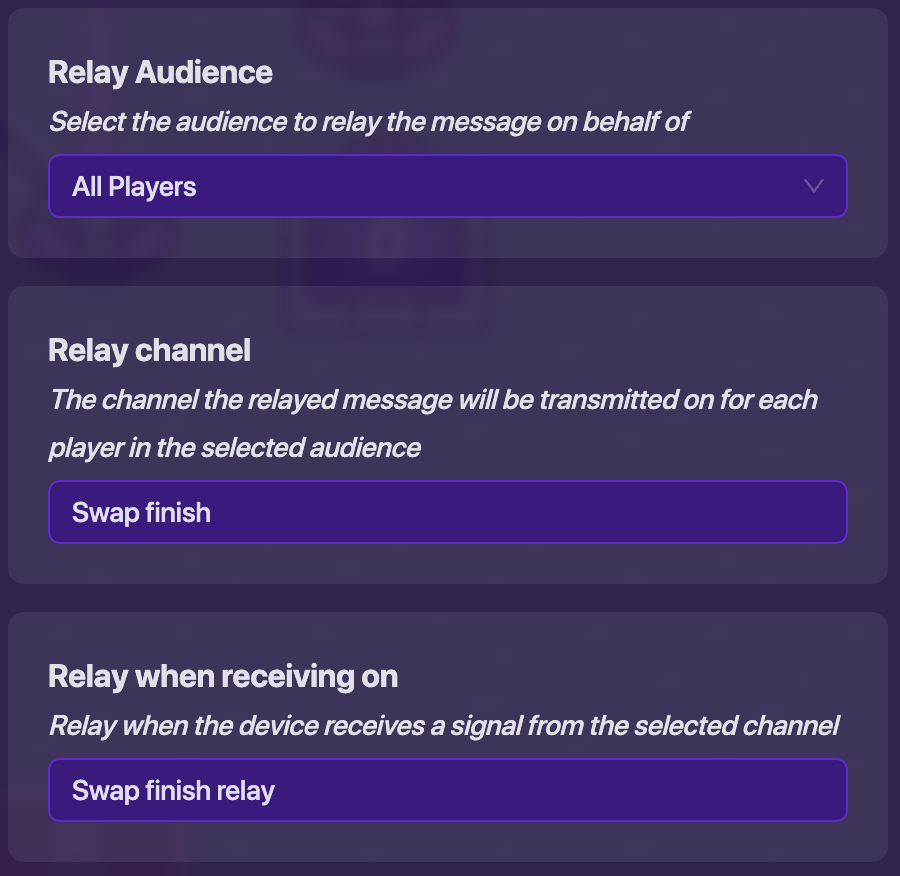
Now get another “Relay” device. This one will be used to give the person who initiated the swap their new score.
Relay Audience:
All Players
Relay channel:Swap finish
Relay when receiving on:Swap finish relay
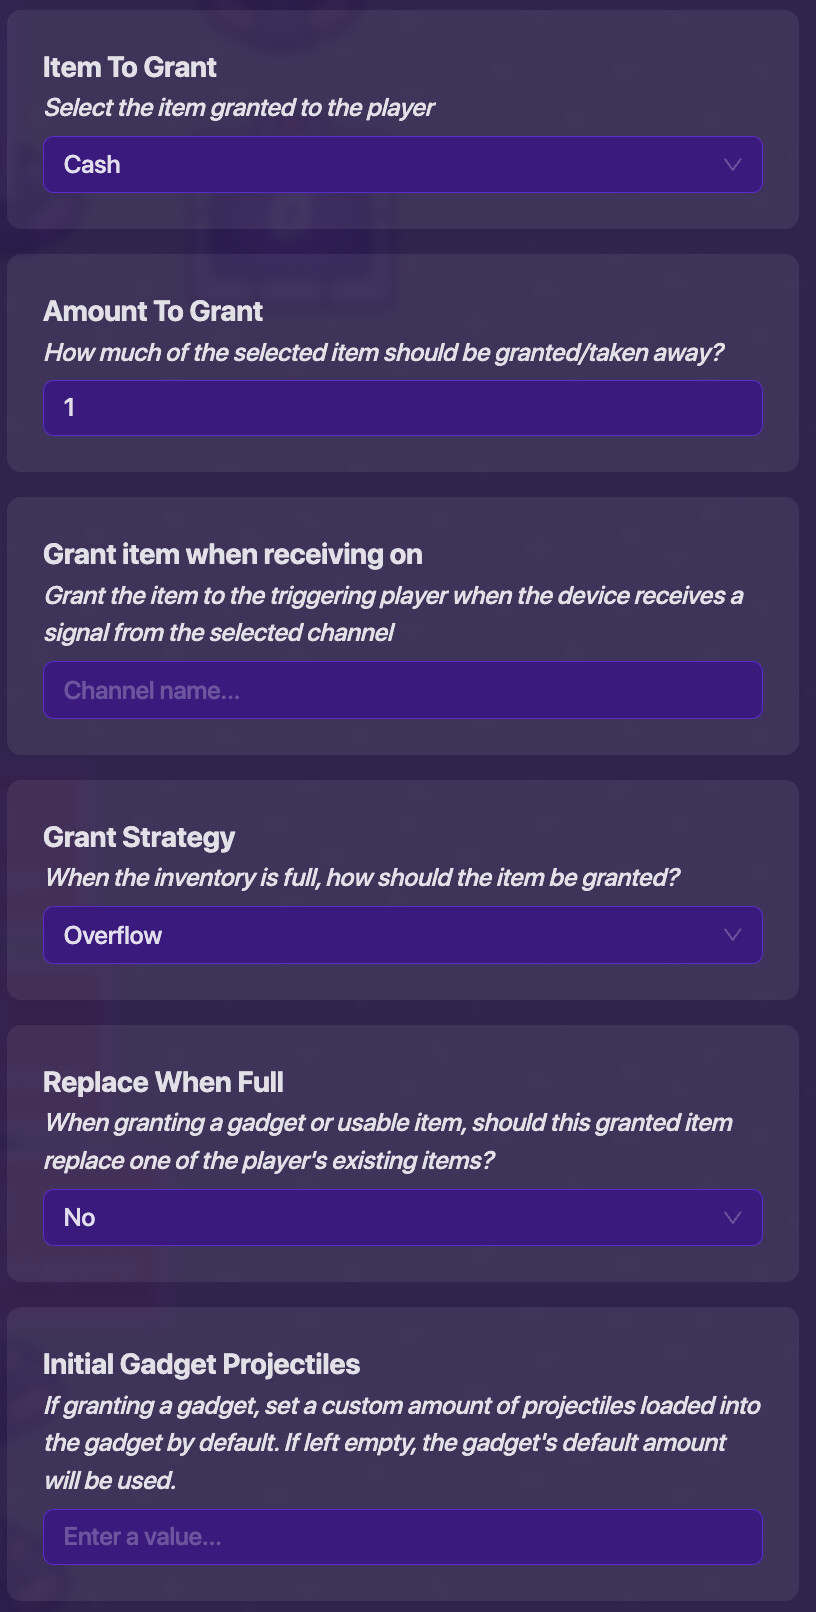
The final steps involve the “Item Granter” device and will be used for holding the code. Most of the settings can be changed to your preference, but if you’re just following along, set it up like this:
Item To Grant:
Cash←Change to the item you’re game scores.
Amount To Grant:1
Grant item when receiving on:
Grant Strategy:Overflow
Replace When Full:No
Initial Gadget Projectiles:
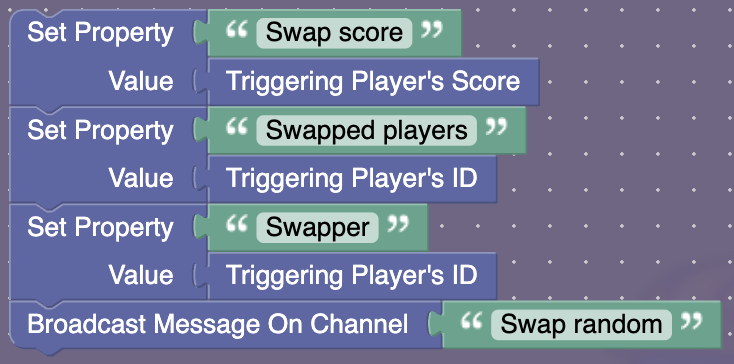
This “Item Granter” will have 3 blocks. This first one is used to initiate the swap:
Create a new block – When receiving on channel:
Swap scoresSet Property: "Swap score" Value: Triggering Player's Score Set Property: "Swapped players" Value: Triggering Player's ID Set Property: "Swapper" Value: Triggering Player's ID Broadcast Message On Channel: "Swap random"

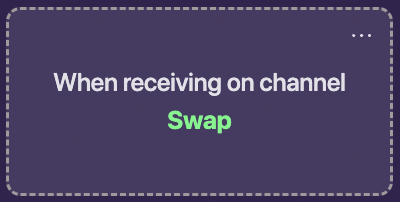
The next block will be used to swap all of the scores.
Create a new block – When receiving on channel:
Swapif: (in text: Get Property: "Swapped players" find (first) occurrence of text: Triggering Player's ID) = (0) do: set (Swap) to: Get Property: "Swap score" Set Property: "Swap score" Value: Triggering Player's Score Grant Player Selected Item (Custom Amount) Amount: Triggering Player's Score × -1 Grant Player Selected Item (Custom Amount) Amount: (Swap) Set Property: "Swapped players" Value: create text with: Get Property: "Swapped players", Triggering Player's ID if: (length of: Get Property: "Swapped players" ÷ 24) ≠ (Get Property: "Players") do: Broadcast message on channel: "Swap random" else: Broadcast message on channel: "Swap finish relay"

The final block is to give the player that initiated the swap their new score.
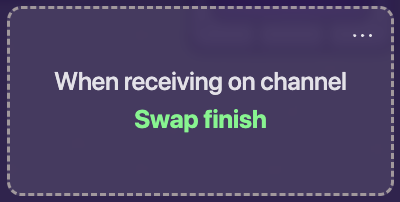
Create a new block – When receiving on channel:
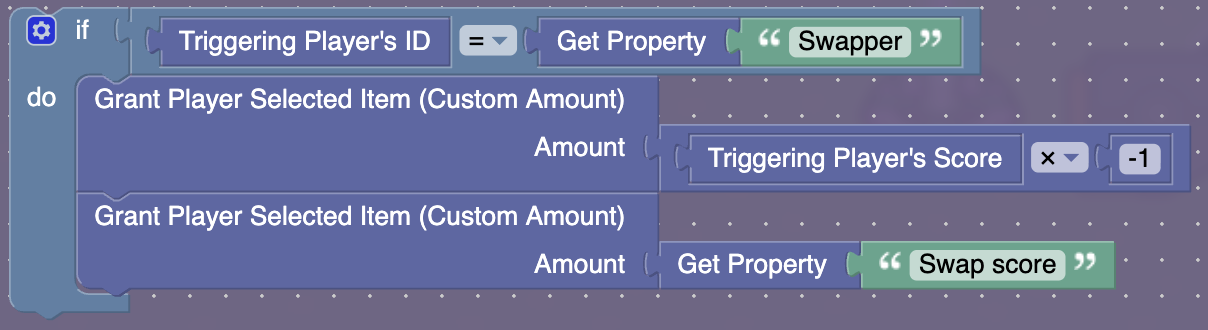
Swap finishif: (Triggering Player's ID) = (Get Property: "Swapper") do: Grant Player Selected Item (Custom Amount) Amount: Triggering Player's Score × -1 Grant Player Selected Item (Custom Amount) Amount: Get Property: "Swap score"
Step-By-Step Breakdown
Step-By-Step Breakdown
Okay, so this is cool and all, but how does it work? First, the swap has to be initiated. I used a button to do this, but feel free to change it, just make sure that your system broadcasts on the Swap scores channel. When initiated, the first block of the “Item Granter” device runs. It sets the “Swap score” property to our score. This is so the score can be passed on to the next person. Then it sets the “Swapped players” property to their unique ID. This is to ensure that they are not the randomly selected player. Then it sets the “Swapper” property to their unique ID as well. This will be used to find the person who initiated the swap once every other player’s score has been swapped. Finally, it broadcasts on the Swap random channel.
A “Relay” device receives this message and broadcasts on the Swap channel to a random player. The “Item Granter” also receives this message and runs another block. First, the block makes sure that the player that was randomly selected hasn’t been selected already. It checks this by seeing if the player’s unique ID is found in the “Swapped players” property. If it’s not, then it swaps their score with the previous player’s score. It sets the “Swap” variable to the “Swap score” property to make sure it is not lost in the process. It then sets the “Swap score” property to their current score that will be passed on to the next player. Then it removes all of the item that counts as the score from their inventory, and grants them their new swapped amount using the “Swap” variable. Finally, the players unique ID is appended to the end of the “Swapped players” property since their score has now been swapped. After the score has been swapped or the player has been skipped over, then it checks to see if the system has gone through every player. It does this by dividing the length of the “Swapped players” property by 24. Since each player’s unique ID is 24 characters long, dividing the length of the property by 24 allows us to see how many players have already been swapped. If that number is not equal to the amount of players that are currently in the game found by using the “Players” property from the live player counter, then the loop must continue until all players have been swapped. The block broadcasts on the Swap random channel to keep the loop going. If all players have been swapped however, it broadcasts on the Swap finish relay channel.
The Swap finish relay channel completes the last swap between the player that initiated the swap and the player that was last swapped. While making this system, I discovered that if the player that began the swap wasn’t picked as the last player, their score would be used to swap twice. [2] To fix this, I made this system. A “Relay” device receives the Swap finish relay broadcast, and sends the Swap finish broadcast to all players. This will ensure that the person who initiated the swap receives the message. Once a player receives the message, the block in the “Item Granter” device that receives on Swap finish is ran. It checks if the player is actually the person who initiated the swap using the “Swapper” property. Hint: this property isn’t actually needed. See if you can find a way to remove it while keeping the system functioning correctly! If they are not the person who started the swap, the block isn’t ran. If they are, then it removes all of the score item that they currently have and adds their new score!
With that, you’ve finished! See if it works by getting some friends to join, or opening the game in separate tabs. When the button is pressed, you should see in the leaderboard the scores for every player being changed.
Changing the Score Type
Changing the Score Type
If your game uses properties to score, you’ll need to change a bit of the code to fit your system. If you’re using a “Property” device to score your game, be sure that you are NOT using a “Counter” device to set the property. Using block code will ensure there are no issues with scoring. If you’re wanting to change the score type from item to property or if you’re wanting to set up your score type for knockouts, follow along. If you already have a scoring system for properties, skip ahead to the code.
You will need 1 extra “Property” device costing 10 memory, another block in the “Item Granter” device costing 500 memory and a “Button” device or some other way to add to the score costing 50 memory. This brings the total memory up to 2,370.
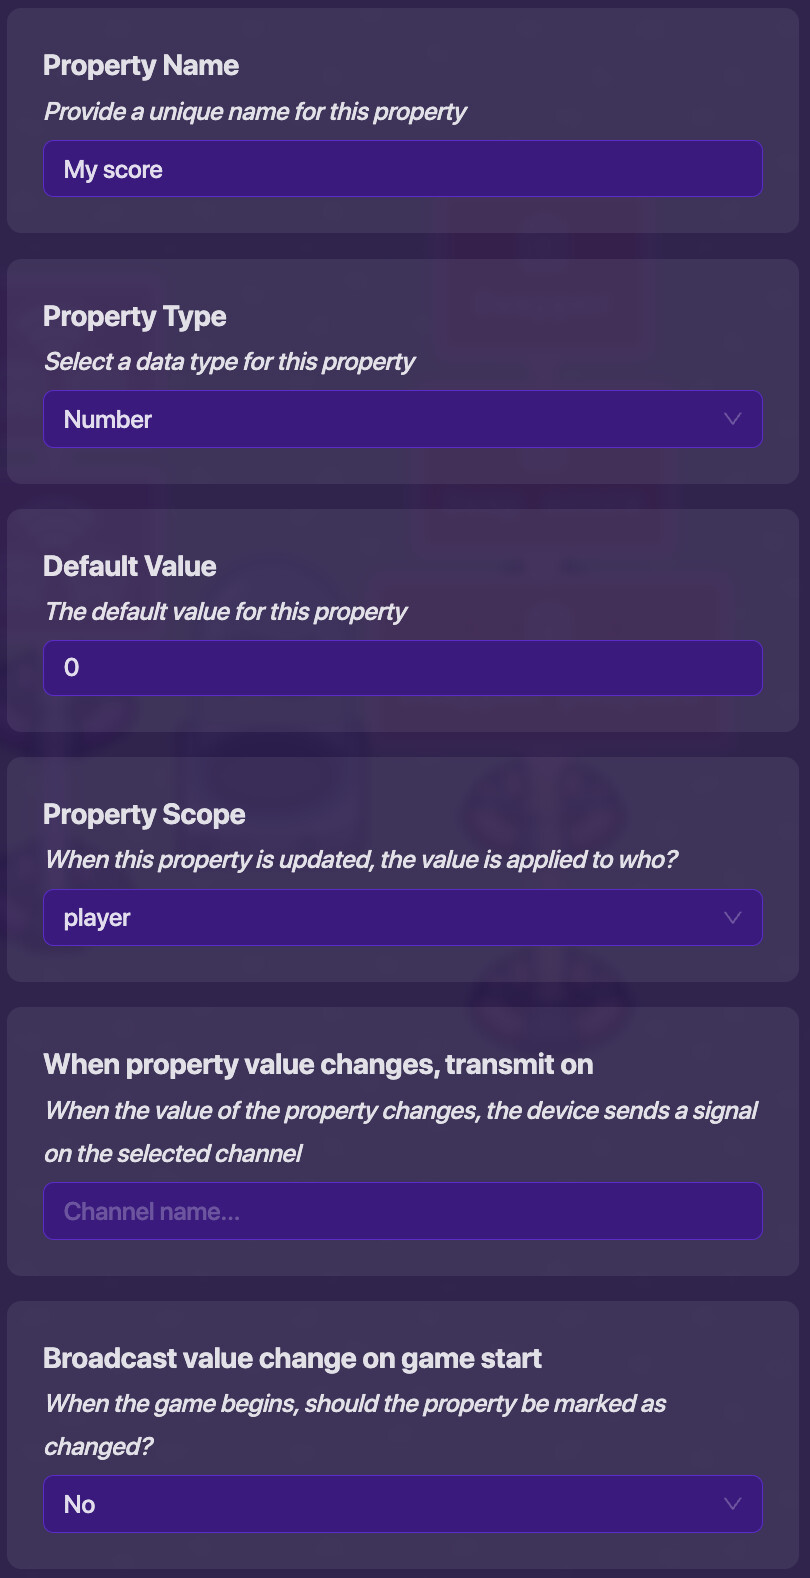
Set up the “Property” device for the score like so:
Property Name:
My score←Change to what you like
Property Type:Number
Default Value:0
Property Scope:player
When property value changes, transmit on:
Broadcast value change on game start:No
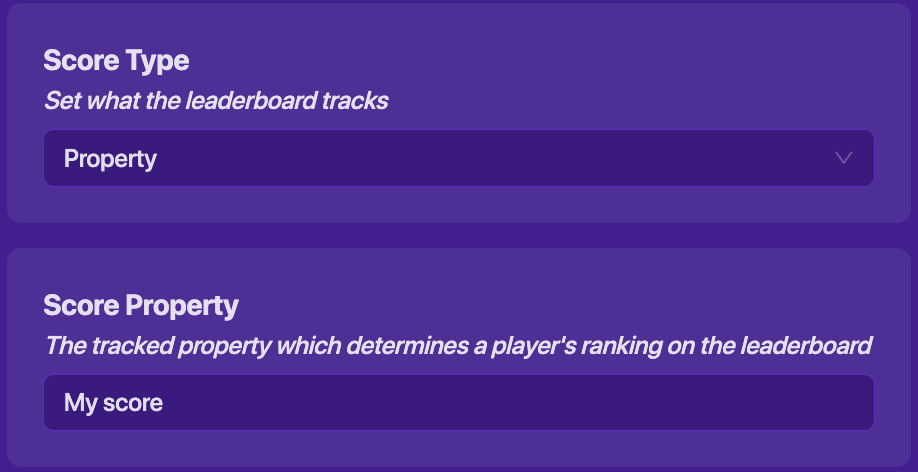
Set the Score Type in the Map Options to Property and set the Score Property to the property you just created.
Settings – Map Options – Score – Score Type:
Property
Settings – Map Options – Score – Score Property:My score
Add the button and give it these settings:
Button Message:
Increase score
When button pressed, transmit on:Increase score
Visible In-Game:Yes
Interaction Duration:1 Second
Active On Game Start:Yes
Activate when receiving on:
Deactivate when receiving on:
Active Scope:global

Then add a block to the “Item Granter” device. This will be used to increase the score by 1 every time the button is pressed.
Create a new block – When receiving on channel:
Increase score


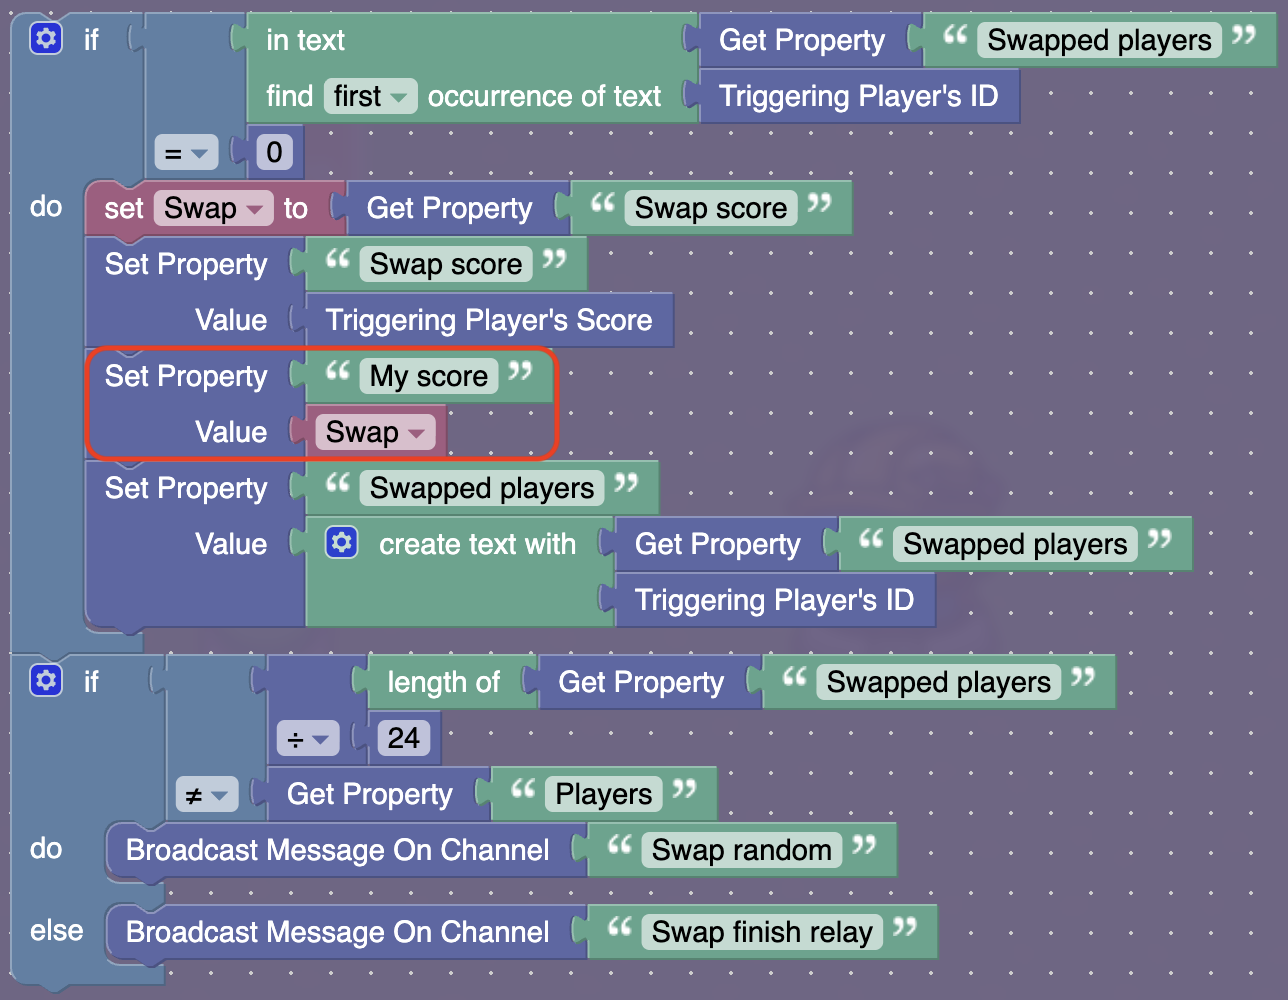
Now we’re going to modify some of the code in the “Swap” and “Swap finish” blocks.
Edit an existing block – When receiving on channel:
Swapif: (in text: Get Property: "Swapped players" find (first) occurrence of text: Triggering Player's ID) = (0) do: set (Swap) to: Get Property: "Swap score" Set Property: "Swap score" Value: Triggering Player's Score Set Property: "My score" Value: (Swap) Set Property: "Swapped players" Value: create text with: Get Property: "Swapped players", Triggering Player's ID if: (length of: Get Property: "Swapped players" ÷ 24) ≠ (Get Property: "Players") do: Broadcast message on channel: "Swap random" else: Broadcast message on channel: "Swap finish relay"Edit an existing block – When receiving on channel:
Swap finishif: (Triggering Player's ID) = (Get Property: "Swapper") do: Set Property: "My score" Value: Get Property: "Swap score"

Now your system can function with properties!
Want your system to work with knockouts? All you need to do is increase the score when you get a knockout instead of pressing a button. Remove the “Button” device, and add a “Lifecycle” device and give it these settings:
Event:Player Knocks Out
When event occurs, transmit on:Increase score

And it’s that simple!
Great job on making your own score swapping system! I hope you learned something today! These guides take a long time to make and format, so leave a heart if you liked it! Thanks for reading, and I’ll see you in the next one!
Mini-Guide on Making Good Guides
Mini-Guide on Making Good Guides
I’ve seen a lot of guides lately that have been lackluster, difficult to follow, or just downright bad. I hope this will shed some light on the situation and others may learn from it.
My suggestions
When setting up a guide, always give background information. The title is a great summary of what the system is about, but you should ensure that readers know exactly what they are going to make before they begin. Example: instead of saying, “In this guide, we will make a camera,” elaborate and give more detail and say, “In this guide, we will be making a camera system using camera points and a basic menu system using Game Overlays.” I also like to give visual aide to what the guide actually makes using a .gif file. I make these by recording the shortest video I possibly can, uploading it to Canva, trimming and speeding up the video, and downloading it as a .gif in the smallest possible size. There are definitely other options out there, but they’re all blocked for me. ![]()
Readers need to know how much memory is going to be used when following a guide, or at least a close estimate. If they already have too much memory taken up in their map, they might not be able to afford your system. Add a list of everything needed for the guide to function, the memory it will take and any notes for customization. For example, using the camera guide example from before, “You will need 3 camera points. Each camera point takes 100 memory. The amount of camera points you use may vary depending on how many cameras you want on your map.”
Make sure progression is smooth. Generally speaking, your guide should progress from cause to effect, meaning after A happens, B happens. For example, “When the button is pressed, activate camera point 1, activate “next” overlay, activate “previous” overlay, activate “close” overlay. When “next” overlay pressed, activate next camera point, deactivate previous camera point. When “previous” overlay pressed, activate previous camera point, deactivate next camera point. When “close” overlay pressed, deactivate all camera points, deactivate “next” overlay, deactivate “previous” overlay, deactivate “close” overlay.”
Split the system into manageable steps. Readers need to feel that they have made progress to keep them engaged. Try not to overload the reader with 1 continuous blob of settings and code. When splitting up the example for a camera guide for example, I might split it into 3 sections, “Setting Up Camera Points,” “Opening The Cameras,” and, “Switching Cameras.”
Don’t just tell readers what to make. Tell them how it works! Readers will never learn anything if they’re blindly following you, and they won’t know what to do if it ends up not working right. Similarly, be sure readers will be able to understand what you’re saying. This can be accomplished by using basic grammar. For example, using the camera system, don’t say “Do camera, then button here.” Instead say, “Place down a Camera Point device anywhere you like. Choose where you want your camera to be opened and place a button there.” I strongly suggest downloading the Grammarly extension to help you with writing guides. My school recently blocked it and I can no longer use it, but it has helped me write so many of my guides. You don’t need Pro either, the normal extension works perfectly fine.
Use polls, and don’t turn down the opportunity to improve yourself. Listen to feedback, don’t write, “plz dont be mean or flag i new here. ![]() ” Also, if you’re asking yourself, “Will I get flagged for this?” chances are the answer is yes. Another thing, if you’re providing feedback, please be constructive. Include something that you think the writer did good, then provide feedback politely and descriptively.
” Also, if you’re asking yourself, “Will I get flagged for this?” chances are the answer is yes. Another thing, if you’re providing feedback, please be constructive. Include something that you think the writer did good, then provide feedback politely and descriptively.
Keep readers engaged, however, focus on delivering information effectively. I’ve seen a lot of people use alter-egos on their guides. It’s funny, but it usually takes away from the actual information and makes the guide difficult to follow. If you’re wanting to do something like that, please don’t use it every other sentence. It’s perfectly okay to make a joke every now and then, but doing so excessively can take away from the overall purpose of the guide.
How I Format
I try to be unique with the way I format my guides. One thing that I think every guide should use is dropdowns to keep things clean and organized. Another thing I do that seems to be unique to me is instead of just using images of device settings and blocks, I include a written version as well. I do this for 2 reasons. One, in case Josh decides to remove all images again, the guide will still be usable. Two, it allows me to easily mark things that can be changed.
When taking a screenshot of a device, I like to include all of the settings in one picture. To do this, I open the All Options section of the device if there is one, then I zoom out by pressing ⌘ - (Ctrl - on Windows) until all of the settings fit in the window. I do this for blocks as well, zooming out until the code fits in the window.
I still haven’t fully decided on a way to write code, but here’s what I used in this guide. I marked text with quotations (" "), inputs with colons ( : ), operator groups and variables with parentheses [( )] and text groups with commas (,). I’m still sort of figuring this out, but I’m sure a straightforward system will come to me eventually.
I use bold text to show important information. Pretty simple, yet effective. It tells readers to pay attention to certain key details they may miss. I also use <mark>Customize</mark> to indicate opportunities for readers to make the system their own.
I also like to add my own touch to my guides that makes them stand out. One thing I do is put device names in quotation marks. Not necessary for the guide to make sense but it makes me feel smarter. ![]() Other things I do are the easter egg, and Make It Your Own:trade_mark: section (which is not here this guide, because it’s pretty small).
Other things I do are the easter egg, and Make It Your Own:trade_mark: section (which is not here this guide, because it’s pretty small).
Thanks for reading this additional mini-guide, and I hope you found it helpful!
- 1
- 2
- 3
- 4
- 5
- 6
- 7
- 8
- 9
- 10
- 11
This is the first time I’ve used a wire since I learned about channel stacking lol ↩︎
You found the Easter Egg!
 What should you do? Reply to this guide saying how much you love (or hate) this guide and put an egg emoji at the end of your reply! Be sure to add some constructive feedback so you don’t get flagged! ↩︎