This is the Airport version of a Metal Detector, or the Bigfootian Item Scanner in GKC (because I looked and didn’t see a post that had this, so I might be the first to come up with it). Although there aren’t metal items a gim can hold, this one can be used to detect certain items and also can take away items that are “Blocked” from a certain area before someone enters. It is pretty cool and not too complex, making it a perfect build for a jailbreak map or something like that.
Here is what you need:
Materials
Props
*2 Gate Consoles (Red light)
*2 metal poles (any thickness you need)
*1 Metal sign (Rectangular)
Devices
*1 Checker
*1 Trigger
*1-5 Item Granters (depending on the number of objects that are banned you want the scanner to check for)
*2 Notifications
Now for the building:
Scanner
The scanner itself is easy.
First, take one gate console and flip it so it is facing the opposite way.

Now add the two poles so that they are coming out of the top of the gate consoles

Finally, using layers, make sure the metal sign is in front of the metal poles and place the metal sign on top.
Now the Scanner is done and we can move on to making it functional.
Devices
Once your scanner is built, the devices are fairly simple in concept to configure, again this depends on the items that you want blocked. The more items you want blocked, the more complex it gets.
First, place the trigger down between your scanner.
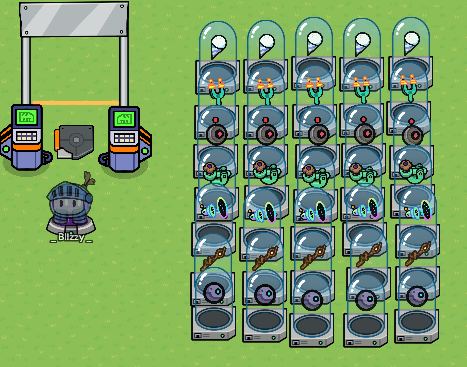
Next, you are going to want to configure the item granters to what items you want to be banned. Simply add your item, but make sure it is granting -1 of that item as that will take it away. For the tutorial, I am using Evil Eye, Zapper, and Slingshot. So the settings should look like this once you are done setting the Item Granters.

Now we are going to do the Checker’s settings. Once you open the checker, run the number of checks as you have item granters. (Again this is up to how many items you want banned.) I am using three checks for the tutorial. Once you are done the Featured tab should say this with the number of checks after it.

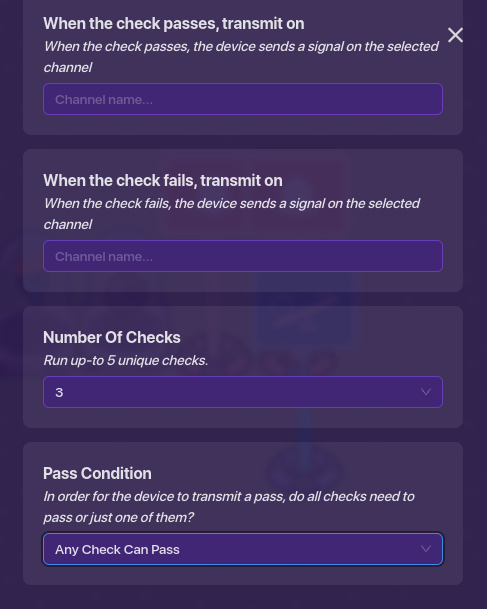
(Remember to make sure any check can pass.)
Then we are going to configure the individual checks. So go to Check #1 and select Check for Item Amount, Your banned item is the item to check for, and the value is equal to 1, or like the picture below. Repeat this for as many banned items as you have.

When you have all the checks configured, we can work on the individualized notifications. You will need 1 notification for the all-clear, and X amount for the amount of banned items you have.
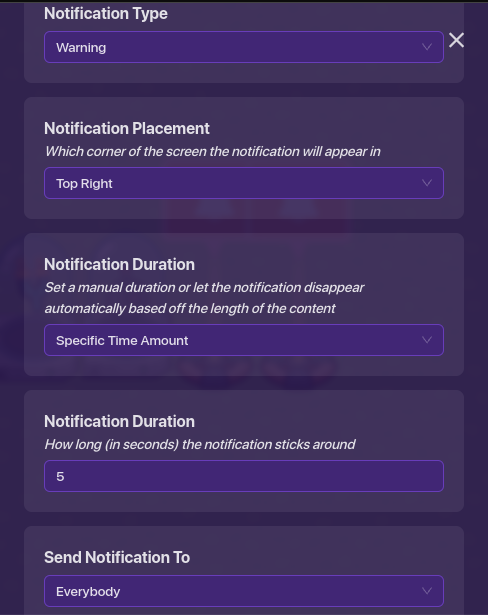
For the banned notification use “Banned Item Detected!” for the title and “Player was caught with banned item: (Item name here)” for the smaller text, and the notification type should be a warning. The settings should look like this for the banned item:

Then do the same for the all-clear but the title is “All Clear!” and the “Player did not have any banned items.” for the smaller text, and notification is sent when received on the channel.
Finally, all we need to do is wire everything together and we are done!
Wiring
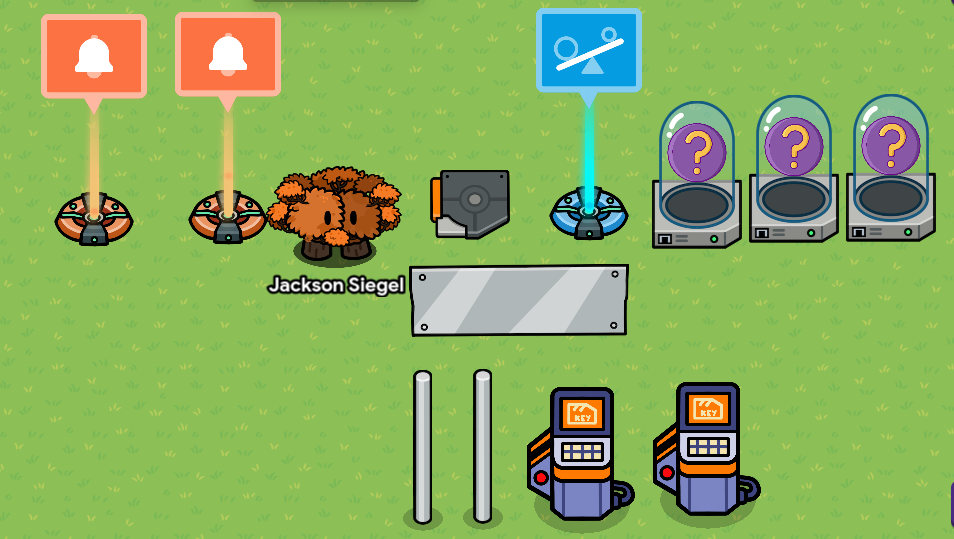
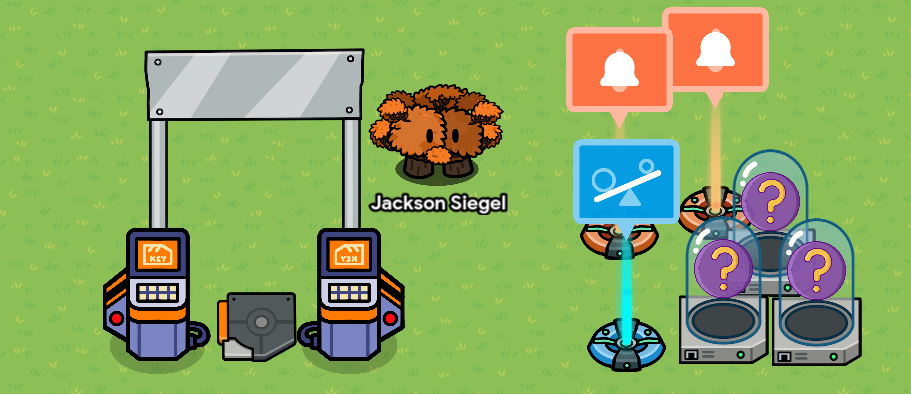
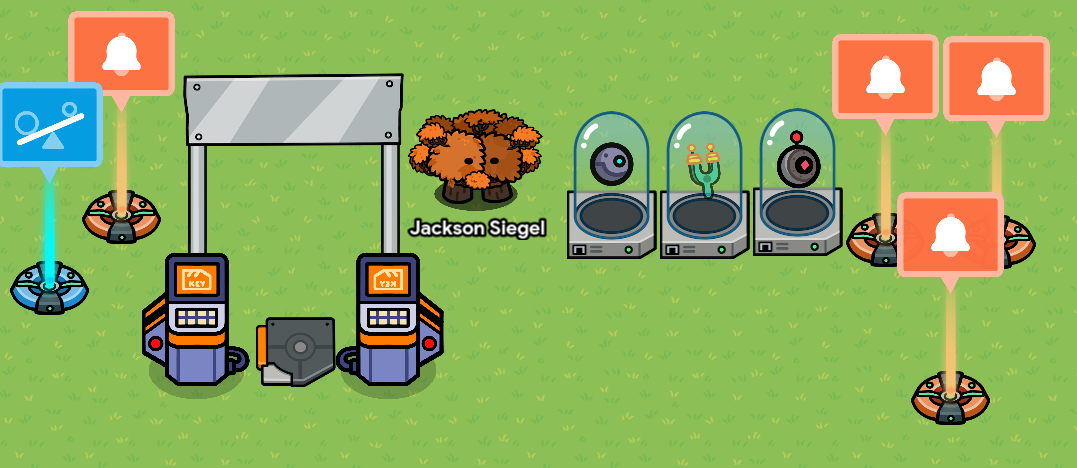
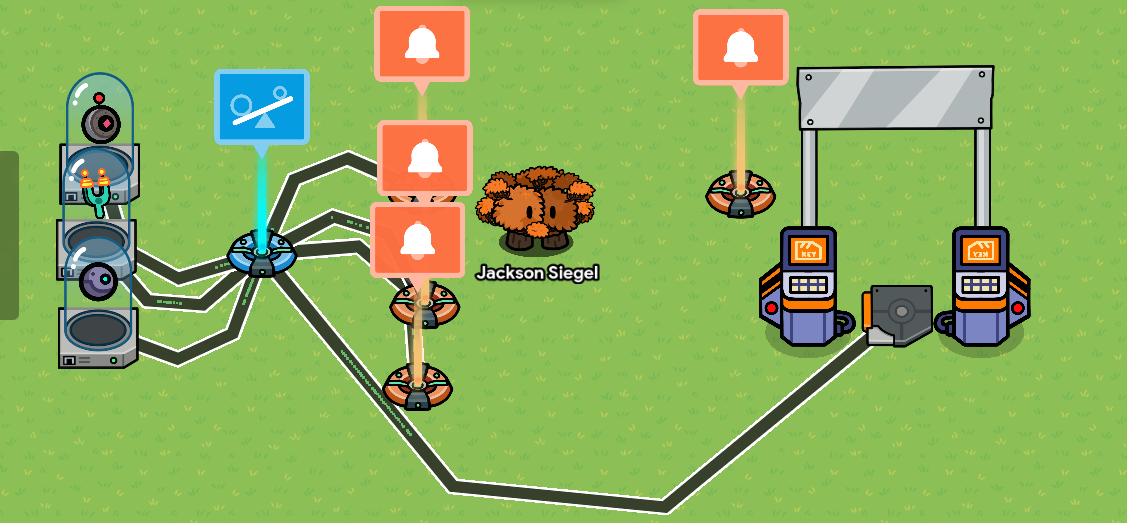
So after all the device settings, you should have something now that resembles this.
Now we can wire everything together. First, you need to connect the checker to the item granters using wires as shown below.
(Do this for all the item granters you have.)
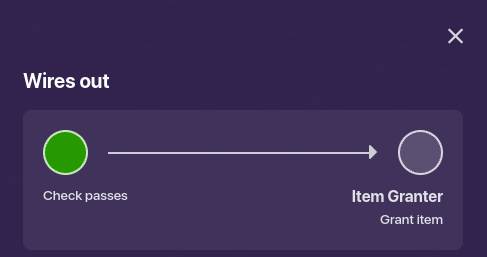
Next, we need to wire the checker to the individual notifications. Make sure that it is “Check Passes” => Send Notification for the banned item version of the notification, (See Below)
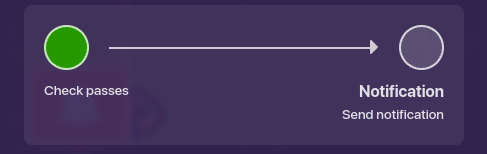
(Do this for all the banned notifications you have.)
For the all-clear, make sure the channels are when check fails => send a notification. Once you are done with that, you should have something that looks like this:

(This is the screenshot of the checker with all the banned items and their unique notifications connected to it.)
Now all that’s left to do is to connect the trigger to the checker using wires. So wire the trigger so that when triggered => run the check.
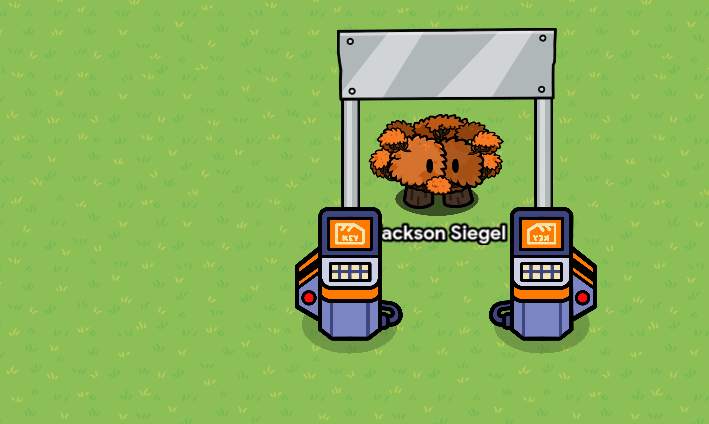
And you are done! You should now have something that resembles the picture below.
Now that you are done, you can use this for a map, or just simply as something to prevent your friends from bringing anything that can defeat you in your secret base. There is also a way so that you can disable anything like a damage boost or speed boost, you’d just have to wire one of those with the settings you want to trigger. And you can also make it so that whenever someone is clear it becomes green and whenever someone is red, it stays red, but I will post about that another time.
This was a lot of work to make and publish!